Solar battery in the phone do it yourself
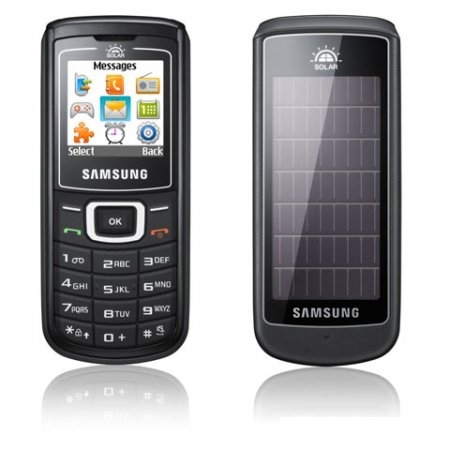
Phone manufacturers for some reason do not want to release normal self-charging gadgets. The picture above is a Samsung E1107 phone. According to the manufacturer, in ideal conditions it can be fully charged from the sun in 55 hours. But in Moscow there are no such ideal conditions.
There are more efficient solar cells and phones with lower consumption. For example, with a black and white Alcatel ot-117 small screen. I had a desire to try to make a solar panel for the phone and place it on the back side, on the battery cover.
I have a good old friend Alcatel ot-117 :

')
Finding a solar panel at a reasonable price with normal efficiency turned out to be unrealistic in Moscow. I bought Chinese exercises.

Bought this charge based on the characteristics. The manufacturer promised to fully charge for 14-16 hours under the sun built-in battery of 500 mAh, i.e. like in my phone. It suited me perfectly, since the phone is discharged in 4 days and the power of the solar panel, even considering not ideal conditions, should be enough so that the phone does not need to be charged from standard charging at all . And all this miracle on aliexpress costs 150r. Cheaper than buying a solar panel separately in our stores. Moreover, this solar panel is quite effective.
And so the experiment
Had to cut the microusb cable NOKIA:

Received microusb on one side, and 4 wires on the other:

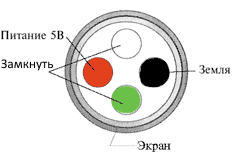
The solar battery needs to be connected with a red wire with a red (plus a plus), and the second wire of the solar battery (I have blue) with a (-) sign with a black wire. Also to go charging you need to close the white and green wire. Wire layout:
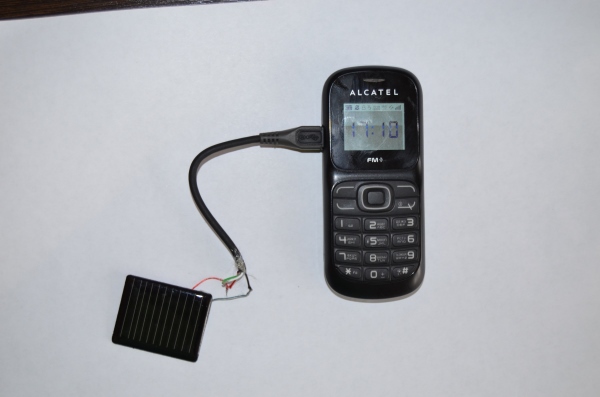
Got this sample for experiments:

It turned out that the phone was charging from it, lying on my office desk in sunny weather for 2 working days, and on cloudy - for 3 working days. I work from 8 am to 5 pm. The office windows face east. I consider the experiment successful. It remains only to solder everything under the case directly to the microusb connector and place it in the lid of the battery compartment. Some additions in the form of diodes and other radio components are not required, since there is no self-discharge when connected to the microusb connector of the phone, and the phone is charged naturally. The charging process is displayed on the phone screen. It's amazing how easy it all is.
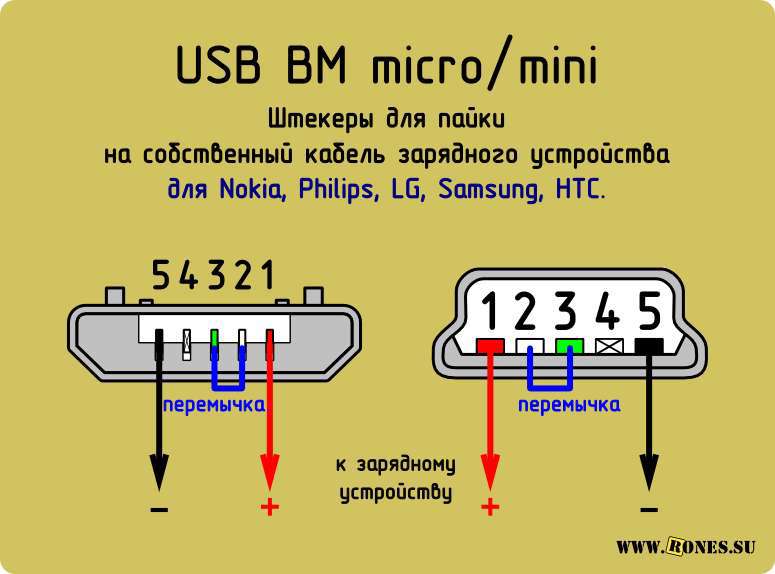
To help lay out the microusb pinout drawing:
Here is the build:

The solar panel will be mounted on a double-sided soft tape:

I ordered a more powerful solar panel on ebee. I also plan to connect it via an SS14 diode (costs 5 rubles) directly to the battery contacts without soldering, simply by holding the contacts. Later lay out the connection diagram. The panel will have to wait 3 weeks. It is 2 times more effective than this and costs only 100 rubles. I decided to do so because of the constant appearance of annoying messages about connecting and disconnecting the charging.

Features:
Max. power: 0.5W.
Max. current: 100mA.
Max. voltage: 5V.
Size: 8.6cm x 3.8cm x 0.2cm.
Source: https://habr.com/ru/post/239781/
All Articles