Beetle modeling
As I listened to the podcast , which casually said about writing a shader for a beetle (25 minutes, 35 seconds) imitating a rainbow surface (I don’t know how to say it in Russian, but in English there is a term - iridescence). I looked at this character and I wanted to write my shader, but imitating a more real surface of chitin, I will tell about it in the next article.
However, there was a problem - I did not have a suitable beetle model.
At first, I looked for models on the Internet, but the free ones didn’t like the quality, and the paid ones had a too high price (~ $ 50), all the more, the required model did not exist at all. In general, I decided to make my beetle, so I will describe the pipeline that I compiled for myself.
- Reference Search
- High poly styling
- Low poly retopology
- Creating texture coordinates (sweep)
- Baking normals
- Baking ambient occlusion
- Adding an offset map to determine the color in the shader (more on that later)
Of course, the pipelines may be different, for example, such items as “concept creation” or “character rigging” could be present in this. They are not there, because in the role of the concept I had refs of real beetles and the model was not planned to be animated. In more serious models, there is also an intermediate retopology of high poly models. For different tasks in different companies use your pipeline.
')
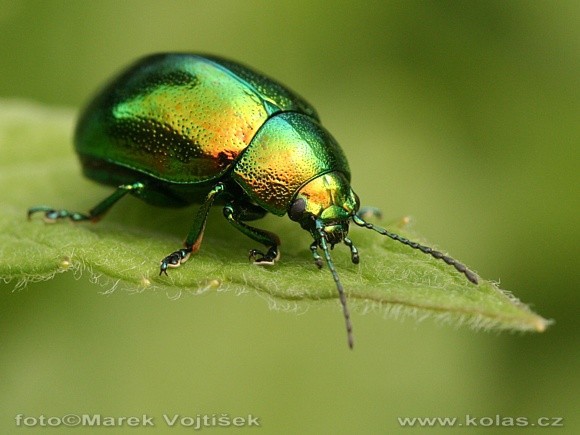
References
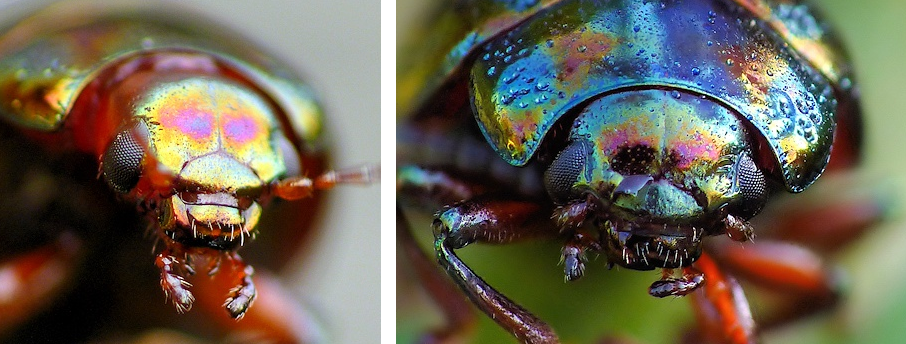
Of all the beetles, I liked the color of chrysolina most of all, or rather the subspecies chrysolina herbacea . This beetle has a beautiful, bright rainbow color, see for yourself:
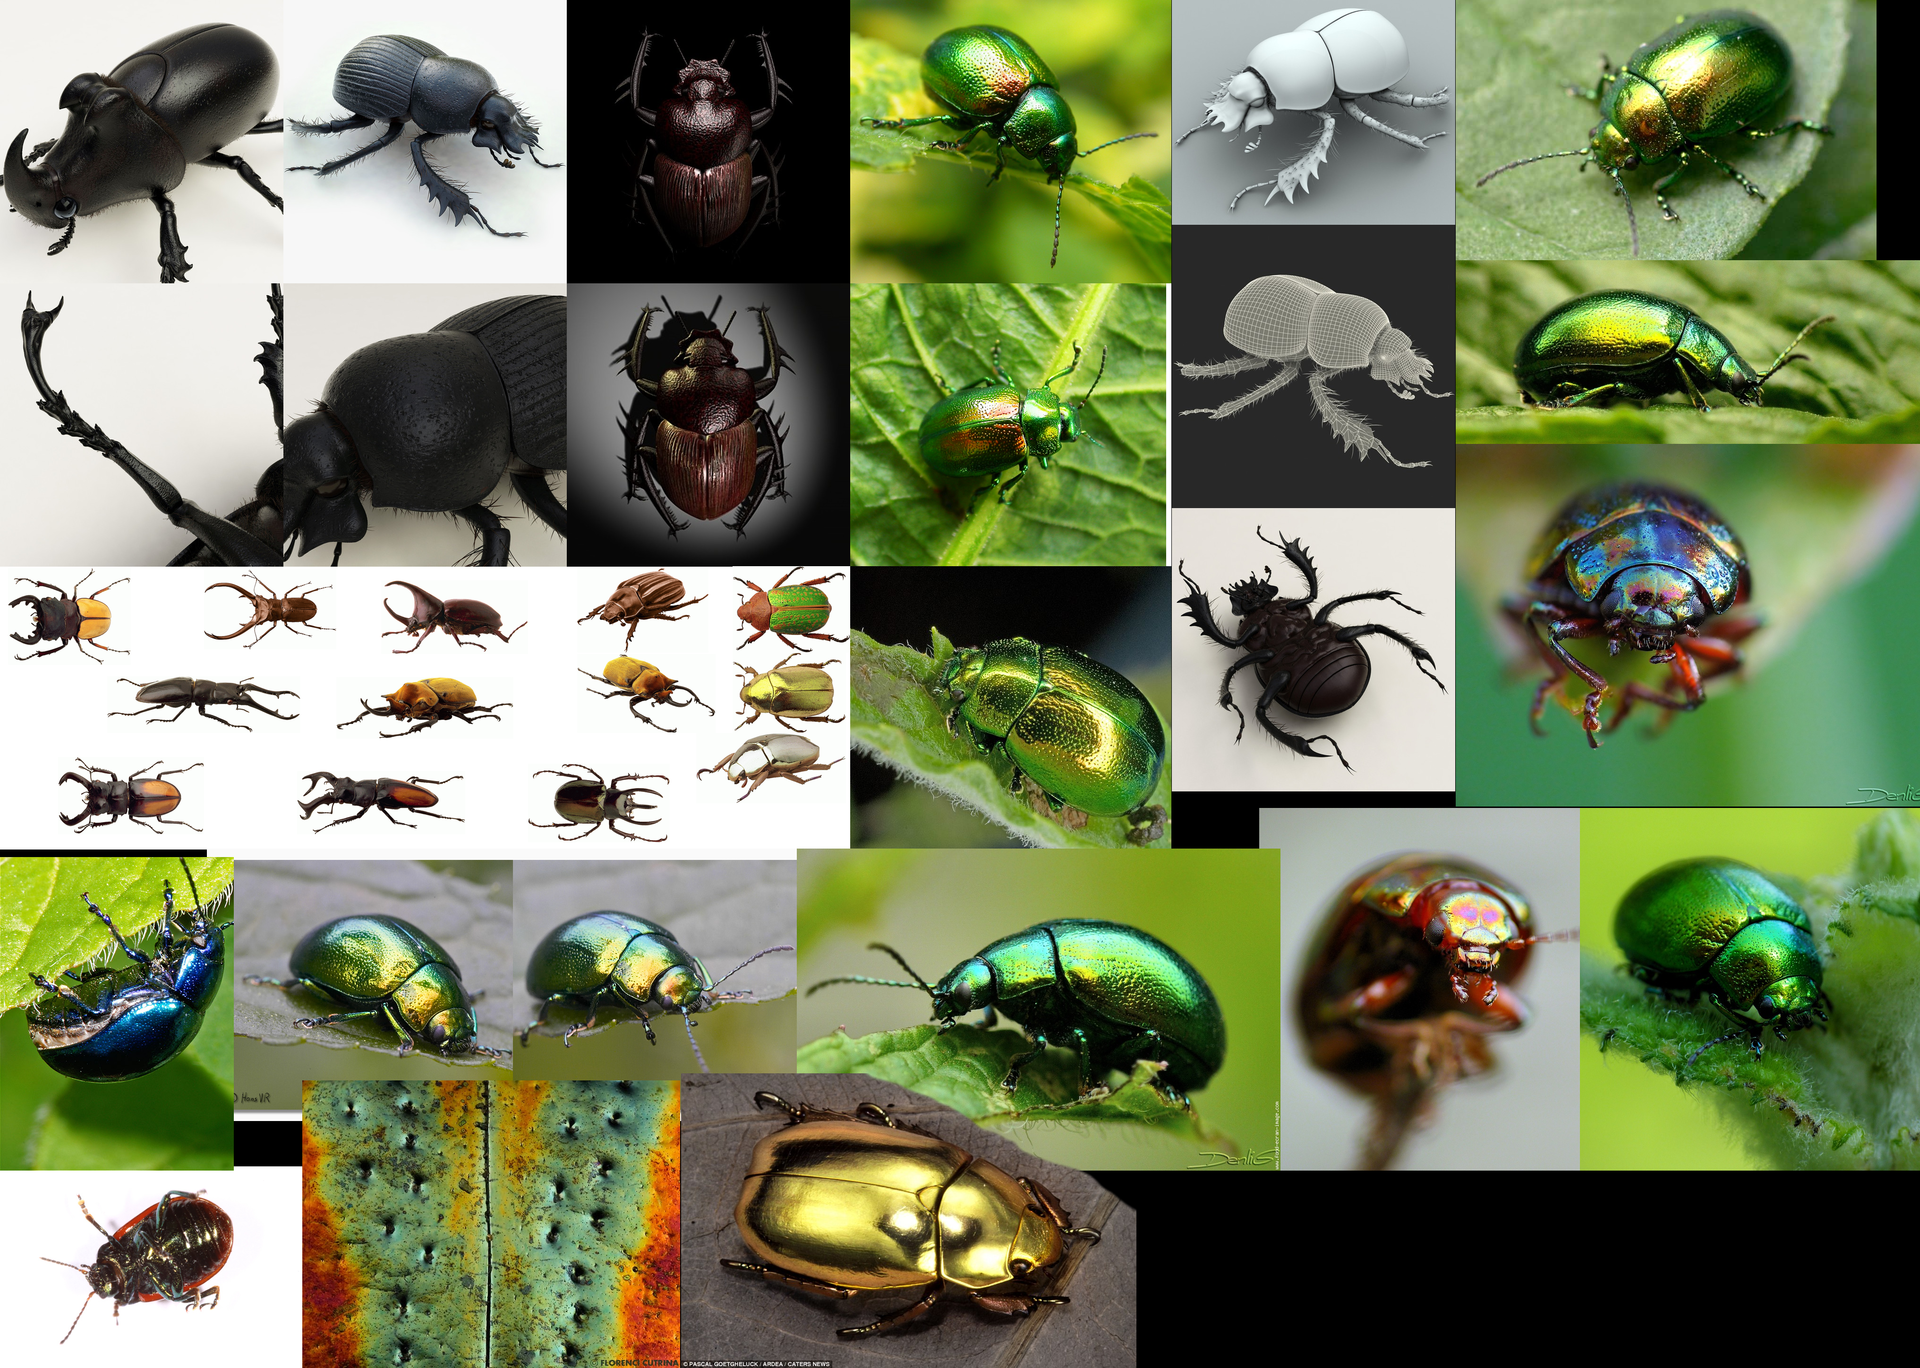
Therefore, I googled up as many pictures as possible and merged them all into one. Also, models of other beetles can be useful for a better understanding of the structure. The result was a picture that loomed on the second monitor almost the entire time the bug was created (clickable):
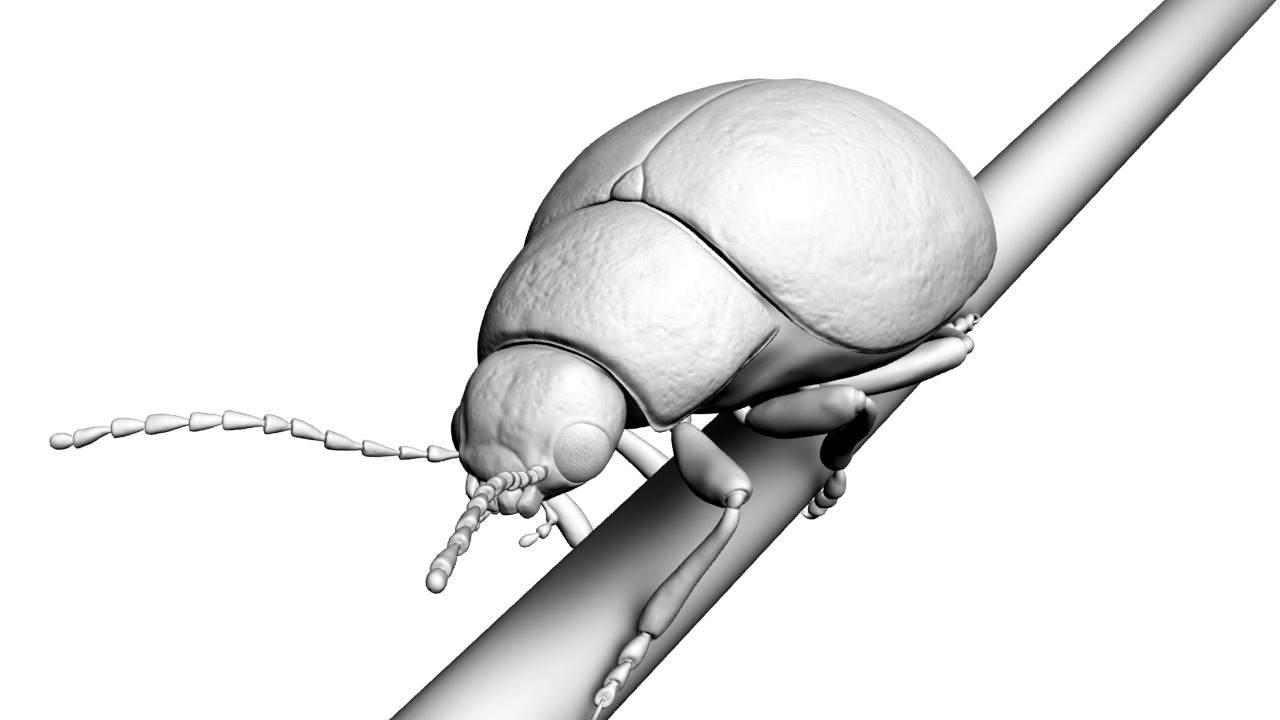
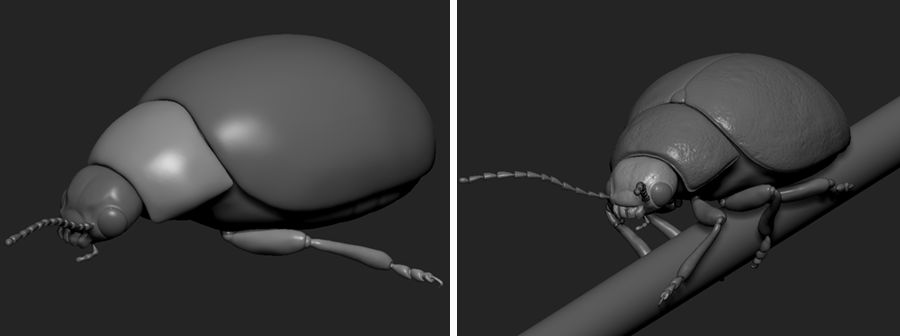
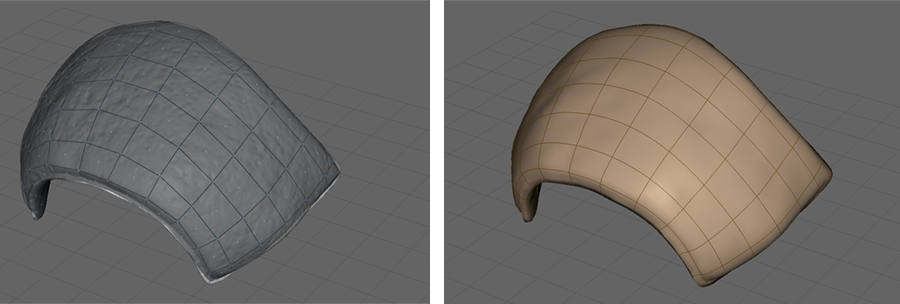
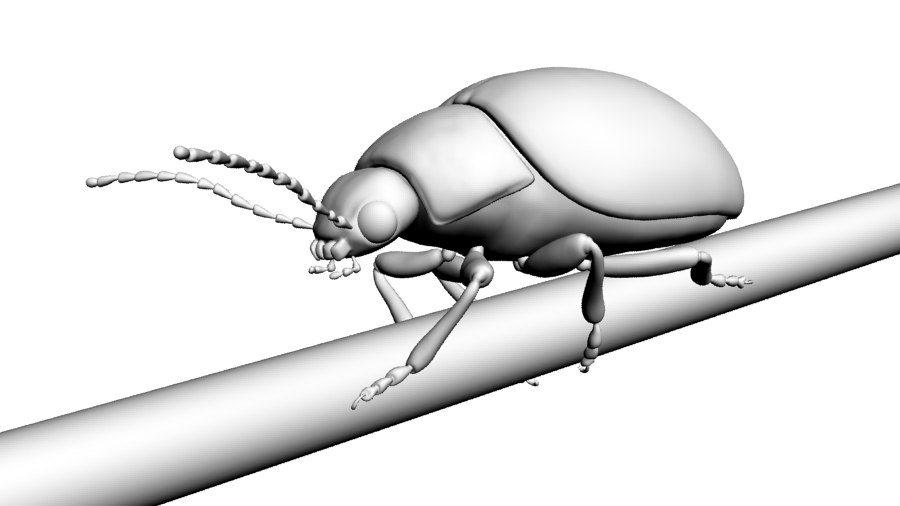
High poly styling
Basically, I made sculpting in ZBrush, I started with the shells, each object sculpted from the sphere:

In the process of sculpturing, you may encounter one problem - pressing a part on the surface - it is squeezed out on the other hand, which is sometimes inconvenient or not necessary at all.
The Lazy Mouse option in the Stroke menu can also be useful - if you turn it on, the brush tracking will be averaged, thus avoiding unnecessary jitter and drawing smoother lines. The LazyRadius parameter changes the degree of smoothing.
In ZBrush there is one cool option that helps to avoid some problems with the grid - DynaMesh. In fact, it rebuilds the modified section of the grid, adapting it to the geometry. Some people dislike it, because after applying this modifier, the grid turns ugly, sometimes it breaks the geometry slightly, but for my needs it came up to me very opportunely. An alternative variant of this option is to gradually increase the subdivision of the model and occasionally produce a retopology.

BackfaceMask, Lazy Mouse and DynaMesh
Gradually added new parts and increased detail:
We should also tell about the eyes. Beetles have faceted eyes, they consist of many hemispheres, you can see that they are arranged, as it were, on a hexagonal grid:
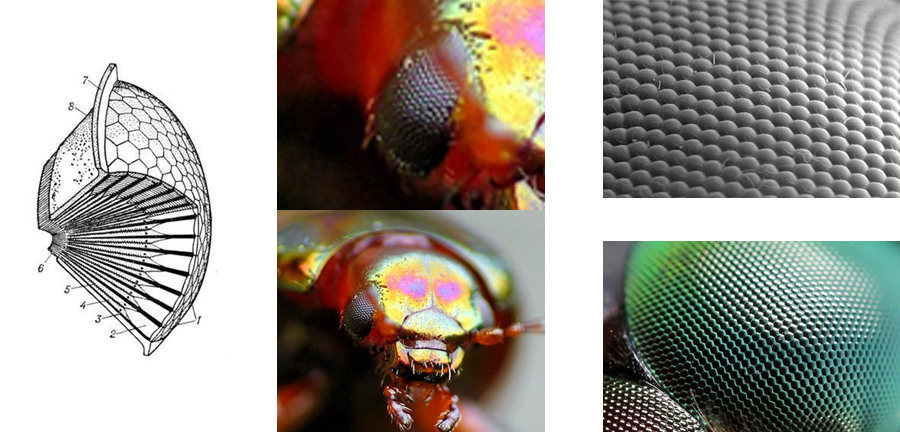
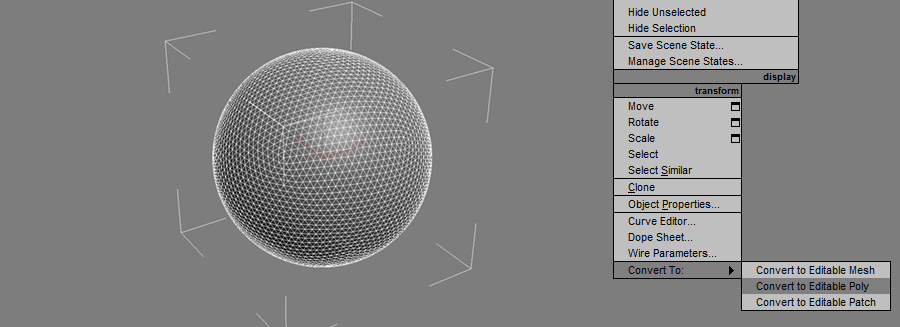
It seemed to me that the easiest way would be to model them in 3D Max, I did them like this:
you first need to create a GeoSphere, set the desired number of segments and convert to an editable polygonal mesh:
then select all the edges and click on the Chamfer button, or rather the button next to it - the fields with settings will open. We select the parameters to make it approximately as in the screenshot below:
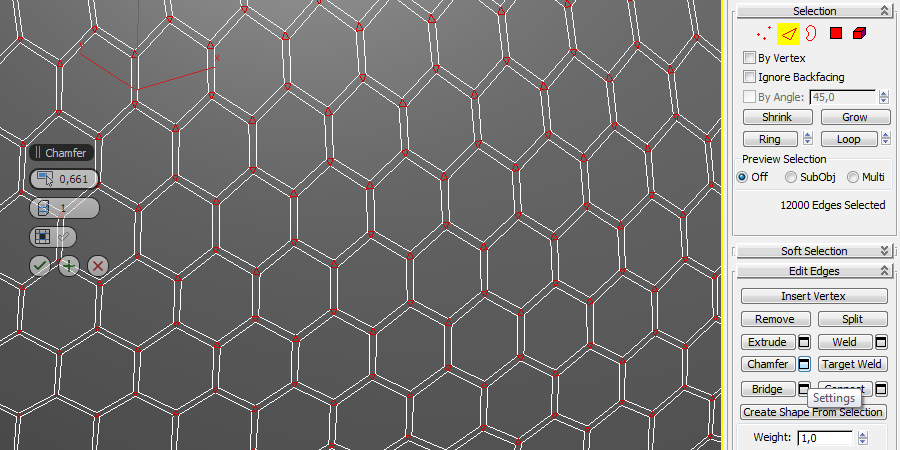
Now select all the vertices and select Weld, set up so that all the vertices at the nodes merge into one:

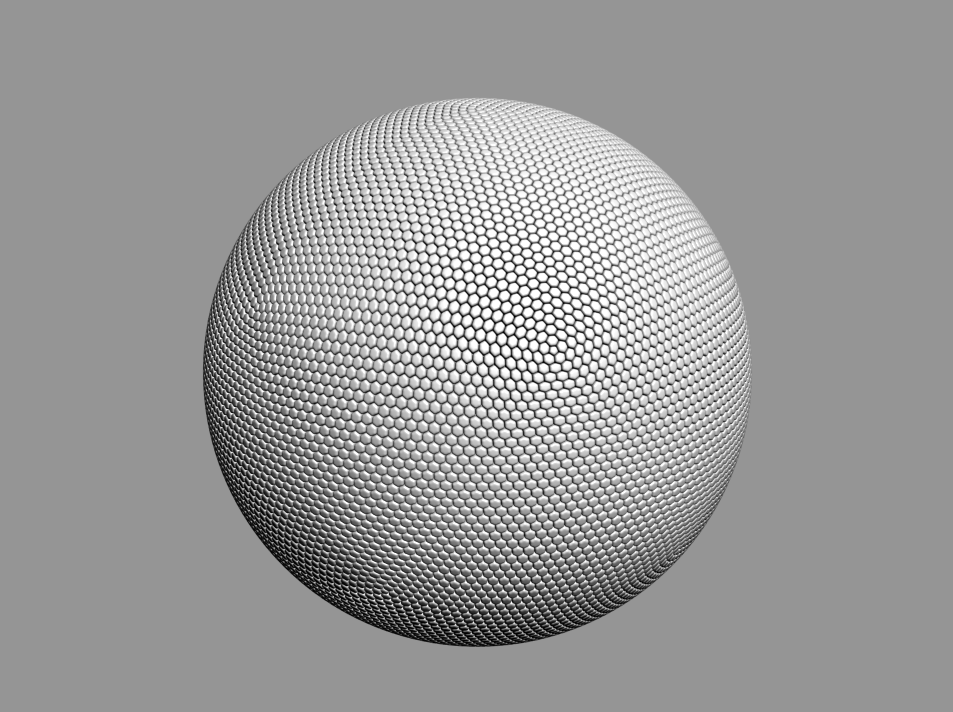
select all the polygons and apply Bevel, squeeze them to about the height equal to the size of the cell, and slightly expand:

click once on the Tesselate button to add polygons:

and finally, we use the TurboSmooth modifier, two iterations were enough for me to get a more or less smoothed version:
In fact, the grid turned out to be not quite hexagonal, there are segments consisting of five edges, not six. This is due to the specifics of the construction of this type of sphere. But for the beetle will do.
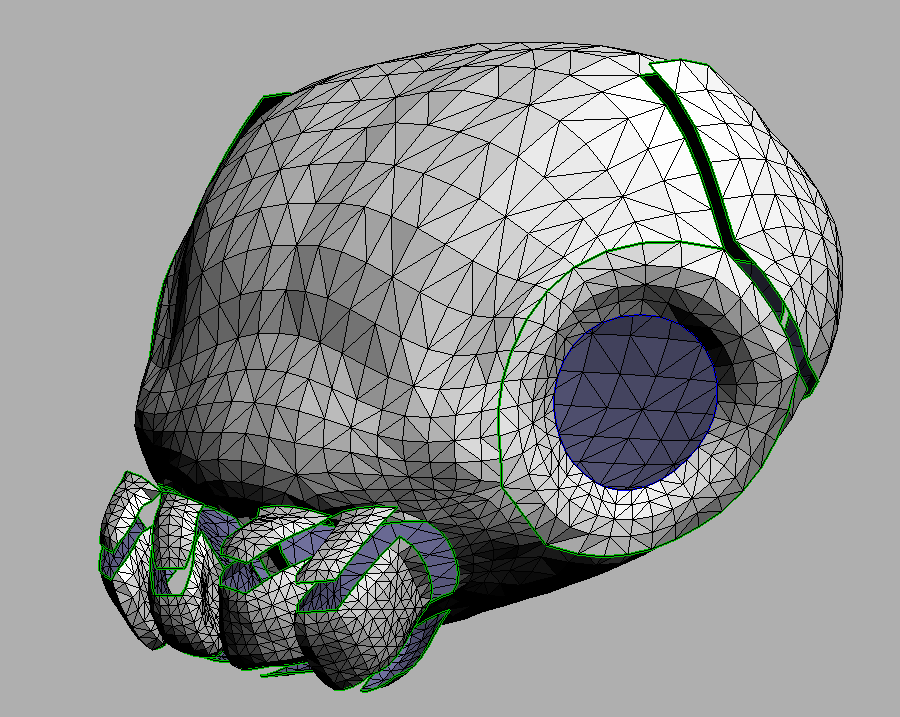
Low poly retopology
Despite the fact that ZBrush has its own tools for retopology, I spent it in TopoGun, since for me there it is more convenient to carry out it by an order of magnitude. There is a very convenient tool for smoothing - you can make a rather large mesh, then apply it. This grid will be divided into a given number of subdivs, with the new vertices located on the high-poly model:
Again, separate eyes - since these are essentially spheres, then as a low poly mesh I took ordinary spheres and cut off the invisible part from them.
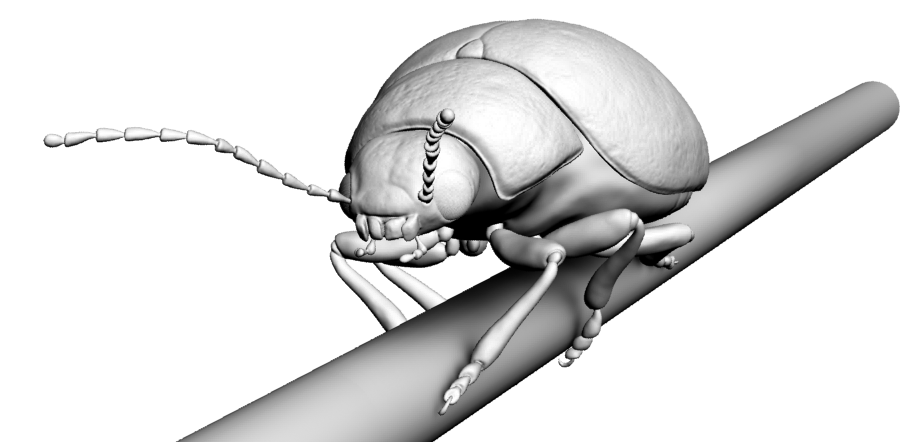
As a result of retopology, a model of 60k polygons was obtained. This, of course, is not quite low poly, but for a scene consisting of only one object it is normal.
low poly model
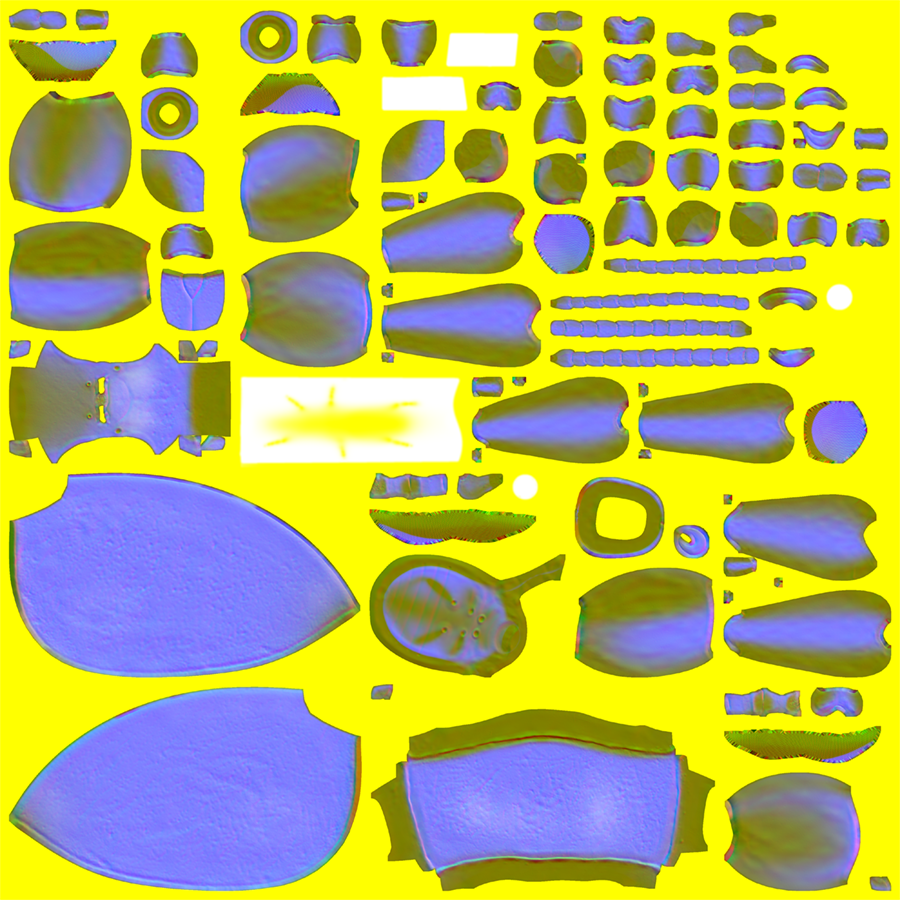
Creating texture coordinates
I did the scan in UVLayout - a fairly convenient program based on hot keys, works quickly and clearly, especially like the way it shows the stretching / compression of polygons in color.
When cutting a model, make as few seams as possible, but at the same time try not to stretch the polygons too much. Since I will not have a diffuse texture, the seams can appear only in relief (with normal mapping), they will not be visible on the displacement map and occluded. I was more concerned about the absence of distortions of polygons, so there were quite a few seams.
When a sweep was ready for all models, I imported them into 3D Max to adjust the relative sweep size. This is quite an important step, as it allows you to increase the detail of critical areas without increasing the texture. So, for example, I deliberately reduced the sweep of the belly of a beetle, but on the contrary I increased the heads. In the end, I used the standard Unwrap UVW modifier packer, and I got this scan of the entire model:

The packer does not pack very optimally, and besides, I left a rather large padding so that the neighboring segments did not interfere with each other on small mips.
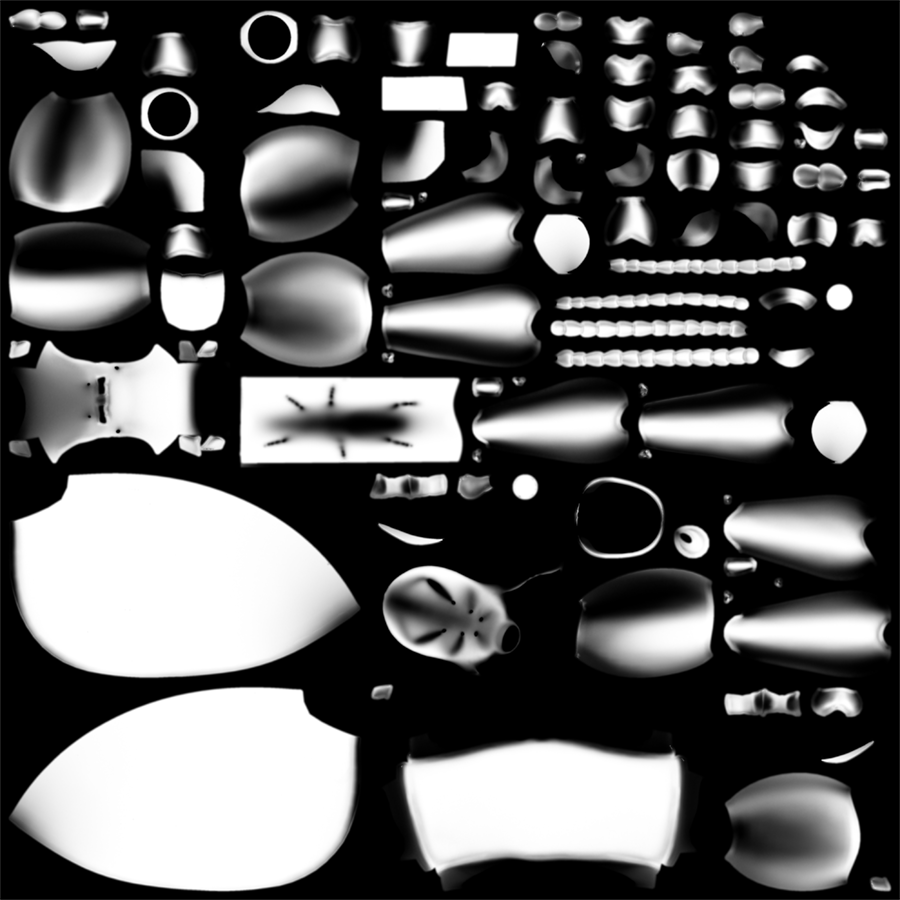
Baking normals
The normal map was in xNormal - a rather peculiar program with an “interesting” interface. Offtopic, in general, to be honestly surprised by the fact that all programs related to graphics have their own unique interface, which is sometimes difficult to figure out even with instructions that you can still find. Although if you use it for some time, then you get used to it and it seems even convenient. But this is just my opinion.

Since the model consists of several parts - it was necessary to bake each separately, if you try to calculate them all at once - artifacts may arise. The size of the texture chose 4096x4096, for a close-up model just right, if problems arise, you can always reduce it two or more times.

Baking ambient occlusion
AO calculated in Maya with the render engine of Mental Ray (in 3D Max there were some problems with it, and xNormal with a complete list of models was mowing a bit, counted for a rather long time and in itself has few settings):
Add displacement map
If you look closely, it is noticeable that the real beetle has places that differ in color, something like stains on the head and shell:
To designate these places, I manually painted black and white spots on a separate layer in the MudBox. Afterwards, I will use them in the shader to shift one of the color components:

The result was three cards, all of them can be packaged in one texture as follows:
- Red and Green Channels - Normal Map
- Blue channel - ambient occlusion
- Alpha Channel - Offset Map
The final map began to look like this:
In the next article I will explain how to apply this card to the model. By the way, here is the previous one.
The model turned out to be rather clumsy, the grid is not very beautiful, but on the other hand I am not a modeler and not an artist, I'm just learning, the following models will hopefully be better. I hope to hear criticism in the comments from real modelers. But in general, the essence of the article is not to show how to model, and what tools exist for this, what the process of creating a static model might look like and prepare for use in the game engine, I think it is useful for a programmer to know in game dev.
Links
- www.turbosquid.com/3d-models/c4d-scarabaeus-included/349707 - here you can find many different paid and free models.
- art-assorty.ru/202-samye-krasivye-zhuki.html - just beautiful beetles
- http://www.uvlayout.com/doc/User_Guide:_Hotkeys - hotkeys for UVLayout
Source: https://habr.com/ru/post/239557/
All Articles