Debugging NDK and JNI for Android
This article will focus on debugging code for Android.
Recently, there have been many advances in this direction. Android Studio appeared, google added support for debugging native code in eclipse.
If you want to debug only Java, then Android Studio will cover your needs completely.
If you need debugging with ++ or Java code, then ADT Bundle with embedded Eclipse will again help solve your problem.
In short
On some devices, it is also necessary to set the debuggable to true in the manifest.
But if you need to debug jni code, where c ++ and Java functions work alternately, then this method will not work for you, because depending on the debugging method chosen (Android Native Application, Android Application), debugging works with either ++ or java code.
How to debug the mixed code will be discussed later in the article.
The basis of our entire system will be the NVIDIA Debug Manager for Android NDK Despite the statement that it is for debugging the Tegra platform, it is perfectly capable of debugging any Android platform.
I failed to install the NVIDIA Debug Manager for Android NDK on the ADT Bundle, so I had to do “my own build”.
First, a list of what we need.
')
Installation Procedure
1. Install Eclipse - just unpack it wherever you want
2. Install ADT - unpack anywhere, run \ tools \ android - add necessary platforms
3. Install NDK - unpack anywhere
4. Install the ADT Plugin in Eclipse
5. Run the Tegra Android Development Pack installer - we only need the NVIDIA Debug Manager for Android NDK
6. Find in the installation folder NVDebugMgrForAndroidNDK * .zip
7. Run eclipse Help-> Install New Software-> Add-> Archive; show the path to the installed zip file, check the NVIDIA Debug Manager, agree with everything that will be offered to us
8. The last step in the list is Debug as Android NDK Application (on some devices it can write that it did not find GDB. Make sure that the Android NDK Application settings -> GDB Server Settings have APK bundled)
Now breakpoints work in both Java and C ++ code.
If you have any problems with NDK 10 try r9d
here are links to some versions
android-ndk-r9d-windows-x86_64.zip
android-ndk-r9d-darwin-x86_64.tar.bz2
android-ndk-r9d-linux-x86.tar.bz2
Recently, there have been many advances in this direction. Android Studio appeared, google added support for debugging native code in eclipse.
If you want to debug only Java, then Android Studio will cover your needs completely.
If you need debugging with ++ or Java code, then ADT Bundle with embedded Eclipse will again help solve your problem.
In short
- Make it clear to Eclipse that the project contains a native part (Add native support)
- Make sure that the build command is NDK_DEBUG = 1
- Click Debug as Android Native Application
On some devices, it is also necessary to set the debuggable to true in the manifest.
But if you need to debug jni code, where c ++ and Java functions work alternately, then this method will not work for you, because depending on the debugging method chosen (Android Native Application, Android Application), debugging works with either ++ or java code.
How to debug the mixed code will be discussed later in the article.
The basis of our entire system will be the NVIDIA Debug Manager for Android NDK Despite the statement that it is for debugging the Tegra platform, it is perfectly capable of debugging any Android platform.
I failed to install the NVIDIA Debug Manager for Android NDK on the ADT Bundle, so I had to do “my own build”.
First, a list of what we need.
- Eclipse (I recommend Kepler) download is suitable for either Standart or IDE for C / C ++ Developers
- Stand-alone Android SDK Tools From the bottom of the page GET THE SDK FOR AN EXISTING IDE
- NDK If you do not write yet for x64 Android, then you need a Platform (32-bit target)
- Tegra Android Development Pack
')
Installation Procedure
1. Install Eclipse - just unpack it wherever you want
2. Install ADT - unpack anywhere, run \ tools \ android - add necessary platforms
I had enough of such a set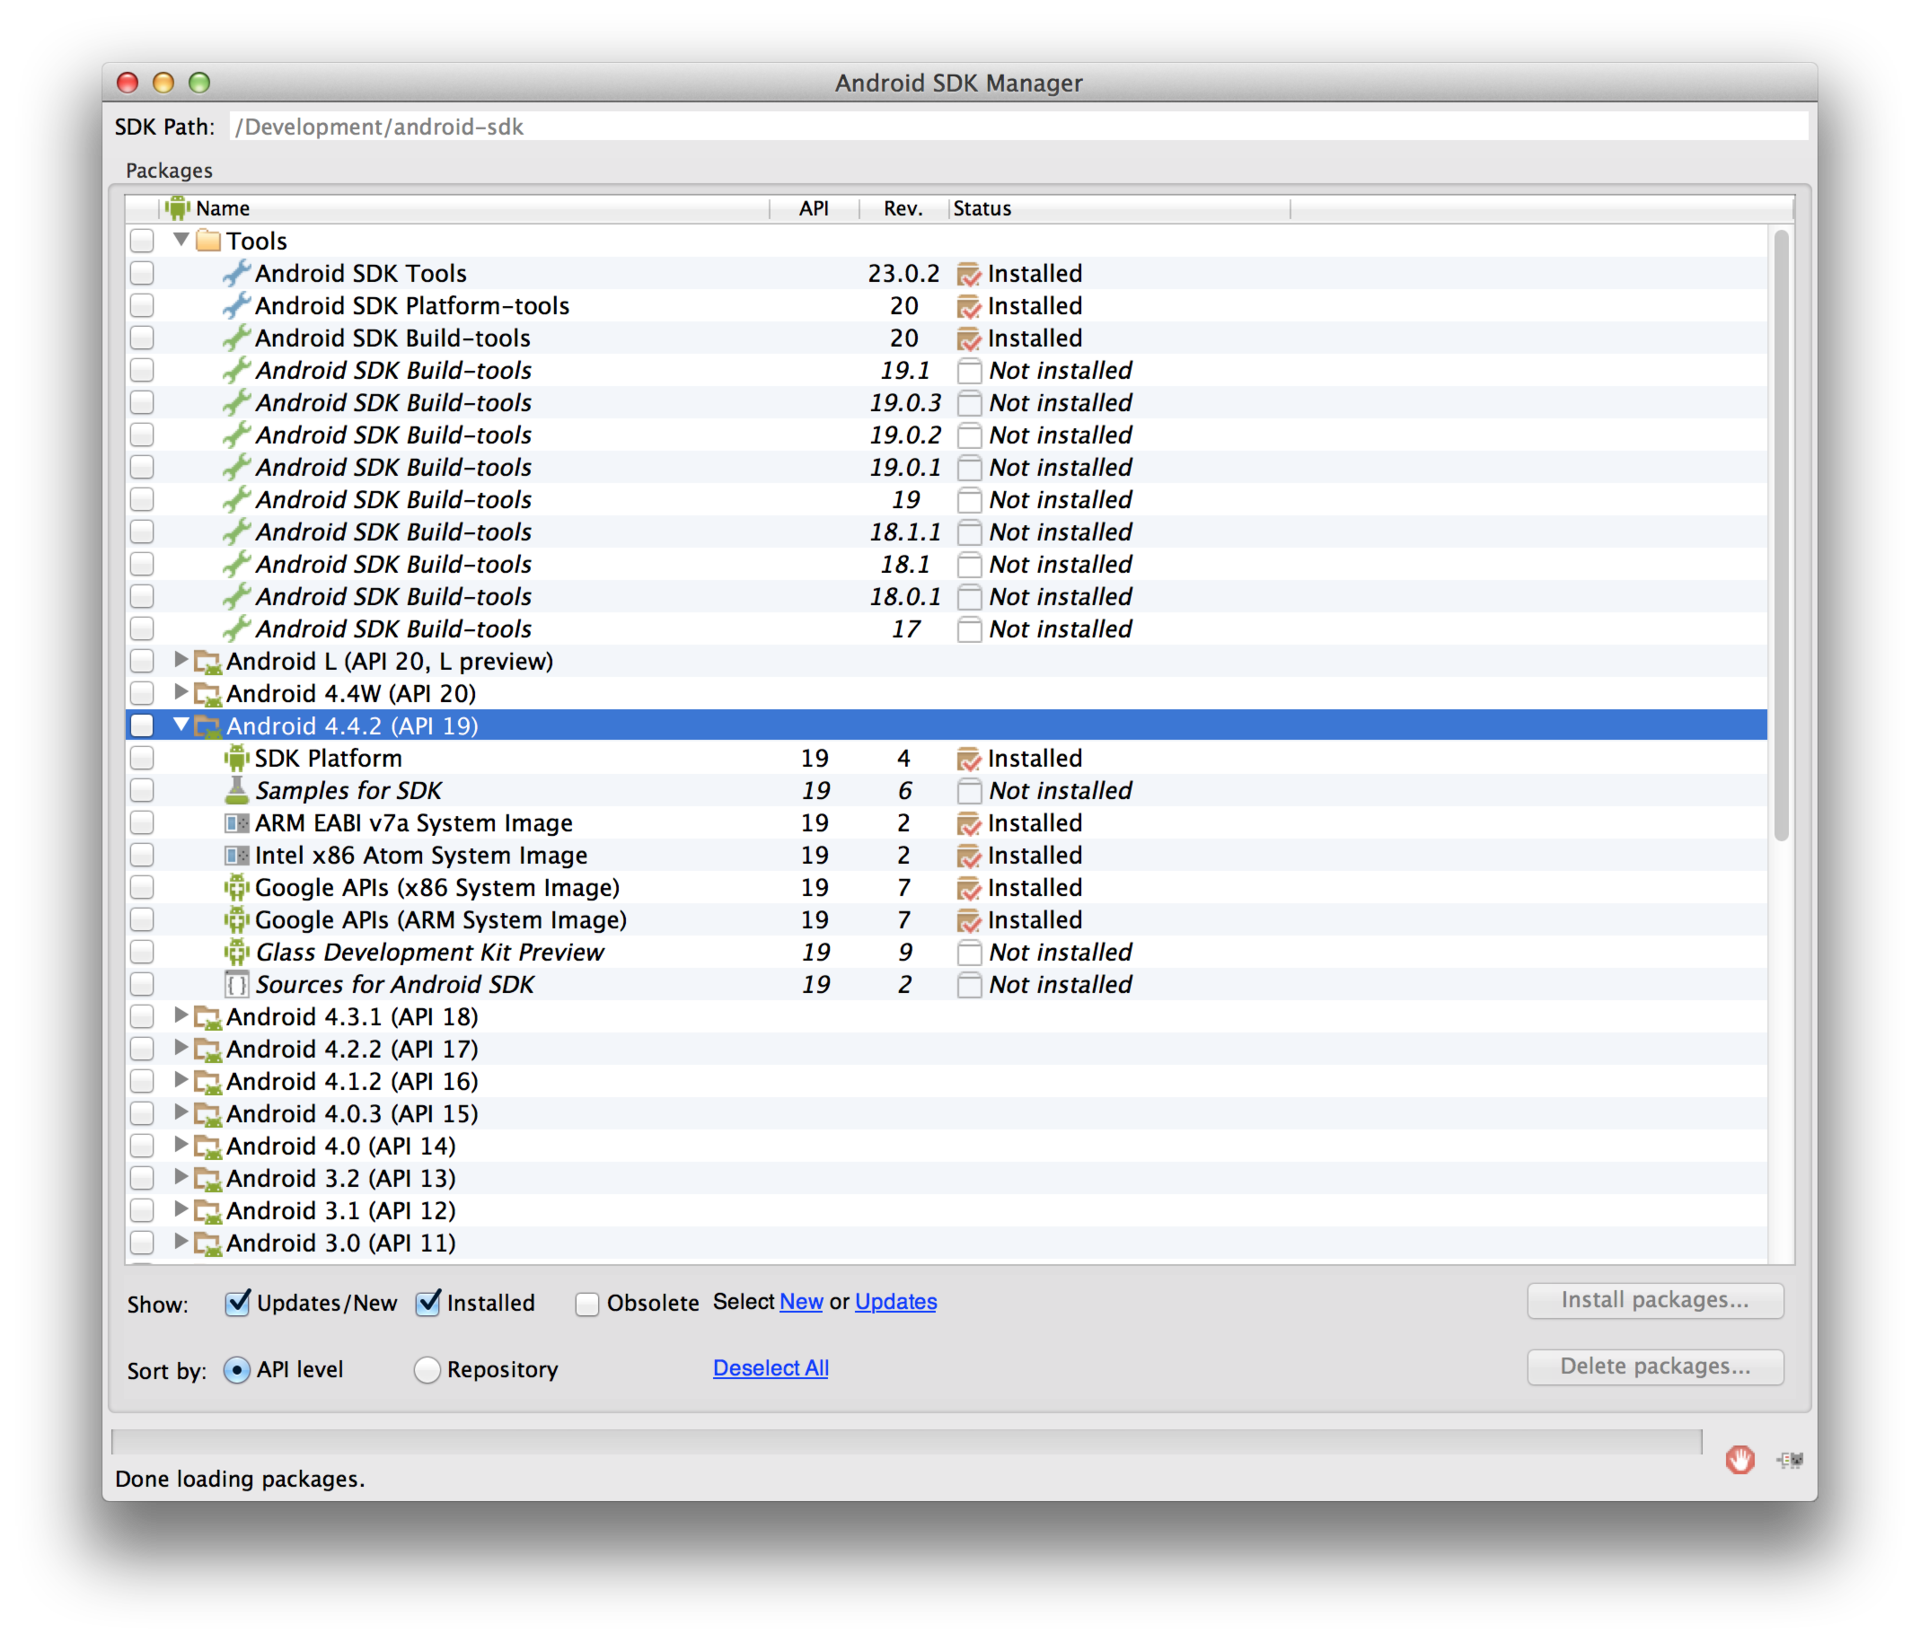
3. Install NDK - unpack anywhere
4. Install the ADT Plugin in Eclipse
Instruction
Original- Launch Eclipse select Help> Install New Software
- Click Add in the upper left corner.
- In the Add Repository dialog, enter “ADT Plugin” in the Name field and
dl-ssl.google.com/android/eclipsedl-ssl.google.com/android/eclipsein the Location field - In the Available Software dialog, activate the checkbox in front of the Developer Tools and click Next.
- In the next window, click Next again.
- Read and accept the license agreement.
- If you received a security warning during installation, just click OK
- Restart Eclipse
- In the Welcome to Android Development window, select Use existing SDKs and specify the path to the installed SDK
- Go to Eclipse-> Preference-> Android-> NDK and specify the path to the NDK
5. Run the Tegra Android Development Pack installer - we only need the NVIDIA Debug Manager for Android NDK
6. Find in the installation folder NVDebugMgrForAndroidNDK * .zip
7. Run eclipse Help-> Install New Software-> Add-> Archive; show the path to the installed zip file, check the NVIDIA Debug Manager, agree with everything that will be offered to us
8. The last step in the list is Debug as Android NDK Application (on some devices it can write that it did not find GDB. Make sure that the Android NDK Application settings -> GDB Server Settings have APK bundled)
Screen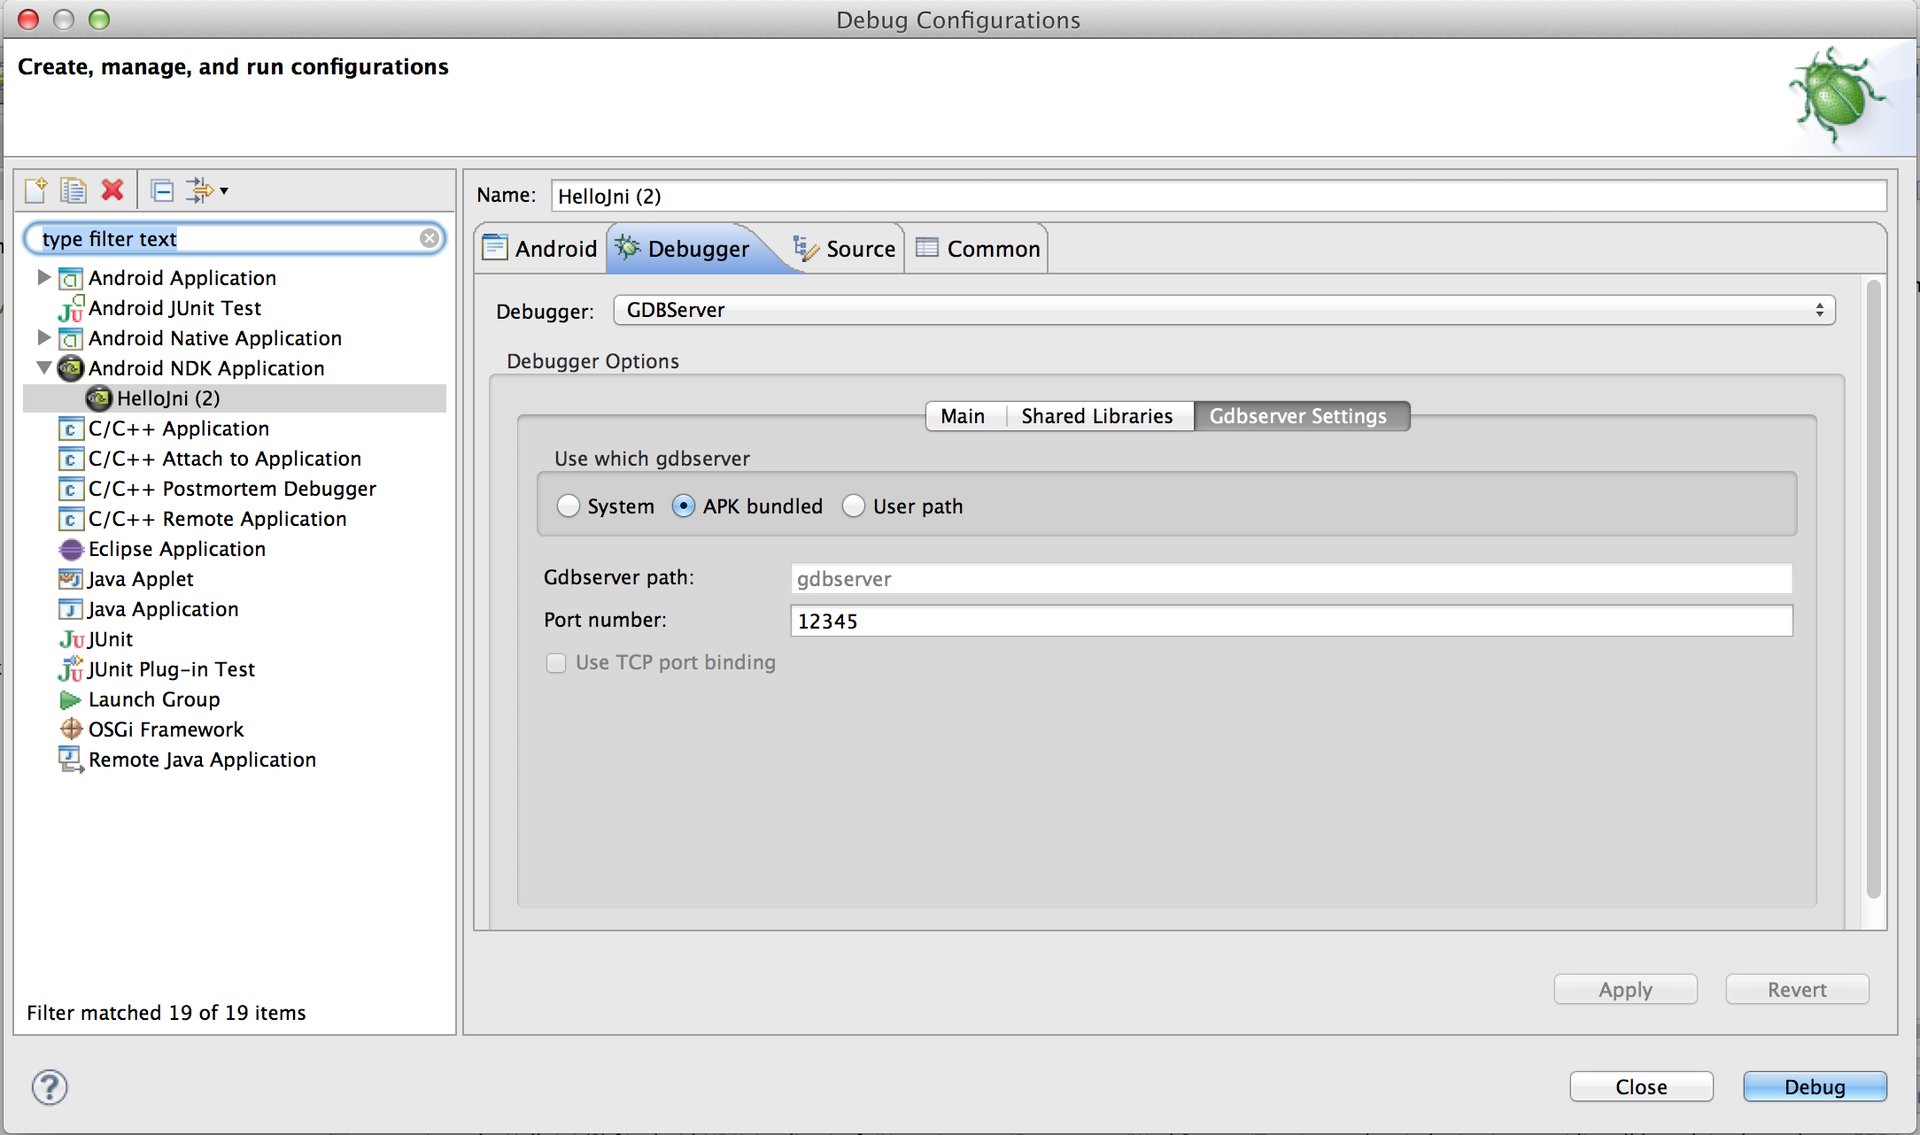
Now breakpoints work in both Java and C ++ code.
If you have any problems with NDK 10 try r9d
here are links to some versions
android-ndk-r9d-windows-x86_64.zip
android-ndk-r9d-darwin-x86_64.tar.bz2
android-ndk-r9d-linux-x86.tar.bz2
Source: https://habr.com/ru/post/239221/
All Articles