Lumia SensorCore SDK: new opportunities for developing mobile applications. Part 2: Creating the Application
Good day, everyone!
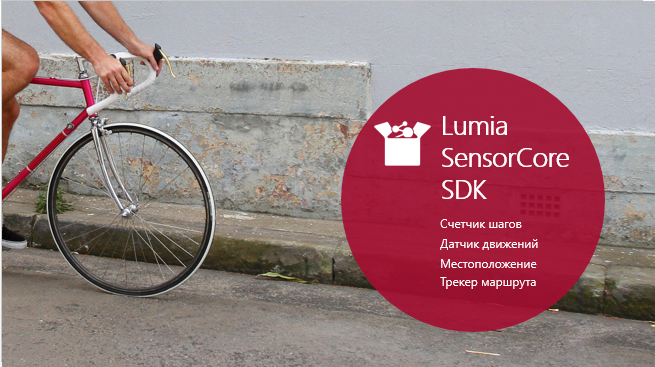
In the previous article, we reviewed the Lumia SensorCore SDK and its components, which allow you to create applications that track user activity in the minimum power consumption mode.
')
In this article, we will look at the practical use of the SensorCore SDK to create an application that sends notifications according to the location of the device. We will discuss the recommendations of working with the new SDK, and see how to generate and use dummy data, as well as API simulators.
As an example of using the SensorCore SDK , let's take the idea of an application that sends a notification depending on the location of the device . The Place Monitor API tool is great for this purpose.
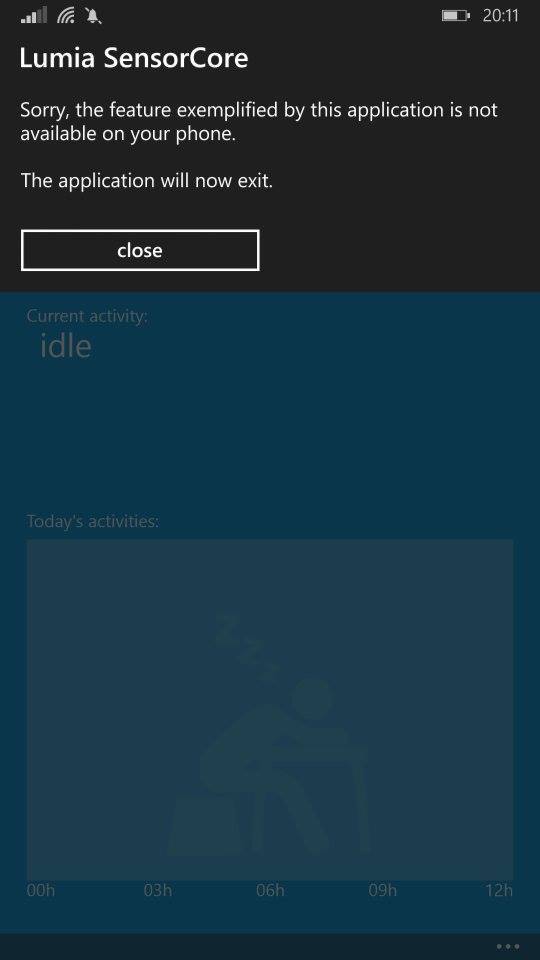
As described in the previous article, to use applications with the SensoreCore SDK, a device must have certain software and hardware features. This condition imposes additional requirements for such applications. For example, it is necessary to develop scenarios for handling situations when the phone does not meet the relevant requirements, but the application is installed on it:
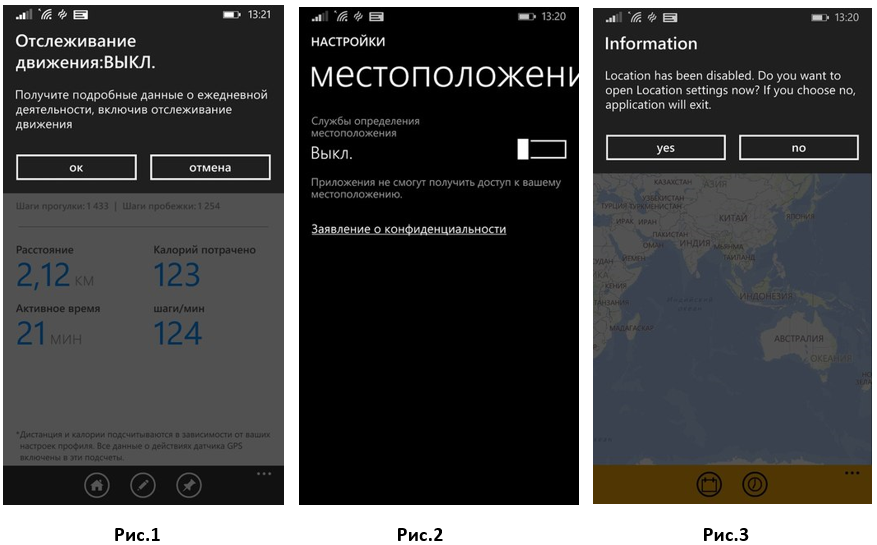
In another situation, when collecting the necessary information is disabled by the user, quick access to connecting the settings should be provided (Fig. 1-2), as well as a scenario in which the user refuses to connect them (Fig. 3) - for example, the application should stop correctly :
Next, consider an example of creating an application using best development practices using the SensorCore SDK .
Create an application
There are some general guidelines on how to use SensorCore in order to ensure the stability and compatibility of the application with the device on which it will be installed.
Below are examples of initialization, error handling, and application lifecycle management:
- Create a Blank App (Windows Phone) project in C # using Visual Studio 2013 (Update 3).
- We are connecting the SensorCore SDK to the project: Tools-> NuGet Package Manager-> Manage NuGet Packages
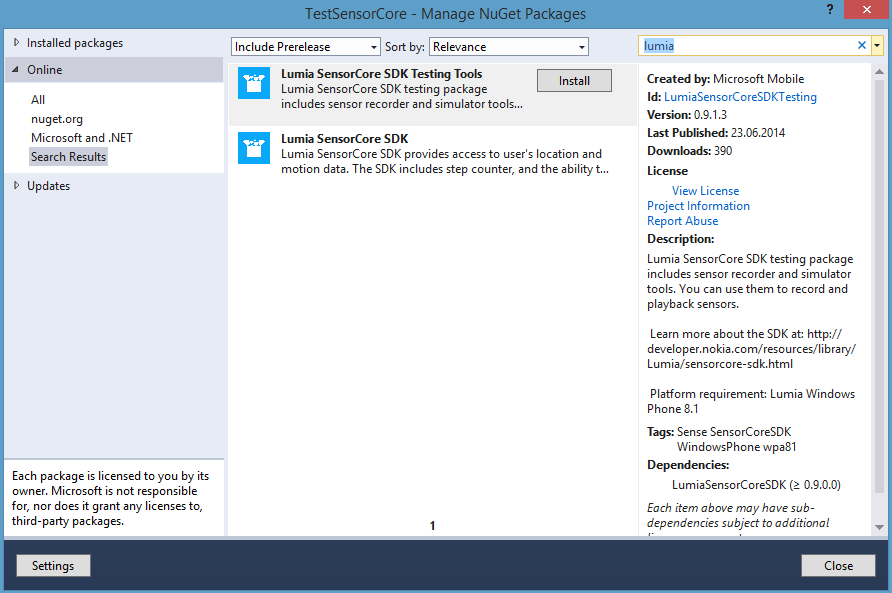
Click Install for all components.
Thus in the project links to Lumia libraries were added . Sense , lumia. Sense. Testing and Microsoft Visual C ++ 2013 Runtime Package for Windows Phone . - To access the API, you must declare the SensorCore HID device and the ability to access it in the application manifest.
Installing the SDK adds these features to Package.appxmanifest automatically:<DeviceCapability Name="location" /> <m2:DeviceCapability Name="humaninterfacedevice"> <m2:Device Id="vidpid:0421 0716"> <m2:Function Type="usage:ffaa 0001" /> <m2:Function Type="usage:ffee 0001" /> <m2:Function Type="usage:ffee 0002" /> <m2:Function Type="usage:ffee 0003" /> <m2:Function Type="usage:ffee 0004" /> </m2:Device> </m2:DeviceCapability> - In order for the SDK to work correctly, you need to switch the platform to x86 in the Configuration Manager: Build -> Configuration manager
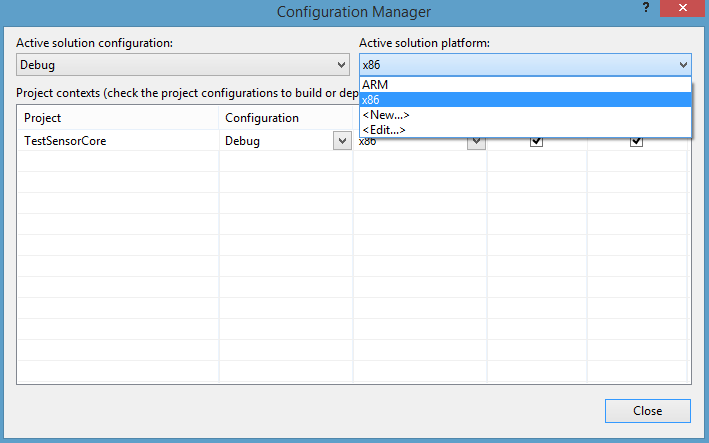
It should be noted that when testing an application on the device, the Active solution platform should be set to ARM . - To use the SensoreCore SDK tools, we will connect the following libraries:
using Windows.UI.Popups; using System.Threading.Tasks; using Lumia.Sense; using Lumia.Sense.Testing;
SensoreCore Initialization
It is not always possible or convenient to work with actual SensorCore API when developing your application: you can test certain application or user interface logic with predefined data, or if you run your application in a Windows Phone emulator, then actual SensorCore interfaces are not available at all. In such cases, you must use the SensorCore simulator .
It is easy to replace the actual SensorCore API with a simulator, just add to the class “Simulator” identifier:
private PlaceMonitor _placeMonitor;=> private PlaceMonitorSimulator _placeMonitor; But in order to make it easier to switch between the actual class and the class of the simulator, it is most convenient to use an alias for the class , and in the project refer to it with the keyword Monitor.
For example:
//using Monitor = Lumia.Sense.PlaceMonitor; using Monitor = Lumia.Sense.Testing.PlaceMonitorSimulator; Initialization of the necessary equipment support
Since the work of the Lumia SensorCore SDK is based on the hardware capabilities of the phone, which not all devices have, the first thing to consider when developing is to check whether the device supports the necessary SensorCore equipment .
If there is a scenario for an application in which the use of the SensorCore SDK is not necessary, then it would be nice to adjust the appearance of the UI controls accordingly.
if (await Monitor.IsSupportedAsync()) Note that while the PlaceMonitorSimulator class is being used, the property is not supported, and at this stage the corresponding code must be commented out , but when used in the real API application, it should be activated again:
//if (await Monitor.IsSupportedAsync()) { // Init SensorCore if (await CallSensorcoreApiAsync(async () => { monitor = await Monitor.GetDefaultAsync(); })) { Debug.WriteLine("PlaceMonitor initialized."); // Update list of known places UpdateKnownPlacesAsync(); HomeButton.IsEnabled = true; WorkButton.IsEnabled = true; FrequentButton.IsEnabled = true; CurrentButton.IsEnabled = true; } else { Application.Current.Exit(); } // Focus on home OnHomeClicked(null, null); } /* else { MessageDialog dialog; dialog = new MessageDialog("Your device doesn't support Motion Data. Some functionality will be disabled", "Information"); dialog.Commands.Add(new UICommand("Ok")); await dialog.ShowAsync(); HomeButton.IsEnabled = false; WorkButton.IsEnabled = false; FrequentButton.IsEnabled = false; }*/ Secure Call Lumia SensorCore SDK
When calling the API, it is important to check that the required settings ( Location data / Motion data ) are turned on and there will be no exception.
To do this, use the wrapper that you need to define when you call the SensorCore SDK and which will take care of such situations:
private async Task<bool> CallSensorcoreApiAsync(Func<Task> action) { Exception failure = null; try { await action(); } catch (Exception e) { failure = e; } if (failure != null) { switch (SenseHelper.GetSenseError(failure.HResult)) { case SenseError.LocationDisabled: MessageDialog dialog = new MessageDialog("Location has been disabled. Do you want to open Location settings now?", "Information"); dialog.Commands.Add(new UICommand("Yes", async cmd => await SenseHelper.LaunchLocationSettingsAsync())); dialog.Commands.Add(new UICommand("No")); await dialog.ShowAsync(); new System.Threading.ManualResetEvent(false).WaitOne(500); return false; case SenseError.SenseDisabled: dialog = new MessageDialog("Motion data has been disabled. Do you want to open Motion data settings now?", "Information"); dialog.Commands.Add(new UICommand("Yes", async cmd => await SenseHelper.LaunchSenseSettingsAsync())); dialog.Commands.Add(new UICommand("No")); await dialog.ShowAsync(); new System.Threading.ManualResetEvent(false).WaitOne(500); return false; default: dialog = new MessageDialog("Failure: " + SenseHelper.GetSenseError(failure.HResult), ""); await dialog.ShowAsync(); return false; } } return true; } Now the monitor.CallSensorcoreApiAsync wrapper is ready for accessing the SensorCore SDK, so the SDK call is secure.
Before using any SensorCore SDK API, you must initialize it with a call to GetDefaultAsync . Initialization can be accomplished using the shell described above:
if (await CallSensorcoreApiAsync(async () => { monitor = await Monitor.GetDefaultAsync(); })) If the call to the SensorCore APIs fails, the application will stop at this stage.
Activation and deactivation of sensors
In Windows XAML applications, the control model is different from Silverlight applications, so connecting and disconnecting sensors is handled differently.
Add a handler for the VisibilityChanged event, where we will activate and deactivate PlaceMonitor when the application is sent to the background or when it is in focus again.
Windows XAML:
Window.Current.VisibilityChanged += async (oo, ee) => { if (monitor != null) { if (!ee.Visible) { await CallSensorcoreApiAsync(async () => { await monitor.DeactivateAsync(); }); } else { await CallSensorcoreApiAsync(async () => { await monitor.ActivateAsync(); }); } } }; For Silverlight applications, do the following:
protected async override void OnNavigatedTo(NavigationEventArgs e) { if (monitor == null) { await Initialize(); } await monitor.ActivateAsync(); } protected override async void OnNavigatingFrom(NavigatingCancelEventArgs e) { await monitor.DeactivateAsync(); } Error processing
All Lumia SensorCore SDK errors cause exceptions, detailed information about which can be obtained using the SenseHelper.GetSenseError () function .
As mentioned above, applications using the SensorCore SDK can also be installed on devices that do not support the SDK functionality.
In such an application, a scenario should be described for the case when none of the data collection sensors is available . If an application cannot function without the SensorCore SDK, this feature should be indicated in the application description in the Windows Phone Store .
Data for testing
Each dummy API has data for processing and playback by default, and is also able to accept recorded data as input.
To simulate your own data from the sensor, you can use the SenseRecorder class:
PlaceMonitor monitor = await PlaceMonitor.GetDefaultAsync(); SenseRecorder recorder = new SenseRecorder(monitor); await recorder.StartAsync(); // ... ... await recorder.StopAsync(); await recorder.GetRecording().SaveAsync(); SenseRecording.SaveAsync () starts viewing the document to display the recorded data and offers to save it in the Documents folder on the phone. You can retrieve the saved file from this folder by attaching the phone to the computer using Windows Explorer.
Next, we link the record with the project, loading it using the SenseRecording.LoadFromFileAsync () function , and then using the GetDefaultAsync () function, passing the data to the simulator:
SenseRecording recording = await SenseRecording.LoadFromFileAsync("myData.txt"); PlaceMonitorSimulator simulator = await PlaceMonitorSimulator.GetDefaultAsync(recording); By default, the entry is configured in such a way that the first event trigger is registered immediately after launch. If you need to define these records as fixed earlier or later, then for the function GetDefaultAsync () you can set your own time for the start of the simulator:
PlaceMonitorSimulator simulator = await PlaceMonitorSimulator.GetDefaultAsync(recording, DateTime.Now - TimeSpan.FromDays(2)); The simulator reproduces the recorded data indefinitely, so that the recording can be used as a two-day history or vice versa, as data that will be received only two days after the launch of the application.
It is worth noting that when the application switches to the background, the recording of test data stops and can continue only when activated, since the SenseRecording class does not work in the background.
Background task
In the case of the implementation of the idea of this application, it is necessary to use a background task, since the notification from the application that “the user has returned home” should occur at the entrance to the geofence of the frequently visited place , when the application is not running.
To create such a task, there is a standard algorithm:
- Creating a background task;
- Announcing it in the application manifest;
- Register a background task in the app.
Let's proceed to its implementation:
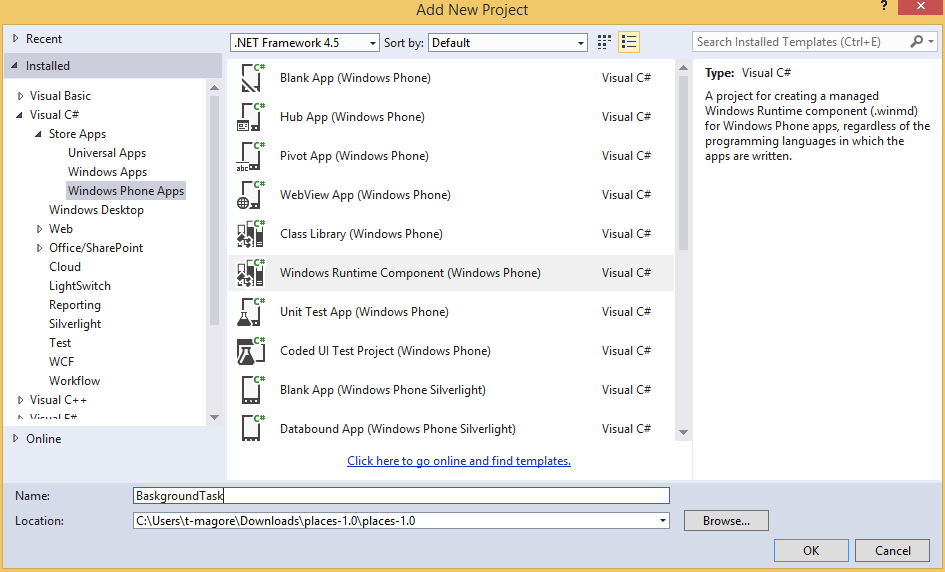
Add a new Windows Runtime Component project to the solution:
Rename the automatically generated Class1.cs to GeofenceBackgroundTask and inherit the IBackgroundTask interface.
Do not forget to connect the corresponding namespace: using Windows.ApplicationModel.Background
Add the Run method required for any background task to this class:
public void Run(IBackgroundTaskInstance taskInstance) { // var toastTemplate = ToastTemplateType.ToastText02; var toastXML = ToastNotificationManager.GetTemplateContent(toastTemplate); var textElements = toastXML.GetElementsByTagName("text"); textElements[0].AppendChild(toastXML.CreateTextNode("Welcome again!")); var toast = new ToastNotification(toastXML); ToastNotificationManager.CreateToastNotifier().Show(toast); } Add a link to the background task project: right click -> References-> Add Reference

Select and click OK.
Declare the background task in Package.appxmanifest:
On the Declarations-> Available declarations tab : Background Task-> Add
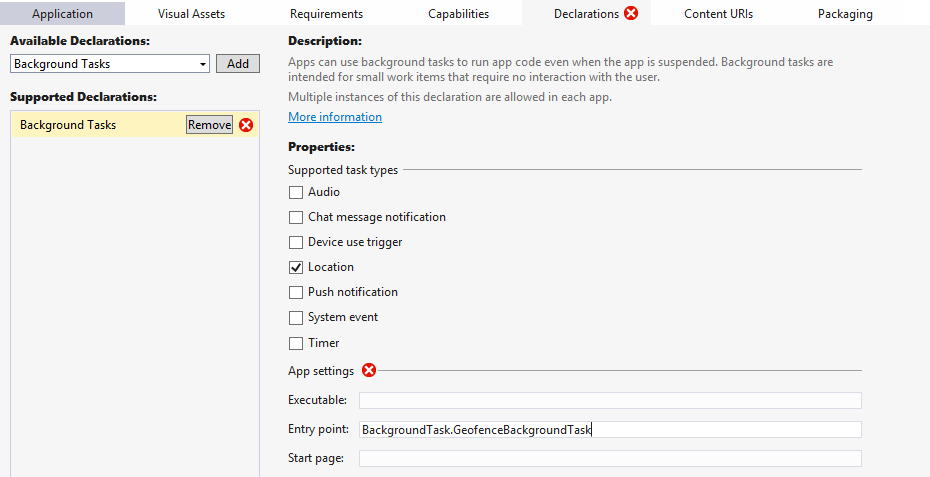
Mark Properties: Location , fill in the Entry point with the name of the class with the namespace: BackgroundTask.GeofenceBackgroundTask.
Add the following method to register the background task:
public static async Task RegisterBackgroundTask() { try { var backgroundAccessStatus = await BackgroundExecutionManager.RequestAccessAsync(); var geofenceTaskBuilder = new BackgroundTaskBuilder() { Name = "GeofenceBackgroundTask", TaskEntryPoint = "BackgroundTask.GeofenceBackgroundTask" }; var trigger = new LocationTrigger(LocationTriggerType.Geofence); geofenceTaskBuilder.SetTrigger(trigger); geofenceTaskBuilder.Register(); } catch (Exception e) { Debug.WriteLine(e); } } We register the task, for this we call the previous method in the application:
await RegisterBackgroundTask(); As a result, we receive a notification from the application in the background when entering the geo-zone of a frequently visited place:

Conclusion
In addition to the existing capabilities in Windows Phone 8.1, with the Lumia SensorCore SDK, developers get advanced functionality to create applications in which users will be able to receive and analyze information about their vital functions, while consuming the minimum amount of energy from the phone.
Developers can apply the experience of using new APIs from already existing examples of real-world applications, which are also available for download in the Windows Phone Store. As well as using detailed documentation for the new SDK.
useful links
Lumia SensorCore SDK:
- Download link SDK
- Description Lumia SensorCore SDK
- Detailed documentation: API references
- Application examples
Microsoft Virtual Academy (MVA) Training Courses
Windows Development Center
Download free or trial Visual Studio 2013
Lumia SensorCore SDK: Part 1. Overview
Source: https://habr.com/ru/post/239027/
All Articles