Turn the world, for the sake of speed and beautiful pictures - PhotoPizza DIY

Hello!
When photographing in the “Photo-360” format, you may encounter the problem of installing some objects on a rotating podium.
For example, a bicycle is difficult to put on a platform without auxiliary elements and you have to invent different mounts, and the diameter of the platform requires about one and a half meters. As a result, the coasters fall into the frame, they are difficult to retouch and the process of creating a photo-360 slows down dramatically. Photo studios turn up prices to pay back costs, and customers refuse to shoot.
')
For a long time working in the field of interactive presentation of objects on the Internet, I set myself a goal: to create a cheap and universal solution for shooting objects in the Photo-360 format. An open project "PhotoPizza" has appeared , for those who are not familiar with the project, can see instructions, download drawings and project files HERE
After creating two floor platforms, I planned to make one modification for hanging quite heavy objects.
Already started to draw, invent and suddenly realized that it is enough to make a few simple changes to the current design of the floor platform.
So, we will modify PhotoPizza with a diameter of 480 mm:

The platform can be attached to the ceiling using dowels or something else, and I assembled a frame made of aluminum:
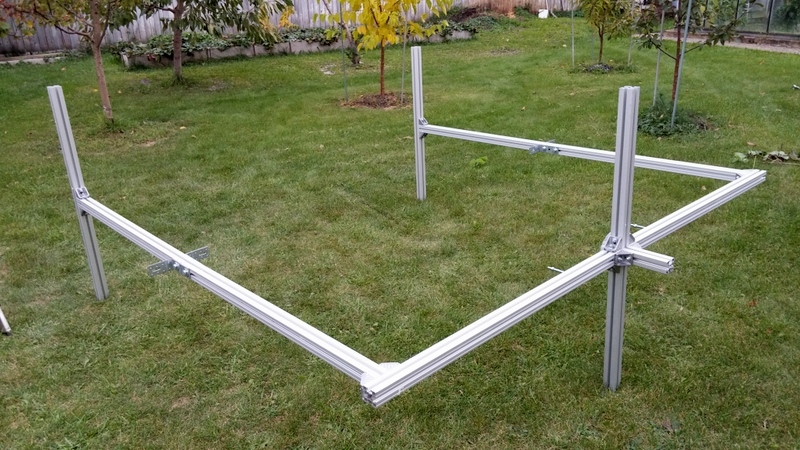
It is convenient to use the frame for outdoor photography and it is easy to fit in the trunk of a car when it is disassembled:

The legs are twisted out of the platform, the central axis and for ease of installation the engine is removed:
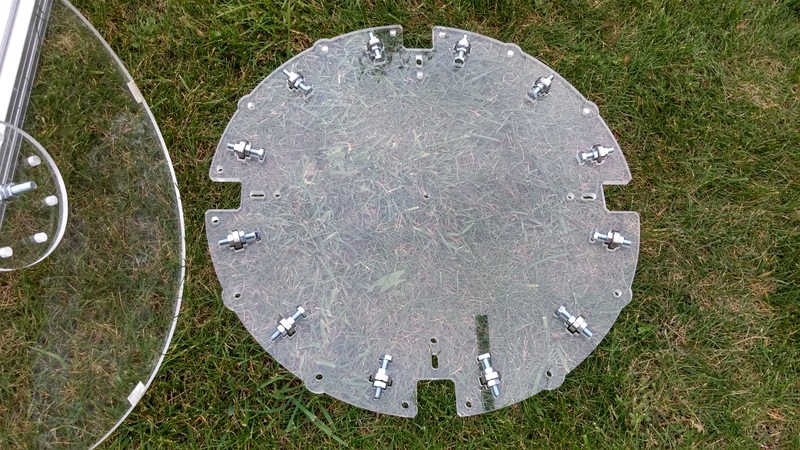
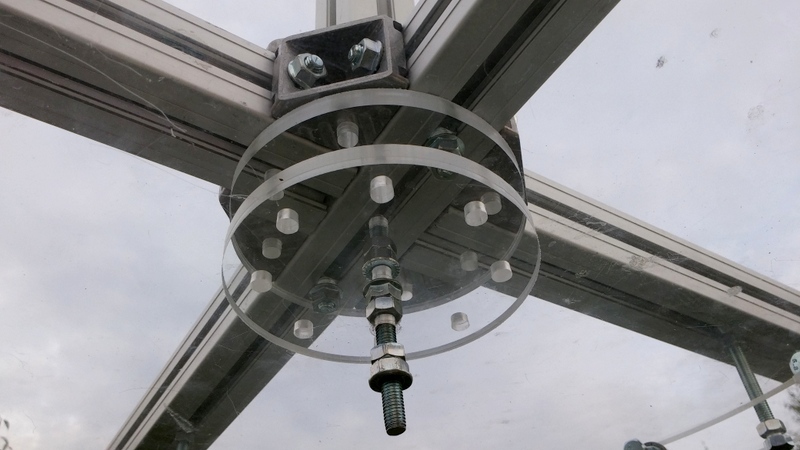
A hairpin is inserted into the platform's top disk, a small disk is put on to distribute the load and fixed with nuts on both sides:
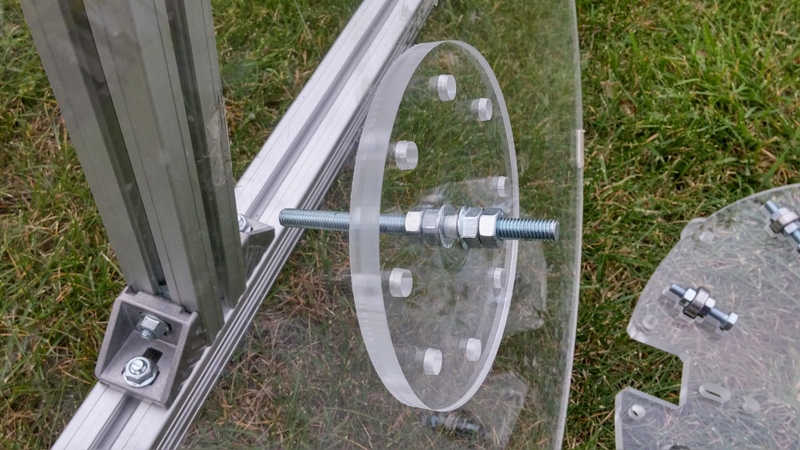
For a more serious load, the disc should be larger in diameter and made of a thicker or more durable material. Studs and nuts with a better use of high-strength steel.
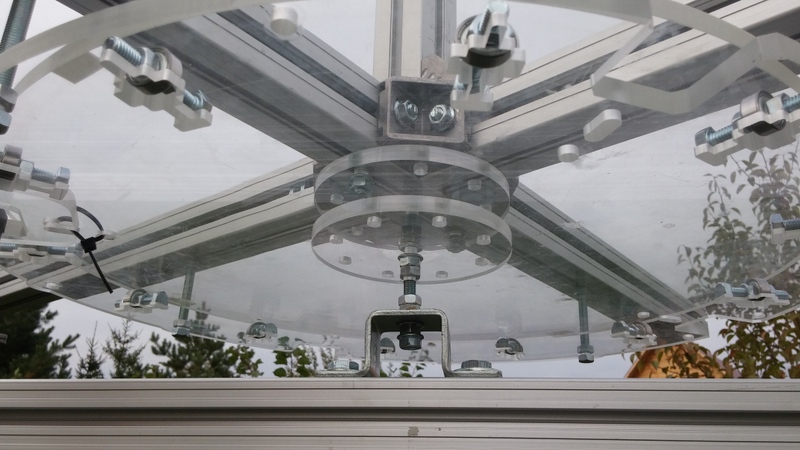
For fastening to the frame 4 screws are used, and to avoid the destruction of the disk in the place of fastening the stud to the rotating disk, the centering disk is attached to the frame. It is similar to fasten to the ceiling, but for load distribution it is better to use 8 screws:
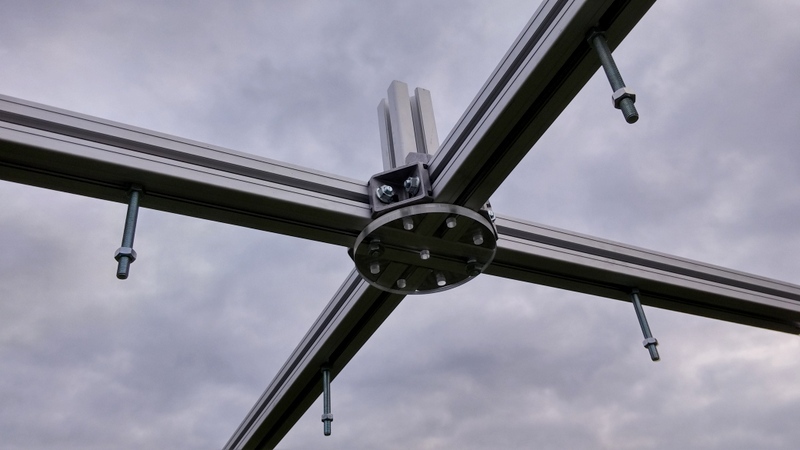
Suspend the platform by inserting the pin into the centering disk:
Then, insert the rollers and fasten the stepper motor:

Fasten the profile for which we will hang the bike:
I hung the bicycle by the line, but the wheels were not washed:

This design requires a balanced load on the profile, for which the bike is suspended, relative to the axis of rotation.
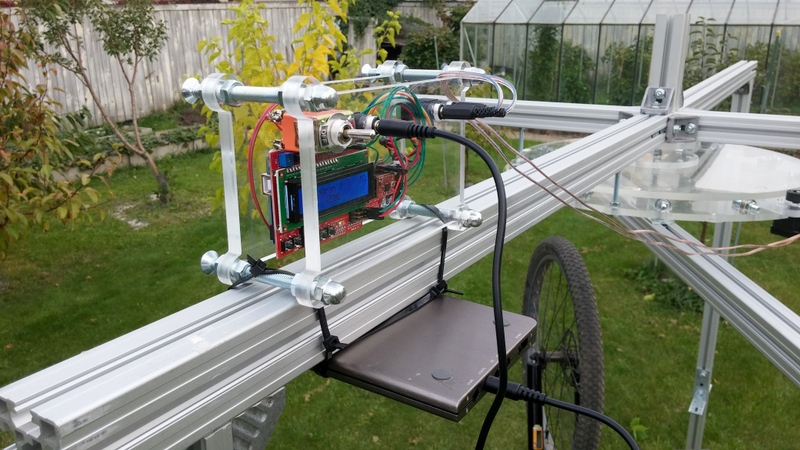
The control unit also attached to the frame together with a battery for autonomous power:
Shooting process
The bike is photographed on a uniformly illuminated white background.
Objects can be photographed in continuous or interval shooting.
Platform Characteristics:
- Rated load capacity - 80 kg.
- Maximum load capacity - 100 kg.
- The diameter of the circle - 480 mm.
- It is possible to photograph objects with illumination below.
- Suitable for photogrammetric 3D scanning of objects - this is a way to construct a 3D object based on the analysis of a sequence of frames with different angles.
- The possible shooting speed is 100 frames in 15 seconds .
- Adjustable rotation parameters - acceleration, rotation speed, infinite rotation, rotation for a certain number of steps, 4 customizable programs
- IR remote control
- Autonomous work is possible
In limbo:
- Nominal loading capacity - 25 kg.
- Maximum load capacity - 35 kg.
Preparing a new modification for shooting objects in a suspended state weighing up to 80 kg.
The total cost of components for self-assembly platform - 7434 rubles.
List of components
Files for cutting material and firmware Arduino
Suspended platform operation:
Work platform in normal mode:
Source: https://habr.com/ru/post/238287/
All Articles