About creating platformer on Unity. Part Three, the long-awaited
Hi, Habr!
Cold St. Petersburg autumn stacks people in bed with the temperature and other delights of the part of the universe that is responsible for the disease. But all bad, fortunately, comes to an end. Therefore, as you understand from the introduction, today in our course from beginner to beginners we will talk about the creation of enemies, levels and physics. More physics!
')
Caution: the volumes of gifs under the cut become simply inhuman!
The previous parts were published almost two weeks ago, so I advise you to refresh your knowledge a bit :)
Disclaimer: all the code shown in the article is not a role model, an example of an ideal code and other things that are fictional and do not exist in nature. Practitioners applied in the article may be one of the many solutions to a specific problem. And may not be.
Let's start from the end by adding the simplest physical piece to the box. We need a sprite box, rigidbody2D and boxcollider2D. Let's get started!
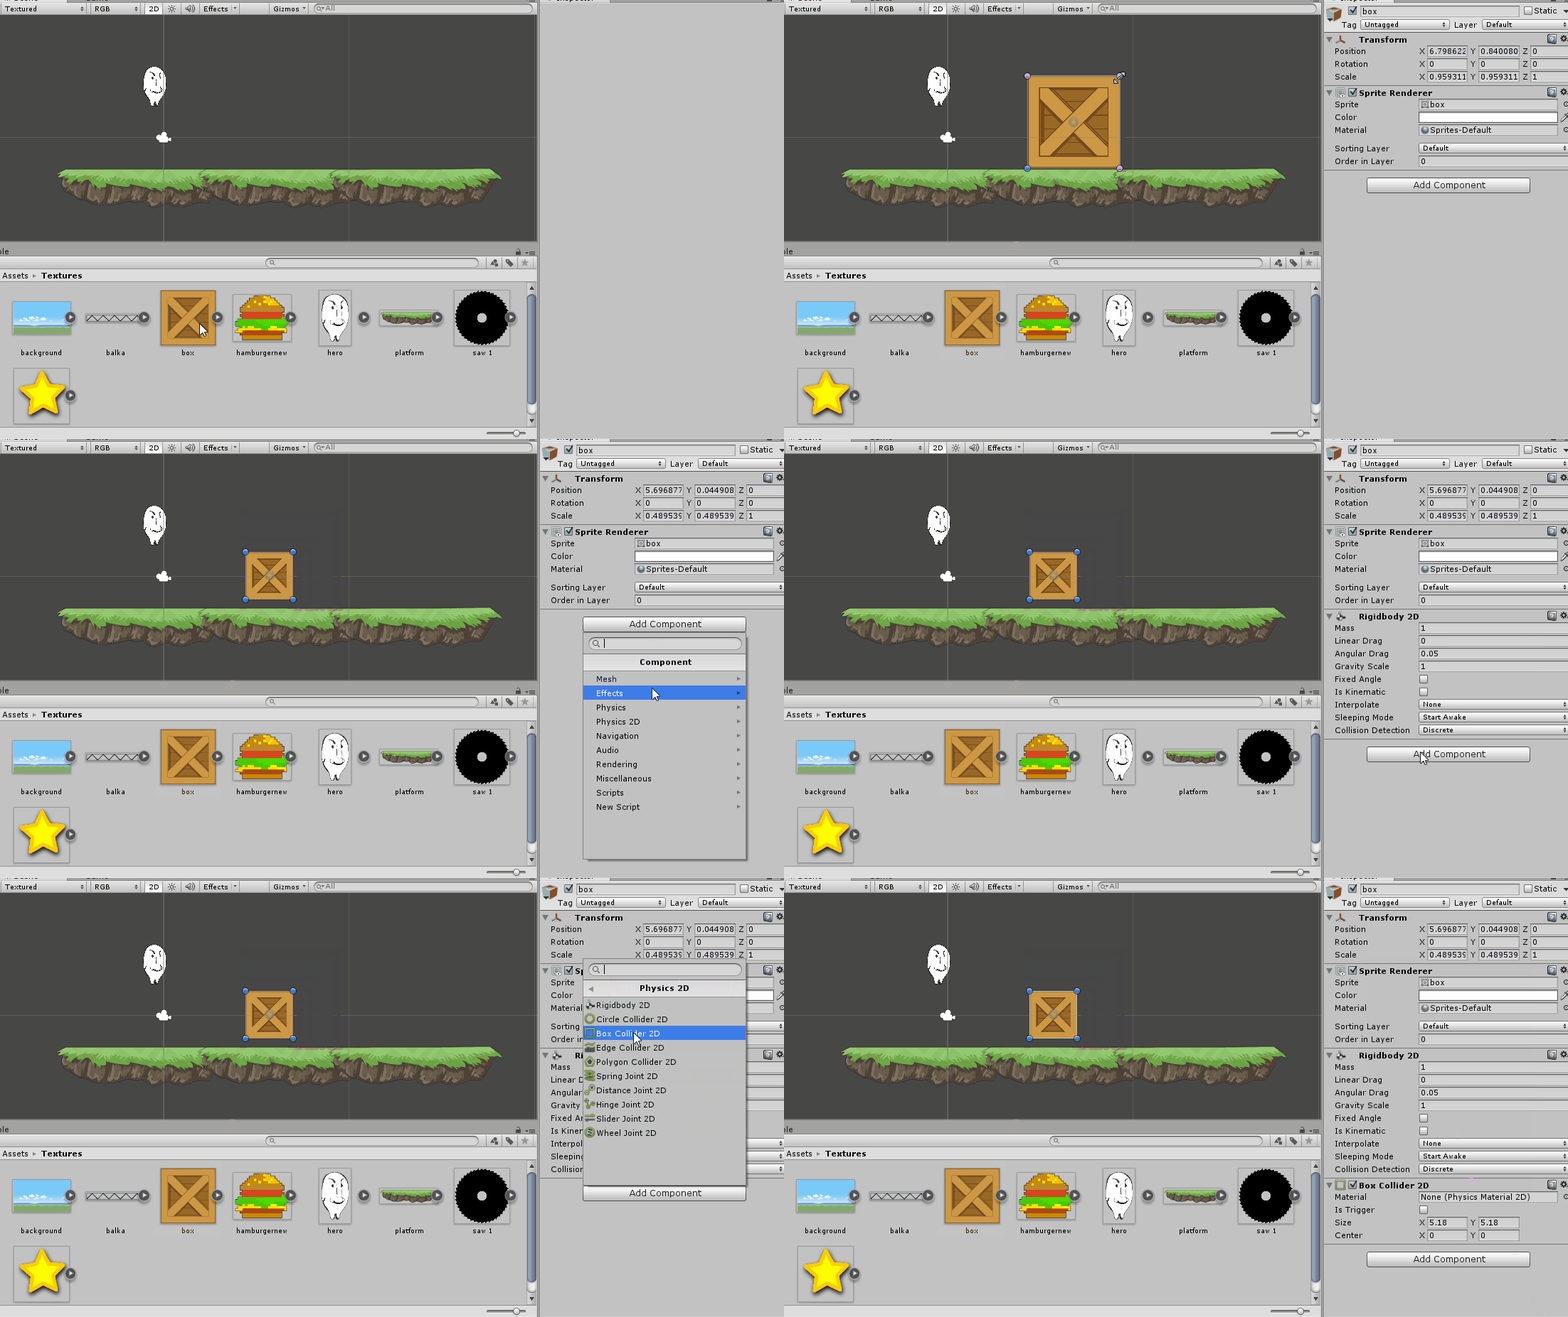
As you can see, there is still nothing complicated. Prepare from the resulting box prefab and transfer again to the form. Watch your hands: in one of the boxes we will put the isKinematic checkbox on a rigidbody2D and start up the fun that begins:
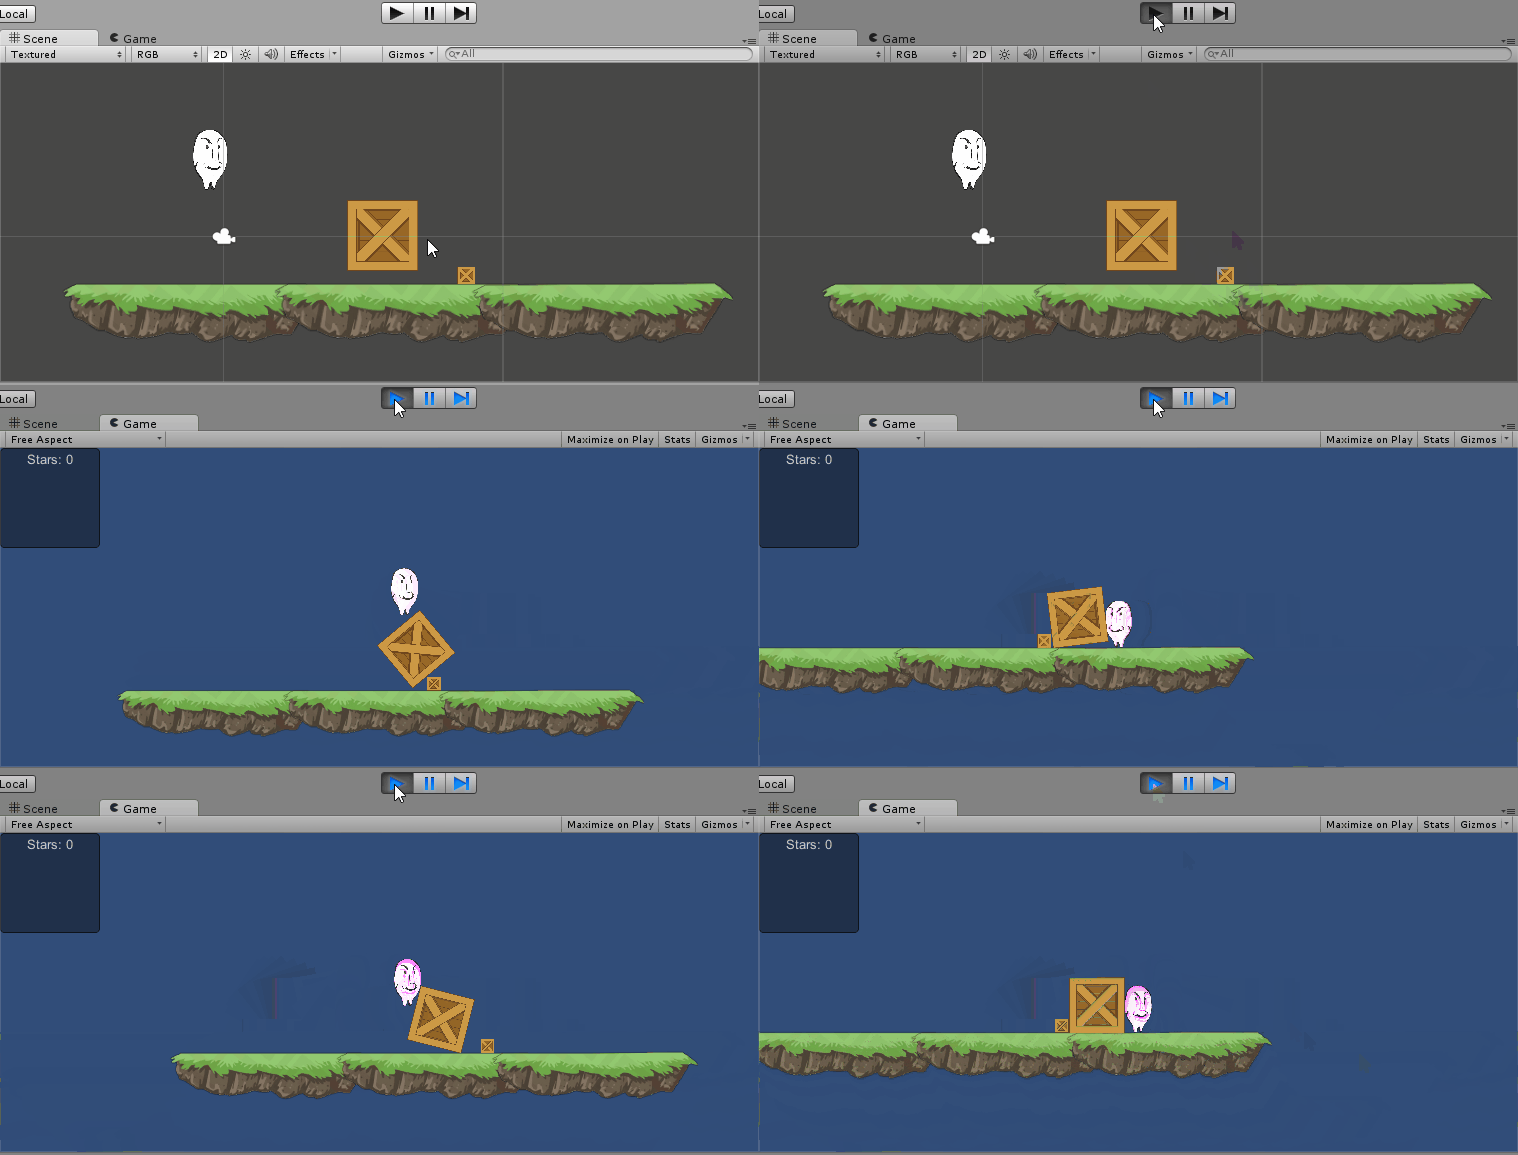
The box with the set rigidbody2D.isKinematic = true does not move. It can not be moved from the place by the use of forces or collisions, so this box will act as a fixed obstacle. Go ahead.
In the best traditions of the super meat boy, add to our yet_the game of the enemy-saw. The saw will spin and ... everything.
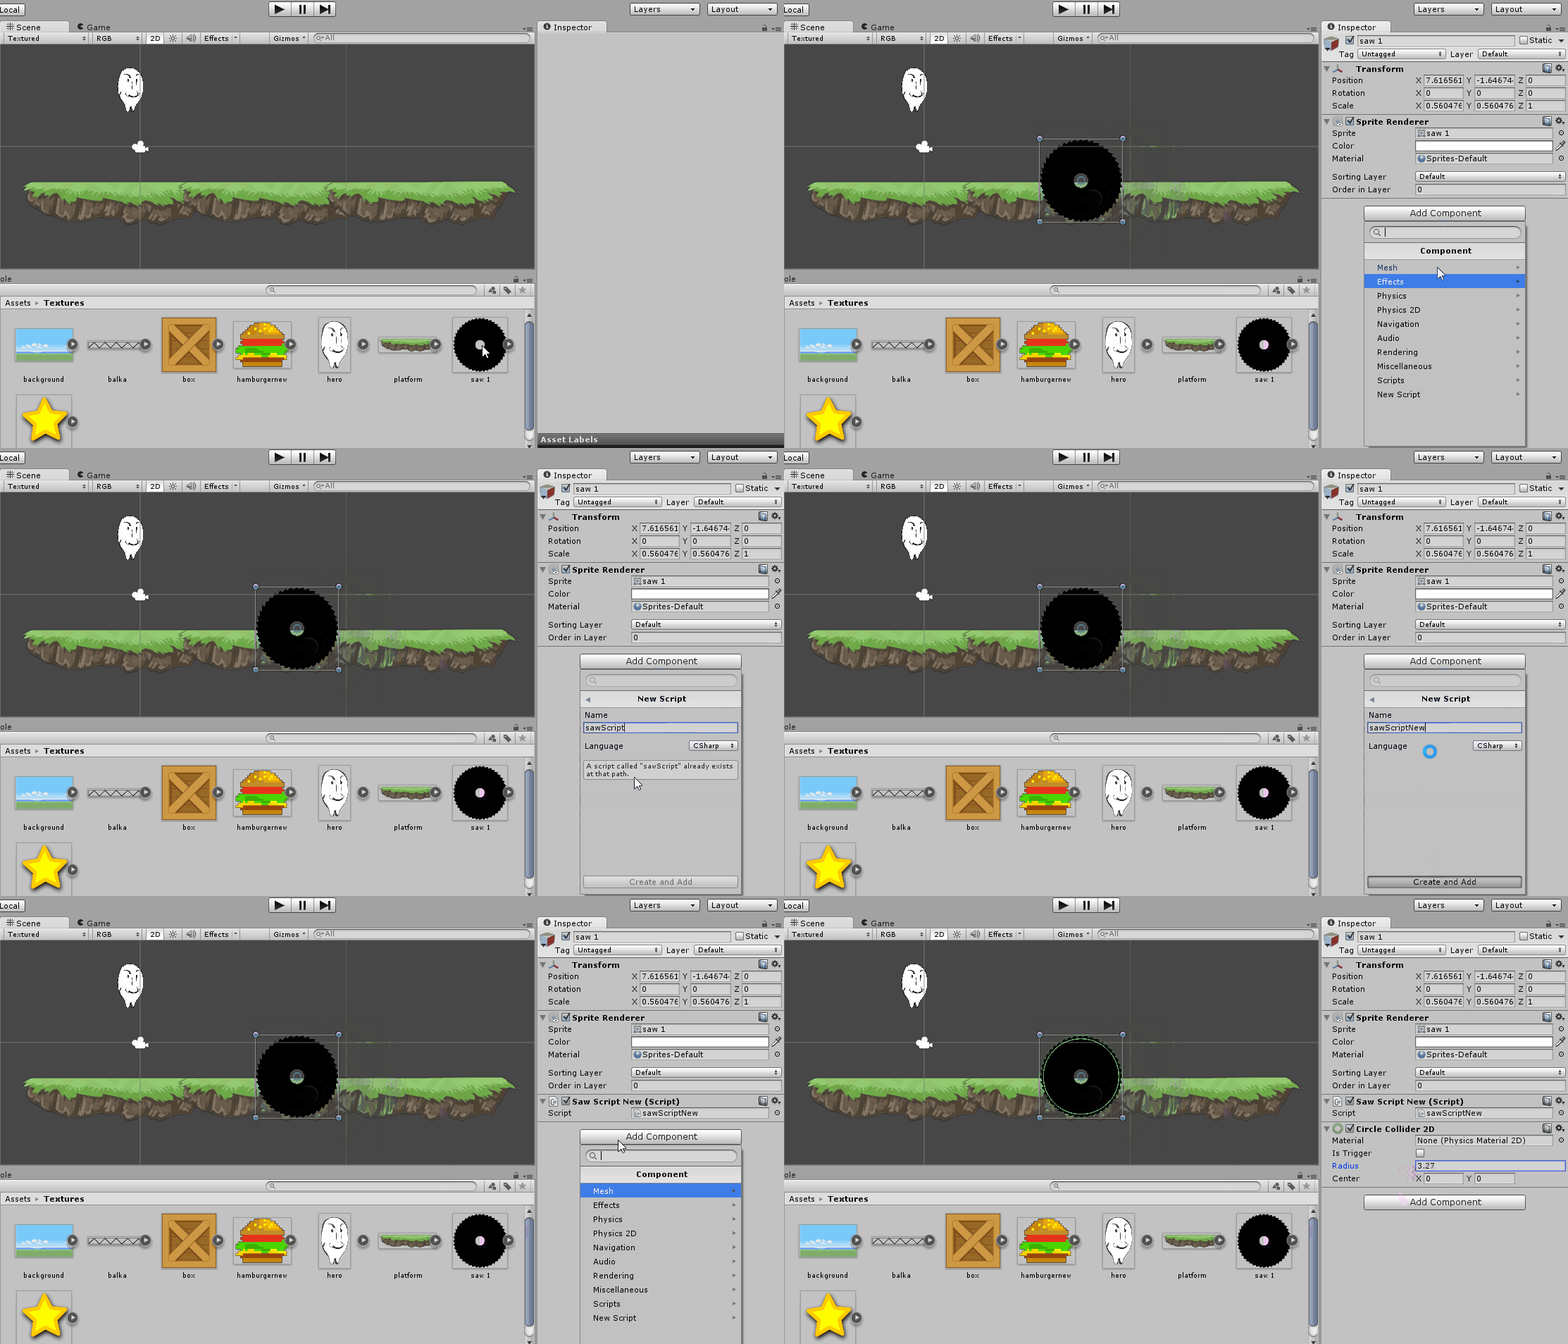
An incredibly complex script for this action looks like this:
Let me explain: transform.rotate rotates a sprite by the angles given in vector3 around, respectively, the x, y and z axes. In the case of a 2D game, the first two axes are of little use for our task, and here's why:
transform.Rotate (new Vector3 (-3f, 0f, 0f));
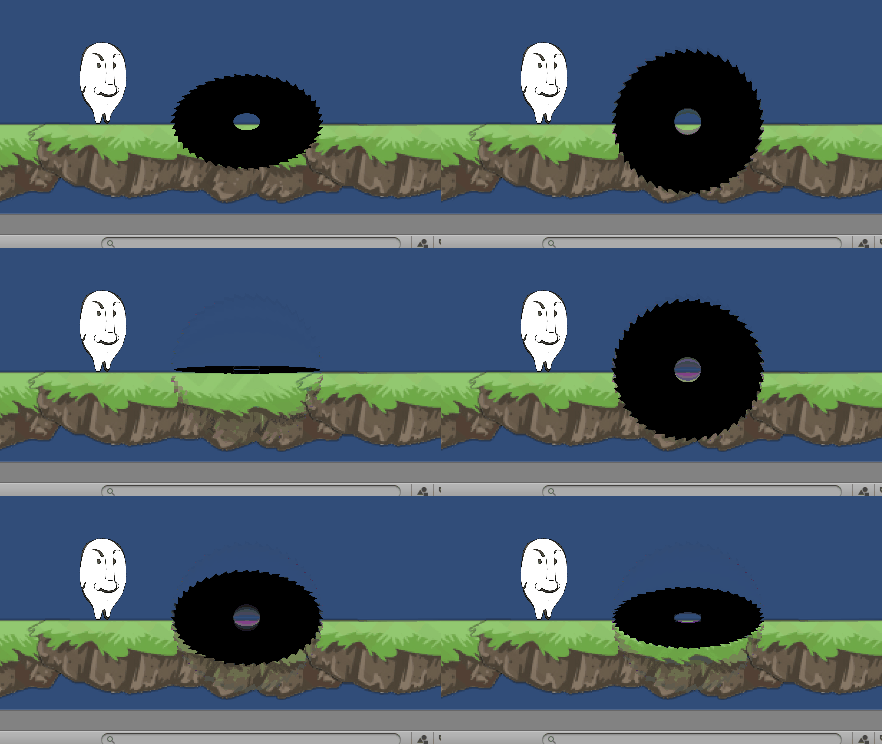
transform.Rotate (new Vector3 (0f, -3f, 0f));
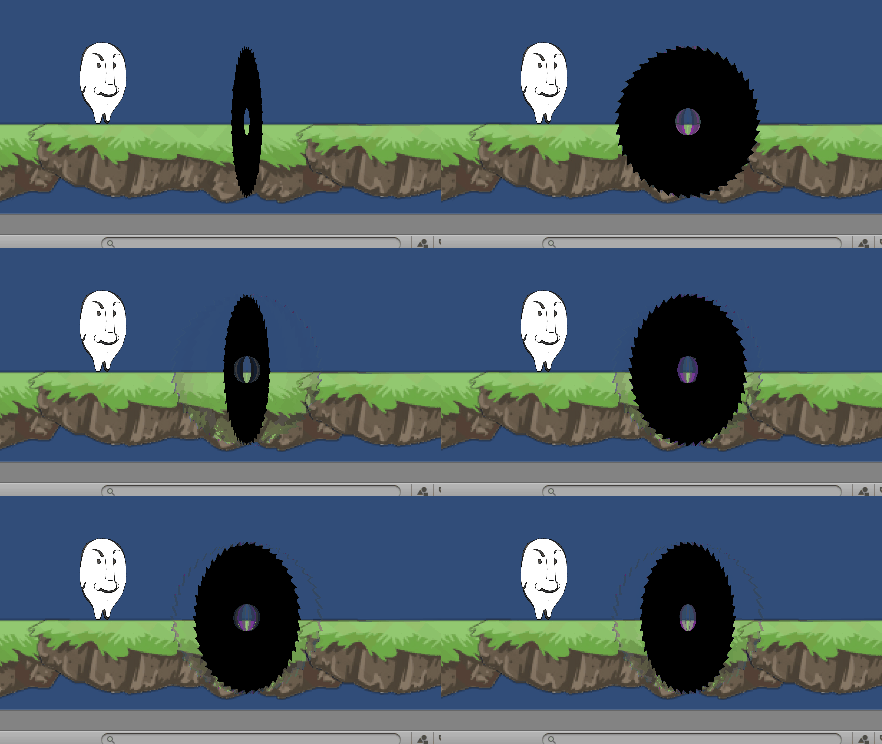
By the way, about 2D mode. The attentive reader noticed that the saw was ugly sticking out in front of the platform and blocking the whole look. In order to fix this, it is enough to know a simple thing - in 2D mode, the objects on the screen are ordered (here I’m not so sure about the terminology, correct) by the z-level. Here's a visual gif about how it works.

Now we will make the hero die when interacting with the saw. Fix characterController.cs as follows:
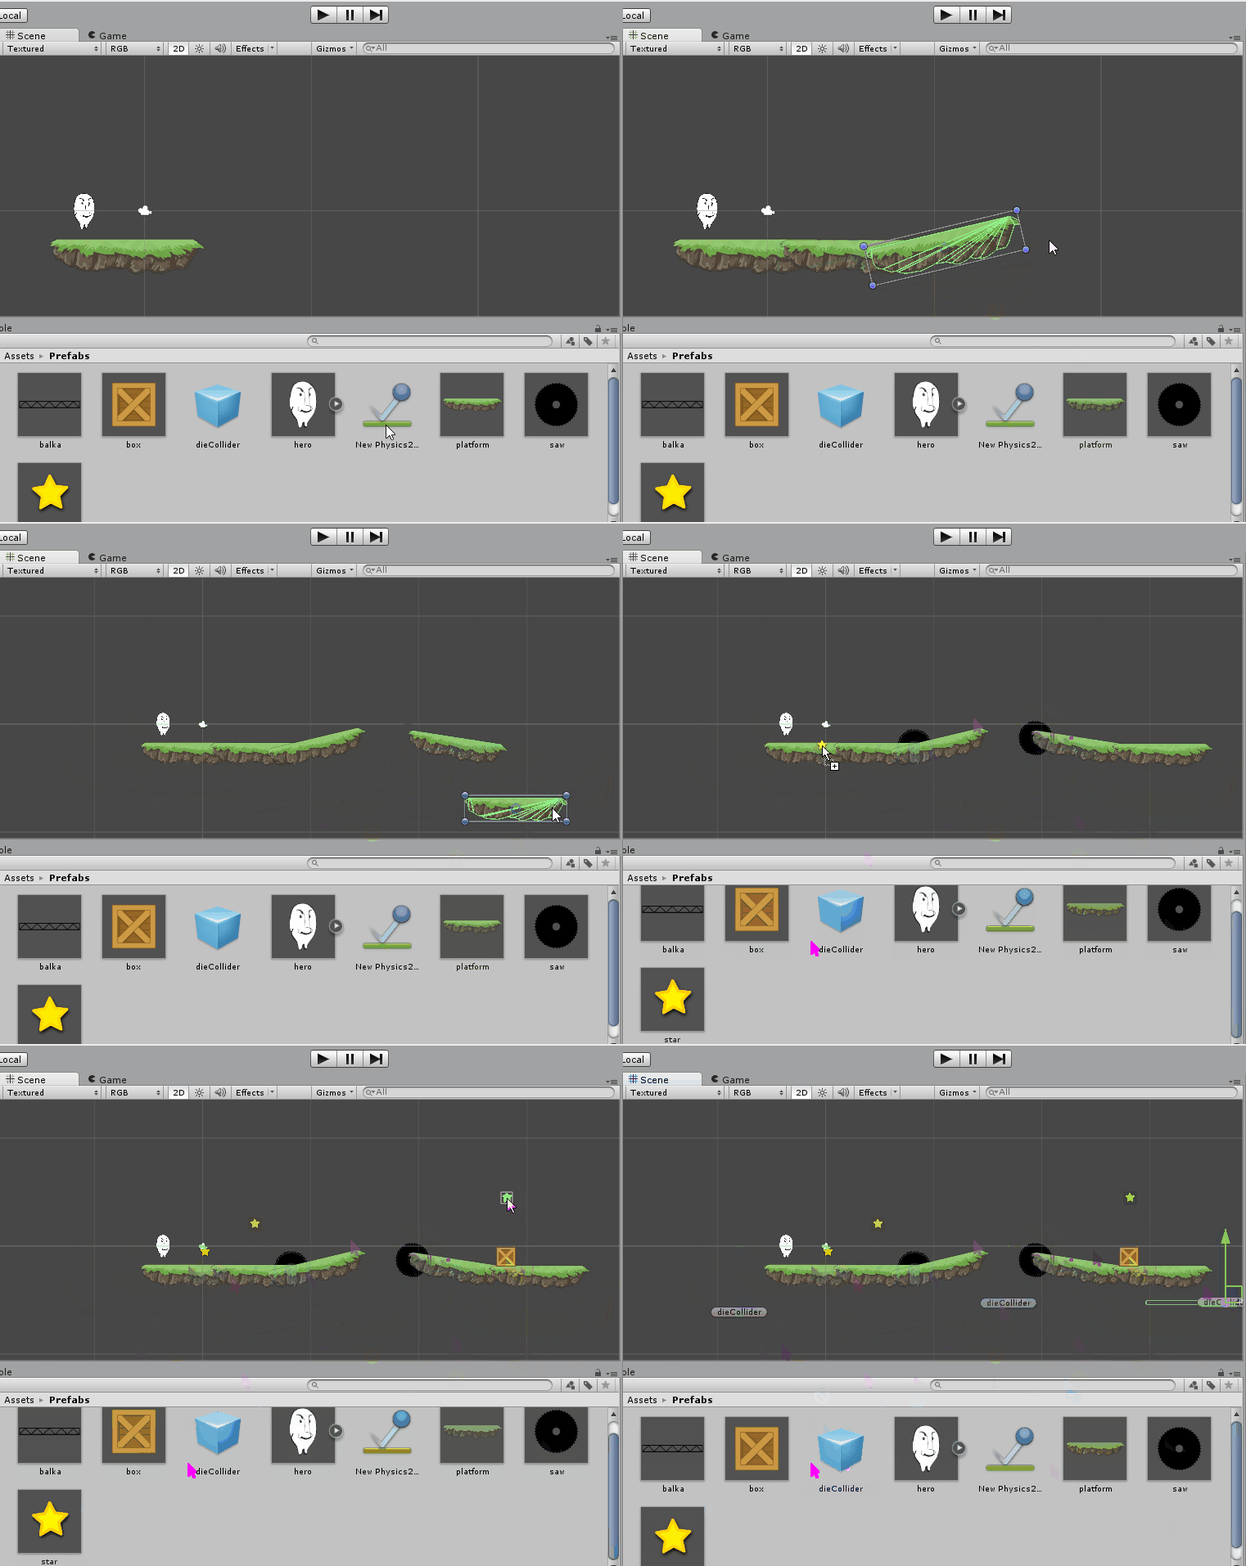
Bingo! Now, having stars, boxes, obstacles and dieColliders, let's try to collect a level. This is done very quickly and easily, since all the objects already exist in the form of prefabs, and they do not need to be re-configured each time.
Go ahead. When there is one level, the second is needed. Save the scene as scene1.unity and create a new one. Let's build, similarly to the example above, one more level and save (already guessed? Well done) as scene2. Now go to File -> Build Settings and put daws on both scenes. Like that:

A number is displayed next to the scene name - by it we can refer to the scene to load it. Or by name, to whom it is more convenient. Create an empty object and program it so that after collecting all the stars and colliding with it (the object), the player moves to the second scene. To do this, in the OnTriggerEnter method we will check whether there are more stars on the scene.
That's how it will look on stage. If desired, you can add a sprite using the sprite renderer component.

This is where the main part of the article ends and the bonus track starts at your request.

Accordingly, a little about fun and about physics! Add a couple of sprites - a platform and a fireball from Super Mario, and try to make a machine out of it to destroy a pile of boxes.
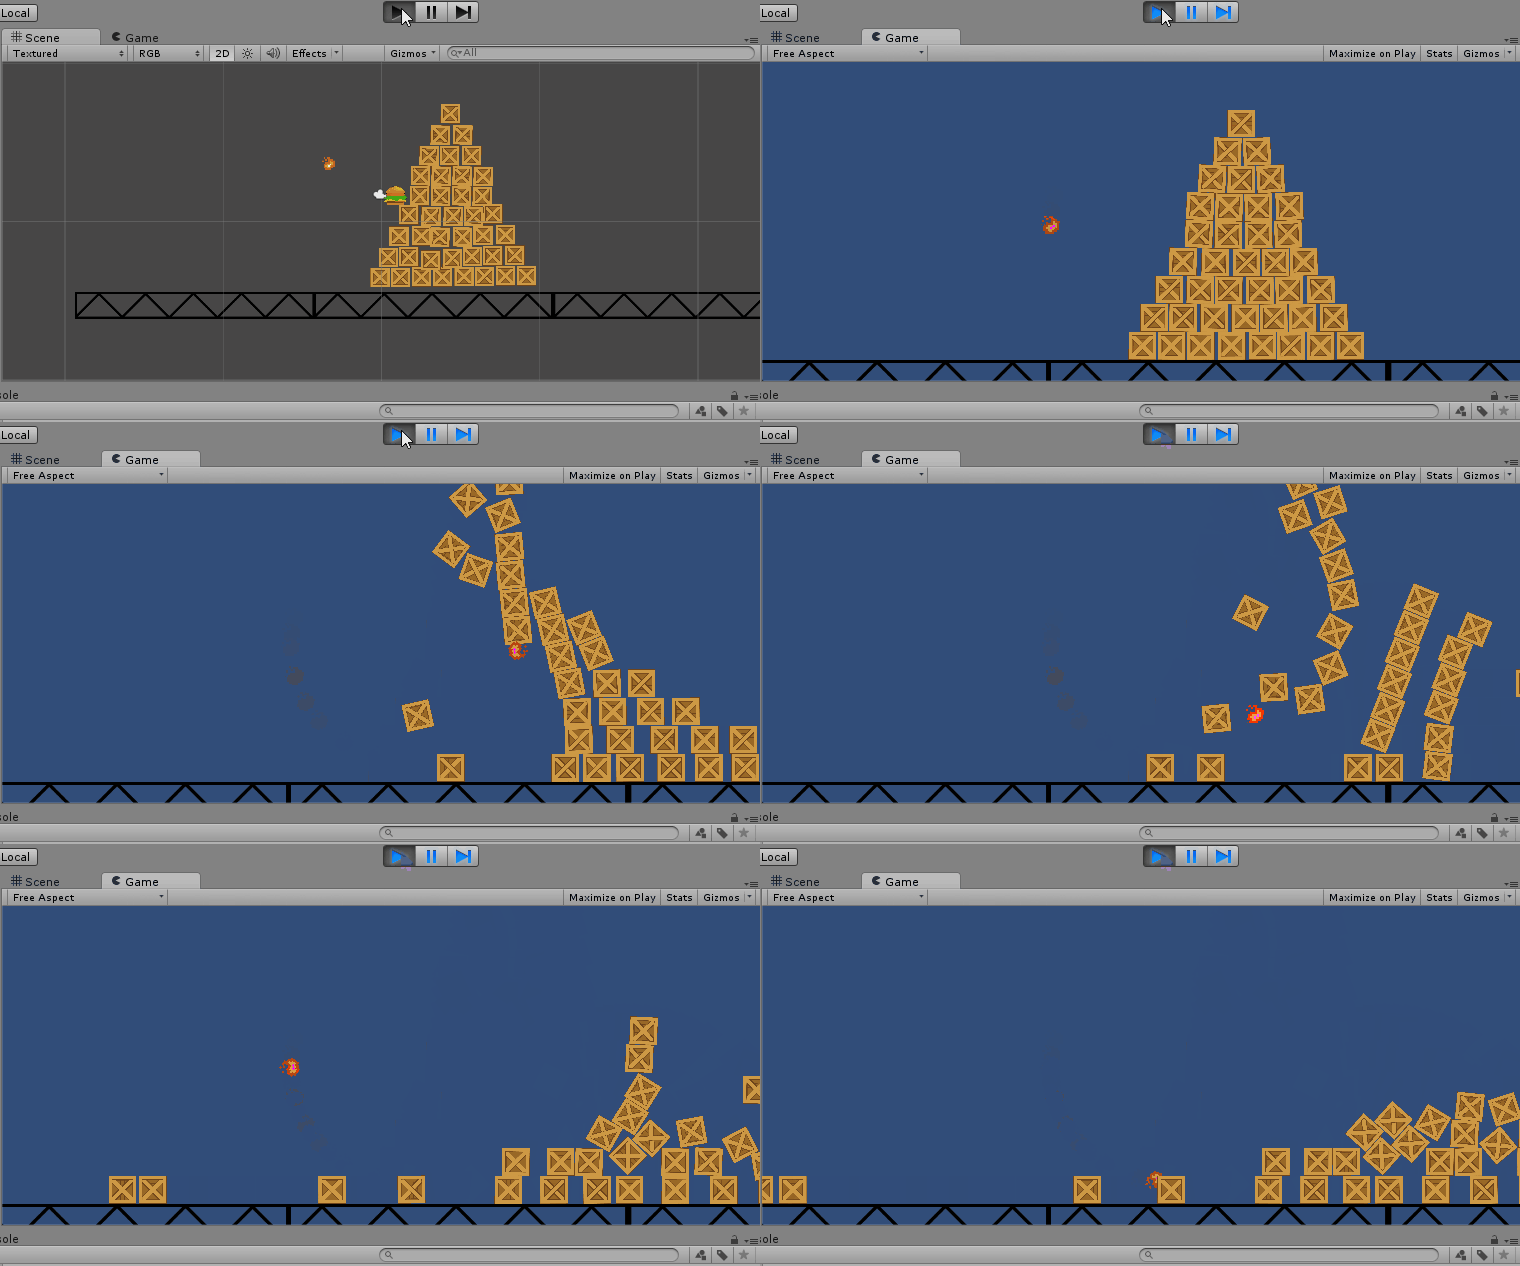
This will help us the first representative of the JDC family, with whom we will get acquainted - Distance Joint, which, in fact, allows you to turn anything in the game into a mathematical pendulum. We add it to the object, choose what will be on the other side of the pendulum (an object with rigidbody2d.isKinematic = true is useful here), what is the distance between them and eventually we get what we got above. The boxes, by the way, are the same as those used in our platformer. Look!
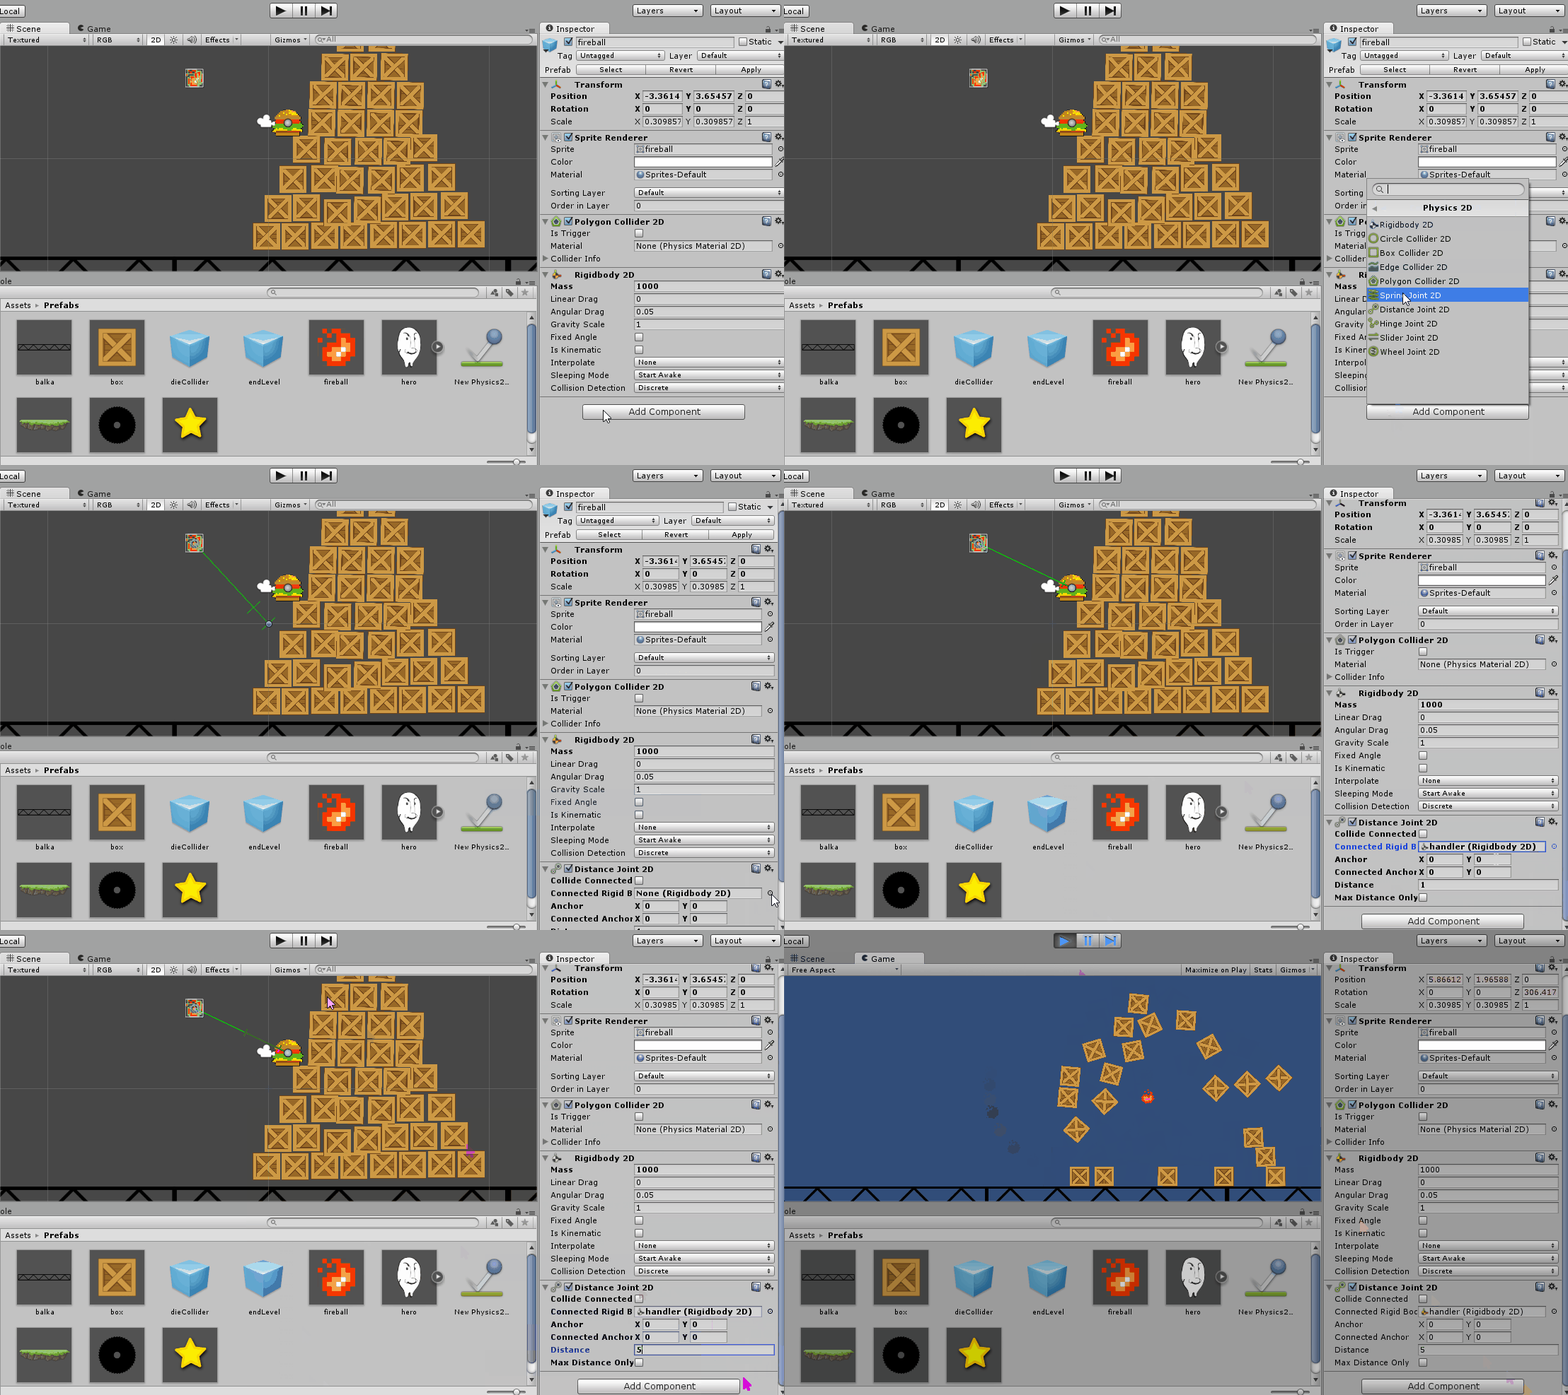
The object to which our destructive ball is attached has a rigidbody2D component with the isKinematic attribute enabled. This is necessary so that it does not fall immediately after the launch of the game (and never at all).
But this is really all! Thank you for your attention, come again, ask questions! In the next article I will show how to animate the hero, asterisks and draw normal inscriptions on the screen. In general, let's do all sorts of decorations.
Previous series:
Part one, in which the charming nose learns to walk
Part two, in which losing is fun.
ps More fun with physics (GIF, 3.1 MB)
Cold St. Petersburg autumn stacks people in bed with the temperature and other delights of the part of the universe that is responsible for the disease. But all bad, fortunately, comes to an end. Therefore, as you understand from the introduction, today in our course from beginner to beginners we will talk about the creation of enemies, levels and physics. More physics!

')
Caution: the volumes of gifs under the cut become simply inhuman!
The previous parts were published almost two weeks ago, so I advise you to refresh your knowledge a bit :)
Disclaimer: all the code shown in the article is not a role model, an example of an ideal code and other things that are fictional and do not exist in nature. Practitioners applied in the article may be one of the many solutions to a specific problem. And may not be.
Let's start from the end by adding the simplest physical piece to the box. We need a sprite box, rigidbody2D and boxcollider2D. Let's get started!

As you can see, there is still nothing complicated. Prepare from the resulting box prefab and transfer again to the form. Watch your hands: in one of the boxes we will put the isKinematic checkbox on a rigidbody2D and start up the fun that begins:

The box with the set rigidbody2D.isKinematic = true does not move. It can not be moved from the place by the use of forces or collisions, so this box will act as a fixed obstacle. Go ahead.
In the best traditions of the super meat boy, add to our yet_the game of the enemy-saw. The saw will spin and ... everything.

An incredibly complex script for this action looks like this:
using UnityEngine; using System.Collections; public class sawScriptNew : MonoBehaviour { // Use this for initialization void Start () { } // Update is called once per frame void Update () { transform.Rotate (new Vector3(0f,0f,-3f)); } } Let me explain: transform.rotate rotates a sprite by the angles given in vector3 around, respectively, the x, y and z axes. In the case of a 2D game, the first two axes are of little use for our task, and here's why:
transform.Rotate (new Vector3 (-3f, 0f, 0f));

transform.Rotate (new Vector3 (0f, -3f, 0f));

By the way, about 2D mode. The attentive reader noticed that the saw was ugly sticking out in front of the platform and blocking the whole look. In order to fix this, it is enough to know a simple thing - in 2D mode, the objects on the screen are ordered (here I’m not so sure about the terminology, correct) by the z-level. Here's a visual gif about how it works.

Now we will make the hero die when interacting with the saw. Fix characterController.cs as follows:
void OnTriggerEnter2D(Collider2D col){ if ((col.gameObject.name == "dieCollider")||(col.gameObject.name == "saw")) Application.LoadLevel (Application.loadedLevel); Bingo! Now, having stars, boxes, obstacles and dieColliders, let's try to collect a level. This is done very quickly and easily, since all the objects already exist in the form of prefabs, and they do not need to be re-configured each time.

Short guide on game design
When creating a level, motivate a player to get acquainted with the world. Place a prize in front of him, and place the next one in such a way that, for example, you should jump. Having, for example, moving boxes, put them so that the next star could not be reached without them. And so on.
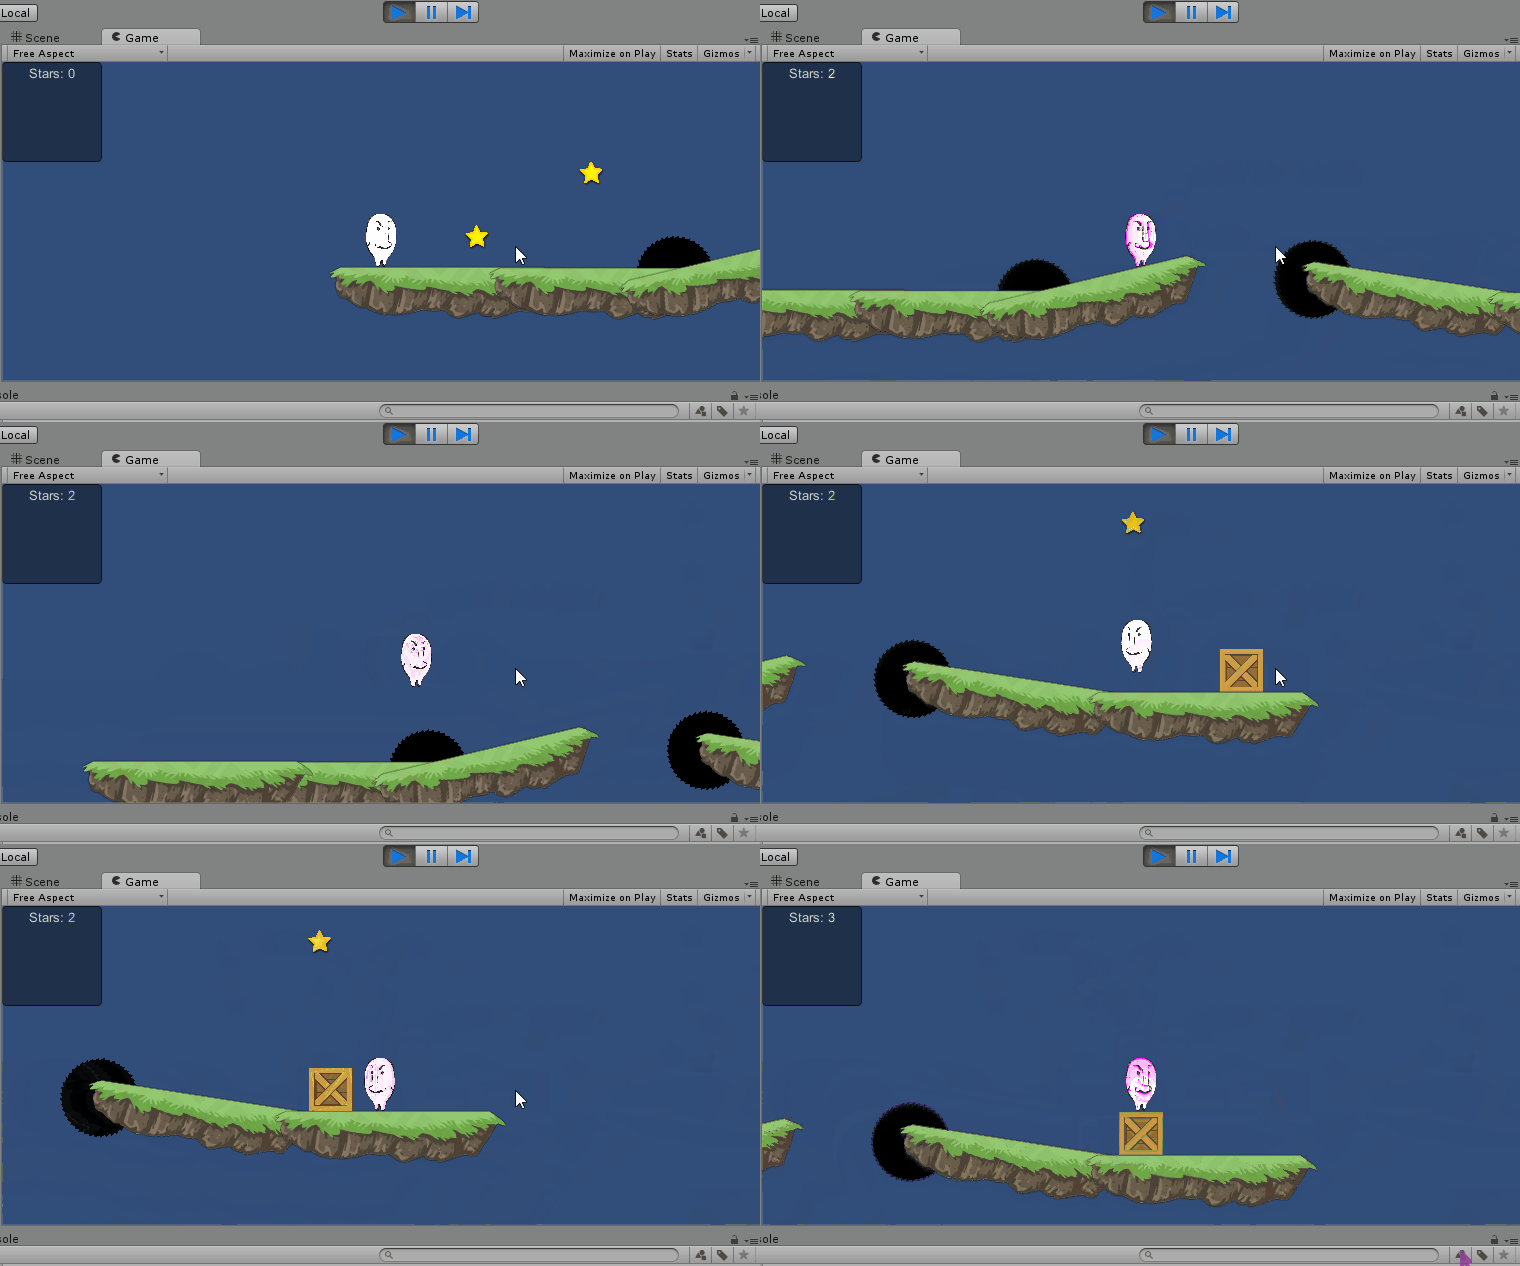
Teach the player as efficiently as possible: do not stretch the introduction to several levels. Remember the classic world 1-1 from Super Mario Brothers. It is (usually) enough to get acquainted with the main game mechanics and the most frequently encountered enemies.

Teach the player as efficiently as possible: do not stretch the introduction to several levels. Remember the classic world 1-1 from Super Mario Brothers. It is (usually) enough to get acquainted with the main game mechanics and the most frequently encountered enemies.
Go ahead. When there is one level, the second is needed. Save the scene as scene1.unity and create a new one. Let's build, similarly to the example above, one more level and save (already guessed? Well done) as scene2. Now go to File -> Build Settings and put daws on both scenes. Like that:

A number is displayed next to the scene name - by it we can refer to the scene to load it. Or by name, to whom it is more convenient. Create an empty object and program it so that after collecting all the stars and colliding with it (the object), the player moves to the second scene. To do this, in the OnTriggerEnter method we will check whether there are more stars on the scene.
if (col.gameObject.name == "endLevel") { if (!(GameObject.Find("star"))) Application.LoadLevel ("scene2"); } That's how it will look on stage. If desired, you can add a sprite using the sprite renderer component.

How does the switching levels (gif, 3.7 MB)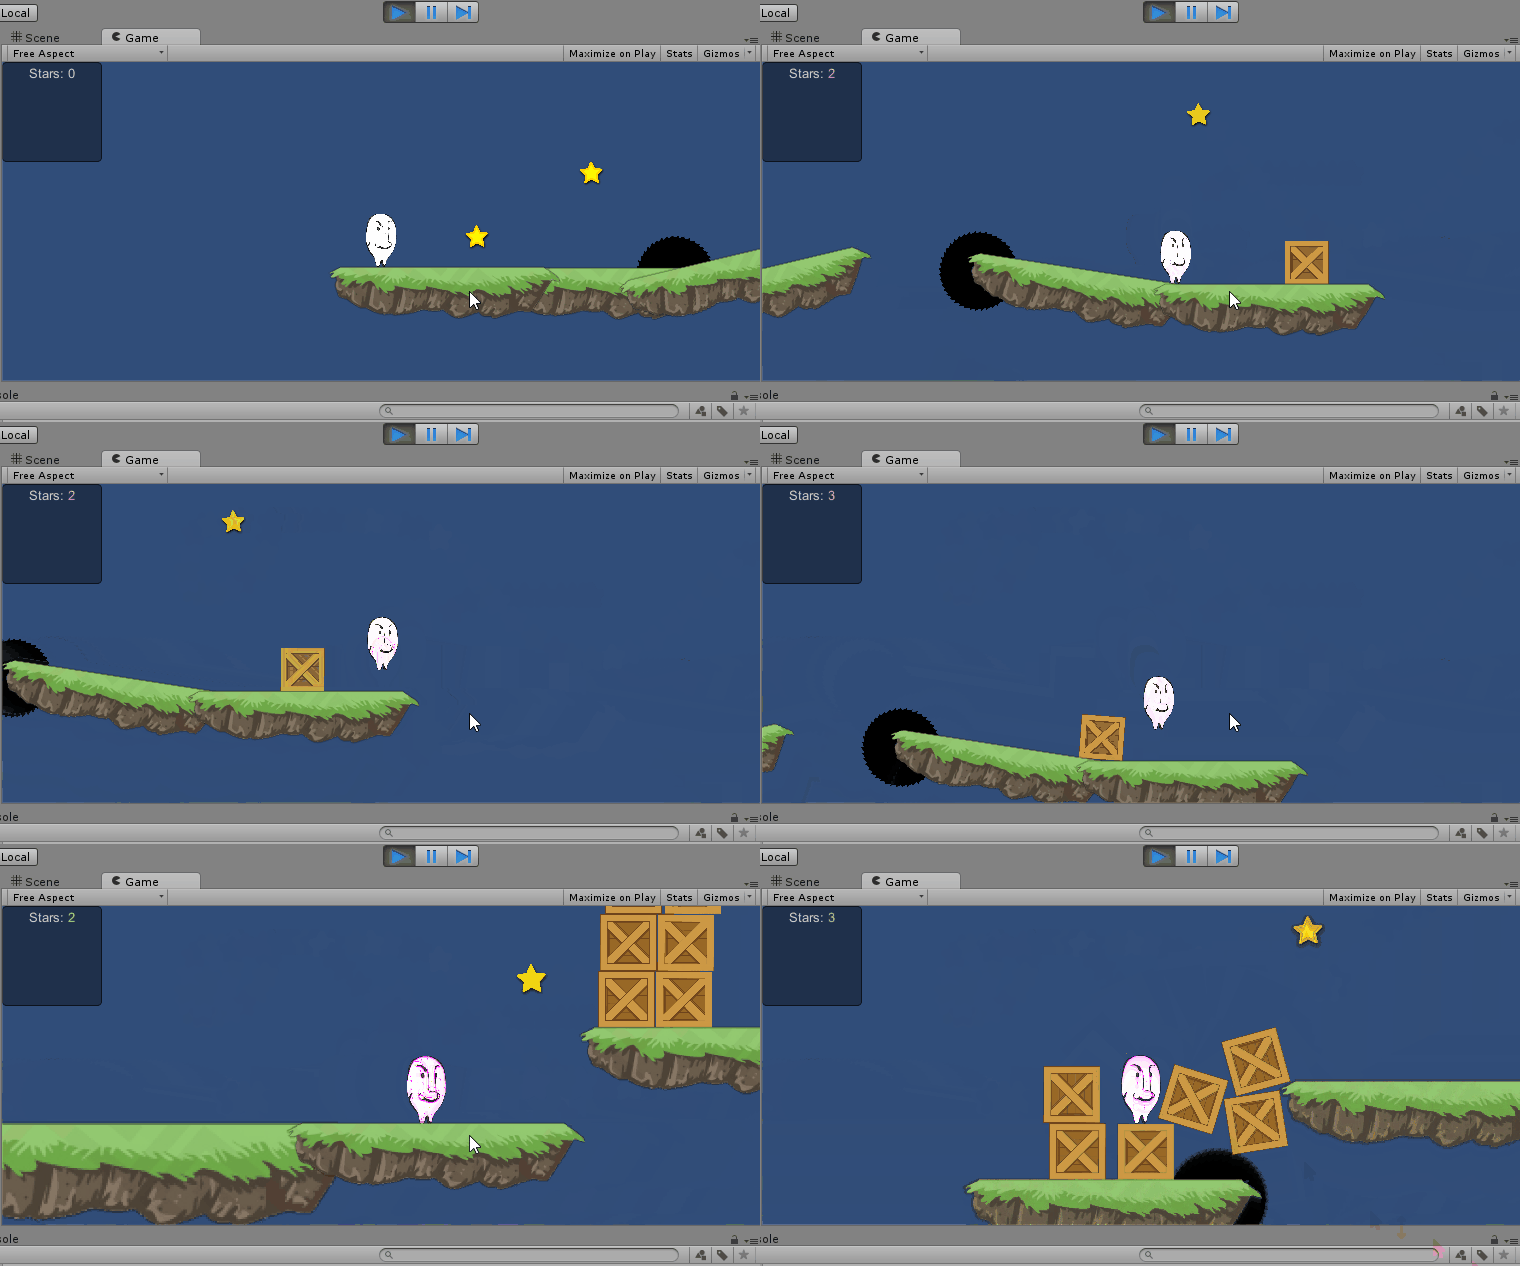

This is where the main part of the article ends and the bonus track starts at your request.

Accordingly, a little about fun and about physics! Add a couple of sprites - a platform and a fireball from Super Mario, and try to make a machine out of it to destroy a pile of boxes.

This will help us the first representative of the JDC family, with whom we will get acquainted - Distance Joint, which, in fact, allows you to turn anything in the game into a mathematical pendulum. We add it to the object, choose what will be on the other side of the pendulum (an object with rigidbody2d.isKinematic = true is useful here), what is the distance between them and eventually we get what we got above. The boxes, by the way, are the same as those used in our platformer. Look!

The object to which our destructive ball is attached has a rigidbody2D component with the isKinematic attribute enabled. This is necessary so that it does not fall immediately after the launch of the game (and never at all).
But this is really all! Thank you for your attention, come again, ask questions! In the next article I will show how to animate the hero, asterisks and draw normal inscriptions on the screen. In general, let's do all sorts of decorations.
Previous series:
Part one, in which the charming nose learns to walk
Part two, in which losing is fun.
ps More fun with physics (GIF, 3.1 MB)
Source: https://habr.com/ru/post/238071/
All Articles