How to make a good video for the application page on the App Store
Hi, Habr!
My name is Alena, I work in the studio motion-graphics. Recently, an application with our video has successfully passed moderation, so I want to share my experience on how to make videos for an App Store page and not screw it up: what and how a developer can do, what is better to outsource, and what chips it’s better to refuse.
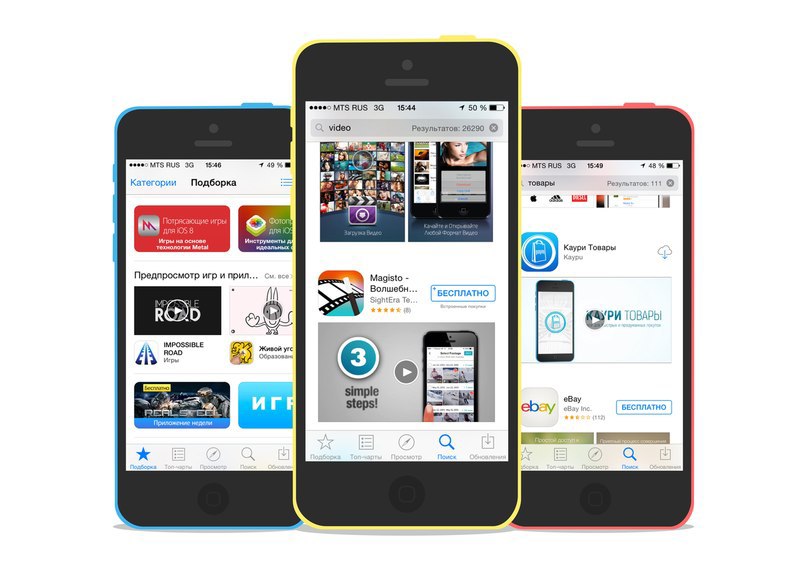
In the application description, the video is placed on the site of the first screenshot, and in the search for the App Store, and generally in the most prominent place:
')

For the preview, you can select any frame. You can upload video, as well as screenshots, only during the update. And for different devices, you can upload different videos, but you cannot localize the video yet: only one video for all languages.
Apple’s key requirements and tips are described here . These are mainly content guidelines:
However, it is unlikely that Apple will be very frustrated because of the zoom or the hands in the frame: the same requirements for screenshots are even more severe, but try to find an application that is 100% compliant with them.
UPD, May 2017: in the first couple of months, the moderators really did not get banned for horizontal videos, telephones in the frame and similar liberties. But now it is important to strictly comply with the requirements: only the interface, simple graphics, frames.
In addition, you cannot show the interface of other applications (for example, if maps or a navigator are integrated into your application) and the start screen of an iPhone - because of this, the release also risks not being moderated.
On the video page there are none, so thanks to Dmitry Yakunin , who shared information from the App Store interface when he uploaded the update.
You can upload videos only with OS X not older than 10.10 via Safari.
Before sending for moderation, the video is post-processed (by Apple), and this may take a long time.
Here is an example of a video that has been moderated:
UPD, May 2017: an example of a video that strictly complies with all the rules and was moderated in April (vertical, no background):
UPD, May 2017: since the requirements of the moderators have become stricter, this issue is no longer relevant for the App Store: the video should be of the same orientation as the application itself - most often, vertical.
But the pros and cons described below are relevant for other sites where you can post both vertical and horizontal video - for example, for mobile advertising networks, facebook and Instagram.
Video on the AppStore - this is the case when you can shoot a vertical video. Of course, if we are talking about applications designed for vertical screen layout.
The question is whether it is necessary.
Of the benefits:
Of the minuses:
A horizontal layout gives you more room for creativity: you have plenty of space in which you can place captions, infographics, illustrations, or the real environment. This helps to quickly draw attention to interesting features of the application, which is important, since the screen time, on the contrary, is very small.

Thus, vertical video is a great option if the application speaks for itself and you do not need additional comments. If you want to show cases, it is better to use horizontal.
It’s much easier to get down to the script if you already have an idea of what you’ll show in the video: only the interface, the interface inside the phone + footnotes and captions, or the application’s interaction with the outside world. From this will depend on the complexity of the video, tools and programs that you need.
I usually write the script in the table: in the first column - time, in the second - what happens at that moment in the application interface (you can just describe it with words or immediately add screenshots with comments to the second column). This is a basic option, if necessary, you can add other columns:
The video is better perceived if you focus on cases, and not the features of the application. In 30 seconds, an average of 1-2 cases fit or a description of about 5 functions related to each other. Best of all, if you can tell a story: for example, how different functions of the application help the user during the day, at all stages of trip planning, etc.
The most difficult part of writing a script is not to make mistakes with timing. On paper, it seems that in 30 seconds you can shove an infinite amount of information, but it is not.
To estimate the time more or less accurately, we rehearse all the actions we want to show, capture them into a video file, and then do a rough cut: cut out all the errors, pauses, speed up the video to the extent that what is happening on the screen looks natural and understandable from we add pauses between cases (or other semantic blocks), plus a couple of seconds at the beginning and end of the video.
The App Store does not allow to localize the video, so if the application runs in several languages, it’s better to use a minimum of captions in the video and stop making voice overs. If the voice acting is used, we advise you to order it only from a professional announcer: this can be done online through a production studio.
On the sinks, you can pick up music that is distributed free of charge under a Creative Commons license. Obligatory condition - the license must allow the use of the track as part of another work (in Creative Commons this is called a derivative work). Plus you need to give a link to the author. Another inexpensive option is to buy a track in the production library.
There are two main ways to animate an interface: this is screen capture + editing or rendering and interface animation based on screenshots.
UPD, May 2017: again, for the App Store, the section is already irrelevant, but it can be useful for creating an advertisement, an expliner or a video for Google Play.
Here, too, there are two ways: use a 3D model of the device or remove a live user with a real phone (again I remind you that Apple is against, but it is unlikely that the update will not pass moderation).
You can add titles yourself in any editing program: the main thing here is not complicated animation, but good taste and ability to work with fonts. But animated infographics, illustrations and other beautiful ones are better to entrust to the studio motion-graphics or video freelance designer.
Theoretically, you can make the whole movie animated: show users, the benefits of the application, the problems that it solves, plus a schematic interface where needed. This video looks much more interesting, but violates Apple’s main requirement - to show the real interface. Will the moderators turn a blind eye - we will see with time.
We have not yet risked uploading a similar video to the App Store page, using it as a YouTube ad (for what we initially did):
UPD: In the comments suggested some useful links about the video for the App Store (in English):
UPD2 : Please participate in the survey : trying to figure out how accurately (according to developers and users) the animation in the video should match the animation in the application.
My name is Alena, I work in the studio motion-graphics. Recently, an application with our video has successfully passed moderation, so I want to share my experience on how to make videos for an App Store page and not screw it up: what and how a developer can do, what is better to outsource, and what chips it’s better to refuse.
In the application description, the video is placed on the site of the first screenshot, and in the search for the App Store, and generally in the most prominent place:
')
For the preview, you can select any frame. You can upload video, as well as screenshots, only during the update. And for different devices, you can upload different videos, but you cannot localize the video yet: only one video for all languages.
Apple Requirements
Apple’s key requirements and tips are described here . These are mainly content guidelines:
- The video should fit the audience from 4 years.
- Apple does not advise users to show in the frame or their hands interacting with the interface (no need to draw hands either), asks to avoid zooming.
- You cannot use montage to create the illusion of the user that your application has functions that are not there.
- You can not use someone else's content if you do not have a special license.
- Graphics, captions, music and voice-over text can be used.
However, it is unlikely that Apple will be very frustrated because of the zoom or the hands in the frame: the same requirements for screenshots are even more severe, but try to find an application that is 100% compliant with them.
UPD, May 2017: in the first couple of months, the moderators really did not get banned for horizontal videos, telephones in the frame and similar liberties. But now it is important to strictly comply with the requirements: only the interface, simple graphics, frames.
In addition, you cannot show the interface of other applications (for example, if maps or a navigator are integrated into your application) and the start screen of an iPhone - because of this, the release also risks not being moderated.
Technical requirements
On the video page there are none, so thanks to Dmitry Yakunin , who shared information from the App Store interface when he uploaded the update.
- 15-30 seconds
- up to 500 MB
- MP4, M4V, MOV
- Aspect ratios (video can be both horizontal and vertical):
- for 4-inch iPhones (5, 5s, 5c): 1136x640, 640x1136, 1920x1080, 1080x1920
- iPhone 6 (4.7 inches): 1334x750, 750x1334
- 6+ (5.5 inches): 1920x1080, 1080x1920
- for iPad: 1200x900, 900x1200
You can upload videos only with OS X not older than 10.10 via Safari.
Before sending for moderation, the video is post-processed (by Apple), and this may take a long time.
Here is an example of a video that has been moderated:
UPD, May 2017: an example of a video that strictly complies with all the rules and was moderated in April (vertical, no background):
Vertical or horizontal?
UPD, May 2017: since the requirements of the moderators have become stricter, this issue is no longer relevant for the App Store: the video should be of the same orientation as the application itself - most often, vertical.
But the pros and cons described below are relevant for other sites where you can post both vertical and horizontal video - for example, for mobile advertising networks, facebook and Instagram.
Video on the AppStore - this is the case when you can shoot a vertical video. Of course, if we are talking about applications designed for vertical screen layout.
The question is whether it is necessary.
Of the benefits:
- interface in real size, full screen - the user has an unconscious impression that he has already installed the application and uses it himself;
- If the application has a lot of small details or text - everything is visible.
Of the minuses:
- no space for additional information;
- It does not work to show the interaction of the application with real objects;
- you can not use this video on video hosting, on social networks, on Habré.
A horizontal layout gives you more room for creativity: you have plenty of space in which you can place captions, infographics, illustrations, or the real environment. This helps to quickly draw attention to interesting features of the application, which is important, since the screen time, on the contrary, is very small.
Thus, vertical video is a great option if the application speaks for itself and you do not need additional comments. If you want to show cases, it is better to use horizontal.
Stages of work
Scenario
It’s much easier to get down to the script if you already have an idea of what you’ll show in the video: only the interface, the interface inside the phone + footnotes and captions, or the application’s interaction with the outside world. From this will depend on the complexity of the video, tools and programs that you need.
I usually write the script in the table: in the first column - time, in the second - what happens at that moment in the application interface (you can just describe it with words or immediately add screenshots with comments to the second column). This is a basic option, if necessary, you can add other columns:
- offscreen text;
- titles;
- infographics;
- video.
The video is better perceived if you focus on cases, and not the features of the application. In 30 seconds, an average of 1-2 cases fit or a description of about 5 functions related to each other. Best of all, if you can tell a story: for example, how different functions of the application help the user during the day, at all stages of trip planning, etc.
The most difficult part of writing a script is not to make mistakes with timing. On paper, it seems that in 30 seconds you can shove an infinite amount of information, but it is not.
To estimate the time more or less accurately, we rehearse all the actions we want to show, capture them into a video file, and then do a rough cut: cut out all the errors, pauses, speed up the video to the extent that what is happening on the screen looks natural and understandable from we add pauses between cases (or other semantic blocks), plus a couple of seconds at the beginning and end of the video.
Speaker
The App Store does not allow to localize the video, so if the application runs in several languages, it’s better to use a minimum of captions in the video and stop making voice overs. If the voice acting is used, we advise you to order it only from a professional announcer: this can be done online through a production studio.
Music
On the sinks, you can pick up music that is distributed free of charge under a Creative Commons license. Obligatory condition - the license must allow the use of the track as part of another work (in Creative Commons this is called a derivative work). Plus you need to give a link to the author. Another inexpensive option is to buy a track in the production library.
Interface animation
There are two main ways to animate an interface: this is screen capture + editing or rendering and interface animation based on screenshots.
- To capture the screen in OS X Yosemite, you can use the pre-installed QuickTime Player - it can capture video directly from your iPhone or iPad. In the Mavericks, you first need to transfer video from a device to a Mac using third-party programs (for example, Reflector ) and after that record in QuickTime. Most of them are paid, but with a trial, which is enough for our purposes.
You can mount in any convenient program, depending on the operating system and experience (Adobe Premier, Movie Maker, Final Cut, etc.). From the raw video, you need to cut out all the extra pauses, incorrect clicks, the final action can be slightly accelerated. When moving to a new case, it is not necessary to show the path from the previous stage or from the start page - you can make a transition and start right away with the right interface. The main transitions are better customized to the music. - Animation with the interface drawn in the vector is a much more difficult task. In this technique, every action is animated: the appearance of elements, typing, pressing each button, etc. This animation looks neater and gives you more freedom: you can add transitions that are not in the application's functionality (in detail: we remember Apple’s requirements and do not deceive the user!), Substitute any content (to avoid copyright problems, do not fill in the demo itself) -accounts, etc.). It is done, naturally, longer and more difficult than screen capturing: it is better to give this work to professionals or to limit to capturing.
Phone animation
UPD, May 2017: again, for the App Store, the section is already irrelevant, but it can be useful for creating an advertisement, an expliner or a video for Google Play.
Here, too, there are two ways: use a 3D model of the device or remove a live user with a real phone (again I remind you that Apple is against, but it is unlikely that the update will not pass moderation).
- The phone model, along with the animation and the simplest captions, can be downloaded on the videohive . For $ 20-30 you get a quality template in the format of the project After Effects. It is very simple to work with him, you can figure it out from scratch: in the project, the name of each track indicates which data should be inserted there. But, of course, in this format, the template can be recognized at a glance. If you want to change it at least a little and have not worked with AE before, I advise you to preview the basic course of Andrew Kramer.
- Shooting video is better to order from the studio or freelancer. If you shoot yourself, pay attention to the insertion of the interface animation in the phone screen. I do not advise you to shoot the screen live: because of the difference in illumination and color temperature, it is very difficult to make a video so that it looks normal, not to mention endless duplicates. So it is better to at least make the screen green at the time of shooting, and then substitute a pre-prepared animation. If you do not need to show complex interaction with the interface, the TrackFinger application will be very helpful. It tracks finger movements and collects information about them into the After Effects project.
Motion design, infographics, titles
You can add titles yourself in any editing program: the main thing here is not complicated animation, but good taste and ability to work with fonts. But animated infographics, illustrations and other beautiful ones are better to entrust to the studio motion-graphics or video freelance designer.
Theoretically, you can make the whole movie animated: show users, the benefits of the application, the problems that it solves, plus a schematic interface where needed. This video looks much more interesting, but violates Apple’s main requirement - to show the real interface. Will the moderators turn a blind eye - we will see with time.
We have not yet risked uploading a similar video to the App Store page, using it as a YouTube ad (for what we initially did):
UPD: In the comments suggested some useful links about the video for the App Store (in English):
- Getting started with App Previews (below links to other materials on the topic, including the manual for creating videos for the App Store in Final Cut)
- App Previews: thoughts and tips
- Video from WWDC 2014
UPD2 : Please participate in the survey : trying to figure out how accurately (according to developers and users) the animation in the video should match the animation in the application.
Source: https://habr.com/ru/post/237635/
All Articles