Presentation with impress.js - simple and elegant
impress.js is a popular framework designed to create extraordinary, sparkling professional brilliance presentations that are shown simply in the browser * .
In the statistics published a few days ago, GitHub impress.js ranks 2nd in the number of stars among the projects created by one author. A very small framework, the main joke of which is that it serves not to create slides , but to display transitions between slides and, very often, to display several slides at once in three - dimensional space .
3D transformations between slides make the game .
On habrahabr.ru there was already a publication dedicated to impress.js , but that was almost 2 years ago, so it’s worthwhile to revisit the key points of using this wonderful framework.
')
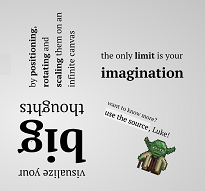
Here is the official demo . As you can see the presentation, with impressive transitions between slides and the display of several slides in three-dimensional space at once, it’s just in the browser * .
I became acquainted with this framework when I needed to make a presentation of a quick start with the TheOnlyPage web service. Therefore, as an example of working with the framework of impress.js, we will use the first few slides of this long
General approaches
First, let's discuss the basics of the basics in order to understand the logic behind the use of impress.js .
The framework works with a sequence of slides, each slide in the framework terminology is referred to as a step .
What, and how it is displayed inside each slide , is determined using the usual means of HTML markup and CSS styles. There are no predefined themes for the design of presentations.
All slides are placed in a certain three-dimensional space.
There are special overview slides , which are empty on their own, do not contain any html elements, but, depending on their position, orientation in space and scale, they display all of the usual slides that can be viewed .
For each slide ( step ), parameters can be set that define its location in three-dimensional space:
- coordinates (x, y, z) of the point corresponding to the center of the slide ;
- the tilt of the slide around the X, Y, and Z axes
The center of the next slide is positioned in the center of the screen.
In addition to the position in space for each slide ( step ), the scale of the slide can be specified.
Pre- transition from one slide to another automatically implemented animation effects: move, rotate and scale (resize).
The scale of the slide does not affect the size of the next active slide , if it is a normal slide .
The scale of the slide affects :
- on the dimensions of the next active slide , if this is a review slide ;
- on the size of ordinary slides on a general overview slide - slides are displayed in accordance with their scale;
- on the size of the usual inactive slides , which fell "in sight" on a normal slide
- on transitional transitions during the transition from one regular slide to another - a change in scale is demonstrated.
Installation
To enable impress.js is enough in html markup
connect the appropriate module:
<script src="//cdnjs.cloudflare.com/ajax/libs/impress.js/0.5.3/impress.min.js"></script> That's all. No supporting style sheets (CSS) are included in the framework, only one javscript module.
Next, you need to initiate the framework, for example, like this:
<script>impress().init();</script> The important point is that the loading of the javascript code of the framework should occur after loading the entire html-code of the presentation, that is, the library connection string should be located at the bottom of the html markup.
Placement in infinite three-dimensional space
The entire presentation should be in a container with
id="impress" <div id="impress"> <!— --> </div> Each next slide ( step ) of the presentation is placed in a sequentially located container, the class of which is:
class="step" <div id="impress"> <div class="step"> <!— 1- --> </div> <div class="step"> <!— 2- --> </div> <div class="step"> <!— 3- --> </div> <!— --> </div> Each slide ( step ) is assigned
data- attributes that determine its place in space: data-x , data-y , data-z and rotation (around the corresponding axis: X, Y, Z): data-rotate-x , data-rotate-y , data-rotate-z .Rotation around the z axis instead of the
data-rotate-z can be abbreviated by the data-rotate attribute.The scale for displaying the current slide (default
1 ) is set by the data-scale attribute data-scale .Presentation example
And now, in order to see the results of applying
data- attributes, let's consider a simple example consisting of the first few slides of the presentation of the web service TheOnlyPageNot to complicate, all slides are located in one plane.
The first slide is an overview - that is, there are no elements inside the container. In order for the screen to display this slide , to fit all 6 slides of the presentation, the scale is set to
data-scale="2" <div id="overview" class="step" data-scale="2"> </div> The second slide is normal . It can be seen in the upper left square of the overview slide , coordinates
data-x="-700" data-y="-400" . The scale is set to data-scale="0.25" to demonstrate what the slide looks reduced in the general overview slide ; the size of a normal slide in the active state does not affect the scaling, but the animated zoom effect is processed from the second slide to the third, which has a default scale equal to 1 . The slide class is used to define in style sheets (CSS) the appearance of this slide . <div id="new_bookmark_1" class="slide step" data-x="-700" data-y="-400" data-scale="0.25"> <h2> (1)</h2> <p> <strong></strong></p> <div><img src="" alt="" /></div> </div> The third slide is normal . It can be seen in the center of the top row of the overview slide , coordinates
data-x="-200" data-y="-300" . The scale is not explicitly set, it means equal to 1 . The slide is rotated 90 o around the Z axis, since the data-rotate="90" . The slide2 class slide2 used to define the appearance of this slide in style sheets (CSS). <div id="new_bookmark_2" class="slide2 step" data-x="-200" data-y="-300" data-rotate="90"> <h2> (2)</h2> <p> <strong> </strong></p> <div><img src="" alt="" /></div> </div> The fourth slide is normal . It can be seen in the upper right square of the overview slide , coordinates
data-x="700" data-y="-500" . The slide is rotated 180 o around the Z axis, since the data-rotate="180" . The slide2 class slide2 used to define the appearance of this slide in style sheets (CSS). <div id="new_bookmark_3" class="slide2 step" data-x="700" data-y="-500" data-rotate="180"> <h2> (3)</h2> <p> </p> <div><img src="" alt="" /></div> </div> The fifth , sixth and seventh slides are ordinary . These slides are arranged sequentially from right to left in the bottom line of the screen. The rotation angle of each next one around the Z axis is 90 o larger than the previous one:
data-rotate="270", data-rotate="0", data-rotate="90" , respectively. The slide and slide1 are used to define the appearance of these slides in style sheets (CSS). <div id="new_bookmark_4" class="slide step" data-x="700" data-y="300" data-rotate="270"> <h2> (4)</h2> <p> <strong></strong></p> <div><img src="" alt="" /></div> </div> <div id="new_bookmark_5" class="slide step" data-x="0" data-y="400" data-rotate="0"> <h2> (5)</h2> <p> <strong></strong></p> <div><img src="" alt="" /></div> </div> <div id="new_bookmark_6" class="slide1 step" data-x="-900" data-y="250" data-rotate="90"> <h2> (6)</h2> <p> !</p> <div><img src="" alt="" /></div> </div> When moving from slide to slide, the hash of the address in the browser's address bar changes; in our example, the slide addresses will be as follows:
http://help.theonlypage.com/impress_demo.html#/ overview
http://help.theonlypage.com/impress_demo.html#/ new_bookmark_1
http://help.theonlypage.com/impress_demo.html#/ new_bookmark_2
http://help.theonlypage.com/impress_demo.html#/ new_bookmark_3
http://help.theonlypage.com/impress_demo.html#/ new_bookmark_4
http://help.theonlypage.com/impress_demo.html#/ new_bookmark_5
http://help.theonlypage.com/impress_demo.html#/ new_bookmark_6
Using such addresses you can go directly to any of the slides .
As you can see, the hash of the address of each slide contains the unique
id corresponding slide .If i
d slide ( step ) is not specified, the hash of the address of this slide will look like: # / step-N , where N is the slide ( step ) number.Classes dynamically reassigned during presentation
When displaying a presentation, the framework assigns and cancels special classes in the body element and in the elements that are containers for the presentation slides ( steps ).
Immediately after the download , if the browser supports the framework functionality for the body element, it is set:
class="impress-supported" , if not supported: class=" impress-not-supported" . What is usually used to display a message about the need to use the appropriate browser to view the presentation.In our example , the following html-code is present:
<div class="fallback-message"> <p> <b>impress.js</b>.</p> <p> <b>Chrome</b>, <b>Firefox</b> <b>Safari</b>. </div> And in the style sheet, the message is defined only if the browser does not support impress.js.
.impress-not-supported .fallback-message { display: block; } .impress-supported .fallback-message { display: none; } As a result, if the presentation opens in an unsuitable browser, for example, the following message is displayed in the Opera browser:

After initiating a presentation , calling the appropriate function:
impress().init(); for the body element is set:
class="impress-enabled" .Also, the body element is set to a class that points to the first
class="impress-on-overview" , and in general, the name of this class is given by the construction: "impress-on-" + id active slide ( steps ).For the first slide , the classes are set:
class="present active" .For the remaining slides ( steps ), the class is set:
class="future"Upon further viewing of slides in the body element, the class defined by the unique
id active slide has the form: "impress-on-" + id active slide ( step ).For the viewed slides , the
class="past"For active slide :
class="present active"The remaining unvisited slides all also contain the class:
class="future"This dynamic change of classes helps using CSS styles to highlight, select, or vice versa muffle the display of active, already displayed or not yet displayed
Used keys
impress.js allows you to cycle through the presentation slides, that is, from the last slide of the presentation, go to the first slide .
The transition to the next slide is set by pressing one of the keys:
tab , space , right arrow, down arrow , Page Down
Go to the previous slide is set by pressing one of the keys:
left arrow up arrow page up
Using the impress.js API , you can significantly expand the possibilities of managing the presentation. But javascript programming using the framework is already the topic of the next, separate publication .
* impress.js works great in the latest versions of Chrome , Firefox , Safari and IE browsers . Learn more about browser support here .
Source: https://habr.com/ru/post/237473/
All Articles