Create a 2D platformer using the Unreal Engine 4. Part 1 - Game character, movement
Not so long ago, the company Epic Games made an incredibly generous gift to everyone - the UE4 engine with source code for only $ 20 / month, consider a gift! We take advantage of their generosity and generosity and try to create something not very complicated, but at least more or less playable - 2D platform game.
First of all, we need:
Since I personally do not know how to draw at all, and this is not our goal, we will use the resources of the wonderful game “Castlevania: Symphony of the night”, in which the main character is Alucard, the son of Dracula. It is easy to find the complete storyboard of the character on the network - what we need!
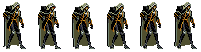
Let's prepare storyboards for 2 states: peace and running, for this you need to remove the red background (we don’t need the character to move always against the red rectangle) and cut out the required parts of the image, getting something like this at the output:
')
And this:

From the background images while cutting out only the floor:
With preparation everything, now we start creation of the project and import of source codes. In the latest versions of UE4, the ability to immediately create a 2D Side Sroller (blueprint) was added, we will use it, not forgetting to remove the starting content - there are a lot of materials and objects that we do not need right now. By default, they give us a mannequin ready for jogging and a couple of platforms; we will not need all this, so we delete it.
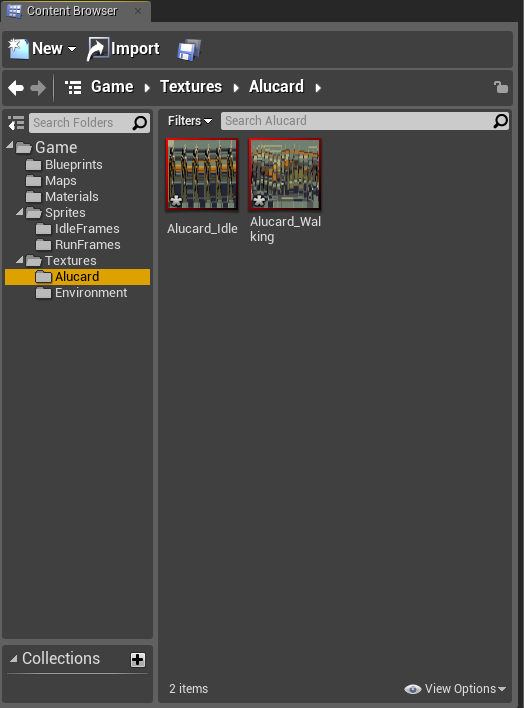
We structure the project folders and import the corresponding images:
Next you need to extract textures from the sprites. This can be done in two ways: automatically and manually, I note that there can be one nuance with automatic extraction: the sprites will be numbered in ascending order, but it is not at all necessary that the numbering will correspond to their position in the original texture, so after extraction I recommend to check everything carefully so that later there would be no animation artifacts. Since we still have a lesson, we will do everything manually.
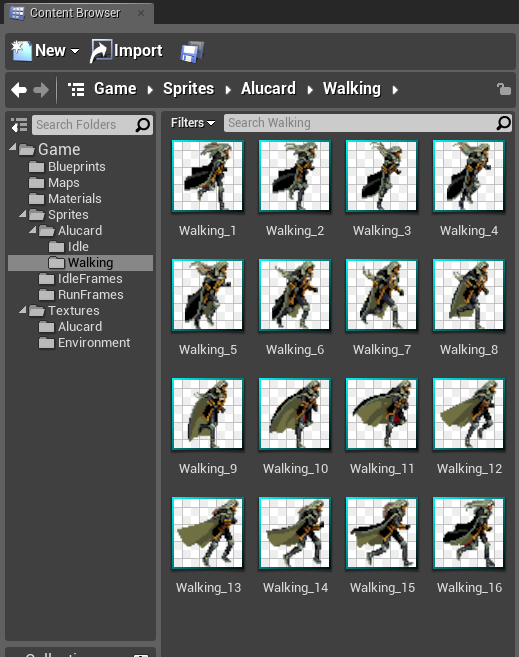
First of all, we create a couple more daddies, this time in “Sprites” → “Alucard”, inside which will be the folders “Idle” and “Walking” with the corresponding sprites. So, create an empty sprite, call it “Idle_1” and open it. Immediately go to “Edit source region”, and as the source-texture we specify the texture “Alucard_Idle”.
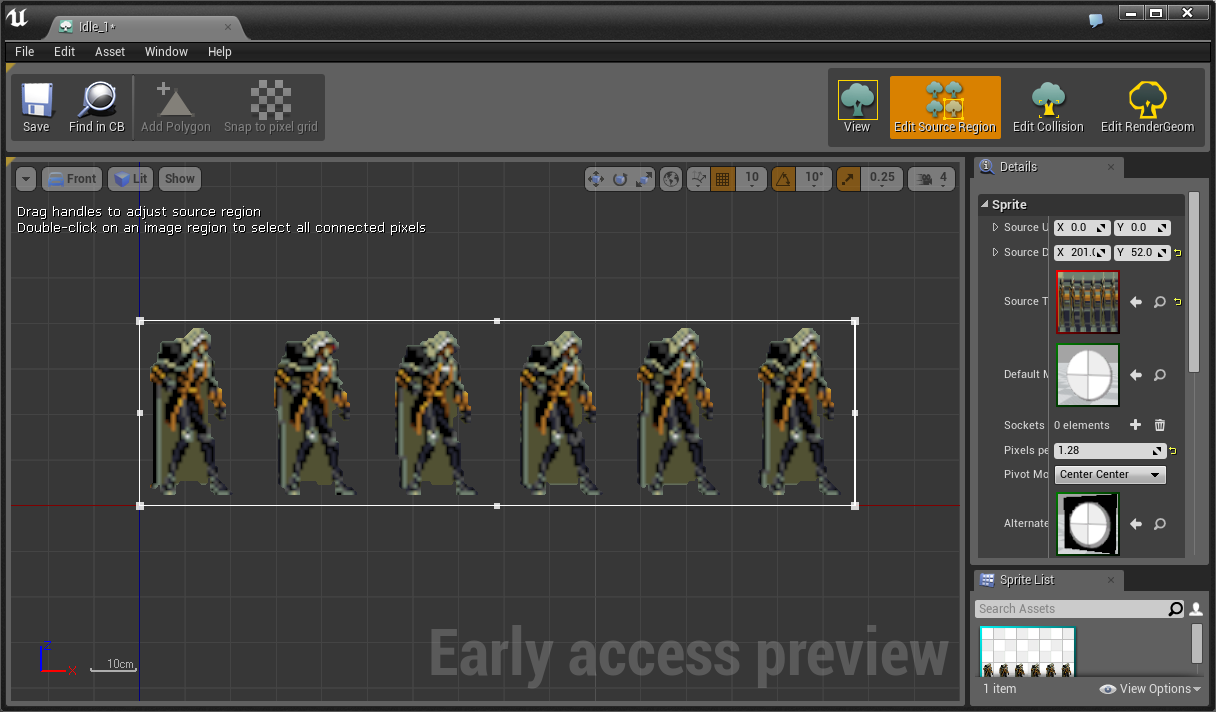
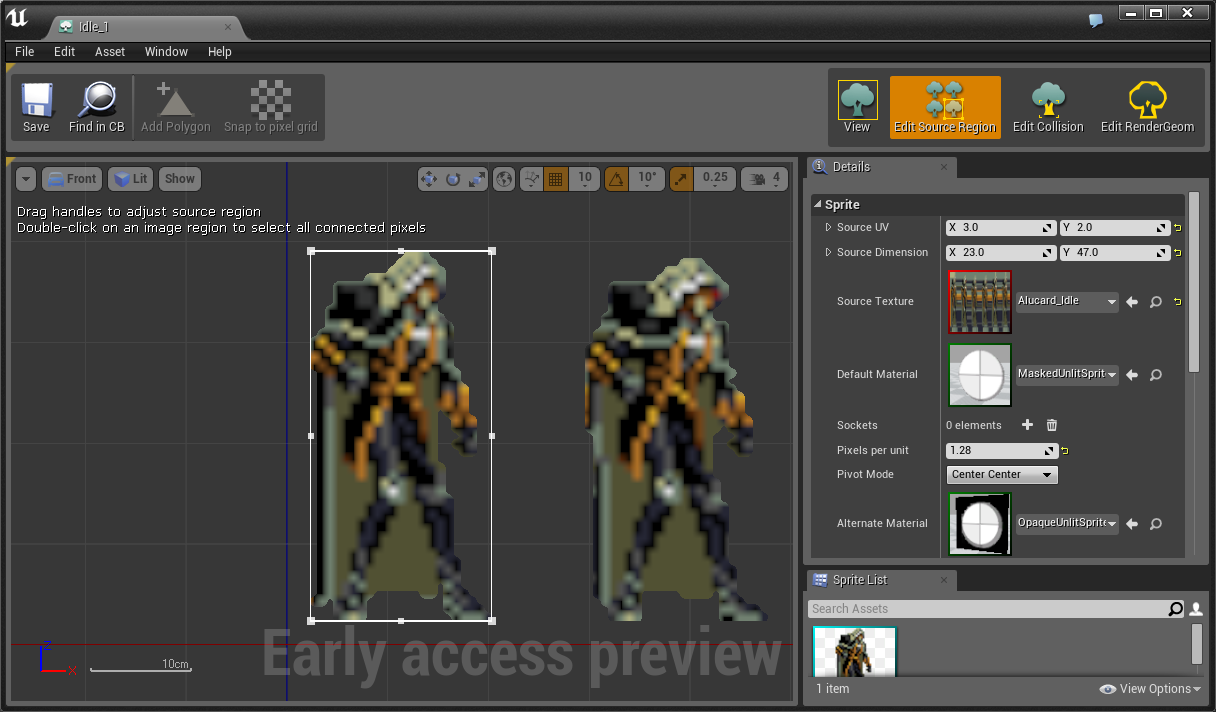
One sprite should contain one frame of character animation, so we will adjust the “Source UV” and “Source dimension” values to get one frame, or simply double click on the image to automatically determine its boundaries:
We do the same with the remaining frames of rest and walking:
From the texture of the platform we also create a sprite, but since there is only one image there, it can be done simply via the context menu.
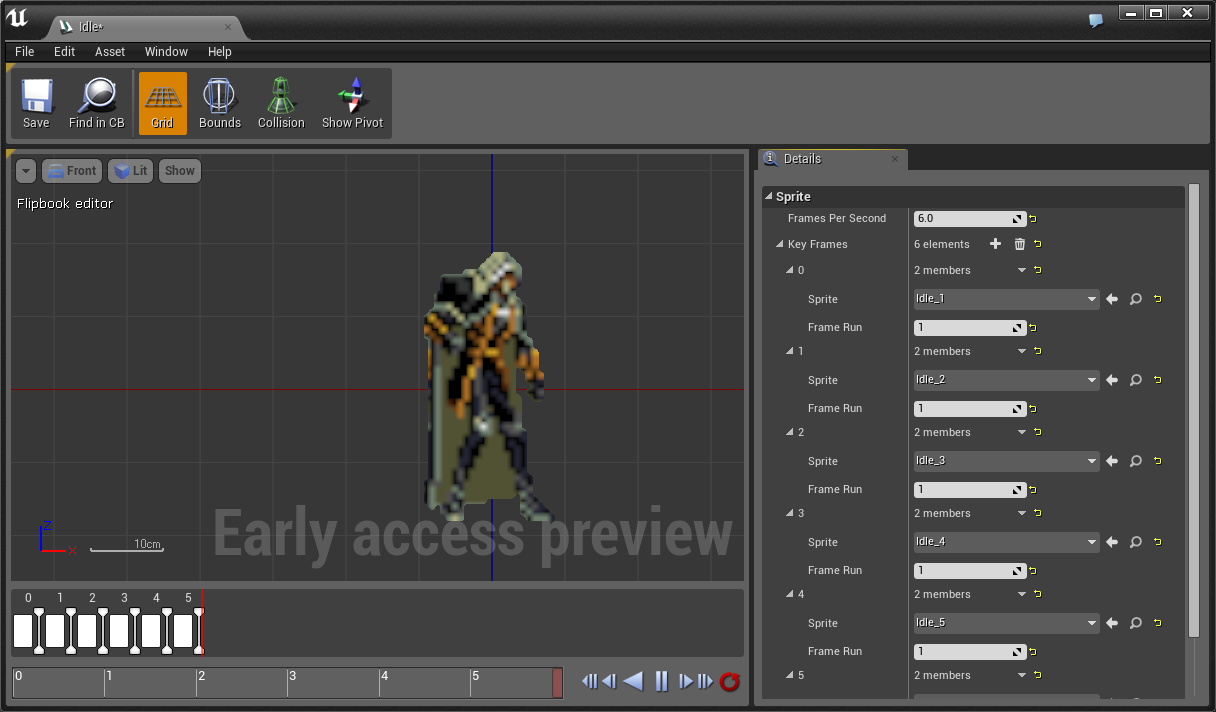
It's time to give some life to our sprites! To do this, create an “Animation flipbook”, give it a name and open it. Add the appropriate frames in order and set the number of frames per second to taste, I like 6:
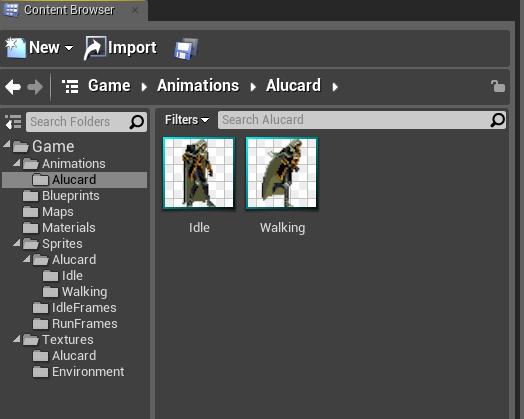
Repeat for walking and at the exit we have 2 flipbooks:
Now we will add our platform to the scene, it is important that in its position the component Y was equal to 0. Next, we will add control (in the workpiece it is already on, but reassign as we prefer): Edit → Project Setting → Input.

We proceed directly to creating a character. In the “Blueprints” folder, create a new BP, ask us which print class, select “Character”, give a name, open it and go to the “Components” section. Adds a Flipbook to the capsule, select the prepared Idle animation as the source, also add SpringArm and hook the camera to it, in principle, you can do without a hand, but better with it. We adjust the size of the sprites and capsules to taste, but the capsule is better to do a little smaller, so that the sprite does not float above the ground. We remove the dependence on the controller from the camera and set the orthographic type, the depth according to taste.

Compile, save. In the world settings, you can create your GameMode, or change it in the already existing “Default Pawn Class” to the character we just created.

Now you can run and make sure that we did everything correctly and that our character is eagerly awaiting orders.

It's time to teach him to move, for this, re-open the character's BP and go to the graph section. It is worth noting that Blueprints is a very powerful tool, with its help you can do without a classical writing of a code in a project, but in reality this is the same programming, you just need to write only a few names and values. So, first of all, you need to add motion on the vector at the MoveRight event:
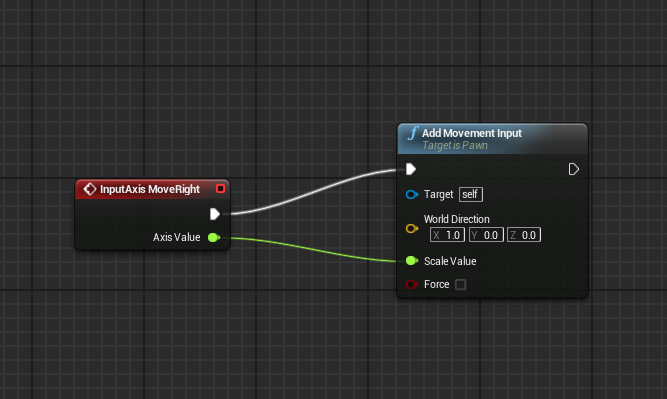
Here the following happens: when we act on the axis (we can have two actions ± 1), the object moves along the X axis for a given effect. In principle, this is enough for movement, you can try - compile, save, test. The character is shifted along the axis, but without animation, because we have not provided for its switching.
To switch between animations, we need to replace the actual animation in the flipbook of our character. This can be done in several ways, but I prefer the most versatile and, I think, elegant. Let's create our event on the column, let's call the “Update animation”, respectively.
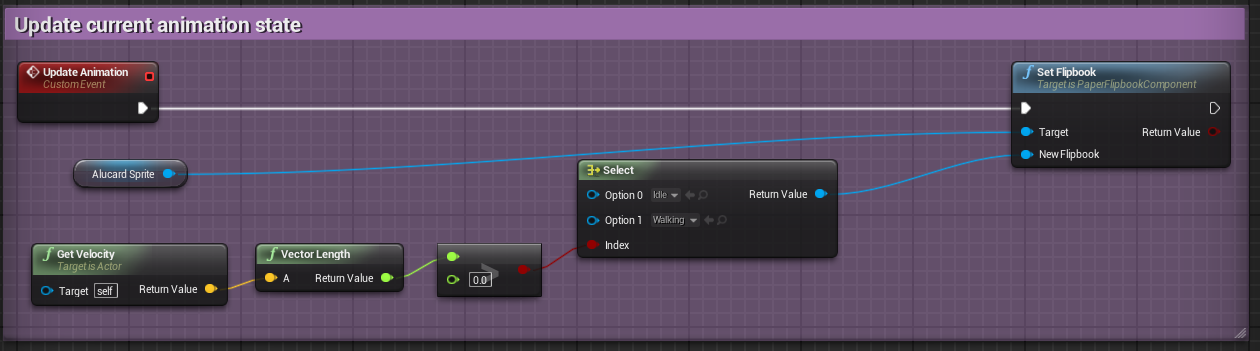
The logic of work here is the following: when you call an event, the target animation is placed in the flipbook target. The animation itself is selected depending on what the speed of our object is, if it is greater than zero, the animation is walking, otherwise - the rest. Update traffic graph:

A new event has appeared - “Event Tick”, it happens every frame, respectively, every frame we now have to check the need to change the animation. If you start the game now, the character will move with the animation of the run, but will always look in one direction, fix this:

The final result:
Thus, today we have created an animated 2D character capable of moving around the platform. In the future, we add the ability to jump, fight and destroy enemies. Suggestions, comments and criticism are welcome.
UPD 1. On the advice of the user, Torvald3d removed the bilinear interpolation on the character source textures. Just go to the imported texture and change the filter to the "nearest".
Well, the comparison:
First of all, we need:
- character sprites
- texture platforms
Since I personally do not know how to draw at all, and this is not our goal, we will use the resources of the wonderful game “Castlevania: Symphony of the night”, in which the main character is Alucard, the son of Dracula. It is easy to find the complete storyboard of the character on the network - what we need!
Alucard full storyboard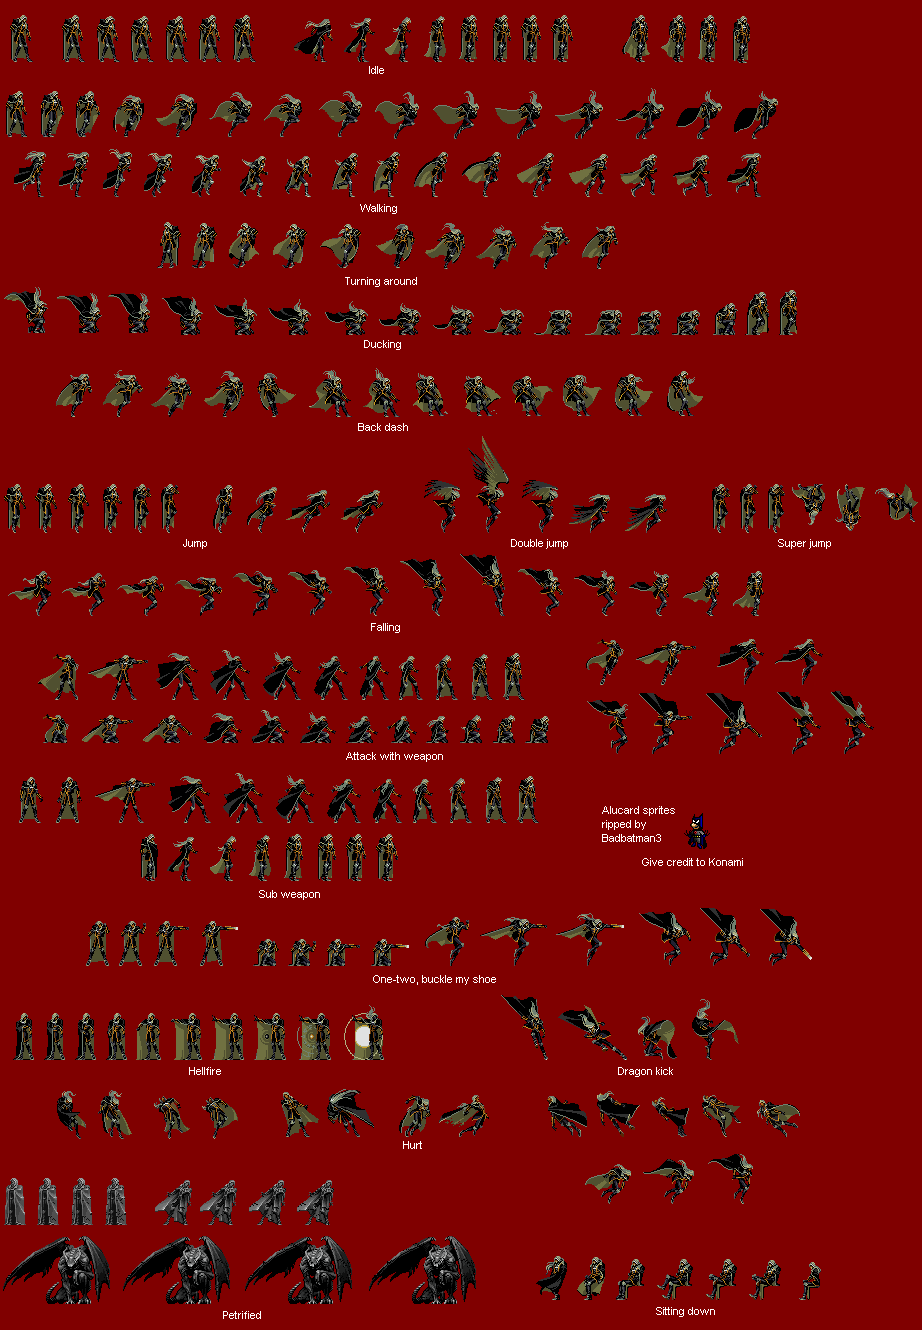
Let's prepare storyboards for 2 states: peace and running, for this you need to remove the red background (we don’t need the character to move always against the red rectangle) and cut out the required parts of the image, getting something like this at the output:
')
And this:
From the background images while cutting out only the floor:
Long and boring floor texture
With preparation everything, now we start creation of the project and import of source codes. In the latest versions of UE4, the ability to immediately create a 2D Side Sroller (blueprint) was added, we will use it, not forgetting to remove the starting content - there are a lot of materials and objects that we do not need right now. By default, they give us a mannequin ready for jogging and a couple of platforms; we will not need all this, so we delete it.
Basic content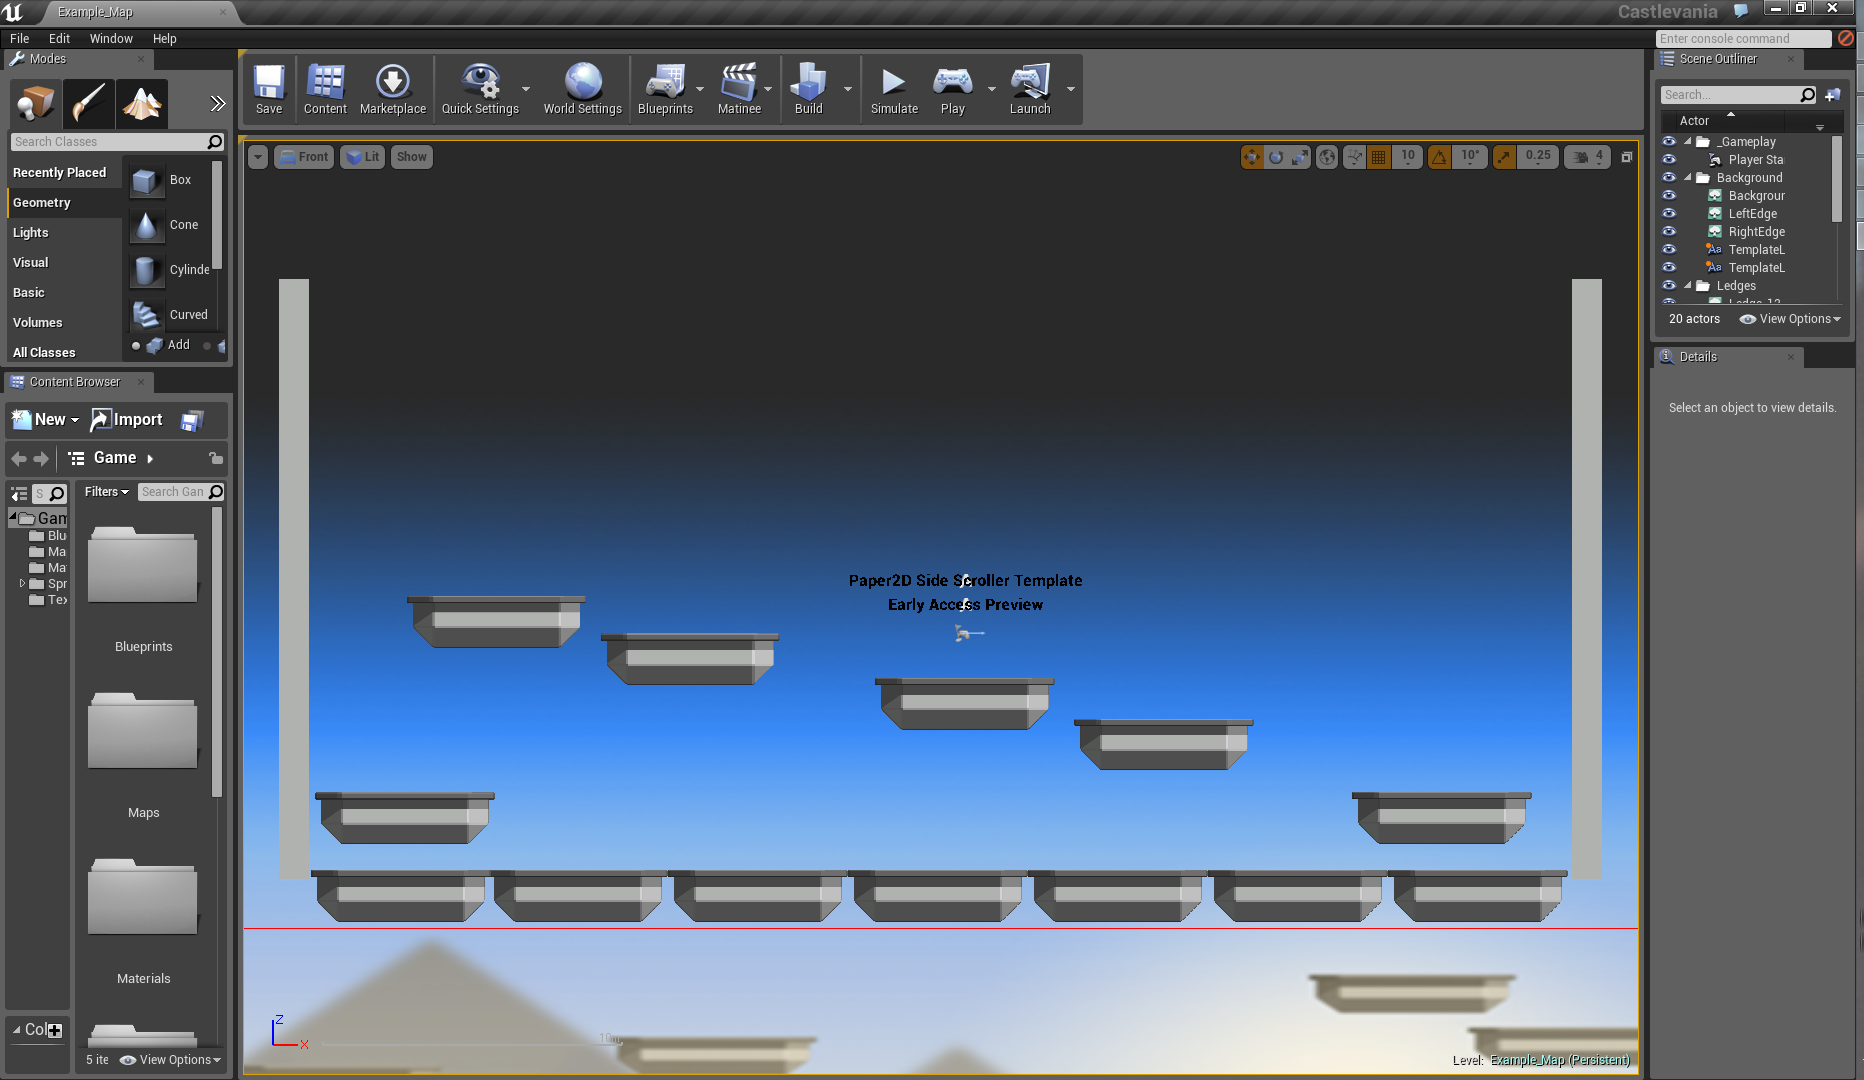
We structure the project folders and import the corresponding images:
Next you need to extract textures from the sprites. This can be done in two ways: automatically and manually, I note that there can be one nuance with automatic extraction: the sprites will be numbered in ascending order, but it is not at all necessary that the numbering will correspond to their position in the original texture, so after extraction I recommend to check everything carefully so that later there would be no animation artifacts. Since we still have a lesson, we will do everything manually.
First of all, we create a couple more daddies, this time in “Sprites” → “Alucard”, inside which will be the folders “Idle” and “Walking” with the corresponding sprites. So, create an empty sprite, call it “Idle_1” and open it. Immediately go to “Edit source region”, and as the source-texture we specify the texture “Alucard_Idle”.
One sprite should contain one frame of character animation, so we will adjust the “Source UV” and “Source dimension” values to get one frame, or simply double click on the image to automatically determine its boundaries:
We do the same with the remaining frames of rest and walking:
From the texture of the platform we also create a sprite, but since there is only one image there, it can be done simply via the context menu.
It's time to give some life to our sprites! To do this, create an “Animation flipbook”, give it a name and open it. Add the appropriate frames in order and set the number of frames per second to taste, I like 6:
Repeat for walking and at the exit we have 2 flipbooks:
Now we will add our platform to the scene, it is important that in its position the component Y was equal to 0. Next, we will add control (in the workpiece it is already on, but reassign as we prefer): Edit → Project Setting → Input.
We proceed directly to creating a character. In the “Blueprints” folder, create a new BP, ask us which print class, select “Character”, give a name, open it and go to the “Components” section. Adds a Flipbook to the capsule, select the prepared Idle animation as the source, also add SpringArm and hook the camera to it, in principle, you can do without a hand, but better with it. We adjust the size of the sprites and capsules to taste, but the capsule is better to do a little smaller, so that the sprite does not float above the ground. We remove the dependence on the controller from the camera and set the orthographic type, the depth according to taste.
Compile, save. In the world settings, you can create your GameMode, or change it in the already existing “Default Pawn Class” to the character we just created.
Now you can run and make sure that we did everything correctly and that our character is eagerly awaiting orders.
It's time to teach him to move, for this, re-open the character's BP and go to the graph section. It is worth noting that Blueprints is a very powerful tool, with its help you can do without a classical writing of a code in a project, but in reality this is the same programming, you just need to write only a few names and values. So, first of all, you need to add motion on the vector at the MoveRight event:
Here the following happens: when we act on the axis (we can have two actions ± 1), the object moves along the X axis for a given effect. In principle, this is enough for movement, you can try - compile, save, test. The character is shifted along the axis, but without animation, because we have not provided for its switching.
To switch between animations, we need to replace the actual animation in the flipbook of our character. This can be done in several ways, but I prefer the most versatile and, I think, elegant. Let's create our event on the column, let's call the “Update animation”, respectively.
The logic of work here is the following: when you call an event, the target animation is placed in the flipbook target. The animation itself is selected depending on what the speed of our object is, if it is greater than zero, the animation is walking, otherwise - the rest. Update traffic graph:
A new event has appeared - “Event Tick”, it happens every frame, respectively, every frame we now have to check the need to change the animation. If you start the game now, the character will move with the animation of the run, but will always look in one direction, fix this:
The final result:
Thus, today we have created an animated 2D character capable of moving around the platform. In the future, we add the ability to jump, fight and destroy enemies. Suggestions, comments and criticism are welcome.
UPD 1. On the advice of the user, Torvald3d removed the bilinear interpolation on the character source textures. Just go to the imported texture and change the filter to the "nearest".
Filter
Well, the comparison:
Interpolation on / off: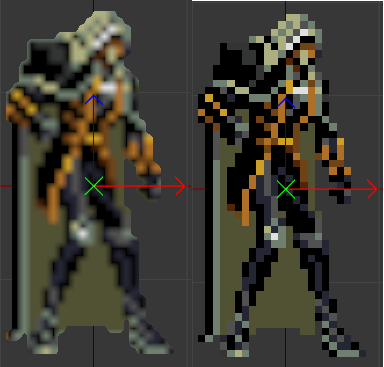
Source: https://habr.com/ru/post/237409/
All Articles