OpenSSL to encrypt QNAP NAS connection SSL WebDav
The task is to connect the QNAP TS-420 network disk array via the Internet for remote work.
I decided that the best solution for this would be using WebDav technology over a secure channel.
Accordingly, the official instructions say how to use WebDav without encryption.
The wiki here and here is written in English with some inaccuracies. In general, for simplicity, I decided to make this manual.
Initial requirements: Your disk array should be accessible via the Internet on a dedicated IP address on ports 80 and 8081. It is also desirable to open access to the array on port 443. Any changes (forwarding) of standard ports to non-standard (for example, 34000 or others like them), leads to significant brakes when connecting and working with a network folder.
First you need to download OpenSSL here or in my article (32 or 64, respectively, of the required width).
If the program fails:
Then you need to run the following command (if the program is installed in the folder C: \ OpenSSL-Win64):
After installation, we first generate a private key with a length of 2048:
Then we make a certificate for 10 years. In the process there will be questions for the certificate.
It is important only "Common Name (eg server FQDN or YOUR name) []:" It is necessary to drive in the address of our disk array.
In my case, I hammered the IP address 123.456.789.012
If the connection goes through a letter name like nas.mydomain.net, then it should be driven in:
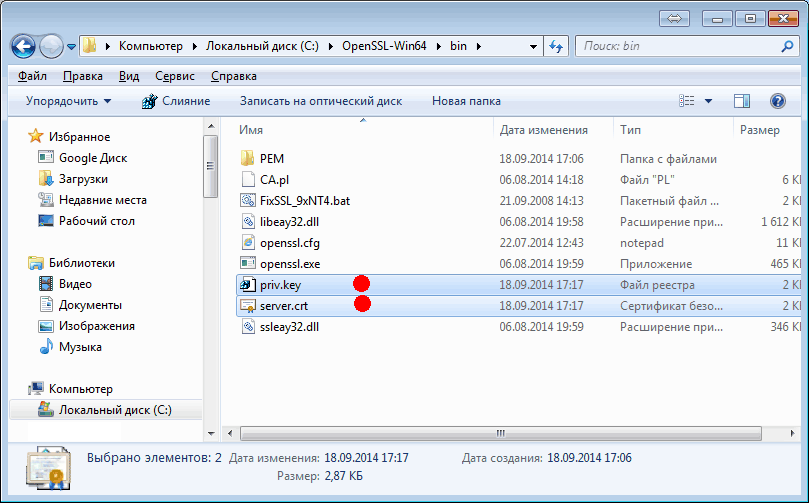
Now we have 2 files: priv.key and server.crt:
')
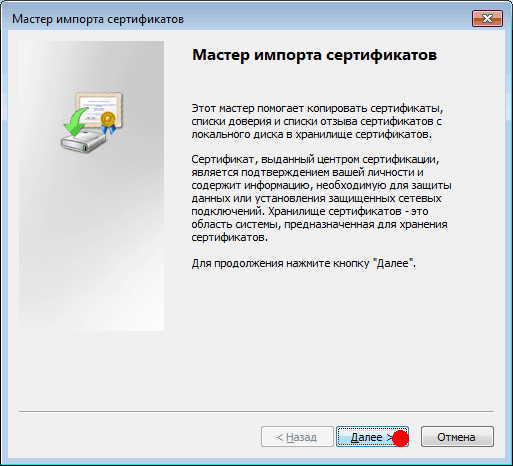
Next, you need to import the certificate made so that the system believes it. Double click on the server.crt file, a window appears:
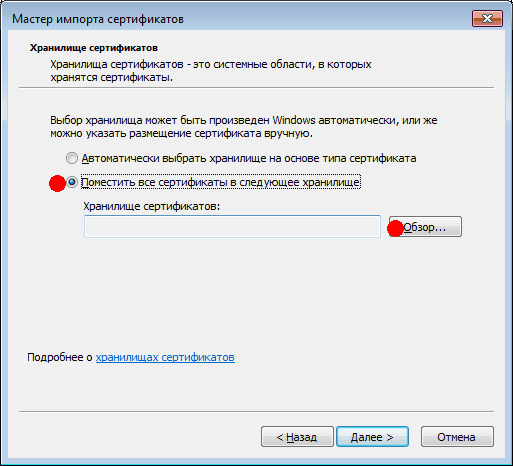
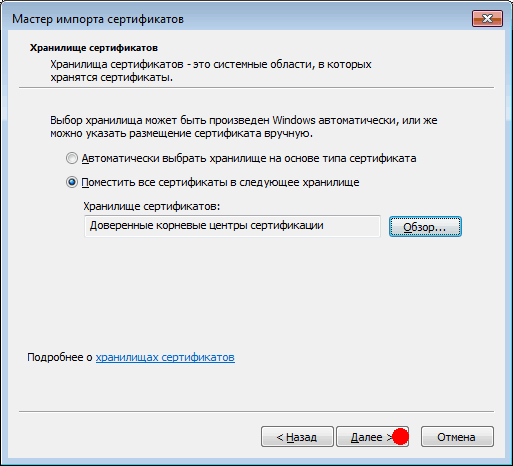
Next, you need to choose where to put this certificate:
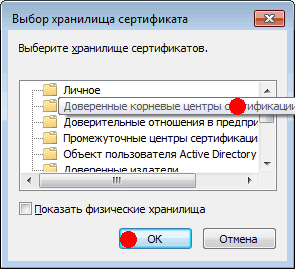
We tell the system that this is our root-level certificate:

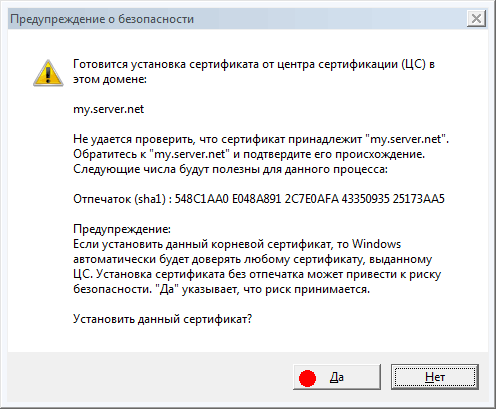
The system is extremely suspicious, but we tell it that everything is under control:
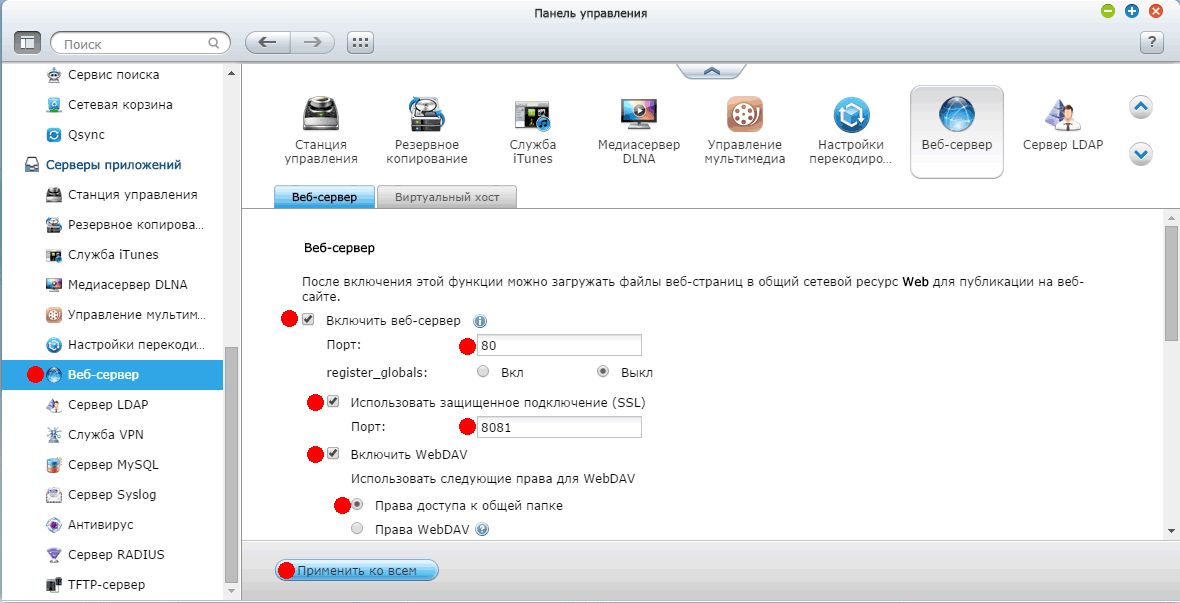
Next, you need to go to the disk array and make some changes to the settings. Everything should be like in the picture:
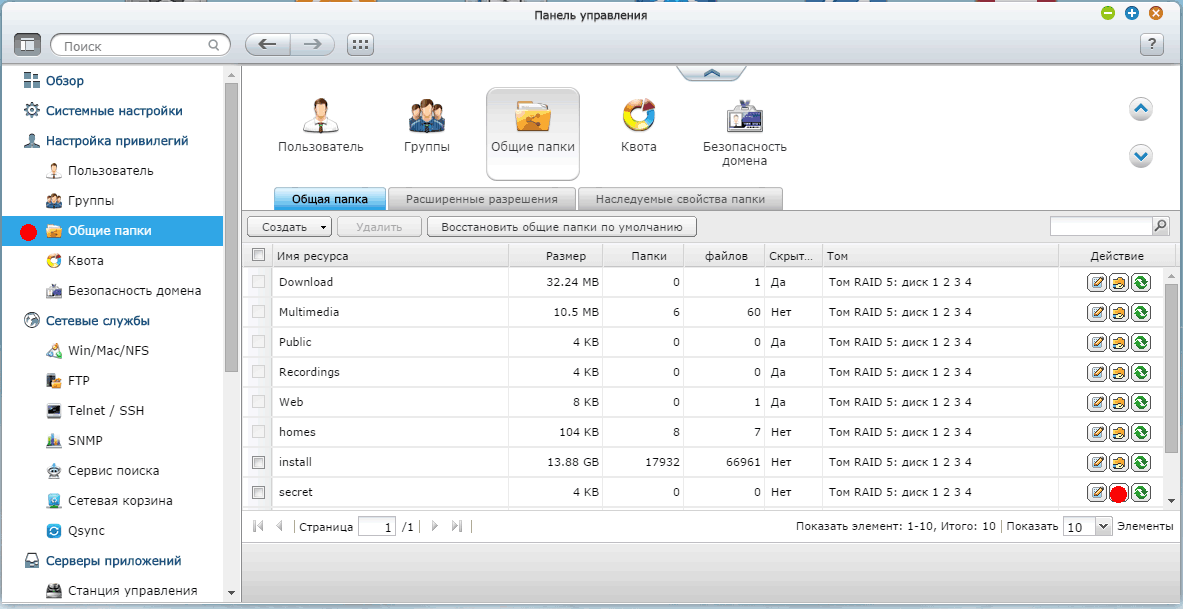
Next, go to the shared folders and click on the settings of the folder to be shared:
We select users and groups that will have access to the folder:

Next you need to add our certificate and key.
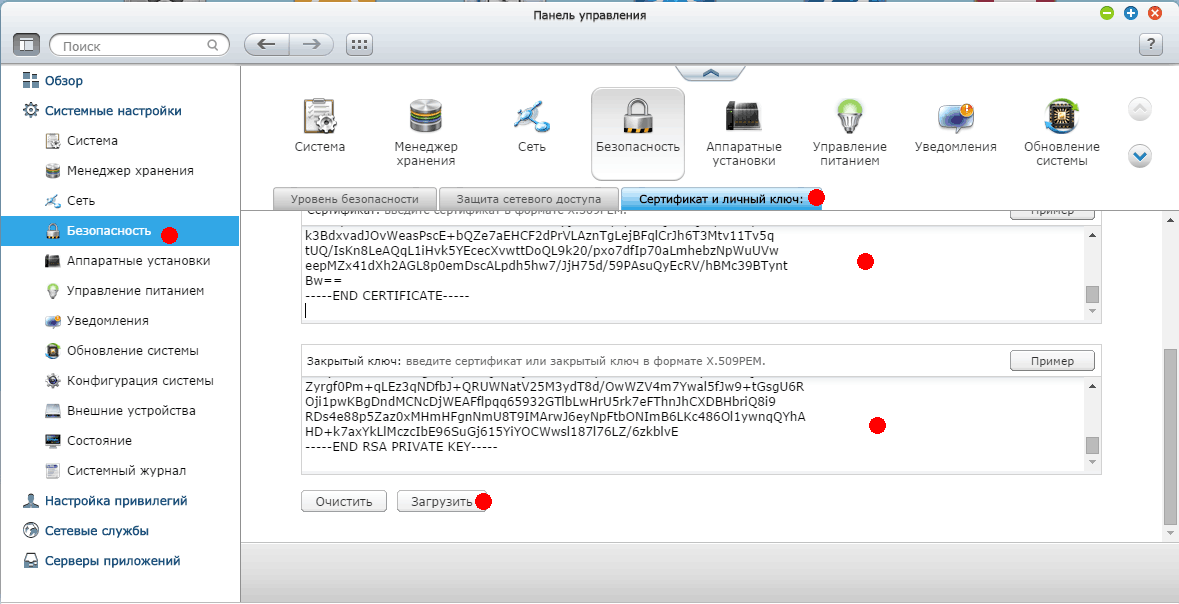
Go to Security.
We open in parallel in notepad our priv.key and server.crt files and copy the text from server.crt to the upper field respectively and the text from priv.key to the lower field. Click "Download":
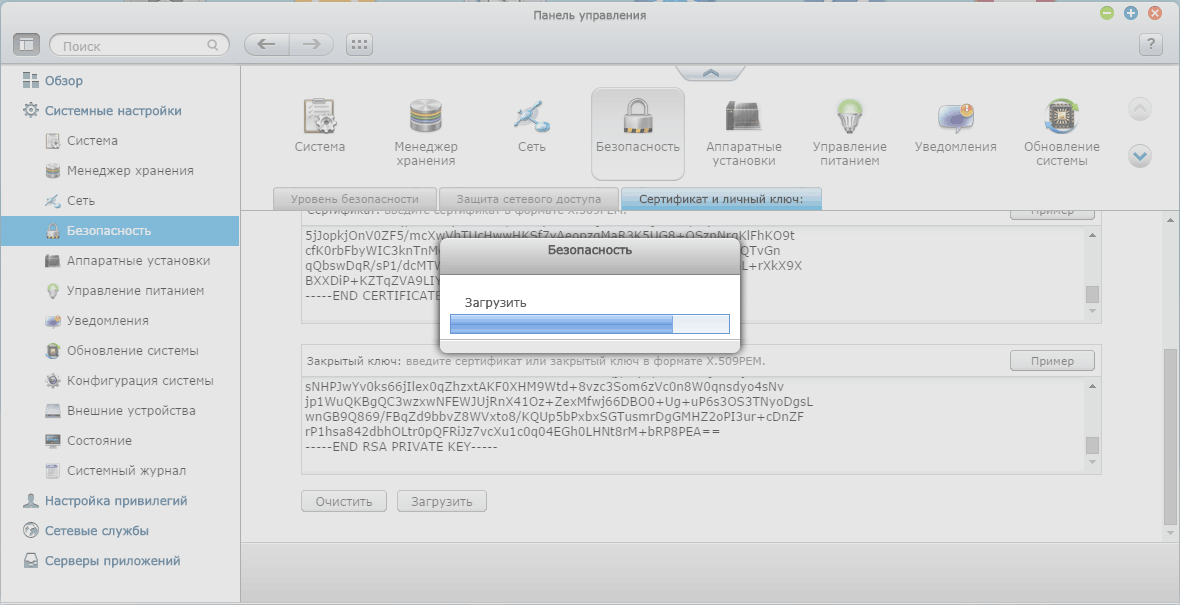
The system displays such a window. Indicates that it downloads certificates.
After loading, the following message should appear:
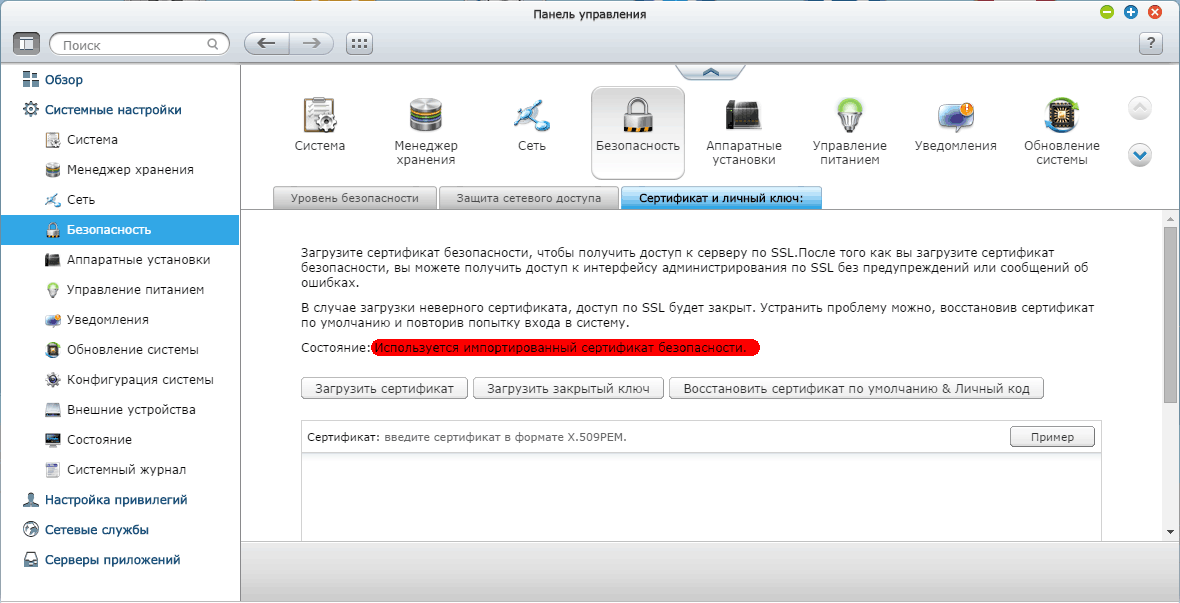
Everything is ready on the disk array.
Now you need to configure the workstation so that the computer can connect to the disk array.
On Windows 7 there is a problem. QNAS requires a security change in the company registry.
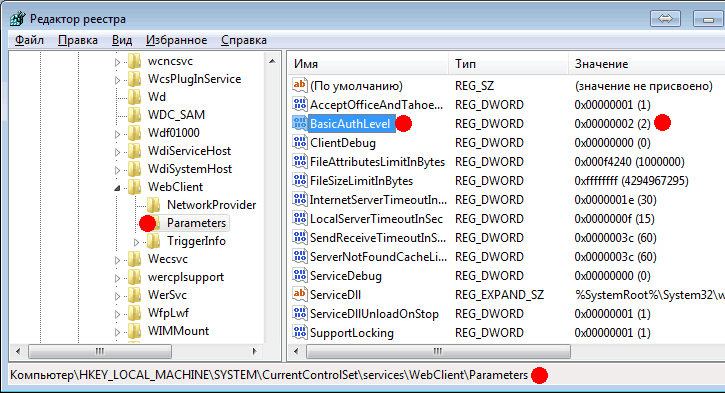
Run regedit and along the way:
change the parameter BasicAuthLevel to value 2
After that, you must either restart your computer or restart the webclient service.
Stop:
Run:
Is done. Now you can try to connect to our disk array.
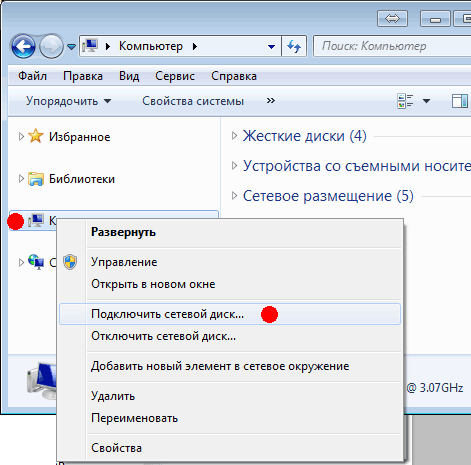
Right-click on the computer and select "Connect a network drive ..."
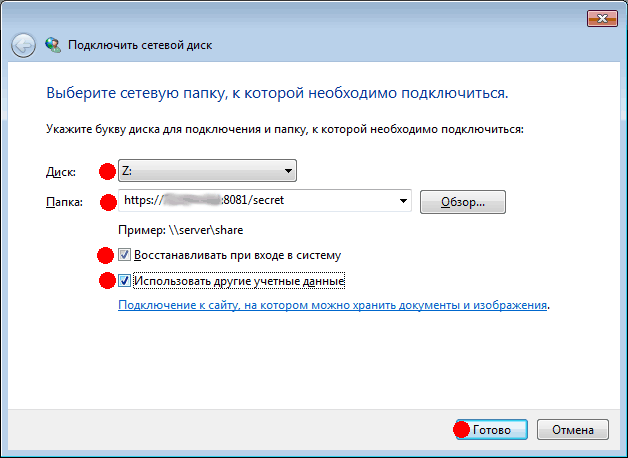
We select the drive letter, and in the folder field we write the address of our array with the port and the name of the shared folder:
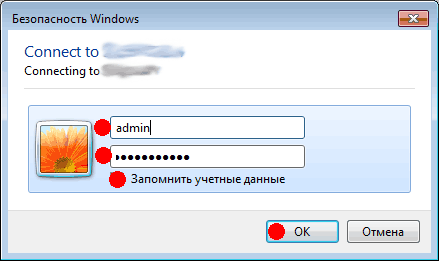
Next, the system asks for a password to access the folder. We write what was scored in the settings of the disk array:
If everything succeeds, the network WebDav folder with encryption via SSL will appear.
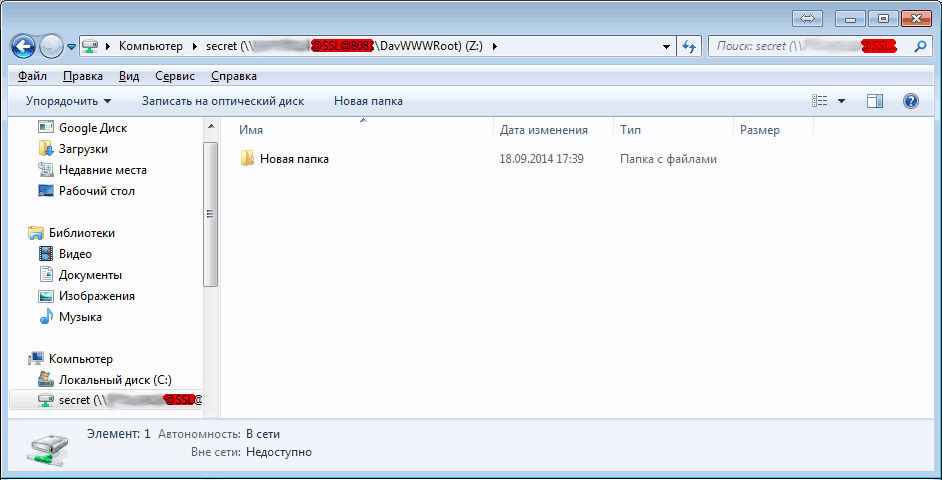
In general, everything is ready! After 10 years will have to redo the keys.
I decided that the best solution for this would be using WebDav technology over a secure channel.
Accordingly, the official instructions say how to use WebDav without encryption.
The wiki here and here is written in English with some inaccuracies. In general, for simplicity, I decided to make this manual.
Initial requirements: Your disk array should be accessible via the Internet on a dedicated IP address on ports 80 and 8081. It is also desirable to open access to the array on port 443. Any changes (forwarding) of standard ports to non-standard (for example, 34000 or others like them), leads to significant brakes when connecting and working with a network folder.
First you need to download OpenSSL here or in my article (32 or 64, respectively, of the required width).
If the program fails:
WARNING: can't open config file: /usr/local/ssl/openssl.cnf

Unable to load config info from /usr/local/ssl/openssl.cnf
Then you need to run the following command (if the program is installed in the folder C: \ OpenSSL-Win64):
Set OPENSSL_CONF=C:\OpenSSL-Win64\bin\openssl.cfgAfter installation, we first generate a private key with a length of 2048:
C:\OpenSSL-Win64\bin>openssl genrsa -out priv.key 2048Loading 'screen' into random state - doneGenerating RSA private key, 2048 bit long modulus......................................................................................+++..........................................................+++e is 65537 (0x10001)Then we make a certificate for 10 years. In the process there will be questions for the certificate.
It is important only "Common Name (eg server FQDN or YOUR name) []:" It is necessary to drive in the address of our disk array.
In my case, I hammered the IP address 123.456.789.012
If the connection goes through a letter name like nas.mydomain.net, then it should be driven in:
C:\OpenSSL-Win64\bin>openssl req -new -key priv.key -out server.crt -x509 -days 3650Loading 'screen' into random state - doneYou are about to be asked to enter information that will be incorporatedinto your certificate request.What you are about to enter is what is called a Distinguished Name or a DN.There are quite a few fields but you can leave some blankFor some fields there will be a default value,If you enter '.', the field will be left blank.-----Country Name (2 letter code) [AU]:ruState or Province Name (full name) [Some-State]:Locality Name (eg, city) []:Organization Name (eg, company) [Internet Widgits Pty Ltd]:Organizational Unit Name (eg, section) []:khbCommon Name (eg server FQDN or YOUR name) []:123.456.789.012Email Address []:Now we have 2 files: priv.key and server.crt:
')
Next, you need to import the certificate made so that the system believes it. Double click on the server.crt file, a window appears:
Next, you need to choose where to put this certificate:
We tell the system that this is our root-level certificate:
The system is extremely suspicious, but we tell it that everything is under control:
Next, you need to go to the disk array and make some changes to the settings. Everything should be like in the picture:
Next, go to the shared folders and click on the settings of the folder to be shared:
We select users and groups that will have access to the folder:
Next you need to add our certificate and key.
Go to Security.
We open in parallel in notepad our priv.key and server.crt files and copy the text from server.crt to the upper field respectively and the text from priv.key to the lower field. Click "Download":
The system displays such a window. Indicates that it downloads certificates.
After loading, the following message should appear:
Everything is ready on the disk array.
Now you need to configure the workstation so that the computer can connect to the disk array.
On Windows 7 there is a problem. QNAS requires a security change in the company registry.
Run regedit and along the way:
HKEY_LOCAL_MACHINE\SYSTEM\CurrentControlSet\services\WebClient\Parameterschange the parameter BasicAuthLevel to value 2
After that, you must either restart your computer or restart the webclient service.
Stop:
C:\Users\raymond>sc stop webclient_: webclient: 20 WIN32_SHARE_PROCESS: 3 STOP_PENDING(STOPPABLE, NOT_PAUSABLE, IGNORES_SHUTDOWN)__Win32 : 0 (0x0)__ : 0 (0x0)_ : 0x0: 0x0Run:
C:\Users\raymond>sc start webclient_: webclient: 20 WIN32_SHARE_PROCESS: 2 START_PENDING(NOT_STOPPABLE, NOT_PAUSABLE, IGNORES_SHUTDOWN)__Win32 : 0 (0x0)__ : 0 (0x0)_ : 0x0: 0x7d0ID_ : 376:Is done. Now you can try to connect to our disk array.
Right-click on the computer and select "Connect a network drive ..."
We select the drive letter, and in the folder field we write the address of our array with the port and the name of the shared folder:
Next, the system asks for a password to access the folder. We write what was scored in the settings of the disk array:
If everything succeeds, the network WebDav folder with encryption via SSL will appear.
In general, everything is ready! After 10 years will have to redo the keys.
Source: https://habr.com/ru/post/237353/
All Articles