We expand the integration of Arduino in the children's designer Connoisseur
Summary of the previous series:
Dad was unable to repair the burned-upbooster and put the Arduka in the Designer Connoisseur . But the quiet life did not last long without a soldering iron. I wanted a child more ...
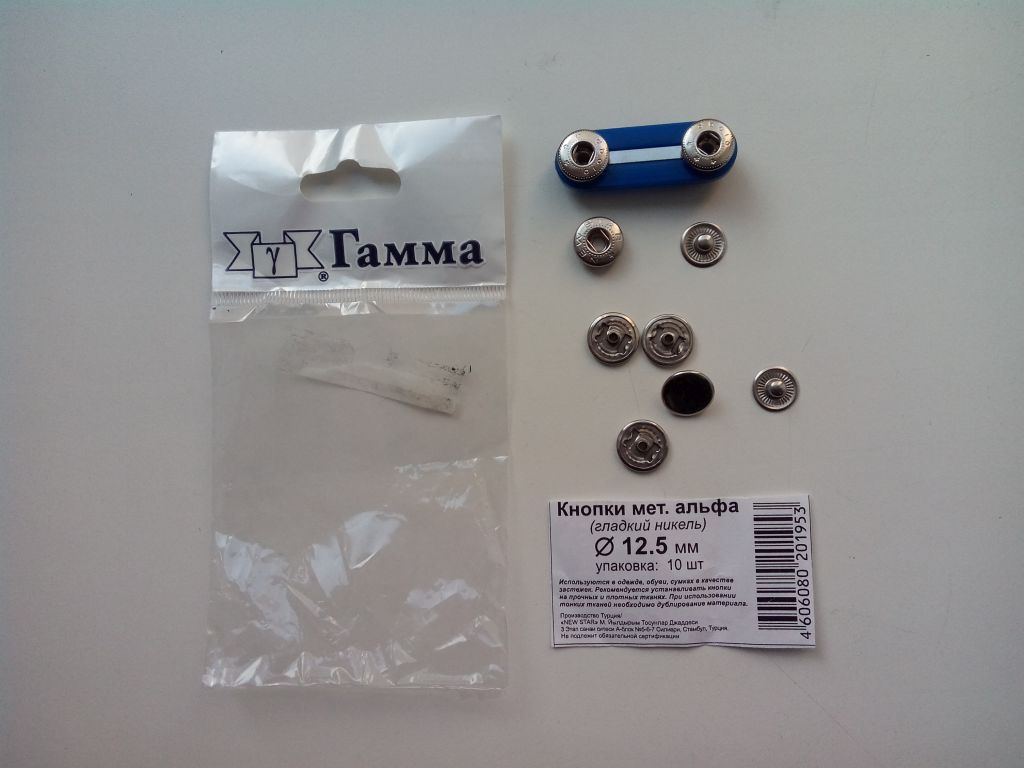
So, after the successful integration of Arduino into the Designer Connoisseur, a short time passes, and the child demands: “More!”. Three inputs / outputs somehow not enough. (I2C mind you not to offer :). And dad went once again to the haberdasher's shop to buy clothing buttons. But he had previously carried out theoretical studies and found out that the Alpha buttons (they are also called Omega , are suitable for the Connoisseur because of the shape of the pressure spring) 12.5 mm in diameter. The buttons consist of four parts, of which I need only one. This item is sold in batches of 1000pcs for $ 20, but vendors do not work with physicists. Suddenly, in the store for clear tactical and technical characteristics of the button, they offer me an acceptable price tag of $ 1.6 for 10 pieces (in the complete set) under the Gamma trademark. I take!
')
The seven-segment indicator is included into the complete set of our designer Connoisseur If you manage to connect it to the Arduino, then you can collect:
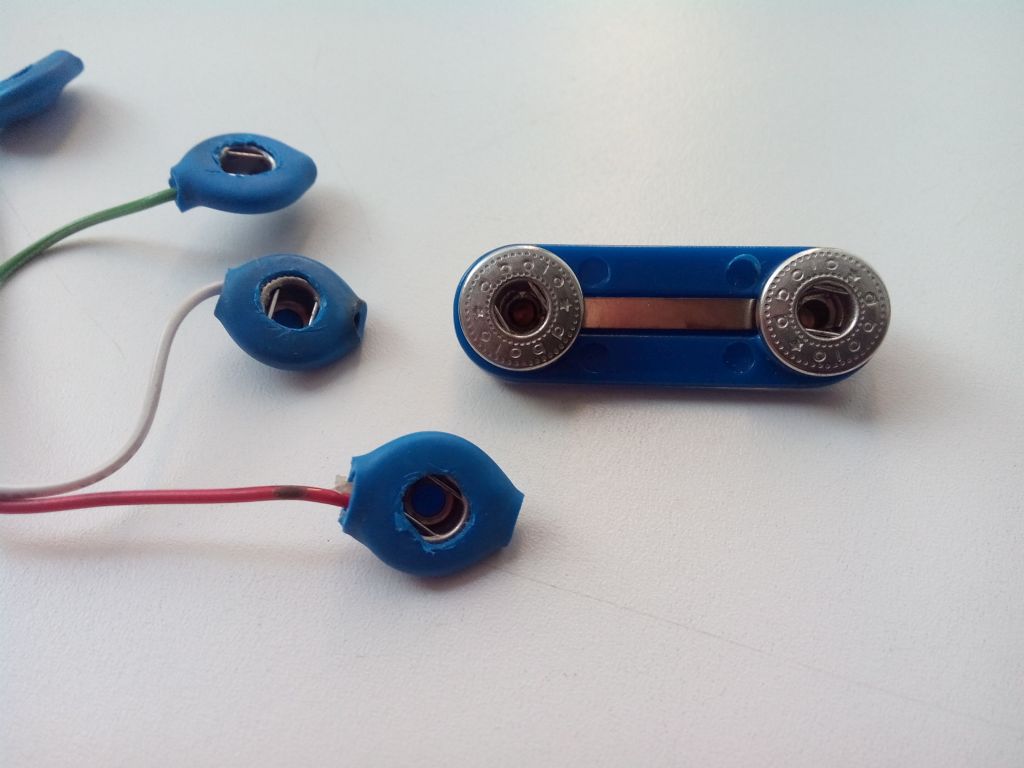
We take the wires, solder them to the details of the button with a spring. Since we do not have a crimper for the buttons, we pulled the heat shrinkage from above (d = 14mm). It so happened that a red tube is seated on the left column of the indicator contacts (the left side is red :), the right side is blue (there was no green :). In the seated tube cut a hole for contact.
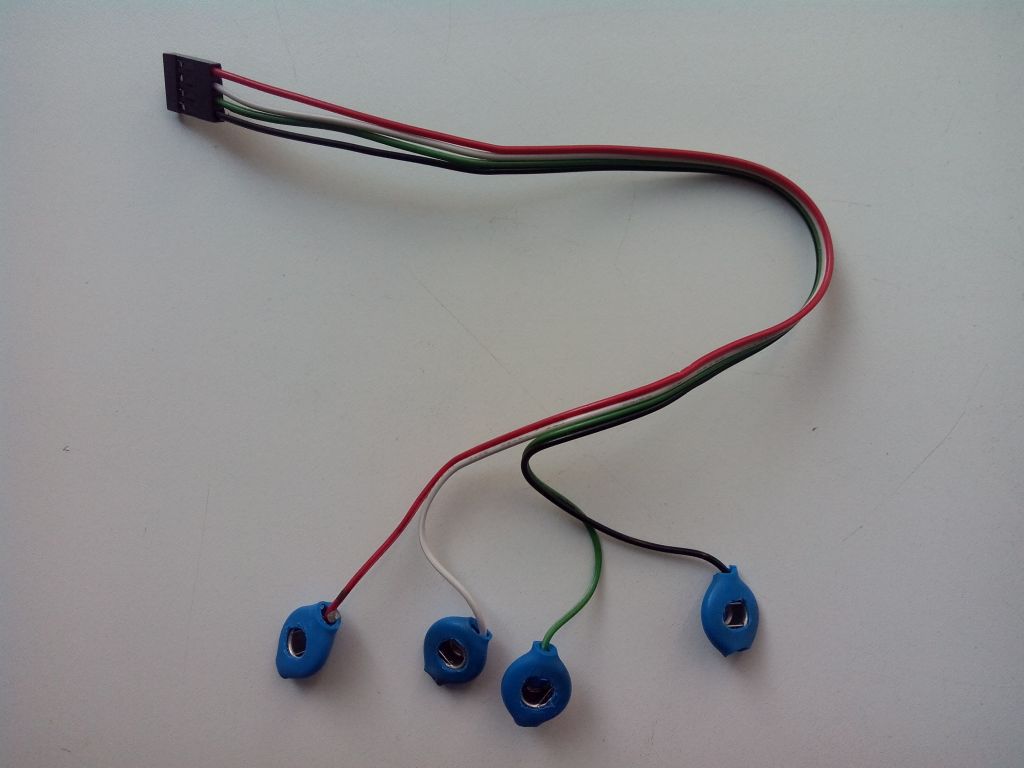
The wires going to the right side of the indicator should be longer by 5..6 cm. We got two four-core cables for 20 and 25 cm.
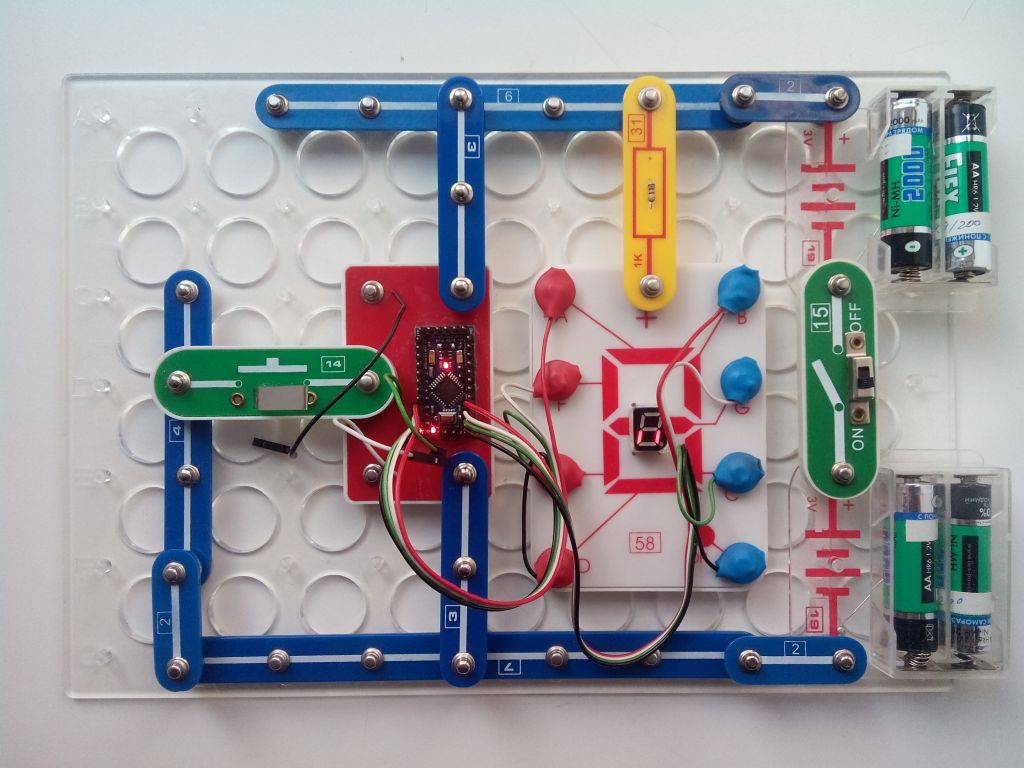
Collected the scheme. Hooray! Earned!
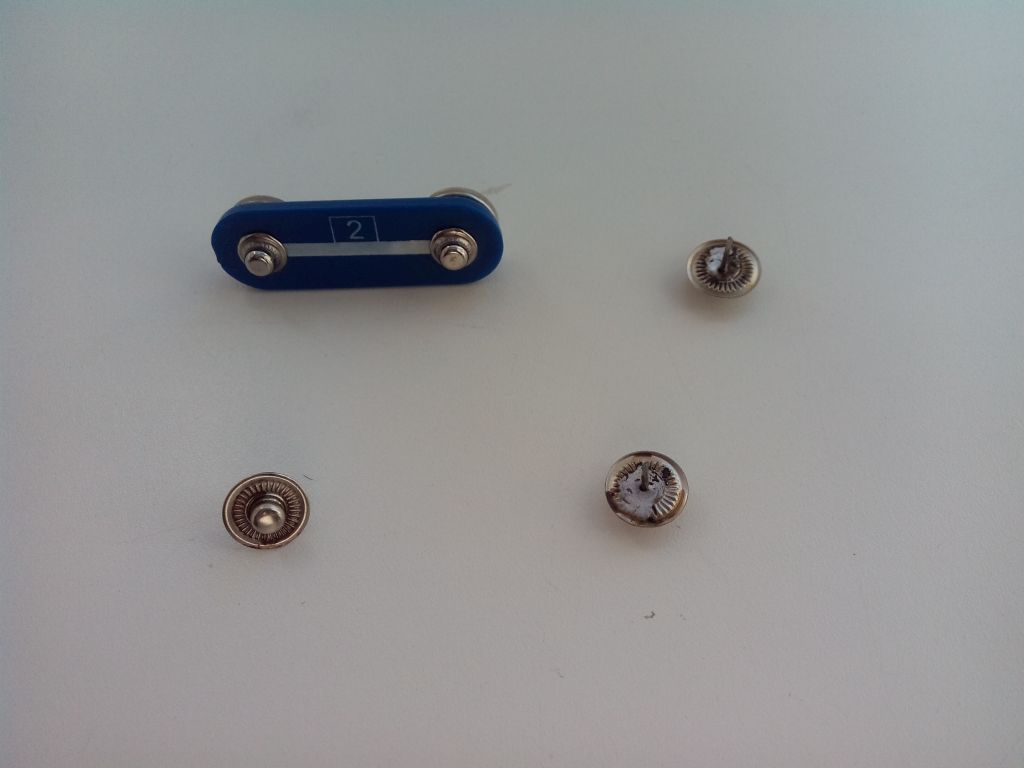
Left parts from the buttons. Where to adapt them? Take the part that is fixed spring and a pair of clips. (Instead of clips, it is better to take straight pins with a square section, but we didn’t have them at hand.) It is better to choose the thickness of the clips from the design scarf specifications (usually 0.3.0.0mm).
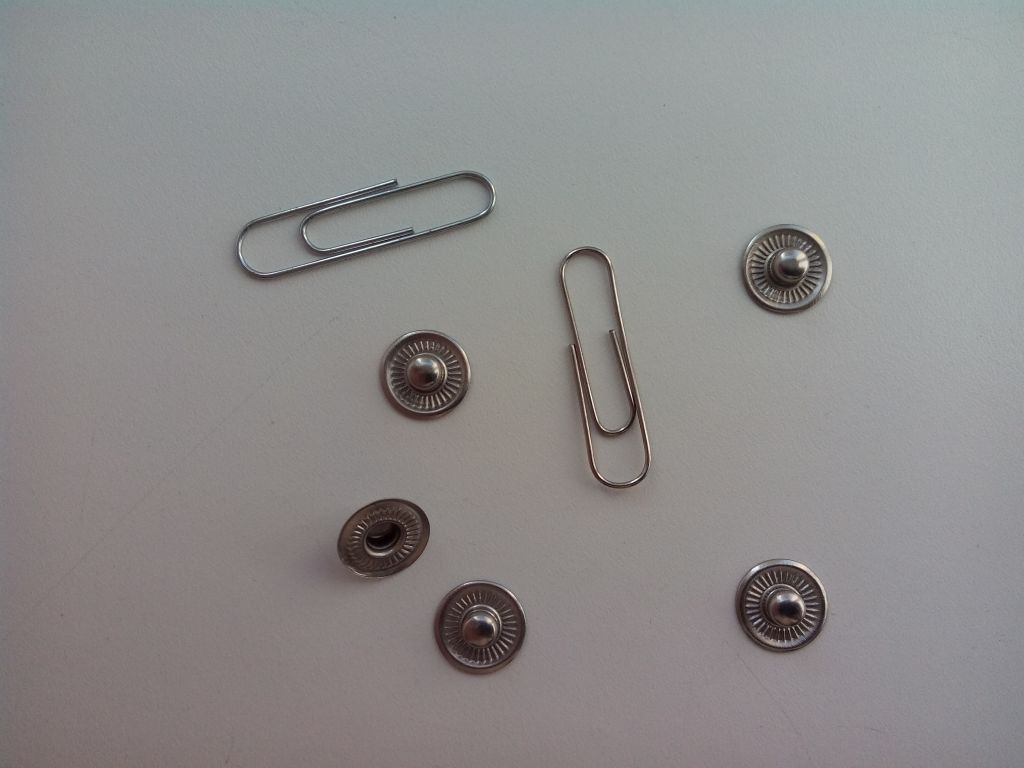
Cut the paperclip into pieces of 1 cm and solder them vertically into the button. It turned out sort of mushrooms - gender-race changers.
Unfortunately, we didn’t have a seven-segment indicator, but there was a 36-point indicator. Approximate scheme in the photo.

And yes pr e will be with you fantasy!
Dad was unable to repair the burned-up
Prehistory
So, after the successful integration of Arduino into the Designer Connoisseur, a short time passes, and the child demands: “More!”. Three inputs / outputs somehow not enough. (I2C mind you not to offer :). And dad went once again to the haberdasher's shop to buy clothing buttons. But he had previously carried out theoretical studies and found out that the Alpha buttons (they are also called Omega , are suitable for the Connoisseur because of the shape of the pressure spring) 12.5 mm in diameter. The buttons consist of four parts, of which I need only one. This item is sold in batches of 1000pcs for $ 20, but vendors do not work with physicists. Suddenly, in the store for clear tactical and technical characteristics of the button, they offer me an acceptable price tag of $ 1.6 for 10 pieces (in the complete set) under the Gamma trademark. I take!
')
We connect the seven-segment indicator
The seven-segment indicator is included into the complete set of our designer Connoisseur If you manage to connect it to the Arduino, then you can collect:
- electronic cube - press the button - the number from 1 to 6 is displayed.
- push counter. You press one button, decrease, on the other - increase.
- stopwatch (remember to crush the bounce)
- toy snake - snake crawling in a circle. Flashing dot - an apple. When the snake's head crawls alongside press the button. Snake will increase. If you press the button when the dot is off - decrease
- the game find out the figure. The indicator switches on the segments randomly. As soon as a number appears, you need to press a button. Note: the inverted numbers are correct, the mirrored numbers are wrong.
We take the wires, solder them to the details of the button with a spring. Since we do not have a crimper for the buttons, we pulled the heat shrinkage from above (d = 14mm). It so happened that a red tube is seated on the left column of the indicator contacts (the left side is red :), the right side is blue (there was no green :). In the seated tube cut a hole for contact.
The wires going to the right side of the indicator should be longer by 5..6 cm. We got two four-core cables for 20 and 25 cm.
Collected the scheme. Hooray! Earned!
Bonus track for those who read to the end, as well as for those who have not entered the seven-segment indicator
Left parts from the buttons. Where to adapt them? Take the part that is fixed spring and a pair of clips. (Instead of clips, it is better to take straight pins with a square section, but we didn’t have them at hand.) It is better to choose the thickness of the clips from the design scarf specifications (usually 0.3.0.0mm).
Cut the paperclip into pieces of 1 cm and solder them vertically into the button. It turned out sort of mushrooms - gender-race changers.
Unfortunately, we didn’t have a seven-segment indicator, but there was a 36-point indicator. Approximate scheme in the photo.
And yes pr e will be with you fantasy!
Source: https://habr.com/ru/post/236669/
All Articles