How to create a 3D character and not survive the mind
Character Artist, Danil Soloviev, reveals the mystery of creating 3D models on the example of the Heavy Archer unit for the game “Sparta: War of Empires”.
')
Usually, the model of the unit from scratch creates Character Artist, but this time they decided to work together with Concept Artist. So I got a pack of concepts, of which we, together with the art director, chose and approved the one that was most suitable for this unit.
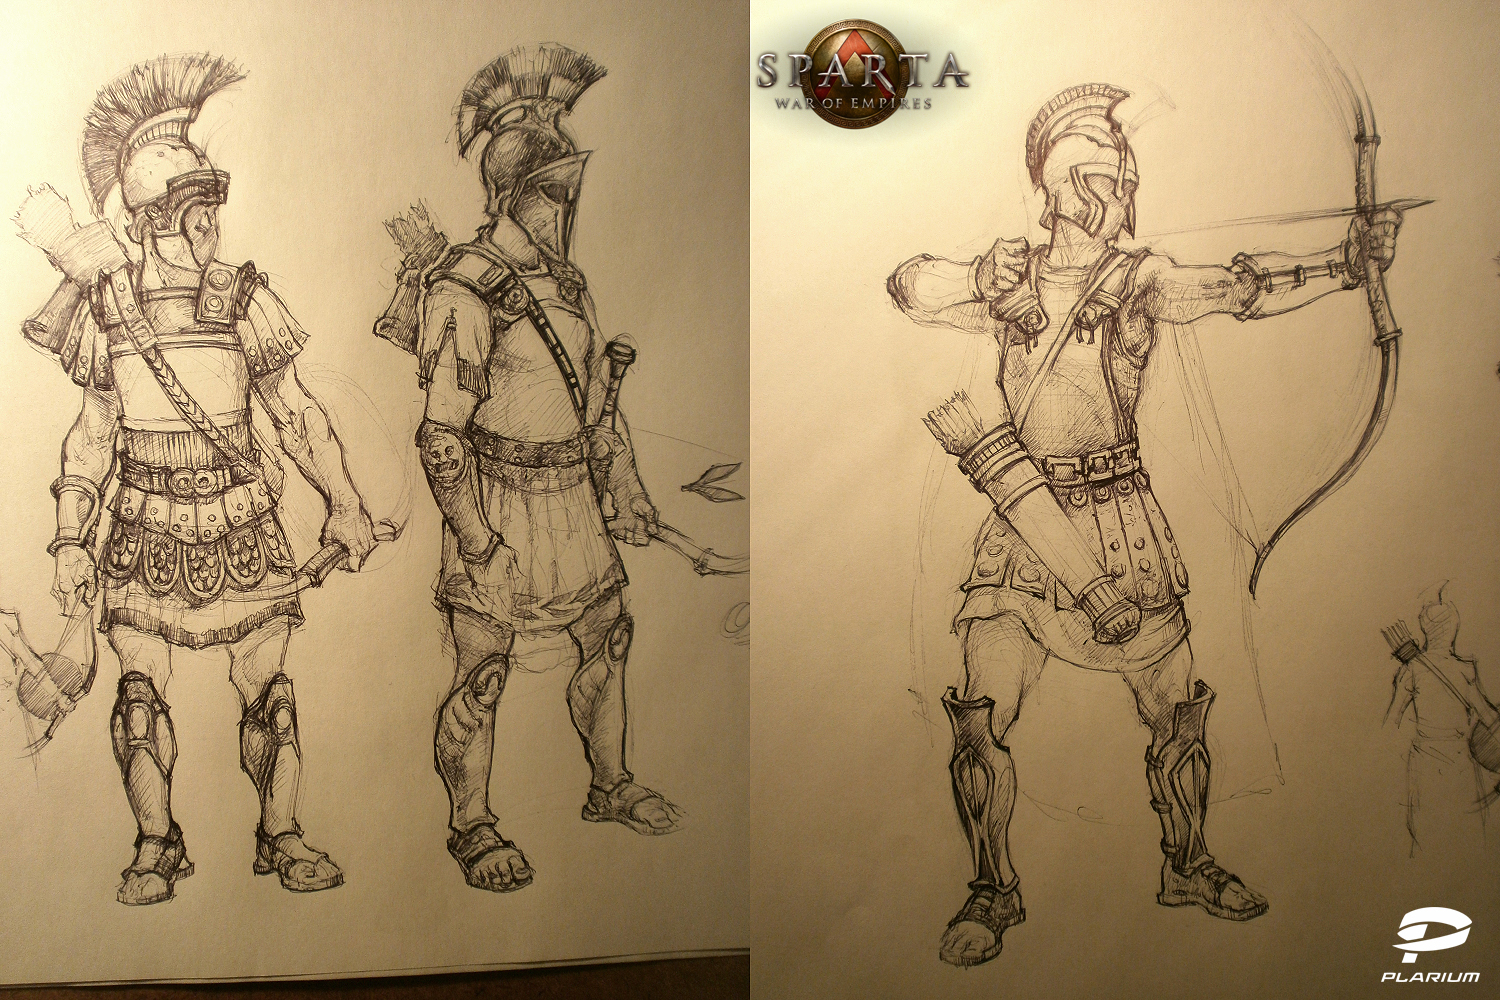
First of all, you need to understand how important the choice of silhouette, gesture is, and what a huge role is played by the so-called S-curve and C-curve even at the stage of T-posture and pig. Many people think that these parameters can be set when setting the character in a pose. This is partly true, but I'll hasten to note: in this case, the character will not turn out as smooth and dynamic as if we set these characteristics in the character's pig (body) initially.

We had one body pattern for all units. It was developed by Vova Silkin, our Team Lead. Having previously prepared a sample, I began to throw at it a low-poly 3D layout in order to quickly present the silhouette and design of the character.
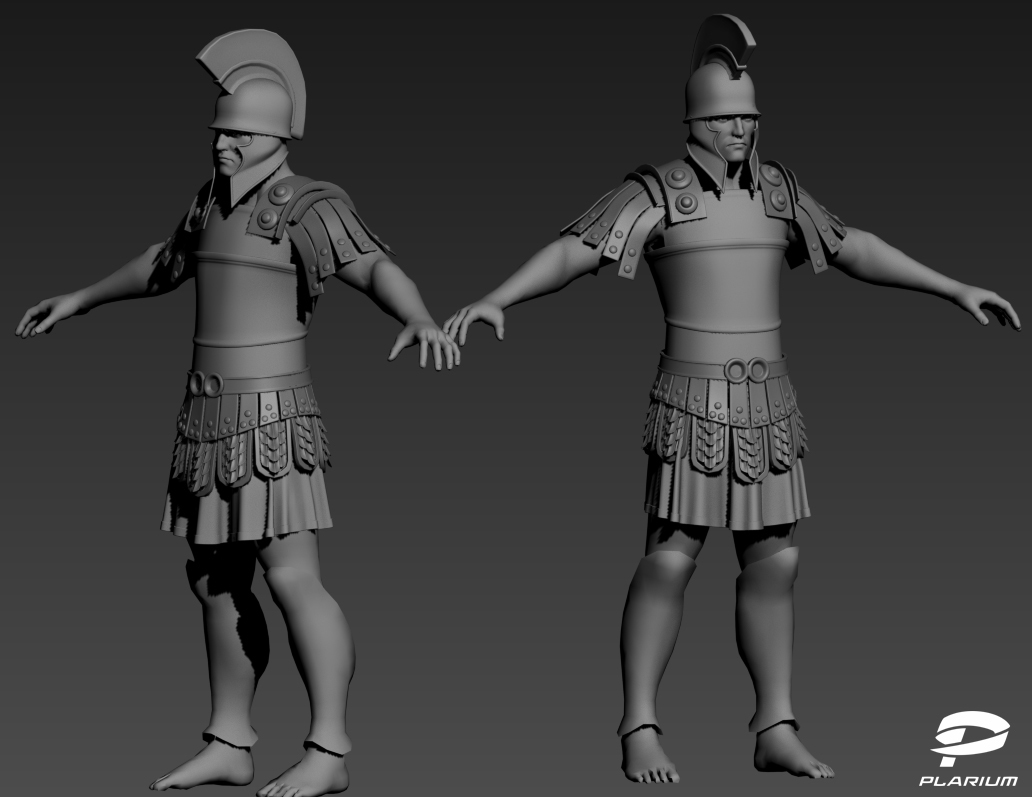
There were many such options, but there were most varieties of helmets, since the character's head is a very important design element. After the dances with a tambourine, we still settled on this version, simultaneously completing the elements that were already arranged for us.
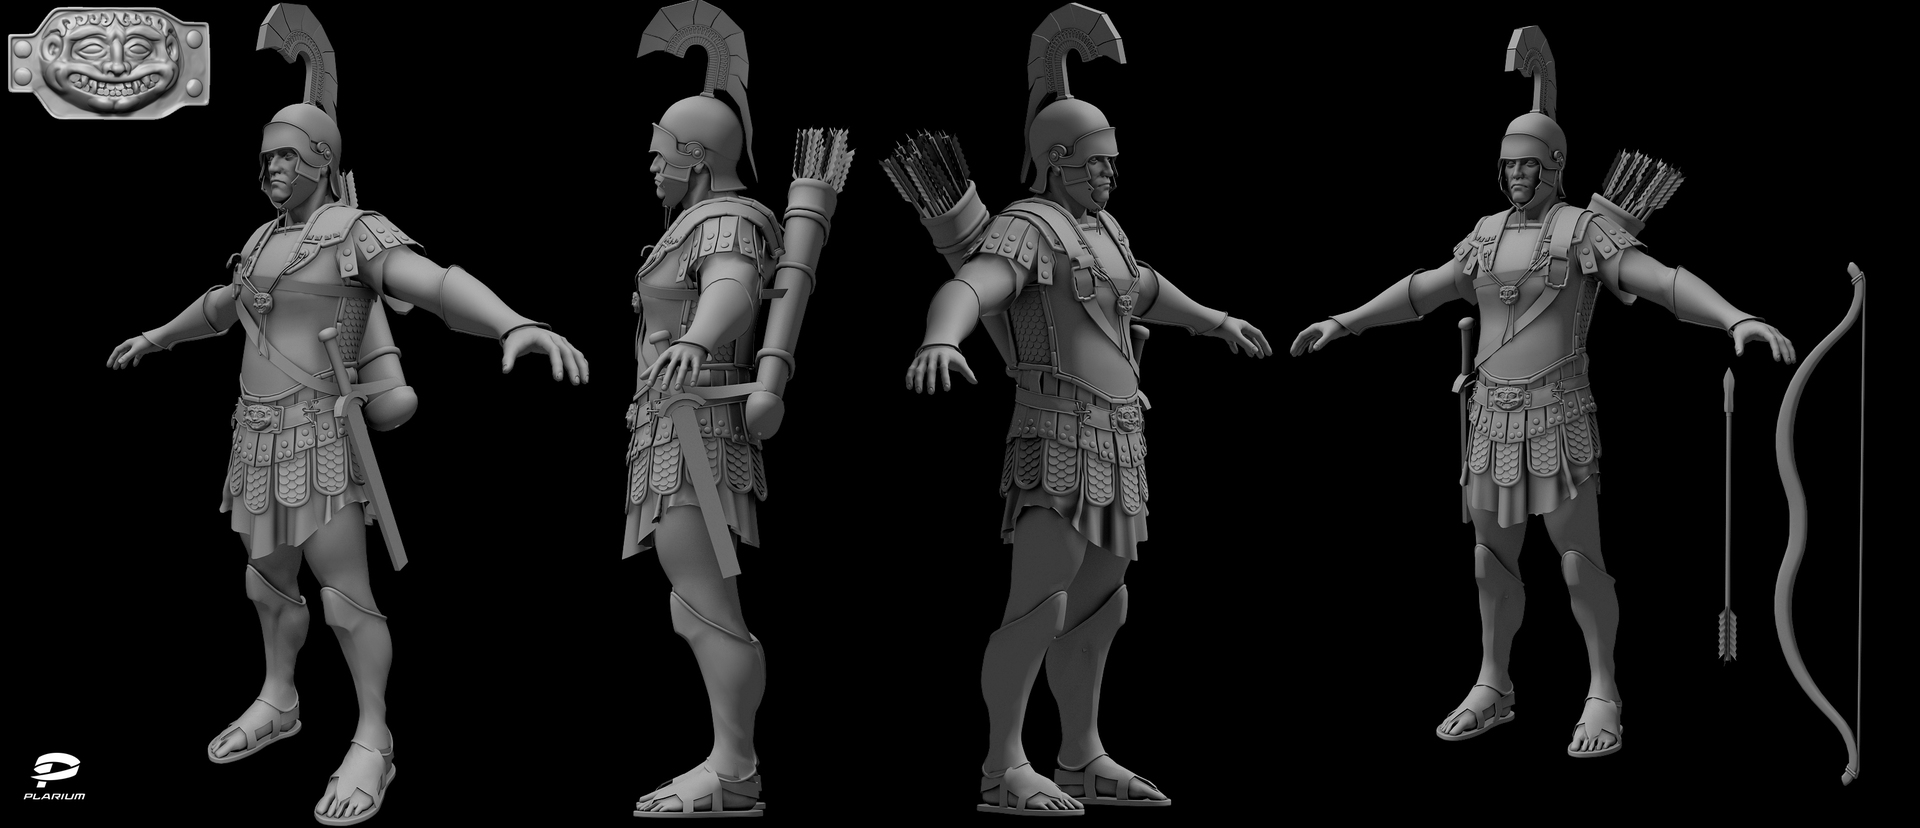
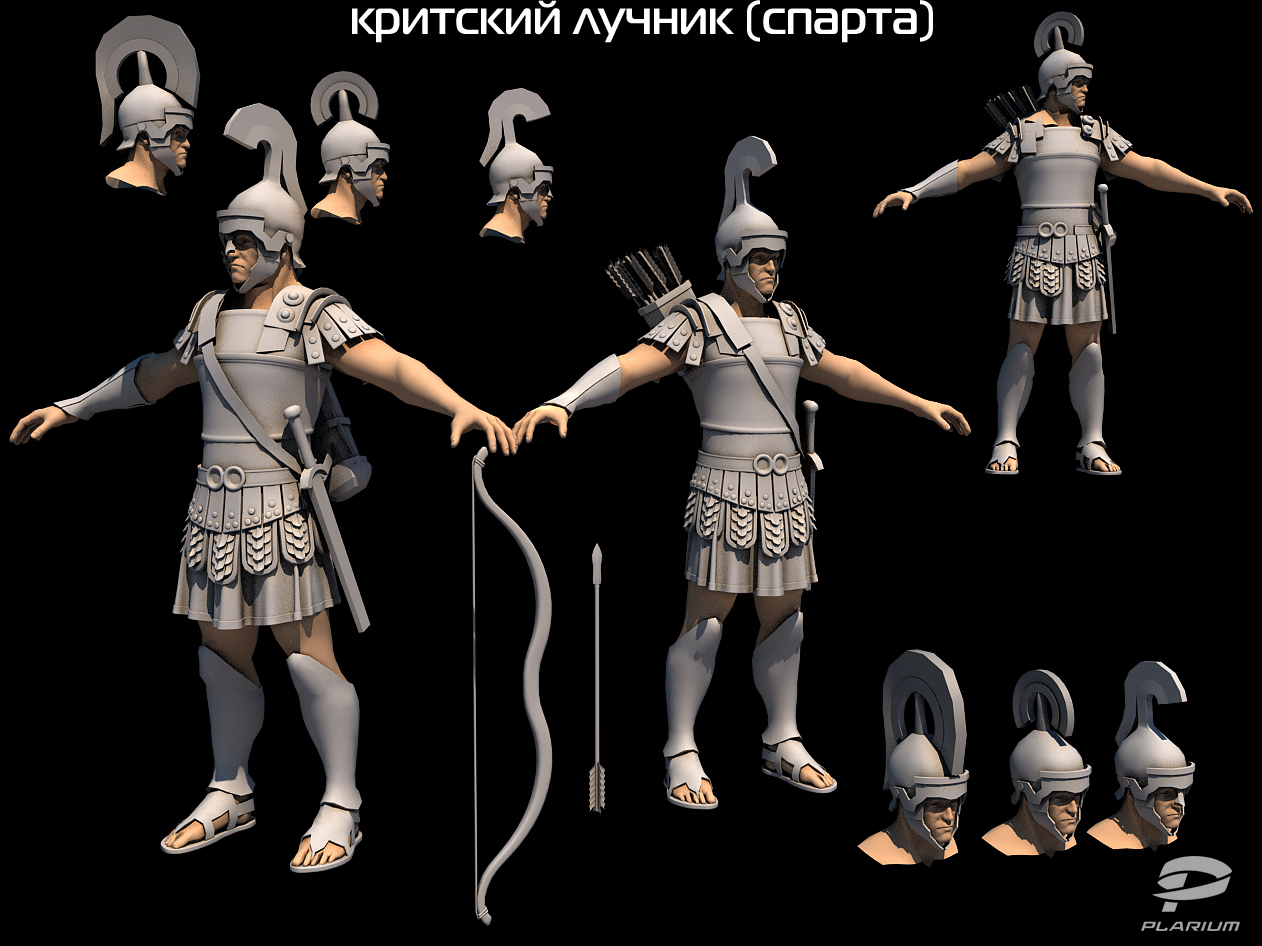
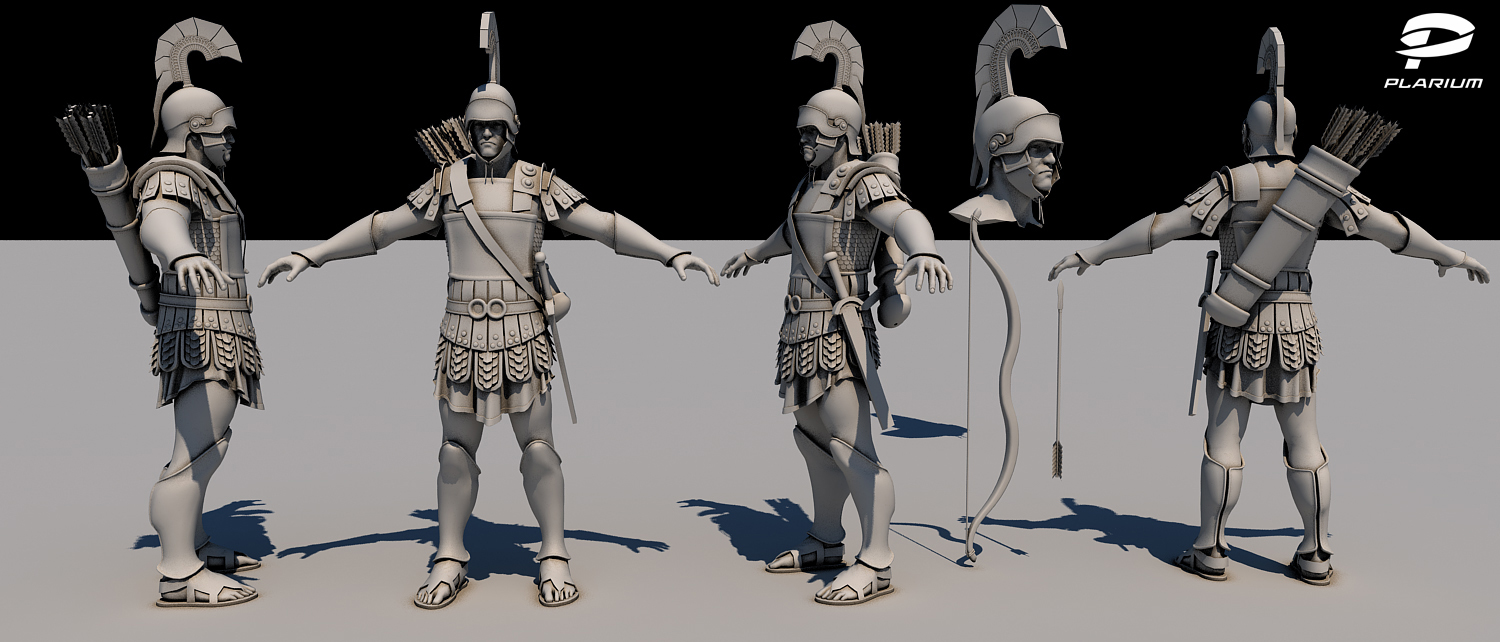
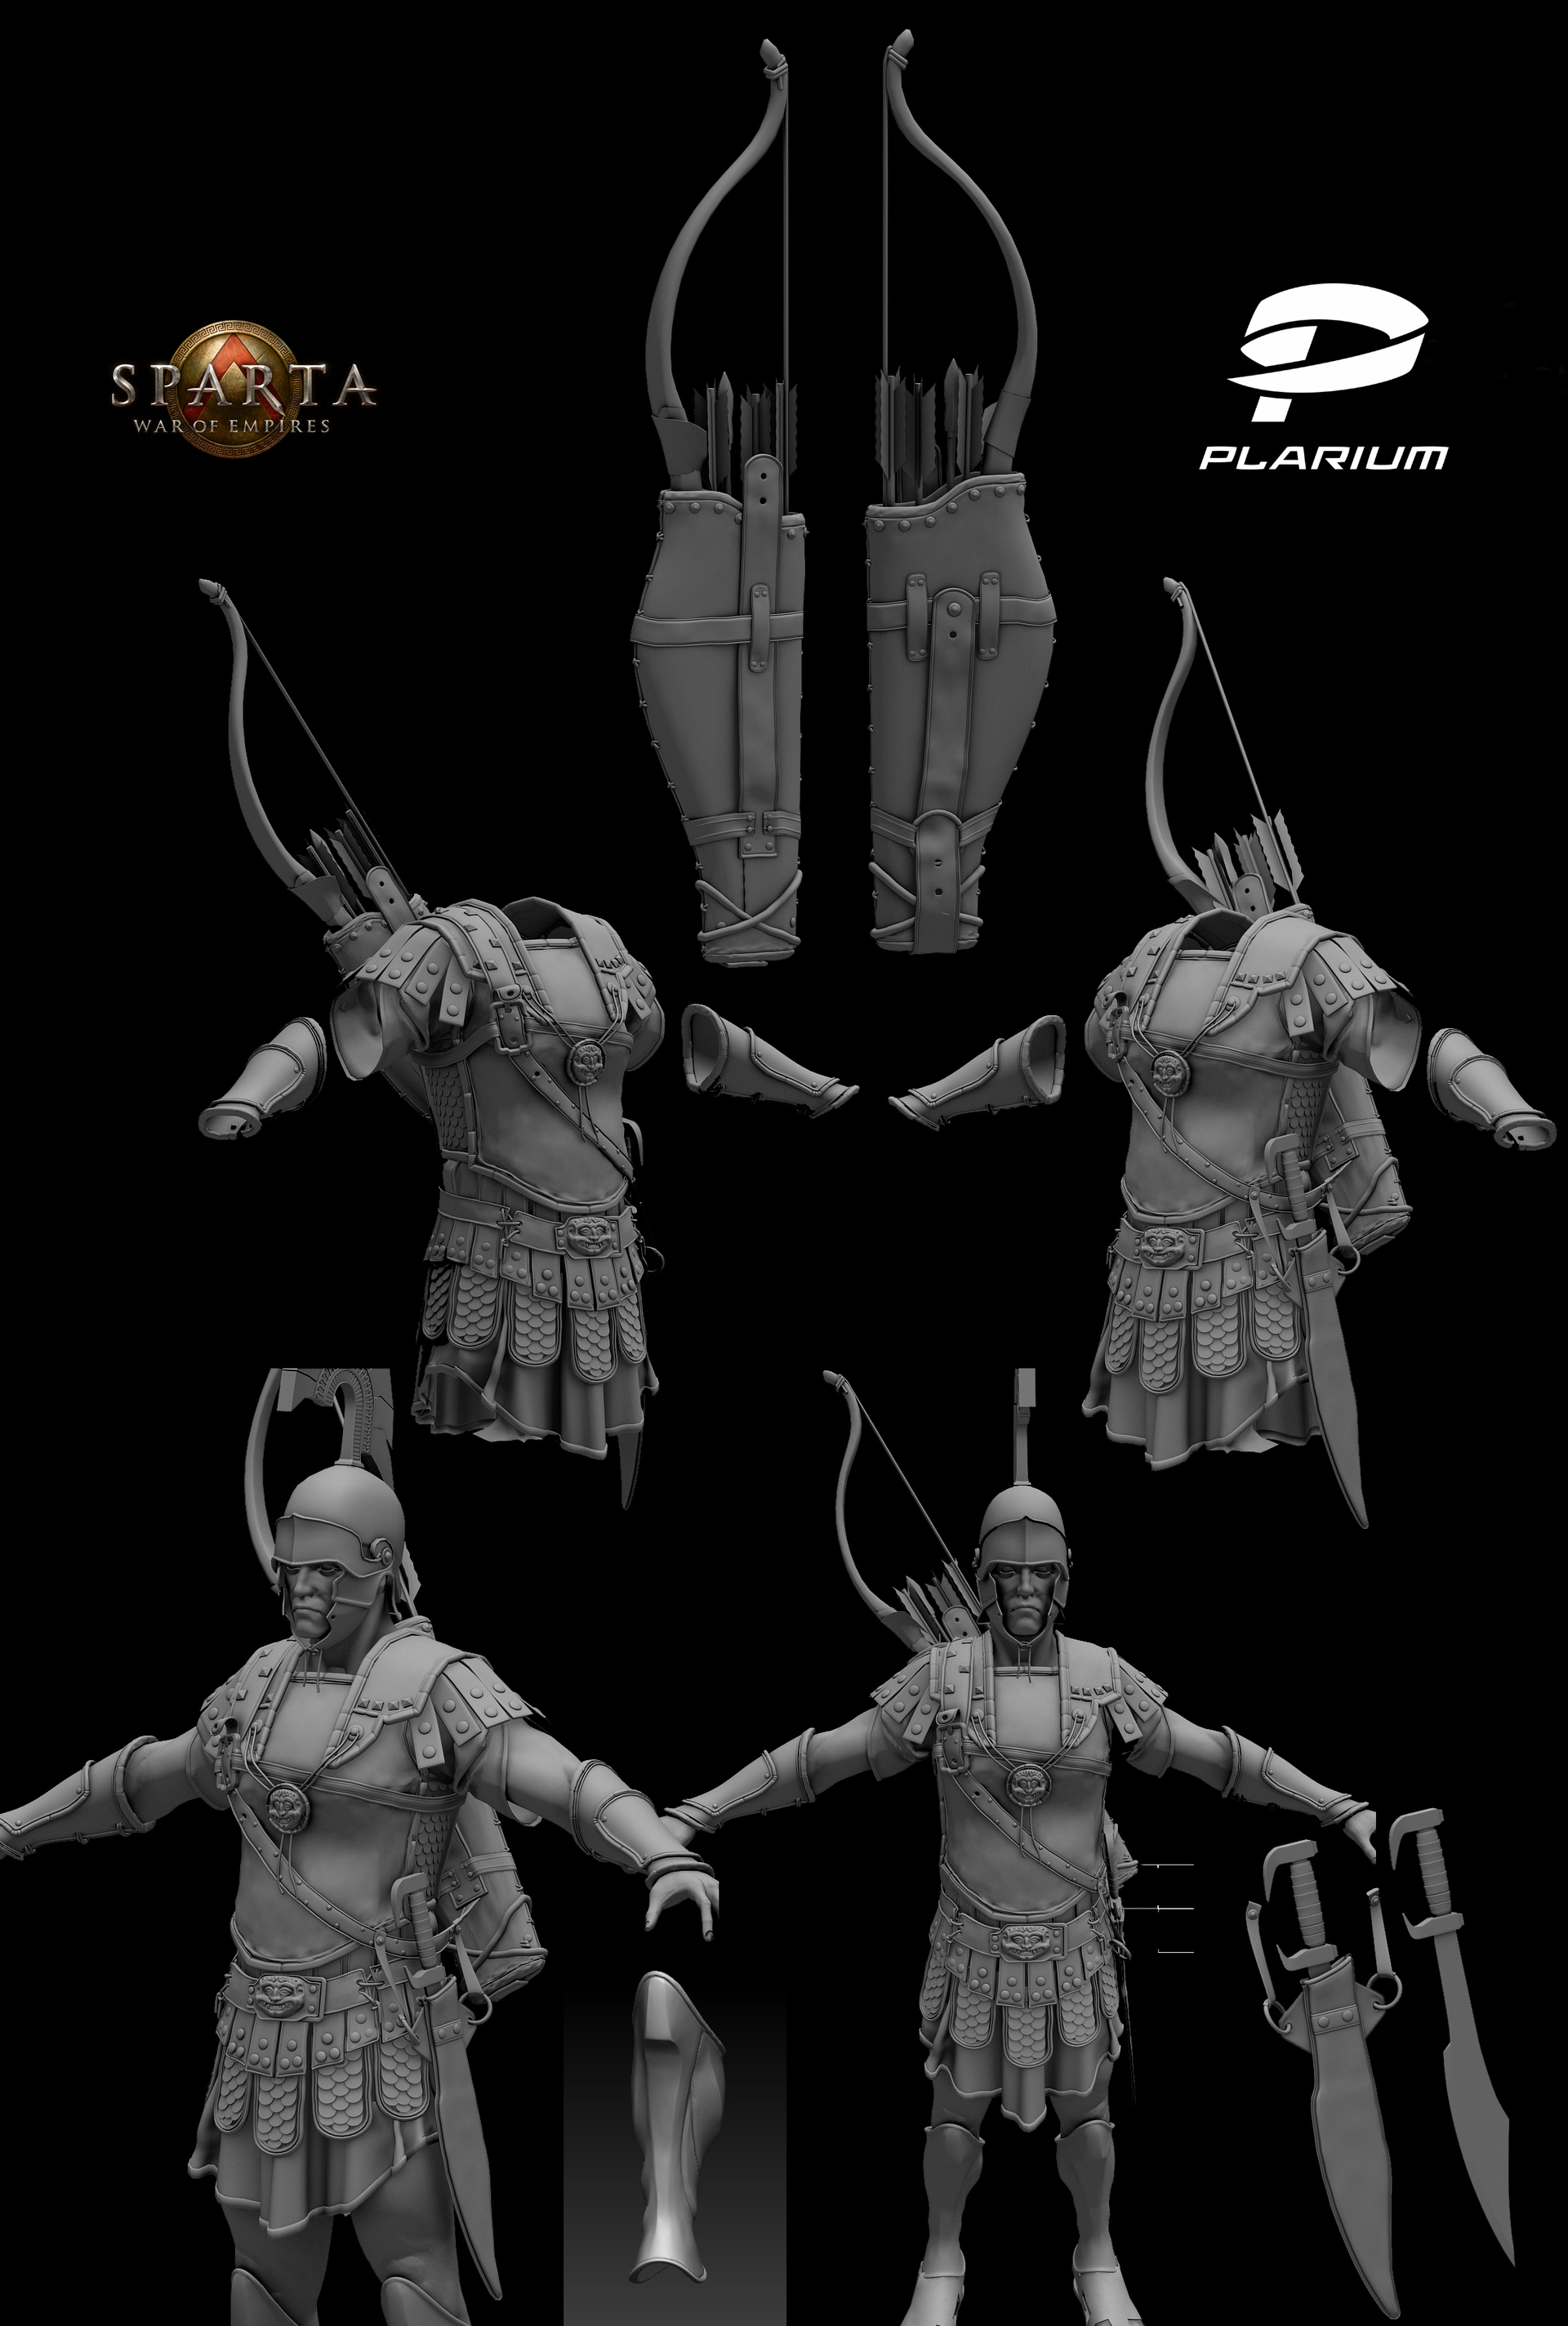
Finally, approved design! You can start working out the details!
Almost all the work on the character was done directly in the 3ds Max program. Since we are doing illustrations, not models for game engines, I had an unlimited number of polygons and complete freedom in resolving texture maps.
As a result, I got 1.5 million polygons and 10 sets of maps (diffuse map, reflection map, specular map, normal map, displacement and opacity) with a resolution of 4096x4096. One set accounted for almost every element of the character, because of which at the end the scene “slowed down”. In such cases, you must disable the display of textures in the viewport.
Take, for example, a quiver hanging over his shoulder. It is leather, therefore, the texture of the quiver cannot be as perfectly smooth as we modeled it under Turbosmooth. To get rid of this drawback, we wrap the noise modifier to give a wrinkled surface effect.
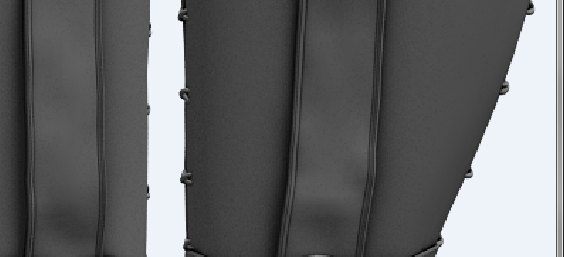
Already looks more realistic. Since this is a rough and thick skin, this option suits us perfectly.
The folds on the leather edging are made by extruding the edges inwards where there might be folds. So I made leather edging on all parts of the armor.
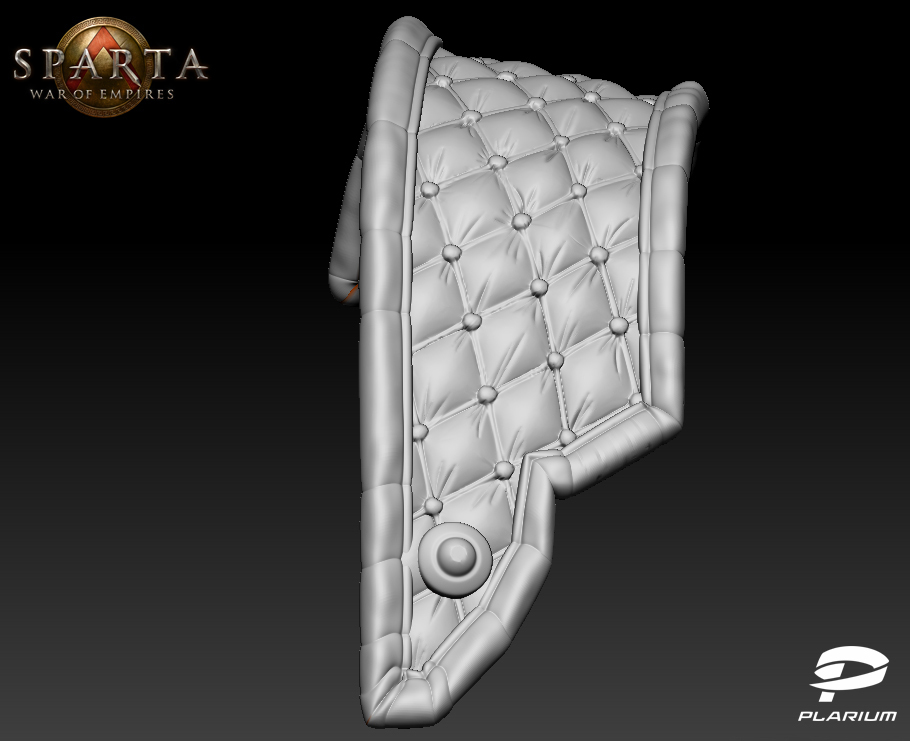
Next is a blank for quilted leather, which we pound in ZBrush (Fig. 1). In the same place we expand the blank with the help of the UV master in order to impose an alpha-map on it. Then we divide the model by the maximum number of polygons. Open the Noise in the Surface rollout (Fig. 2), press the completely invisible Alpha on / off button to load your alpha map and turn on the UV button so that the map is projected along the UV scan. If the alpha map lay crooked, then you need to align the scan and repeat what has been done. (Fig. 3).
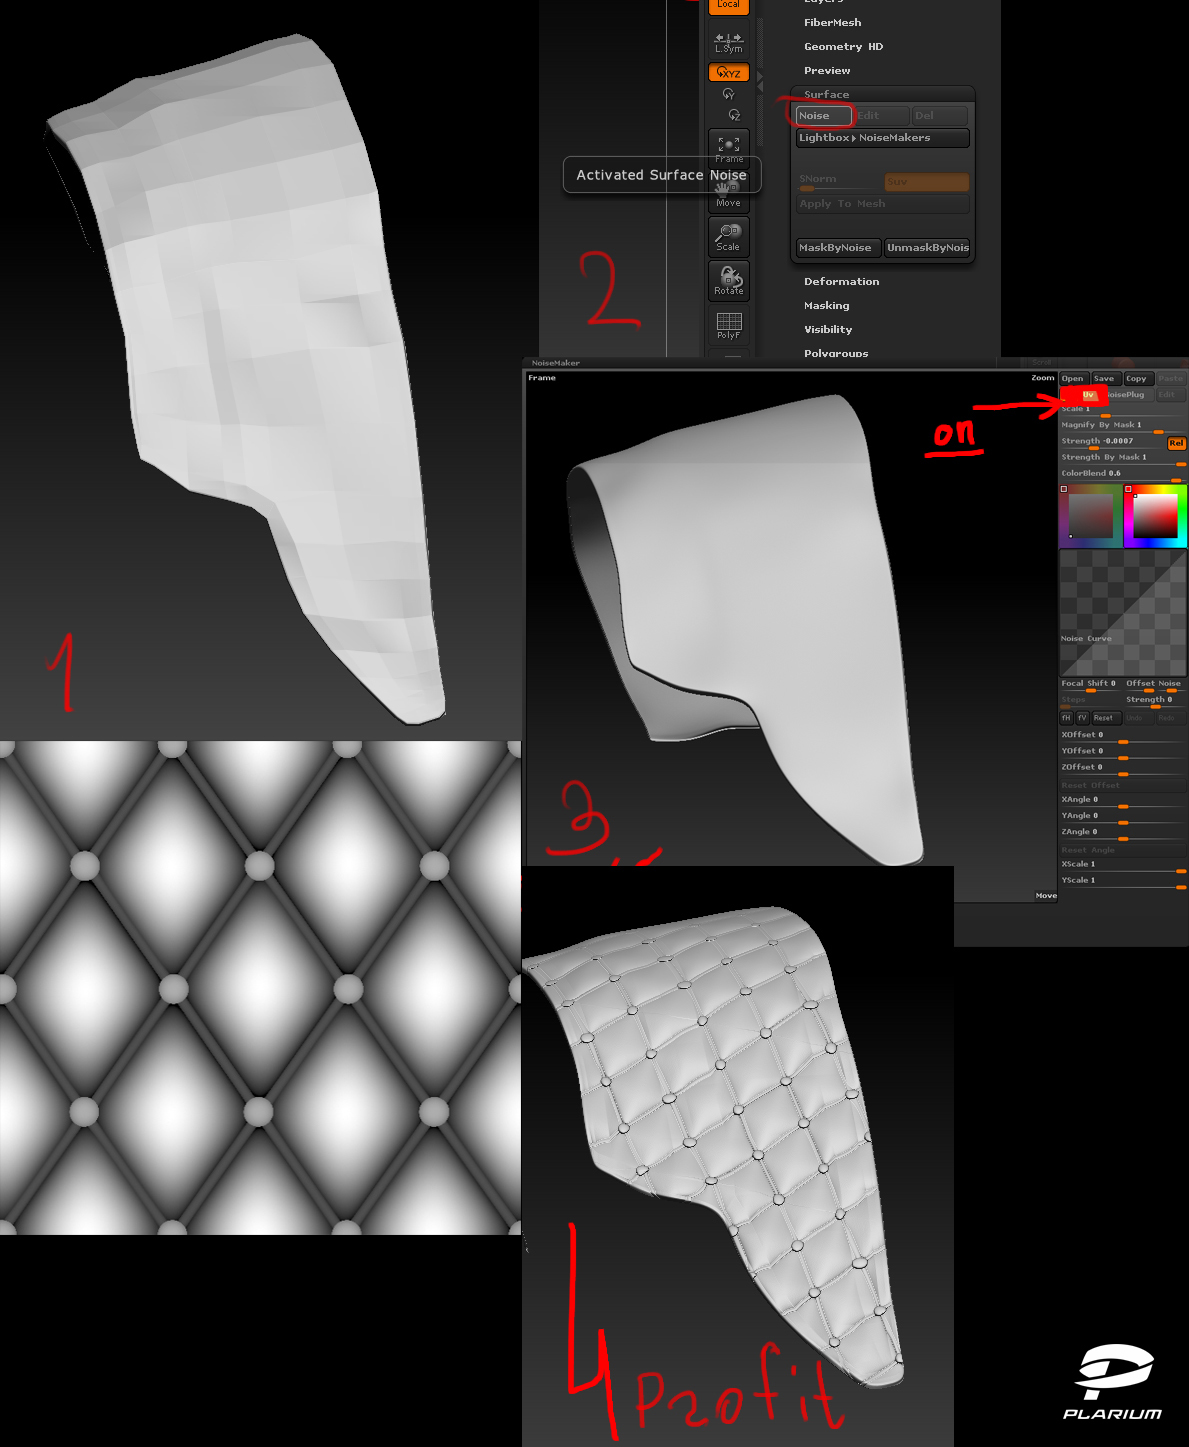
After this, we align the UV scan so that the alpha map goes straight.
Now add the folds with the Dam-Standart brush.
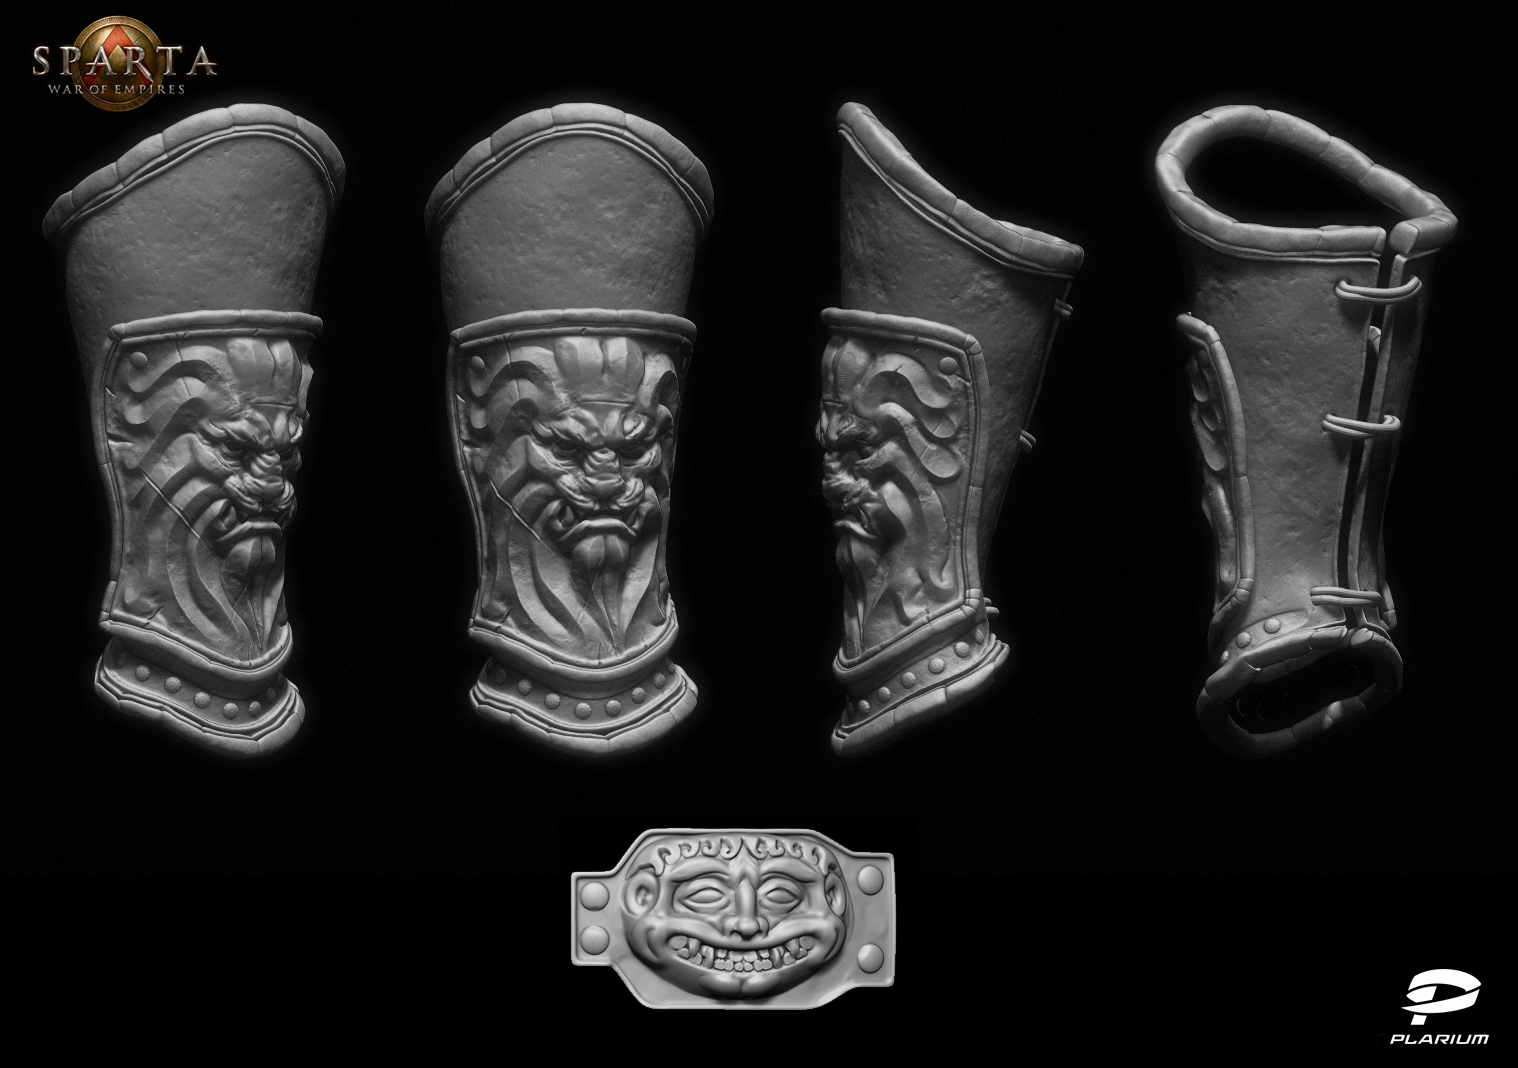
Bracers and some details I blinded in ZBrush.
Metal texture was made in the same way, through Noise, only using another card.
When I began to sculpt the face of a lion, I ran into a problem: the bracers are not symmetrical. Therefore I had to sculpt without symmetry. After three unsuccessful attempts, I finally found an elementary solution for myself, recalling drawing lessons. It was necessary to draw this way:
This situation proves once again how important it is to know and remember the basics of design. Perhaps designers accustomed to Activate Symmetry may also make such mistakes.
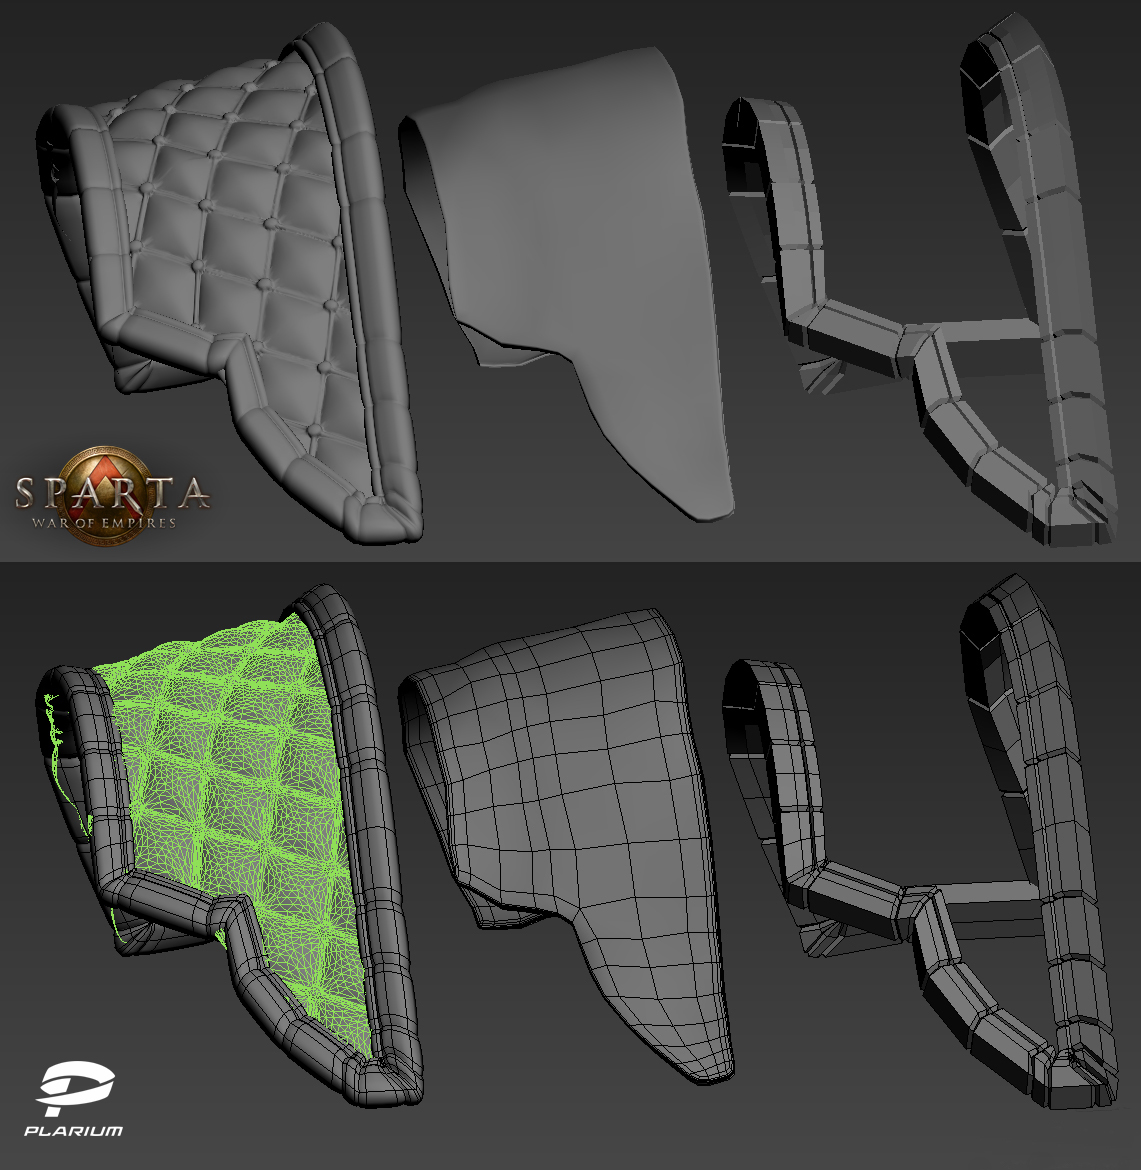
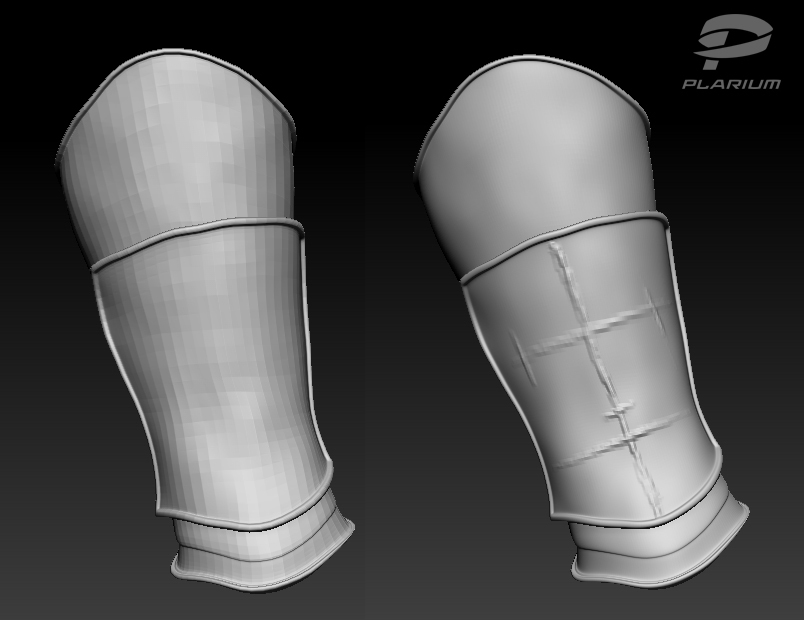
Consider the steps of creating a knee pad.
1. First, I model a blank in 3ds Max, covering the body. See if I like its proportions and silhouette. At this stage it is enough.
2. I start to select the appropriate design in ZBrush. In this case, relying on the knowledge of human anatomy, repeating the directions of muscles and bones, we get beautiful lines. So, in fact, did the ancient Greeks, and not only them.
3. Only after we were convinced that we like proportions and design, we begin to add small details. This method (from the general to the particular) is applied everywhere.
4. Now that we have finished working on all the details, we can transfer the disc to 3ds Max back. I do an illustration, respectively, this model has no restrictions in polygons and maps.
Consequently, I can afford the ZRemesher autostepology, a new feature of ZBrush. This option allows in a matter of seconds, by pressing just one button, to make from a million grid such as in the picture below, a grid of 5k polygons, which for 3ds Max is now absolutely fatal.

As for texturing, I can write very little, because it was made in the old-fashioned way: in Photoshop. And everyone knows everything about Photoshop long ago. It didn’t do without Mudbox: in it I just planned out the masks for scratches and imported the model back into Photoshop. This method I find the most convenient in recent times.
All sweeps were made automatically using the UV master in ZBrush.
In this paper, I discovered two new things: the Additional bump and the rules for applying patterns on the edges. Actually, they are related.
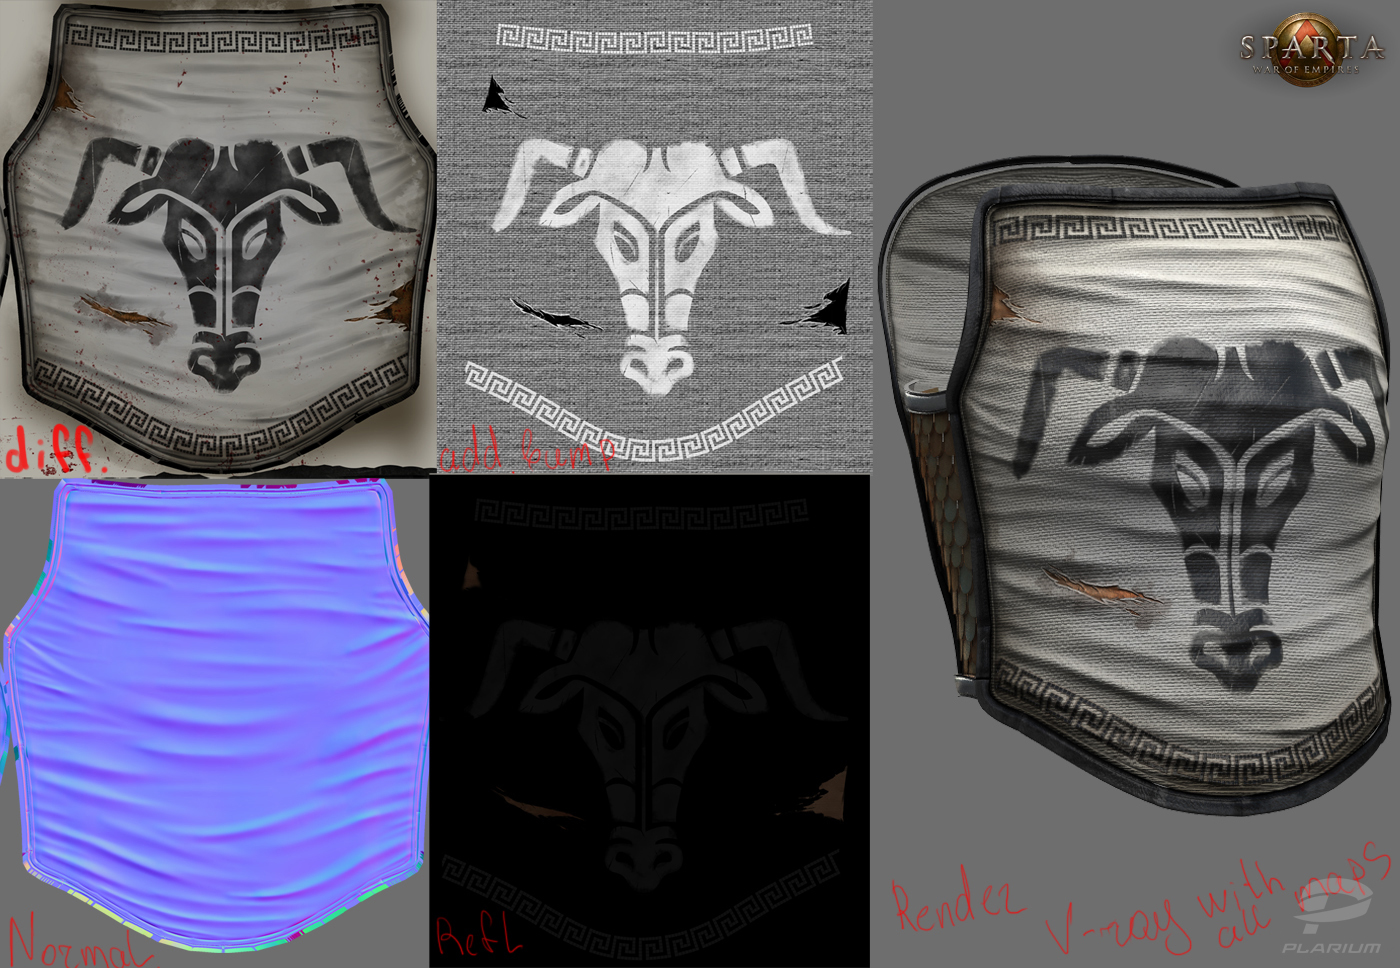
I wanted to paint Greek patterns around the edges so that they slightly protrude above the fabric.
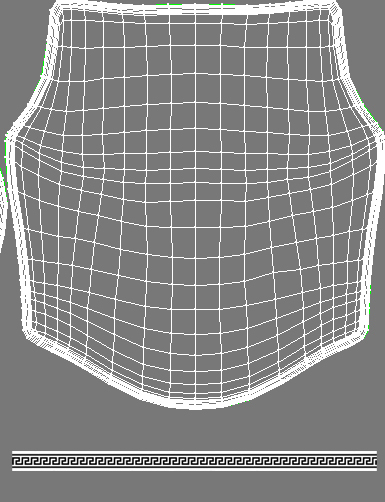
I didn’t know how to do it better, so I’ve scored them in ZBrush. It turned out terribly crooked and long. After a few more unsuccessful attempts, I eventually found a way out. So, we take a direct ornament.

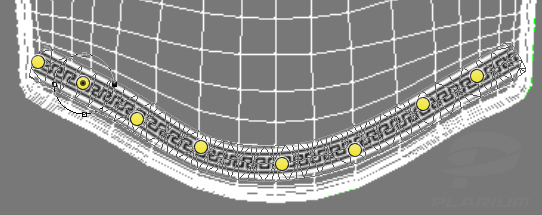
Apply to it Edit> Puppet Warp - a function in Photoshop that allows you to crumple and bend the image into any desired shape.
Put the pivot points. And, clamping each of the points, we curve the ornament into the shape we need. Press Enter - and you're done.
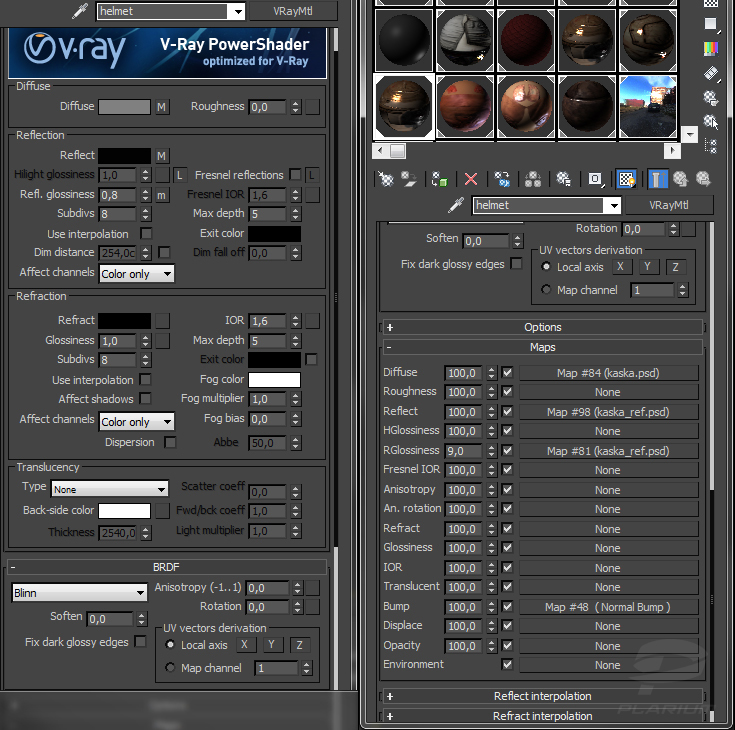
As for the creation of materials, there is nothing military here! Everything is governed by maps, there are no clever settings.
It is important to remember that some metals - gold, bronze - are cast in a yellow-orange color. Therefore, on Reflect, it is necessary to throw a card with such a shade, and not the usual black and white one. The picture shows the lighting scheme.

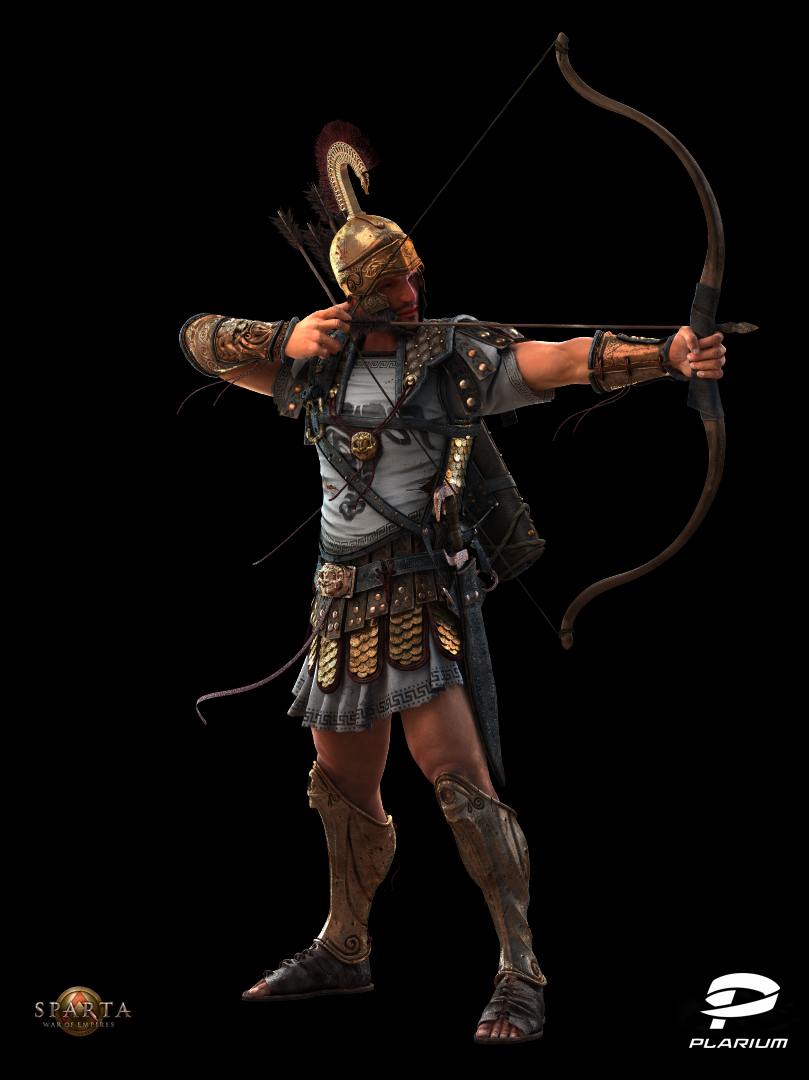
After rendering, we get such a clean render without post-processing.

In this work, I became convinced that attention to even insignificant and almost imperceptible details at first glance is a pledge of successful work, a sign of professionalism and love for your work. My recipe is this: do not rush and always move from the general to the particular!
')
Usually, the model of the unit from scratch creates Character Artist, but this time they decided to work together with Concept Artist. So I got a pack of concepts, of which we, together with the art director, chose and approved the one that was most suitable for this unit.
First of all, you need to understand how important the choice of silhouette, gesture is, and what a huge role is played by the so-called S-curve and C-curve even at the stage of T-posture and pig. Many people think that these parameters can be set when setting the character in a pose. This is partly true, but I'll hasten to note: in this case, the character will not turn out as smooth and dynamic as if we set these characteristics in the character's pig (body) initially.
We had one body pattern for all units. It was developed by Vova Silkin, our Team Lead. Having previously prepared a sample, I began to throw at it a low-poly 3D layout in order to quickly present the silhouette and design of the character.
There were many such options, but there were most varieties of helmets, since the character's head is a very important design element. After the dances with a tambourine, we still settled on this version, simultaneously completing the elements that were already arranged for us.
Finally, approved design! You can start working out the details!
Almost all the work on the character was done directly in the 3ds Max program. Since we are doing illustrations, not models for game engines, I had an unlimited number of polygons and complete freedom in resolving texture maps.
As a result, I got 1.5 million polygons and 10 sets of maps (diffuse map, reflection map, specular map, normal map, displacement and opacity) with a resolution of 4096x4096. One set accounted for almost every element of the character, because of which at the end the scene “slowed down”. In such cases, you must disable the display of textures in the viewport.
Take, for example, a quiver hanging over his shoulder. It is leather, therefore, the texture of the quiver cannot be as perfectly smooth as we modeled it under Turbosmooth. To get rid of this drawback, we wrap the noise modifier to give a wrinkled surface effect.
Already looks more realistic. Since this is a rough and thick skin, this option suits us perfectly.
The folds on the leather edging are made by extruding the edges inwards where there might be folds. So I made leather edging on all parts of the armor.
Next is a blank for quilted leather, which we pound in ZBrush (Fig. 1). In the same place we expand the blank with the help of the UV master in order to impose an alpha-map on it. Then we divide the model by the maximum number of polygons. Open the Noise in the Surface rollout (Fig. 2), press the completely invisible Alpha on / off button to load your alpha map and turn on the UV button so that the map is projected along the UV scan. If the alpha map lay crooked, then you need to align the scan and repeat what has been done. (Fig. 3).
After this, we align the UV scan so that the alpha map goes straight.
Now add the folds with the Dam-Standart brush.
Bracers and some details I blinded in ZBrush.
Metal texture was made in the same way, through Noise, only using another card.
When I began to sculpt the face of a lion, I ran into a problem: the bracers are not symmetrical. Therefore I had to sculpt without symmetry. After three unsuccessful attempts, I finally found an elementary solution for myself, recalling drawing lessons. It was necessary to draw this way:
This situation proves once again how important it is to know and remember the basics of design. Perhaps designers accustomed to Activate Symmetry may also make such mistakes.
Consider the steps of creating a knee pad.
1. First, I model a blank in 3ds Max, covering the body. See if I like its proportions and silhouette. At this stage it is enough.
2. I start to select the appropriate design in ZBrush. In this case, relying on the knowledge of human anatomy, repeating the directions of muscles and bones, we get beautiful lines. So, in fact, did the ancient Greeks, and not only them.
3. Only after we were convinced that we like proportions and design, we begin to add small details. This method (from the general to the particular) is applied everywhere.
4. Now that we have finished working on all the details, we can transfer the disc to 3ds Max back. I do an illustration, respectively, this model has no restrictions in polygons and maps.
Consequently, I can afford the ZRemesher autostepology, a new feature of ZBrush. This option allows in a matter of seconds, by pressing just one button, to make from a million grid such as in the picture below, a grid of 5k polygons, which for 3ds Max is now absolutely fatal.
As for texturing, I can write very little, because it was made in the old-fashioned way: in Photoshop. And everyone knows everything about Photoshop long ago. It didn’t do without Mudbox: in it I just planned out the masks for scratches and imported the model back into Photoshop. This method I find the most convenient in recent times.
All sweeps were made automatically using the UV master in ZBrush.
In this paper, I discovered two new things: the Additional bump and the rules for applying patterns on the edges. Actually, they are related.
I wanted to paint Greek patterns around the edges so that they slightly protrude above the fabric.
I didn’t know how to do it better, so I’ve scored them in ZBrush. It turned out terribly crooked and long. After a few more unsuccessful attempts, I eventually found a way out. So, we take a direct ornament.
Apply to it Edit> Puppet Warp - a function in Photoshop that allows you to crumple and bend the image into any desired shape.
Put the pivot points. And, clamping each of the points, we curve the ornament into the shape we need. Press Enter - and you're done.
As for the creation of materials, there is nothing military here! Everything is governed by maps, there are no clever settings.
It is important to remember that some metals - gold, bronze - are cast in a yellow-orange color. Therefore, on Reflect, it is necessary to throw a card with such a shade, and not the usual black and white one. The picture shows the lighting scheme.
After rendering, we get such a clean render without post-processing.
In this work, I became convinced that attention to even insignificant and almost imperceptible details at first glance is a pledge of successful work, a sign of professionalism and love for your work. My recipe is this: do not rush and always move from the general to the particular!
Source: https://habr.com/ru/post/234305/
All Articles