App Studio - a new version of the online application designer from Microsoft
Hello to all!
I present to your attention a new tool from Microsoft “Windows App Studio” - a designer for creating applications. Today I’ll tell you how the creation of applications for Windows and Windows Phone has become available to the ordinary user. And a little about how this tool can be useful to the developer.
App Studio tool designed to create content applications. This type of application provides the user with thematic information, various directories and a whole range of other standard functions.
')
App Studio interacts with the user through a web interface, works on any browser and is available at the following link . All App Studio data is stored in the cloud.
To access App Studio, you must have a Microsoft account (formerly Live ID) and the ability to access the network.
Overview
The interface is simple and intuitive:

On the main page there is a control panel for accessing the main pages of the resource:
- My projects - the page on which all applications ever created by a user in App Studio will be stored with their status: Edition / Generated

- How to - page with instructions for App Studio, which describes in detail the elements, actions and results c App Studio.
- Start new - duplicates the button on the “Start new project” home page and directs it to the page for creating a new application.
- Sample apps - will tell and demonstrate examples of ready-made demo applications.
- News - the news page of the resource where you can see updates, messages from the support team, etc.
- OS preview - directs the user to the Developer Center page, which describes how to get all updates about operating systems before regular users, how to get a developer account and quickly download all updates to your phone.
- Dev center - further Development Center and resource for developers under Windows and Windows Phone.
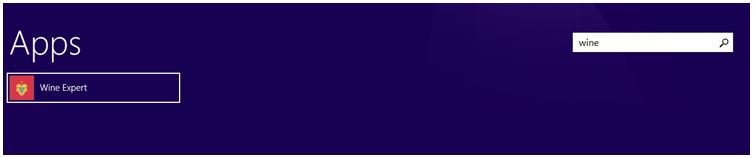
Also on the main page are the applications created in App Studio that function and are available in the Windows Store:

Templates
App studio offers the following scripts to create an app:
- Use templates;
- Create an application from scratch.
App Studio templates are thematically oriented applications with a ready structure, demo content and the ability to edit:
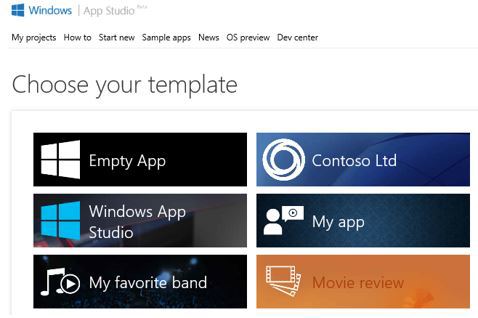
Unlike other templates, the Empty App does not offer any script for creating applications and is completely free of content.
All App Studio templates provide the ability to create universal applications available on Windows and Windows Phone 8.1 devices. In addition to the Web App template:

The purpose of this template is to convert the mobile version of the website into a Web App using the website URL. This feature is available only for Windows Phone applications.
It is worth noting the variety of templates App Studio and the presence of thematic components of each of them:

Create application
The cycle of creating an application in App Studio consists of 4 stages:
- Search for an idea;
- Filling content;
- Style design;
- Using the finished application;
To demonstrate the capabilities of the tool, let's create a Win Catalog based on the Empty App. Let's call it Wine Expert, start creating a structure and add content.
The starting page of the new Empty App is as follows:
The work area is divided into four parts:
- Work on the structure and content of the application: Content ;
- Next, two tabs are responsible for the appearance and style of the application: Themes and Tiles .
- Publish info contains preliminary settings for publishing an application in the Windows Store.
Work on content
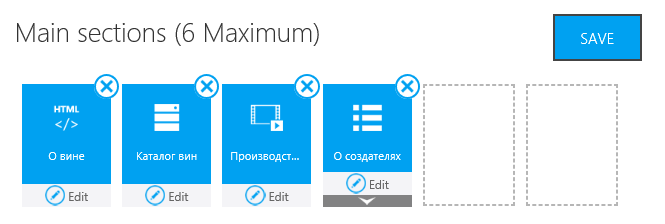
In the Content area, we define which pages the Wine Expert will consist of:
- About wine;
- Wine catalog;
- Wine production;
- About the creators.
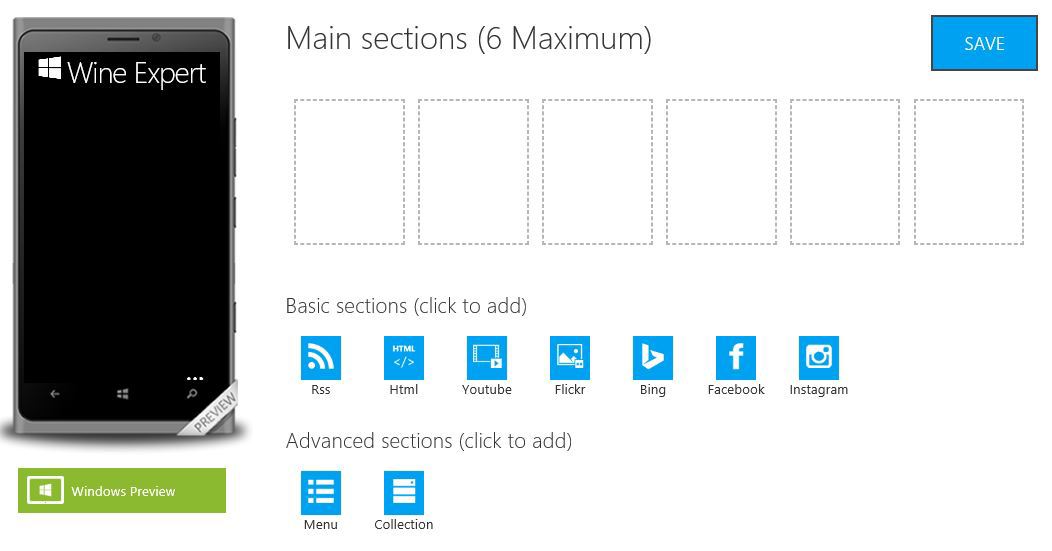
To create a structure, we use the set of blocks proposed by App Studio:

- The “About wine” page, if it contains the text as in this example, is most conveniently done using the “HTML” block:
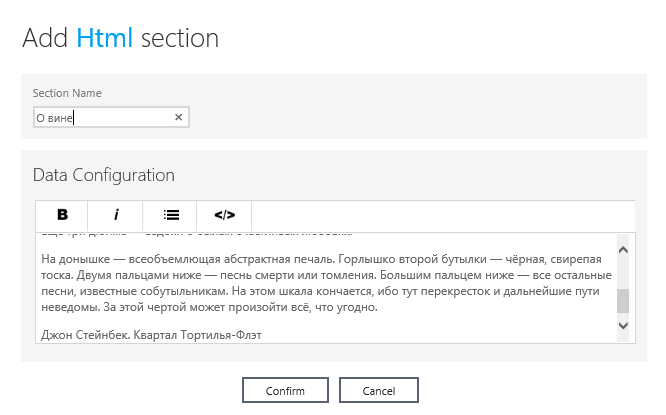
Text editing is available in both text mode and HTML editor, just click on the </> symbol. - Wine catalog is a “Collection” type block:
The data in the application can be of two types:- Static;
- Dynamic.
Static data is data that is in the application. An application with this data type does not require an internet connection. However, to update the static data, you have to completely update the entire application.
Dynamic data - data located in the cloud. To access them, you need an Internet connection, but when you update this data in the cloud, in the application, they will be updated automatically.
The process of filling in any of these data types in App Studio is the same, and Dynamic resources are suitable for the demonstration. The resource type can be changed until the data is filled.
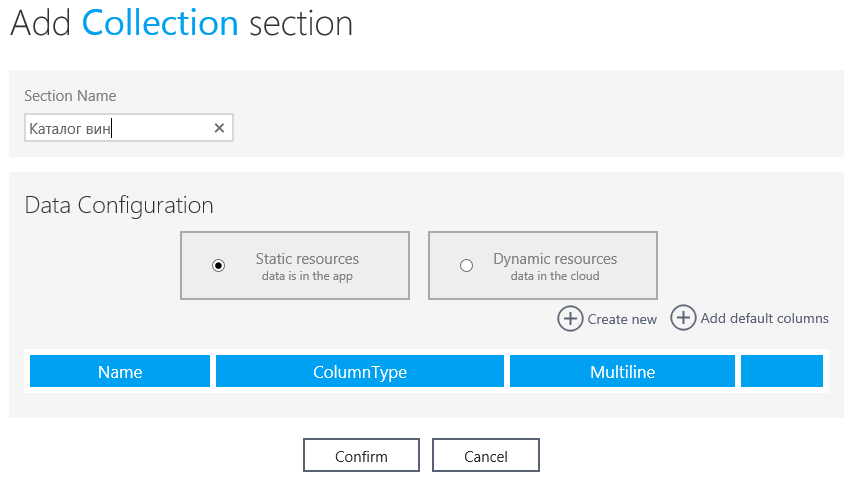
Let's design the database structure of our application. When you click on the “Add default columns” button, App Studio automatically adds the required and used data storage fields: Title, Subtitle, ImageUrl, Description.
I remove the SubTitle field and add my own, using the “Create new” button: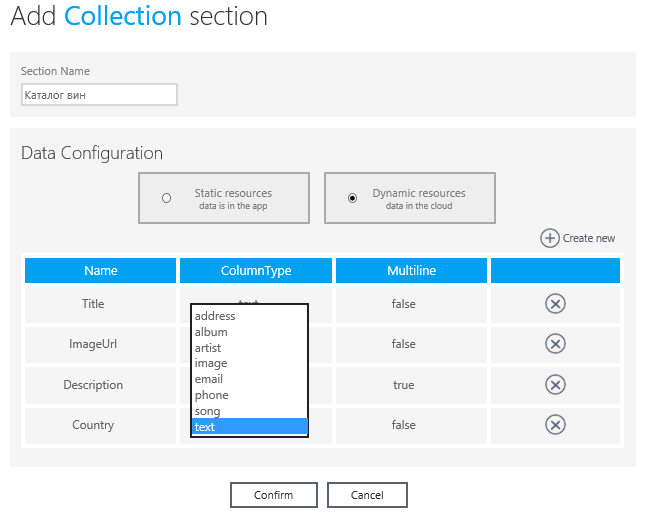
In the "ColumnType" select the field type - text. Boolean Multiline, allowing multi-line records, leave in false status.
This completes the process of creating the database structure of the application. And we proceed to its filling.
The “Confirm” button returns us to the “Content” workspace, where we observe all the pages that the application consists of: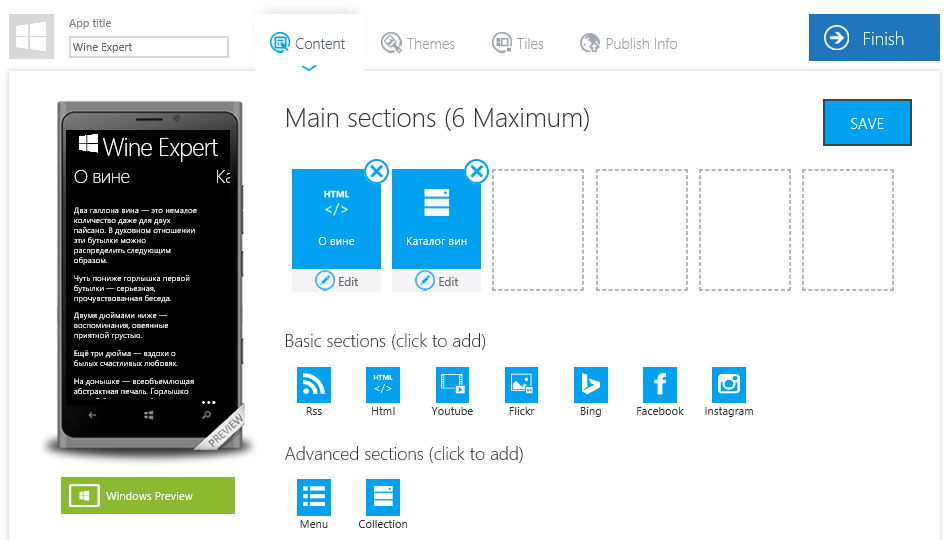
On the “Catalog of wines” block, press the “Edit” button and switch to the editing mode of this block:
This message appears in the browser when no changes are left on the page. In this case, click "Stay on this page", and then click "Save" in the upper right corner.
Repeat the action and get into the edit mode of the collection:
The Pages tab provides the ability to edit the display of data both on the page and when selecting a catalog item, as well as setting up the data sources corresponding to the fields of the application database - “Bindings”. The number of lines in “Bindings” depends on the selected display mode: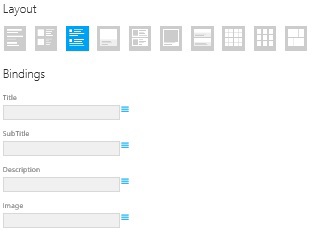
Configure these sources: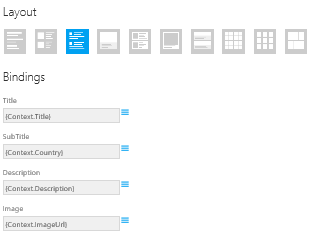
And switch to the edit mode display the selected item: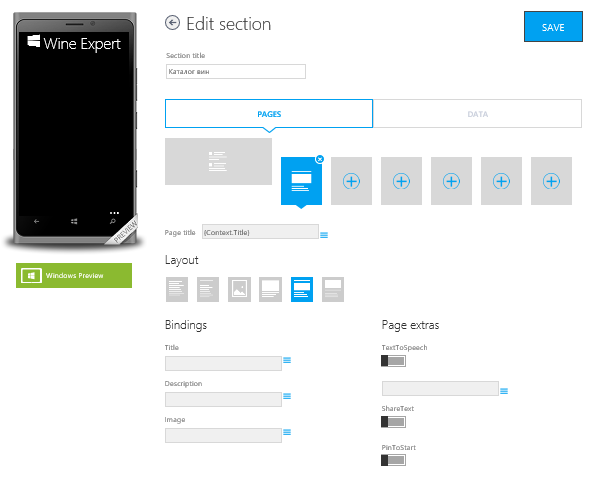
Here again, you need to configure the sources, but pay attention to the new settings - “Page extras”:- TextToSpeech will allow you to convert text to speech in order to listen to the text;
- ShareText will allow the app to share the selected item;
- PinToStart will allow you to fix your favorite article on the device start screen to provide quick access to it.
For these functions, you also need to select the content source: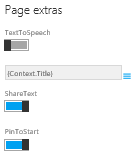
Do not forget about the "Save" button and look at the Data tab:
Already known database structure, ready for editing. We are interested in entering data into the application, click "Edit Data" and get to the next page: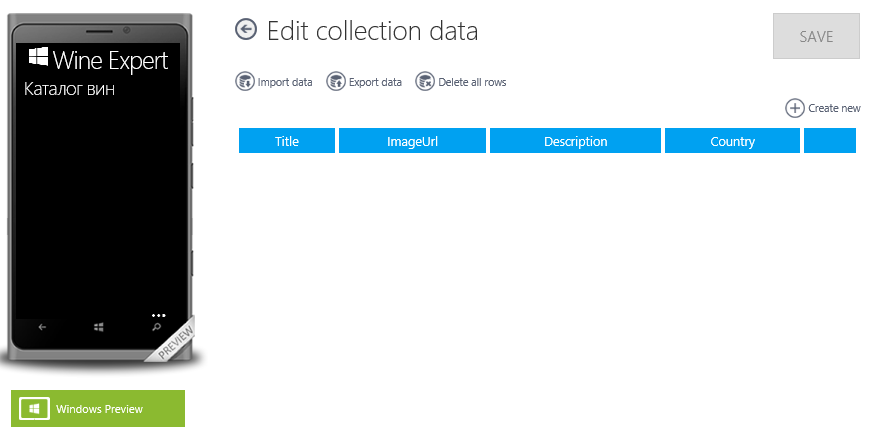
Data can be added to the manual, filling each line after its creation, using the "Create new". But we will use the built-in App Studio ability to load data using a file with the .csv extension “Import data”:
We warn the loader that our file was created without a header and you can download data from the first line.
It remains only to add pictures: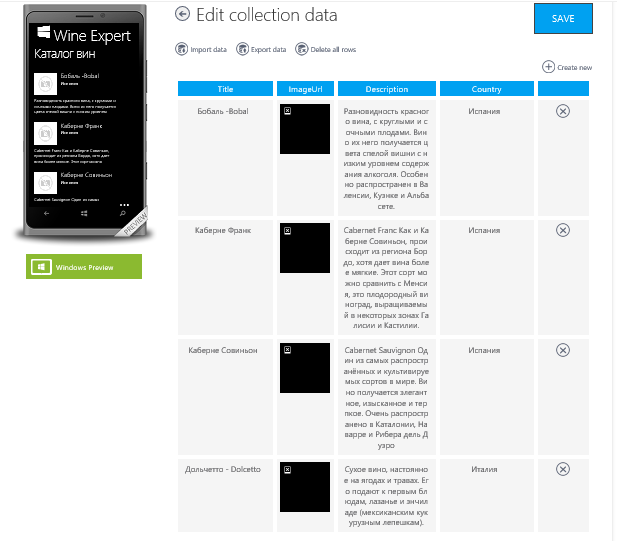
Pictures added, press the save button, return to the collection editing mode and look at the result: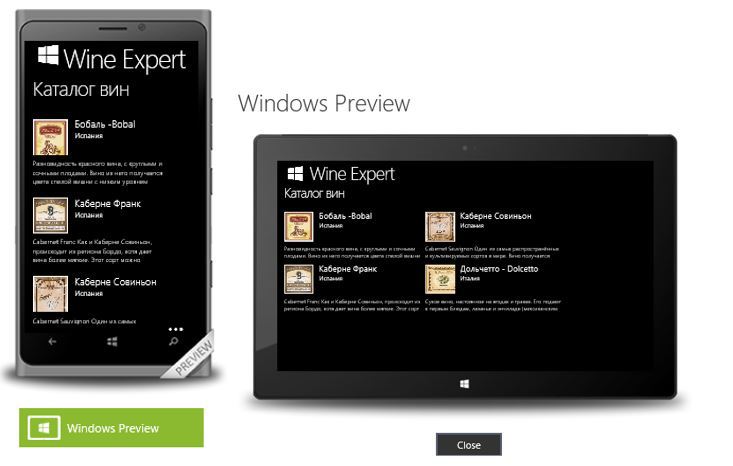
The preview mode of the application on the Windows platform is available by clicking on “ Windows Preview ”. - The “Wine production” page will contain a video of this process, in this case, select the YouTube type block:
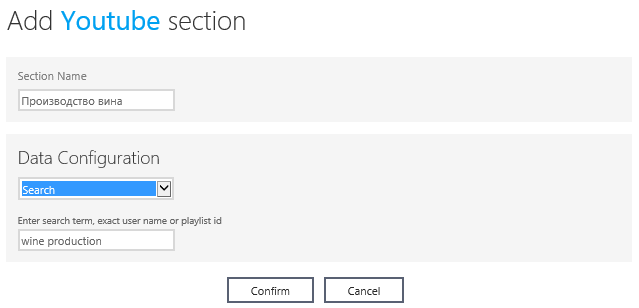
Specify the name of the page, further configure the parameters that are necessary to display the corresponding video on the page:- Search / User / Playlist - type of request by which the application will search for the video;
- " Wine production " - the content of the request.
Result - a page that displays a video from YouTube for a given search query:
- “About creators” - we will create this page using a block of the type “Menu”:
Two editing modes are available for this block:- Standard editing of the display of data on the page: the button "Edit";
- Editing menu items.
Editing menu items is an area in which you want to add the necessary elements: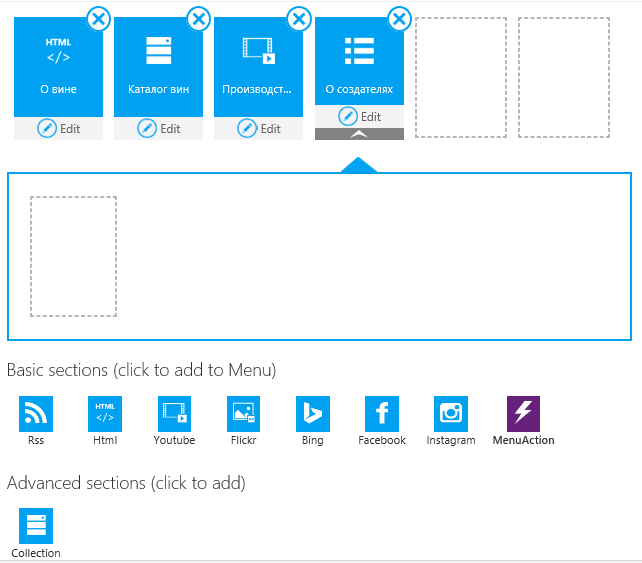
A “Menu” block can contain all the basic blocks, collections, as well as an element of the new “MenuAction” type: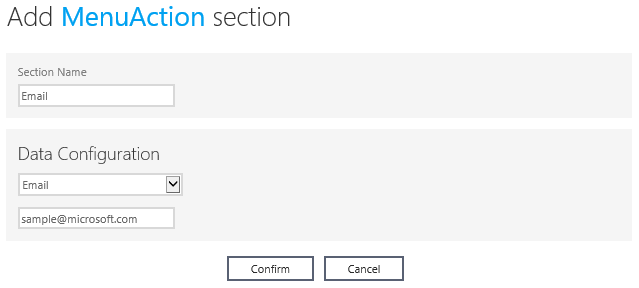
The action for which this item is responsible after editing is writing a letter through the applications available on the device:
The “MenuAction” setting also includes other actions: a phone call, switching to a specified page, etc.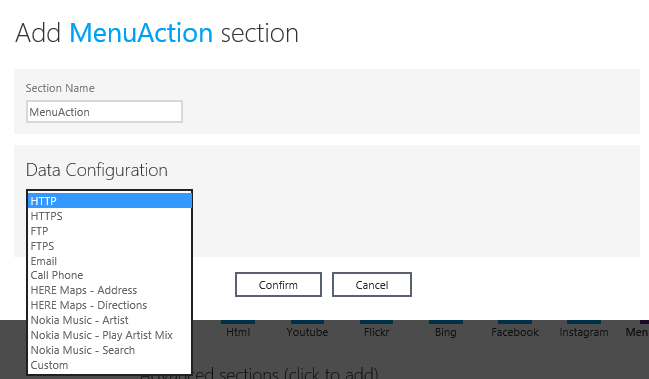
Add to the page “About creators” the phone and the filling of the application with content completed:
The design and style of the application

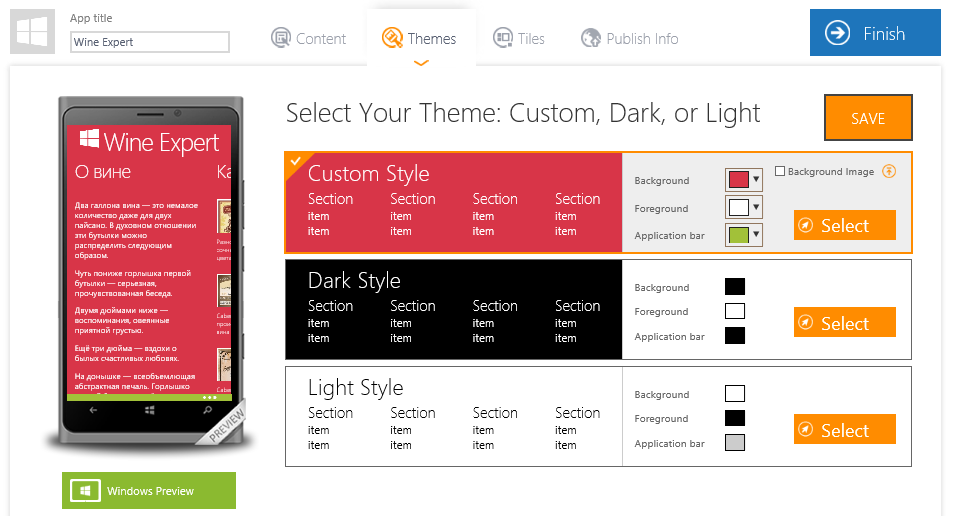
App studio in the Themes tab offers to customize the theme of the application:
- Standard: dark, light background;
- Background that the user prefers, including the ability to set the image as a “Background Image”.
Using Custom Style, you can also customize the text color and the standard Application bar of the application:
The Tiles tab makes out the appearance of the application on the start screen, the background image and the background image:
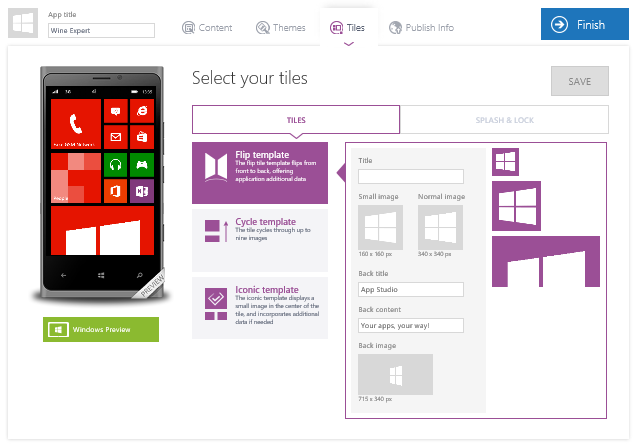
Set up the app tile on the start screen:
- Flip template - live tile;
- Cycle template - flipping of the specified collection from the application;
- Iconic template - one image of all three tile sizes.
For the wine catalog, select the Flip template and load the necessary images corresponding to the specified sizes:

In the upper left corner there is also an area for downloading the image, which will be displayed next to the application name, and fill it in:

On the Splash & Lock tab, we will perform the same actions with images:

Save the changes and go to the next step.
Setup of the application for the publication in Windows Store
Let us analyze what data “Publish info” requires from us, in order to prepare the publication of the application in the Windows Store, in addition to the understandable App title, App description and Language:
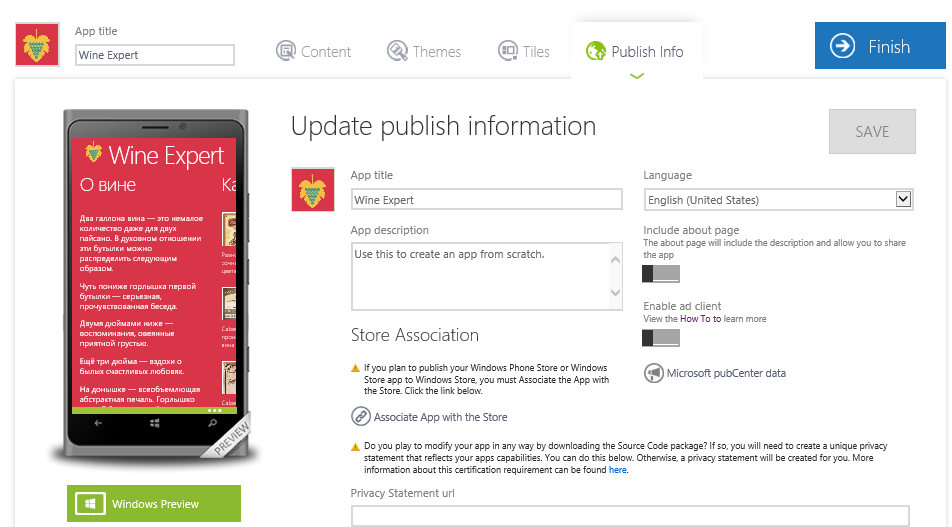
- Enable ad client - setting the display of advertising banners in the application;
Those who activate this setting must fill in the “Microsoft pubCenter data” data: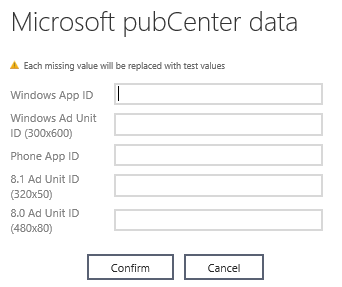
- Store Association
All applications created in App Studio can be published in the Windows Store, but the publication is available to those App Studio users who have a developer account in the Development Center .
One of the conditions for publishing an application to the Windows Store is that the application name (App Name) is reserved in the store before being published. Reserve the application name in the Development Center . For each reserved (registered) name the store will assign its “Package Identity”. The App Studio user needs to know this information, name and ID.
In order for App Studio to generate a special application package for publishing, you need to fill in the “Application manifest” - application manifest. For this, the “Associate App with the Store” setting is provided in “Publish Info”:

All data will find the Development Center :
- App Identity: open Store Dashboard, select or register an application there. Select Edit -> Select Services -> Live Services site. Then we see the necessary information “Application Identity” in the format “1234user.YourAppName”.
- App Display Name: This is the reserved name of the application in the store.
- Publisher ID: this information is listed in the developer’s “Account Profile” in the Developer Center, in the following format “CN = AAAAA-1111-2222-BBBBBBBBBB”.
- Publisher Name: the name with which the developer is registered in the Developer Center. Also available in the “Account Profile”.
Privacy statement url
Since the Windows Store works with personal data, you need to specify privacy policy information in each application. The privacy policy tells the user of the application how his data is used. Therefore, this clause should include a link to the privacy policy statement. More information about this privacy policy can be found here .
How to publish the application in Windows Store can be read here .
The final stage of working with the application
The application is ready - click "Finish":
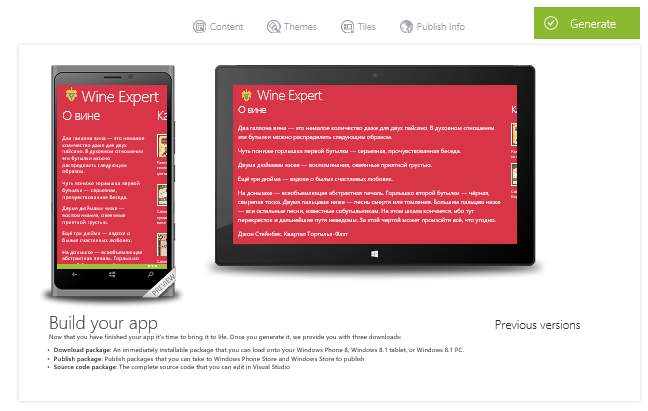
We get the ability to preview applications for any device.
The “Generate” function offers to choose for which platform you need to generate an application, choose Windows Phone 8.1 and Windows 8.1, which will allow you to create a new type of application - universal :
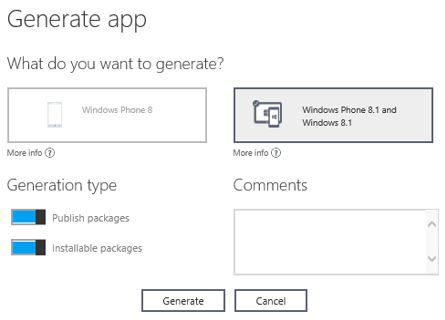
In the field “Generation type” we note that we need an application package for installation on the device and a package for publication. The source code of the application is generated by default.
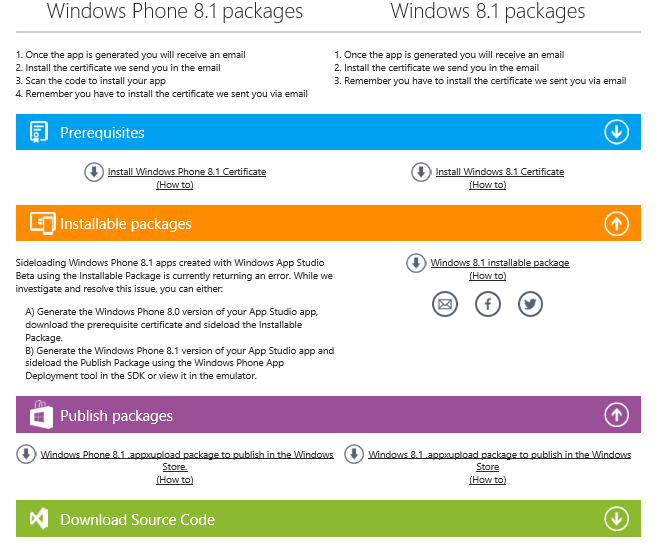
So, now we can download all the materials provided by App Studio to work with the created application.
Install the application on the device
An application created using App Studio can be installed on the device directly, outside of the Windows Store, thanks to the generated package “Installable packages”.
What you need for this:
- Install the certificate on the device:
- Download the installation package for the certificate provided in App Studio depending on the device (PC, tablet, phone);
- Run the file with the .cer extension (during installation, select Local machine, Place all certificates in the following store: Trusted Root certification Authorities).
- Install the application on the device:
- Download Installable packages;
- Find the file Add-AppDevPackage1.ps1, right-click to run “Run with PowerShell”.
Access app data in the cloud
To add, delete, or edit dynamic data of a published application, you need to access the corresponding application in the Dashboard list in the Development Center. Open the collection and make all necessary changes. The application will update automatically.
Developer Opportunities
App Studio can be useful for a professional developer in that it provides the source code of the application.

It can also be convenient for the developer to create the structure of his application with the help of this tool, and then using Visual Studio 2013 (Update 2) to finalize it, without wasting time writing the basic elements.
Conclusion
In order to create an application in App Studio does not require programming knowledge, in addition, creating an application and getting its source code is completely free.
Developers will also be interested in using the new tool, for example, to reduce the time to develop the basic structure of the application.
useful links
Windows App Studio Tool
Microsoft Virtual Academy (MVA) training courses: Building Windows and Windows Phone 8.1 applications in App Studio
Download free or trial Visual Studio 2013
Windows Development Center
How to publish an application in the Windows Store
Download sample application from this article.
Source: https://habr.com/ru/post/233831/
All Articles