How-to: Expand Oracle Real Application Cluster 11g on VirtualBox

1. Background
Our company is engaged in serial production of equipment for purely peaceful purposes and all related information from the production is written to the Oracle database, which is located on a virtual server running VMware ESX . And everything seems to be adjusted, the pipeline is working, data is being written, the finished product is being shipped.
But the rack, on which, in addition to the database server, is still based on a bunch of some incomprehensible servers, sometimes has the amazing property of falling. Yes, and from the database at one point, anything can happen. Of course, the first thing that comes to mind is a competent database backup organization or VMware spapshot creation. However, all these actions, in case of equipment failure, do not allow for continuous operation of the database and the entire pipeline, respectively. In general, I wanted to try out other solutions.
')
When the IT department once again held a meeting on this issue, it was decided to try the idea to raise the Oracle Real Application Cluster and deploy a production database on it. The only problem was that no one at that time knew how to do it.
Before purchasing hardware and deploying new servers, it was decided to test the selected technology locally using VM VirtualBox . After several weeks, smoothly moving into the months, searching and digesting the necessary information as air, the cluster was finally launched, and one could proceed to the first tests. And so, anyone who wants to raise the n -nodovy ( n> = 2 ) cluster, welcome under cat.
2. Software
At first, I would like to announce the entire list of software that was used to build the cluster:
- Oracle VM VirtualBox. At the time of this writing, the latest version for Windows was 4.3.14. You can download it here ;
- Oracle Linux Server 6.5 for x86-64. The nodes of the future cluster will be deployed on this axis;
- Oracle Grid Infrastructure 11g Release 2 (11.2.0.3.0) for Linux x86-64;
- Oracle Database 11g Release 2 (11.2.0.3.0) for Linux x86-64;
- CentOS 6.4 or any other axis for DNS server.
3. Description of cluster infrastructure
Our cluster will consist of 3 virtual machines: on the first 2 nodes of the cluster will be located directly, and the 3rd will be used as a DNS server. 5 VDI ( Virtual Disk Image ) created in a special way will be simultaneously connected to all the nodes of the cluster. A disk group will be created from these disks to store Oracle database data.
Sketch a diagram of how this should look like: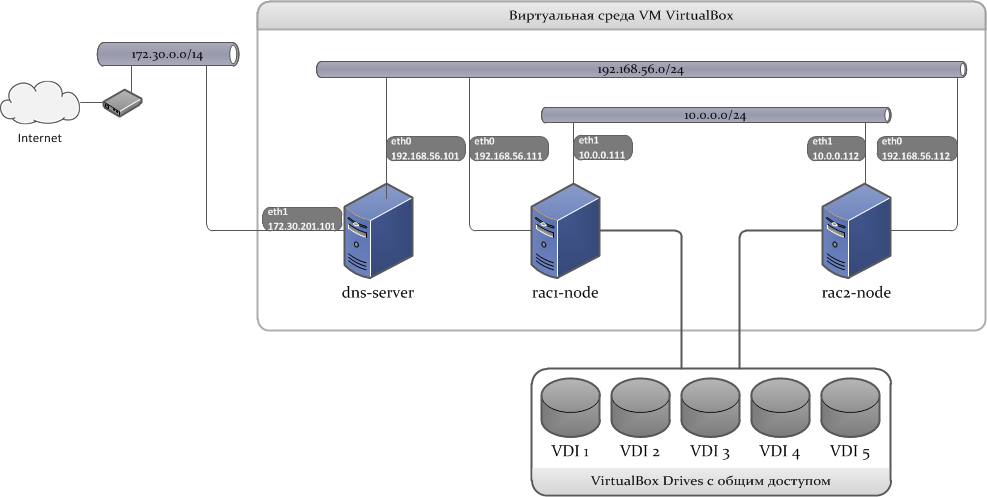
3.1 Network infrastructure
To build a cluster, 3 subnets will be used:
- LAN 1: external network interface, used to connect clients to the database;
- LAN 2: internal network interface for interconnect;
- LAN 3: An external network with Internet access, necessary for installing and updating packages during the installation phase.
Next we need the network addresses that the cluster will use. How and where to set them, I will tell later.
Here are the addresses that will be involved in the cluster.
* IP addresses of virtual host adapters;
** IP address of the gateway used by the host;
*** IP addresses of external DNS servers.
| SERVER NAME | LAN 1 (192.168.56.0/24) | LAN 2 (10.0.0.0/24) | LAN 3 (172.30.0.0/14) | |
| dns-server | Device | eth0 | eth1 | |
| IP Address | 192.168.56.101 | 172.30.201.101 * | ||
| Network mask | 255.255.255.0 | 255.255.0.0 | ||
| Gateway | 192.168.56.1 * | 172.30.0.1 ** | ||
| DNS | 127.0.0.1 | 172.30.1.3 *** 172.30.1.8 *** | ||
| rac1-node | Device | eth0 | eth1 | |
| IP Address | 192.168.56.111 | 10.0.0.111 | ||
| Network mask | 255.255.255.0 | 255.255.255.0 | ||
| Gateway | 192.168.56.101 | 10.0.0.1 * | ||
| DNS | 192.168.56.101 | |||
| rac2-node | Device | eth0 | eth1 | |
| IP Address | 192.168.56.112 | 10.0.0.112 | ||
| Network mask | 255.255.255.0 | 255.255.255.0 | ||
| Gateway | 192.168.56.101 | 10.0.0.1 * | ||
| DNS | 192.168.56.101 | |||
* IP addresses of virtual host adapters;
** IP address of the gateway used by the host;
*** IP addresses of external DNS servers.
In addition, we still need SCAN (Single Client Access Name) and VIP addresses .
SCAN addresses. With this technology, all clients are configured to access the same service name, which can be resolved to multiple IP addresses using a DNS server, each of which has a public LISTENER hanging on it. The number of SCAN addresses is determined by the expression n + 1 , where n is the number of nodes of the cluster:
192.168.56.121 192.168.56.122 192.168.56.123 VIP addresses. These are logical network addresses assigned to nodes on external network interfaces. As soon as some cluster node becomes unavailable, the other node in the cluster should,
192.168.56.113 192.168.56.114 3.2 Disk subsystem
The operation of Oracle Grid Infrastructure requires total disk space available for all nodes of the cluster. There are two options for organizing such storage: it is Oracle Automatic Storage Management ( Oracle ASM ) and Shared File System . When using the second option, everything is quite simple: on a separate server, NFS-balls are created, which are mounted on each node of the cluster (additional mounting options are needed), the storage itself is configured.
The following actions are not useful to us, but if suddenly, then ...
Mounting NFS balls for Shared File System :
Open
# mkdir -p /st_nfs0 # mkdir -p /st_nfs1 # mkdir -p /st_nfs2 Open
/etc/fstab and add entries: storage-server:/mnt/nfs0 /st_nfs0 nfs bg,intr,noac,acregmin=0,acregmax=0,acdirmin=0,acdirmax=0 0 0 storage-server:/mnt/nfs1 /st_nfs1 nfs bg,intr,noac,acregmin=0,acregmax=0,acdirmin=0,acdirmax=0 0 0 storage-server:/mnt/nfs2 /st_nfs2 nfs bg,intr,noac,acregmin=0,acregmax=0,acdirmin=0,acdirmax=0 0 0 ASM is a new way to manage storage, which is the basis of the database. Built into the Oracle Database kernel, it provides file system and volume manager integration for database files. Starting with version 11gR2, ASM implements the ASM Cluster File System and ASM Dynamic Volume Manager . These ASM capabilities are an alternative to third-party file system and volume management solutions for databases and applications, for tasks such as creating and deploying databases, managing space on disks, placing executable application files, and other similar tasks.
Despite the complexity of implementation, we stop the choice on Oracle ASM. This ends the theory and proceeds to install the software.
4. Install Oracle VM VirtualBox
At the stage of installing VBox there is nothing difficult. The only thing I would like to note, after installing VBox, add the installation path to the
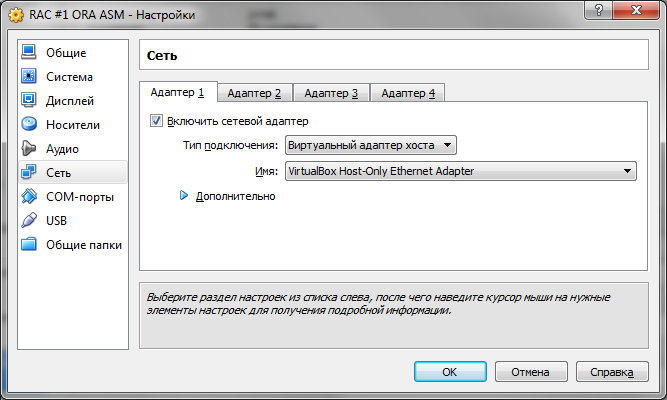
Path variable in the list of system variables. In the future it will be very useful to us.In the next step, we need to add and configure virtual host adapters. By default, the VBox creates one adapter named
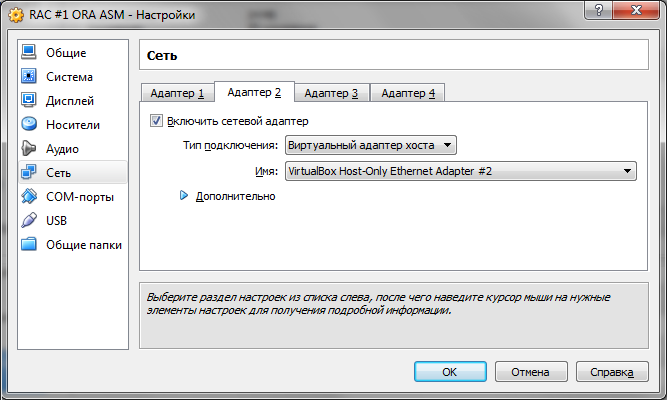
VirtualBox Host-Only Ethernet Adapter . Using the program menu, create another adapter named VirtualBox Host-Only Ethernet Adapter #2 .Properties of PTC / IPv4 adapter:
Next, go to Control Panel \ Network and Internet \ Network Connections, and in the properties of the PTC / IPv4 adapter, write the following:
VirtualBox Host-Only Ethernet Adapter: IP Address: 192.168.56.1 Mask: 255.255.255.0 VirtualBox Host-Only Ethernet Adapter #2 IP Address: 10.0.0.1 Mask: 255.255.255.0 This completes the VBox configuration, you can proceed to the creation of a VM.
5. Setup and configuration of the DNS server
As the distribution kit for the future DNS server, I chose the one that first came into view. It turned out to be the CentOS 6.4 x86_64 distribution kit.
5.1 VM Configuration
Here are my settings: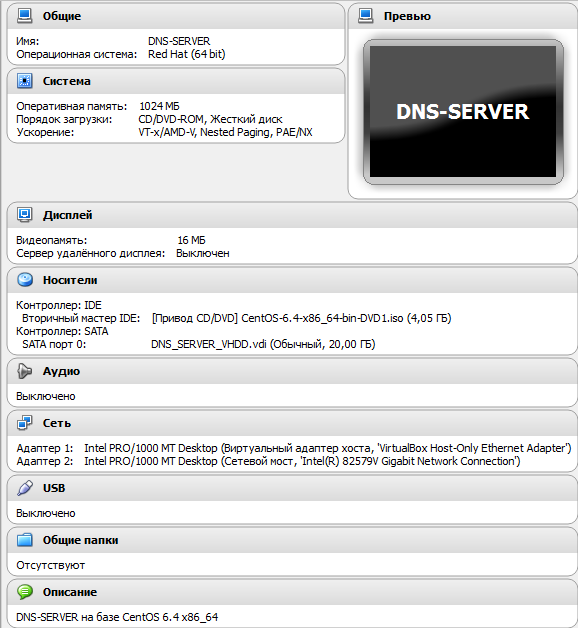
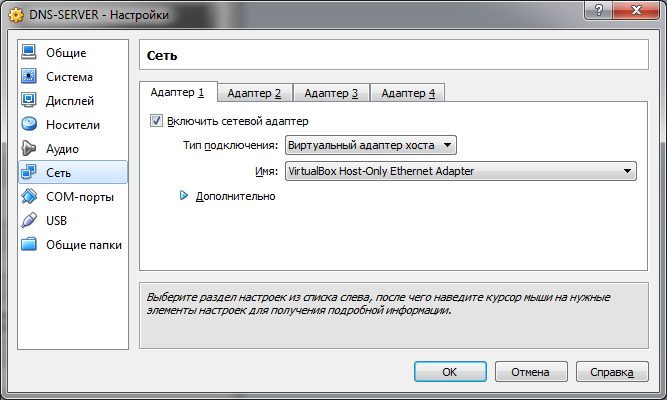
On the Network tab, select the Virtual Host Adapter as the 1st adapter:
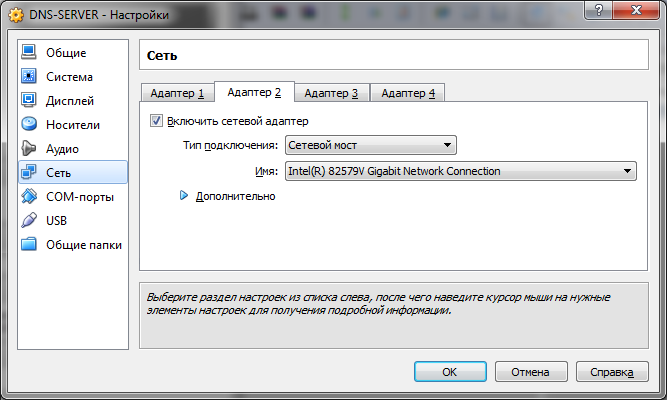
2nd adapter - Network bridge (you can use NAT) with an adapter that looks to the external network:
On the Network tab, select the Virtual Host Adapter as the 1st adapter:
2nd adapter - Network bridge (you can use NAT) with an adapter that looks to the external network:
5.2 Installing the OS
Detailed process
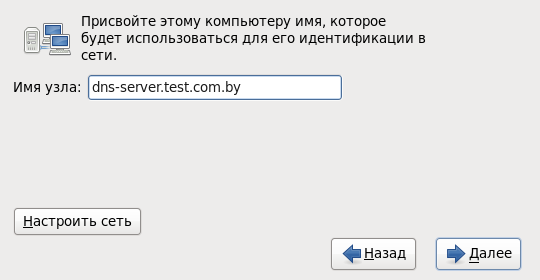
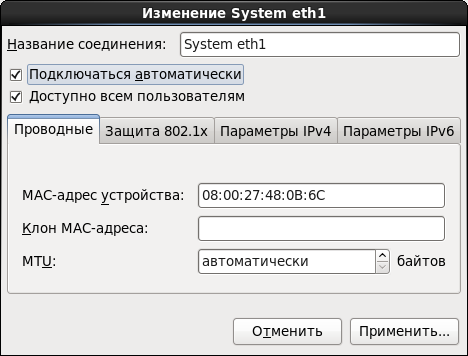
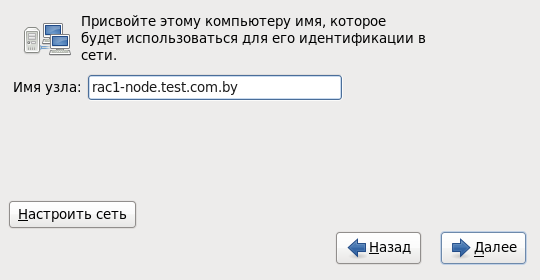
Go to the OS installation. Set our server name:
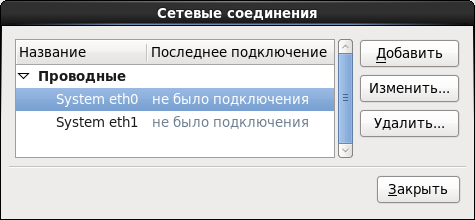
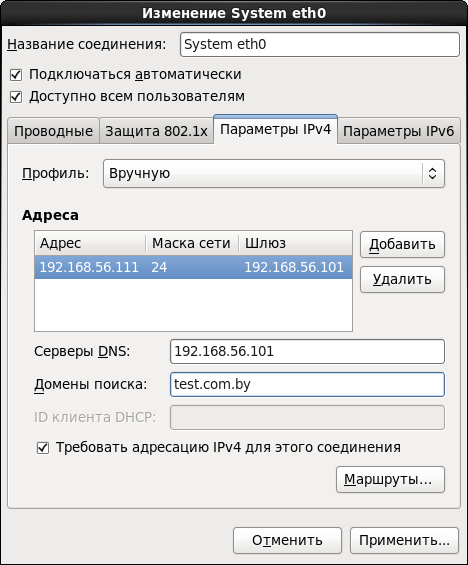
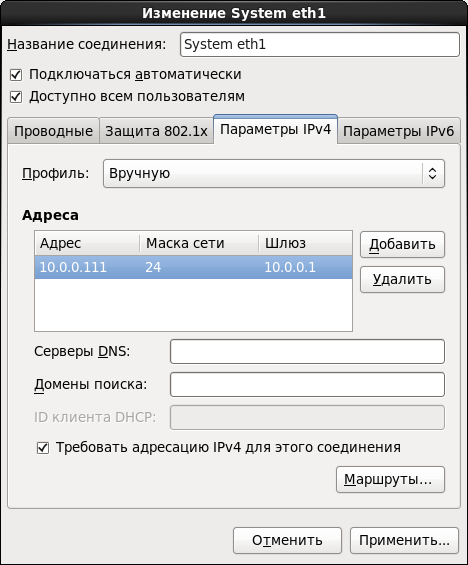
Immediately click Configure network and alternately set parameters for both adapters:
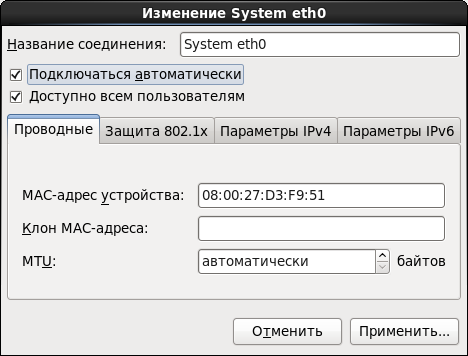
Set the option Connect automatically . Otherwise, every time after restarting the machine, the network will have to be turned on manually:
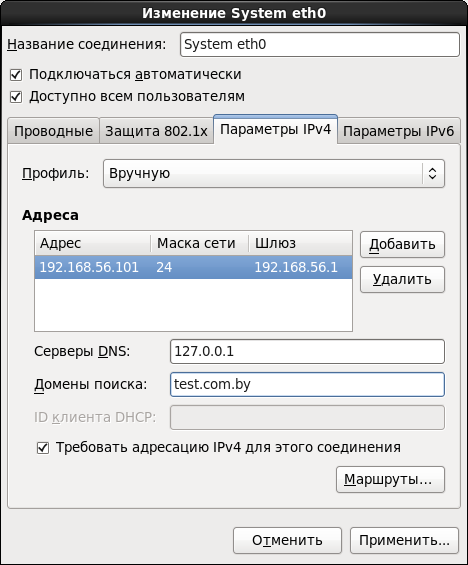
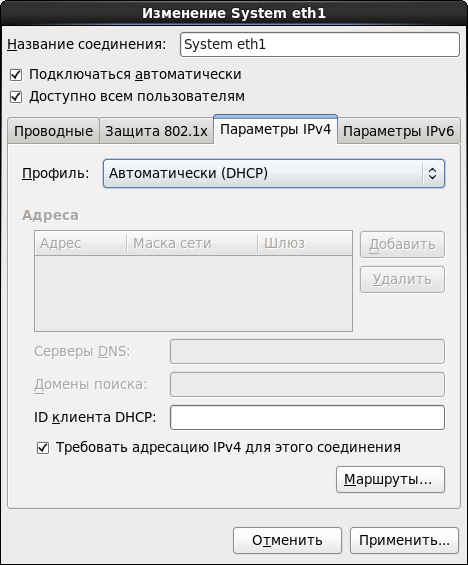
Set IPv4 options:
Similarly, we do everything for the 2nd interface:
If the external network has its own DHCP server, or you chose NAT, then the IPv4 parameters can be not configured:
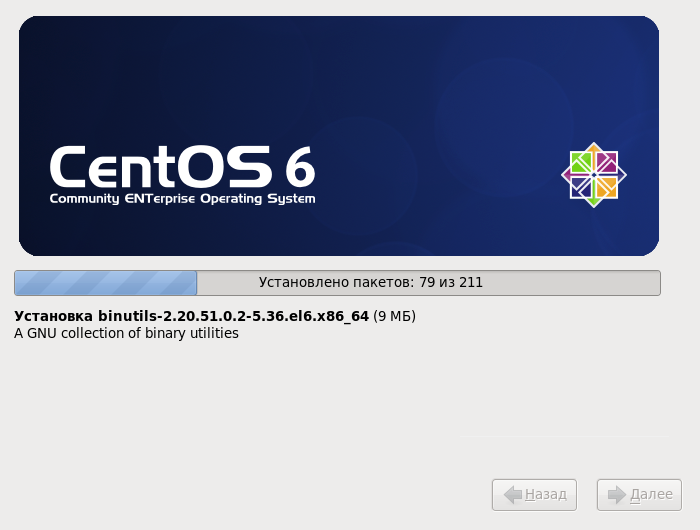
We choose the minimum installation - this will be quite enough for our server:

We are waiting,fingers crossed , the end of the installation:
dns-server.test.com.by :Immediately click Configure network and alternately set parameters for both adapters:
Set the option Connect automatically . Otherwise, every time after restarting the machine, the network will have to be turned on manually:
Set IPv4 options:
Similarly, we do everything for the 2nd interface:
If the external network has its own DHCP server, or you chose NAT, then the IPv4 parameters can be not configured:
We choose the minimum installation - this will be quite enough for our server:
We are waiting,
5.3 BIND configuration
Before starting the further configuration of the system, in order to avoid the questions “Well, I think I did everything correctly, why it doesn’t work?” , I recommend to turn off the Firewall for a while.
Check the status:
# service iptables status And disable:
# service iptables stop # chkconfig iptables off We will use BIND as the DNS server.
# yum install named Next, you need to edit the
named.conf file: # nano /etc/named.conf * IMHO, for these purposes it is best to use Midnight Commander or WinSCP.
Here is what we should have at the exit:
// named.conf logging { channel "xfer" { file "/var/log/named/xfer.log" versions 3 size 10m; print-time yes; print-severity yes; severity info; }; channel "lame" { file "/var/log/named/lamers.log" versions 2 size 10m; print-time yes; print-severity yes; severity info; }; channel "config" { file "/var/log/named/conf.log" versions 3 size 10m; print-time yes; print-severity yes; severity info; }; channel "security" { file "/var/log/named/security.log" versions 3 size 10m; print-time yes; print-severity yes; severity info; }; category "xfer-in" { "xfer"; }; category "xfer-out" { "xfer"; }; category "notify" { "xfer"; }; category "lame-servers" { "lame"; }; category "config" { "config"; }; category "security" { "security"; }; category "default" { "default_syslog"; "default_debug"; }; }; acl "test_net" { localhost; 192.168.56.0/24; }; options { directory "/var/named"; dump-file "/var/named/data/cache_dump.db"; statistics-file "/var/named/data/named_stats.txt"; memstatistics-file "/var/named/data/named_mem_stats.txt"; version "DNS Server"; allow-recursion { test_net; }; allow-query { test_net; }; forwarders { 172.30.1.3; 172.30.1.8; }; forward only; listen-on port 53 { localhost; 192.168.56.101; }; ### Master DNS IP ### dnssec-enable no; dnssec-validation no; dnssec-lookaside auto; /* Path to ISC DLV key */ bindkeys-file "/etc/named.iscdlv.key"; managed-keys-directory "/var/named/dynamic"; }; zone "." IN { type hint; file "named.ca"; }; zone"test.com.by" IN { type master; file "forward.test"; allow-update { none; }; }; zone"56.168.192.in-addr.arpa" IN { type master; file "reverse.test"; allow-update { none; }; }; include "/etc/named.rfc1912.zones"; include "/etc/named.root.key"; Creating report files:
# cd /var/named/chroot/var/log/named # touch conf.log # touch lamers.log # touch security.log # touch xfer.log Recursively assign access rights to the entire directory:
# cd /var/named/chroot/var/log # chmod 750 -R named # chown -R named:named named To create a direct zone, go to the directory:
# cd /var/named and create the
forward.test file: # touch forward.test # chmod 750 forward.test # chown named:named forward.test The contents of the file direct zone:
$TTL 86400 @ IN SOA dns-server.test.com.by. root.test.com.by. ( 2011071001 ;Serial 3600 ;Refresh 1800 ;Retry 604800 ;Expire 86400 ;Minimum TTL ) @ IN NS dns-server.test.com.by. @ IN A 192.168.56.101 @ IN A 192.168.56.111 @ IN A 192.168.56.112 @ IN A 192.168.56.113 @ IN A 192.168.56.114 dns-server IN A 192.168.56.101 rac1-node IN A 192.168.56.111 rac2-node IN A 192.168.56.112 rac1-node-vip IN A 192.168.56.113 rac2-node-vip IN A 192.168.56.114 rac1-node-priv IN A 10.0.0.111 rac2-node-priv IN A 10.0.0.112 rac-scan IN A 192.168.56.121 rac-scan IN A 192.168.56.122 rac-scan IN A 192.168.56.123 Similarly, we create a
reverse.test file for the reverse zone.with this content:
$TTL 86400 @ IN SOA dns-server.test.com.by. root.test.com.by. ( 2011071001 ;Serial 3600 ;Refresh 1800 ;Retry 604800 ;Expire 86400 ;Minimum TTL ) @ IN NS dns-server.test.com.by. @ IN PTR test.com.by. grid-server IN A 192.168.56.101 rac1-node IN A 192.168.56.111 rac2-node IN A 192.168.56.112 rac1-node-vip IN A 192.168.56.113 rac2-node-vip IN A 192.168.56.114 101 IN PTR dns-server.test.com.by. 111 IN PTR rac1-node.test.com.by. 112 IN PTR rac2-node.test.com.by. 113 IN PTR rac1-node-vip.test.com.by. 114 IN PTR rac2-node-vip.test.com.by. We set the
named daemon to autorun and start: # chkconfig named on # service named start If everything is done correctly, then the daemon successfully starts with the message:
named: [ OK ] Testing:
Please note: for each new attempt to pinganut
# ping rac-scan PING rac-scan.test.com.by (192.168.56.121) 56(84) bytes of data. From server-manager (192.168.56.101) icmp_seq=1 Destination Host Unreachable # ping rac-scan PING rac-scan.test.com.by (192.168.56.122) 56(84) bytes of data. From server-manager (192.168.56.101) icmp_seq=1 Destination Host Unreachable # ping rac-scan PING rac-scan.test.com.by (192.168.56.123) 56(84) bytes of data. From server-manager (192.168.56.101) icmp_seq=1 Destination Host Unreachable # ping rac1-node PING rac1-node (192.168.56.111) 56(84) bytes of data. From server-manager (192.168.56.101) icmp_seq=1 Destination Host Unreachable # ping rac2-node PING rac2-node (192.168.56.112) 56(84) bytes of data. From server-manager (192.168.56.101) icmp_seq=2 Destination Host Unreachable # ping habrahabr.ru PING habrahabr.ru (212.24.44.141) 56(84) bytes of data. 64 bytes from habrahabr.ru (212.24.44.141): icmp_seq=1 ttl=128 time=30.95 ms 64 bytes from habrahabr.ru (212.24.44.141): icmp_seq=1 ttl=128 time=28.03 ms 64 bytes from habrahabr.ru (212.24.44.141): icmp_seq=1 ttl=128 time=24.71 ms Please note: for each new attempt to pinganut
rac-scan , the server returns a new IP address in a circle. This completes the DNS server configuration. More details about setting up BIND can be found here .6. Preparing to install the GRID infrastructure
So! Now we are close to the creation of a node cluster. This clause describes an example of preparing the first node of the cluster to install the GRID infrastructure.
In order to prepare the next node for the cluster, it is necessary to repeat paragraphs 6.1 - 6.3 .
* If you previously worked with VBox, then you can prepare one node, and then create its clone (army of clones).
6.1 VM Configuration
VM settings for node: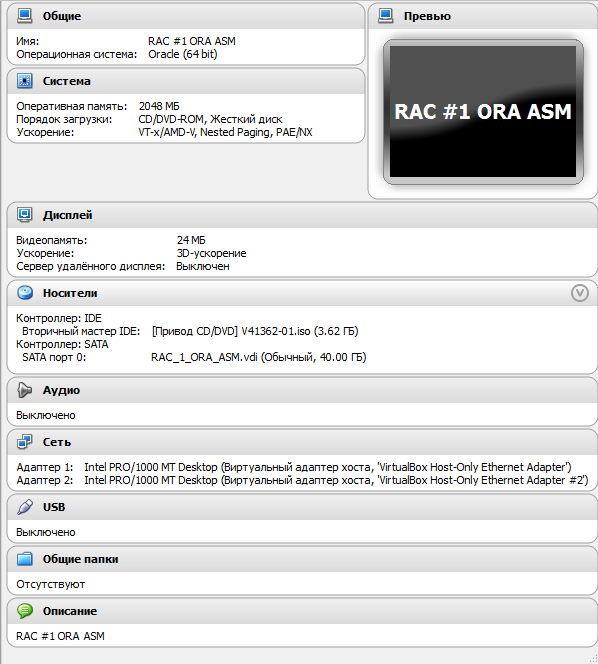
On the Network tab, as the 1st adapter, select the VirtualBox Host-Only Ethernet Adapter virtual host adapter:
For the second adapter, select the VirtualBox Host-Only Ethernet Adapter # 2 :
On the Network tab, as the 1st adapter, select the VirtualBox Host-Only Ethernet Adapter virtual host adapter:
For the second adapter, select the VirtualBox Host-Only Ethernet Adapter # 2 :
6.2 OS Installation
Detailed process
Run the installation of Oracle Linux. Select Install or upgrade an existing system :

Choosing a native installation language:

But the keyboard layout is better to leave the default.

Choose a standard type of drives:

Assign a name for the first node of the cluster:
System eth0 :

System eth1 :

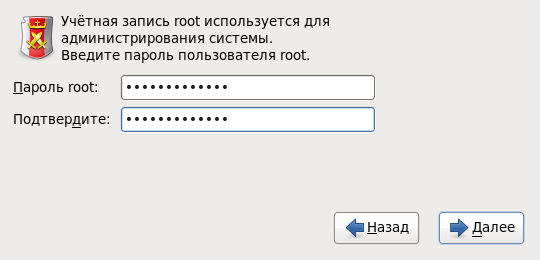
We set the password for the super user
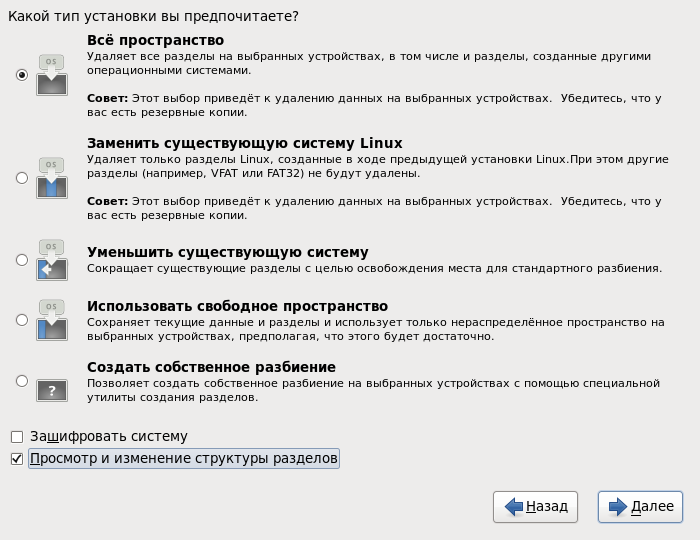
Further, when selecting the type of installation, specify the All space and be sure to check the View and change the section structure :
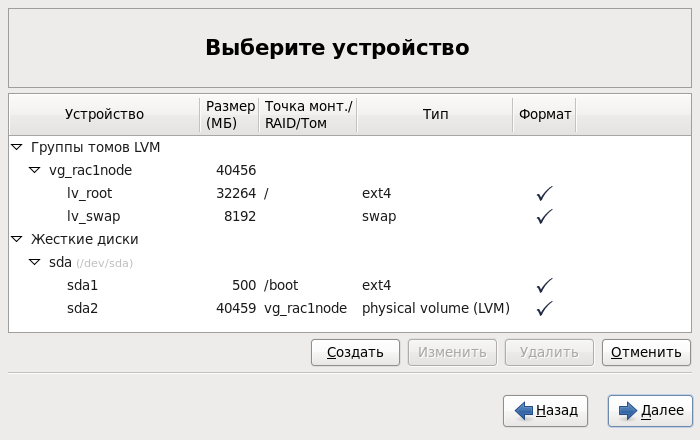
In the next step, the system will automatically create a partition. Everything seems to be good here, but there is one thing: during automatic splitting, the size of the swap is set approximately equal to the amount of allocated RAM. So, when installing Oracle GRID, it is very much “swearing” at the value of this parameter. When the amount of RAM is 2 Gb, it will require a swap size of at least 3.8 Gb. I decided to play it safe and set the value to 8 Gb. To do this, you first need to reduce the size of the logical volume
Select the type of Desktop installation (you can use the Database Server ) and check the Configure now item to change the package set :

In the next step, go to the Databases tab and clear all checkboxes if they are set :

Next, the package installation will begin, after which you will be asked to reboot the system. Next you need to create a user
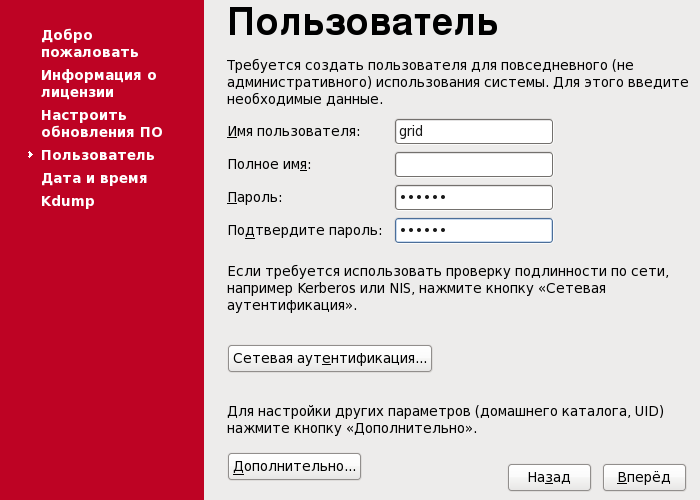
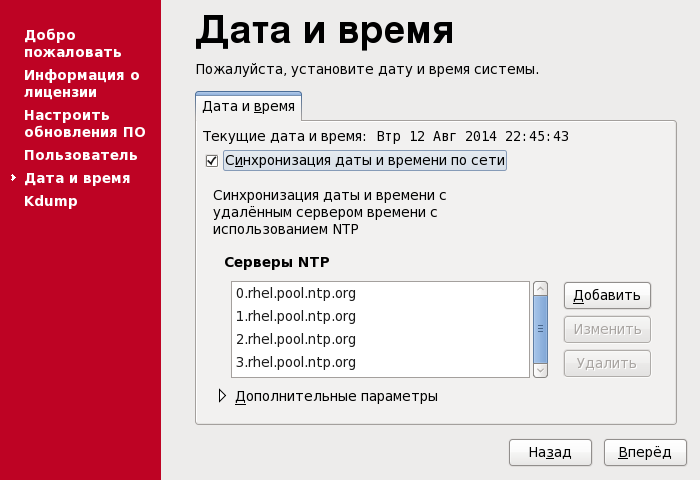
Turn on time synchronization. If your network has an NTP server, you can specify it in the server list:
At this step, the installation is complete, we reboot the system. Then you can proceed to further configuration.
Choosing a native installation language:
But the keyboard layout is better to leave the default.
Choose a standard type of drives:
Assign a name for the first node of the cluster:
rac1-node.test.com.by and proceed to the configuration of network connections:System eth0 :
System eth1 :
We set the password for the super user
root :Further, when selecting the type of installation, specify the All space and be sure to check the View and change the section structure :
In the next step, the system will automatically create a partition. Everything seems to be good here, but there is one thing: during automatic splitting, the size of the swap is set approximately equal to the amount of allocated RAM. So, when installing Oracle GRID, it is very much “swearing” at the value of this parameter. When the amount of RAM is 2 Gb, it will require a swap size of at least 3.8 Gb. I decided to play it safe and set the value to 8 Gb. To do this, you first need to reduce the size of the logical volume
lv_root , and then increase the size of the lv_swap due to the free space. It should end up with something like this:Select the type of Desktop installation (you can use the Database Server ) and check the Configure now item to change the package set :
In the next step, go to the Databases tab and clear all checkboxes if they are set :
Next, the package installation will begin, after which you will be asked to reboot the system. Next you need to create a user
grid . Under it will be the further installation of Oracle GRID:Turn on time synchronization. If your network has an NTP server, you can specify it in the server list:
At this step, the installation is complete, we reboot the system. Then you can proceed to further configuration.
6.3 OS Configuration
All operations in this subsection are performed as
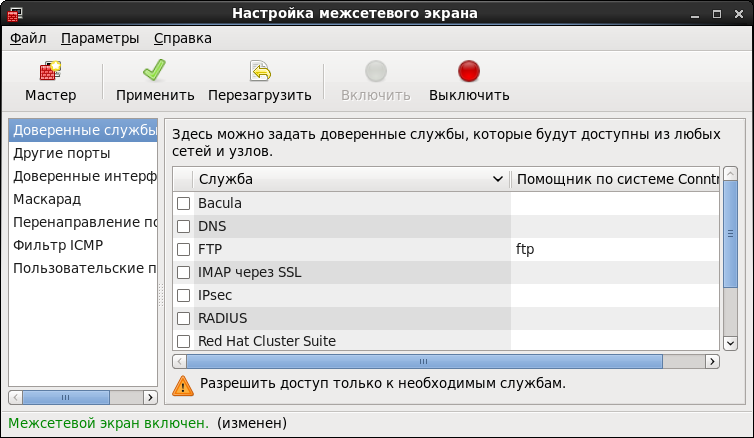
root !Security Settings:
After installing the OS, first of all turn off the Firewall . At this step, you can use the GUI. To do this, select System - Administration - Firewall . Click Turn Off and Apply :
Further, it is recommended to disable SELinux by setting the value of the
Further, it is recommended to disable SELinux by setting the value of the
SELINUX=disabled variable in the /etc/selinux/config file.Create a group of the same name and a user from which we will install the Oracle Database :
# groupadd -g 501 oracle # useradd -g oracle -u 501 -d /home/oracle -p ****** oracle Create additional groups:
# groupadd -g 502 dba # groupadd -g 503 asmdba # groupadd -g 504 asmoper # groupadd -g 505 asmadmin Add user
gridin groups:
# usermod -g dba grid # usermod -a -G grid grid # usermod -a -G disk grid # usermod -a -G asmdba grid # usermod -a -G asmoper grid # usermod -a -G asmadmin grid For user
oracledoing the same procedure:
# usermod -g dba oracle # usermod -a -G oracle oracle # usermod -a -G asmdba oracle # usermod -a -G asmoper oracle # usermod -a -G asmadmin oracle On the host, share the directory where the unpacked installer for Oracle Database 11g Release 2 for Linux is located . Mount the ball:
# mkdir -p /media/ora_linux # mount -t cifs "//192.168.56.1/ora_linux" /media/ora_linux -o username="vasya_pupkin",password="********",iocharset=utf8,file_mode=0777,dir_mode=0777 Install additional packages. In fact, I hurried a little and moved this item here, because I already know exactly which packages I would not have enough for complete happiness. If you plan to use,
Go to the directory
/media/ora_linux/grid/rpm andwe start installation of packages:
# yum install ./cvuqdisk-1.0.9-1.rpm # yum install bind-utils # yum install compat-libcap1-1.10 # yum install compat-libstdc++-33 # yum install libstdc++-devel # yum install gcc-c++ # yum install ksh-20100621 # yum install libaio-devel # yum install oracleasm # yum install oracleasm-support For the subsequent installation of Oracle GRID and Database
create a directory structure:
# mkdir -p /u01/app/grid # mkdir -p /u01/app/oracle # chown grid:dba /u01/app/grid # chown oracle:dba /u01/app/oracle # mkdir -p /u01/app/11.2.0/grid # chown grid:dba /u01/app/11.2.0 # chown grid:dba /u01/app/11.2.0/grid # mkdir /u01/app/oraInventory # chown grid:dba /u01/app/oraInventory # chmod -R 775 /u01/ After installing the Oracle ASM packages , you can proceed to its configuration. The first step is to configure the driver itself. This is done once . We run the configuration and specify some data: the user from which the driver will work, and who will own the interface, group , autostart driver at system startup .
Here's what it looks like:
# oracleasm configure –i Configuring the Oracle ASM library driver. This will configure the on-boot properties of the Oracle ASM library driver. The following questions will determine whether the driver is loaded on boot and what permissions it will have. The current values will be shown in brackets ('[]'). Hitting <ENTER> without typing an answer will keep that current value. Ctrl-C will abort. Default user to own the driver interface []: grid Default group to own the driver interface []: dba Start Oracle ASM library driver on boot (y/n) [n]: y Scan for Oracle ASM disks on boot (y/n) [y]: y Writing Oracle ASM library driver configuration: done Initialize the driver:
# oracleasm init Creating /dev/oracleasm mount point: /dev/oracleasm Loading module "oracleasm": oracleasm Configuring "oracleasm" to use device physical block size Mounting ASMlib driver filesystem: /dev/oracleasm Configure the NTP service. Open
/etc/sysconfig/ntpd and add the –x parameter.It should be like this:
OPTIONS="-x -u ntp:ntp -p /var/run/ntpd.pid -g" Restart the NTP service:
# service ntpd restart This completes the OS configuration. Now you can extinguish the car and create a clone.
6.4 Creating ASM Drives
When creating a disk group, we will use the usual redundancy organized by means of Oracle. Taking into account the reserve space for importing the test database, we will create 5 disks of 10 Gb each. To do this, open the Windows console on the host machine and move to the directory where the files of the ASM disks and
execute the following commands:
We connect disks to the cluster nodes:
ASM> VBoxManage createhd --filename ASM_1.vdi --size 10240 --format VDI --variant Fixed ASM> VBoxManage createhd --filename ASM_2.vdi --size 10240 --format VDI --variant Fixed ASM> VBoxManage createhd --filename ASM_3.vdi --size 10240 --format VDI --variant Fixed ASM> VBoxManage createhd --filename ASM_4.vdi --size 10240 --format VDI --variant Fixed ASM> VBoxManage createhd --filename ASM_5.vdi --size 10240 --format VDI --variant Fixed We connect disks to the cluster nodes:
ASM> VBoxManage storageattach "RAC #1 ORA ASM" --storagectl "SATA" --port 1 --device 0 --type hdd --medium ASM_1.vdi --mtype shareable ASM> VBoxManage storageattach "RAC #1 ORA ASM" --storagectl "SATA" --port 2 --device 0 --type hdd --medium ASM_2.vdi --mtype shareable ASM> VBoxManage storageattach "RAC #1 ORA ASM" --storagectl "SATA" --port 3 --device 0 --type hdd --medium ASM_3.vdi --mtype shareable ASM> VBoxManage storageattach "RAC #1 ORA ASM" --storagectl "SATA" --port 4 --device 0 --type hdd --medium ASM_4.vdi --mtype shareable ASM> VBoxManage storageattach "RAC #1 ORA ASM" --storagectl "SATA" --port 5 --device 0 --type hdd --medium ASM_5.vdi --mtype shareable ASM> VBoxManage storageattach "RAC #2 ORA ASM" --storagectl "SATA" --port 1 --device 0 --type hdd --medium ASM_1.vdi --mtype shareable ASM> VBoxManage storageattach "RAC #2 ORA ASM" --storagectl "SATA" --port 2 --device 0 --type hdd --medium ASM_2.vdi --mtype shareable ASM> VBoxManage storageattach "RAC #2 ORA ASM" --storagectl "SATA" --port 3 --device 0 --type hdd --medium ASM_3.vdi --mtype shareable ASM> VBoxManage storageattach "RAC #2 ORA ASM" --storagectl "SATA" --port 4 --device 0 --type hdd --medium ASM_4.vdi --mtype shareable ASM> VBoxManage storageattach "RAC #2 ORA ASM" --storagectl "SATA" --port 5 --device 0 --type hdd --medium ASM_5.vdi --mtype shareable Everything! At this all the preparatory work is completed, you can install Oracle GRID Infrastructure .
7. Installing the GRID infrastructure
Run all the nodes. Login to one of the nodes with which we will perform the installation, under the user
grid .Mount the ball with the distribution:
# mount -t cifs "//192.168.56.1/ora_linux" /media/ora_linux -o username="vasya_pupkin",password="********",iocharset=utf8,file_mode=0777,dir_mode=0777 7.1 ASM disk partitioning
Before you start the installation, you need to mark up the ASM disks in a special way and check their availability on each node. Further, all operations are performed as
root on one of the nodes of the cluster!Markup:
Select the first drive in the list and mark it up:
Next, enter the commands in the following sequence:
Disk partitioning is complete. We carry out a similar procedure with the remaining 4 discs. This is what should happen in the end:
# ls /dev/sd* /dev/sdb /dev/sdc /dev/sdd /dev/sde /dev/sdf Select the first drive in the list and mark it up:
# fdisk /dev/sdb Next, enter the commands in the following sequence:
n p 1 Enter w Disk partitioning is complete. We carry out a similar procedure with the remaining 4 discs. This is what should happen in the end:
# ls /dev/sd* /dev/sdb1 /dev/sdc1 /dev/sdd1 /dev/sde1 /dev/sdf1 Create ASM disks:
# oracleasm createdisk DISK1 /dev/sdb1 # oracleasm createdisk DISK2 /dev/sdc1 # oracleasm createdisk DISK3 /dev/sdd1 # oracleasm createdisk DISK4 /dev/sde1 # oracleasm createdisk DISK5 /dev/sdf1 On all nodes in turn
check the availability of ASM disks:
# oracleasm scandisks Reloading disk partitions: done Cleaning any stale ASM disks... Scanning system for ASM disks... # oracleasm listdisks DISK1 DISK2 DISK3 DISK4 DISK5 This completes the ASM disk layout. Now you can proceed directly to installing Oracle GRID.
7.1 Installing GRID
Installation is carried out using a graphical wizard. We start the terminal on behalf of the
grid . [grid@rac1-node /]$ cd /media/ora_linux/grid [grid@rac1-node /]$ ./runInstaller Step-by-step installation wizard
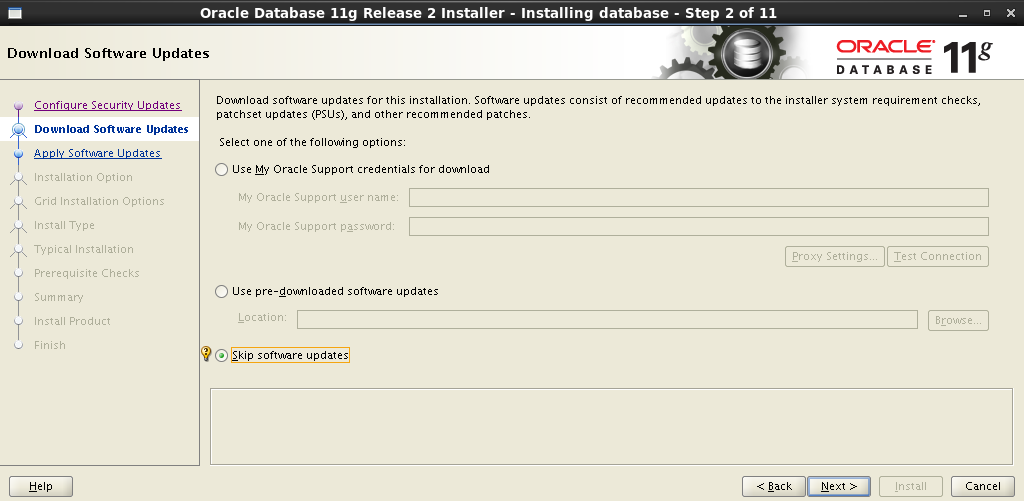
Skipping the software update:

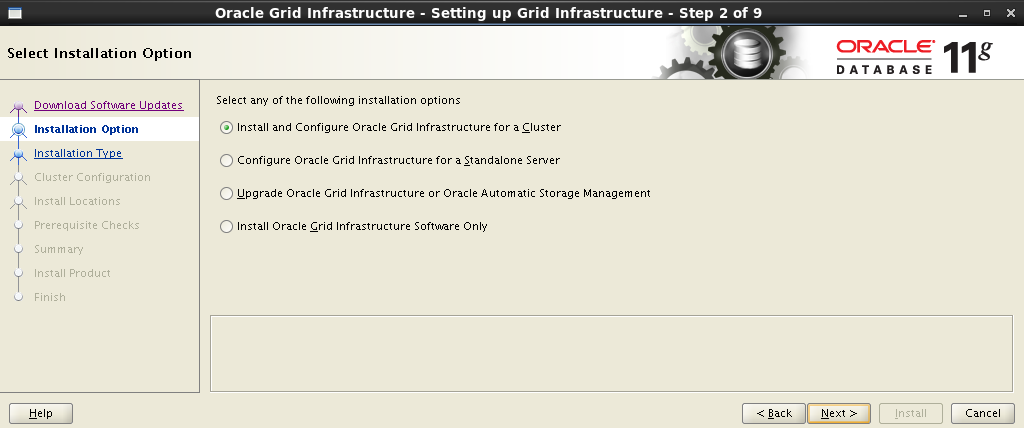
In the next step, we select the installation and configuration of Oracle Grid Infrastructure :
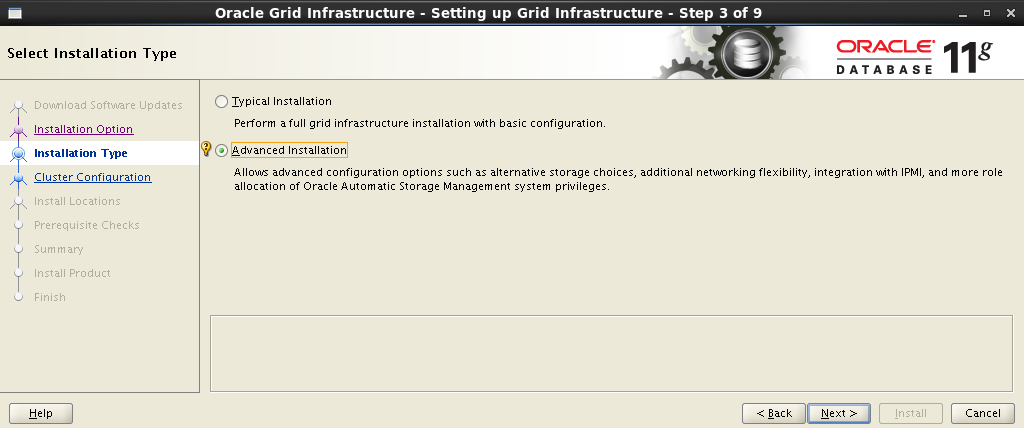
Select the advanced installation type:
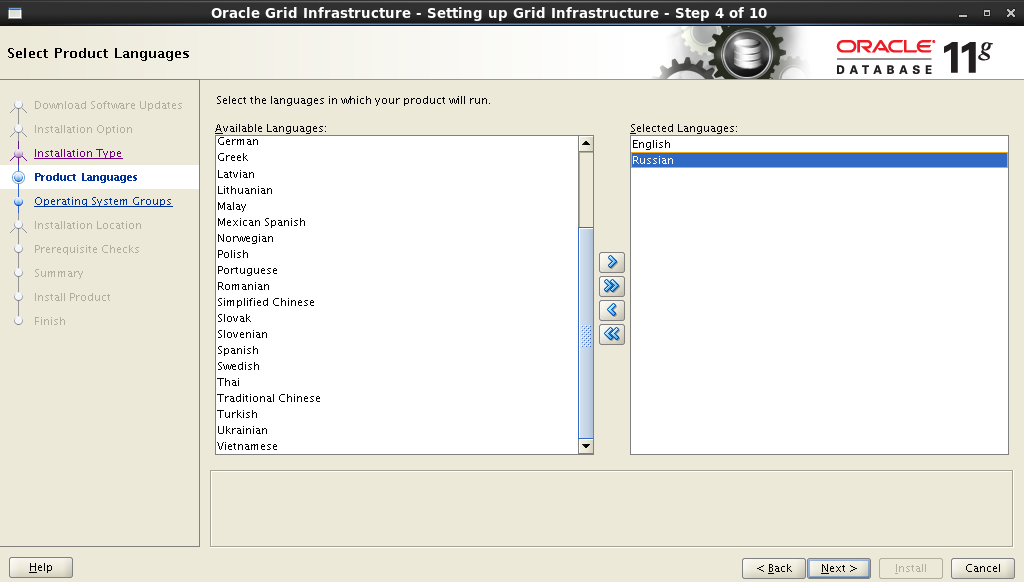
Add support for native language:
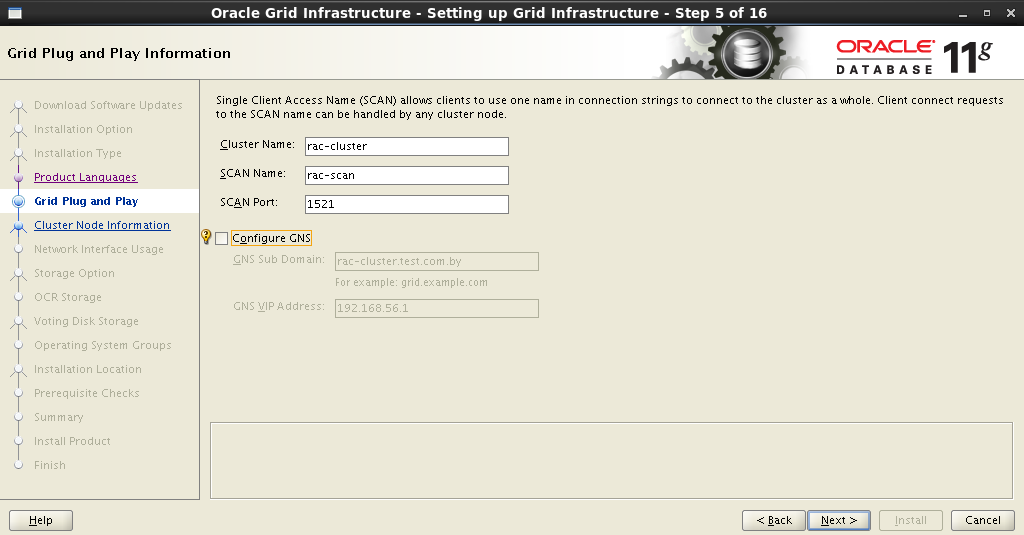
In the next step, you need to specify the cluster name , the name and port of SCAN . Here it will look like this:
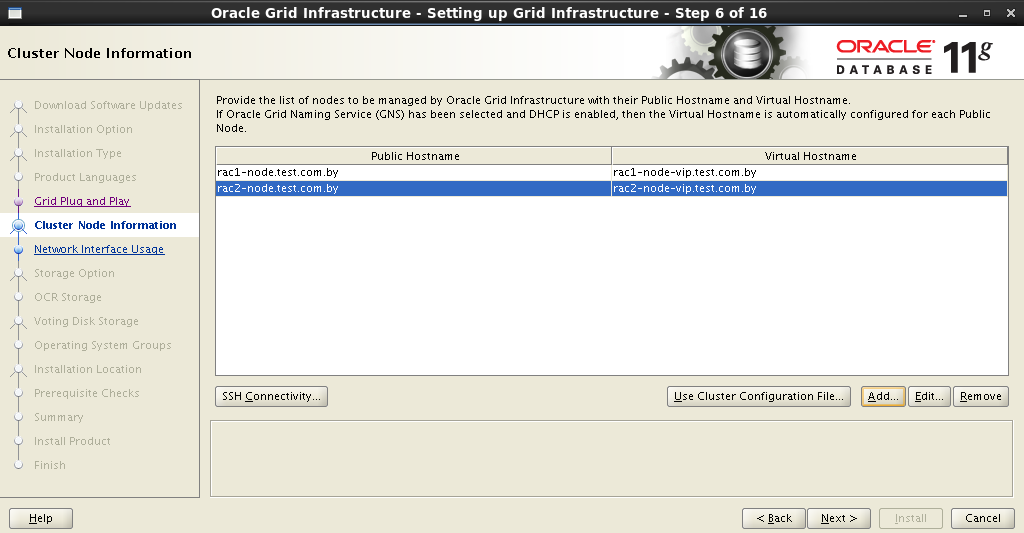
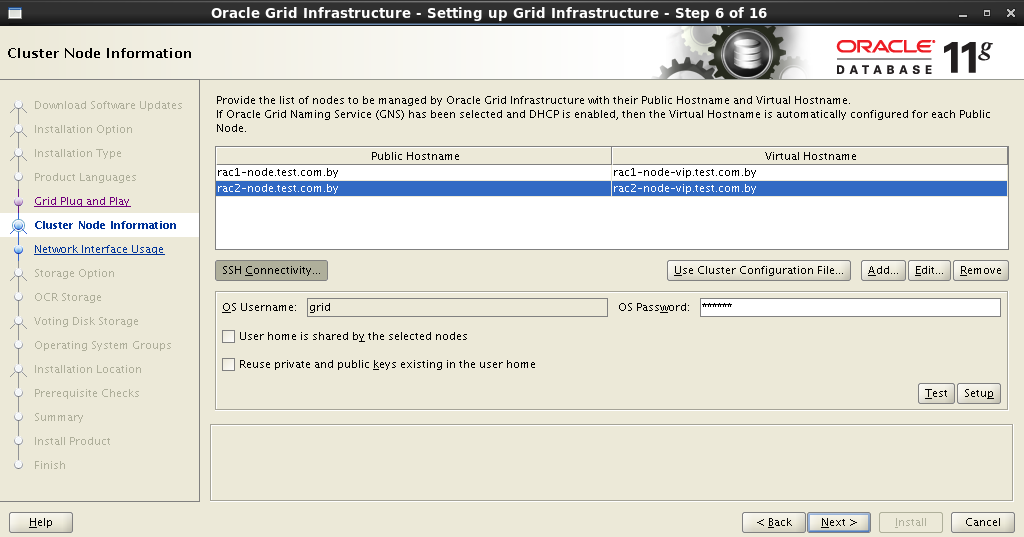
The installer will contact the DNS server and check for the presence of the corresponding SCAN address entries . If everything is in order, then in the next step you can add nodes to the cluster. When adding another node, you must fill in the Public and Virtual Hostname fields. Public Hostname is the name of the computer used to identify it on the network. Virtual Hostname is the virtual name of the computer that will be used by Oracle GRID . All names must have corresponding records on the DNS server.
In my case, it looks like this:
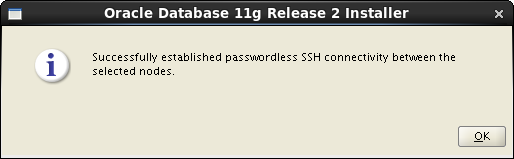
After all nodes have been entered into the cluster, it is necessary to configure an SSH connection between future nodes. To do this, you must click the SSH Connectivity button and enter the
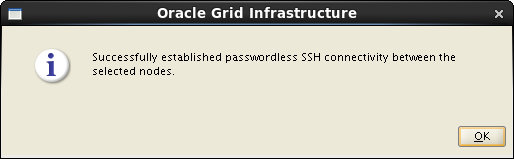
If everything is done correctly, then Oracle Grid will report to us about this, after which it will be possible to proceed to the next step.
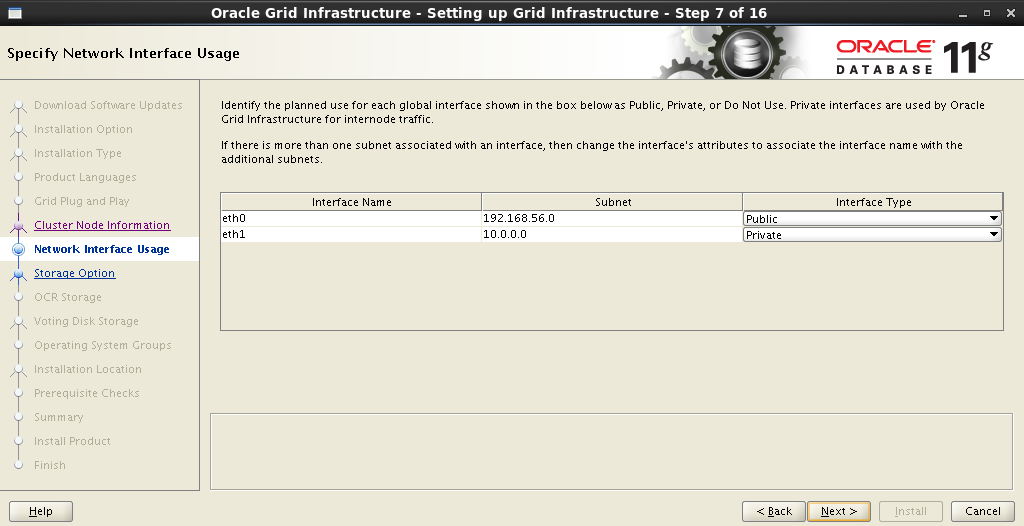
The next step is to distribute the network interfaces: which will be external, and which will be used for interconnect:
Next, you need to decide on the type of storage. Choose Oracle ASM :

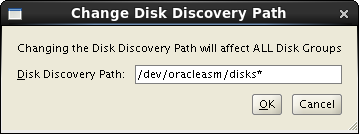
Set the name of the disk group. This name will later be used as a starting point when specifying the location of database data files. Choose redundancy, set the block size and mark the disks.
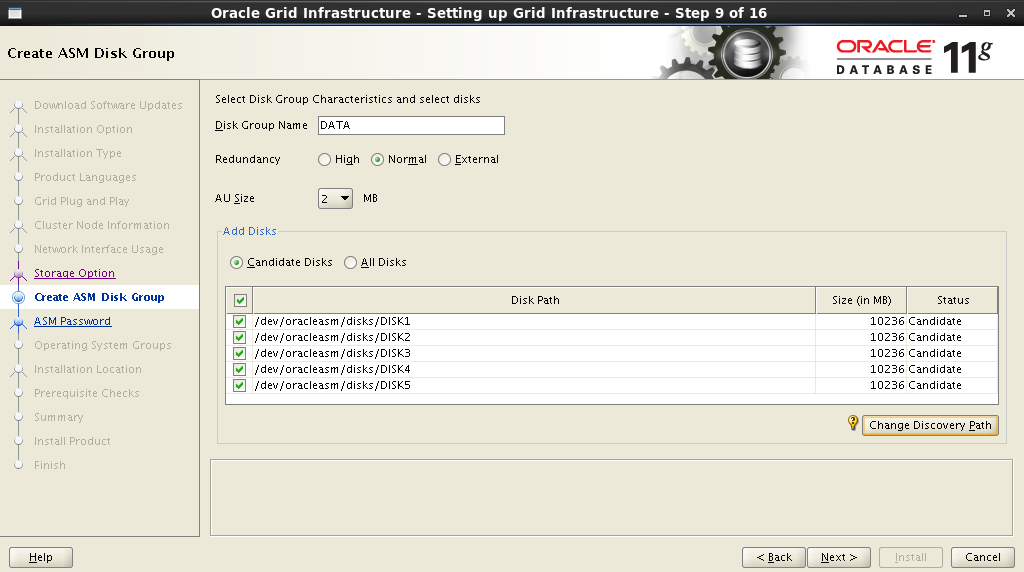
In order for the disks that we created in the previous step to appear in the Add Disks field, you must specify the path:
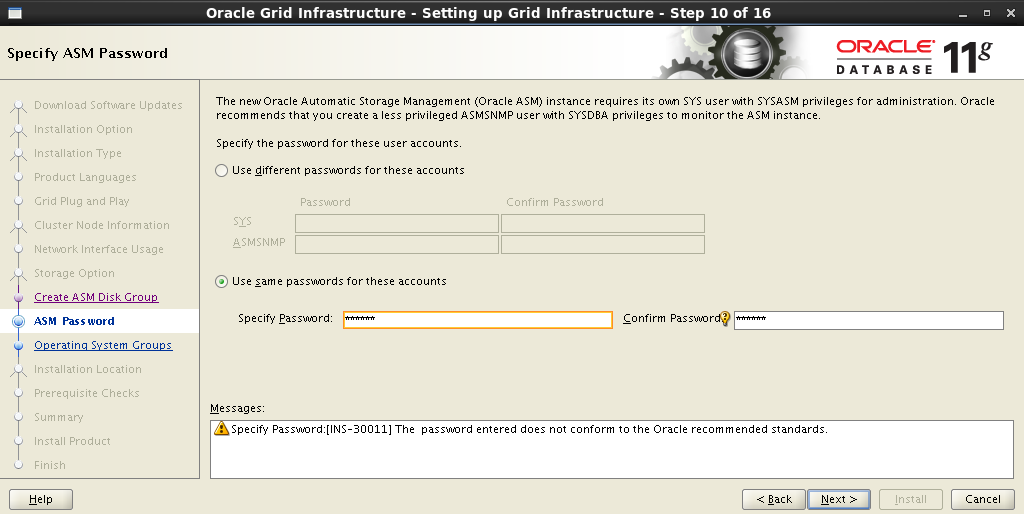
Set a password for ASM Account :
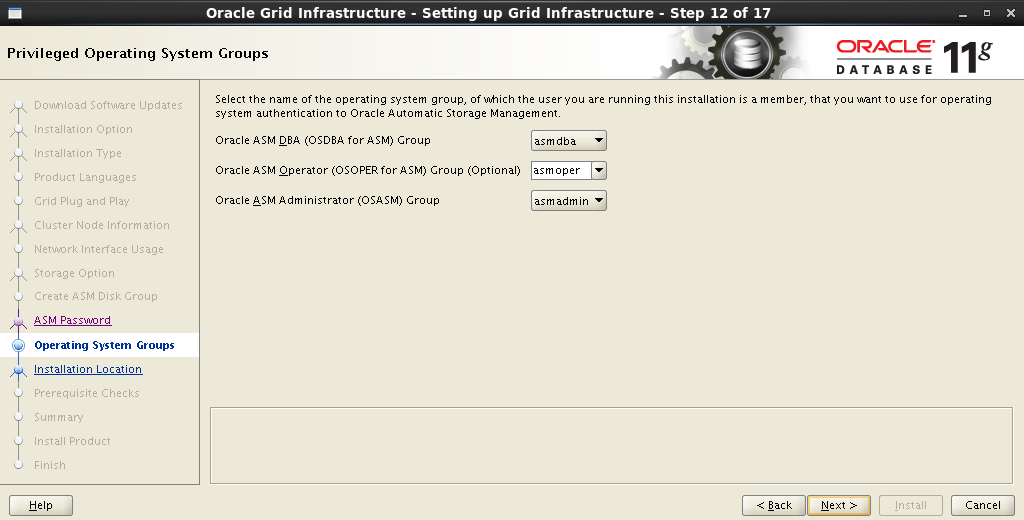
We assign privileges to the appropriate groups:
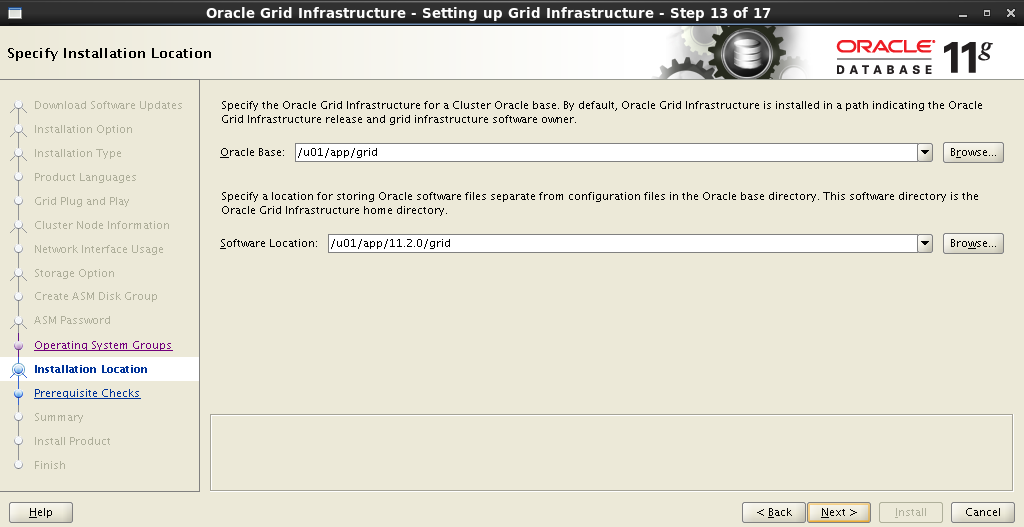
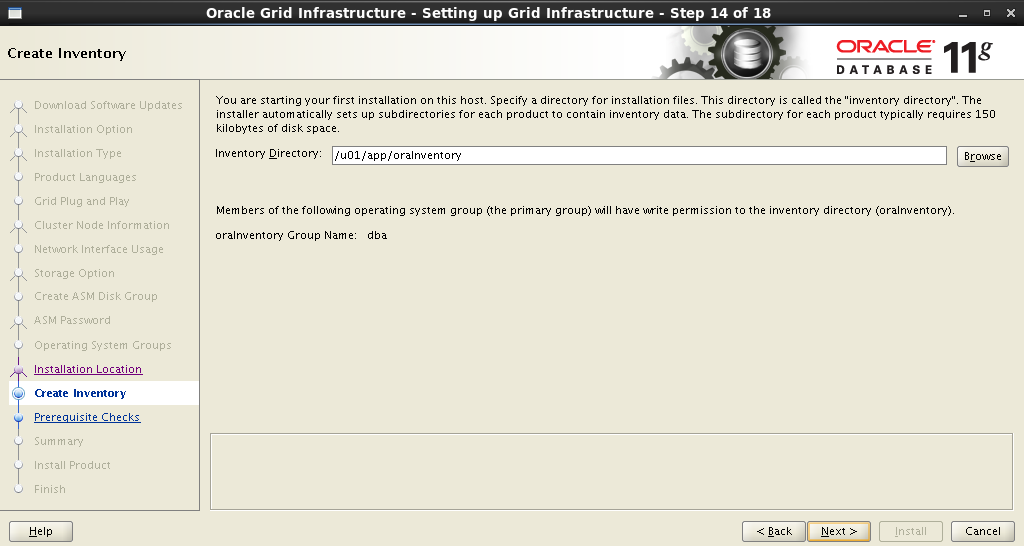
Register the installation paths for Oracle Base and Software Location :
Oracle Inventory installation path:
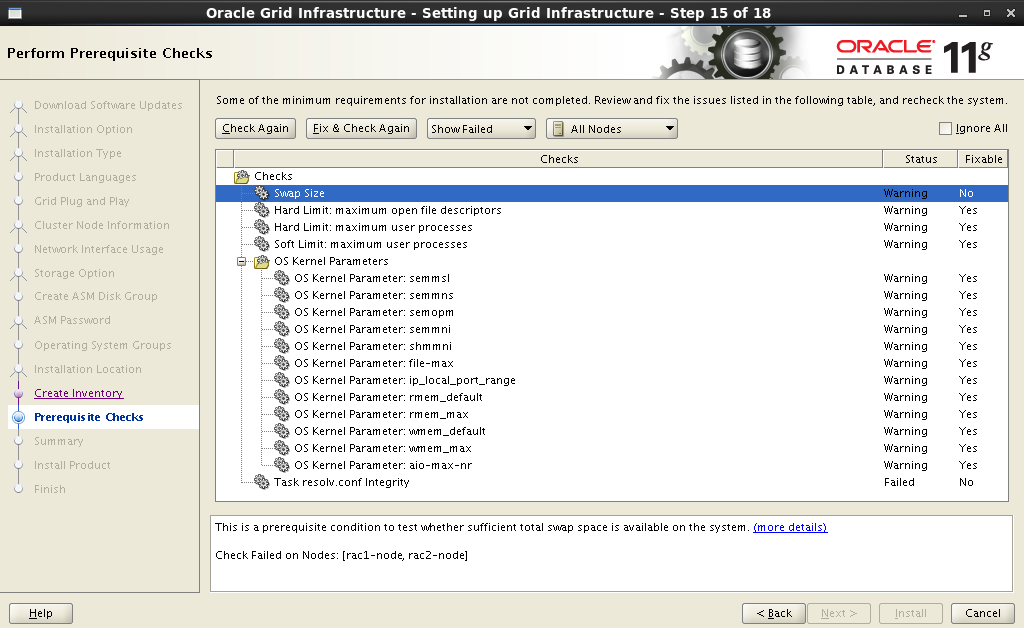
After setting all the parameters, the installer will start analyzing the system, which may result in an impressive list of actions: change some system parameters, install additional packages,do something impossible . Those items that are marked as No will have to be corrected manually. The rest can be killed with a single click. Fix & Check Again :
After clicking the Fix & Check Again button, the Execute Fixup Scripts window appears with detailed instructions and a startup sequence.
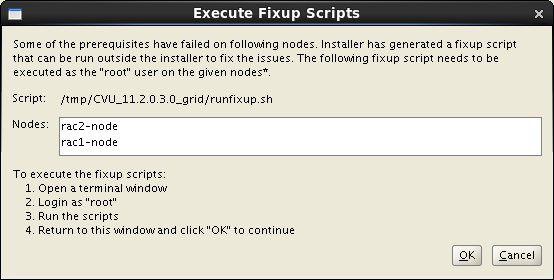
Here is my example of fixing warnings:
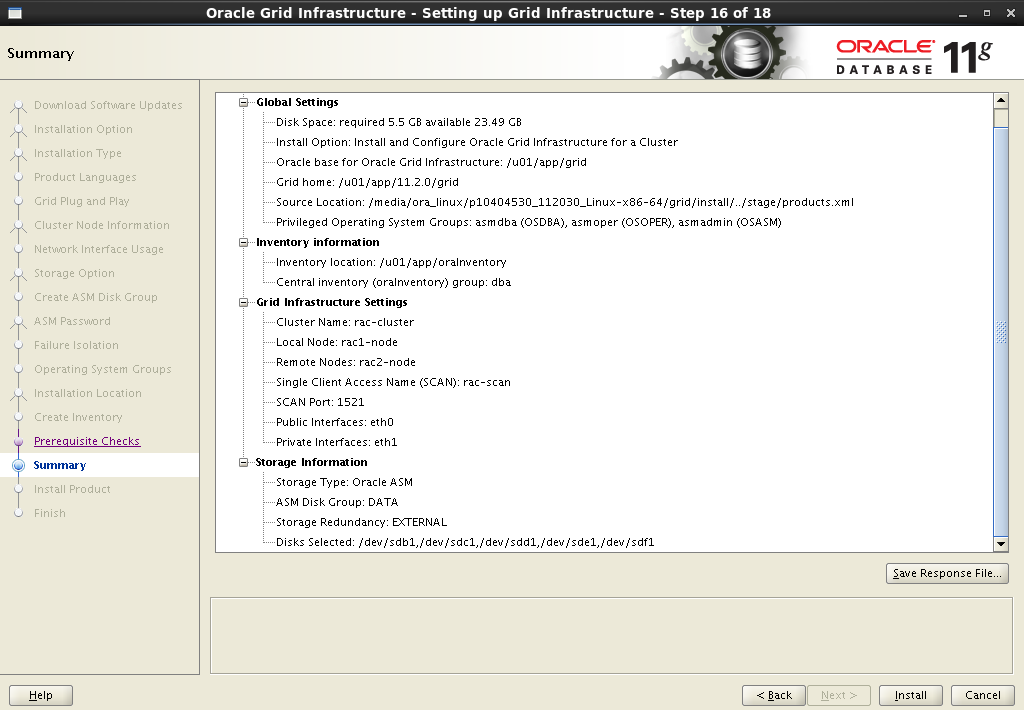
After eliminating all,or almost all warnings, the remaining ones are not critical. Put Ignore All :
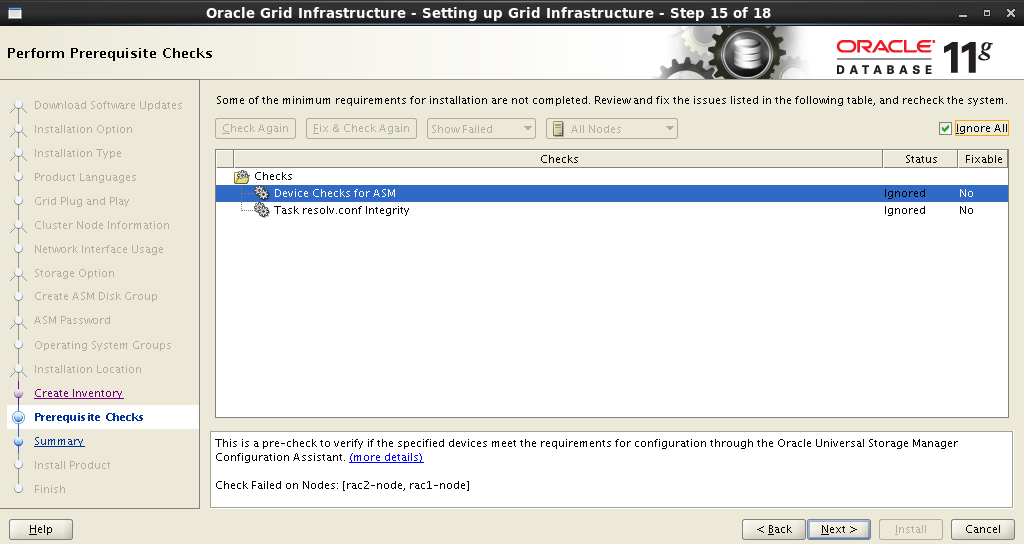
After receiving a brief summary, start the installation process:
Installation process:
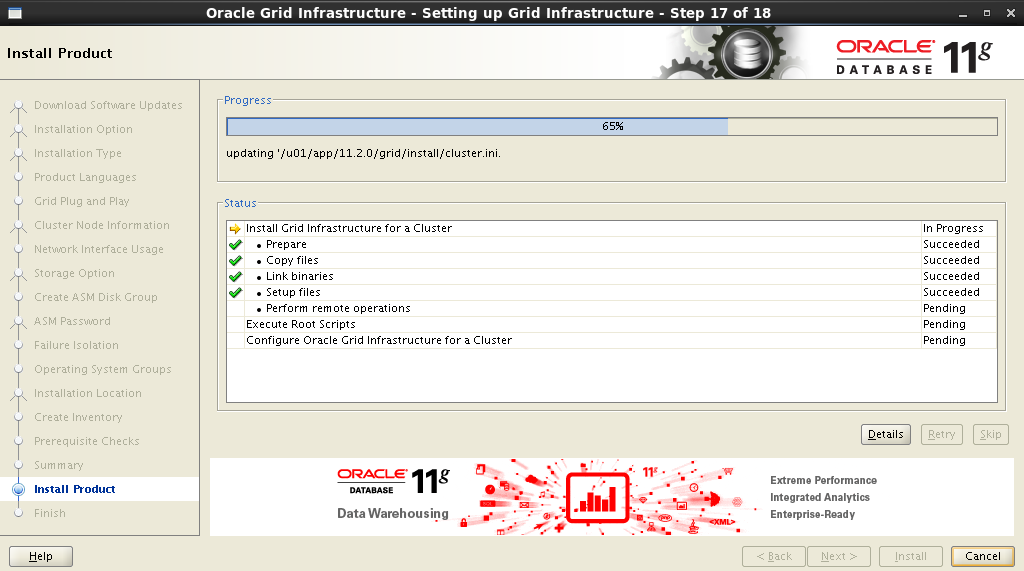
During installation, you will need to run several scripts as
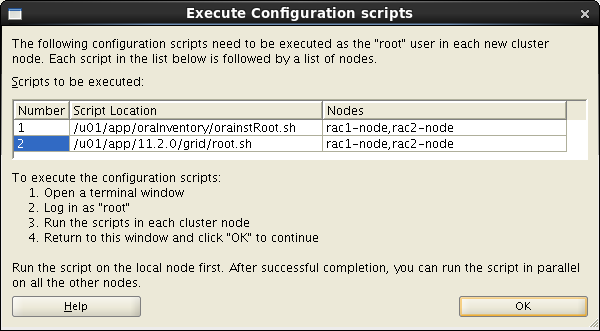
In this case, you need to follow these instructions consistently on both nodes:
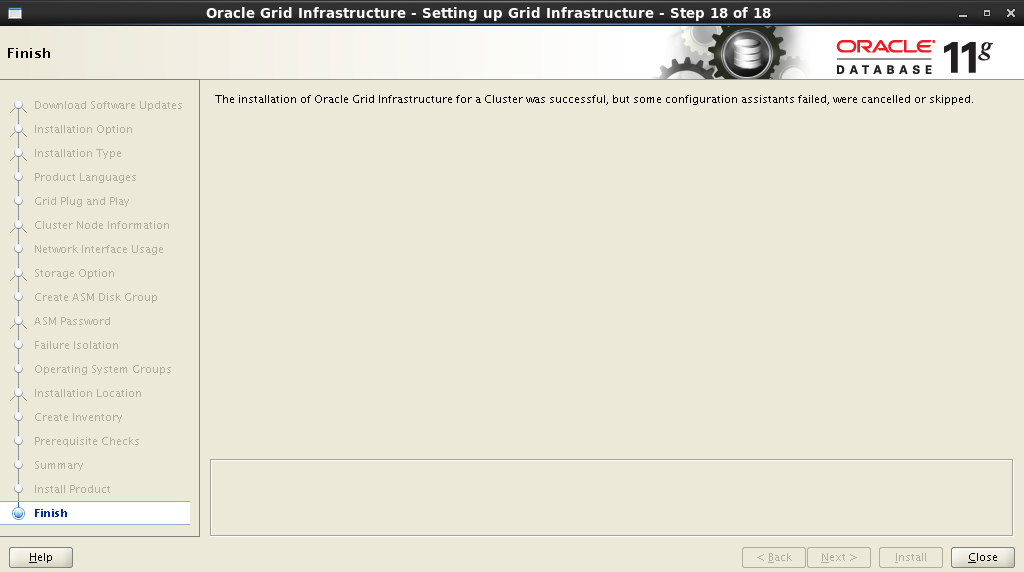
The installation process - the final is near:
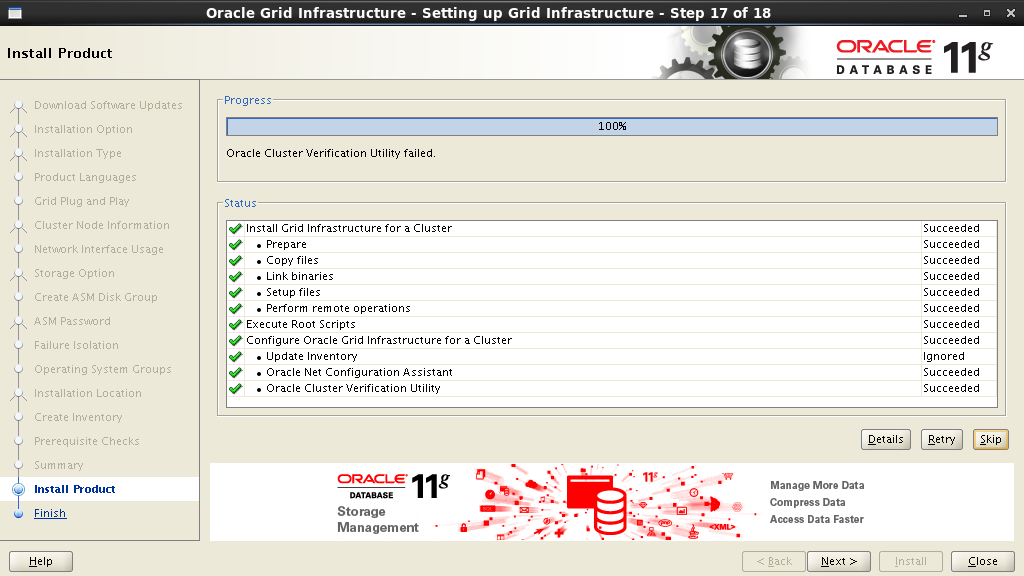
Everything, the installation is complete!
In the next step, we select the installation and configuration of Oracle Grid Infrastructure :
Select the advanced installation type:
Add support for native language:
In the next step, you need to specify the cluster name , the name and port of SCAN . Here it will look like this:
Cluster Name: rac-cluster SCAN name: rac scan SCAN Port: 1521 The installer will contact the DNS server and check for the presence of the corresponding SCAN address entries . If everything is in order, then in the next step you can add nodes to the cluster. When adding another node, you must fill in the Public and Virtual Hostname fields. Public Hostname is the name of the computer used to identify it on the network. Virtual Hostname is the virtual name of the computer that will be used by Oracle GRID . All names must have corresponding records on the DNS server.
In my case, it looks like this:
| Node | Public Hostname | Virtual hostname |
| one | rac1-node.test.com.by | rac1-node-vip.test.com.by |
| 2 | rac2-node.test.com.by | rac2-node-vip.test.com.by |
After all nodes have been entered into the cluster, it is necessary to configure an SSH connection between future nodes. To do this, you must click the SSH Connectivity button and enter the
grid user password (that's why all the nodes must have the same users with the same password). Establish a connection by clicking the Setup button:If everything is done correctly, then Oracle Grid will report to us about this, after which it will be possible to proceed to the next step.
The next step is to distribute the network interfaces: which will be external, and which will be used for interconnect:
Next, you need to decide on the type of storage. Choose Oracle ASM :
Set the name of the disk group. This name will later be used as a starting point when specifying the location of database data files. Choose redundancy, set the block size and mark the disks.
Disk Group Name: DATA Redundancy: Normal AU Size: 2 MB In order for the disks that we created in the previous step to appear in the Add Disks field, you must specify the path:
/dev/oracleasm/disks* in the Change Disk Discovery Path window:Set a password for ASM Account :
We assign privileges to the appropriate groups:
Register the installation paths for Oracle Base and Software Location :
Oracle Inventory installation path:
After setting all the parameters, the installer will start analyzing the system, which may result in an impressive list of actions: change some system parameters, install additional packages,
After clicking the Fix & Check Again button, the Execute Fixup Scripts window appears with detailed instructions and a startup sequence.
Here is my example of fixing warnings:
$ su Password: # cd /tmp/CVU_11.2.0.3.0_grid # ./runfixup.sh After eliminating all,
After receiving a brief summary, start the installation process:
Installation process:
During installation, you will need to run several scripts as
root . Detailed instructions will be presented in the Execute Configuration scripts window:In this case, you need to follow these instructions consistently on both nodes:
$ su Password: # cd /u01/app/oraInventory # ./orainstRoot.sh # cd /u01/app/11.2.0/grid # ./root.sh The installation process - the final is near:
Everything, the installation is complete!
Rebuild all nodes of the cluster.
7.2 Infrastructure check
After loading all the nodes, open the terminal and
look at the status of the cluster nodes:
# cd /u01/app/11.2.0/grid/bin # ./crsctl status resource -t -------------------------------------------------------------------------------- NAME TARGET STATE SERVER STATE_DETAILS -------------------------------------------------------------------------------- Local Resources -------------------------------------------------------------------------------- ora.DATA.dg ONLINE ONLINE rac1-node ONLINE ONLINE rac2-node ora.LISTENER.lsnr ONLINE ONLINE rac1-node ONLINE ONLINE rac2-node ora.asm ONLINE ONLINE rac1-node Started ONLINE ONLINE rac2-node Started ora.gsd OFFLINE OFFLINE rac1-node OFFLINE OFFLINE rac2-node ora.net1.network ONLINE ONLINE rac1-node ONLINE ONLINE rac2-node ora.ons ONLINE ONLINE rac1-node ONLINE ONLINE rac2-node -------------------------------------------------------------------------------- Cluster Resources -------------------------------------------------------------------------------- ora.LISTENER_SCAN1.lsnr 1 ONLINE ONLINE rac2-node ora.LISTENER_SCAN2.lsnr 1 ONLINE ONLINE rac1-node ora.LISTENER_SCAN3.lsnr 1 ONLINE ONLINE rac1-node ora.cvu 1 ONLINE ONLINE rac1-node ora.oc4j 1 ONLINE ONLINE rac1-node ora.rac1-node.vip 1 ONLINE ONLINE rac1-node ora.rac2-node.vip 1 ONLINE ONLINE rac2-node ora.scan1.vip 1 ONLINE ONLINE rac2-node ora.scan2.vip 1 ONLINE ONLINE rac1-node ora.scan3.vip 1 ONLINE ONLINE rac1-node ora.wind.db 1 ONLINE ONLINE rac1-node Open 2 ONLINE ONLINE rac2-node Open 8. Install Database Software
Login to one of the nodes with which we will perform the installation, under the user
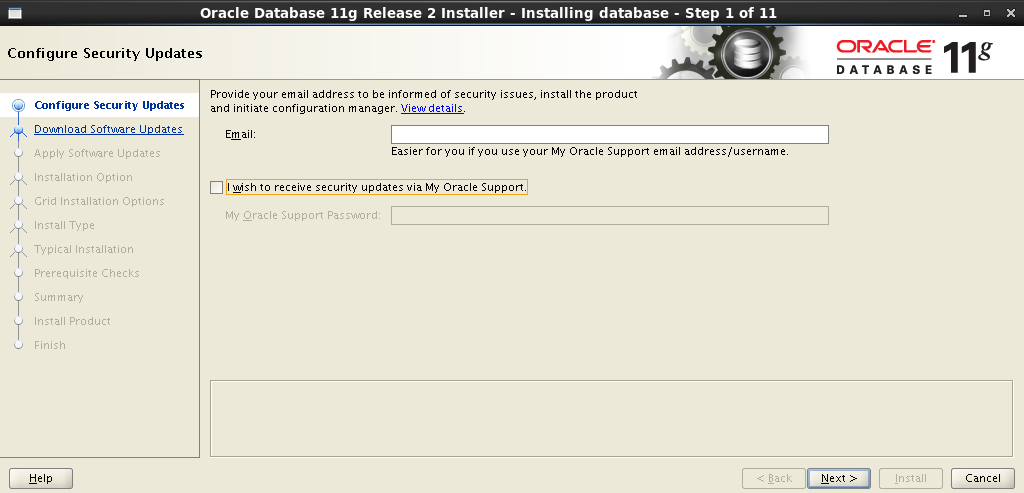
oracle. Mount the ball. Further, as in the case of Oracle GRID , the installation is carried out using a graphical wizard. We start the terminal on behalf of oracle. [oracle@rac1-node /]$ cd /media/ora_linux/database [oracle@rac1-node /]$ ./runInstaller Step-by-step installation wizard
:
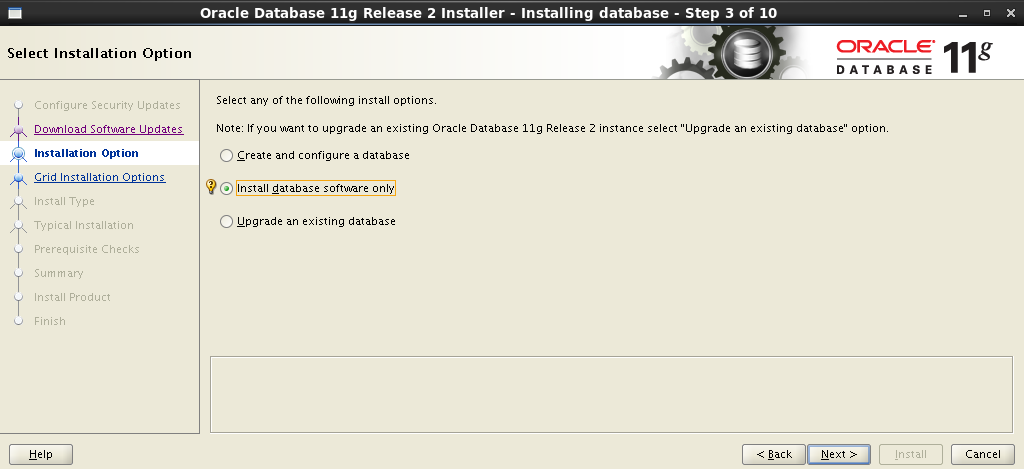
: Install database software only . .
: Oracle Real Application Clusters database installation ,

SSH .
:

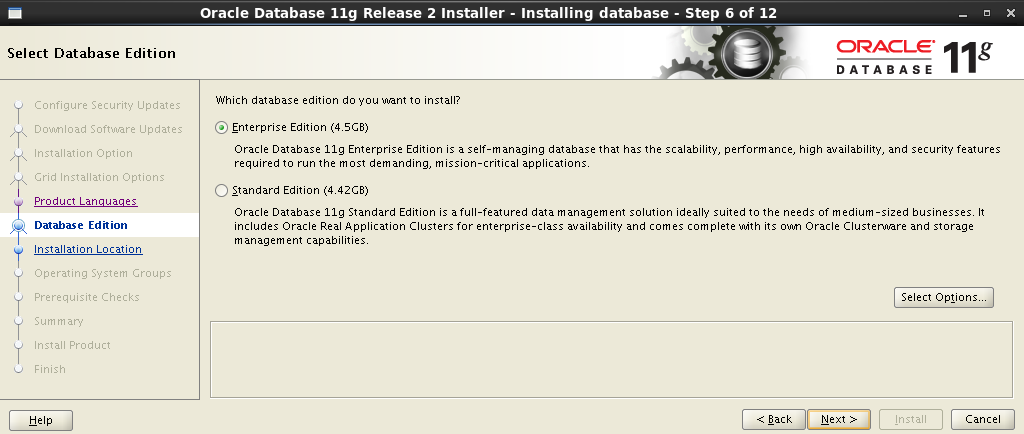
– Enterprise Edition :
Oracle Base Software Location :

:
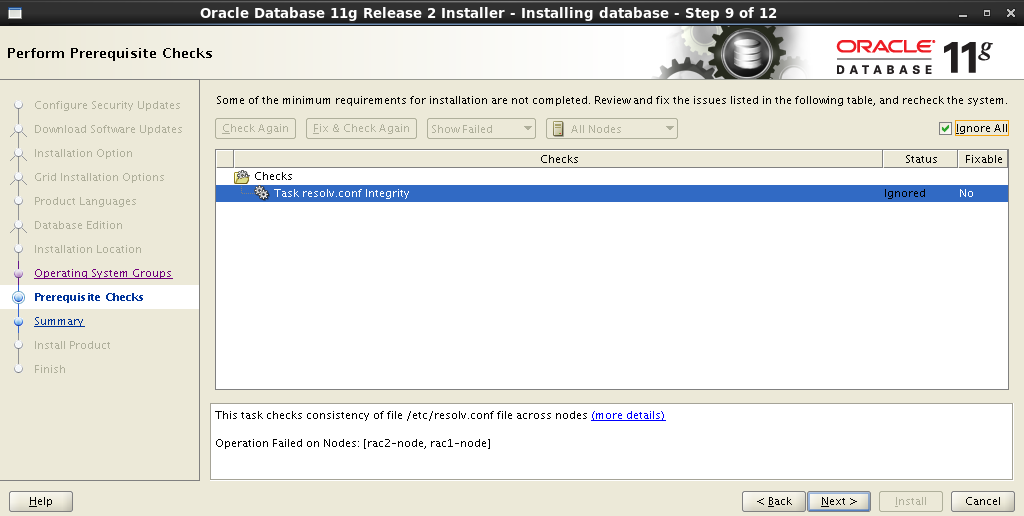
, , . , No – . Fix & Check Again :

Fix & Check Again Execute Fixup Scripts :
:
.
. Task resolv.conf Integrity . , , :
:
:
:
.
, Oracle Database Software !

: Install database software only . .
: Oracle Real Application Clusters database installation ,
oracle Setup :SSH .
:
– Enterprise Edition :
Oracle Base Software Location :
:
, , . , No – . Fix & Check Again :
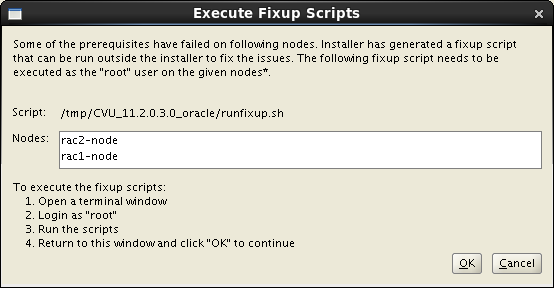
Fix & Check Again Execute Fixup Scripts :
:
$ su Password: # cd /tmp/CVU_11.2.0.3.0_oracle # ./runfixup.sh .
. Task resolv.conf Integrity . , , :
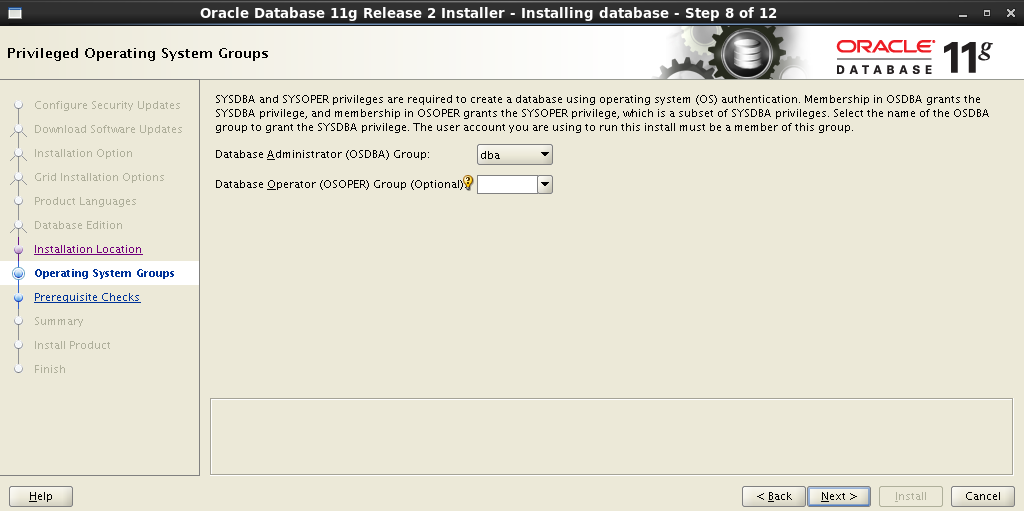
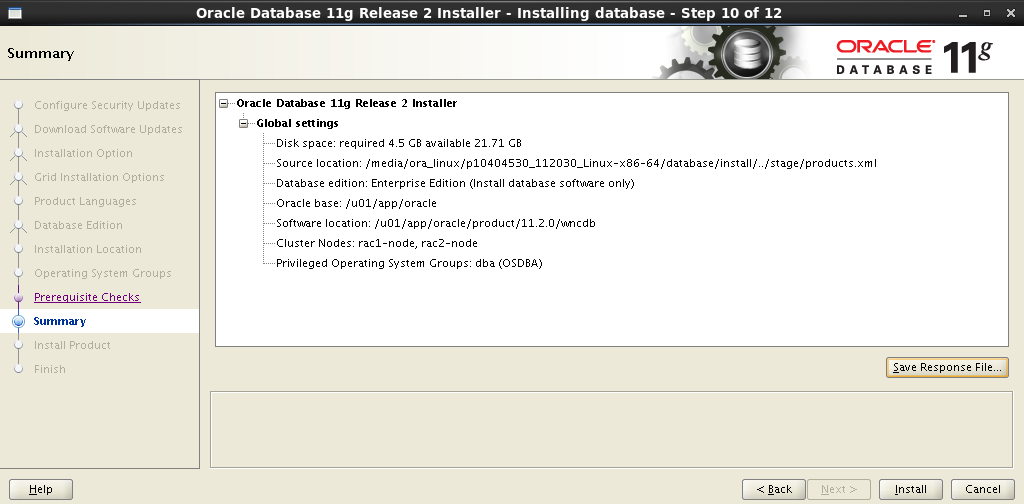
:
:
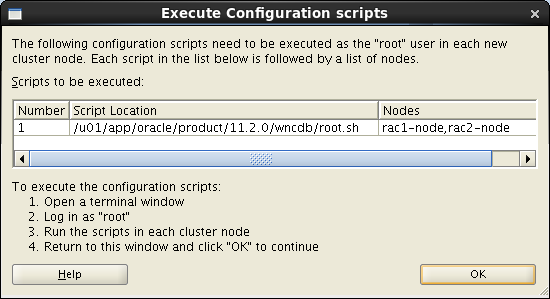
root . Execute Configuration scripts ::
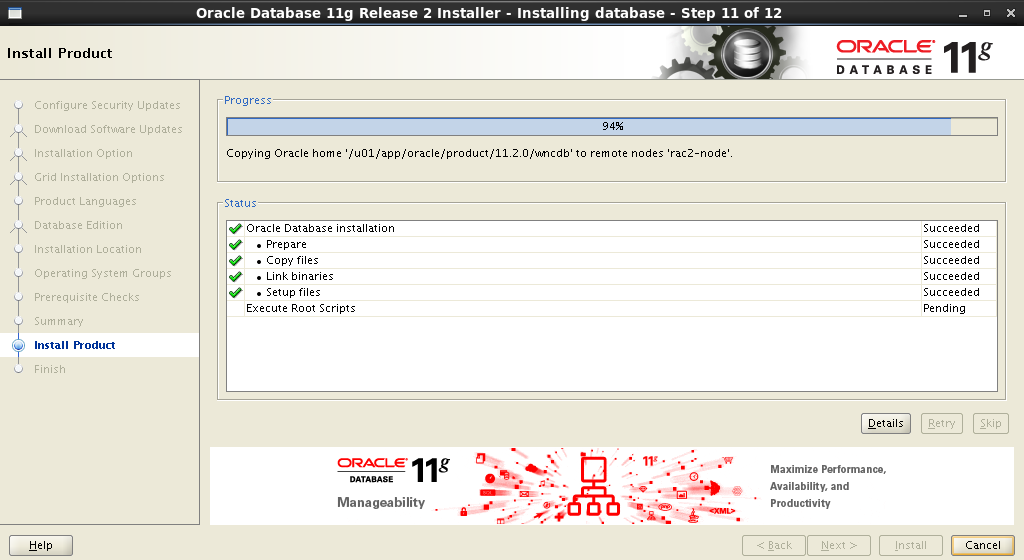
$ su Password: # cd /u01/app/oracle/product/11.2.0/wncdb # ./root.sh .
, Oracle Database Software !
9. Creating and testing a database
Now everything is ready to create the database and fill the dump.
9.1 Creating a DB
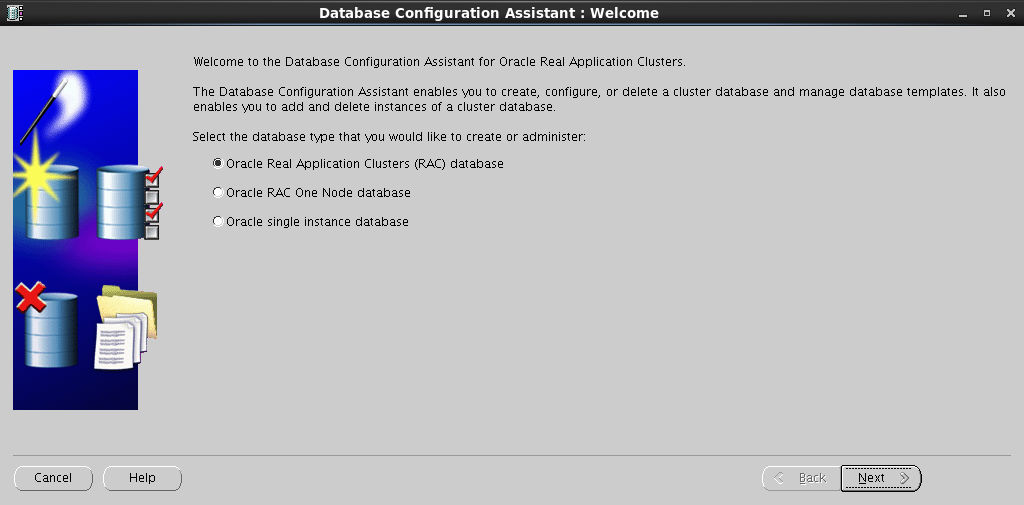
Run the DB Configuration Assistant :
[oracle@rac1-node /]$ cd /u01/app/oracle/product/11.2.0/wncdb/bin [oracle@rac1-node /]$ ./dbca Step-by-step database creation process
Oracle Real Application Clusters (RAC) database :
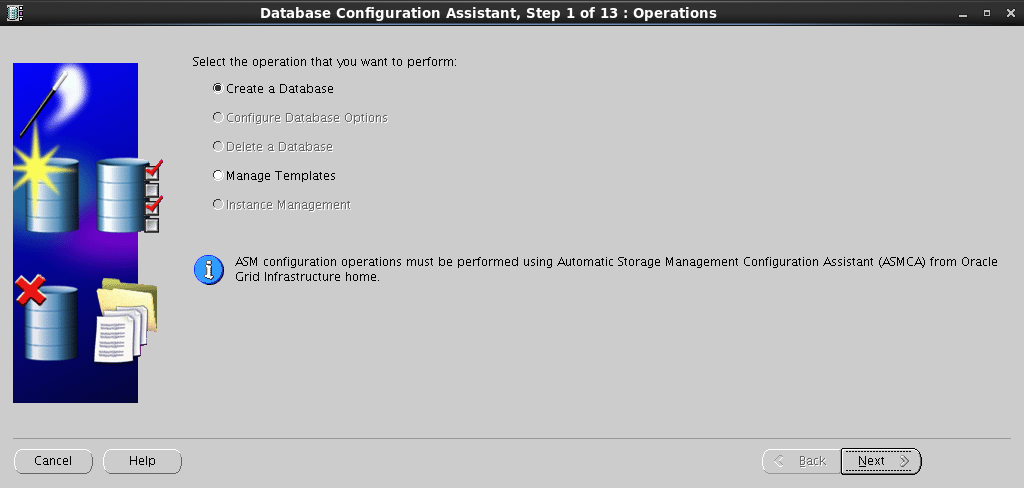
Create a Database :
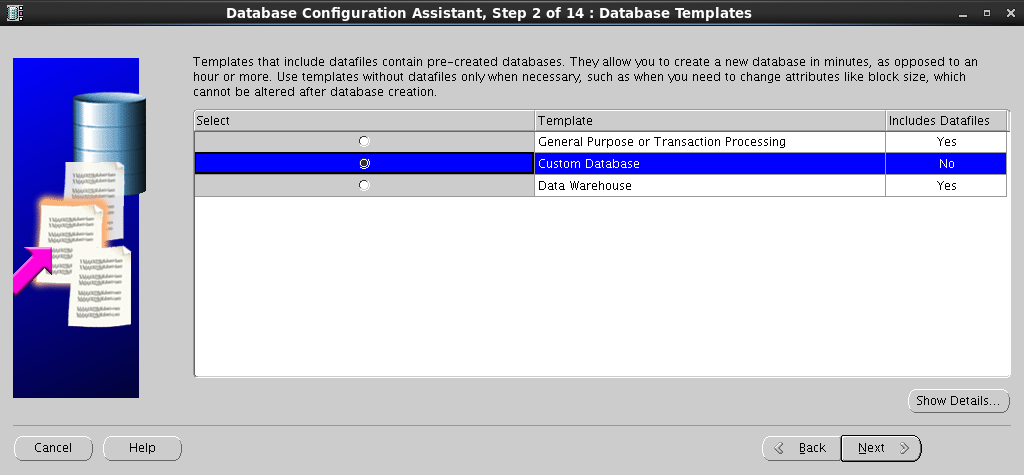
:
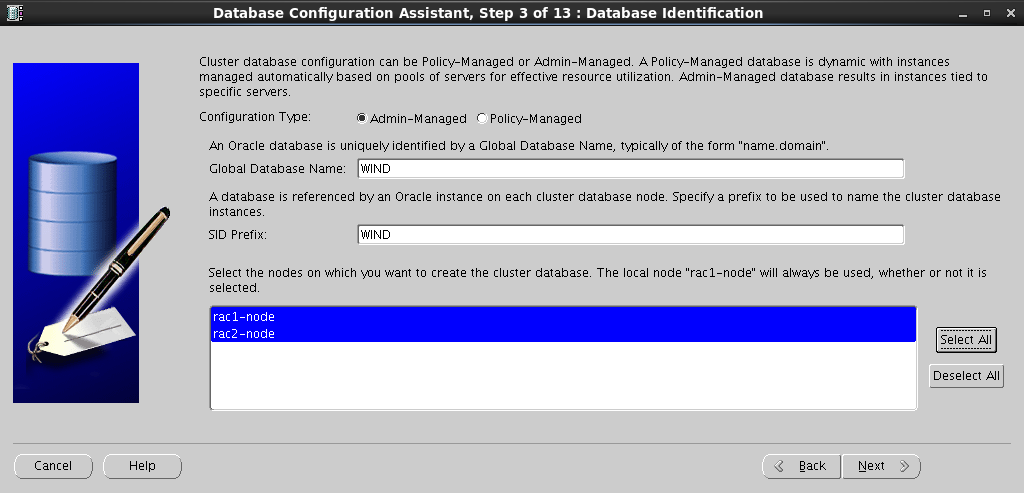
Configuration Type , Global Database Name , :
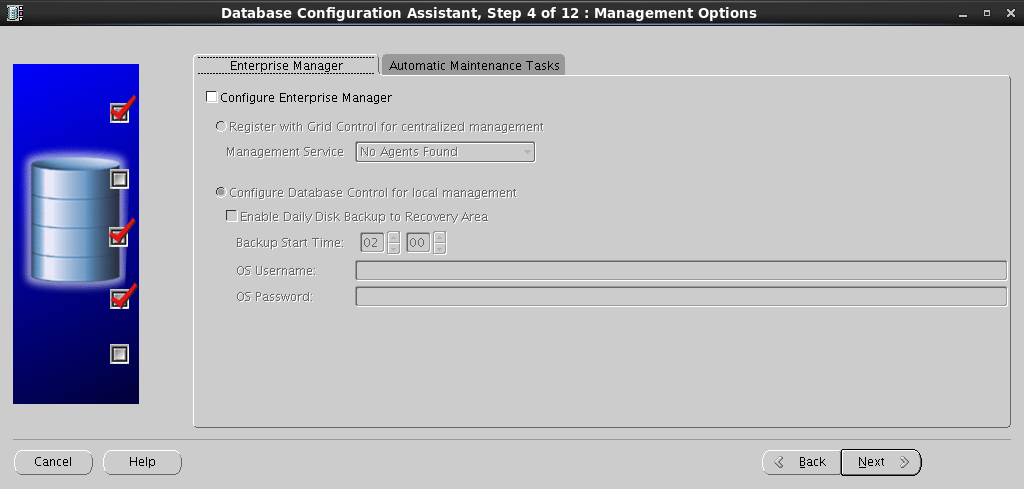
Enterprise Manager :
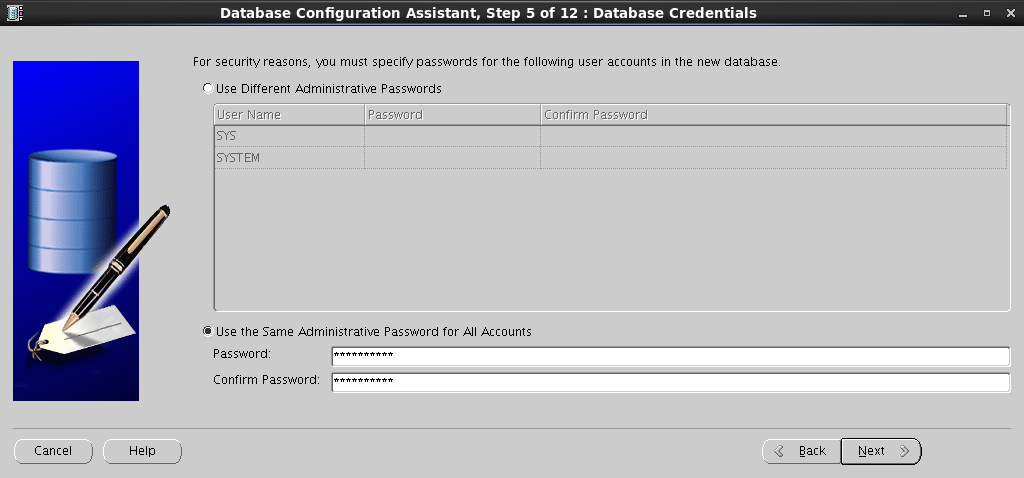
SYS SYSTEM :
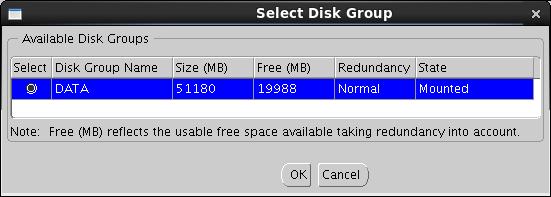
. DATA :

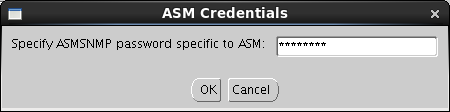
Browse , ASM Account :
:
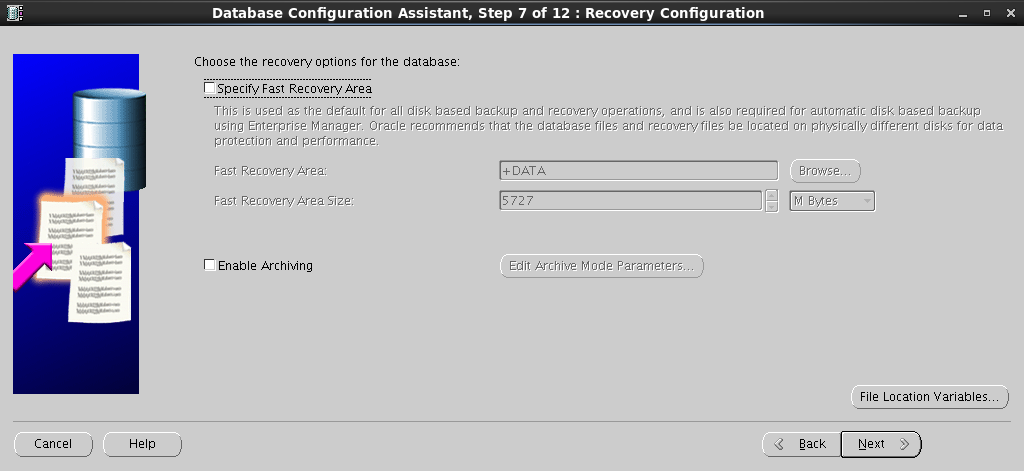
Fast Recovery Area . :
:
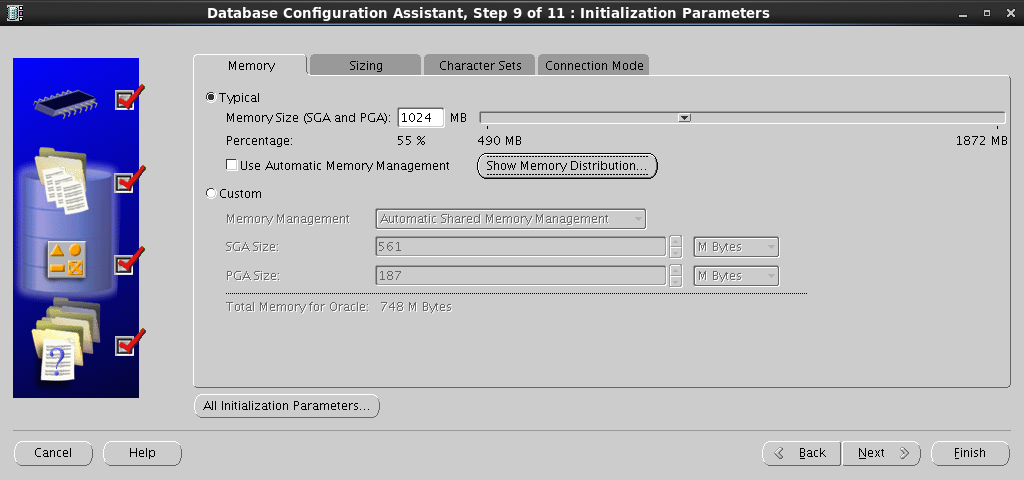
SGA PGA :
:
:
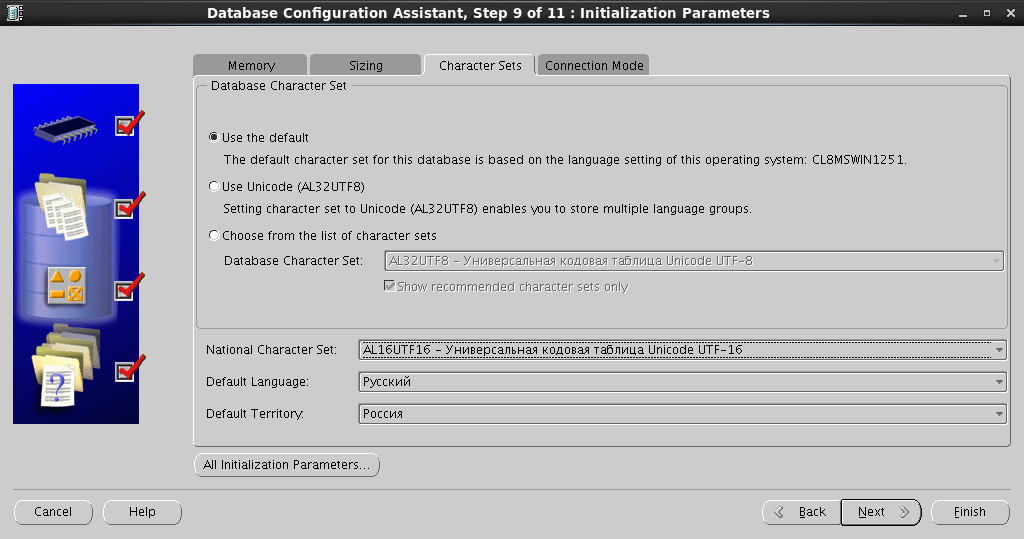
:
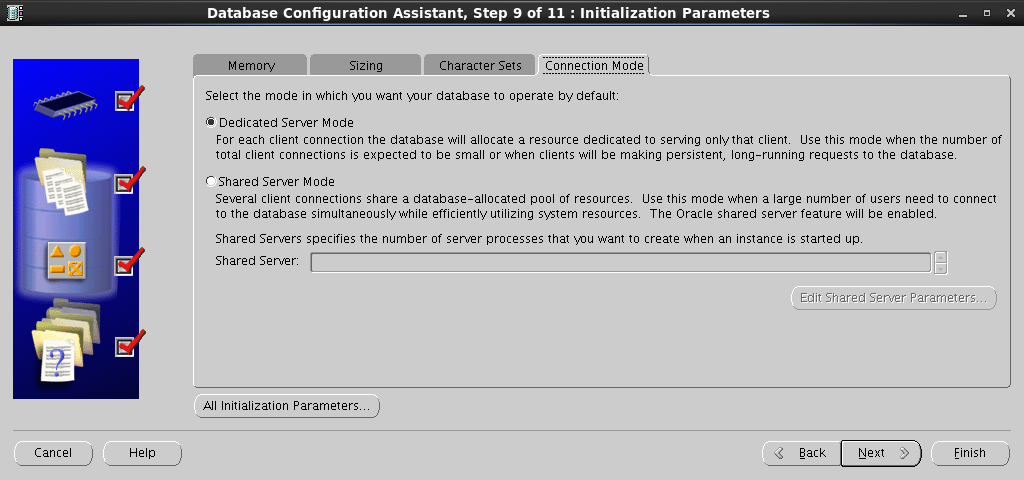
, Redo Log :
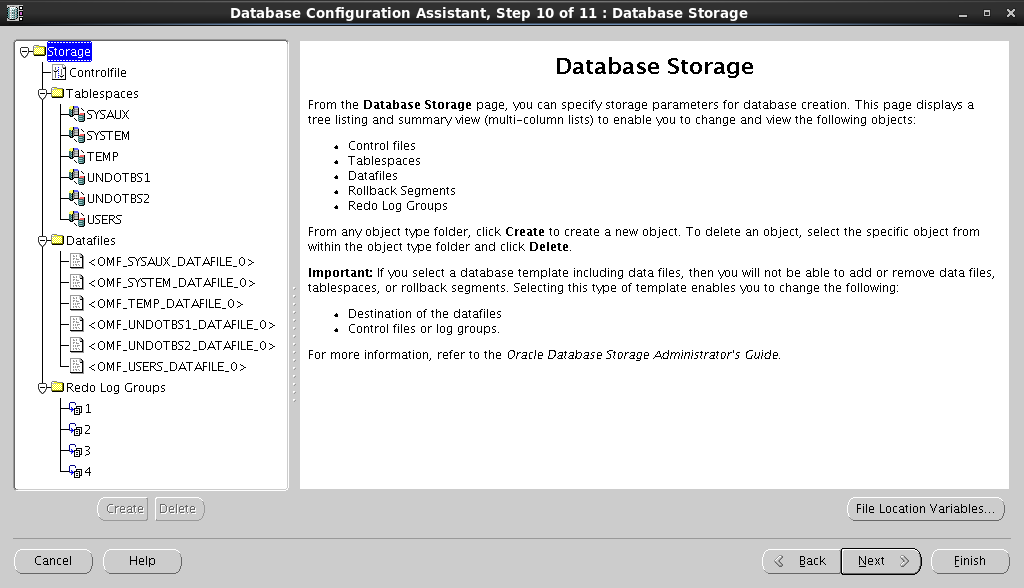
,
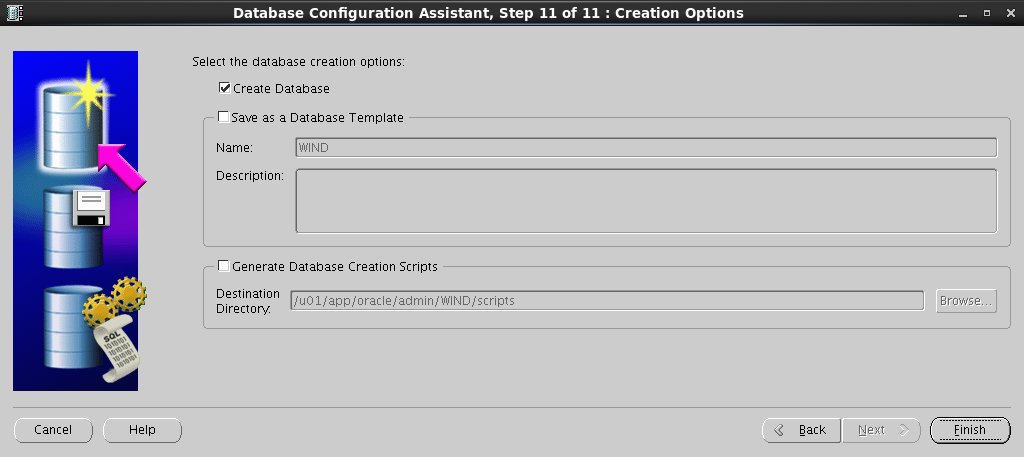
Summary – :
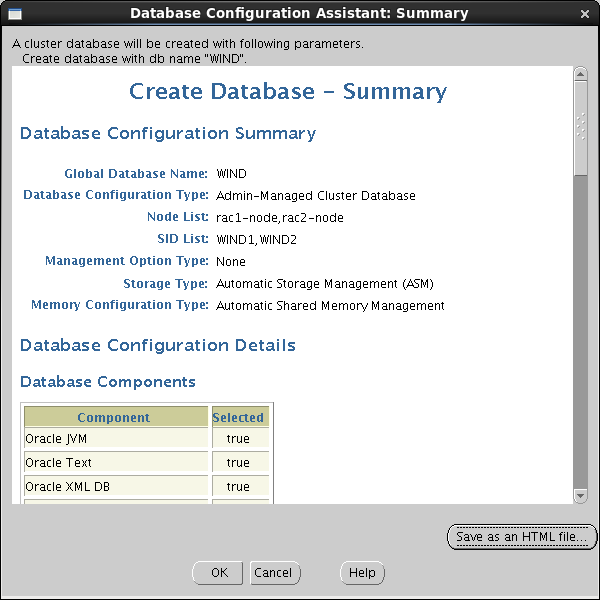
, :
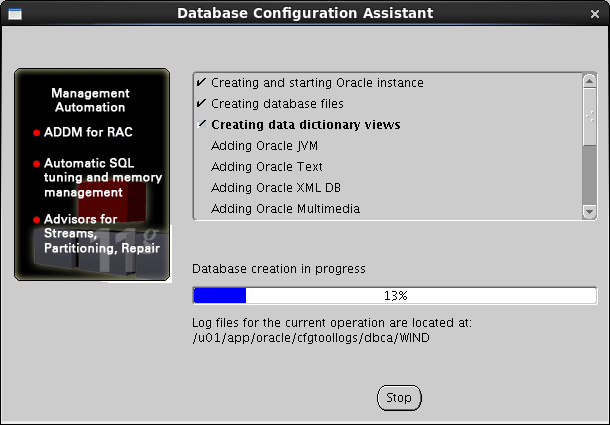
, , :
Create a Database :
:
Configuration Type , Global Database Name , :
Enterprise Manager :
SYS SYSTEM :
. DATA :
Browse , ASM Account :
:
Fast Recovery Area . :
:
SGA PGA :
:
:
:
, Redo Log :
,
Summary – :
, :
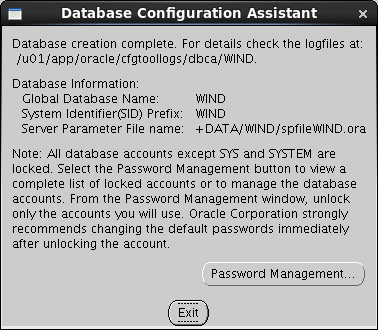
, , :
9.2 Connection Testing
If you want to run SQLplus directly from one node, you must
set the environment variables:
[oracle@rac1-server /]$ PATH=$PATH:/u01/app/oracle/product/11.2.0/wncdb/bin [oracle@rac1-server /]$ export PATH [oracle@rac1-server /]$ ORACLE_HOME=/u01/app/oracle/product/11.2.0/wncdb [oracle@rac1-server /]$ export ORACLE_HOME [oracle@rac1-server /]$ ORACLE_OWNER=oracle [oracle@rac1-server /]$ export ORACLE_OWNER [oracle@rac1-server /]$ NLS_LANG=AMERICAN_AMERICA.CL8MSWIN1251 [oracle@rac1-server /]$ export NLS_LANG Run SQLplus:
[oracle@rac1-server /]$ sqlplus SQL*Plus: Release 11.2.0.3.0 Production on Thu Aug 14 11:41:49 2014 Copyright (c) 1982, 2011, Oracle. All rights reserved. Enter user-name: sys@wind as sysdba Enter password: Connected to: Oracle Database 11g Enterprise Edition Release 11.2.0.3.0 - 64bit Production With the Partitioning, Real Application Clusters, Automatic Storage Management, OLAP, Data Mining and Real Application Testing options SQL> SELECT inst_name FROM v$active_instances; INST_NAME ------------------------------------------------------------ rac1-node.test.com.by:WIND1 rac2-node.test.com.by:WIND2 SQL> exit Disconnected from Oracle Database 11g Enterprise Edition Release 11.2.0.3.0 - 64bit Production With the Partitioning, Real Application Clusters, Automatic Storage Management, OLAP, Data Mining and Real Application Testing options [oracle@rac1-server /]$ To connect to the database from any other place where the Oracle Client is installed ,
tnsnames.oraneed to add:
WIND = (DESCRIPTION = (ADDRESS = (PROTOCOL = TCP)(HOST = rac-scan.test.com.by)(PORT = 1521)) (CONNECT_DATA = (SERVER = DEDICATED) (SERVICE_NAME = WIND) ) ) As a result of all these manipulations, we have a functioning dvuhnodovy cluster with a deployed test database!
Source: https://habr.com/ru/post/233801/
All Articles