How to stop worrying and start shooting panoramas

Sometimes the technical capabilities of photographic equipment are not enough to capture the picture that appears to our eyes. At such moments, you have to go for all sorts of tricks, without which the photo just will not work.
For example, one of my favorite subjects of photography is the clouds. I love to watch the sky as the clouds appear, roll from one figure to another, disappear, and new ones appear in their place. But in order to make a beautiful photograph of the clouds is often not enough resolution and viewing angle of a digital camera, so you have to make panoramas. Panoramic photography is a common photograph, assembled from a variety of individual frames with fragments of the scene. The process of assembling a panorama in the editor is called pasting a panorama. I will not paint every step - I will give general information that will allow you to start glueing the panoramas, and you can make out the details of the programs yourself, if there is a desire.
To photograph and glue the panorama is not as difficult as it may seem at first glance. For shooting there are simple rules, adhering to which you can get a good source material for pasting panoramas.
')
The first rule is to use the same expo pair for all fragments. That is, it is necessary to transfer the camera to the "M" mode, set the sensitivity, shutter speed and aperture, and with these parameters, take all the frames to glue the panorama. In order to find out these parameters, take a few test frames of interesting fragments of the future panorama and see what happens.
The second rule is to shoot with an overlap of at least 1/3 of the frame. That is, if you, for example, photograph a panorama in one row by moving the camera from right to left, then the left 1/3 of the frame becomes on the next frame the right 1/3.
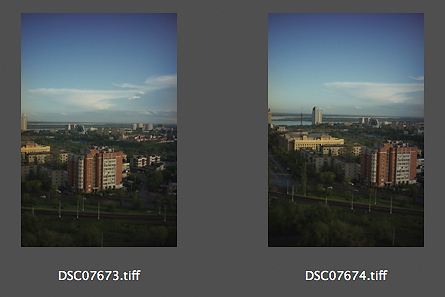
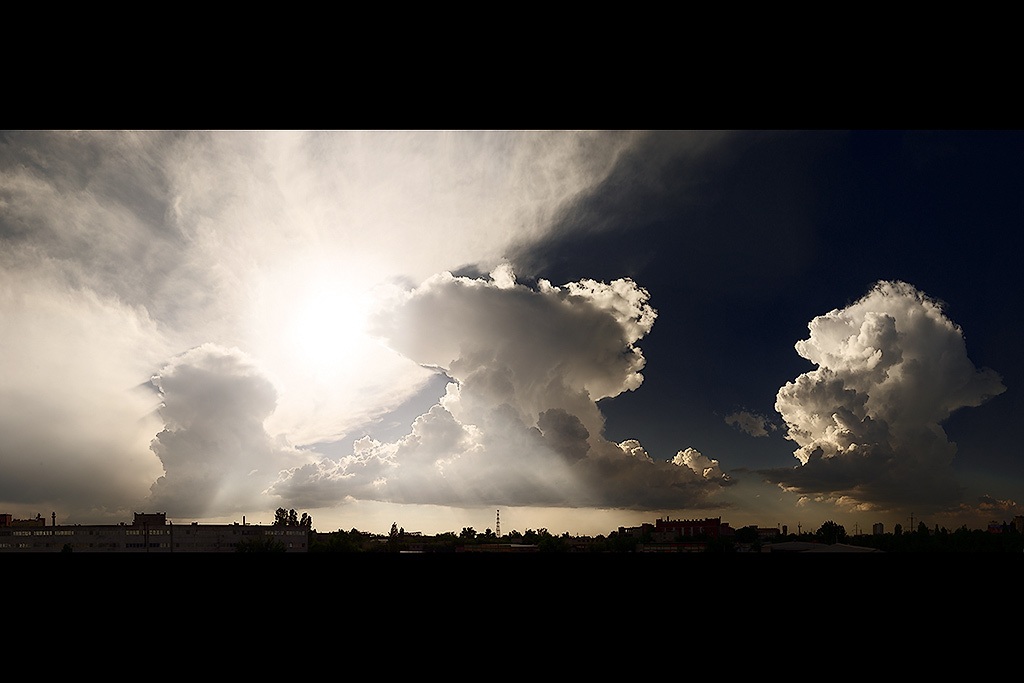
Here the overlap is even more than 1/3
Third, not even the rule, but rather the recommendation, try not to shoot the panorama with a wide-angle lens, otherwise you

Here unrecognizable straight streets have changed. Shot at 24mm (34 vertical frames in 3 rows. Panorama resolution - 167829071, 152 MPks) Large size (4096 pixels on the long side)
Thus, guided by these simple rules, you can get excellent material for the subsequent pasting of the panorama.
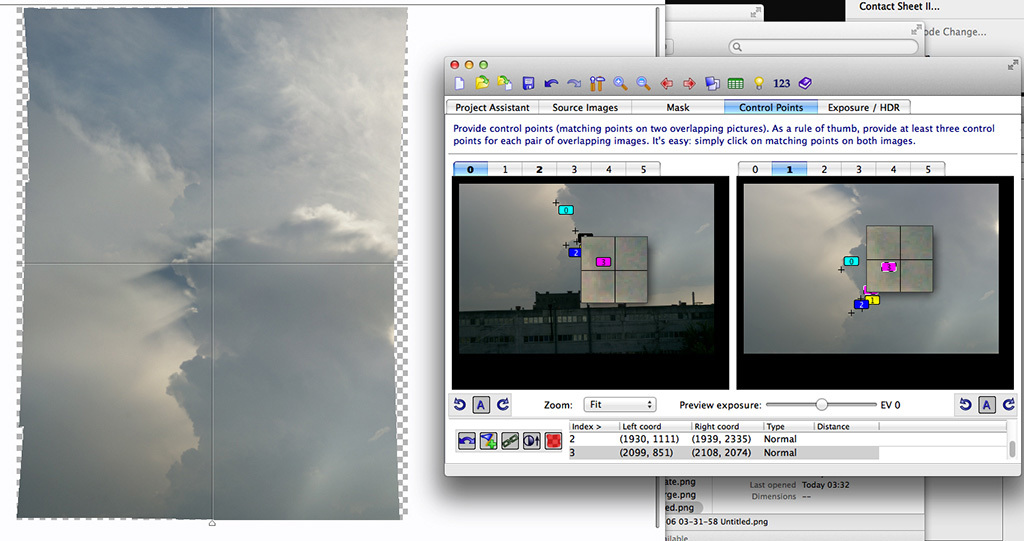
So, you have the material, it's time to start gluing. To begin with, if you shoot in RAW, you need to convert the photos with the same settings so that the panorama fragments do not differ from each other in exposure. After that you need to select the Photomerge menu item in Photoshop and load the original photos
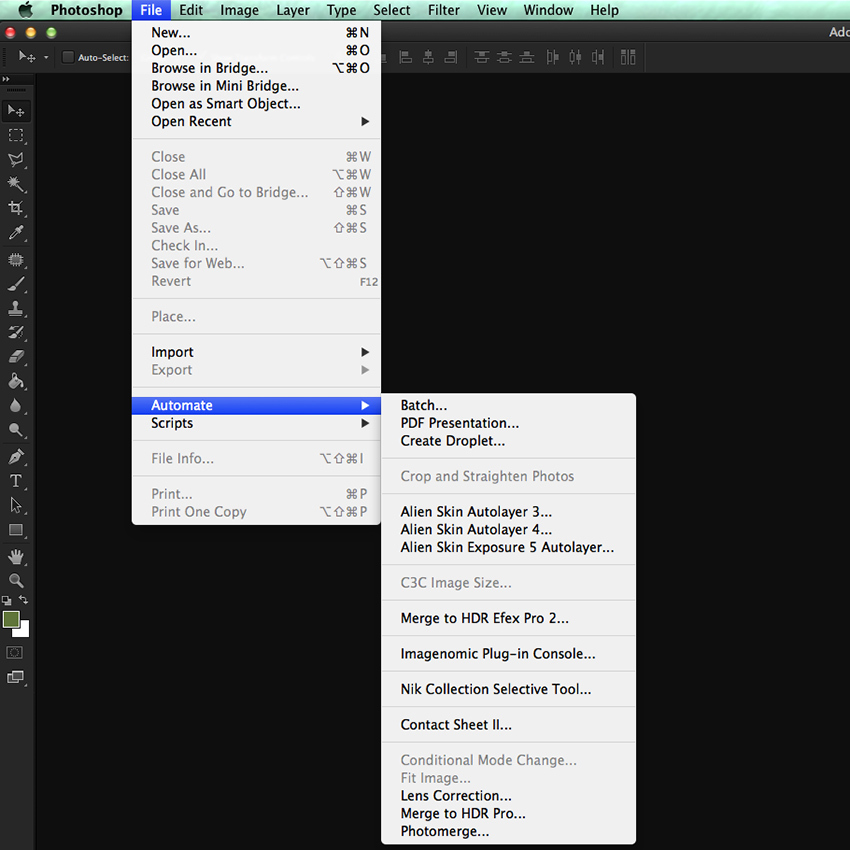
Most often, Photoshop automatically collects beautiful panoramas without user intervention.
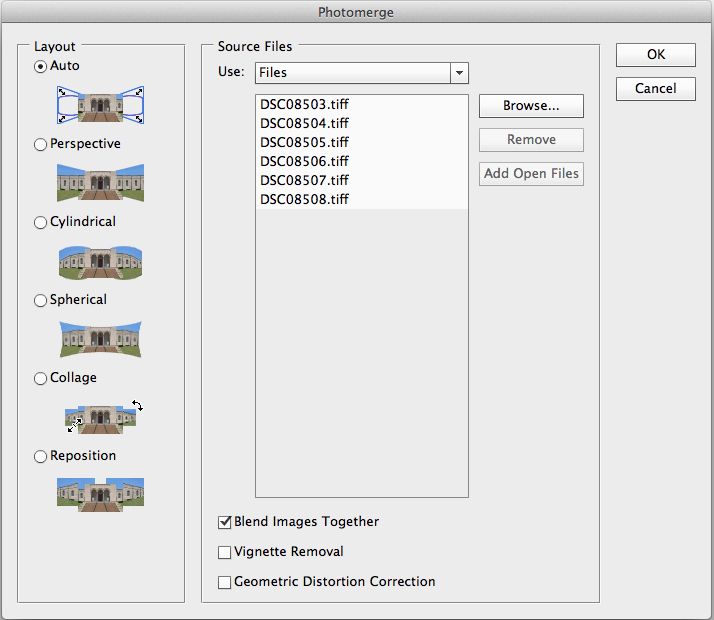
For more complex cases, I prefer to use the PTGui program.
In especially difficult cases when the program cannot match the fragments itself, it will ask you to do it.
Here, for example, a panorama assembled in Photoshop:
Filmed on Sony Nex-3 with Pentax 50/2 lens (89 horizontal shots. Panorama resolution - 2675011024, 295 MPks) Large size (4096 pixels on the long side)

Crop scale 100%. Pay attention to the bird in the lower right.

And this is the original frames. Filmed with vertical stripes from bottom to top, from left to right.
Automation sometimes can not do everything right and sometimes you have to intervene in the process of gluing, or adjust the result.
In addition to landscapes using panning, you can simulate shooting on large-format cameras when you need to get a wide viewing angle and a shallow depth of field. This method is called the Brenizer method. Another name is bokerama. The bottom line is that we shoot fragmentary, for example, a portrait with a telephoto lens, and then collect a panorama from these frames.
Filmed on a Nikon D300 with a Nikkor 85 / 1.8D lens (50 horizontal shots. Panorama resolution - 11470x14337, 164 MPks) Large size (4096 pixels on the long side)
Crop scale 100%.
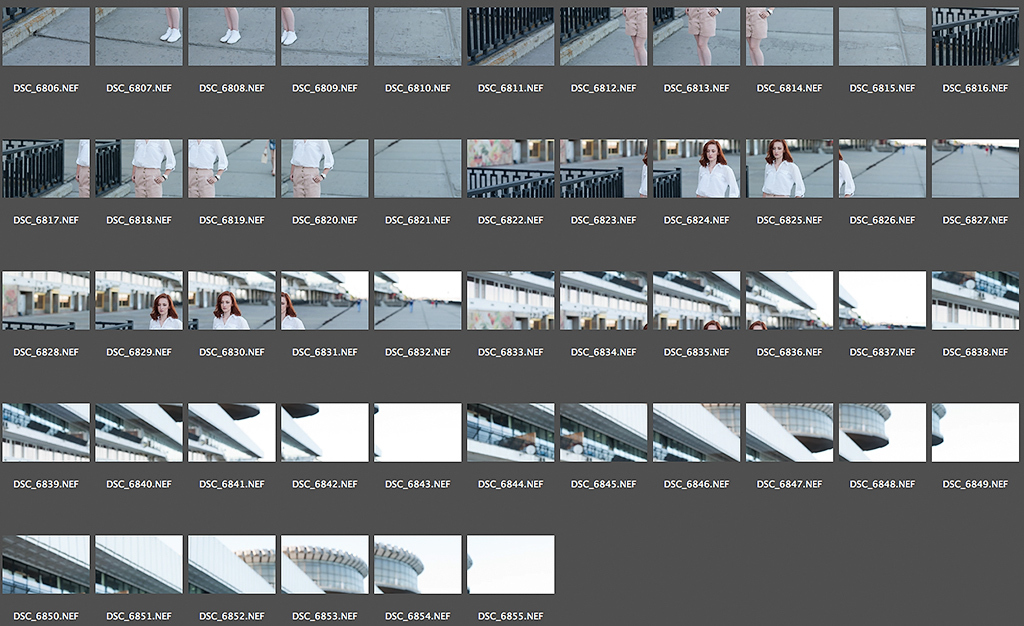
And this is the original frames. Filmed in horizontal stripes from left to right, from bottom to top.
Here, briefly, but it seems, quite clearly told how I shoot panoramas. Hope you enjoyed it. If you have questions - ask in the comments. And yet - is it worth continuing the cycle of articles on photography (including with an IT bias - laser triggers for flash)?
UPD: In the comments, Hesed gave a link to the Brett calculator for the Brenizer method. I share the link and express my gratitude to him.
Source: https://habr.com/ru/post/232083/
All Articles