T-shirt printer: from home crafts to serial models of textile printer
In the summer of 2011, I published a couple of articles on Habré ( here and here ) about how to assemble a textile printer from scrap materials practically on my knees. As it turned out, this topic is very interesting to many people, and since the publication of these articles by amateurs to make fun of printers , many homemade devices have been assembled, which successfully print and even make a profit.
And in this series of articles I want to share with you how a small hobby of a self-made craft over the past few years gradually and imperceptibly turned into a small but rather serious production of printers for direct printing on fabrics, T-shirts and other materials. I will try to tell you what nuances and difficulties I encountered on this way, I will tell you how best to redo modern printers and what errors are best avoided.
So if all this is interesting to you, welcome under kat.
')

I will begin my story with the first device based on Epson 1290, which I wrote about in the last article

After printing some time on it, I began to correct its shortcomings. As it turned out - the weakest point is the table friction drive. Yes, this option works, but delivers some hassle and inconvenience. It was decided to go on a flat belt, and at the same time to get away from the kitchen rails. Unfortunately, photos from that time have not been preserved, only a video of the printing process is left. By design, everything is simple - we put the belt on the shaft and fasten it on the table.
After such a small modification, it became much more convenient to print and I even started printing T-shirts to friends and acquaintances. But as you can see from the video, the print speed of epson 1290 is extremely low. In principle, such a device is quite a right to life when you need to print 3-5 T-shirts per day, especially considering its budget of $ 150. But it's all good on white shirts. But to print on black T-shirts - in 1290 there were only two channels left where it was possible to fill in white ink. And the white print speed was even slower than color. In general, a black T-shirt could easily take an hour and a half. But this speed did not suit me and epson 1290 took the place of epson r1800. He has 8 channels, 4 of them could be left under the color, and 4 to give under the white. And the speed of printing is higher.
Unfortunately, the device based on epson r1800 did not last long for me. The thing is that the speed of printing on white t-shirts has increased, but on black ... on black I could not get a normal print in white ink even despite its 4 channels. As I learned later, a lot of people encounter this problem in textile printers based on R1800 / R1900 / R2400 (these are essentially twins). So just want to warn you - if you do not want to suffer, then do not pour white ink into these devices.
Well, have a little photo cut epson R1800 for installation on the textile table
Remove all plastic case
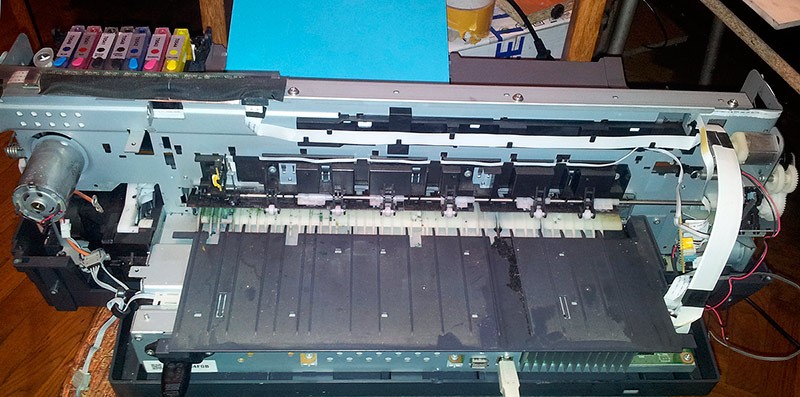
remove all other extra details. The photo shows what should remain - almost bare frame. Well, an extra piece of the printer's frame cut off
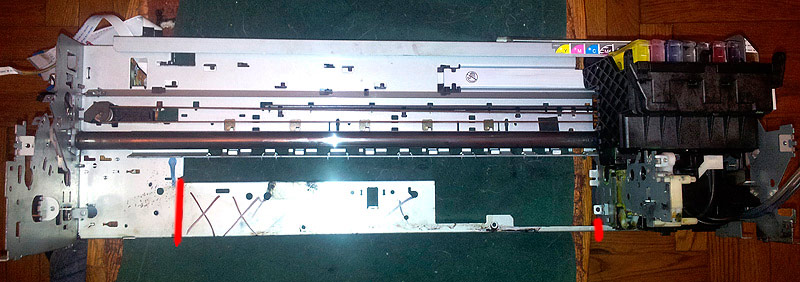
And that's what we have left of the printer
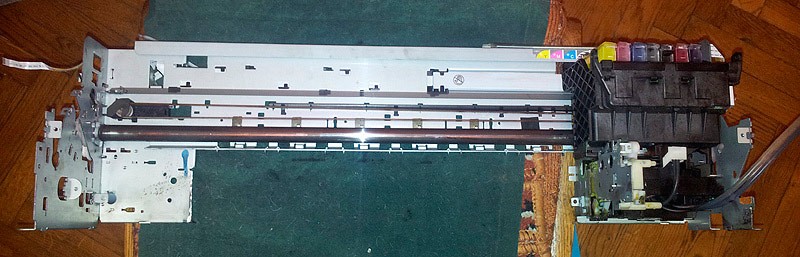
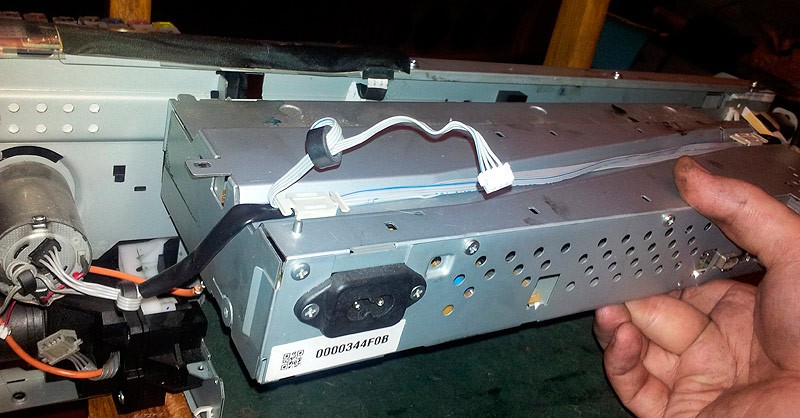
it remains to attach to it the power supply and control board

Without hesitation, the control unit was simply bolted to the printer frame
and this whole structure is delivered instead of the 1290th

In principle, this modification would be rather insignificant and, as I wrote above, it would be almost useless if not for one!
The installation of the r1800 was the starting point on my journey to the production of textile printers. The thing is that at some point I got tired of pushing the table into the print with my hands and, in principle, I decided to start managing the table myself and make the drive through the timing belt and the stepping motor. Therefore, the first controller was assembled immediately with the driver on board and I began to dig deeper into how the printer works

Having forced the table to ride on the encoder signals from the printer, I decided, as they say, to make a knight's move and solve two more problems:
1. Start typing in white
2. Increase the print format (all the same, the A3 format is too small for T-shirts L-XXL)
Therefore, after a long struggle with himself, it was decided to buy and cut a brand-new Epson 3880. Considering its price of $ 1,800 at that time, it was a very risky undertaking. It is one thing to cut B. printers with a price of 30 $ -75 $ and quite another thing to cut the printer for almost two thousand.
Why this particular device? because the cheapest eight-color A2 format. At the same time, the epson positions it as a trimmed version - there is no roll feed, paper scraps, small cartridges ... But this version is trimmed for those who want to print on paper. But just for me, this is good - there are no unnecessary functions, a good price, ink supply under pressure. and, in principle, a printer about a series where everything was done quite successfully (which I was convinced of after disassembling it). Plus, I knew that the Greeks made textiles on the basis of these epons and that they are quite good at printing white.
As it turned out, there wasn’t much difference if you saw the printer for 5 kopecks or a couple of thousand dollars. Outside is the same plastic, and inside is the same frame, a piece of which we cut to move the table. But I already wanted to do everything well with beautifully. Therefore, the PCB for the controlling controller ordered already at the factory

I quickly screwed it to the frame of the aluminum profile and started testing
Since the apparatus itself began to work, it was decided to test further on textiles. Textile paints were flooded and when he began to print perfectly in white, and the top also in color - my joy knew no bounds
After successful tests I began to think about how to make a beautiful body.
The idea was good, but something real had to be made. And the easiest way to find plastic cutting advertisers. Therefore, the legs and sides of the plastic were quickly made
and the back wall is also made of plastic, covering everything. what we cut off

It turned out quite a nice, but ... not practical. the point is that a textile printer needs maintenance. Textile paint sticks to the parking head, on the knife, cleansing the head and all this needs to be cleaned from time to time. But the trouble is that such a convenient and beautiful native building does not provide convenient access to all these nodes.
Therefore, it was decided to remove the completely native printer case and make completely your own, from metal. While trying on, doing the drawings, and waiting for the manufacture of the body - brought to mind the controlling controller. Now he controlled not only the movement of the table back and forth. but also engaged in vertical positioning, clearly setting the table to the desired height on the optosensors. Well, added all sorts of nice features such as resetting the levels of cartridges, touch keyboard ...
Unfortunately, the photos of the first stainless steel monster have not been preserved - but there is a video of his work
It was already one of the first prototypes that can be called pre-production. But he still had many shortcomings, although they already concerned not so much the printer itself. how much assembly process and materials used. The first problem I encountered is not exactly accurate bending, even on CNC machines. Therefore, we had to redo the entire structure with the ability to adjust the size where the beaters could have screwed up. The second problem was that in enterprises. working with metal, the attitude to this metal is devil-may-care and the stainless steel was all scratched. Trifle, but also unpleasant.
Therefore, all the drawings have been redone and it is time for the beta versions. She decided to make shells just of steel and cover them with polymer - this made it possible to give a presentation and avoid scratches. This is how the first black device appeared.
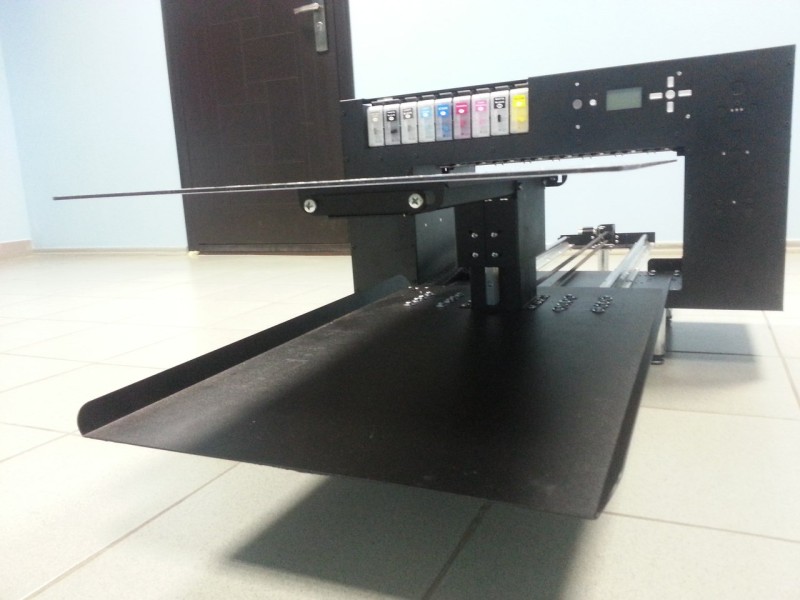
I decided to approach the construction seriously - cylindrical guides on rails, structural aluminum profile, console table ...
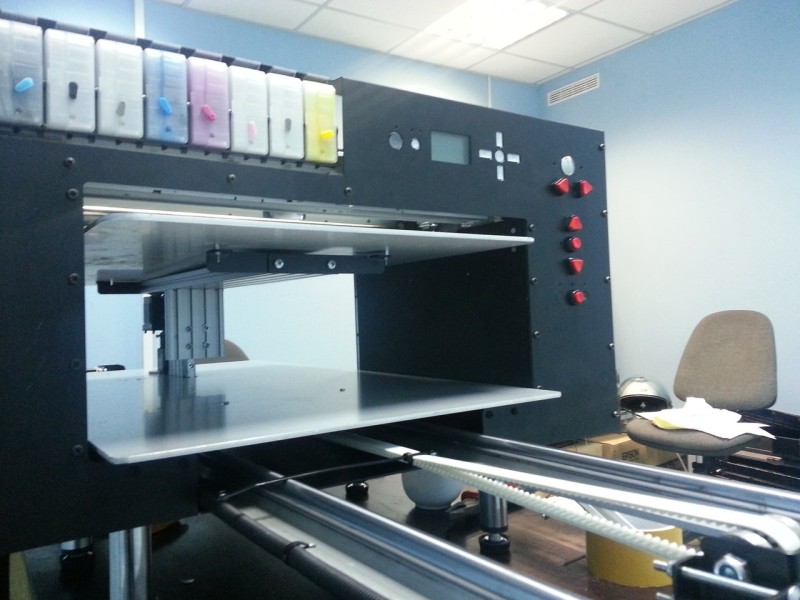
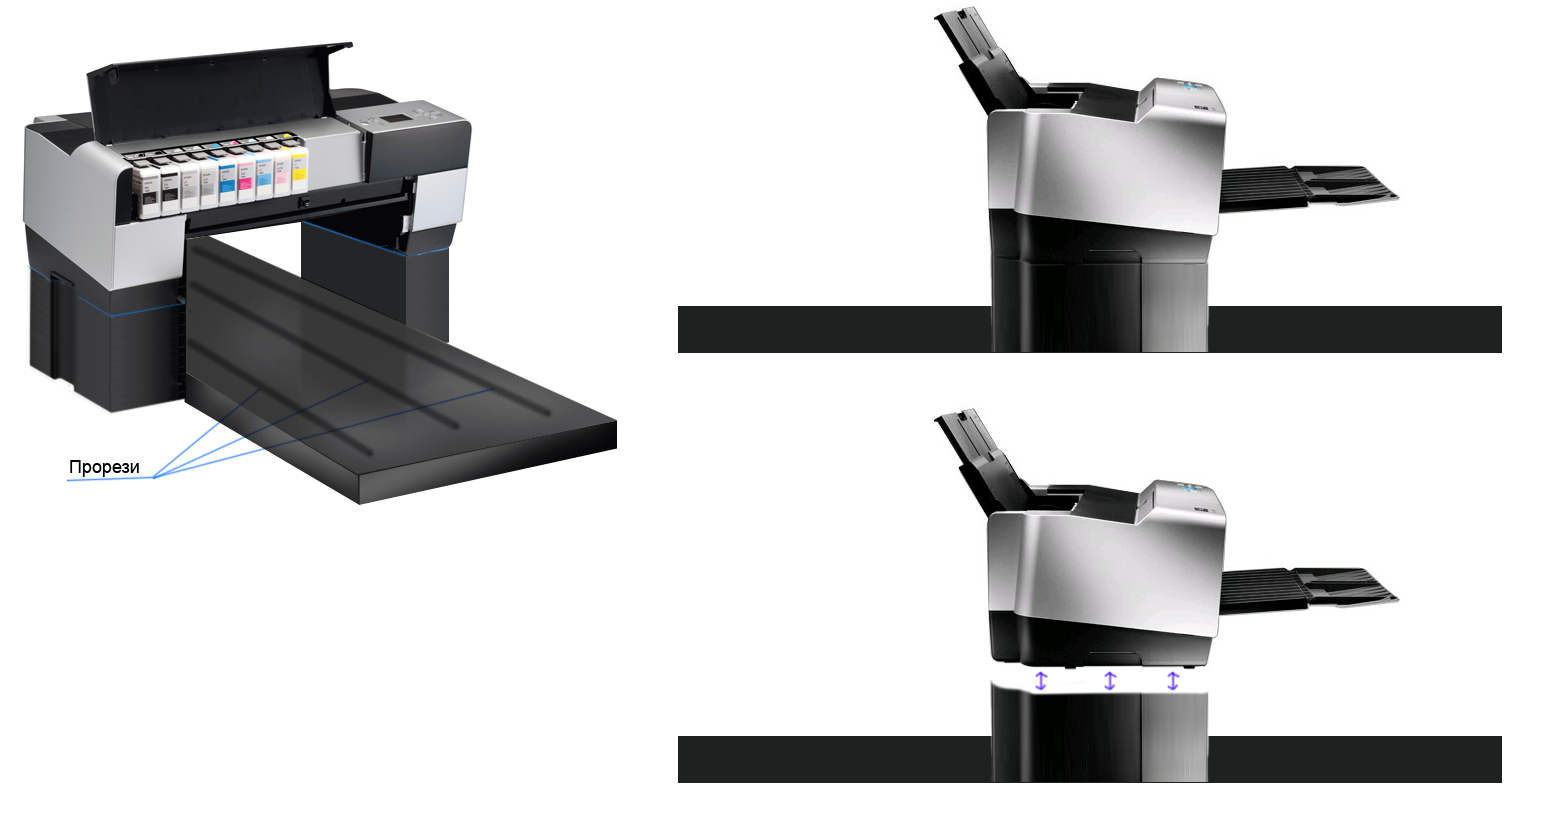
Now I’ll dwell on the console table. Why chose such a design despite the fact that in the manufacture it is more complicated than a classic table. The thing is that when printing, the distance from the print head to the material is very critical. If the distance is more than 2-3mm, then the head begins to dust, the picture loses quality. And when we put a T-shirt in two layers on the table, the thick seams become double. and if the distance from the print head to the T-shirt is 2mm, then the seams in two layers give a very high mound, which the head can sometimes catch on, which is unacceptable. But on the console table the T-shirt does not fall on top, but puts on - therefore on the table there is a single-layer T-shirt and the seams do not protrude so strongly above the common surface. This allows you to print on the main surface of the shirt and protruding seams. Therefore, this requires such a clever design

But the constructional profile was not very convenient at work. And it was decided to go completely to the steel structure. As a result, this was the device that was the last beta version.


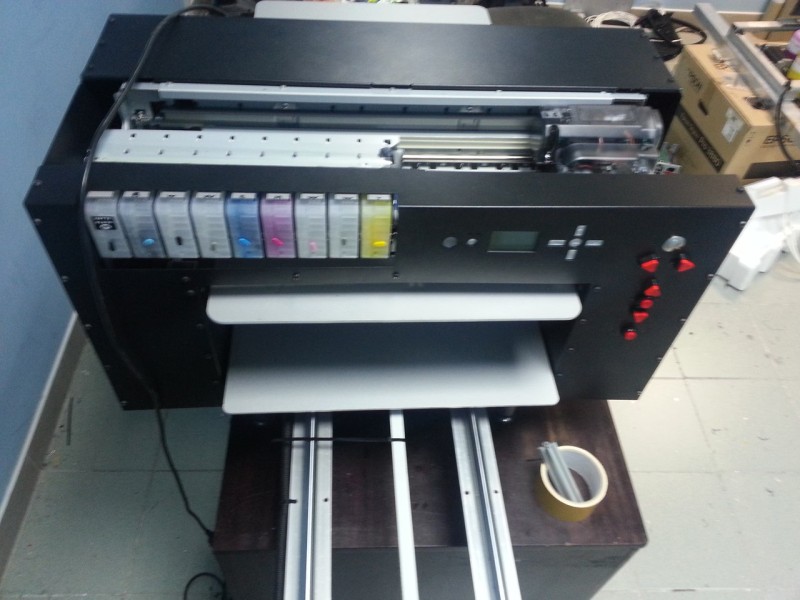
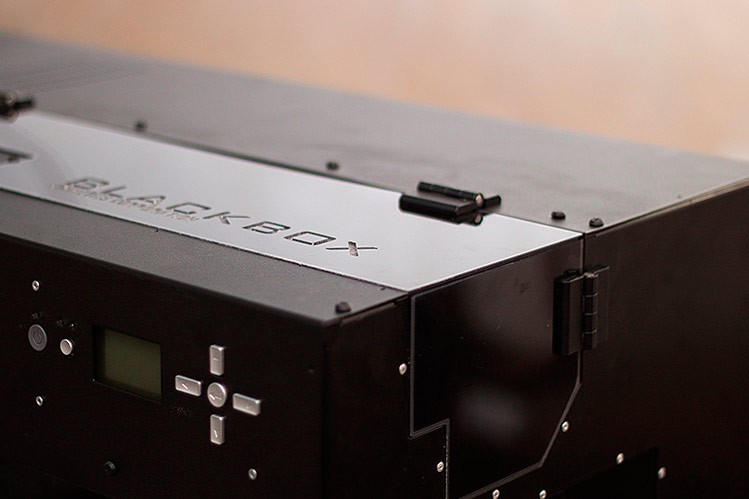
For a while I stopped at such a structure, and in the expanses of the CIS, quite a few such devices are already printing. But then she and the beta version, that would bring it to the ideal. Therefore, I tried to listen to users and bring the printer even more to the ideal. Taking into account a lot of wishes, I reached the first serial device - the BlackBOX.
Despite the fact that it looks very similar to the beta versions, it turned out to be a completely reworked structure, which significantly increased the rigidity of the base, added removable tables of different sizes for the quick change of which magnets are used, the noise level during work is completely reduced, the fully enclosed which makes it still easy to carry out preventive maintenance ...
For a start, the whole project was made in the autodesk inventor - and it had to be approached very responsibly - with the placement of all bolts and gadgets (yes, there were cases when the bolt heads interfered, and some were barely able to crawl to be screwed) and preliminary renders were made

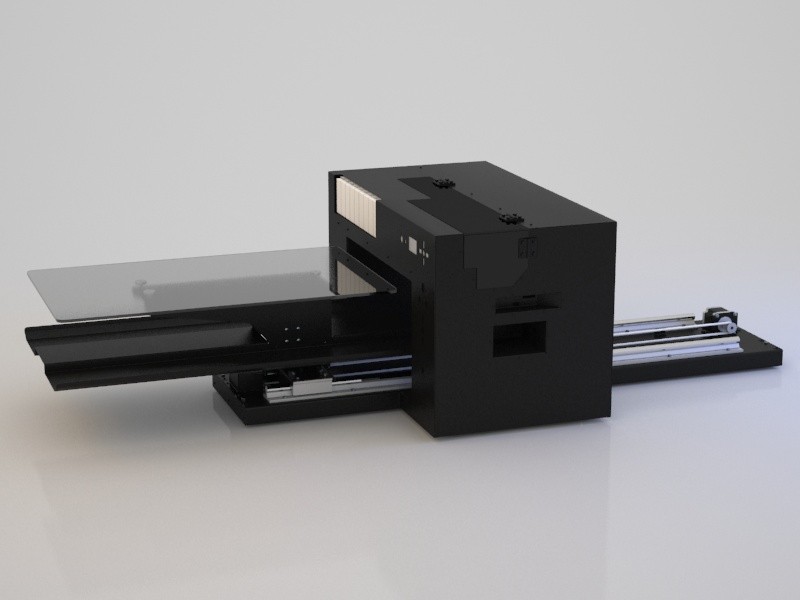

Then it all went into production and now successfully passes the testing process.
Here are some partial photos of this device - I will try to tell about it in the next article in more detail and with a lot of photos. And I will also answer questions that will be asked here in the comments. Also in the next part I will tell you in detail about the free software, which forces the whole thing to print in color and white ink.

Well, I’ll finish with a small video, where I talked a little about the functionality of the latest BlackBox, although the sound quality did not work.
PS And the next time I will talk about the process of creating a UV printer, the work on which is just underway at the moment.
PPS A detailed description of the textile printer BlackBox v2.0
And in this series of articles I want to share with you how a small hobby of a self-made craft over the past few years gradually and imperceptibly turned into a small but rather serious production of printers for direct printing on fabrics, T-shirts and other materials. I will try to tell you what nuances and difficulties I encountered on this way, I will tell you how best to redo modern printers and what errors are best avoided.
So if all this is interesting to you, welcome under kat.
')
I will begin my story with the first device based on Epson 1290, which I wrote about in the last article
After printing some time on it, I began to correct its shortcomings. As it turned out - the weakest point is the table friction drive. Yes, this option works, but delivers some hassle and inconvenience. It was decided to go on a flat belt, and at the same time to get away from the kitchen rails. Unfortunately, photos from that time have not been preserved, only a video of the printing process is left. By design, everything is simple - we put the belt on the shaft and fasten it on the table.
After such a small modification, it became much more convenient to print and I even started printing T-shirts to friends and acquaintances. But as you can see from the video, the print speed of epson 1290 is extremely low. In principle, such a device is quite a right to life when you need to print 3-5 T-shirts per day, especially considering its budget of $ 150. But it's all good on white shirts. But to print on black T-shirts - in 1290 there were only two channels left where it was possible to fill in white ink. And the white print speed was even slower than color. In general, a black T-shirt could easily take an hour and a half. But this speed did not suit me and epson 1290 took the place of epson r1800. He has 8 channels, 4 of them could be left under the color, and 4 to give under the white. And the speed of printing is higher.
Unfortunately, the device based on epson r1800 did not last long for me. The thing is that the speed of printing on white t-shirts has increased, but on black ... on black I could not get a normal print in white ink even despite its 4 channels. As I learned later, a lot of people encounter this problem in textile printers based on R1800 / R1900 / R2400 (these are essentially twins). So just want to warn you - if you do not want to suffer, then do not pour white ink into these devices.
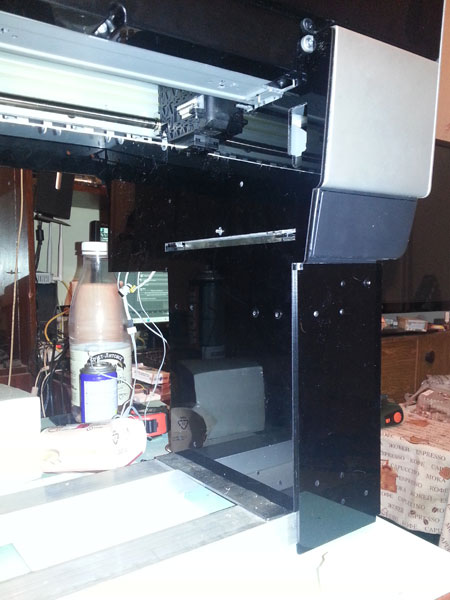
Well, have a little photo cut epson R1800 for installation on the textile table
Remove all plastic case
remove all other extra details. The photo shows what should remain - almost bare frame. Well, an extra piece of the printer's frame cut off
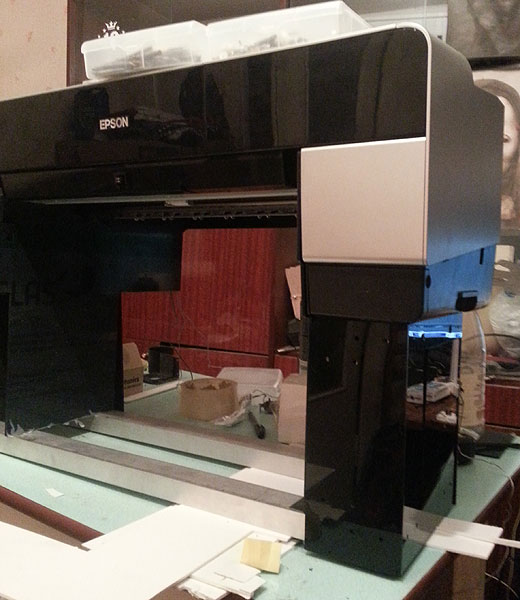
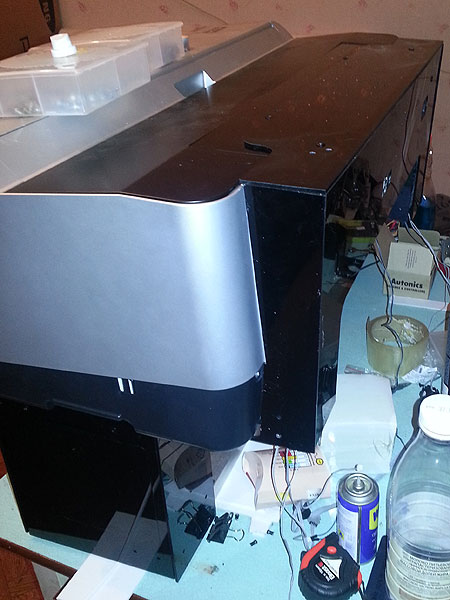
And that's what we have left of the printer
it remains to attach to it the power supply and control board
Without hesitation, the control unit was simply bolted to the printer frame
and this whole structure is delivered instead of the 1290th
In principle, this modification would be rather insignificant and, as I wrote above, it would be almost useless if not for one!
The installation of the r1800 was the starting point on my journey to the production of textile printers. The thing is that at some point I got tired of pushing the table into the print with my hands and, in principle, I decided to start managing the table myself and make the drive through the timing belt and the stepping motor. Therefore, the first controller was assembled immediately with the driver on board and I began to dig deeper into how the printer works
Having forced the table to ride on the encoder signals from the printer, I decided, as they say, to make a knight's move and solve two more problems:
1. Start typing in white
2. Increase the print format (all the same, the A3 format is too small for T-shirts L-XXL)
Therefore, after a long struggle with himself, it was decided to buy and cut a brand-new Epson 3880. Considering its price of $ 1,800 at that time, it was a very risky undertaking. It is one thing to cut B. printers with a price of 30 $ -75 $ and quite another thing to cut the printer for almost two thousand.
Why this particular device? because the cheapest eight-color A2 format. At the same time, the epson positions it as a trimmed version - there is no roll feed, paper scraps, small cartridges ... But this version is trimmed for those who want to print on paper. But just for me, this is good - there are no unnecessary functions, a good price, ink supply under pressure. and, in principle, a printer about a series where everything was done quite successfully (which I was convinced of after disassembling it). Plus, I knew that the Greeks made textiles on the basis of these epons and that they are quite good at printing white.
As it turned out, there wasn’t much difference if you saw the printer for 5 kopecks or a couple of thousand dollars. Outside is the same plastic, and inside is the same frame, a piece of which we cut to move the table. But I already wanted to do everything well with beautifully. Therefore, the PCB for the controlling controller ordered already at the factory
I quickly screwed it to the frame of the aluminum profile and started testing
Since the apparatus itself began to work, it was decided to test further on textiles. Textile paints were flooded and when he began to print perfectly in white, and the top also in color - my joy knew no bounds
After successful tests I began to think about how to make a beautiful body.
The idea was good, but something real had to be made. And the easiest way to find plastic cutting advertisers. Therefore, the legs and sides of the plastic were quickly made
and the back wall is also made of plastic, covering everything. what we cut off
It turned out quite a nice, but ... not practical. the point is that a textile printer needs maintenance. Textile paint sticks to the parking head, on the knife, cleansing the head and all this needs to be cleaned from time to time. But the trouble is that such a convenient and beautiful native building does not provide convenient access to all these nodes.
Therefore, it was decided to remove the completely native printer case and make completely your own, from metal. While trying on, doing the drawings, and waiting for the manufacture of the body - brought to mind the controlling controller. Now he controlled not only the movement of the table back and forth. but also engaged in vertical positioning, clearly setting the table to the desired height on the optosensors. Well, added all sorts of nice features such as resetting the levels of cartridges, touch keyboard ...
Unfortunately, the photos of the first stainless steel monster have not been preserved - but there is a video of his work
It was already one of the first prototypes that can be called pre-production. But he still had many shortcomings, although they already concerned not so much the printer itself. how much assembly process and materials used. The first problem I encountered is not exactly accurate bending, even on CNC machines. Therefore, we had to redo the entire structure with the ability to adjust the size where the beaters could have screwed up. The second problem was that in enterprises. working with metal, the attitude to this metal is devil-may-care and the stainless steel was all scratched. Trifle, but also unpleasant.
Therefore, all the drawings have been redone and it is time for the beta versions. She decided to make shells just of steel and cover them with polymer - this made it possible to give a presentation and avoid scratches. This is how the first black device appeared.
I decided to approach the construction seriously - cylindrical guides on rails, structural aluminum profile, console table ...
Now I’ll dwell on the console table. Why chose such a design despite the fact that in the manufacture it is more complicated than a classic table. The thing is that when printing, the distance from the print head to the material is very critical. If the distance is more than 2-3mm, then the head begins to dust, the picture loses quality. And when we put a T-shirt in two layers on the table, the thick seams become double. and if the distance from the print head to the T-shirt is 2mm, then the seams in two layers give a very high mound, which the head can sometimes catch on, which is unacceptable. But on the console table the T-shirt does not fall on top, but puts on - therefore on the table there is a single-layer T-shirt and the seams do not protrude so strongly above the common surface. This allows you to print on the main surface of the shirt and protruding seams. Therefore, this requires such a clever design
But the constructional profile was not very convenient at work. And it was decided to go completely to the steel structure. As a result, this was the device that was the last beta version.
For a while I stopped at such a structure, and in the expanses of the CIS, quite a few such devices are already printing. But then she and the beta version, that would bring it to the ideal. Therefore, I tried to listen to users and bring the printer even more to the ideal. Taking into account a lot of wishes, I reached the first serial device - the BlackBOX.
Despite the fact that it looks very similar to the beta versions, it turned out to be a completely reworked structure, which significantly increased the rigidity of the base, added removable tables of different sizes for the quick change of which magnets are used, the noise level during work is completely reduced, the fully enclosed which makes it still easy to carry out preventive maintenance ...
For a start, the whole project was made in the autodesk inventor - and it had to be approached very responsibly - with the placement of all bolts and gadgets (yes, there were cases when the bolt heads interfered, and some were barely able to crawl to be screwed) and preliminary renders were made
Then it all went into production and now successfully passes the testing process.
Here are some partial photos of this device - I will try to tell about it in the next article in more detail and with a lot of photos. And I will also answer questions that will be asked here in the comments. Also in the next part I will tell you in detail about the free software, which forces the whole thing to print in color and white ink.
Well, I’ll finish with a small video, where I talked a little about the functionality of the latest BlackBox, although the sound quality did not work.
PS And the next time I will talk about the process of creating a UV printer, the work on which is just underway at the moment.
PPS A detailed description of the textile printer BlackBox v2.0
Source: https://habr.com/ru/post/232021/
All Articles