How to make a phone holder with your own hands
Many of us love tinkering. I, for example, in childhood loved to burn on a tree and fold origami. And, judging by the activity in the DIY hub, many users of the habr like to create something.
The other day I visited my designer friend and found her in an interesting occupation. She made a mobile phone holder with OWN HANDS . Moreover, it turned out to be a very exciting experience! I asked for her “master class” and then decided to share my impressions with you. For the manufacture of our own holder, we needed simple materials that can be bought in the nearest office supply store or simply found at home. The only “BUT” is polycaprolactone (yes, don't worry. I couldn't read it either the first time). In order not to break tongues and fingers, we will call it simply "thermoplastic". In addition to the pronunciation of the name with him there was no particular difficulty, because It can be purchased at any hardware store, or in a store for creativity (in this article you can learn more about polycapro ..., in general, learn about thermoplastic).
So,
')
1. Water;
2. A teapot;
3. Deep container in which we will pour boiling water;
4. Thermoplastic;
5. Stationery knife;
6. Scissors;
7. Linear;
8. Any metal object to stir the molten thermoplastic (We used a dental spatula);
9. A knife for artwork;
10. Handle;
11. Linea;
12. Circus;
13. Pencil;
14. Eraser;
15. Grease paper;
16. Cutting board (preferably new);
17. Metal bank.
We need to measure the dimensions of the phone (height can be picked up by eye, it’s not at all necessary to make the holder the entire length of the device).
Then you need to make a drawing of the corresponding stencils on paper and cut with scissors. Next, use a stationery knife to cut off the top and bottom of the metal can and cut it along. We lay out the paper stencils on the resulting metal base and cut the metal stencils with a clerical knife now.
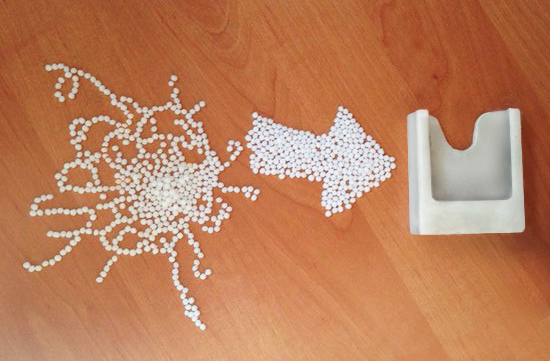
1. Fill thermoplastic balls with hot water (water temperature should be at least 60 degrees);
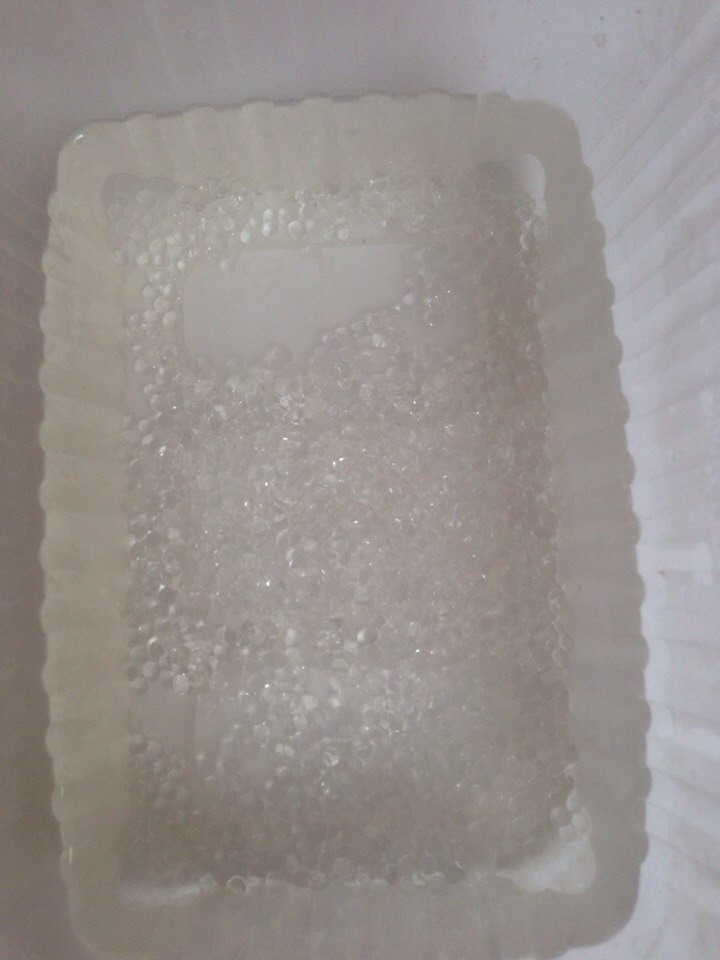
2. Gently mix the granules in a container until a homogeneous mass;

3. A little knead in the hands (thermoplastic should become a little harder);
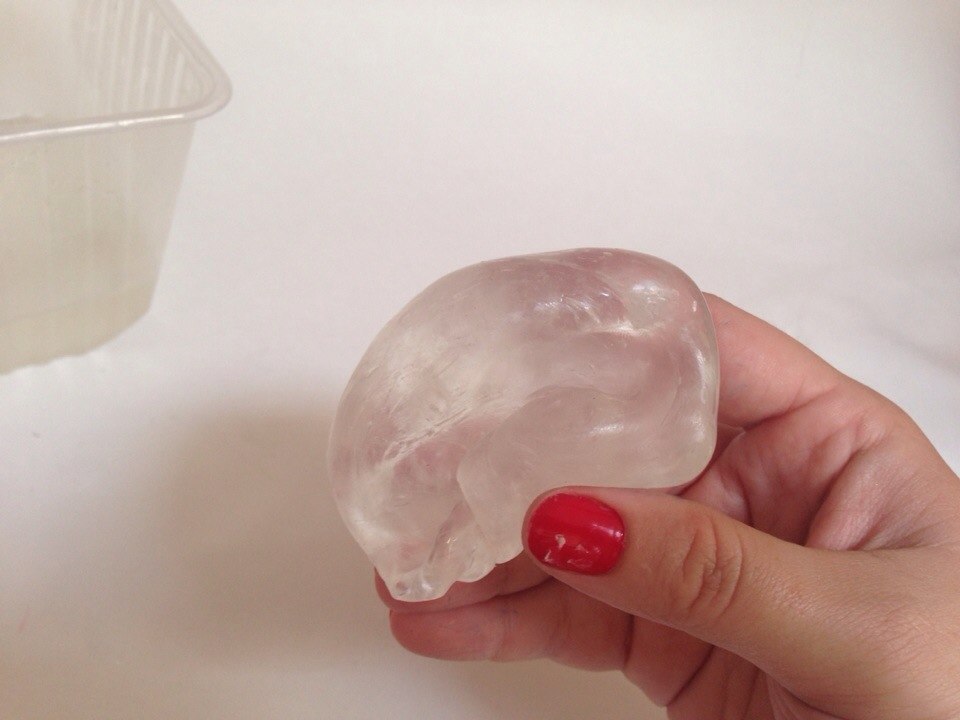
4. Lay out on any solid foundation spread out and roll out so that it becomes dense (in general, thermoplastic its texture is very similar to clay);
5. Lay out the stencils and circle them on the basis;
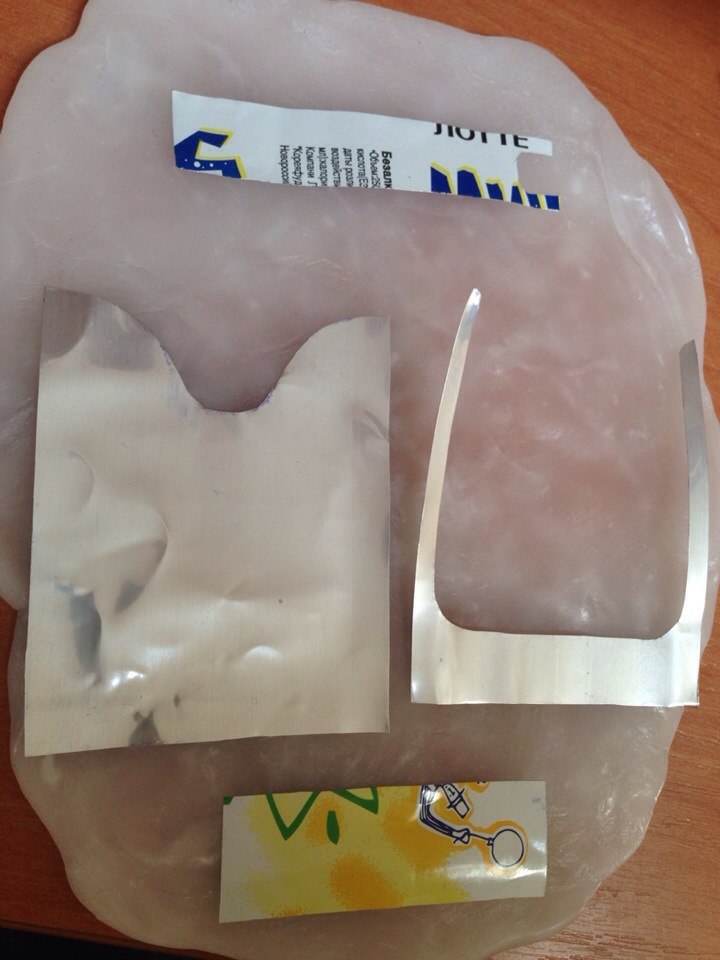
6. Cut out the details (Thickness ~ 4 mm);

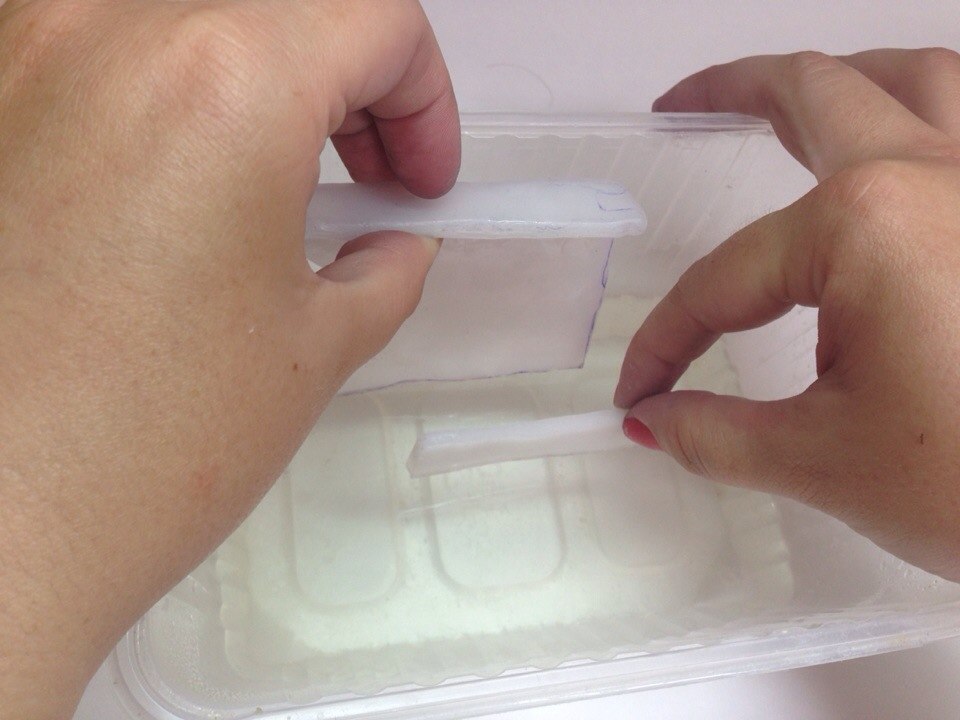
7. Now, to glue the resulting elements, you need to partially immerse them in hot water (places for gluing must be kept in water until they become transparent);
The following steps are very simple, so I decided that illustrating them makes no sense:
8. While the bend is not hardened, we adjust the holder to the size of the phone;
9. Again we dip the holder from all sides into boiling water and level it on a hard surface (for example, a kitchen board);
10. Trim excess plastic with a knife;
11. Once again, dip the holder into the water and smooth out the remaining bumps with your fingers;
12. To process a sandpaper, in order to finally get rid of irregularities.
* It is better not to wait for the water to boil. If the thermoplastic is very hot, it will become too plastic.
* Each time it is necessary to check that the part of the plastic with which you are working has become transparent FULLY.
* If the thermoplastic has cooled and hardened, you need to dip it in hot water so that it becomes plastic again.
* At each remelting, the water temperature should be higher than before.
* Be careful when gluing shapes. Do not forget that you work with boiling water.
* To make it easier to align the irregularities on the bends, you should pre-cut a number of small plastic parts. To do this, you need to completely melt the little part and cover up uneven places with it.
* The main surface can be leveled, pressed to a hard plane.
* Always try to avoid residual water on those parts that are ready.
Of course, this is not a five-minute lesson, but I had a great time on a day off. Instead of Sunday procrastination, I did something exciting and even useful. Now this holder has become an indispensable thing in my car. Finally, my phone does not hang around the cabin. I am sure that every interested habrovchanin will come up with his interesting application to polycaprolactone. If someone has already worked with this material, I suggest sharing your creations in the comments. Here is the result of our efforts:
The other day I visited my designer friend and found her in an interesting occupation. She made a mobile phone holder with OWN HANDS . Moreover, it turned out to be a very exciting experience! I asked for her “master class” and then decided to share my impressions with you. For the manufacture of our own holder, we needed simple materials that can be bought in the nearest office supply store or simply found at home. The only “BUT” is polycaprolactone (yes, don't worry. I couldn't read it either the first time). In order not to break tongues and fingers, we will call it simply "thermoplastic". In addition to the pronunciation of the name with him there was no particular difficulty, because It can be purchased at any hardware store, or in a store for creativity (in this article you can learn more about polycapro ..., in general, learn about thermoplastic).
So,
')
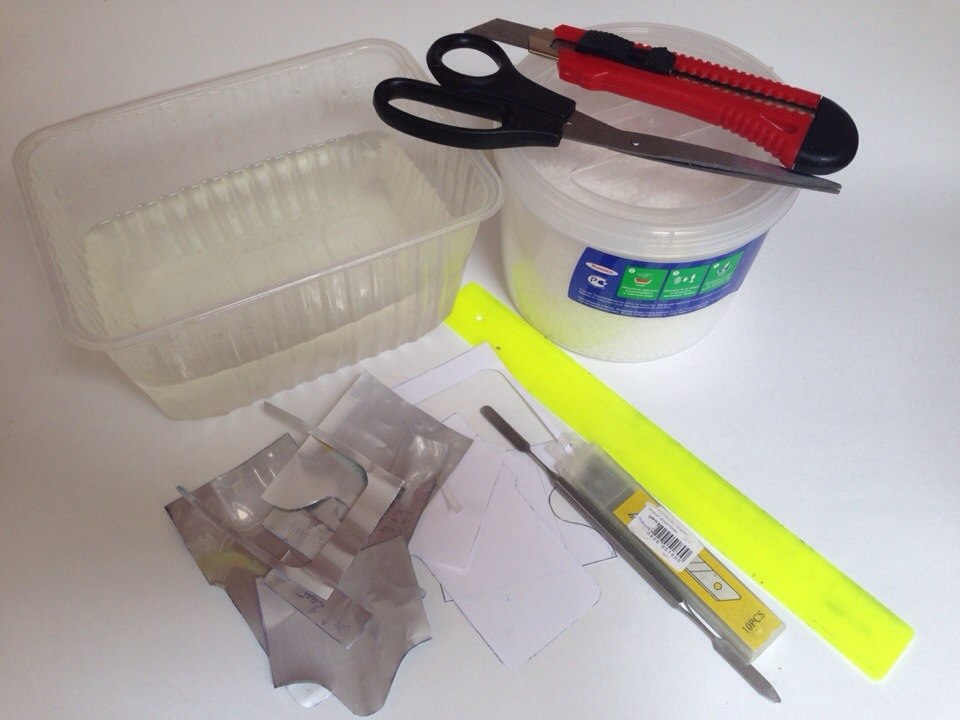
To create a holder, we need:
1. Water;
2. A teapot;
3. Deep container in which we will pour boiling water;
4. Thermoplastic;
5. Stationery knife;
6. Scissors;
7. Linear;
8. Any metal object to stir the molten thermoplastic (We used a dental spatula);
9. A knife for artwork;
10. Handle;
11. Linea;
12. Circus;
13. Pencil;
14. Eraser;
15. Grease paper;
16. Cutting board (preferably new);
17. Metal bank.
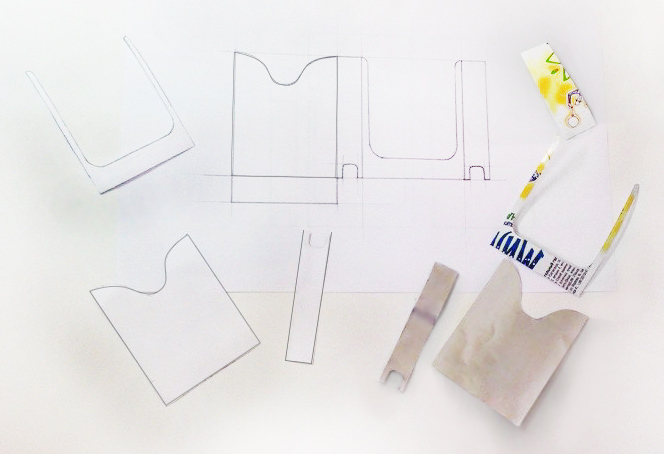
Training. How to cut stencils:
We need to measure the dimensions of the phone (height can be picked up by eye, it’s not at all necessary to make the holder the entire length of the device).
Then you need to make a drawing of the corresponding stencils on paper and cut with scissors. Next, use a stationery knife to cut off the top and bottom of the metal can and cut it along. We lay out the paper stencils on the resulting metal base and cut the metal stencils with a clerical knife now.
HOW TO:
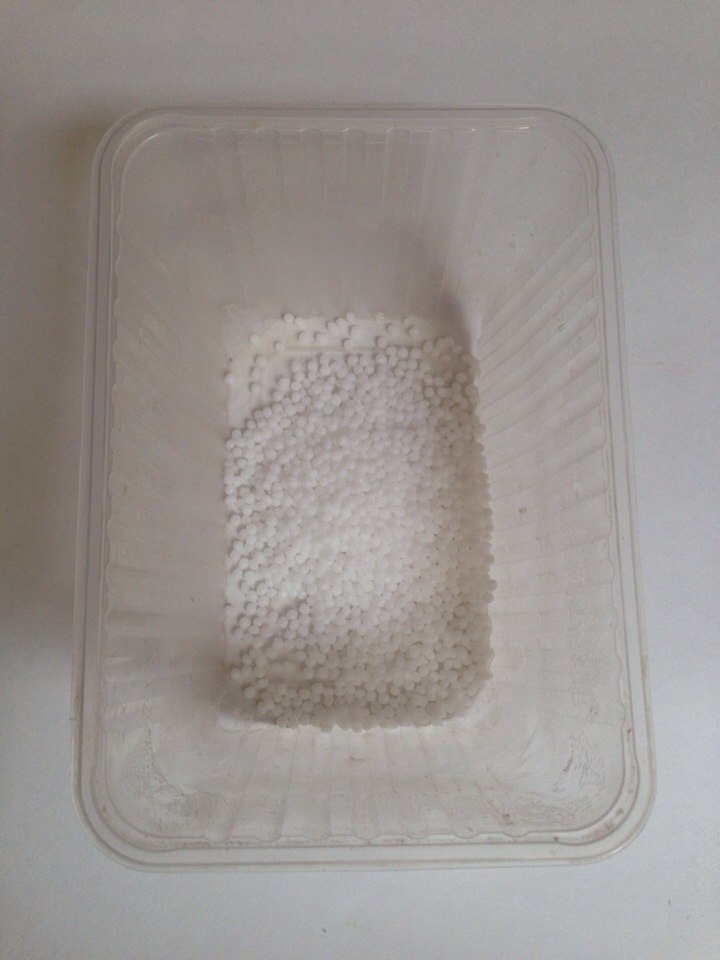
1. Fill thermoplastic balls with hot water (water temperature should be at least 60 degrees);
2. Gently mix the granules in a container until a homogeneous mass;
3. A little knead in the hands (thermoplastic should become a little harder);
4. Lay out on any solid foundation spread out and roll out so that it becomes dense (in general, thermoplastic its texture is very similar to clay);
5. Lay out the stencils and circle them on the basis;
6. Cut out the details (Thickness ~ 4 mm);
7. Now, to glue the resulting elements, you need to partially immerse them in hot water (places for gluing must be kept in water until they become transparent);
The following steps are very simple, so I decided that illustrating them makes no sense:
8. While the bend is not hardened, we adjust the holder to the size of the phone;
9. Again we dip the holder from all sides into boiling water and level it on a hard surface (for example, a kitchen board);
10. Trim excess plastic with a knife;
11. Once again, dip the holder into the water and smooth out the remaining bumps with your fingers;
12. To process a sandpaper, in order to finally get rid of irregularities.
Tips:
* It is better not to wait for the water to boil. If the thermoplastic is very hot, it will become too plastic.
* Each time it is necessary to check that the part of the plastic with which you are working has become transparent FULLY.
* If the thermoplastic has cooled and hardened, you need to dip it in hot water so that it becomes plastic again.
* At each remelting, the water temperature should be higher than before.
* Be careful when gluing shapes. Do not forget that you work with boiling water.
* To make it easier to align the irregularities on the bends, you should pre-cut a number of small plastic parts. To do this, you need to completely melt the little part and cover up uneven places with it.
* The main surface can be leveled, pressed to a hard plane.
* Always try to avoid residual water on those parts that are ready.
Total
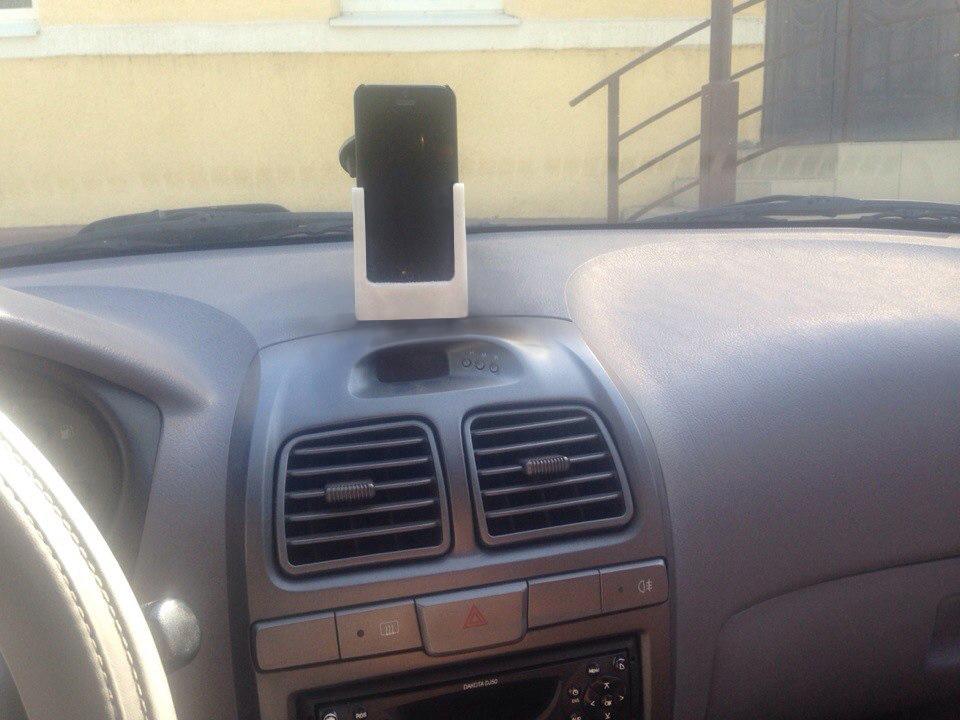
Of course, this is not a five-minute lesson, but I had a great time on a day off. Instead of Sunday procrastination, I did something exciting and even useful. Now this holder has become an indispensable thing in my car. Finally, my phone does not hang around the cabin. I am sure that every interested habrovchanin will come up with his interesting application to polycaprolactone. If someone has already worked with this material, I suggest sharing your creations in the comments. Here is the result of our efforts:
Source: https://habr.com/ru/post/231499/
All Articles