Speedometer for skate. Hopelessness
Prehistory
Good day.
One fine summer evening, in search of something long forgotten, but fascinating, I sorted through things in boxes. Looking into the latter, already slightly desperate, I still found an interesting thing. It was a Chinese bicycle speedometer. Of course, the microcomputer was not there - which is not surprising (as a child, thanks to my curiosity, most of the things I had taken away were not collected and were simply thrown away). But this was not the only problem - I do not have a bicycle. His older brother took him, and I myself ride a skateboard. So the idea arose, what to do!
Under the cut a lot of photos.
Components
Skate
Since I do not perform any tricks on a skateboard, I ride the cruiserboard for my own pleasure and it is interesting: “how long have I driven?”.
Photo cruiserboard'a

Smart watch
On the New Year, I bought myself such a watch from the Chinese:
Photos of smart watches

This smart watch company SmartQ, called Z-Watch. Share on older (Z1) and younger (Z1-Lite) model. The difference is that in the younger model there isn’t: a Wi-fi module, eMMC 512Mb flash memory (in the older 4Gb), 256Mb RAM (in the older 512Mb). The watch is equipped with a 1.54-inch TFT LCD screen with a resolution of 240x240 pixels, an Ingenic JZ4775 processor with a frequency of 1.0Ghz, Bluetooth 4.0 BLE, an IEEE 802.11 b / g / n Wi-fi module, an accelerometer, waterproof IP-X7 (3 ATM), a Li battery -poly at 300mAh, operating system OS Android 4.4 KitKat (simplified).
')
Arduino Mini Pro
Arduino Pro Mini microcontroller:
Photo of Arduino Pro Mini
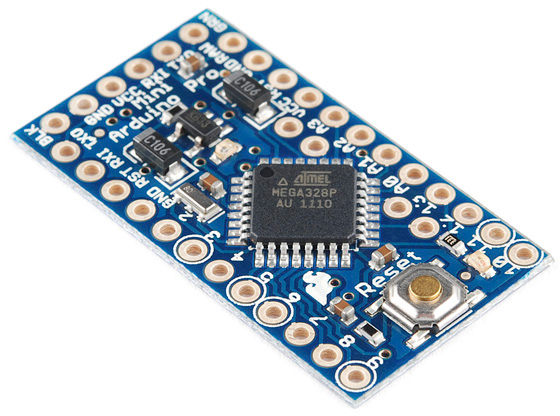
It was chosen simply because it was at hand. Will count the number of revolutions of the wheel.
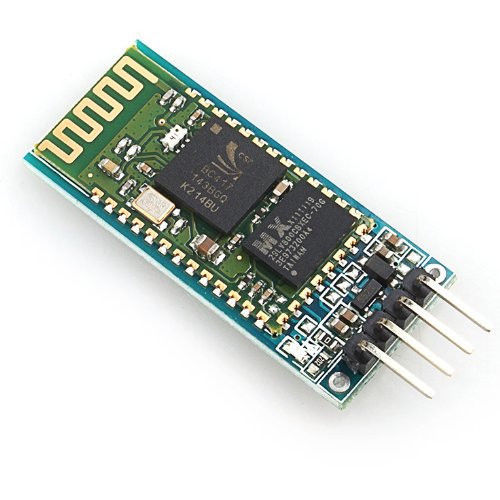
Bluetooth HC-06
Bluetooth module with which we will communicate with our watch:
Photo of Bluetooth module
Reed Sensor
The sensor from the Chinese bicycle speedometer:
Photo sensor

Battery
Samsung 3.7V battery, 1000 mAh capacity:
Battery photo

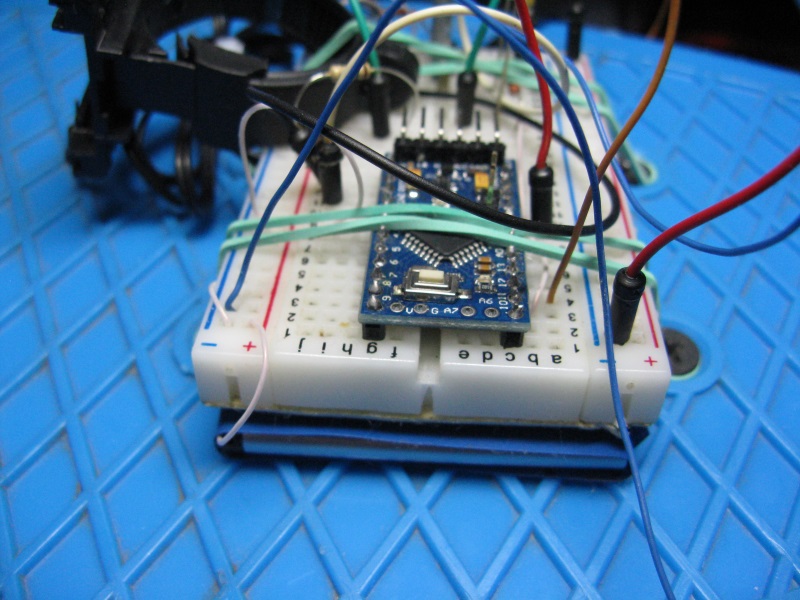
Assembly
The scheme of our device:
Speedometer circuit

I think the comments do not need. Of course, the LED should have been connected through a transistor - then there would be more light, but this is not so important. I assembled the prototype on the breadboard. It has a piece of double-sided tape on the bottom, on which I attached a battery. I didn’t cut the sensor mount to the handlebars of the bicycle, as I could later acquire a bicycle, respectively. :)
Photo of the prototype
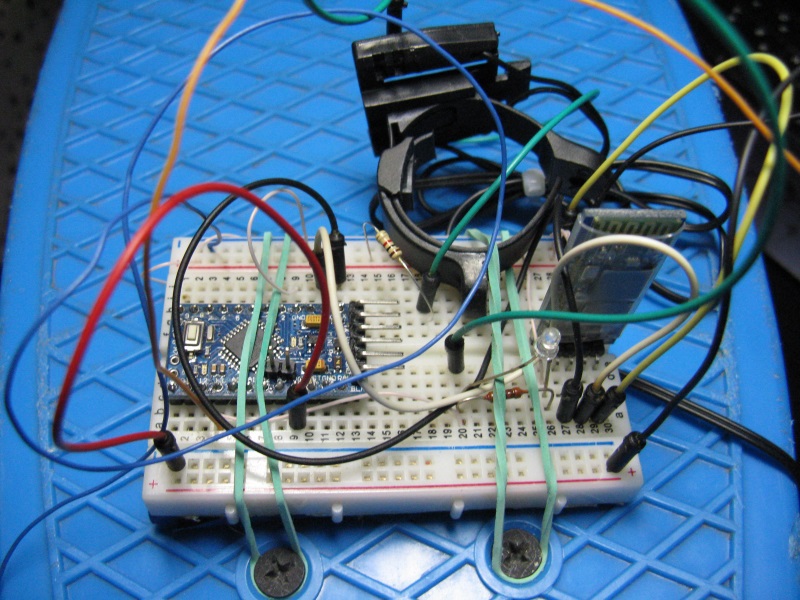
I fixed the sensor with reed switch on the suspension with the help of flagella:
Photo of the bottom of the skate
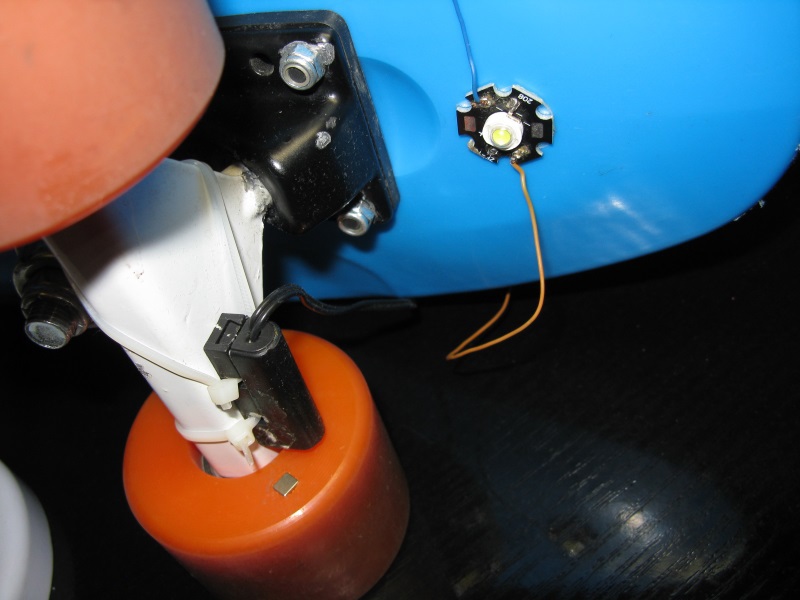
The LED at the bottom was attached to test the data transfer from the clock to the microcontroller. Suitable as a backlight at night.
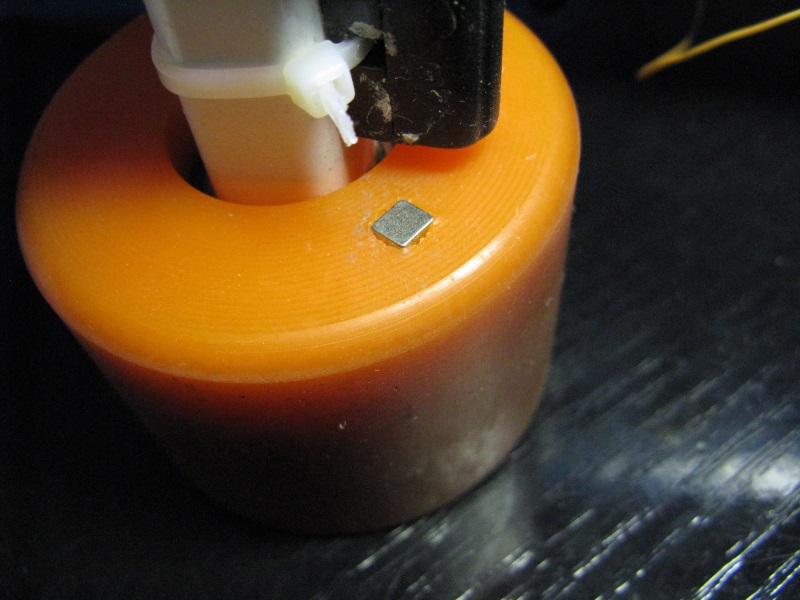
Drilled a shallow hole in the wheel and secured a neodymium magnet in it (pulled from the old drive):
Photo wheel with a magnet
Software part
In programming is not strong, but I will be very happy in the tips on this!
Microcontroller
volatile long cntr; boolean flip; boolean yes = false; int rev = 0; void setup() { Serial.begin(9600); pinMode(13, OUTPUT); pinMode(12, INPUT); TCCR2A = 0; TCCR2B = 2; TCNT2 = 59; TIMSK2 |= (1 << TOIE2); } ISR(TIMER2_OVF_vect) { TCNT2 = 59;//55; cntr++; if(cntr>9999) { flip = true; cntr = 0; } } void loop() { if (flip) { Serial.println(String(rev)+';'); rev = 0; flip = false; } else { if (digitalRead(12) == HIGH) { if (yes) { rev++; yes = false; } } else yes = true; } if (Serial.available() > 0){ char command = Serial.read(); switch(command){ case '0': digitalWrite(13, LOW); break; case '1': digitalWrite(13, HIGH); break; } } } The essence of the program
While the timer is ticking, the number of turns is calculated in the main loop and the commands from the clock are processed, if any. After a second, the controller sends the number of revolutions to the clock, i.e. we have frequency (r / c).
Clock
The code was taken from this article and added a little.
Code
AndroidManifest.xml
<uses-permission android:name="android.permission.BLUETOOTH"/> <uses-permission android:name="android.permission.BLUETOOTH_ADMIN"/> FullscreenActivity.java
package com.example.admin.speedometer; import java.io.IOException; import java.io.InputStream; import java.io.OutputStream; import java.net.Socket; import java.util.UUID; import com.example.admin.speedometer.R; import android.os.Bundle; import android.os.Handler; import android.app.Activity; import android.util.Log; import android.view.View; import android.view.View.OnClickListener; import android.widget.Button; import android.widget.TextView; import android.widget.Toast; import android.bluetooth.*; import android.content.Intent; public class FullscreenActivity extends Activity { private static final int REQUEST_ENABLE_BT = 1; final int ArduinoData = 1; final String LOG_TAG = "myLogs"; private BluetoothAdapter btAdapter = null; private BluetoothSocket btSocket = null; private StringBuilder sb = new StringBuilder(); private static String MacAddress = "20:13:05:07:01:97"; // MAC- private static final UUID MY_UUID = UUID.fromString("00001101-0000-1000-8000-00805F9B34FB"); private ConnectedThred MyThred = null; public TextView spdtext, distext, fromarduino; public double Distance = 0; Button b1, b2; Handler h; /* Settings: */ private static double Radius = 3.0; // private static double spdUnit = 3.6; // : 3.6 /, 1.0 /c @Override protected void onCreate(Bundle savedInstanceState) { super.onCreate(savedInstanceState); setContentView(R.layout.activity_fullscreen); btAdapter = BluetoothAdapter.getDefaultAdapter(); spdtext = (TextView) findViewById(R.id.textView1); distext = (TextView) findViewById(R.id.textView2); fromarduino = (TextView) findViewById(R.id.textView5); if (btAdapter != null){ if (btAdapter.isEnabled()){ //mytext.setText("Bluetooth . ."); }else { Intent enableBtIntent = new Intent(BluetoothAdapter.ACTION_REQUEST_ENABLE); startActivityForResult(enableBtIntent, REQUEST_ENABLE_BT); } }else { MyError("Fatal Error", "Bluetooth "); } b1 = (Button) findViewById(R.id.button1); b2 = (Button) findViewById(R.id.button2); b1.setOnClickListener(new OnClickListener() { public void onClick(View v) { MyThred.sendData("1"); } }); b2.setOnClickListener(new OnClickListener() { public void onClick(View v) { MyThred.sendData("0"); } }); h = new Handler() { public void handleMessage(android.os.Message msg) { switch (msg.what) { case ArduinoData: byte[] readBuf = (byte[]) msg.obj; String strIncom = new String(readBuf, 0, msg.arg1); sb.append(strIncom); int endOfLineIndex = sb.indexOf("\r\n"); if (endOfLineIndex > 0) { String sbprint = sb.substring(0, endOfLineIndex); sb.delete(0, sb.length()); String value = ""; byte channel = 0; // : 0;0;0; fromarduino.setText("Arduino: " + sbprint); for (int i = 0; i < sbprint.length(); i++) { if (sbprint.charAt(i) == ';') { if (!value.isEmpty()) { switch (channel) { case 0: double Dis = (Double.parseDouble(value) * (Radius * 6.28) ) / 100.0; double Speed = Dis * spdUnit; spdtext.setText(String.valueOf(Math.round(Speed))); Distance += Dis; distext.setText(String.valueOf(Math.round(Distance))); break; } } value = ""; channel++; } else value += sbprint.charAt(i); } } break; } }; }; } @Override public void onResume() { super.onResume(); BluetoothDevice device = btAdapter.getRemoteDevice(MacAddress); Log.d(LOG_TAG, "*** Device***"+device.getName()); try { btSocket = device.createRfcommSocketToServiceRecord(MY_UUID); Log.d(LOG_TAG, "... ..."); } catch (IOException e) { MyError("Fatal Error", " onResume() : " + e.getMessage() + "."); } btAdapter.cancelDiscovery(); Log.d(LOG_TAG, "*** ***"); Log.d(LOG_TAG, "***...***"); try { btSocket.connect(); Log.d(LOG_TAG, "*** ***"); } catch (IOException e) { try { btSocket.close(); } catch (IOException e2) { MyError("Fatal Error", " onResume() " + e2.getMessage() + "."); } } MyThred = new ConnectedThred(btSocket); MyThred.start(); } @Override public void onPause() { super.onPause(); Log.d(LOG_TAG, "...In onPause()..."); if (MyThred.status_OutStrem() != null) { MyThred.cancel(); } try { btSocket.close(); } catch (IOException e2) { MyError("Fatal Error", " onPause() " + e2.getMessage() + "."); } } private void MyError(String title, String message){ Toast.makeText(getBaseContext(), title + " - " + message, Toast.LENGTH_LONG).show(); finish(); } // private class ConnectedThred extends Thread{ private final BluetoothSocket copyBtSocket; private final OutputStream OutStrem; private final InputStream InStrem; public ConnectedThred(BluetoothSocket socket){ copyBtSocket = socket; OutputStream tmpOut = null; InputStream tmpIn = null; try{ tmpOut = socket.getOutputStream(); tmpIn = socket.getInputStream(); } catch (IOException e){} OutStrem = tmpOut; InStrem = tmpIn; } public void run() { byte[] buffer = new byte[1024]; int bytes; while(true){ try{ bytes = InStrem.read(buffer); h.obtainMessage(ArduinoData, bytes, -1, buffer).sendToTarget(); }catch(IOException e){break;} } } public void sendData(String message) { byte[] msgBuffer = message.getBytes(); Log.d(LOG_TAG, "*** : " + message + "***" ); try { OutStrem.write(msgBuffer); } catch (IOException e) {} } public void cancel(){ try { copyBtSocket.close(); }catch(IOException e){} } public Object status_OutStrem(){ if (OutStrem == null){return null; }else{return OutStrem;} } } } The essence of the program
The program receives data from the microcontroller on the frequency of rotation of the wheel. In order to get the correct information, you need to measure the radius of the wheel, then the program will find its circumference and calculate the speed and distance. You need to adjust the wheel radius and in which units the speed will be displayed:
/* Settings: */ private static double Radius = 3.0; // private static double spdUnit = 3.6; // : 3.6 /, 1.0 /c N - number of turns;
l is the circumference;
t - time (since we count once per second - this value can be neglected);
l = 2r is the circumference;
S = V * t = (N * l) / 100 - the distance we traveled in 1 second (expressed in meters);
double Dis = (Double.parseDouble(value) * (Radius * 6.28)) / 100.0; V = S / t = S * 3.6 - speed (expressed in km / h).
double Speed = Dis * spdUnit; There are also two buttons on. and off LED, which is located on the bottom of the skate.
Conclusion
There are some mistakes, but on the whole I am satisfied with the result. Thanks to sychidze for the article!
Video work will be a little later.
Source: https://habr.com/ru/post/231461/
All Articles