How we build a simulator: projection screen
Hello!
In order not to repeat my own mistakes, I decided to write how we build a flight simulator. Then, when everything is completed, there will be no time to rake photos and videos, much will be forgotten, and in general too lazy.
We have almost completed R & D with a new visual system for the simulator, which will appear in St. Petersburg this year, and I will tell you how an independent product came out in the process.
')
Picture to attract attention:
Let's go ( caution, traffic )
When we received an order to build a Boeing-737 entertainment simulator for a St. Petersburg customer, first of all we decided not to step on the already tested rake.
One of these rakes is called "X-Plane and cylindrical projection."
The problem is that the functionality built into the simulator does not have enough flexibility to qualitatively reduce the image from the three projectors on a geometrically not perfect cylindrical screen.
Moreover, in the process of very emotional communication with the author of X-Plane, it turned out that he carried out all the tests of this function on a segmental-screen, and did not fully understand what we actually wanted from him.
In addition to this aspect, we realized that LCD-projectors for our application are not very suitable - over time, colors and brightness “go”, and this means that the picture all the time will have to be reduced to brightness and chromaticity.
We also decided to change the power structure of the simulator, and hide the supporting structures directly into the casing, hence the “collective farm” with the tension screen would be impossible, and the screen must be designed from the very beginning as part of a single power circuit of the simulator.
And then we decided that it was not a sin to try a spherical screen made of fiberglass.
Since the rule of "no more than 10% of innovations" is clearly not for us, but we are crazy, not idiots, it was decided to make one screen on stationary supports in order to beat all possible jambs and crutches "on the ground."
The manufacturer of fiberglass cladding panels made us a set of panels and a ground-based power structure, which arrived in Moscow and was assembled in a hangar. It turned out like this:
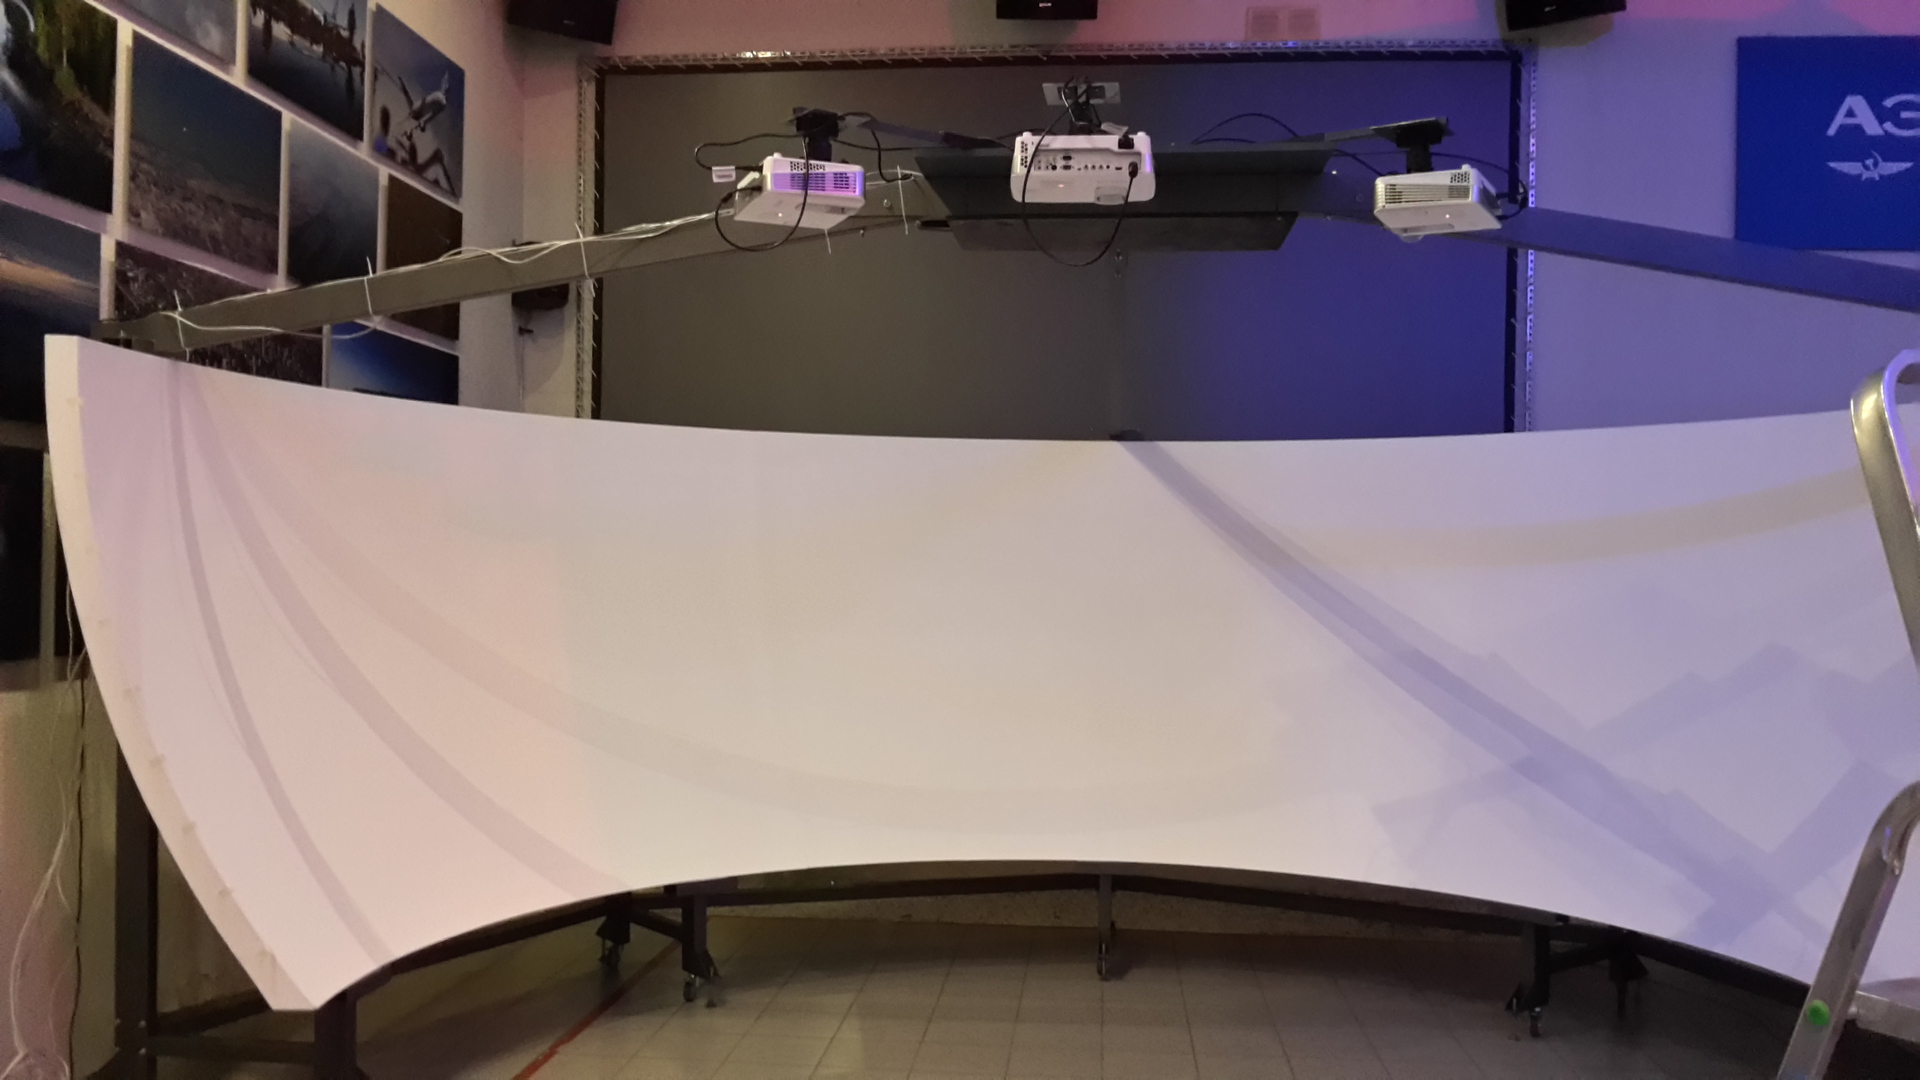
The screen consists of three fiberglass panels mounted on steel supports with wheels. In the simulator, the screen will be mounted directly on the supporting structures in the casing.
The working surface is painted with a special paint for projection surfaces. This paint contains some kind of magical additives, which slightly increase the image contrast and reduce the “hooking” of the look to the surface.
One of the concerns was the joints of the panels, but the manufacturer managed to make the edges of the panels very high-quality and smooth, so that the joints are almost invisible.
All the hours are assembled and disassembled in two or three hours, which is just fine compared to our past screens.
From TTX: diameter is about 6 meters, the viewing angle is 220 degrees horizontally and 40 degrees vertically.
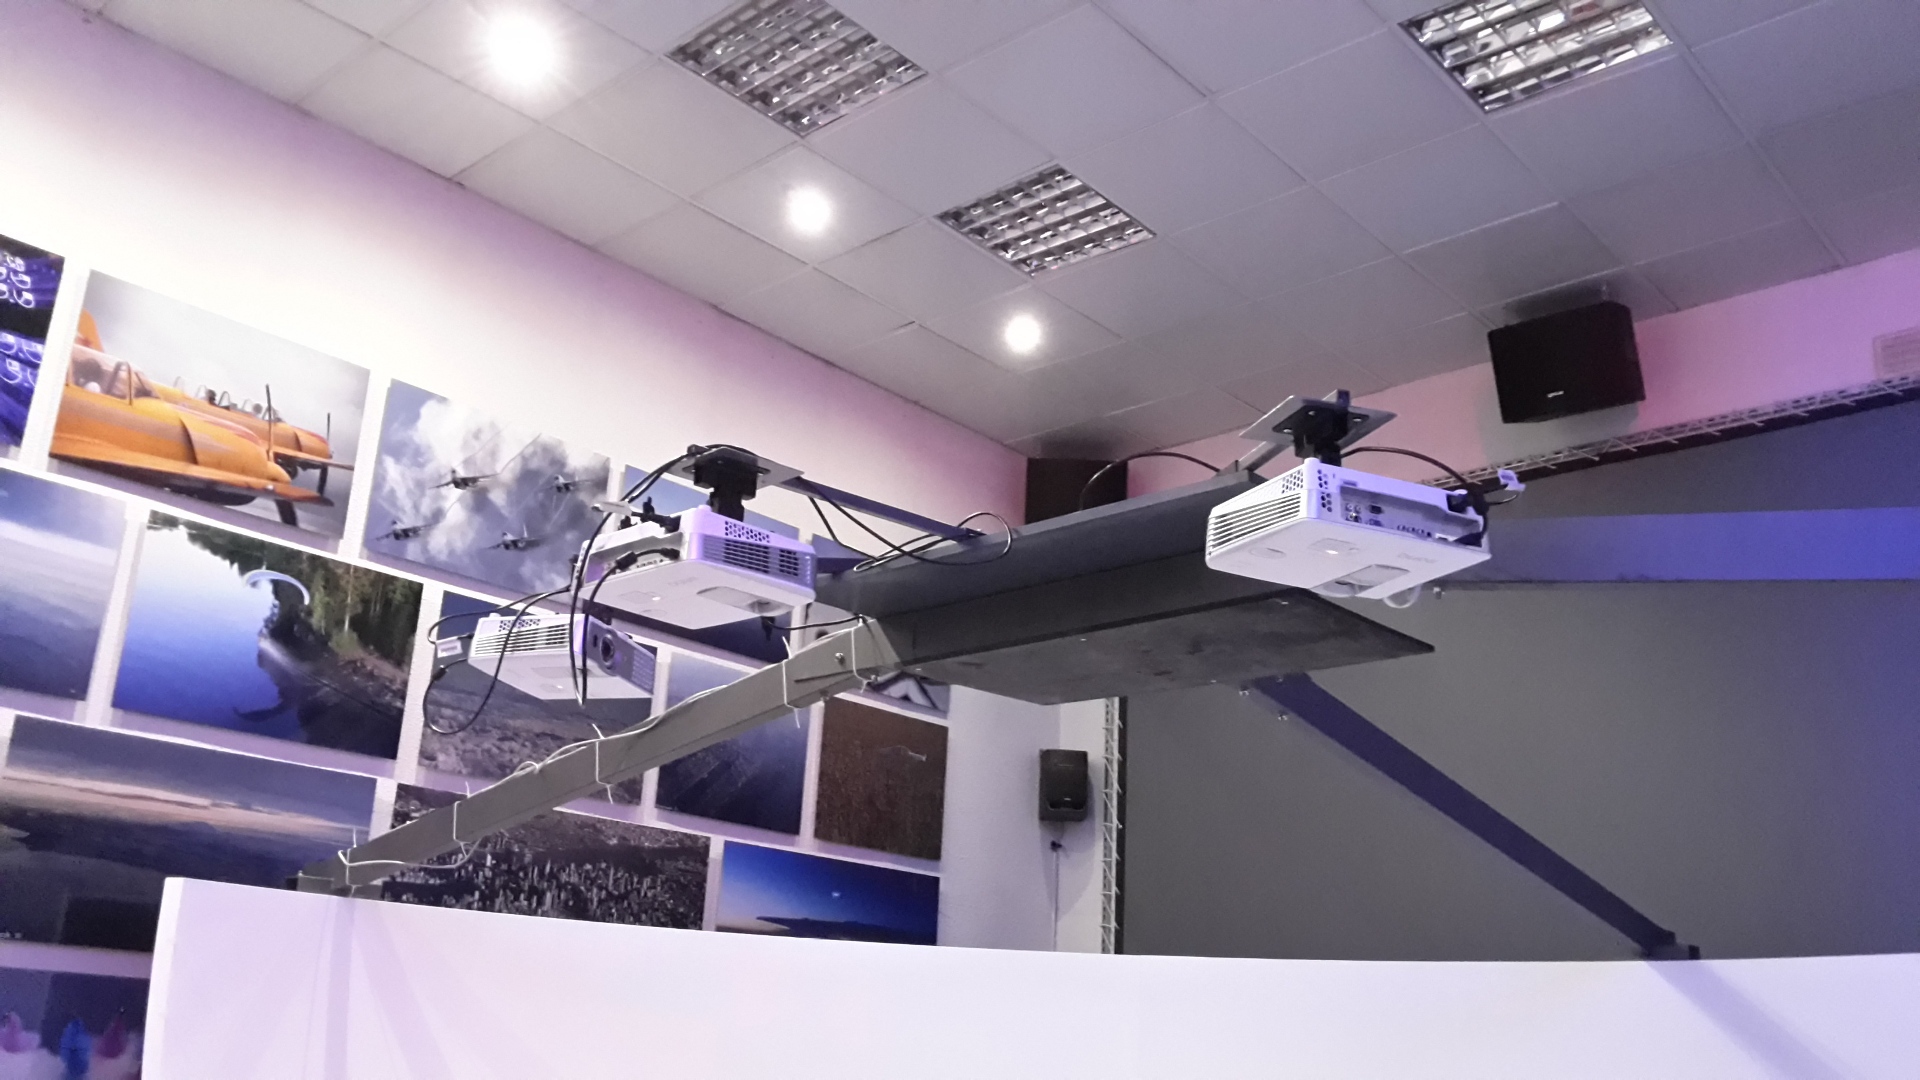
Three projector Benq W1080ST. Ordinary household DLP-projectors, no frills. The only difference from the very everyday models - Short throw, that is - a short focus.
The difference between LCD and DLP is immediately visible - right out of the box, all three projectors shine almost the same, the pixel size is much smaller than that of the LCD. The resolution is 1920x1080.
The projectors are aimed so as to ensure overlap of projections from neighboring projectors of about 200 pixels, or 10% of the picture. Why it is needed - it will be clear further.
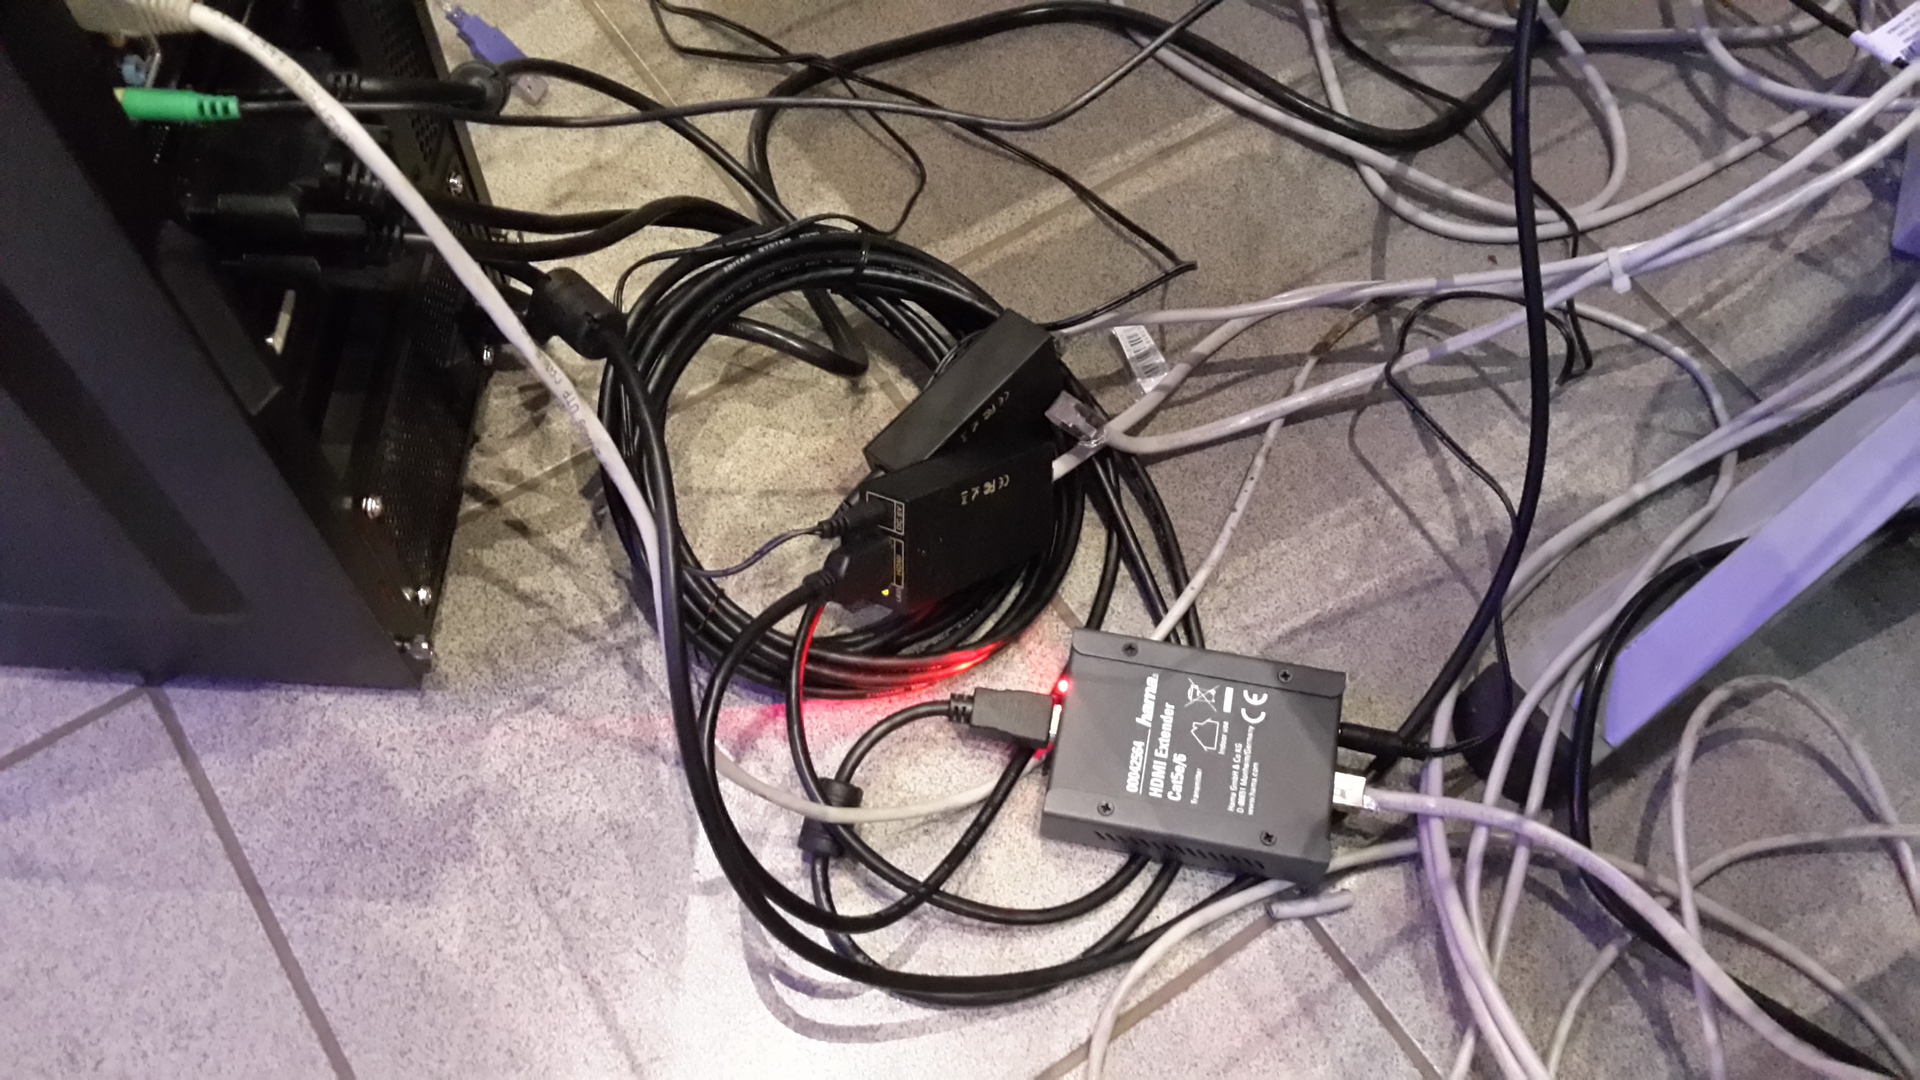
In order not to pull expensive, heavy and uncomfortable HDMI cables, HDMI over UTP extenders were used. In the A320, we used Hama extension cords, but they suddenly disappeared from sale in the Russian Federation, so something similar was bought. At first there was a problem with one of the extension cords, so I used Hama from stocks, so it remained.
This song and moan.
When projected on a curved surface, the image must be corrected.
In addition to the geometric correction, it is necessary to “stitch” the image, because in the overlap zone two projectors shine on the same surface.

At the very beginning we considered three options:
1. Software solutions that work at the video card level. Such software - many, among the popular and well-known - Sol7 and Immersive Display.
2. Hardware for stitching.
3. Well, as a completely spare option, we were mentally ready to return to the solution with three X-Plane and its scanty possibilities for stitching.
Pro and contra have both solutions.
In the case of software, we are attached to the platform - I did not find any sane cross-platform solutions, therefore only Windows. In addition, part of the computer resources will be given to the task of stitching. Plus software solutions - the cost, and the ability to automate the process of correction.
The hardware solution is more expensive, and much more expensive. In addition, the community of this solution is not great, mostly companies that implement multi-projector systems for presentation purposes.
Unfortunately, we turned to "specialists" who, having no experience of such projects, sent us hardware stitchers from the Taiwanese company VNS. They are called Geobox G-104, look like this:
What the G-104 does:
1. The curvature of the image by points;
2. Color correction;
3. Binding by gradient decrease in brightness.
The problem is only one - this piece of hardware did not solve our problem.
In order for it to work, it was necessary either to skip the video streams for all three projectors through one piece of iron (and the “experts” did not offer us such glands), or it was necessary to make an overlap of the image at the level of the video card. The existing technology Eyefinity from AMD and 3D Vision Surround for ordinary gaming graphics cards do not.
After the failure with the iron solution became apparent, the “experts” still found a way out: they offered us to buy and use a professional AMD Quadro K5000 card - in the drivers for it it is possible to overlap. But by the time the error was realized, we had two weeks looking at the fruitless attempts of the “specialists”, and decided to refuse their services. In addition, the performance of the K5000 did not inspire confidence in applications such as X-Plane. In general, we are now looking for buyers for two sets of G-104. "Not useful."
As a result, we switched to a software solution, and, after analysis, stopped at Immersive Display Pro.
I will not describe here the procedure of converting images using this software and a webcam, it is pretty obvious. If someone faces difficulties, I will be happy to answer in a personal or comments.
The main points when using this software:
1. Works only under Windows;
2. Requires Aero to work;
3. It’s impossible to do without manual work with a laser level - the image will be crooked, although this does not affect the perception of the picture by the cerebellum.

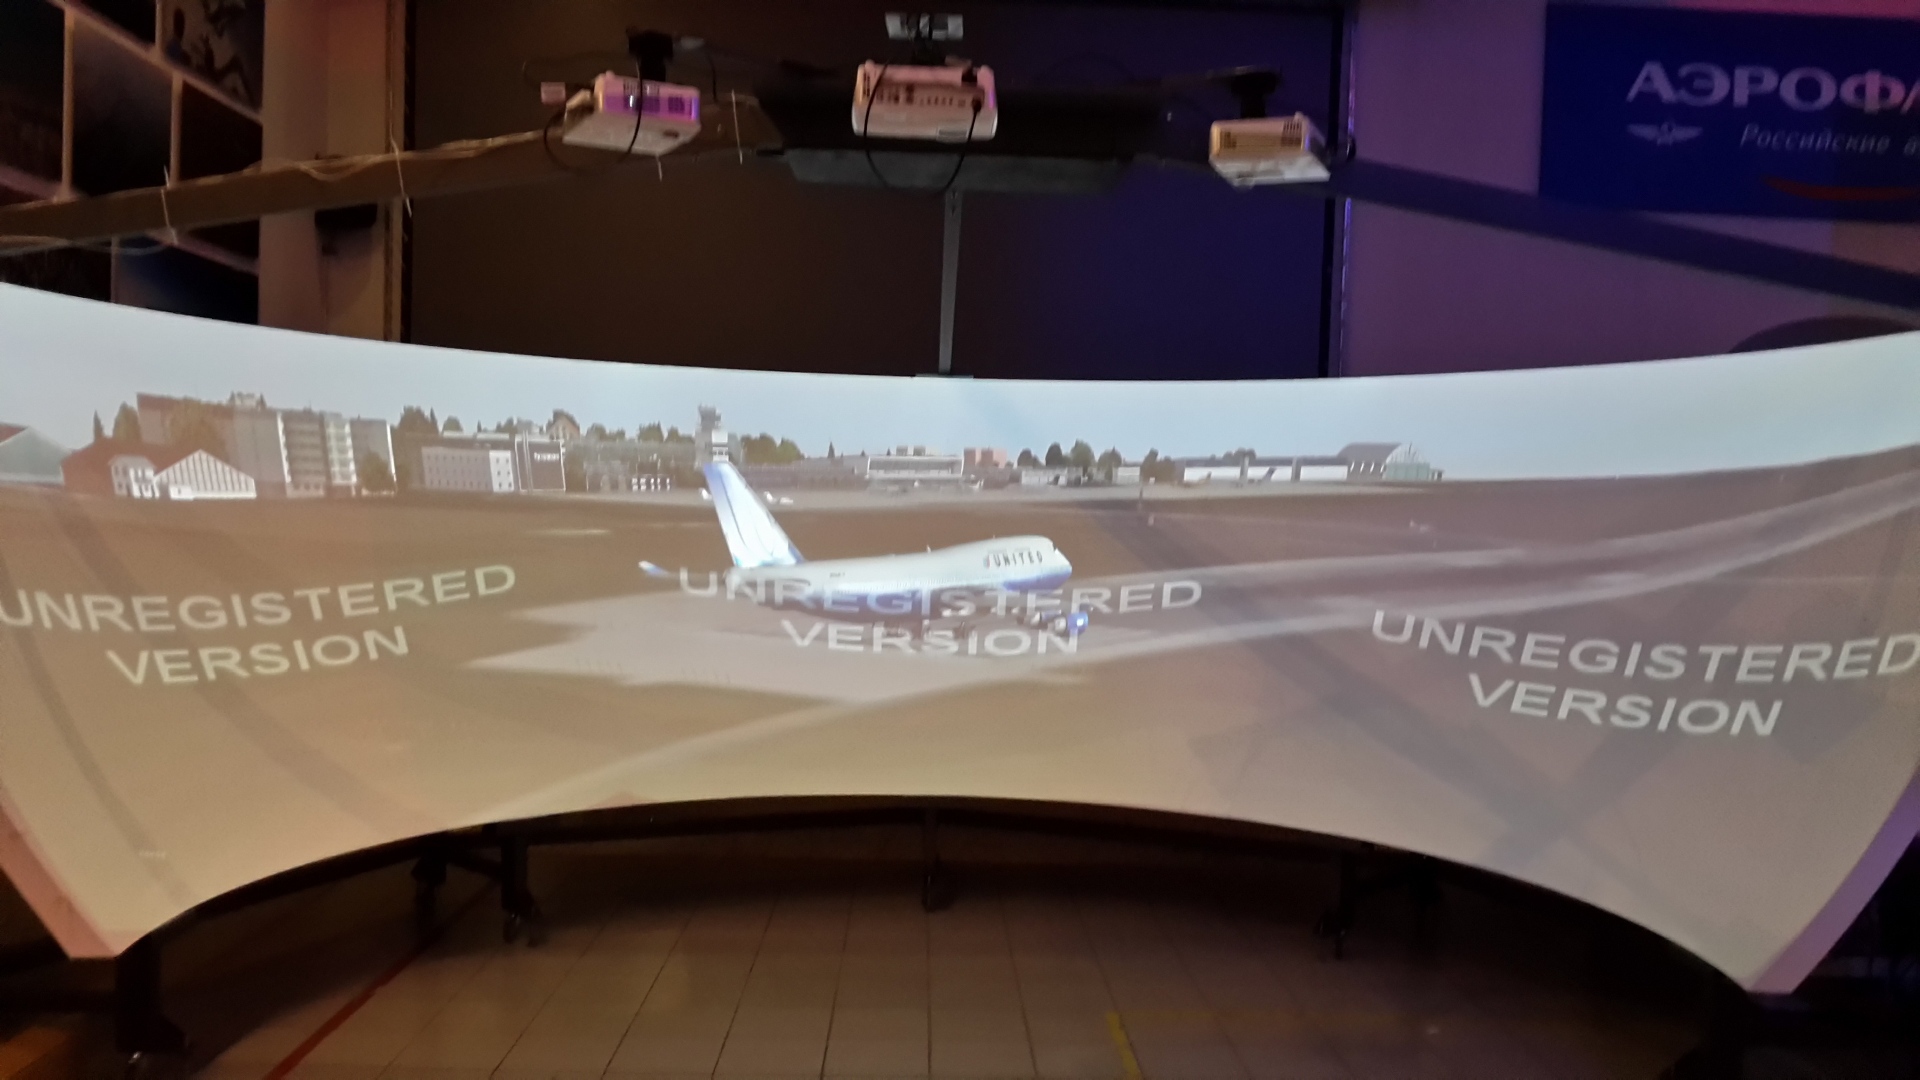
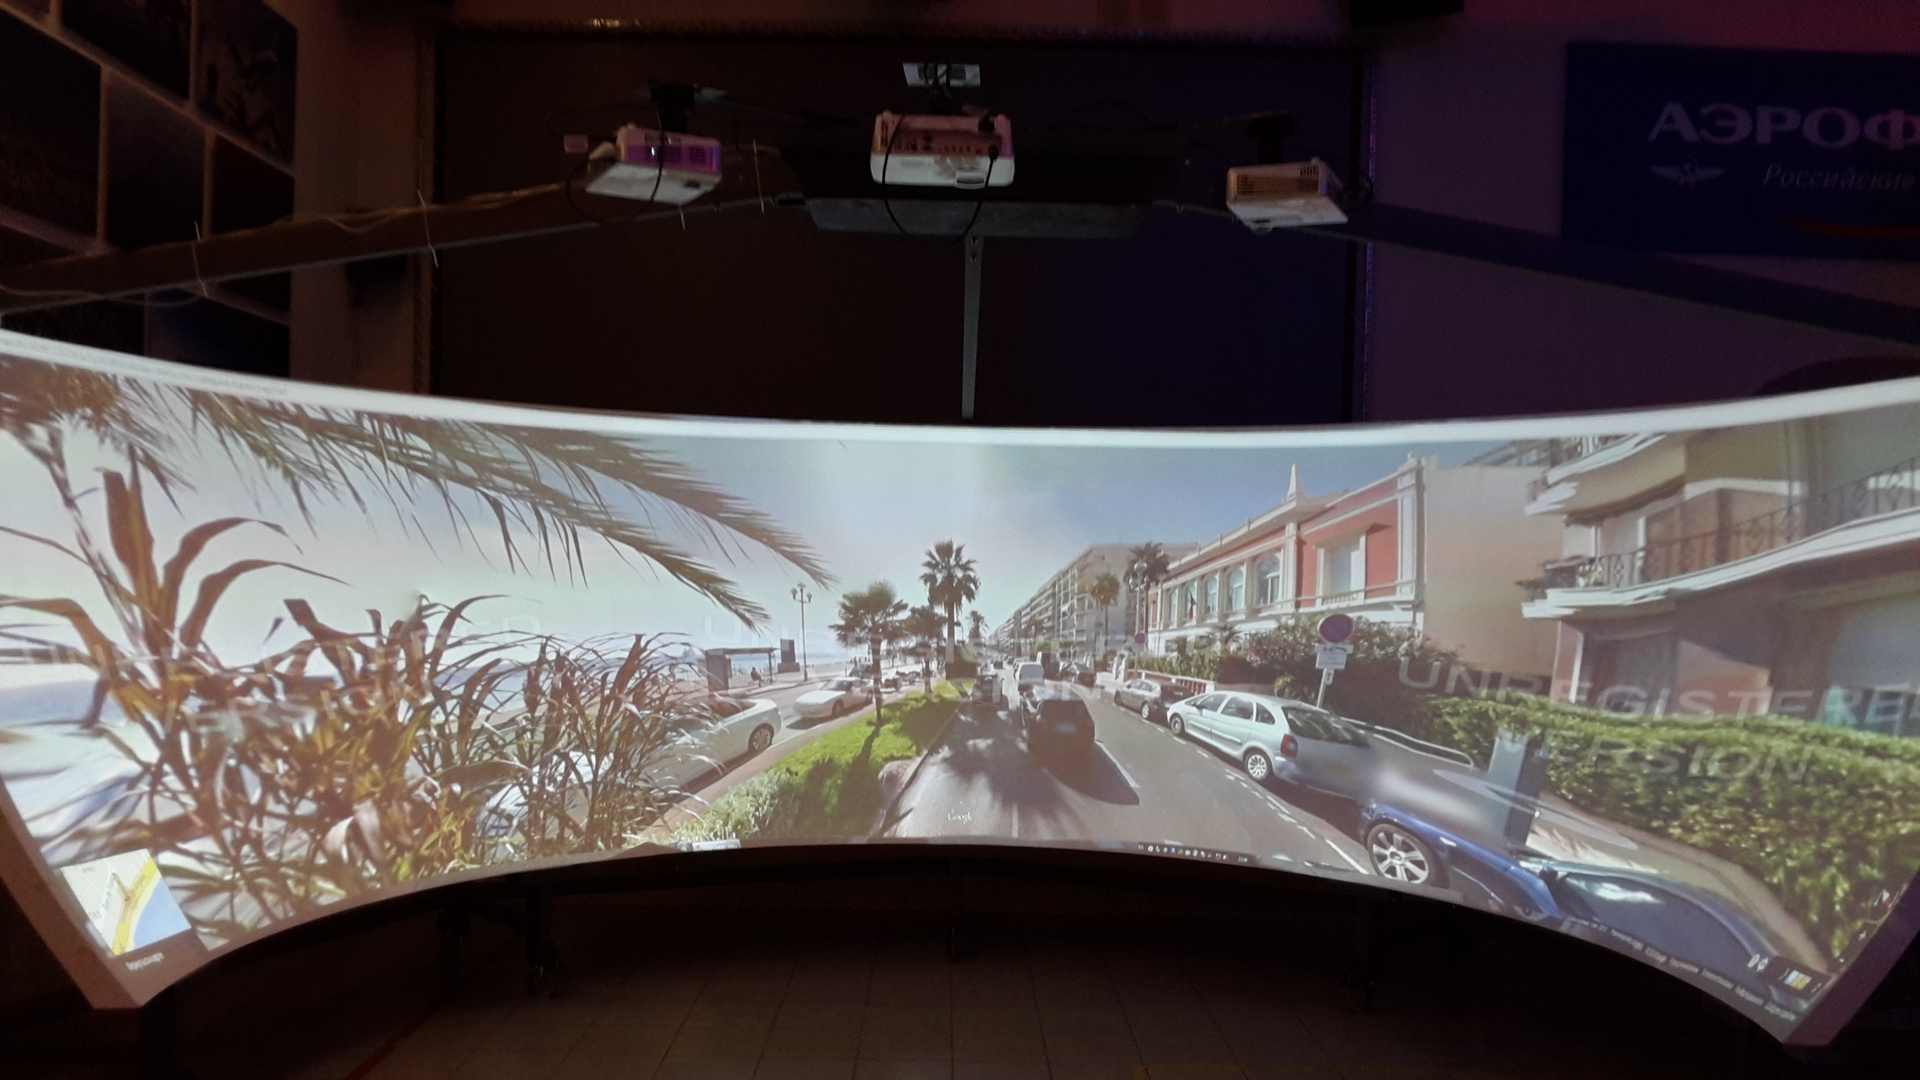
The result was that on KDPV. As the first application launched, I tried Google Street View
So, as a picture generator, we have a regular i7 gaming computer with an AMD R9 290X.
Three HDMI <-> UTP <-> HDMI converters are connected to the video card.
At the level of video card drivers assembled virtual display with a resolution of 5760x1080

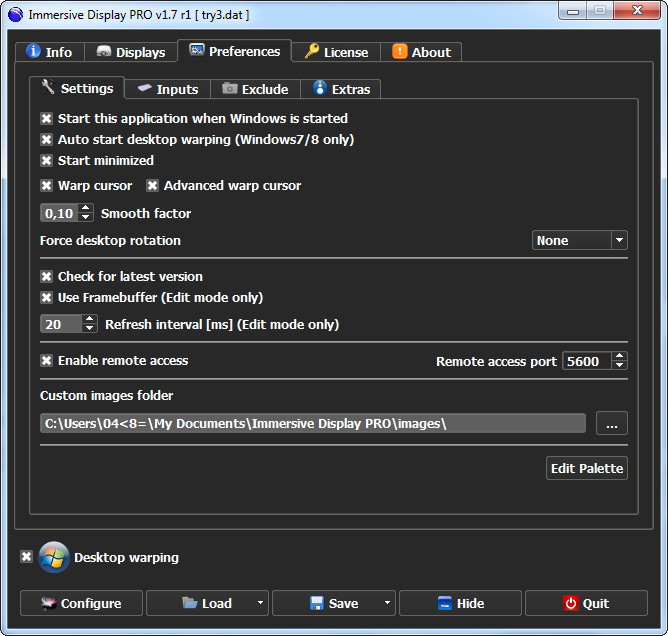
Above all, Immersive Display Pro is running, which produces curvature and image stitching:
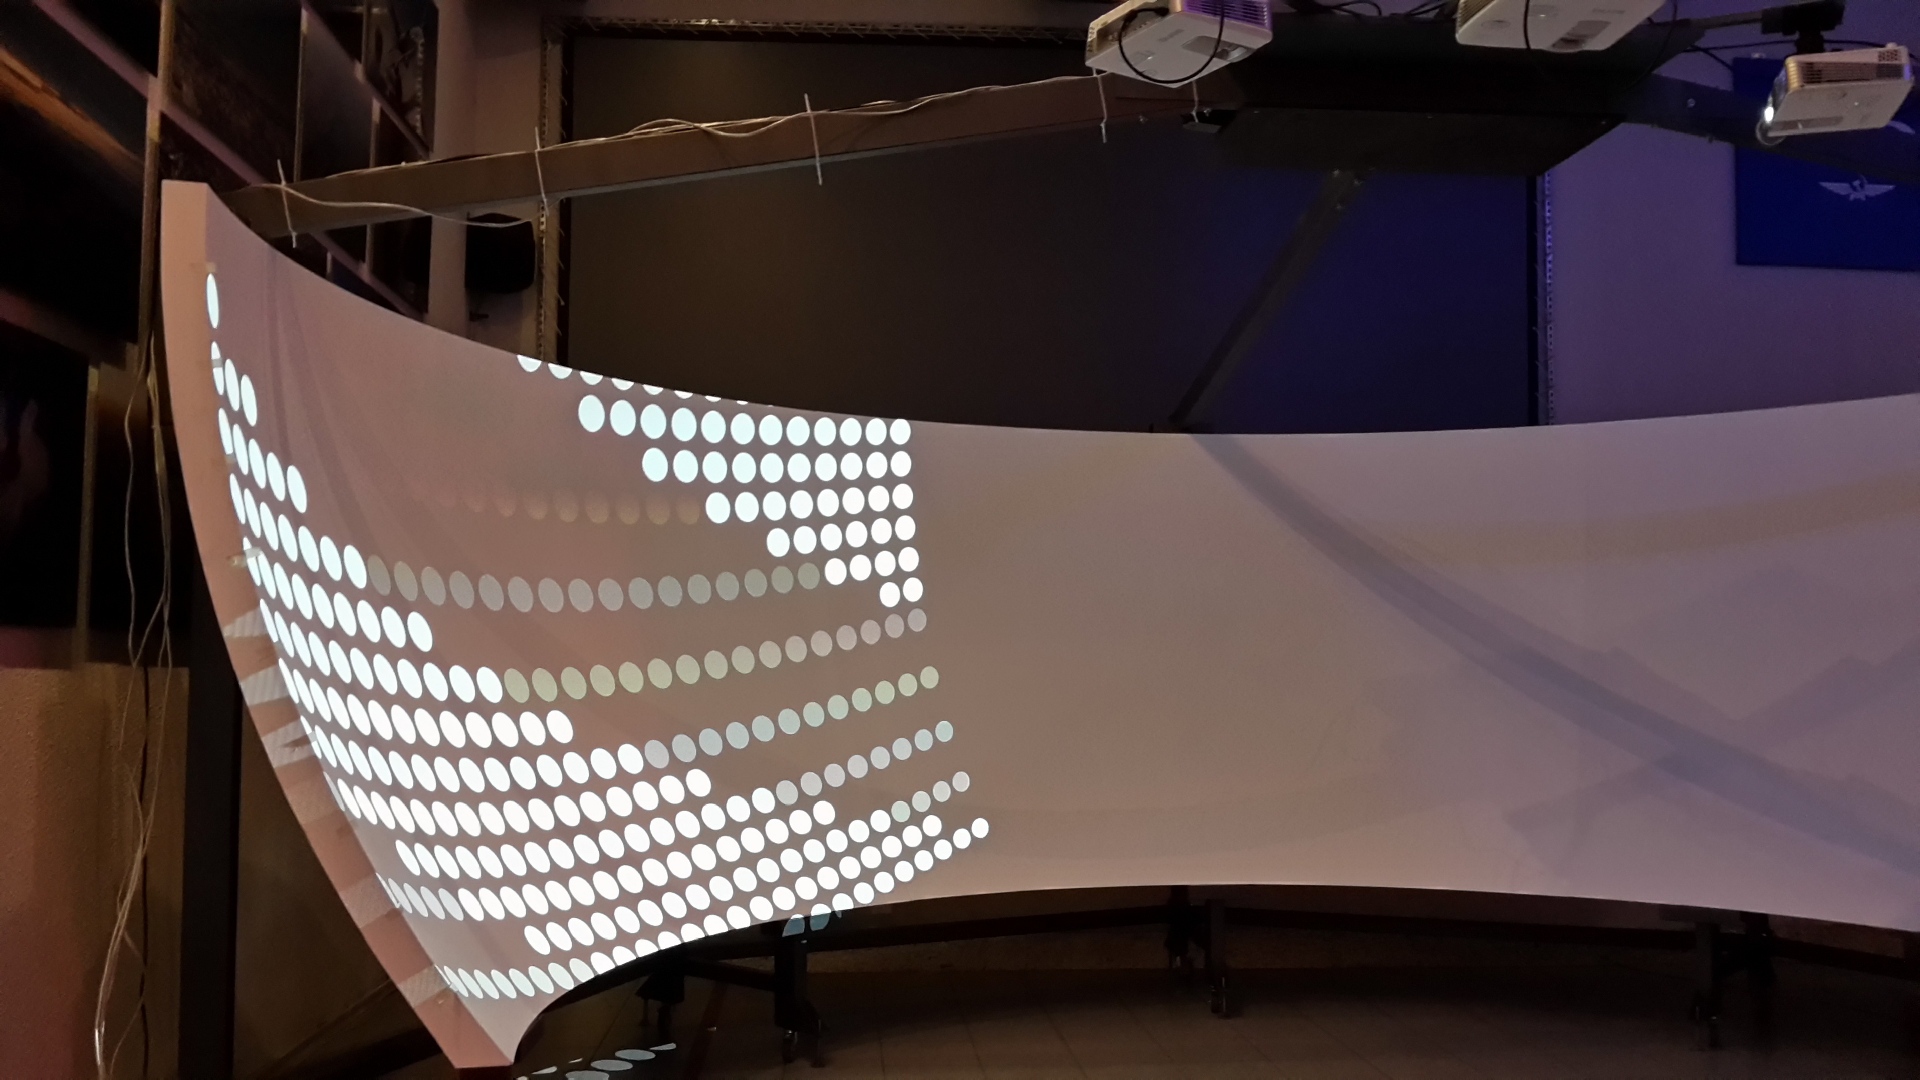
To adjust everything, Immersive Calibration Pro was used, which with the help of an external webcam almost automatically makes a curvature and correction (and the resulting file is pushed into Display Pro). In the course of the settings on the screen such funny pictures are formed
It remains to try to find a video with a resolution of 5760x1080. Until now, I have only found videos from games on YouTube, but our Internet barely misses such a resolution, so we’re looking for five seconds - 25 are waiting for it to be released.
After everything turned out, it became obvious that the screen itself was a product. There are games, viewing information and videos (although it’s not clear where to get such video content).
The other day there was an idea to try to run 3D on the screen. A quick look at the Internet showed that the task, generally speaking, is being solved, but on NVidia, but with AMD the people did not succeed, but we will try. Banal anaglyph does not want, we want to immediately shutter glasses.
Well, then, if it works out with 3D, you can add reality and get something similar to the first 15 seconds of the video:
By the way, since this undertaking has no commercial value, if someone has a desire to play augmented reality on such a screen, you are welcome.
Thank you for your attention, and I will be glad to answer questions!
In order not to repeat my own mistakes, I decided to write how we build a flight simulator. Then, when everything is completed, there will be no time to rake photos and videos, much will be forgotten, and in general too lazy.
We have almost completed R & D with a new visual system for the simulator, which will appear in St. Petersburg this year, and I will tell you how an independent product came out in the process.
')
Picture to attract attention:
Let's go ( caution, traffic )
In outline
When we received an order to build a Boeing-737 entertainment simulator for a St. Petersburg customer, first of all we decided not to step on the already tested rake.
One of these rakes is called "X-Plane and cylindrical projection."
The problem is that the functionality built into the simulator does not have enough flexibility to qualitatively reduce the image from the three projectors on a geometrically not perfect cylindrical screen.
Moreover, in the process of very emotional communication with the author of X-Plane, it turned out that he carried out all the tests of this function on a segmental-screen, and did not fully understand what we actually wanted from him.
In addition to this aspect, we realized that LCD-projectors for our application are not very suitable - over time, colors and brightness “go”, and this means that the picture all the time will have to be reduced to brightness and chromaticity.
We also decided to change the power structure of the simulator, and hide the supporting structures directly into the casing, hence the “collective farm” with the tension screen would be impossible, and the screen must be designed from the very beginning as part of a single power circuit of the simulator.
And then we decided that it was not a sin to try a spherical screen made of fiberglass.
Since the rule of "no more than 10% of innovations" is clearly not for us, but we are crazy, not idiots, it was decided to make one screen on stationary supports in order to beat all possible jambs and crutches "on the ground."
The manufacturer of fiberglass cladding panels made us a set of panels and a ground-based power structure, which arrived in Moscow and was assembled in a hangar. It turned out like this:
Screen
The screen consists of three fiberglass panels mounted on steel supports with wheels. In the simulator, the screen will be mounted directly on the supporting structures in the casing.
The working surface is painted with a special paint for projection surfaces. This paint contains some kind of magical additives, which slightly increase the image contrast and reduce the “hooking” of the look to the surface.
One of the concerns was the joints of the panels, but the manufacturer managed to make the edges of the panels very high-quality and smooth, so that the joints are almost invisible.
All the hours are assembled and disassembled in two or three hours, which is just fine compared to our past screens.
From TTX: diameter is about 6 meters, the viewing angle is 220 degrees horizontally and 40 degrees vertically.
Projectors
Three projector Benq W1080ST. Ordinary household DLP-projectors, no frills. The only difference from the very everyday models - Short throw, that is - a short focus.
The difference between LCD and DLP is immediately visible - right out of the box, all three projectors shine almost the same, the pixel size is much smaller than that of the LCD. The resolution is 1920x1080.
The projectors are aimed so as to ensure overlap of projections from neighboring projectors of about 200 pixels, or 10% of the picture. Why it is needed - it will be clear further.
In order not to pull expensive, heavy and uncomfortable HDMI cables, HDMI over UTP extenders were used. In the A320, we used Hama extension cords, but they suddenly disappeared from sale in the Russian Federation, so something similar was bought. At first there was a problem with one of the extension cords, so I used Hama from stocks, so it remained.
Space Warp
This song and moan.
When projected on a curved surface, the image must be corrected.
In addition to the geometric correction, it is necessary to “stitch” the image, because in the overlap zone two projectors shine on the same surface.
At the very beginning we considered three options:
1. Software solutions that work at the video card level. Such software - many, among the popular and well-known - Sol7 and Immersive Display.
2. Hardware for stitching.
3. Well, as a completely spare option, we were mentally ready to return to the solution with three X-Plane and its scanty possibilities for stitching.
Pro and contra have both solutions.
In the case of software, we are attached to the platform - I did not find any sane cross-platform solutions, therefore only Windows. In addition, part of the computer resources will be given to the task of stitching. Plus software solutions - the cost, and the ability to automate the process of correction.
The hardware solution is more expensive, and much more expensive. In addition, the community of this solution is not great, mostly companies that implement multi-projector systems for presentation purposes.
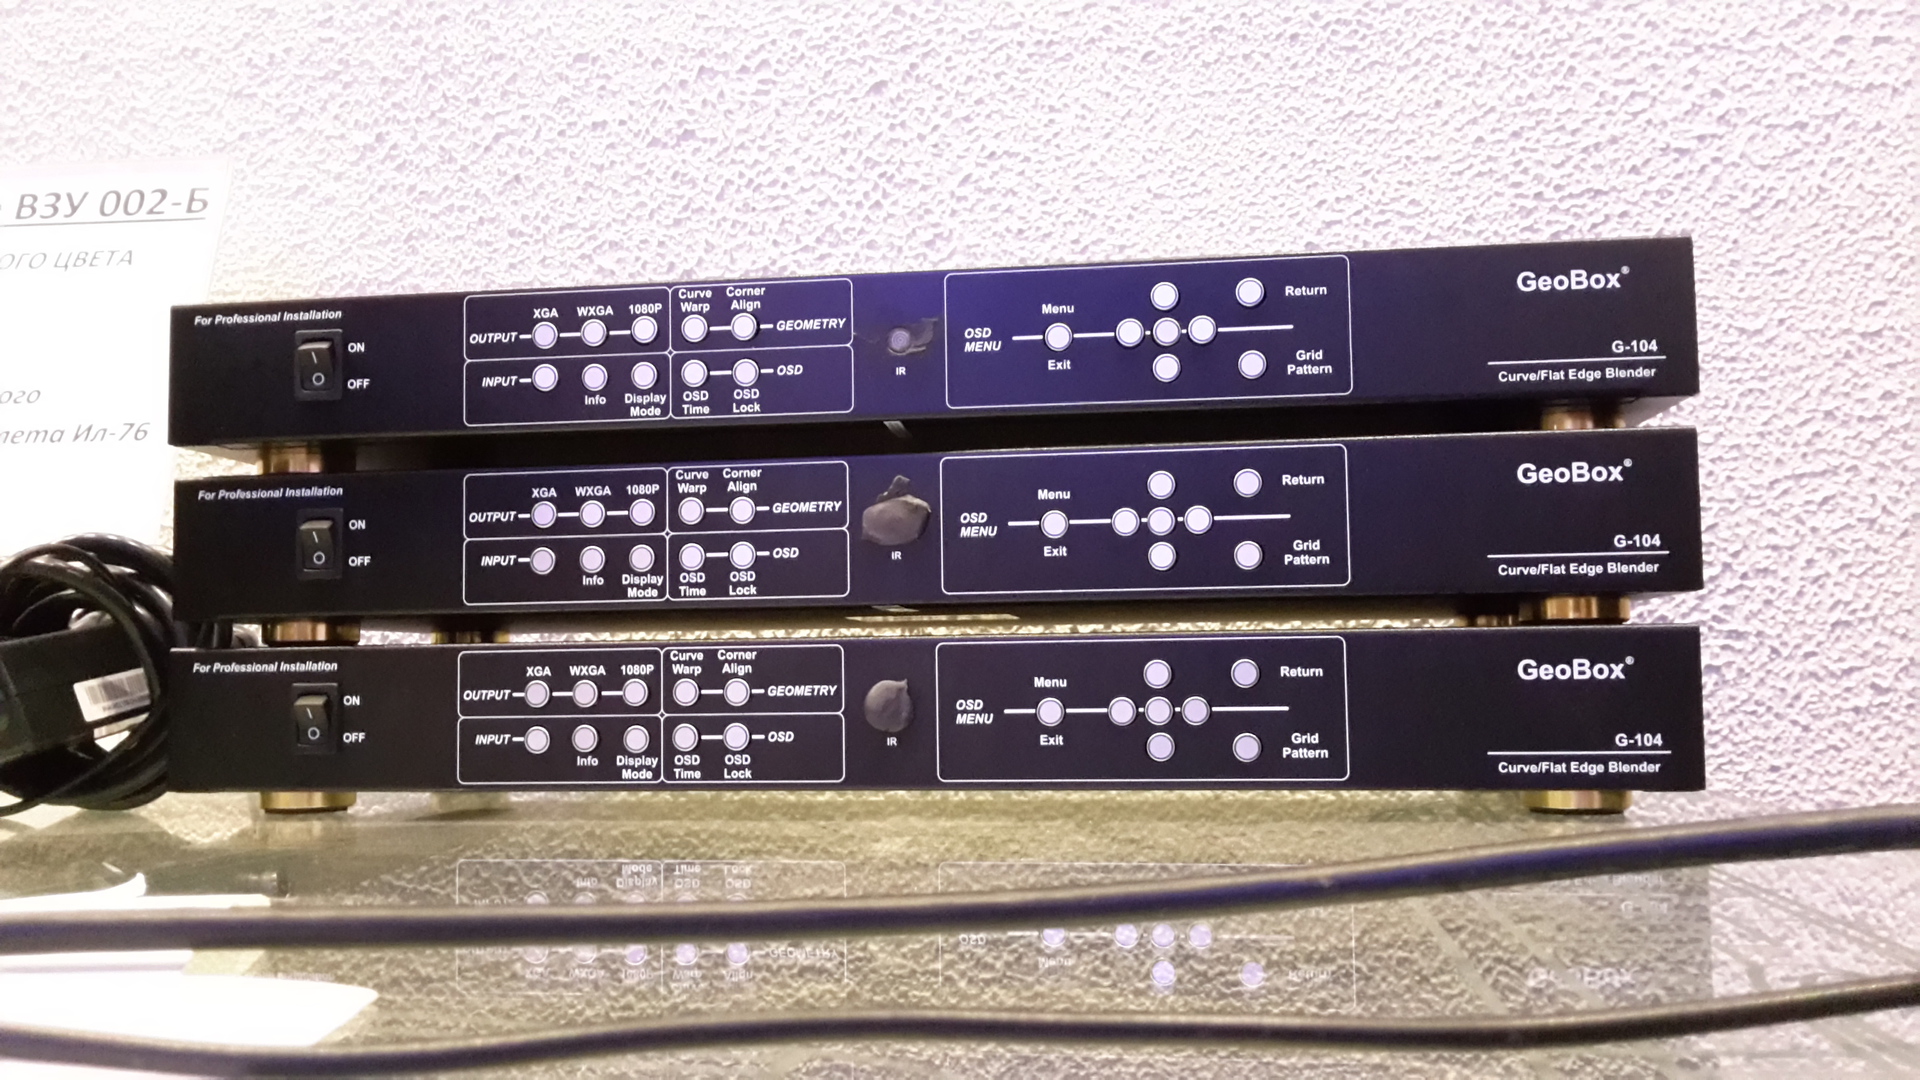
Unfortunately, we turned to "specialists" who, having no experience of such projects, sent us hardware stitchers from the Taiwanese company VNS. They are called Geobox G-104, look like this:
What the G-104 does:
1. The curvature of the image by points;
2. Color correction;
3. Binding by gradient decrease in brightness.
The problem is only one - this piece of hardware did not solve our problem.
In order for it to work, it was necessary either to skip the video streams for all three projectors through one piece of iron (and the “experts” did not offer us such glands), or it was necessary to make an overlap of the image at the level of the video card. The existing technology Eyefinity from AMD and 3D Vision Surround for ordinary gaming graphics cards do not.
After the failure with the iron solution became apparent, the “experts” still found a way out: they offered us to buy and use a professional AMD Quadro K5000 card - in the drivers for it it is possible to overlap. But by the time the error was realized, we had two weeks looking at the fruitless attempts of the “specialists”, and decided to refuse their services. In addition, the performance of the K5000 did not inspire confidence in applications such as X-Plane. In general, we are now looking for buyers for two sets of G-104. "Not useful."
As a result, we switched to a software solution, and, after analysis, stopped at Immersive Display Pro.
I will not describe here the procedure of converting images using this software and a webcam, it is pretty obvious. If someone faces difficulties, I will be happy to answer in a personal or comments.
The main points when using this software:
1. Works only under Windows;
2. Requires Aero to work;
3. It’s impossible to do without manual work with a laser level - the image will be crooked, although this does not affect the perception of the picture by the cerebellum.
The result was that on KDPV. As the first application launched, I tried Google Street View
Configuration and Architecture
So, as a picture generator, we have a regular i7 gaming computer with an AMD R9 290X.
Three HDMI <-> UTP <-> HDMI converters are connected to the video card.
At the level of video card drivers assembled virtual display with a resolution of 5760x1080
Above all, Immersive Display Pro is running, which produces curvature and image stitching:
To adjust everything, Immersive Calibration Pro was used, which with the help of an external webcam almost automatically makes a curvature and correction (and the resulting file is pushed into Display Pro). In the course of the settings on the screen such funny pictures are formed
It remains to try to find a video with a resolution of 5760x1080. Until now, I have only found videos from games on YouTube, but our Internet barely misses such a resolution, so we’re looking for five seconds - 25 are waiting for it to be released.
What to do next
After everything turned out, it became obvious that the screen itself was a product. There are games, viewing information and videos (although it’s not clear where to get such video content).
The other day there was an idea to try to run 3D on the screen. A quick look at the Internet showed that the task, generally speaking, is being solved, but on NVidia, but with AMD the people did not succeed, but we will try. Banal anaglyph does not want, we want to immediately shutter glasses.
Well, then, if it works out with 3D, you can add reality and get something similar to the first 15 seconds of the video:
By the way, since this undertaking has no commercial value, if someone has a desire to play augmented reality on such a screen, you are welcome.
Thank you for your attention, and I will be glad to answer questions!
Source: https://habr.com/ru/post/230715/
All Articles