Create game character
This article describes the process of creating a character for the game engine. The article is primarily addressed to those who are interested in the process of developing next gen models, as well as to everyone who wants to look behind the scenes of modern igrodel. I made the character for the portfolio, I switched to the characters quite recently, we can say that this is the first character brought to mind. Since this work is my personal project, I set a limit of triangles to 20,000, textures in 2048 * 2048, the work was planned for PBR .
Pipeline
First of all, I will tell the plan on which I acted, an approximate pipeline. Pipeline or production sequence in creating graphic content may differ from company to company, and from artist to artist. Here is described the pipeline, which I followed, excluding the first 2 points, because I took as a basis the finished concept and the last 2.
- Verbal description
- Concept
- Modeling / sculpturing common high poly models (HiPoly)
- Hiopoly rotopology model (creating HiPoly finishing geometry for detailing)
- Detailing HiPoly models
- Hiopoly retopology model (creating a game lowpoly, which goes directly to the engine)
- LowPoly scan (create texture coordinates)
- Map baking: normals, ambient occlusion, color map (transfer of information from HiPoly to LowPoly)
- Texture creation: Diffuse, Specular, Gloss, Normal
- Render in the engine
- Rig and character skin (skeleton tooling and snapping to bones)
- Animation
')
Concept
But enough of the boring lists. Now about the creation process in more detail.
I found the concept in the open spaces of the network, and I wanted to make it in 3d. Later I found out that this character was already implemented in 3d more than once.

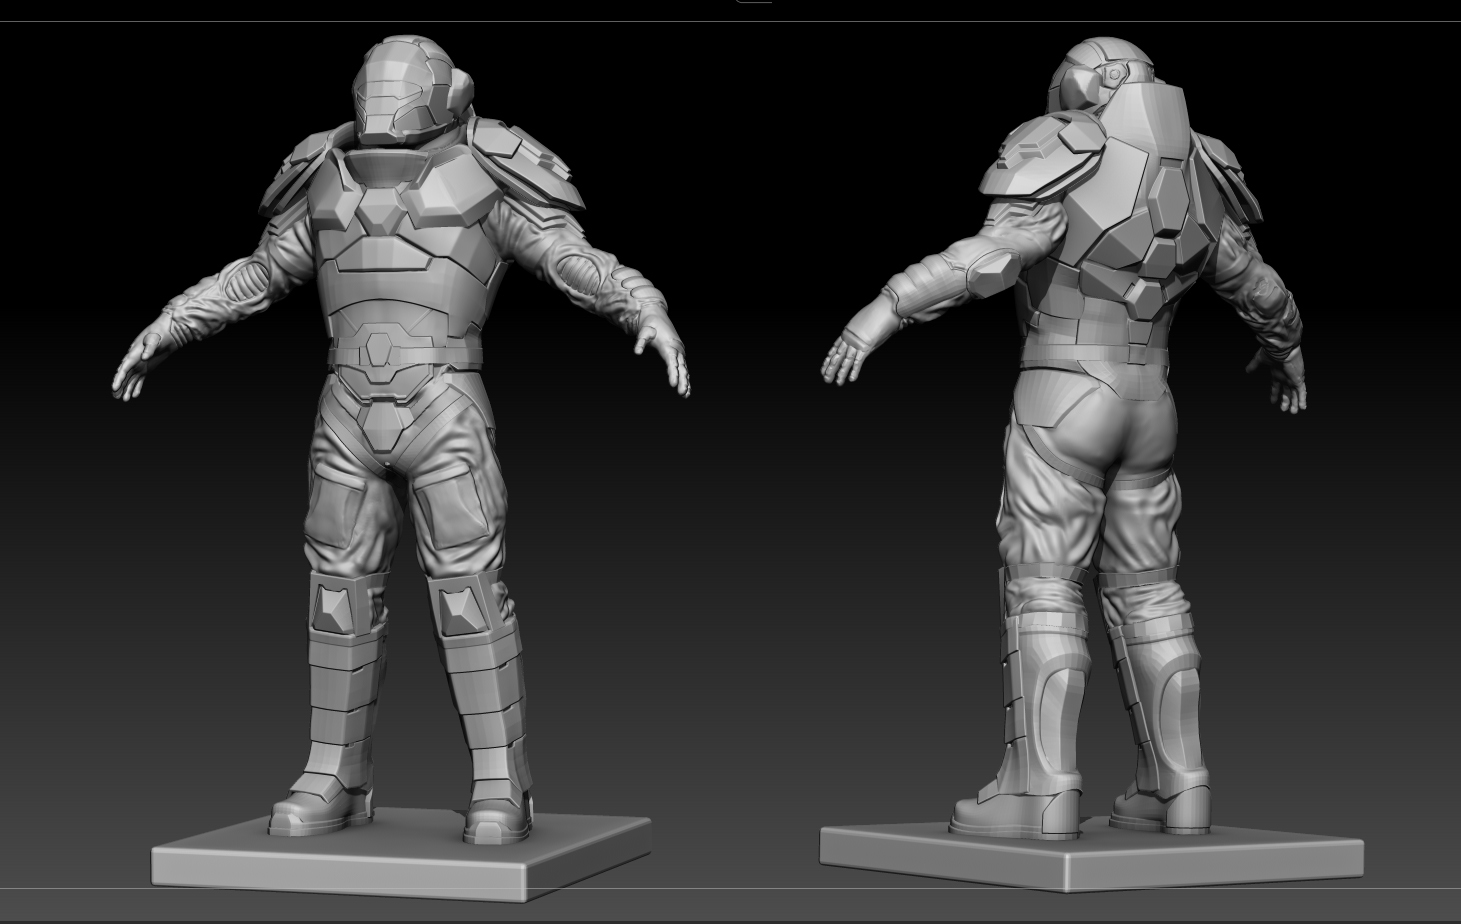
Scultping
But still, I didn’t refuse to give up the idea of implementation, I just decided that I’m going to rework some of the details, and I won’t repeat the concept completely. First of all, I decided to fashion the model entirely in one piece in ZBrush. ZBrush - (Brush, Zebra, Zibrash) is a great program that allows you to “model”, which is qualitatively different from other three-dimensional graphics programs, where we act on the model through vertices, edges and polygons. Here we have a brush with different properties and with the help of a tablet you can perform quite subtle operations, like a sculptor or a clay artist. Using the brush allowed me to cut off the errors with the main masses and proportions at the initial stage, with a simple model in the brush I could very easily change the proportions and look for options for detailing. It turned out to sculpt hardsurfaces (the so-called inorganic objects in the simulation) was not easy.

Although the model went awry, the idea was embodied, but the business moved on.
Several iterations of the search, and a form was satisfied that satisfied me.
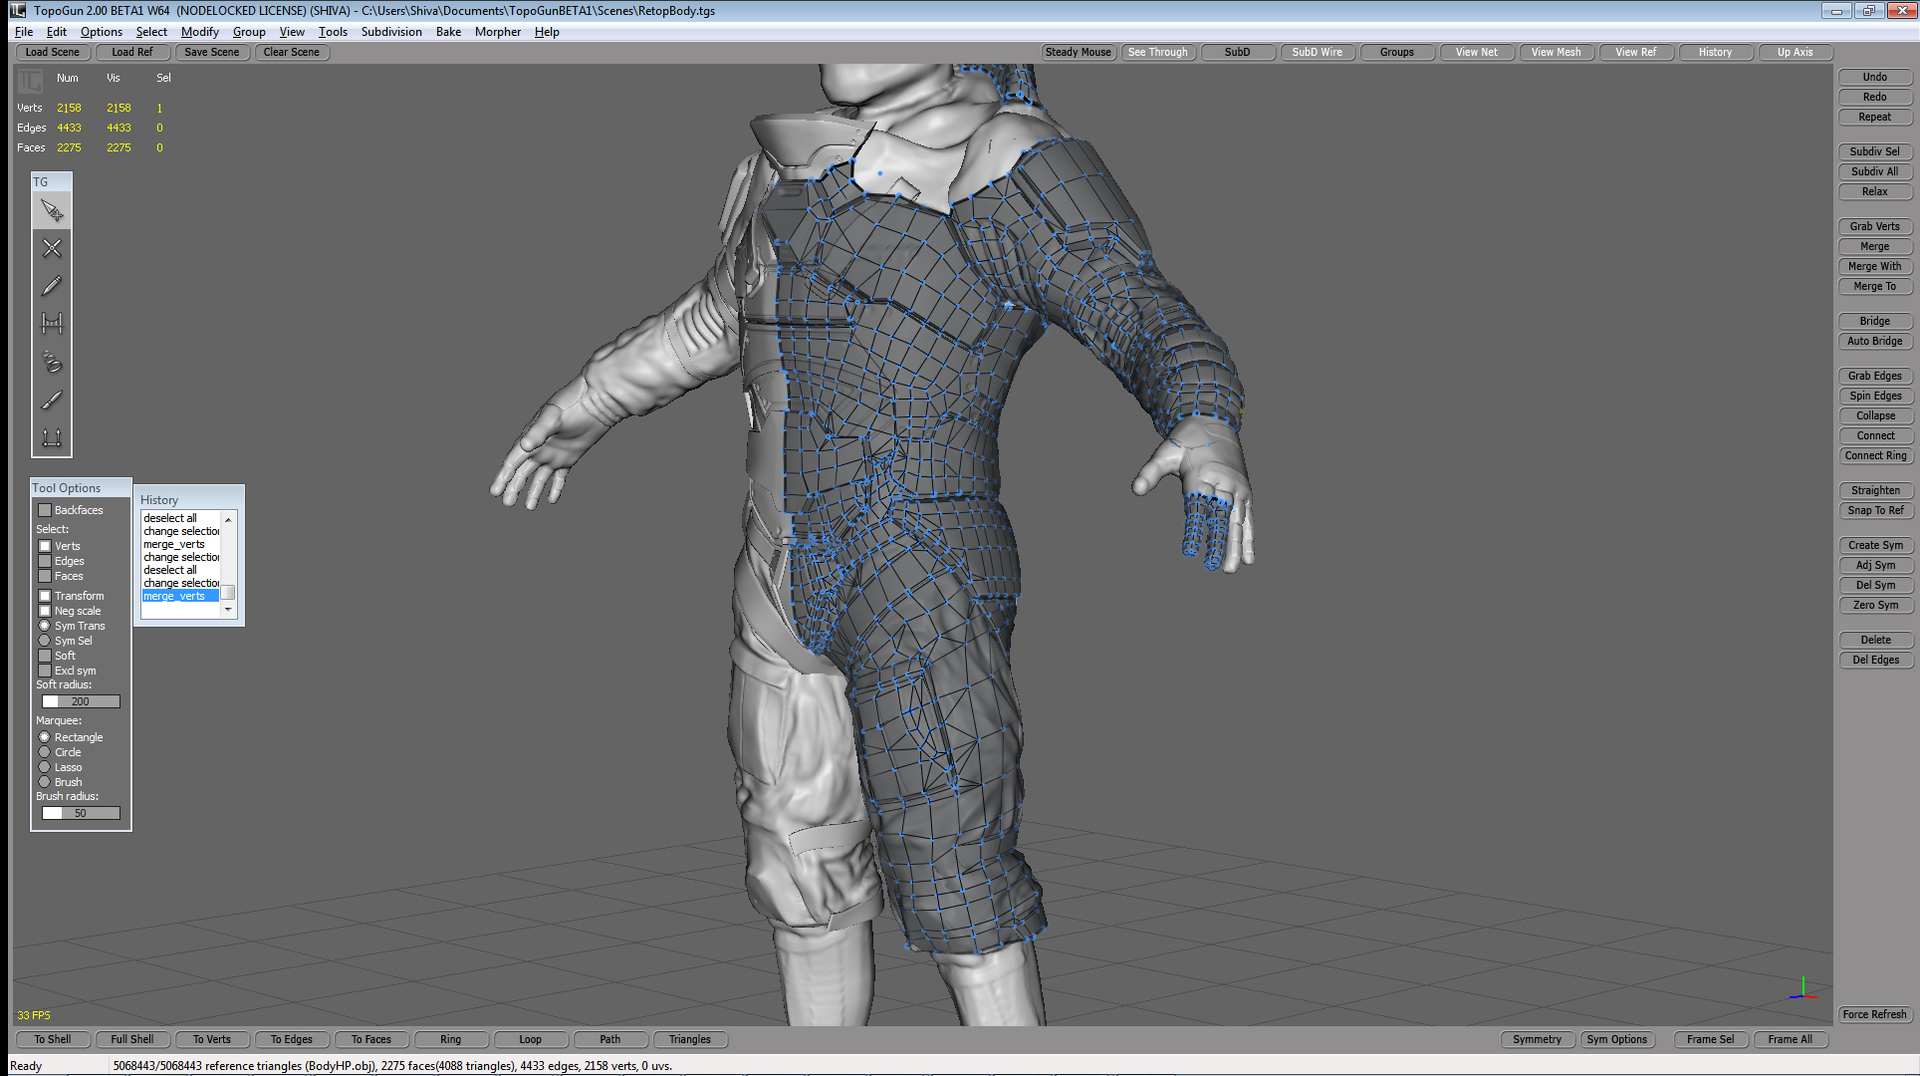
Rotopology HiPoly models
When it seemed to me that the model was ready for retopology, I switched to another program for creating pure geometry for sculpturing - Topogun and 3ds Max. The essence of retopology is that a mesh of another is built on top of one model. The rotopology allows you to make many programs of three-dimensional graphics the same ZBrush, 3dsMax. However, the retopology there is very inconvenient (although some are reteped in the brush) and not very functional. Topogun is a program created for retopology and has many advantages over editors-combines. There are drawbacks, after a dozen hours of work in it, I came up with a number of improvements, but who cares about them :) An important drawback: the lack of a normal auto backup and frequent crashes of Topogun. A feature of the new topology was that it was prepared for smoothing (Turbosmooth), so there are almost no triangles, tried to use quads (square polygons).

An example of a new grid next to the old one.
In Max, I fixed all the shoals and made the geometry clean. The rotopology was long and tedious, because I exported each part from the brush, then re-saw it separately into Topogun, then transferred it to 3dsmax, corrected it there and imported it back into Zbrush. Part of the model was made right in max (for example, knee pads).
Ultimately, the model was almost completely buried in a new, clean mesh and loaded again into Zbrush.
This is what the re-mesh inside Zbrush looks like.
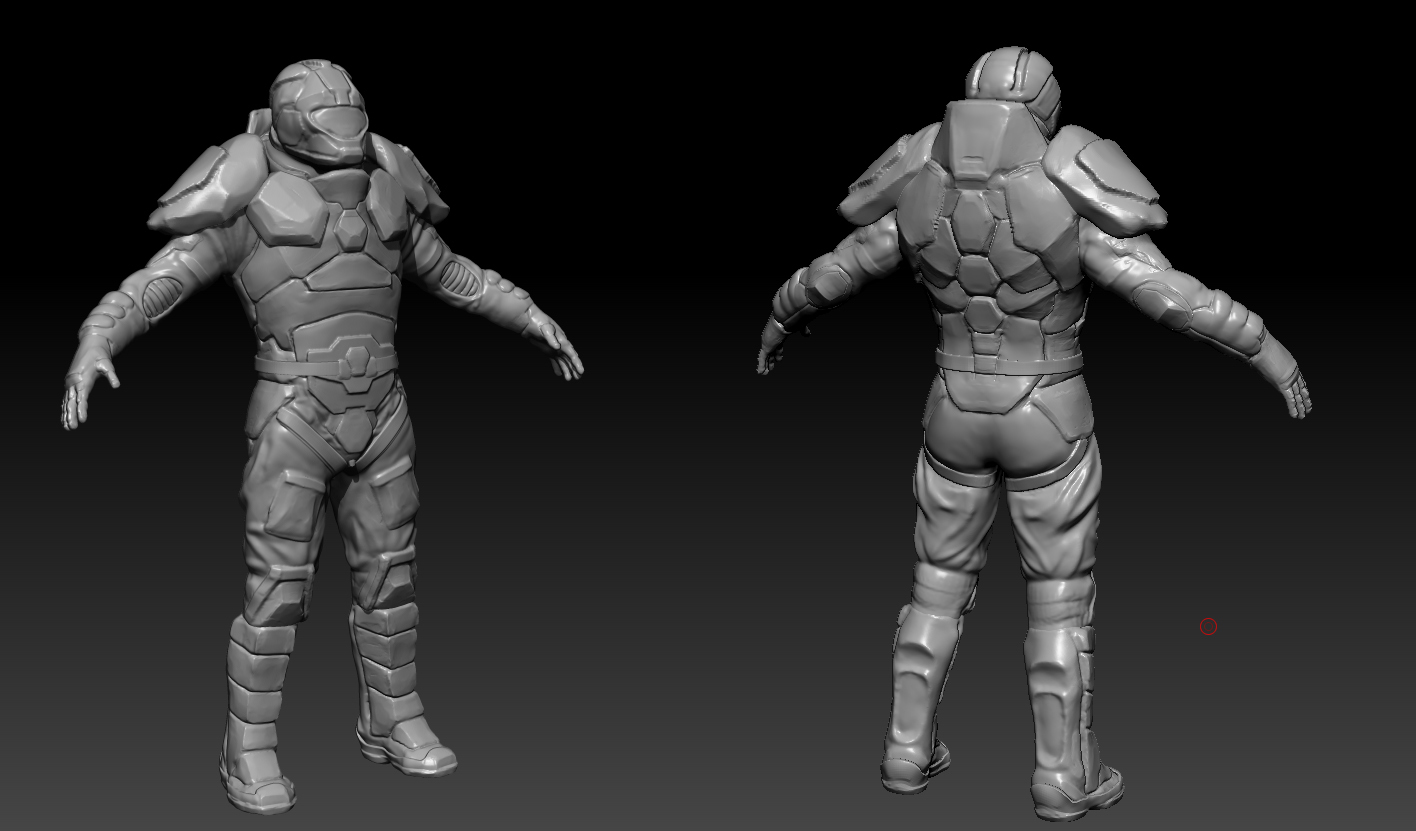
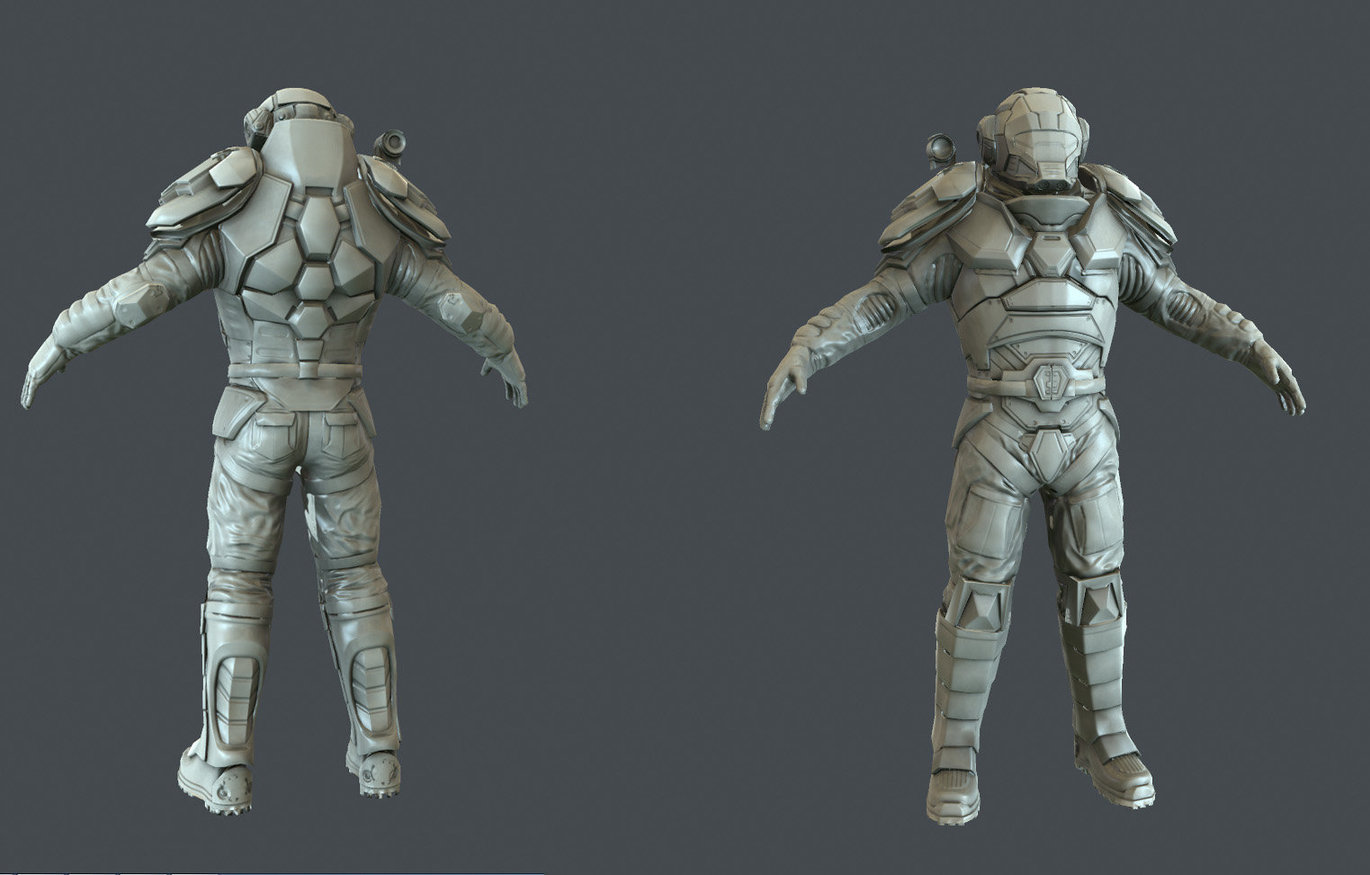
Final detail
Tired of the lengthy mechanical process of retopology, I was glad to switch to the model detailing. Then everything is simple - I increased the number of model polygons and added details with brushes. I wasn’t happy for long, when the polygon of the object passed over 12 million, the computer began to dull a little and this brought discomfort.
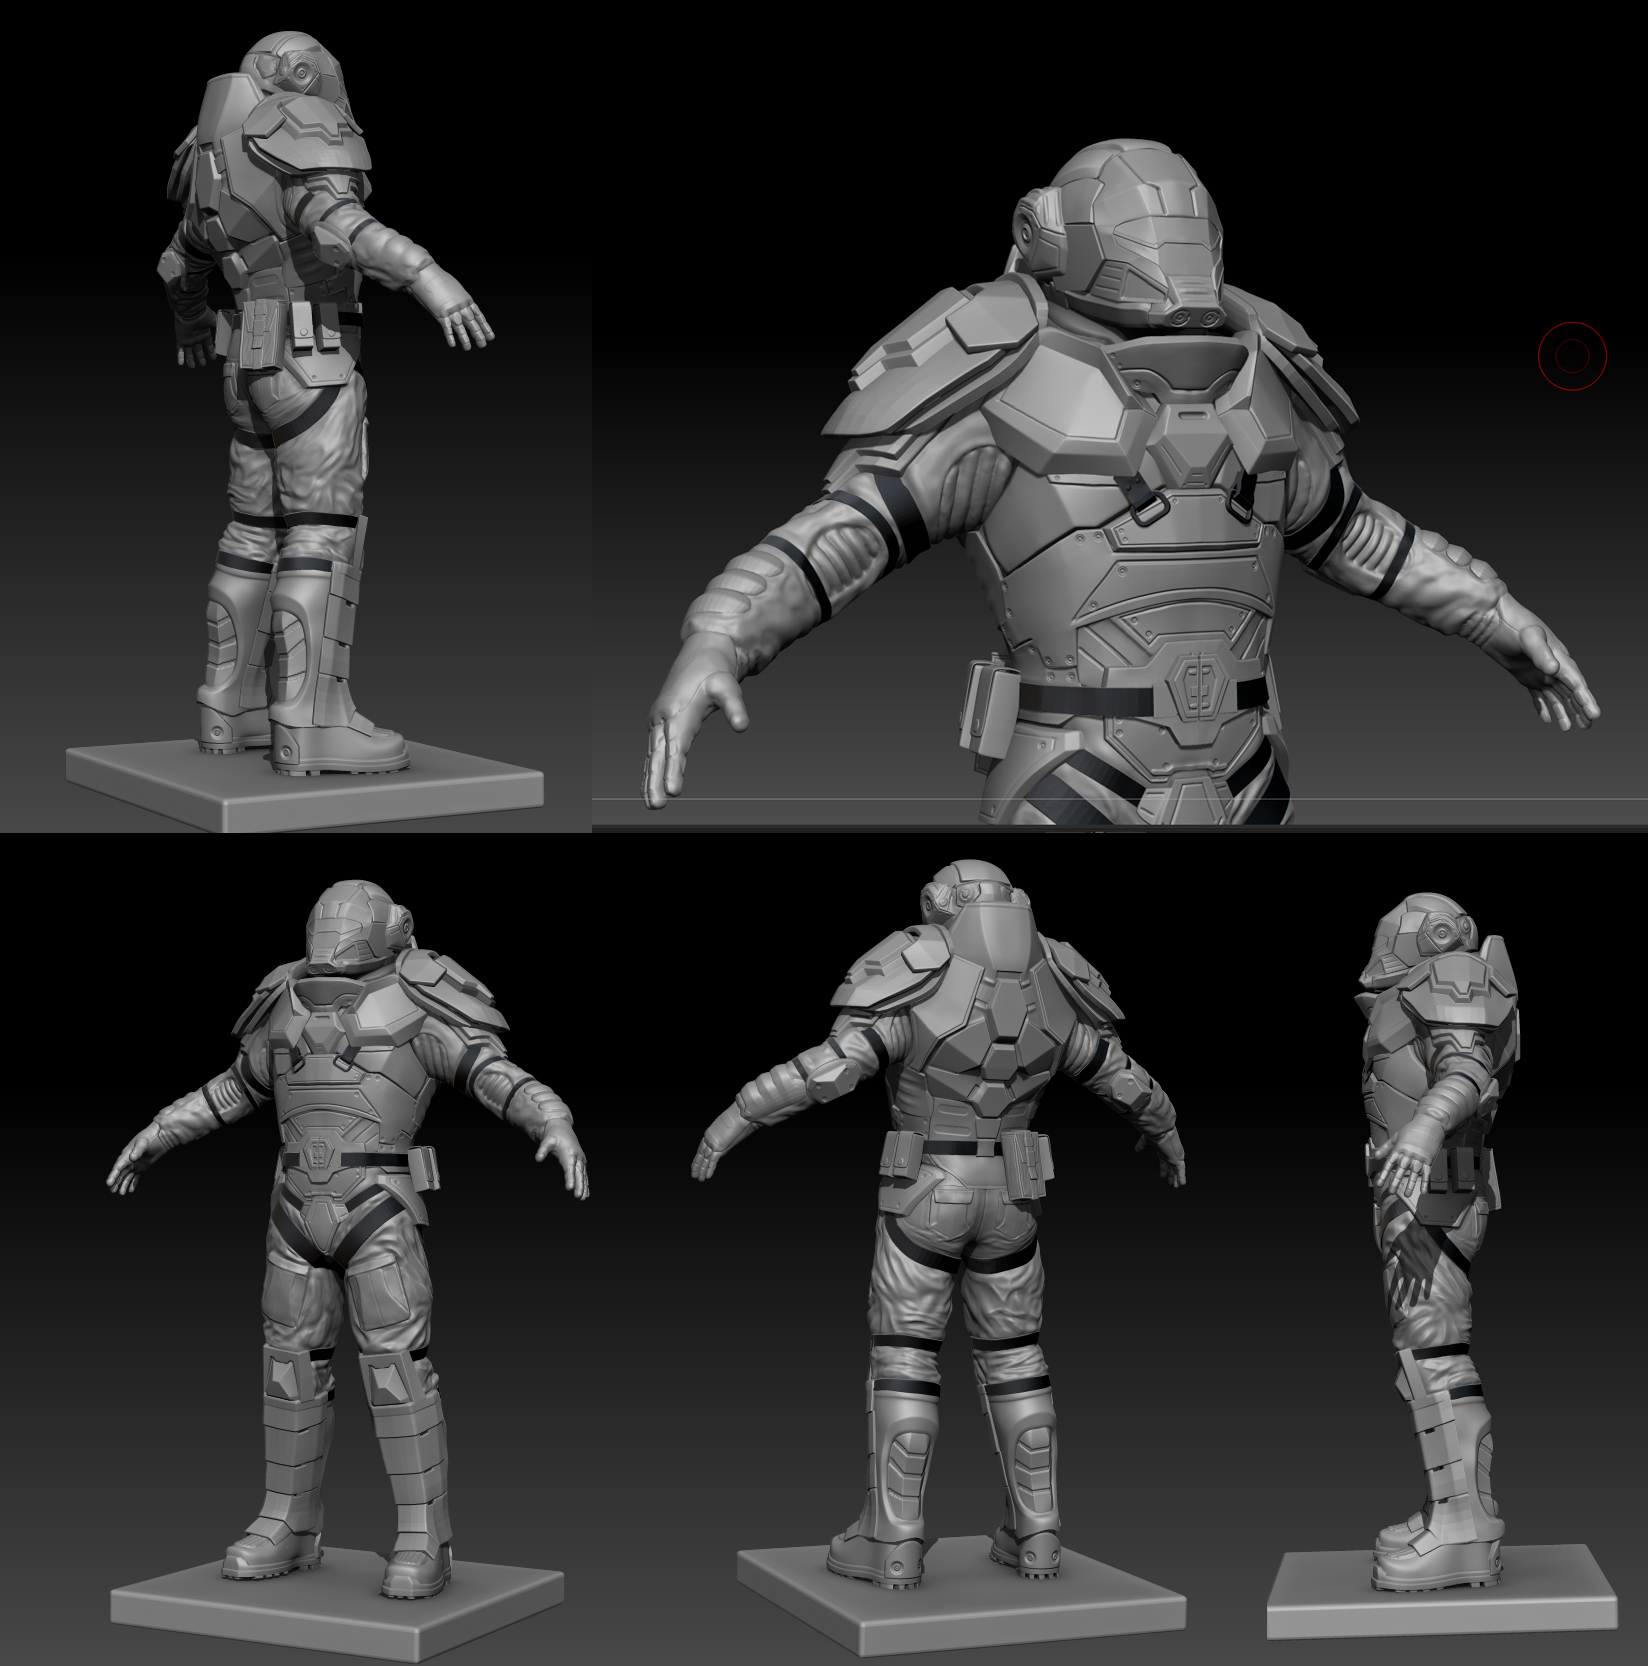
Ultimately, the model looked like this.
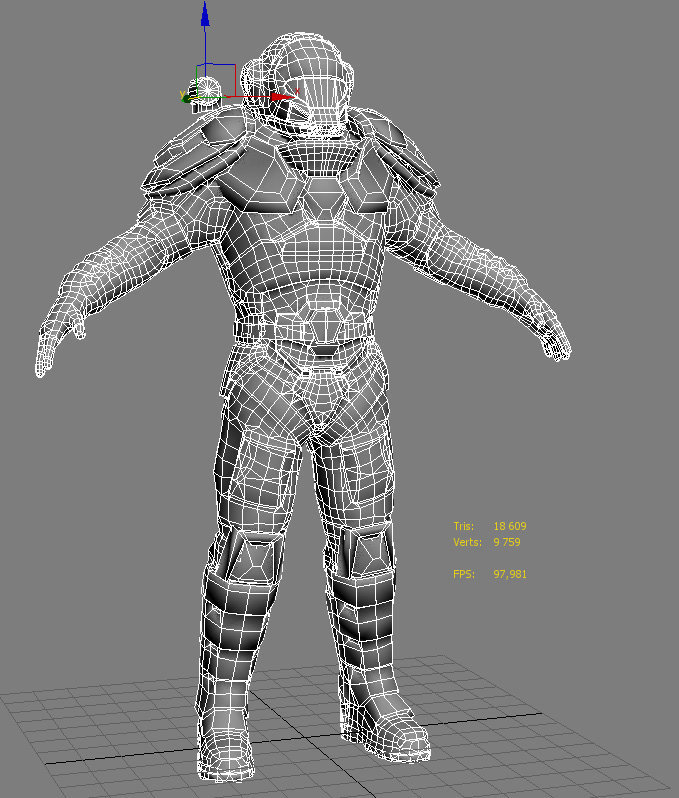
Rotopology, the creation of LowPoly
It is time to make a grid for use in realtime renders (game engines). Again Topogan, now the work went completely in him, in Max he corrected only some of the shoals of geometry. The work was for the portfolio, so I didn’t skimp on the triangles, although I know that I could save a lot of money. At this stage, I tried to bake a Normal map to see if the details are adequately transferred. It was at this stage that I realized that with Topogun, we were no longer on the way and already in the next project I refused it in favor of 3dCoat. But that's another story…
It looks like a new grid.
LowPoly model assembled in max. Now it's UV unwrap time.
Creating texture coordinates
Until now, there was no need for texture coordinates. However, after preparing the LowPoly model, you need to create the correct UV coordinates in order to bake the maps and make it possible to texture the model. UV I did in 3dsMax, I consider a rather convenient built-in editor. I used to use third-party programs, but when I mastered the UV editor in 3dsMax, it turned out to be quite powerful ...
Correct scanning ensures easy and correct texturing, drawing maps and can affect the quality of textures.
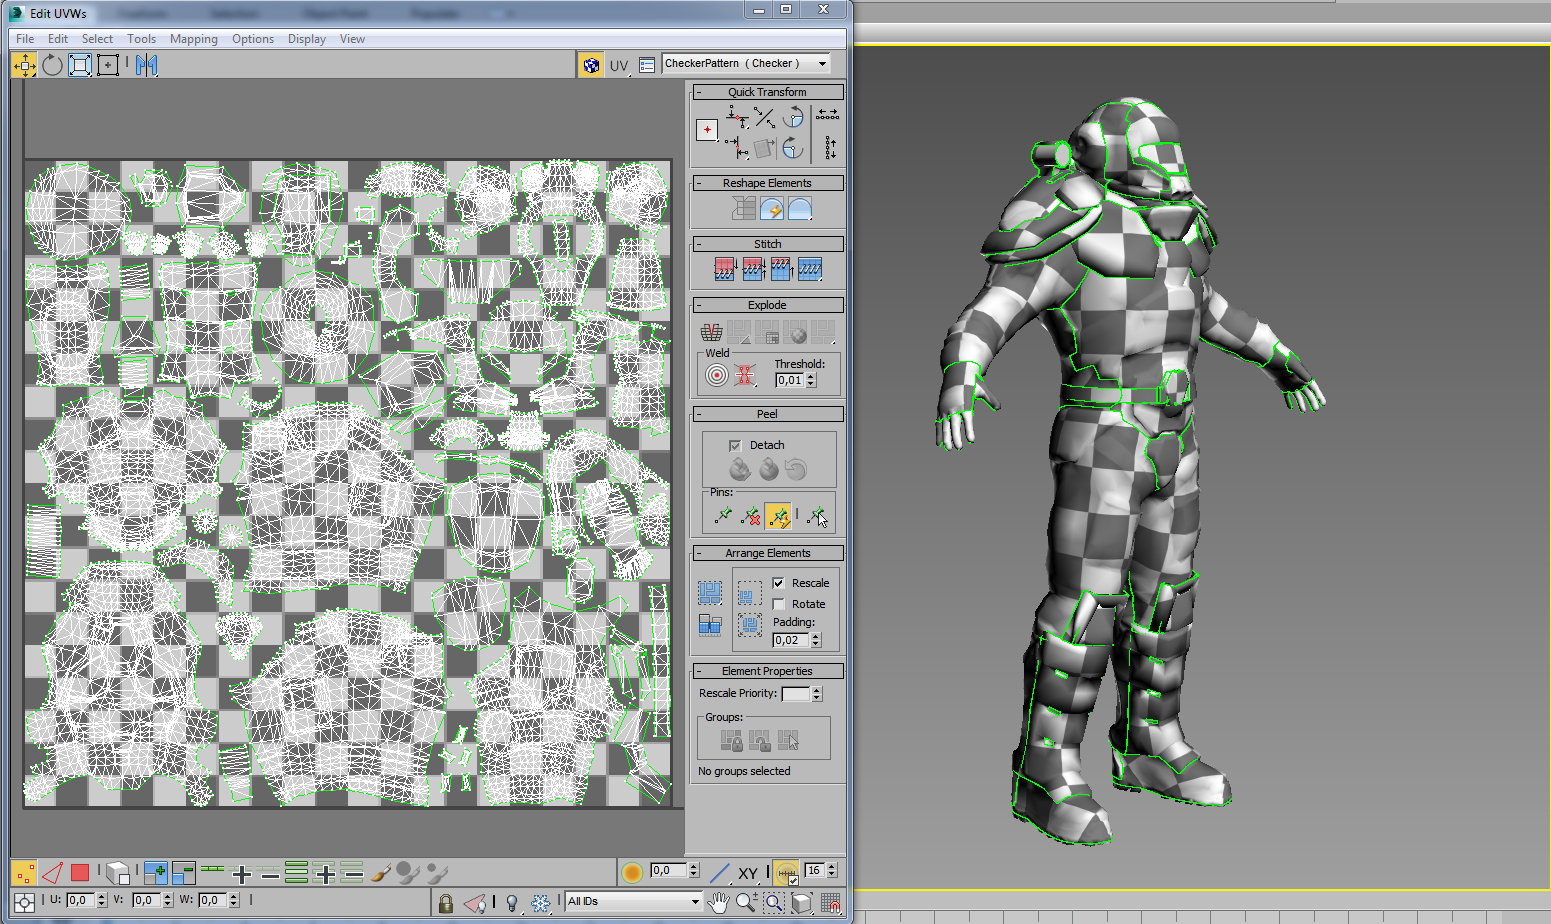
This is how the layout of pieces of UV looks like.
Baking cards
The essence of baking cards (in this case) is to transfer information from the HiPoly model to the LowPoly texture. I baked with the help of the program xNormal - an excellent program that copes with baking much better than combines programs. I baked a normal map (tangent space normal map) (information about the surface relief, which adds fake details to the model), ambient occlusion (self-shadowing map), the cavity map received from ambient occlusion, I also received the object space normal map using the xNormal utility from tangent space normal map.
This is the model in the engine with a normal map and ambient occlusion. Marmoset Toolbag engine. There are still bugs, which were corrected in Photoshop.
Texture creation
Now that maps have been prepared that could be obtained with the help of information transfer, it is necessary to prepare diffusion, speculative and glossiness cards. Previously, diffuse, normal and spec maps were usually enough, now PBR allows you to create glossiness effects, not just information about the strength of the reflection. There is a wonderful Photoshop plugin that makes it easy to create and edit all of these maps - dDo. This is an amazing program that essentially allows you to control several parameters of the cards at once through masks. It took preparatory work so that I could work with this plugin, by the way, I used it for the first time in my pipeline. The plugin allows you to parametrically add various effects to surfaces, such as scuffs, stains and dirt, so it turned out to be very suitable for this job. Having generated the main details of the textures, I modified it manually in Photoshop.
The resolution of the textures with which I worked was 4096 * 4096, the Photoshop file quickly grew to 6 gigabytes. I am glad again that I have a pretty fast computer :)
In the end, despite the fact that I reworked the texture several times (because Photoshop killed the file several times), the textures were created.

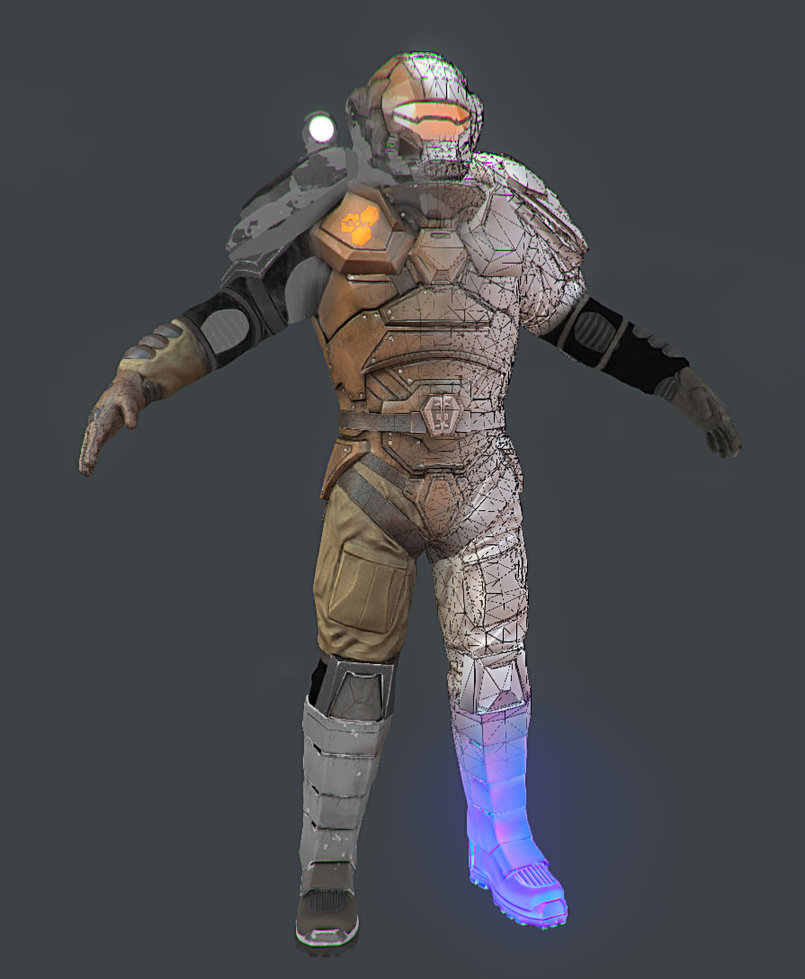
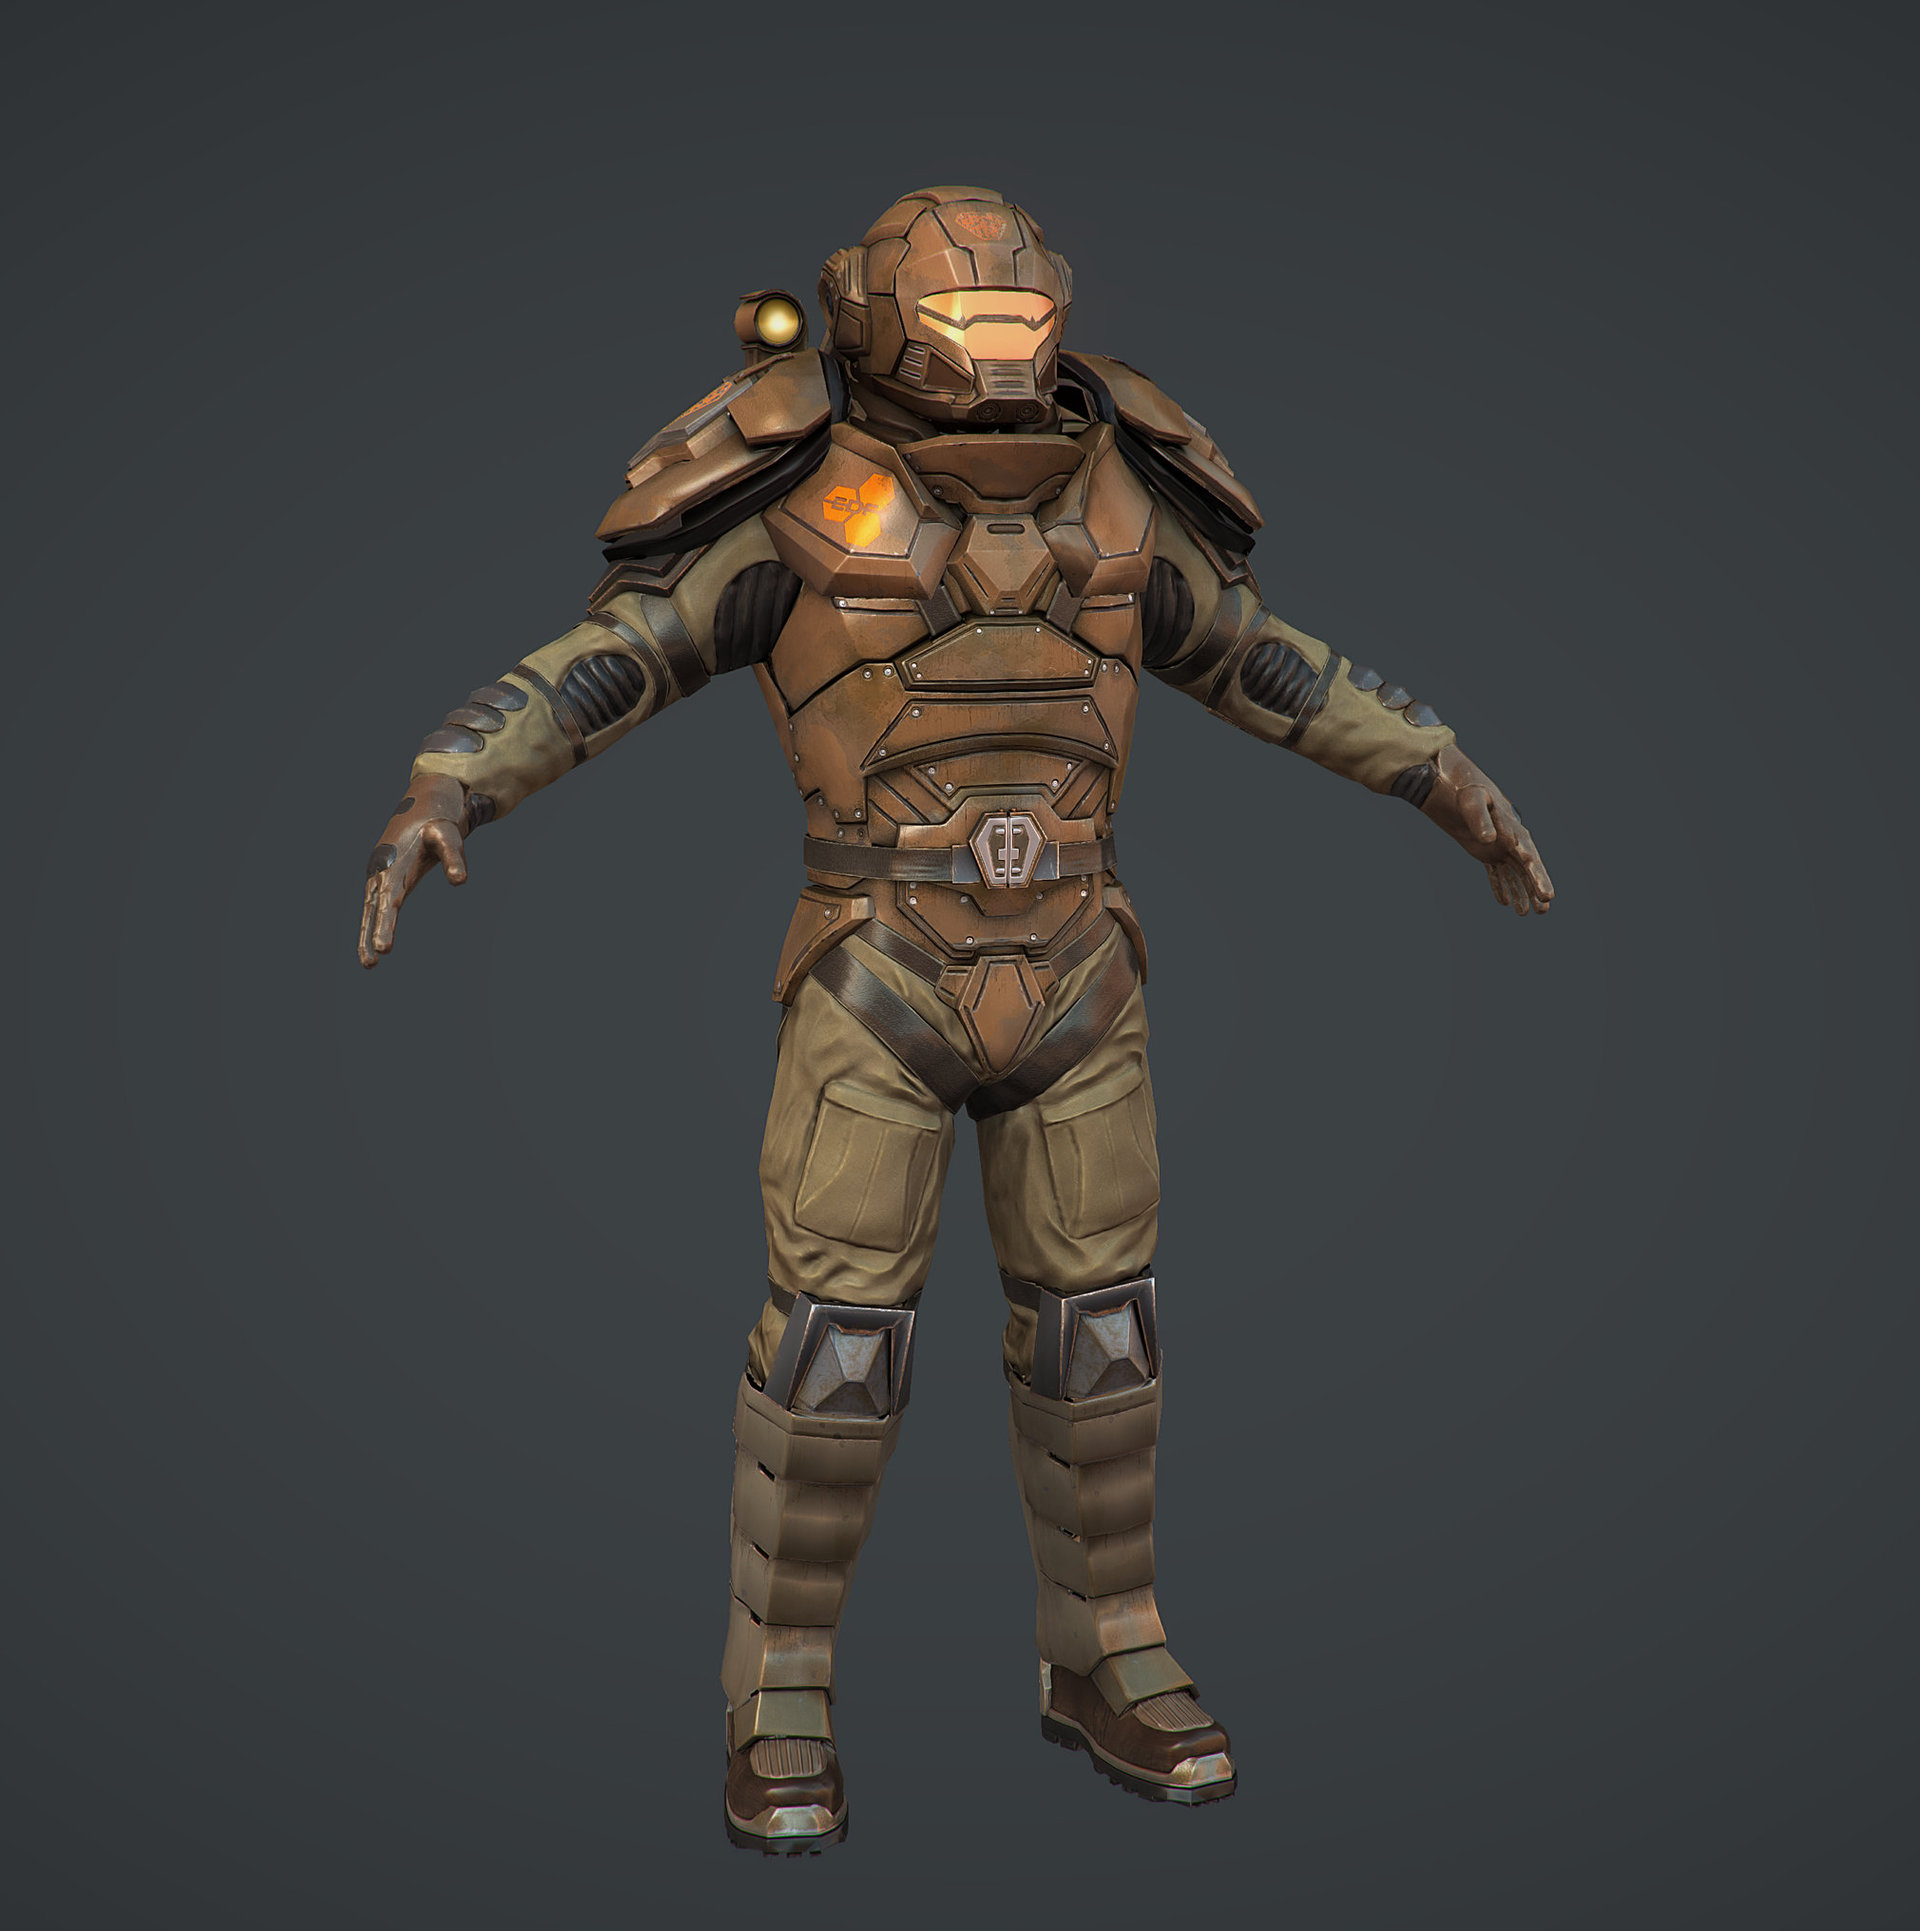
Render
And finally, the final render! Although in essence, this is a preview of the textures, I didn’t load the model engine at the present, adult (UDK, Unity3d, CryEngine). For each engine (as well as the setting, location and individual color solution of the game) most likely it was necessary to conduct its own tuning textures.


Then it would be necessary to make a rig for the model and tie the grid to the skeleton, and then zanimirovat or put in an interesting position. But more about that some other time.
Actually, that's all. Thanks for watching, ask questions in the comments, maybe something will be interesting.
PS This is my first article on Habré, so if I did something wrong, let me know.
I also want to immediately note: about the realism of the armor, the questions to the concept artist, also do not forget that the art component is often more important than functionality and realism, although ideally, of course, this should be combined.
Source: https://habr.com/ru/post/230081/
All Articles