Create a platformer in four evenings
Immediately make a reservation: it will be about game development for the soul. In order not to be ashamed to show the game to the world - you have to sweat a little longer.
Like many, I became a programmer because of the childhood dream of writing my own game. In time, I devoted myself to another field, but once I decided to make my dream come true by all means. Here I want to share my experience to perhaps inspire you.
1. Purpose
My goal was to create a classic platformer, but with such a plot, characters and levels that are interesting to me. I wanted to make a game on my own and especially for myself; while doing it with minimal effort and your free time.
')
2. Search for tools
Of course, creating gameplay from scratch is unwise. I started by searching for designers and game development environments and found a fairly large list on the site [ http://gcup.ru/load/konstruktory_igr/12 ]. I want to pay special attention to the designers, allowing you to quickly create themed games: for example, Open Zelda [ http://openzelda.net/ ] or Mario Worker [ http://www.softendo.com/game/Mario%20Worker ]. A real treasure for fans.

Not uncommon and designers who allow you to create games of classical genres (including platform games), and at the same time do not require programming skills. For example, 001 Game Creator [ http://www.engine001.com/ ] or Rune Sword [ http://www.runesword.com/ ].

With all its functionality, such designers to some extent limit the creator in the possibilities. In addition, most of the features of these tools, such as porting games to Android, are paid.
Among other game design tools, my attention was drawn to the Tululoo Game maker [ http://tululoo.com/ ].


The advantages are obvious: a completely free tool that combines the convenience of a ready-made engine with the variability of programming specific aspects of the game. In addition, the finished game is a HTML5 web page with javascript, which allows you to put the game on the Internet. The biggest inconvenience can be considered the lack of a debugger. And yet, this option perfectly solves my problem, so I stopped at it.
3. Quick start in Tululoo Game maker
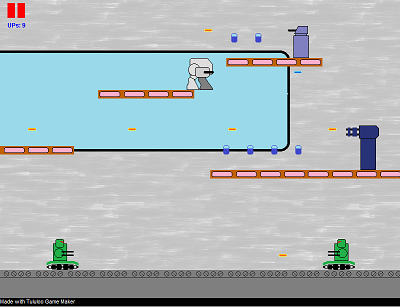
To work with the Tululoo Game maker environment, no knowledge of OOP, javascript, or the presence of a browser with HTML5 support is required. There are 2 project examples in the environment: adventure and platformer. I took as a basis the proposed platformer, which greatly simplified the start of writing my game. In the example, there is already one level and a character who can move, jump, collect coins and shoot boxes, is a great template for further experiments.

For those who are interested in creating a game using Tululoo Game Maker, I will consider several stages of work for a quicker and more enjoyable start.
4. Editing a character
In the game editor, go to the tab Objects -> Double click on the object obj_player -> in the list of object event handlers, select Step. In the Code preview field, the corresponding javascript event will be loaded.

It should be noted that the obj_player object code focuses on the main mechanics of the game - through the player’s interaction with the rest of the game world objects. The Step event runs on a timer every frame; the number of frames per second is adjusted when editing levels (I have adopted the default value - 60 frames per second). Now in the Step event, keystrokes and a player’s collision with landscape objects are processed. First of all, let's replace the player's image with our hero. I drew a new character in the paint in two versions: looking left and right, and added the resulting pictures to the sprites on the Sprites tab. After each picture is loaded, the Edit button can be used to edit the image, where there is a useful Erase color option - with the help of it you can erase the background, thereby achieving the correct outline.

Now you need to go back to editing the obj_player object and specify one of the new sprites for it.

Let's work with the code: let's teach the player's object to turn left and right. To do this, we will change the picture of the character between the left and right side, using the sprite_index property (a more complete description of the API can be seen in the help).
obj_player Step event:
At the very beginning of the code we edit the lines:
if ( x > room_width ) { x = room_width; instance_destroy(); room_goto_next(); } if ( keyboard_check(vk_right) ) { x += 4; if(direction > 0) sprite_index = spr_player_right; //change sprite if direction changed direction = 0; if (place_meeting(x, y, obj_ground) != null || place_meeting(x, y, obj_box) != null) { x = xprevious; } } if ( keyboard_check(vk_left) ) { x -= 4; if(direction == 0) sprite_index = spr_player_left; //change sprite if direction changed direction = 180; if (place_meeting(x, y, obj_ground) != null || place_meeting(x, y, obj_box) != null) { x = xprevious; } } Run and enjoy. Animation of steps is more difficult to do, so I will not consider this procedure here.
5. Adding Objects
Add two objects: the enemy and the projectile, which he will shoot. When creating an enemy object, inherit it from obj_box so that it prevents the player from passing through itself, and also destroyed it when it hit the projectile. In the event handlers Creation and Step, add the code for shooting at the player.


The player’s code will have to be edited: if you contact the enemy projectile, obj_player will be destroyed. We also move the player's object to the global variable.

Object code:
Global variables:
global.player = obj_player; obj_player event Creation:
this.air = 0; this.jump = 0; global.player = id; obj_player event Collision with obj_enemy_bullet:
instance_destroy(); obj_enemy_1 Creation event:
this.timer_max = 60; this.timer = this.timer_max; this.distance_fire = 480; this.bullet_speed = 5; this.bullet_height = 25; obj_enemy_1 Step event:
//aim player distance = global.player.x - x; direction = 0; if(distance < 0) { distance = -distance; direction = 180; } function fire() { // DECREASE THE TIMER timer--; if ( timer <= 0 ) { bullet = instance_create(x,y - bullet_height, obj_enemy_bullet); bullet.direction = direction; bullet.speed = bullet_speed; timer = timer_max; } } if(distance < distance_fire) { fire(); } 6. Editing levels
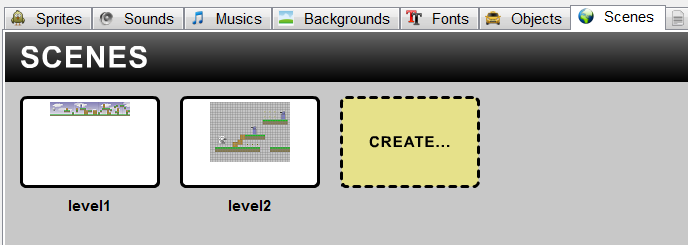
The last step, important for creating a full-fledged platformer - the creation of levels. In Tululoo, for this, a very simple intuitive interface: in the designer, on the Scenes tab, we throw in the necessary objects into the playing area - and that's it. Of course, level design is an important and most time-consuming process. Here is a real scope for imagination.
Separately, I will describe the part of the code responsible for switching between levels. For this, the room_goto_next function is used (a more complete description of the API can be seen in the help).
obj_player Step event:
Replace the last line of code with:
if ( x > room_width ) { x = room_width; instance_destroy(); room_goto_next(); } The resulting code for this event will look like this:
obj_player Step event:
if ( keyboard_check(vk_right) ) { x += 4; if(direction > 0) sprite_index = spr_player_right; //changew sprite if direction changed direction = 0; if (place_meeting(x, y, obj_ground) != null || place_meeting(x, y, obj_box) != null) { x = xprevious; } } if ( keyboard_check(vk_left) ) { x -= 4; if(direction == 0) sprite_index = spr_player_left; //changew sprite if direction changed direction = 180; if (place_meeting(x, y, obj_ground) != null || place_meeting(x, y, obj_box) != null) { x = xprevious; } } if ( keyboard_check_pressed(vk_up) && jump == 0 ) { jump = 1; air = 12; //sound_play(snd_jump); } if ( air > -5 ) air -= 0.5; y -= air; if ( place_meeting(x, y, obj_ground) != null || place_meeting(x, y, obj_box) != null ) { y = yprevious; air = 0; jump = 0; } if (keyboard_check_pressed(vk_space)) { bullet = instance_create(x,y - 25,obj_bullet); bullet.direction = direction; bullet.speed = 15; } if ( x < 0 ) x = 0; if ( x > room_width ) { x = room_width; instance_destroy(); room_goto_next(); } 7. Summary
There are many ways to easily create your dream game. I disassembled only one of them; Perhaps someone will be able to find more convenient tools - please leave your feedback about them in the comments. I wish you creative success!
Source: https://habr.com/ru/post/229125/
All Articles