Work with data in mobile applications. Implement offline storage and data synchronization using Microsoft Azure and SQLite
Now the market has a huge number of applications that are not adapted for offline work, which creates inconvenience for users.
Some time ago, a new Microsoft Azure Mobile Services SQLiteStore SDK 1.0 alpha became available for C # developers, which provides an API for building an application that works in the absence of the Internet and takes care of synchronizing data between a local database and an Azure database. SQLite is created and used as a local database.
So, we have the following popular ways to organize offline storage:
- Serialization in XML, JSON or other NoSQL.
- SQLite or other third-party databases.
Synchronization mechanisms:
- Each time the local database copy is completely updated.
- Only changes are transmitted over the network.
Synchronization Tools:
- Sync Framework Toolkit
- Azure SQL Data Sync
- Develop your own logic and libraries for synchronization.
- Microsoft Azure Mobile Services SQLiteStore SDK 1.0 alpha ( ! New )
Azure Mobile Services SDK for syncing
The functionality of the new Microsoft Azure Mobile Services SQLiteStore SDK 1.0 alpha for data synchronization is not identical to the Sync Framework or Azure Data Sync.
From the client’s point of view, while it is possible to work only with SQLite , the creators promise that the opportunities will be developed and other client databases will be added later.
')
The server side supports the following databases: SQL Database, MongoDB and Azure Table Storage.
The SDK supports the following operations: Push (send to server), Pull (download from server), Purge (clear local storage).
Today we will focus on how to create a backend for your application using Microsoft Azure Mobile Services SQLiteStore SDK 1.0 alpha .
To work we need:
- Azure subscription - on the site you can get a trial for a month
- Windows 8.1
- Visual Studio 2013 Update 2
Our task will consist of the following items:
- Creating a mobile service and mobile database in Microsoft Azure;
- Creating an application project. We will make a universal application in Visual Studio.
- Creating a local database application.
- Implement data synchronization.
Let's get started ...
Configure Azure Mobile Services
1. To create an Azure Mobile Service for your project, you must open the Microsoft Azure Portal and go to the Mobile Services - New menu.

Creating a cloud service, you can choose in what language you will write the service code. On C # or JavaScript.
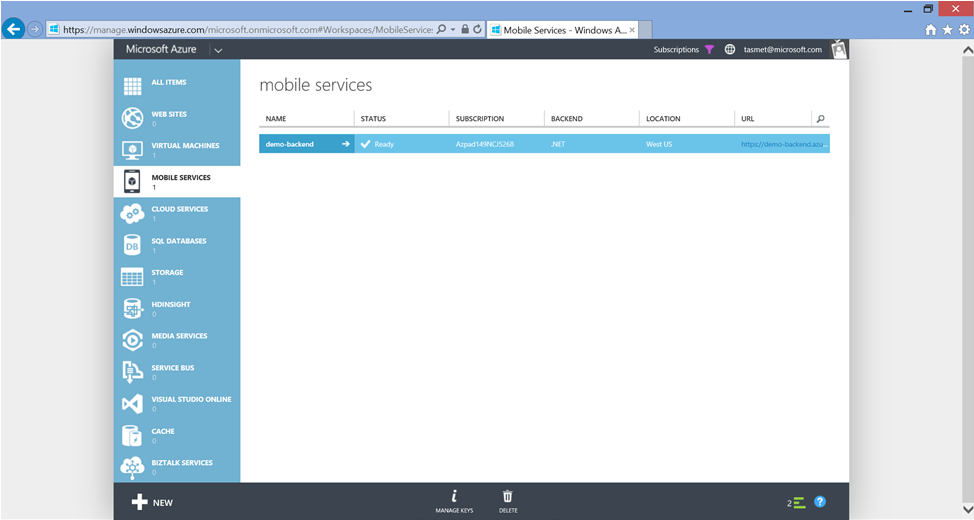
2. When the mobile service is created, on the main page of the service, you can find instructions on how to use it in applications for many popular platforms and frameworks, such as Windows, Windows Phone, IOS, Android, Xamarin.

3. You can download a cloud service project template, modify its code, for example, by adjusting the data model as in the screenshot below.

4. Then, post to the cloud from Visual Studio.

How to develop and publish a cloud service is written in sufficient detail here .
Create an application project
1. I will use the universal application project for Windows and Windows Phone.

2. After creating the project, we will connect the necessary libraries. Since we have a project for both Windows and Windows Phone, it is necessary to install WindowsAzure.MobileServices for both projects.


3. In the general project ( Shared ), open App.xaml.cs and add the mobile service announcement there:
public static MobileServiceClient MobileService = new MobileServiceClient("https://demo-backend.azure-mobile.net/", "ZDgibxPOCWSwOvbYJvAAipjAybMIJO51"); 4. Now we can work with the data through the cloud service and save the data in the database.
Create local database and sync
Now we need to create a local SQLite data store.
1. Install SQLite for Windows 8.1 and SQLite for Windows Phone 8.1
2. Add SQLite as the used library for our Windows and Windows Phone applications.


3. Install and add the WindowsAzure.MobileServices.SQLiteStore package to References

4. Open the Shared project and create there a new empty class with the data model. In my case, it turned out like this:

5. Let's create an auxiliary class that will create a local database for us, be able to fill it with data and send data to the cloud service.
MobileServicesSync.cs
using System; using System.Collections.Generic; using System.Linq; using System.Text; using System.Threading.Tasks; using Microsoft.WindowsAzure.MobileServices.Sync; using Microsoft.WindowsAzure.MobileServices.SQLiteStore; using System.Threading; namespace DemoApp { public static class MobileServicesSync { public static async void InitSQLiteStore() { if (!App.MobileService.SyncContext.IsInitialized) { var store = new MobileServiceSQLiteStore("DemoAppSync.db"); store.DefineTable<MyAppItem>(); await App.MobileService.SyncContext.InitializeAsync(store, new MobileServiceSyncHandler()); } } public static async void InsertItem(MyAppItem item) { IMobileServiceSyncTable<MyAppItem> table = App.MobileService.GetSyncTable<MyAppItem>(); await table.InsertAsync(item); } public static async void Push() { string errorString = null; try { CancellationToken token = new CancellationToken(); await App.MobileService.SyncContext.PushAsync(token); } catch (MobileServicePushFailedException ex) { errorString = "Push failed because of sync errors: " + ex.PushResult.Errors.Count() + ", message: " + ex.Message; } catch (Exception ex) { errorString = "Push failed: " + ex.Message; } } } } Application interface
1. Open MainPage.xaml and add buttons to fill the table with data and synchronization.
MainPage.xaml
<Page x:Class="DemoApp.MainPage" xmlns="http://schemas.microsoft.com/winfx/2006/xaml/presentation" xmlns:x="http://schemas.microsoft.com/winfx/2006/xaml" xmlns:local="using:DemoApp" xmlns:d="http://schemas.microsoft.com/expression/blend/2008" xmlns:mc="http://schemas.openxmlformats.org/markup-compatibility/2006" mc:Ignorable="d"> <Grid Background="{ThemeResource ApplicationPageBackgroundThemeBrush}"> <StackPanel VerticalAlignment="Center" HorizontalAlignment="Center"> <Button Name="addBtn" Content="Add item" Click="addBtn_Click"></Button> <Button Name="syncBtn" Content="Sync" Click="syncBtn_Click" ></Button> </StackPanel> </Grid> </Page> 2. Add to MainPage.xaml.cs code for event handling.
MainPage.xaml.cs
public MainPage() { this.InitializeComponent(); MobileServicesSync.InitSQLiteStore(); } private void addBtn_Click(object sender, RoutedEventArgs e) { MobileServicesSync.InsertItem(new MyAppItem { Text="!" }); } private void syncBtn_Click(object sender, RoutedEventArgs e) { MobileServicesSync.Push(); } Run and check
1. Run the application and see how it works.

2. As soon as we launched the application, we already had a local SQLite database. We can find it in the application folder and see. For this, I will use SQLite Browser .
My database is here: C: \ Users \ [username] \ AppData \ Local \ Packages \ [app id] \ LocalState

As you can see, it is now empty.
3. Add an item to it by clicking on the Add Item button of our application.
4. The data in the database will be updated and a record will be added there, but our cloud database is still empty.

5. Now click on the Sync button in the database synchronization application and see the result.

Synchronization worked and data from the local application database appeared in the cloud database.

Note: for those who did not work
It may happen that the creation of a local database will fall with an error. Then find and add the SQLitePCL.Ext.dll assembly to References . For some reason, it itself is not always set by NuGet.

Conclusion
New Microsoft Azure Mobile Services and its SDK have many new useful features for application developers. One of them is the support of offline work and data synchronization for applications. Following this guide, you can set up data synchronization for your Phone or Windows application without spending a lot of time on complex algorithms and writing libraries.
useful links
: Ure
Tutorial: Get started with offline data
Tutorial: Handle conflicts with offline data in Mobile Services
Try Azure for free for 30 days!
Download free or trial Visual Studio
Take a training course at the Microsoft Virtual Academy (MVA)
- Application Development on the Microsoft Platform
- Cross-platform application development for Windows Phone and Windows 8
- Developing applications with common code for Windows 8 and Windows Phone platforms
- Complicated techniques for developing applications for Windows Phone 8
- Advanced Development Features for Windows Phone 8
- or Azure cloud development courses
- or many other free MVA courses !
Become a Windows Phone Application Developer
Source: https://habr.com/ru/post/229041/
All Articles