Writing a package for PFSense
In this article I will try with a simple example to show the creation of a custom GUI package for pfSense . It is assumed that the reader has experience with pfSense, has some knowledge in PHP.
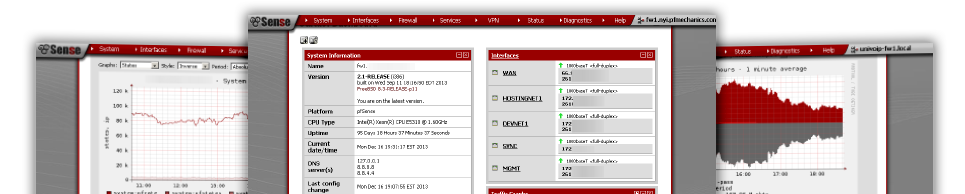
The pfSense router (based on FreeBSD) is used by many sysadmins thanks to, first of all, the management of system settings via the WEB interface. Even a novice administrator is quite capable of coping with many settings, which makes it possible to expand the scope of application of this router. At the same time, experienced colleagues can take full advantage of access to the console to study and control the operation of the system.
')
In addition to the standard settings of the router, most of which can be done through the WEB interface, sometimes there are enterprise-specific tasks that require the sysadmin to manage the settings through the console. Next, I want to show how to clothe my work in the code that allows you to manage the system settings from the WEB interface.
So, you have installed and configured test pfSense. First we need tools to access the console and pfSense files over SSH. Since I’m a winuser, I’ll use WinSCP + Putty for work.
Connect using WinSCP3 to pfSense and open the / usr / local / pkg directory. This folder contains files related to GUI packages. Typically, these are XML and INC files, including configuration descriptions and PHP package handlers. Configuration description of the GUI package is located in XML files, and contains:
Create two empty files mypkg.xml and mypkg.inc . The name mypkg is the name of our package, and the name of the XML file is key to access the package's WEB interface. The name of the inc file can be arbitrary, and then it will be shown how to connect it.
We form our XML file.
The service information contains the name, title, category, GUI version of the package and a list of INC files included. In our case, the INC include file is only one, the full path to the connected file must be specified.
The WEB interface header contains the description of the GUI pages in the tabs node, and is displayed in the navigation area. We will have only one page. The text element contains the name of the navigation item in the GUI. The url element contains the relative path to the page of our package.
The WEB interface form describes which controls of the parameters of our package will be available to the user. First, create a single Enable field with the checkbox element:
WEB interface event handlers is the final part of the XML file, and describes which functions will be called at one time or another by the GUI form. There are three commonly used handlers:
Using handlers, you can specify the names of the php functions from the mypkg.inc file, which will be called in case of a particular event. Specific actions to modify the configuration of the router are performed in the custom_php_resync_config_command handler, which is called both when the Save button is clicked on the forms and when pfSense is loaded.
Here you can see the full text of the file:
We create the file mypkg.inc empty, since our test package does nothing.
After saving the created mypkg.xml and mypkg.inc files in the / usr / local / pkg directory, you can check how our package will look. To do this, go to the pfSense WEB interface and add the path /pkg_edit.php?xml=mypkg.xml in the address bar. If everything is done correctly and without errors, we get the following picture

As a result, we received a very simple GUI package that does not perform anything useful, does not save any data, and is not even registered in the WEB interface menu. But nevertheless, using the example of this package, you can get an idea of how the pfSense graphical interface works.
PS: For earlier I apologize for possible shortcomings. This article is written to get invites . If this topic is of interest to the community, I will try to explain in more detail how to create a full-fledged GUI package for pfSense.
The pfSense router (based on FreeBSD) is used by many sysadmins thanks to, first of all, the management of system settings via the WEB interface. Even a novice administrator is quite capable of coping with many settings, which makes it possible to expand the scope of application of this router. At the same time, experienced colleagues can take full advantage of access to the console to study and control the operation of the system.
')
In addition to the standard settings of the router, most of which can be done through the WEB interface, sometimes there are enterprise-specific tasks that require the sysadmin to manage the settings through the console. Next, I want to show how to clothe my work in the code that allows you to manage the system settings from the WEB interface.
So, you have installed and configured test pfSense. First we need tools to access the console and pfSense files over SSH. Since I’m a winuser, I’ll use WinSCP + Putty for work.
Connect using WinSCP3 to pfSense and open the / usr / local / pkg directory. This folder contains files related to GUI packages. Typically, these are XML and INC files, including configuration descriptions and PHP package handlers. Configuration description of the GUI package is located in XML files, and contains:
- service information;
- WEB interface page header;
- form of the WEB interface page;
- information about PHP function-event handlers WEB interface.
Create two empty files mypkg.xml and mypkg.inc . The name mypkg is the name of our package, and the name of the XML file is key to access the package's WEB interface. The name of the inc file can be arbitrary, and then it will be shown how to connect it.
We form our XML file.
The service information contains the name, title, category, GUI version of the package and a list of INC files included. In our case, the INC include file is only one, the full path to the connected file must be specified.
<?xml version="1.0" encoding="utf-8" ?> <packagegui> <name>mypkg</name> <title>My First Package</title> <category>Test</category> <version>0.1</version> <include_file>/usr/local/pkg/mypkg.inc</include_file> The WEB interface header contains the description of the GUI pages in the tabs node, and is displayed in the navigation area. We will have only one page. The text element contains the name of the navigation item in the GUI. The url element contains the relative path to the page of our package.
<tabs> <tab> <text>My Package</text> <url>/pkg_edit.php?xml=mypkg.xml</url> <active/> </tab> </tabs> The WEB interface form describes which controls of the parameters of our package will be available to the user. First, create a single Enable field with the checkbox element:
<fields> <field> <fielddescr>Enable</fielddescr> <fieldname>enable</fieldname> <description>Check this for enable package.</description> <type>checkbox</type> </field> </fields> WEB interface event handlers is the final part of the XML file, and describes which functions will be called at one time or another by the GUI form. There are three commonly used handlers:
- custom_php_command_before_form - called before the form is displayed;
- custom_php_validation_command - called when checking data for each element of a form before saving its data;
- custom_php_resync_config_command - called when saving form data
<custom_php_command_before_form/> <custom_php_validation_command/> <custom_php_resync_config_command/> </packagegui> Using handlers, you can specify the names of the php functions from the mypkg.inc file, which will be called in case of a particular event. Specific actions to modify the configuration of the router are performed in the custom_php_resync_config_command handler, which is called both when the Save button is clicked on the forms and when pfSense is loaded.
Here you can see the full text of the file:
Mypkg.xml file
<?xml version="1.0" encoding="utf-8" ?> <packagegui> <name>mypkg</name> <title>My First Package</title> <category>Test</category> <version>0.1</version> <include_file>/usr/local/pkg/mypkg.inc</include_file> <tabs> <tab> <text>My Package</text> <url>/pkg_edit.php?xml=mypkg.xml</url> <active/> </tab> </tabs> <fields> <field> <fielddescr>Enable</fielddescr> <fieldname>enable</fieldname> <description>Check this for enable package.</description> <type>checkbox</type> </field> </fields> <custom_php_command_before_form/> <custom_php_validation_command/> <custom_php_resync_config_command/> <custom_php_install_command/> <custom_php_deinstall_command/> </packagegui> We create the file mypkg.inc empty, since our test package does nothing.
Mypkg.inc file
<?php /* mypkg.inc */ ?> After saving the created mypkg.xml and mypkg.inc files in the / usr / local / pkg directory, you can check how our package will look. To do this, go to the pfSense WEB interface and add the path /pkg_edit.php?xml=mypkg.xml in the address bar. If everything is done correctly and without errors, we get the following picture
As a result, we received a very simple GUI package that does not perform anything useful, does not save any data, and is not even registered in the WEB interface menu. But nevertheless, using the example of this package, you can get an idea of how the pfSense graphical interface works.
PS: For earlier I apologize for possible shortcomings. This article is written to get invites . If this topic is of interest to the community, I will try to explain in more detail how to create a full-fledged GUI package for pfSense.
Source: https://habr.com/ru/post/228977/
All Articles