The story of the creation of the game

The article will be about creating the second in a row my game for Android, on the cross-platform engine Cocos2D-x (v3.1). The code is mainly in C ++, in some places Java and Lua. I will try to briefly tell you about the main points of development.
Introduction
It has been exactly one year since I seriously decided to get into the industry. Then the development for mobile platforms seemed incredibly promising, and the development of such relatively simple games was simple. Being an 18-year-old student with a little programming and graphics skills, but with huge ambitions, I wanted to do something special, something huge and perfect. Reality quickly put in place and it was decided to do something small but make the most of all my experience and skills. The lack of time constraints and the lack of responsibility before themselves stretched the development of the game and went out to Google Play already at the end of March of the current (2014) year. Despite the very warm reviews in various forums, the results were not at all pleased - 200 downloads of all time and about 0.30 € from advertising.
')
The first pancake - lumpy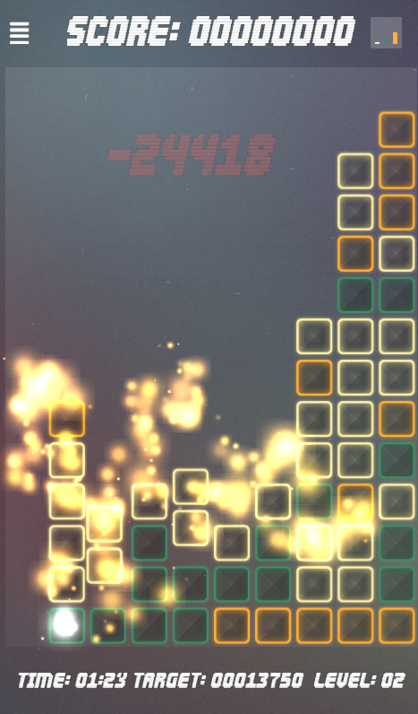
Disappointment just added excitement. After analyzing the failure and reading a bit of literature, after a month and a half I decided to write something simple to invest in a month or two of development. No sooner said than done! I wanted to do a puzzle puzzle. The essence of the game is that the image is given and the elements of the image in different forms (translucent and inverted, for example) and simple manipulations must be put in place.
First level
Cocos2D-x
Cocos2D-x is the port of the popular iOS engine. Free and cross platform. If you only decide to start making games for mobile devices and do not know which engine to choose, be sure to consider it as an option.
Benefits that have become key:
- cross platform
- C ++
- development in Windows, followed by transfer to Android
- Lua support
- open source
The lack of full-fledged documentation and lessons complicates the start of work with the engine, but in general, he showed himself very well. In addition, the community is constantly expanding the functionality and documentation. Allows you to write 2D games of almost any complexity, since you can call OpenGL ES functions directly.
If someone is interested, I can write a small tutorial on creating “Hello, world!” And the main points.
Concept
So, as mentioned above, the concept of the game is that the picture is given and some of its parts (elements) are scattered in different places. The task of the player is to put all the elements in their place. Elements may have different properties, for example: rotation, transparency, resizing, etc. It should also be possible to create different forms and different behaviors.
Example of a level with rotating elements
Design
There is no opportunity to hire a professional designer. It was decided to make the design as simple as possible, without unnecessary details, and it seems to me that I have adequately coped with this task.
Level selection menu
Level completion
On the left - exit to the level selection menu, center - the name of the image and the author, on the right - the transition to the next level.

As an icon for Google Play and the application itself, I used a screenshot of one of the levels.
All kinds of icons
Implementation levels
From the description it is clear that the main task is to create such code, which without problems would allow to create different levels without recompiling, and at the same time maintain sufficient flexibility to create elements of different types. XML and Lua were selected for this purpose. XML describes the level, position of elements, their positions on images, form, transparency, dimensions, etc. It also has tags in which you can insert pieces of code written in Lua.
Example of describing one of the levels in XML
<level pack="1" id="9"> <element shape="circle2.png" x="-196" y="124" texx="-196" texy="124" width="100" height="" rotation="100"> <onCreate> e4Opacity = 5 e4BeginOpacityAnimation = false element:setOpacity(e4Opacity) </onCreate> <onTouchMovedFunction> local dX = touch:getLocation().x - touch:getPreviousLocation().x local dY = touch:getLocation().y - touch:getPreviousLocation().y local scale = level:getScale() element:setRotation(element:getRotation() + dX / 2 / scale+ dY / 2 / scale) </onTouchMovedFunction> <onUpdateFunction> if not e4BeginOpacityAnimation then return end if 150 > e4Opacity then e4Opacity = e4Opacity + 1 element:setOpacity(e4Opacity) end </onUpdateFunction> <onDestroy> e4Opacity = nil e4BeginOpacityAnimation = nil </onDestroy> </element> <element shape="square2.png" x="-359" y="-177" texx="-359" texy="-177" width="100" height="" rotation="180"> <onCreate> e3Opacity = 5 e3BeginOpacityAnimation = false element:setOpacity(e3Opacity) </onCreate> <onTouchMovedFunction> local dX = touch:getLocation().x - touch:getPreviousLocation().x local dY = touch:getLocation().y - touch:getPreviousLocation().y local scale = level:getScale() element:setRotation(element:getRotation() + dX / 2 / scale+ dY / 2 / scale) </onTouchMovedFunction> <onUpdateFunction> if not e3BeginOpacityAnimation then return end if 150 > e3Opacity then e3Opacity = e3Opacity + 1 element:setOpacity(e3Opacity) end </onUpdateFunction> <onDestroy> e3Opacity = nil e3BeginOpacityAnimation = nil e4BeginOpacityAnimation = true </onDestroy> </element> <element shape="triangle2.png" x="319" y="69" texx="319" texy="69" width="150" height="" rotation="180"> <onCreate> e2Opacity = 5 e2BeginOpacityAnimation = false element:setOpacity(e2Opacity) </onCreate> <onTouchMovedFunction> local dX = touch:getLocation().x - touch:getPreviousLocation().x local dY = touch:getLocation().y - touch:getPreviousLocation().y local scale = level:getScale() element:setRotation(element:getRotation() + dX / 2 / scale+ dY / 2 / scale) </onTouchMovedFunction> <onUpdateFunction> if not e2BeginOpacityAnimation then return end if 150 > e2Opacity then e2Opacity = e2Opacity + 1 element:setOpacity(e2Opacity) end </onUpdateFunction> <onDestroy> e2Opacity = nil e2BeginOpacityAnimation = nil e3BeginOpacityAnimation = true </onDestroy> </element> <element shape="waves.png" x="311" y="-227" texx="-365" texy="30" width="200" height="0"> <onCreate> e1Opacity = 10 e1BeginOpacityAnimation = false element:setOpacity(e1Opacity) </onCreate> <onTouchBeganFunction>e1BeginOpacityAnimation = true</onTouchBeganFunction> <onTouchMovedFunction> local dY = touch:getLocation().y - touch:getPreviousLocation().y local dX = touch:getLocation().x - touch:getPreviousLocation().x local scale = level:getScale() element:setPosition(element:getPositionX() + dX / scale, element:getPositionY() + dY / scale) </onTouchMovedFunction> <onUpdateFunction> if not e1BeginOpacityAnimation then return end if 200 > e1Opacity then e1Opacity = e1Opacity + 2 element:setOpacity(e1Opacity) end </onUpdateFunction> <onDestroy> e1Opacity = nil e1BeginOpacityAnimation = nil e2BeginOpacityAnimation = true </onDestroy> </element> <element x="-50" y="50" texx="300" texy="50" width="100" height="100"> <onTouchMovedFunction> local dY = touch:getLocation().y - touch:getPreviousLocation().y local dX = touch:getLocation().x - touch:getPreviousLocation().x local scale = level:getScale() element:setPosition( element:getPositionX() + dX / scale, element:getPositionY() + dY / scale) </onTouchMovedFunction> </element> <element x="50" y="50" texx="-300" texy="-50" width="100" height="100"> <onTouchMovedFunction> local dY = touch:getLocation().y - touch:getPreviousLocation().y local dX = touch:getLocation().x - touch:getPreviousLocation().x local scale = level:getScale() element:setPosition( element:getPositionX() + dX / scale, element:getPositionY() + dY / scale) </onTouchMovedFunction> </element> <element x="-50" y="-50" texx="-400" texy="-100" width="100" height="100"> <onTouchMovedFunction> local dY = touch:getLocation().y - touch:getPreviousLocation().y local dX = touch:getLocation().x - touch:getPreviousLocation().x local scale = level:getScale() element:setPosition( element:getPositionX() + dX / scale, element:getPositionY() + dY / scale) </onTouchMovedFunction> </element> <element x="50" y="-50" texx="400" texy="-100" width="100" height="100"> <onTouchMovedFunction> local dY = touch:getLocation().y - touch:getPreviousLocation().y local dX = touch:getLocation().x - touch:getPreviousLocation().x local scale = level:getScale() element:setPosition( element:getPositionX() + dX / scale, element:getPositionY() + dY / scale) </onTouchMovedFunction> </element> </level> With Lua, you can write functions such as:
- onCreate - called when an item is created
- onTouchBeganFunction - called when the element is “touched”
- onTouchMovedFunction - called when moving a touch
- onTouchEndedFunction - called when the touch ends
- onUpdateFunction - called when the item is updated
- onDestroy - called when an item is destroyed
In each function, variables such as the element itself, the element sprite, form sprite, level, and level sprite are transferred. In the "onTouch" function, a variable of the "Touch" type is also transmitted, which has in itself such data as the touch position or the previous position. Due to the fact that Cocos2D-x supports Lua, you can work with functions and objects of Cocos2D-x directly, passing them as arguments. Such a realization of the levels turned out to be quite effective and very flexible (after all, you can, for example, close the game when you click on an element or control other elements).
The implementation of calling Lua-functions of elements on Cocos2D-x looks like this (using the example of the onCreate function, which is called when an element is created):
Hidden text
if (!m_scriptFunctionOnCreate.empty()) { LuaEngine* engine = LuaEngine::getInstance(); LuaStack* luaS = engine->getLuaStack(); luaS->executeString(m_scriptFunctionOnCreate.c_str()); lua_getglobal(luaS->getLuaState(), "onCreate"); luaS->pushObject(this, "cc.Node"); // element luaS->pushObject(m_sprite, "cc.Sprite"); // element sprite if (m_shapeMaskSprite != nullptr) { luaS->pushObject(m_shapeMaskSprite, "cc.Sprite"); // shape } else { luaS->pushNil(); } luaS->pushObject(getParent(), "cc.Node"); // level luaS->pushObject(((Level*)getParent())->getLevelSprite(), "cc.Sprite"); // levelSprite lua_call(luaS->getLuaState(), 5, 0); luaS->clean(); } Instead of conclusion
The main purpose of creating this game was rather “to make to make”, so there is no expectation of success. Perhaps in the near future I will lay out its source code for free access.
If it is interesting, then in the following articles I will tell you about connecting AdMob and Google Analytics to a game written in Cocos2D-x.
Source: https://habr.com/ru/post/228965/
All Articles