Modernization of the Chinese F & D speaker system (SVEN) SPS-828
Hello!
I want to share with you my experience in upgrading the F & D speaker system (it is also distributed under the SVEN brand) of the SPS-828 model. Immediately I want to apologize for the quality of the photo, I photographed when and similar crafts are made - in the evening, with a quick telephone.
I don’t have any photos of the “virgin” type of speaker system that I made myself, as I didn’t think about it during disassembly, so I borrowed them from various resources using Google Images so that you had an idea of how the speaker looked before the intervention.
')
Let's start with the original look.
This is how the AU looks like:
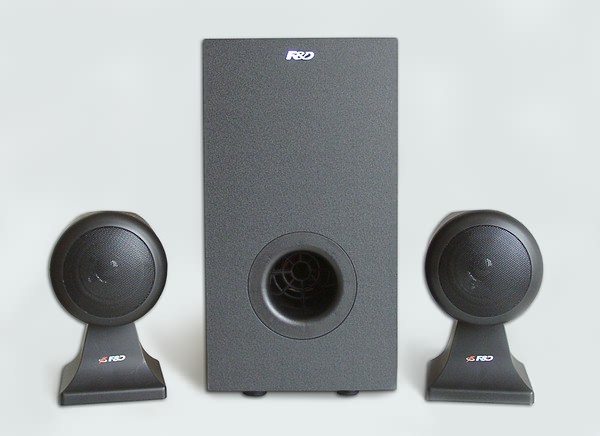
The subwoofer is made of fiberboard with a thickness of about 1 cm, the speakers are completely made of plastic with a thickness of about 2 mm. All components of the speaker system are painted black.
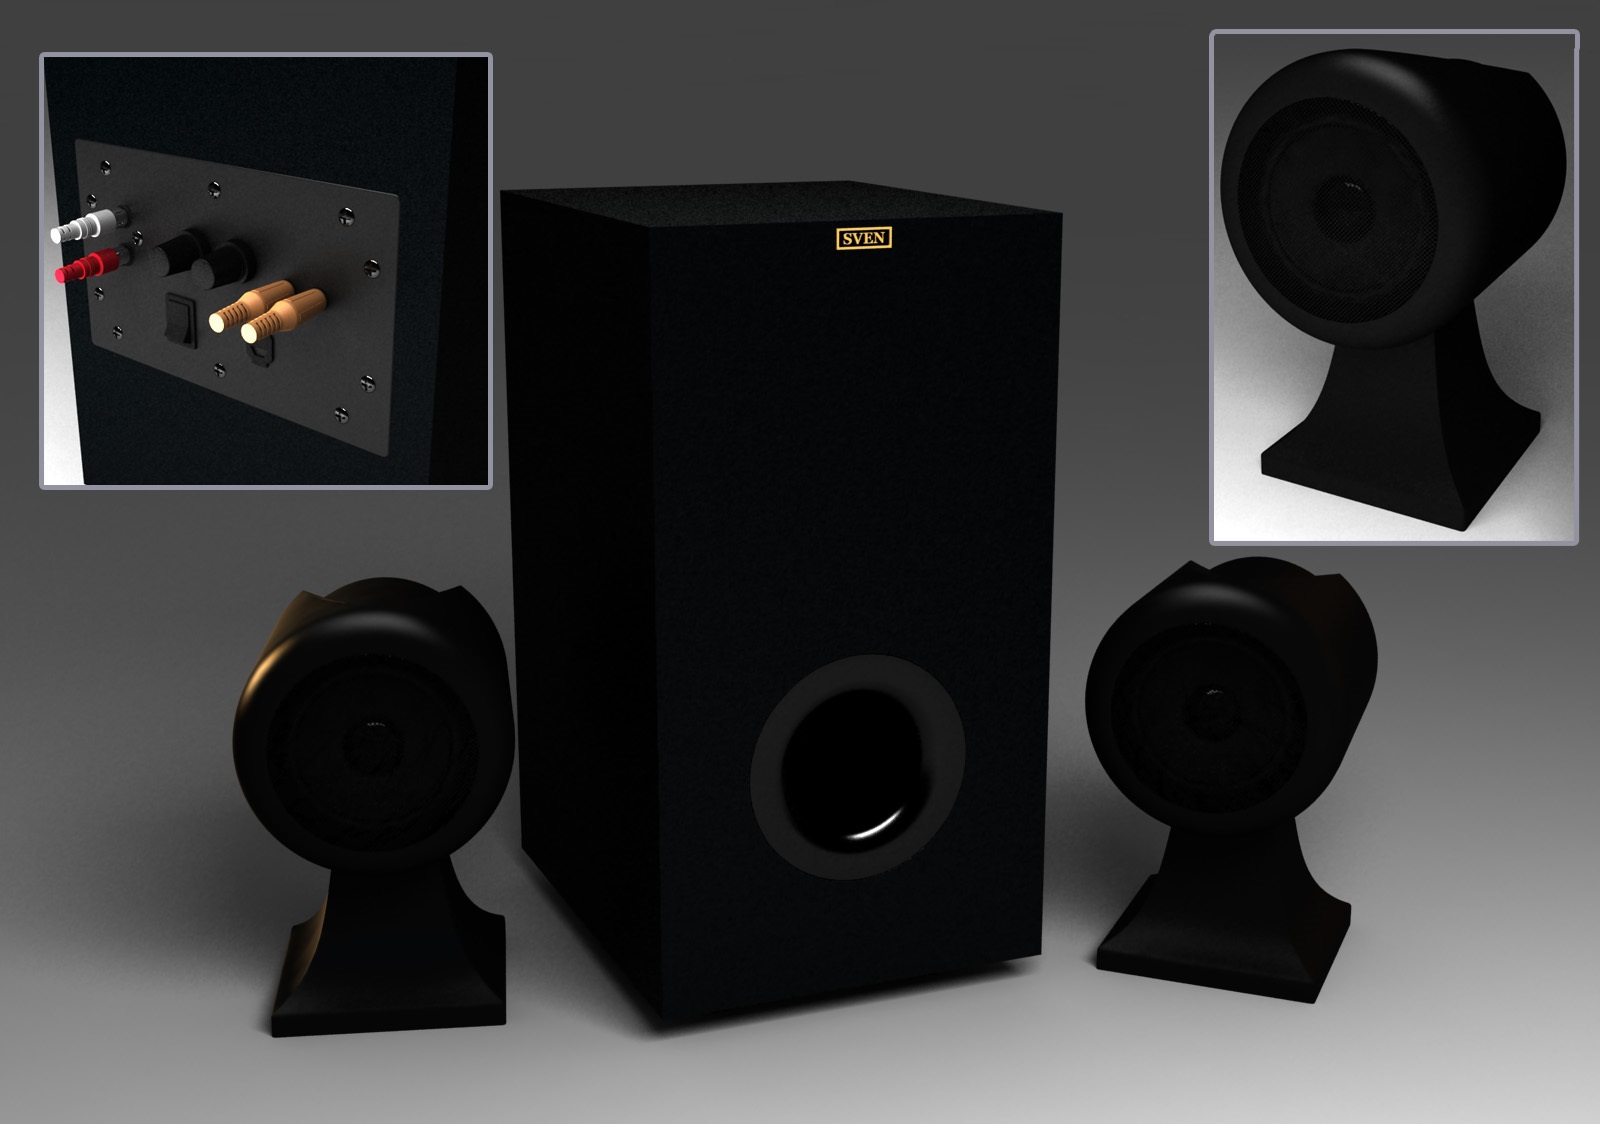
Interface panel and control, which is located behind the subwoofer:

As you can see, access to the controls is very inconvenient, the regulators and the power switch should have been brought to the front panel, or at least from the side, which I basically only wanted to do in the beginning, but then changed my mind.
Interfaces panel disassembled:


The board itself clings to the aluminum plate by means of two nuts of variable regulators, one screw, which is screwed into the plastic housing of the RCA jacks of the connectors and a pile of glue. The aluminum plate is in turn bolted to the subwoofer itself with the help of 10 screws.
The heart of this speaker system is on the bottom of the subwoofer, after unscrewing 14 screws, we can observe the following picture:
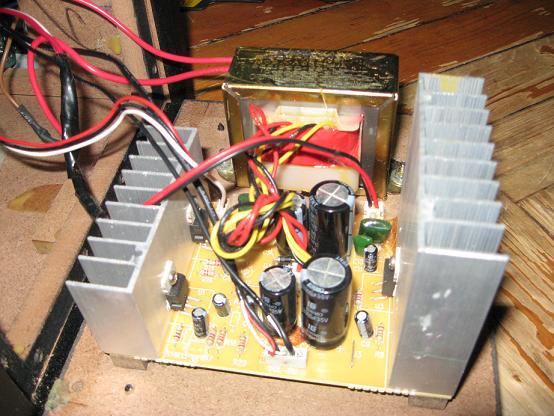
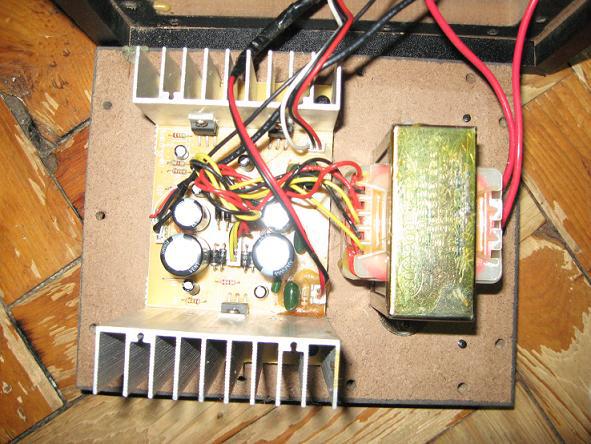
The transformer is attached with two bolts and nuts that pass through the bottom, the board is bolted with four screws to two small bars, which in turn are glued to the bottom.
A larger radiator cools the LM1875T microcircuit responsible for the subwoofer woofer; a smaller radiator has two TDA2030 microcircuits on which the left and right speaker channels are implemented.
Let's take a closer look at the transformer itself (my photos will go on):

The transformer has two secondary windings with a midpoint.
Characteristics of the winding that feeds the opamp LM1875T (subwoofer) 18V, 1.2A, the winding supplying the opamp TDA2030 (speakers) is satisfied with a lower voltage and current of 13V, 1A.
I want to note that in a wooden, closed case, without active cooling, especially in summer, the power transformer and radiators on which the operational amplifiers are installed were very hot, it was impossible to touch them with a finger and it is in idle mode, without any load, it’s generally strange how a thermistor in a transformer didn’t work for so many hot summer days, except that it’s not there, but oh well, we’ll leave it to the engineers ’conscience, although I’m not so sure about conscience, especially if we take into account the price of this product how much it cost, but I know that a little.
What I wanted most of all was to replace the poor-quality Chinese electrolytes of the incoming power supply circuits with better and more capacious ones, but as we know, the greater the capacitance and voltage, the larger the size of the capacitor itself. Instead of four standard 2x3300mkF 35V (sub) and 2x2200mkF 25V (speakers) of an unknown company Konmo, I wanted to put 2x4700mkF 35V of Samwha (sub) and 2x10000mkF 25V of Jamicon (speakers), but they simply didn’t fit into the subwoofer case, they didn’t play the last pieces.
Then the idea came to me, to move the entire middle of the wooden active subwoofer, to the ATX case from 400W of computer power supply, immediately replacing some of the details.
- For that matter, the first thing I did was replace two TDA2030 microcircuits with a TDA2050, the latter have better response characteristics.
-Then I took over the replacement of all the small electrolytes on the board, for seven years of work, day after day in such a temperature mode, they just dried out and partially lost their properties.
- I replaced the diodes in the bridges, instead of the identical, small 1A 1000V, I installed more 3A 1000V for the LM1875T (subwoofer), and 3A 80B Schottky for the TDA2050 (speakers).
The part in which I took measurements, drilled, twisted, sawed ... I’ll skip because there are still no photos of this whole process, and this is a tedious task, at least for me: D
Okay, enough stories about the replacement, see what all this happened.
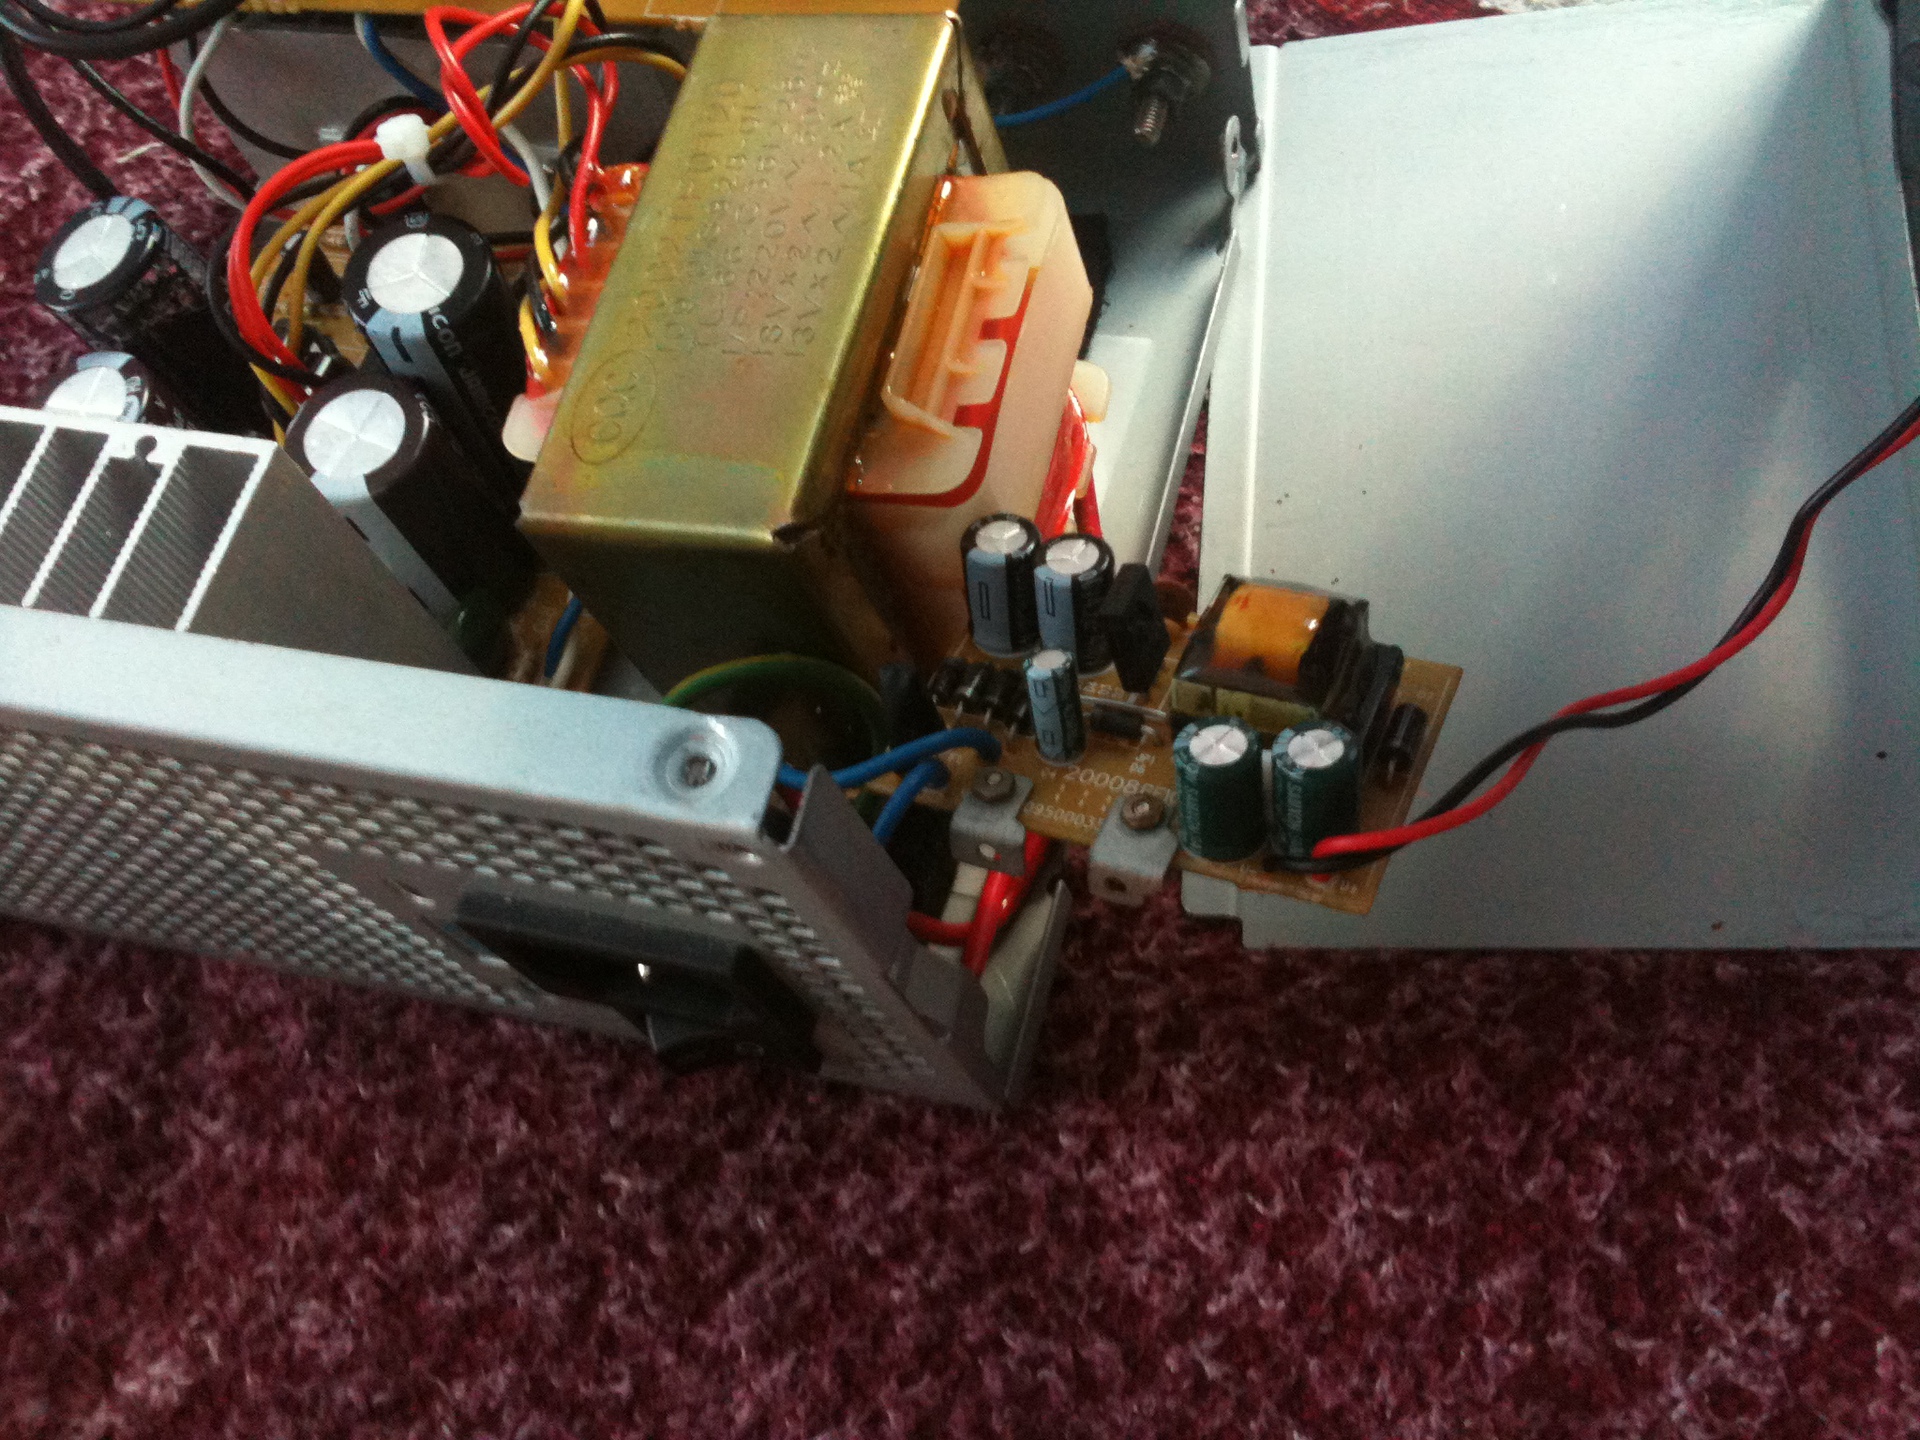
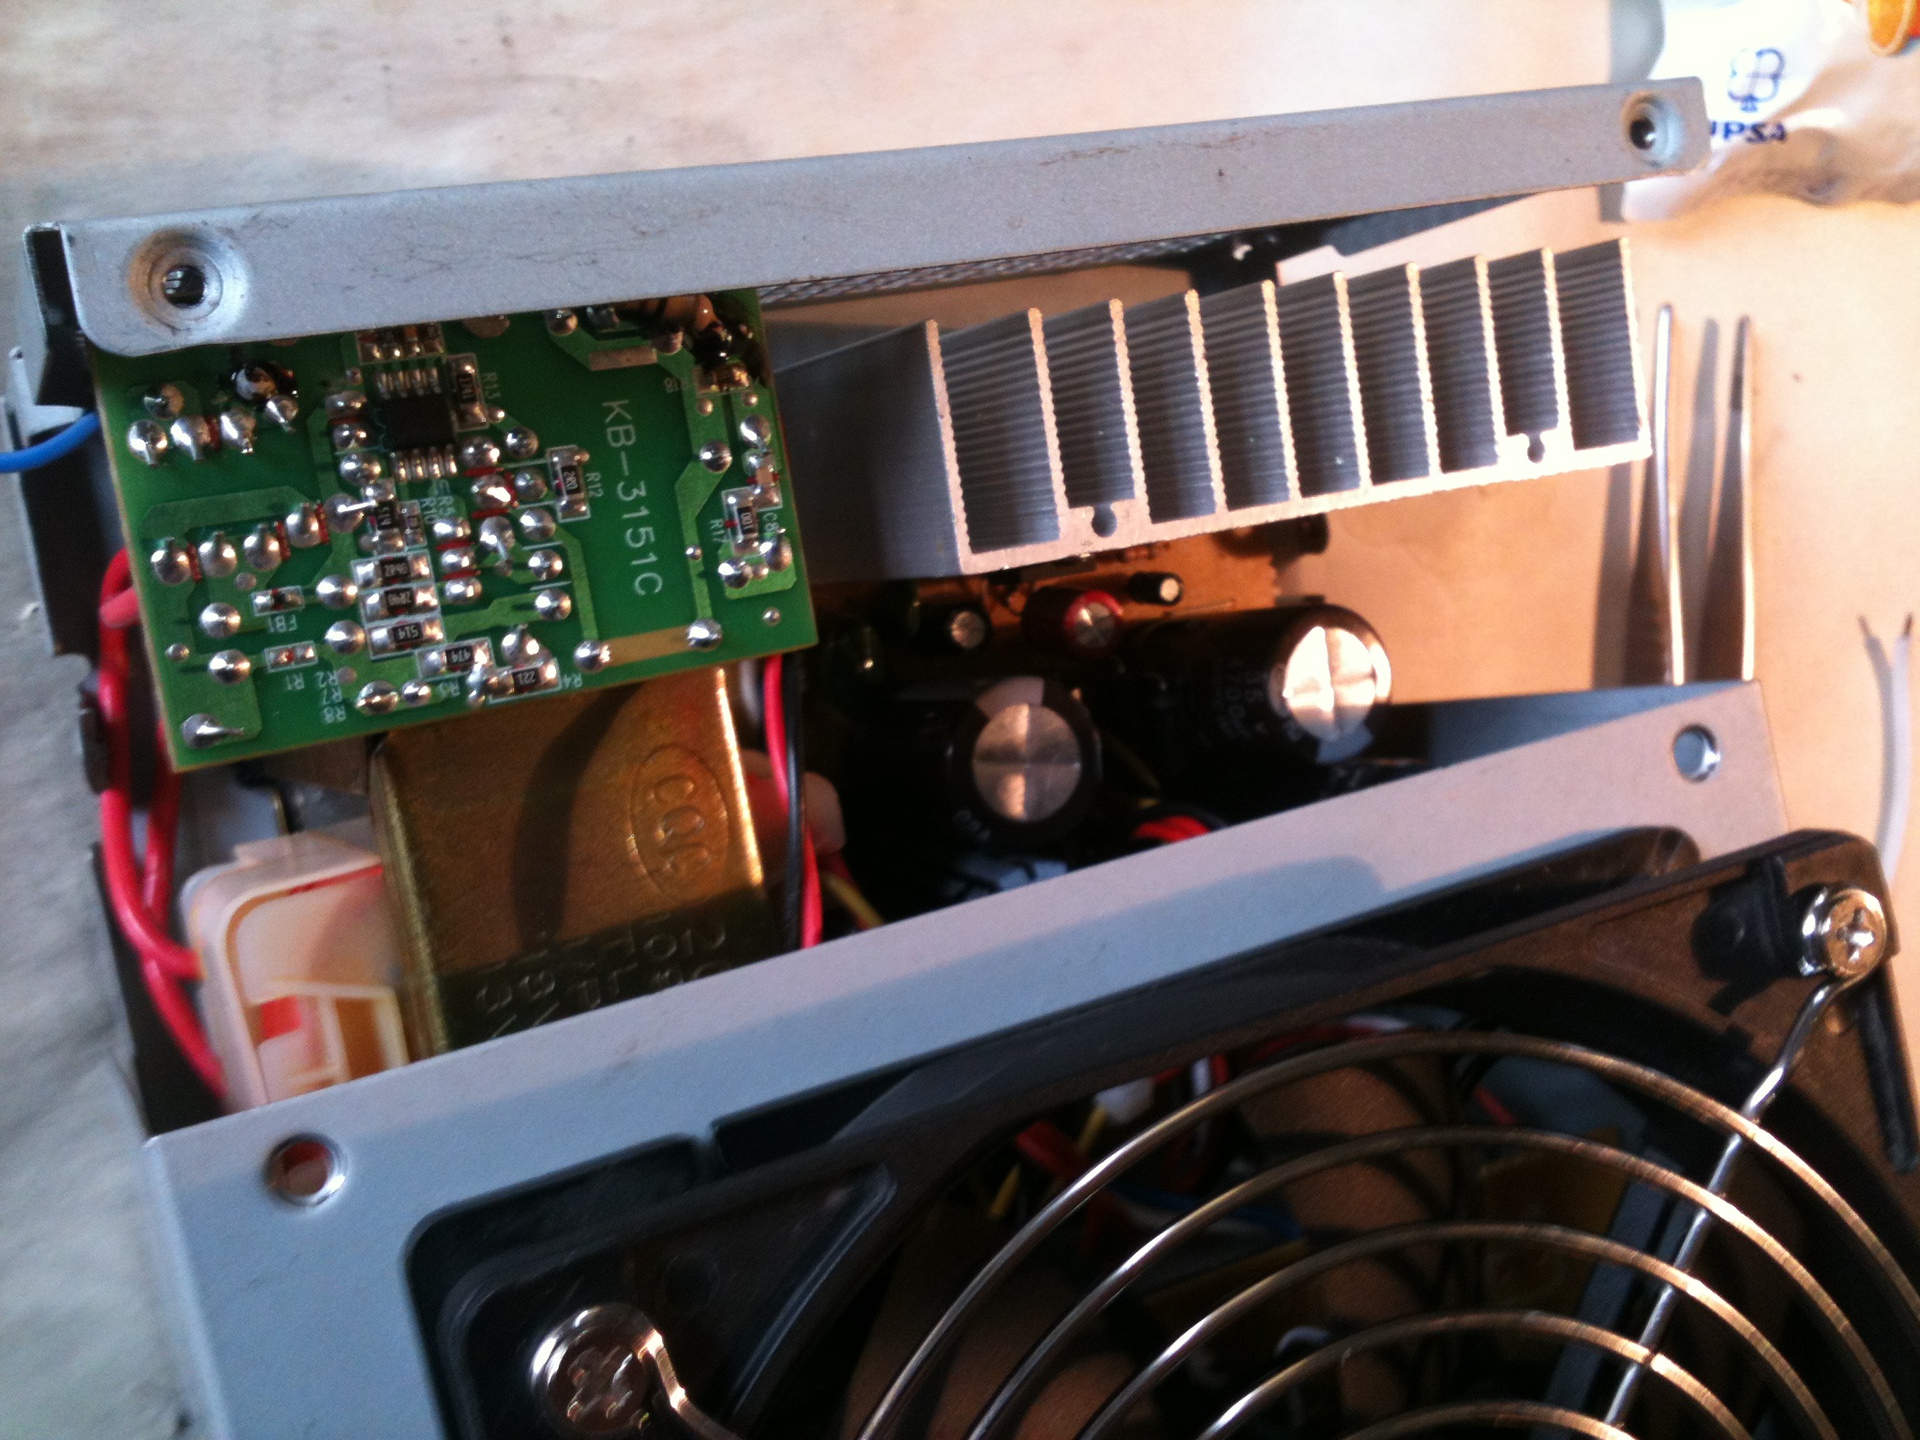
Amplifier board:

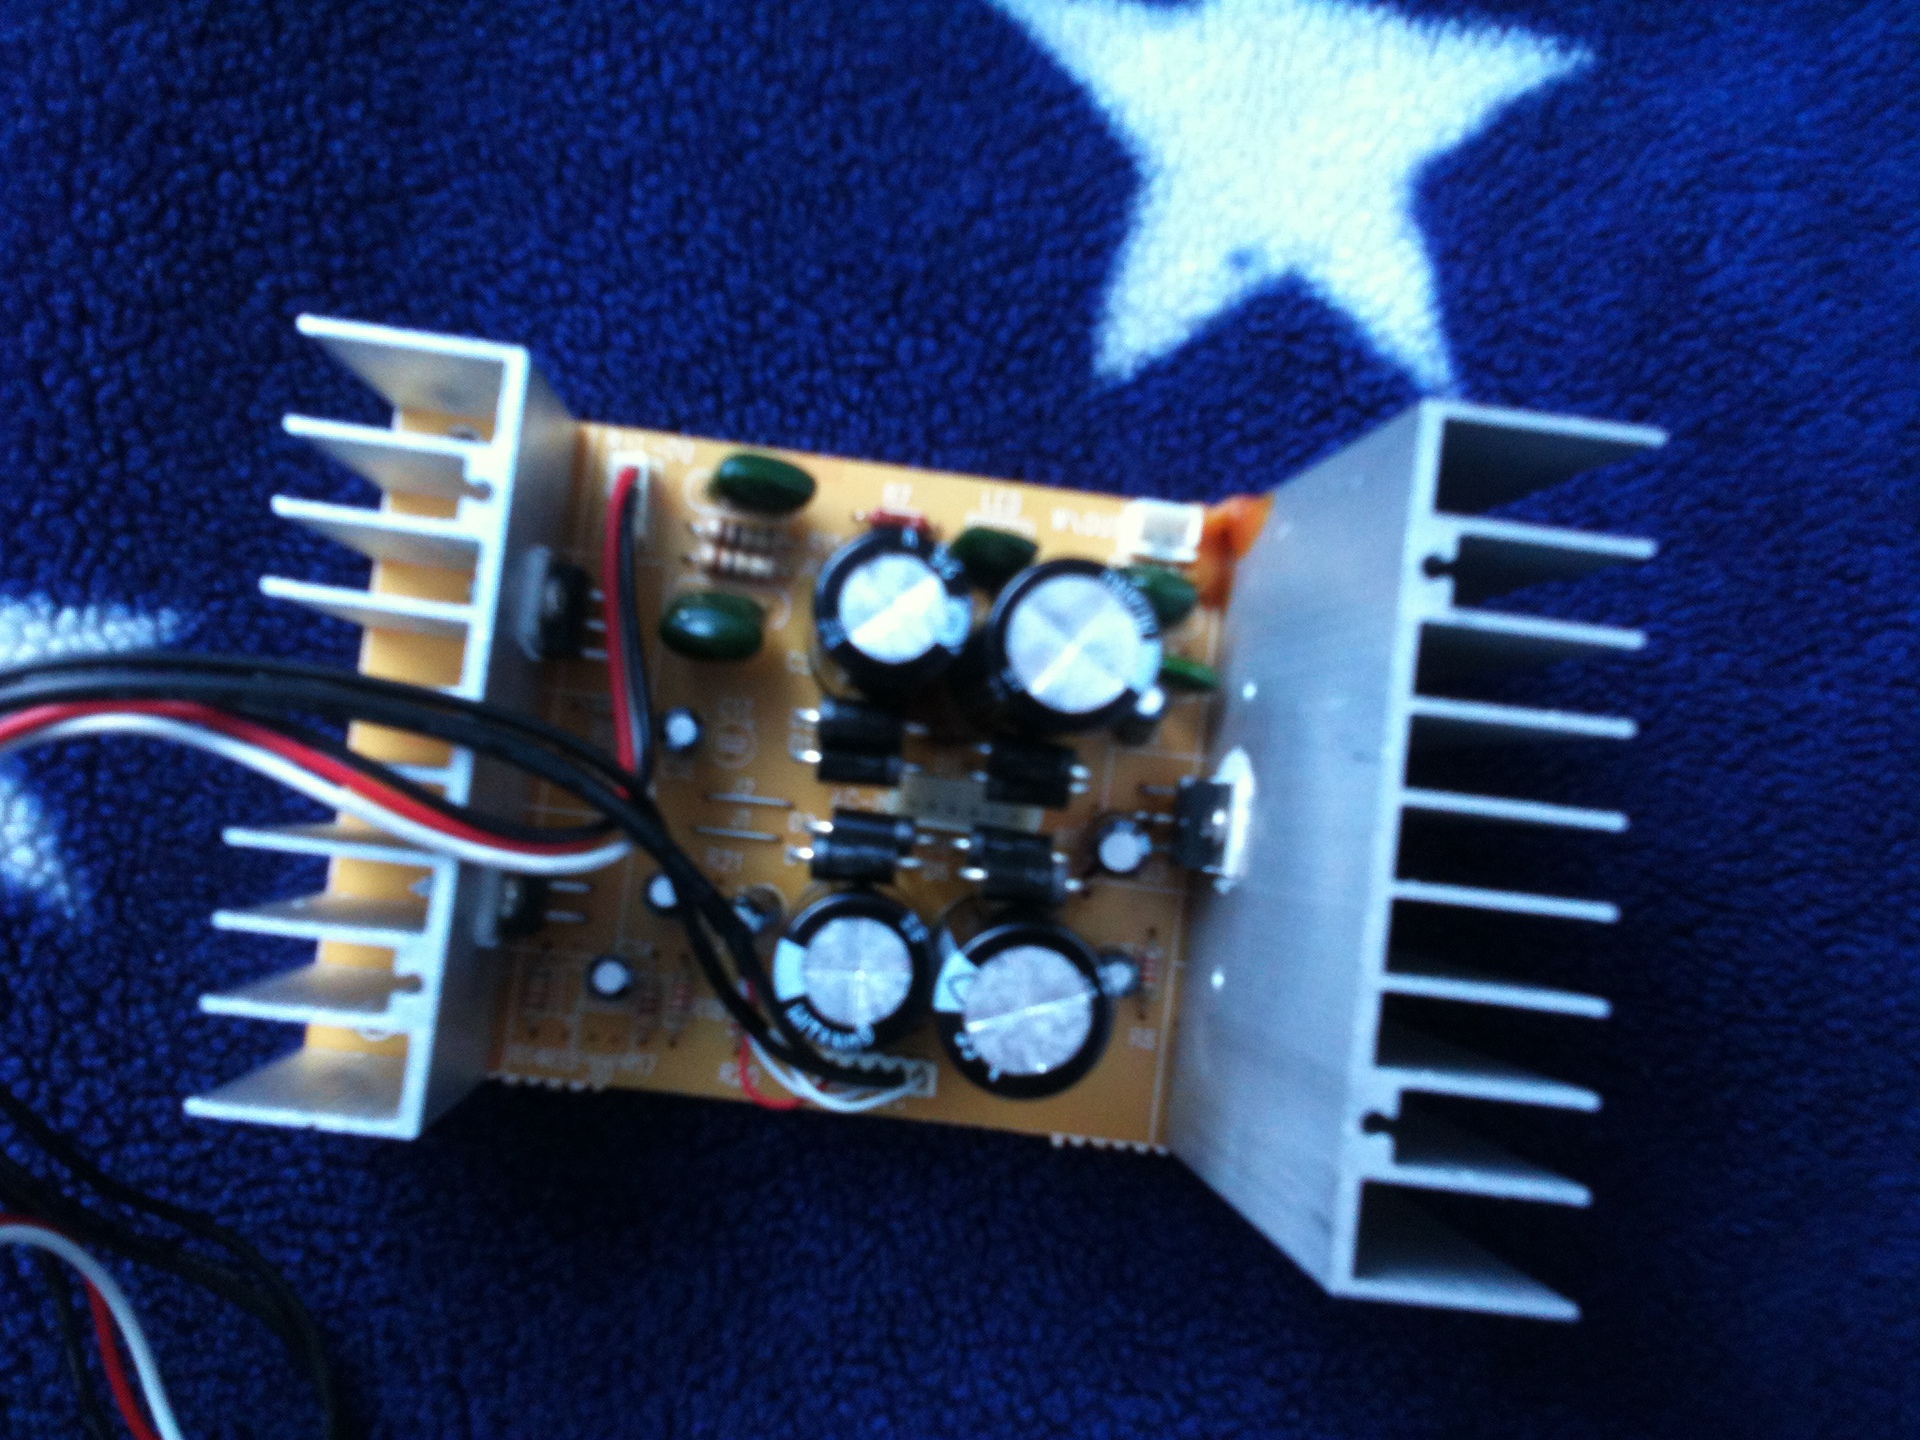
Replaced all the above parts and of course thermal grease on the chip.
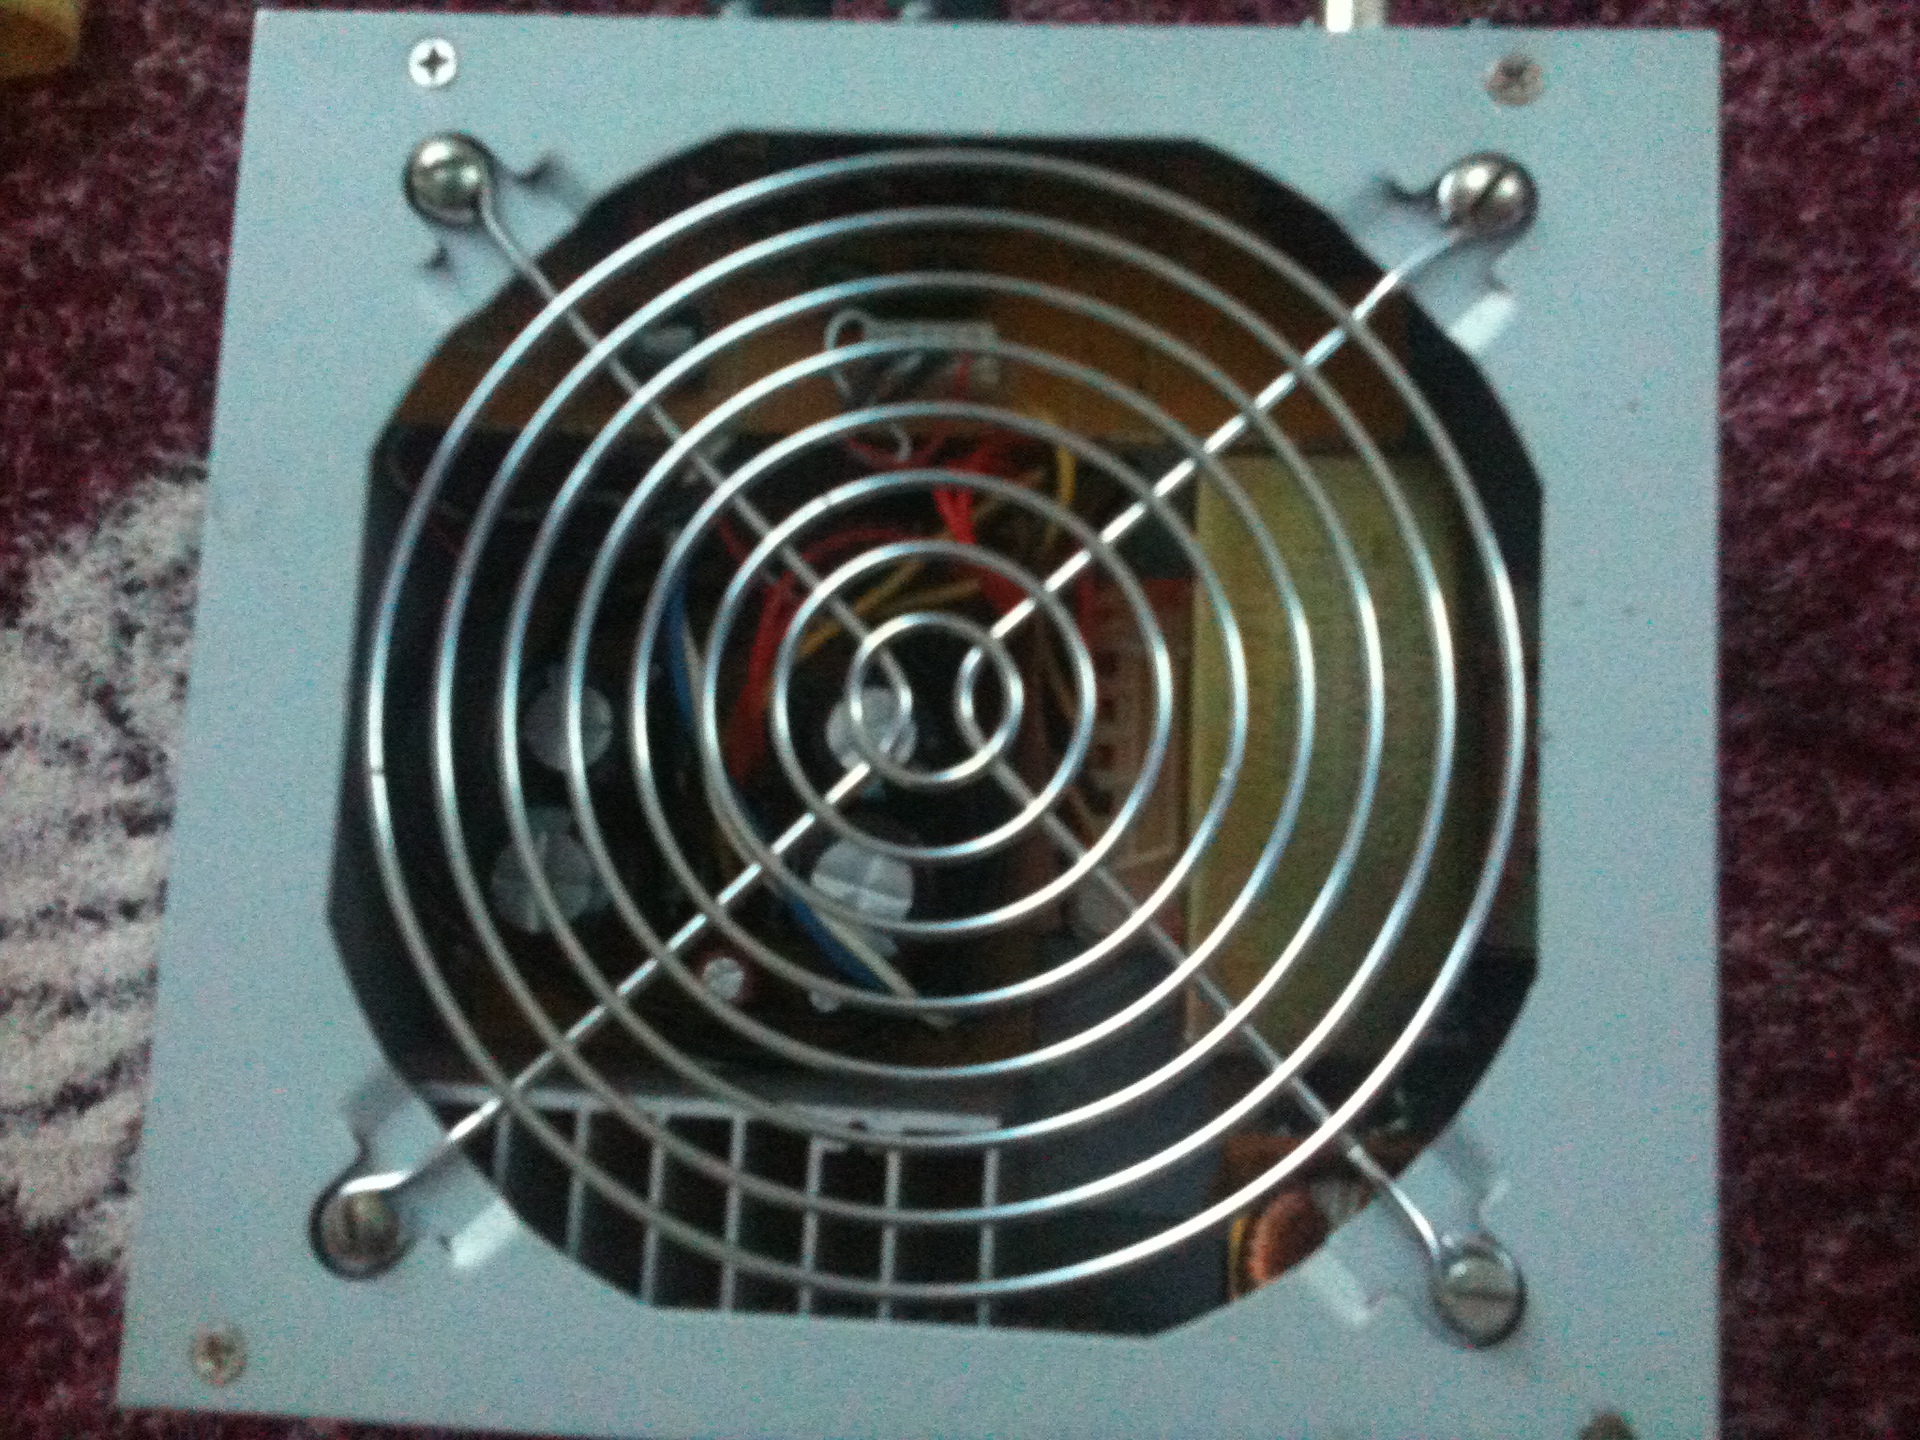
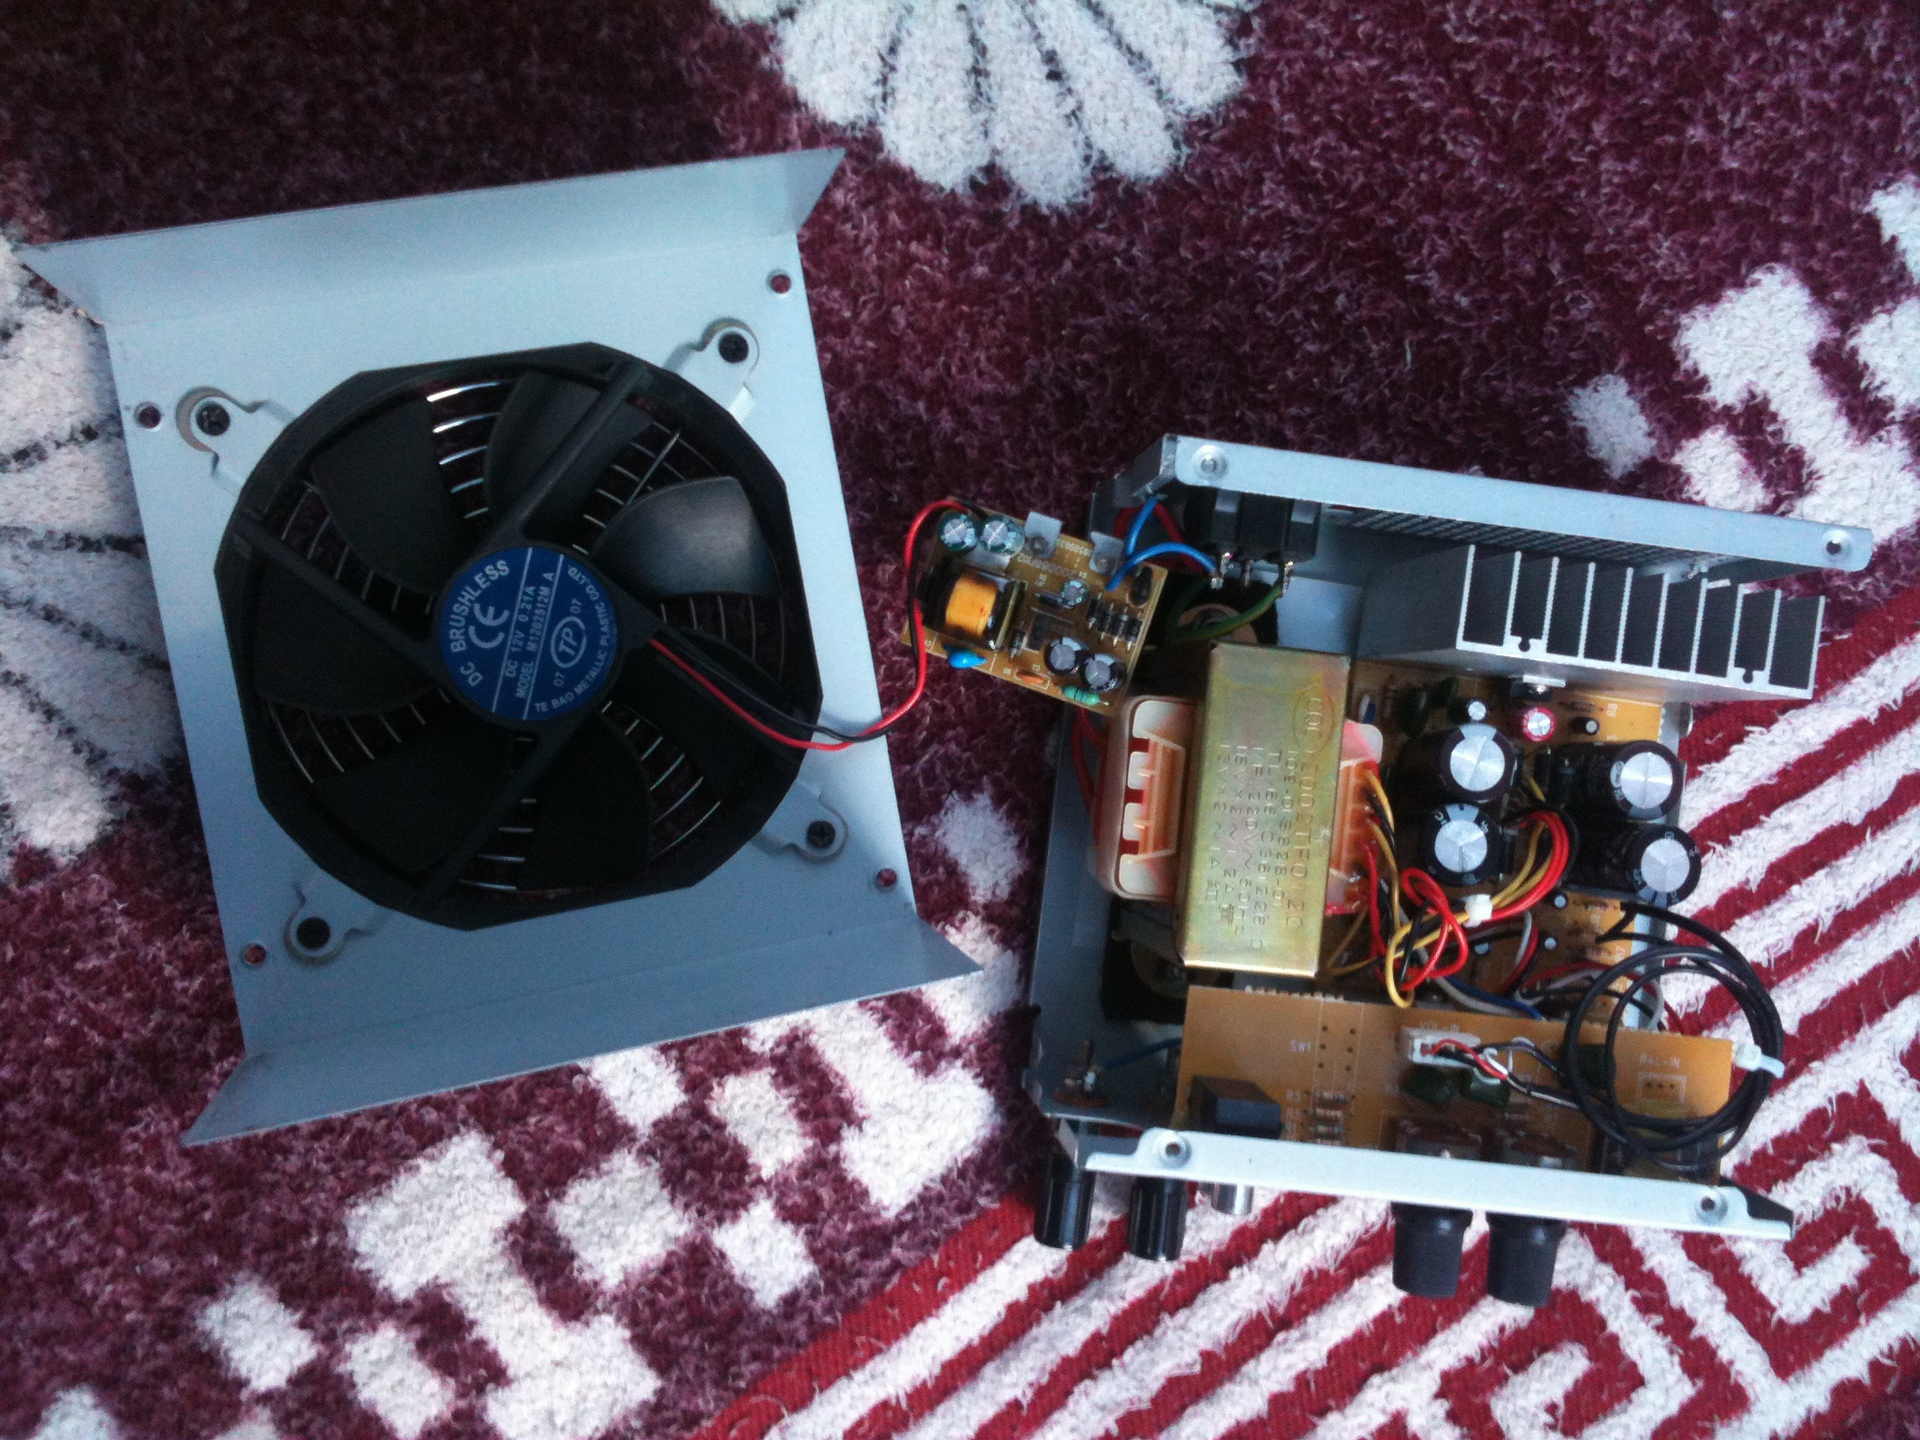
Amplifier assembled without top cover:
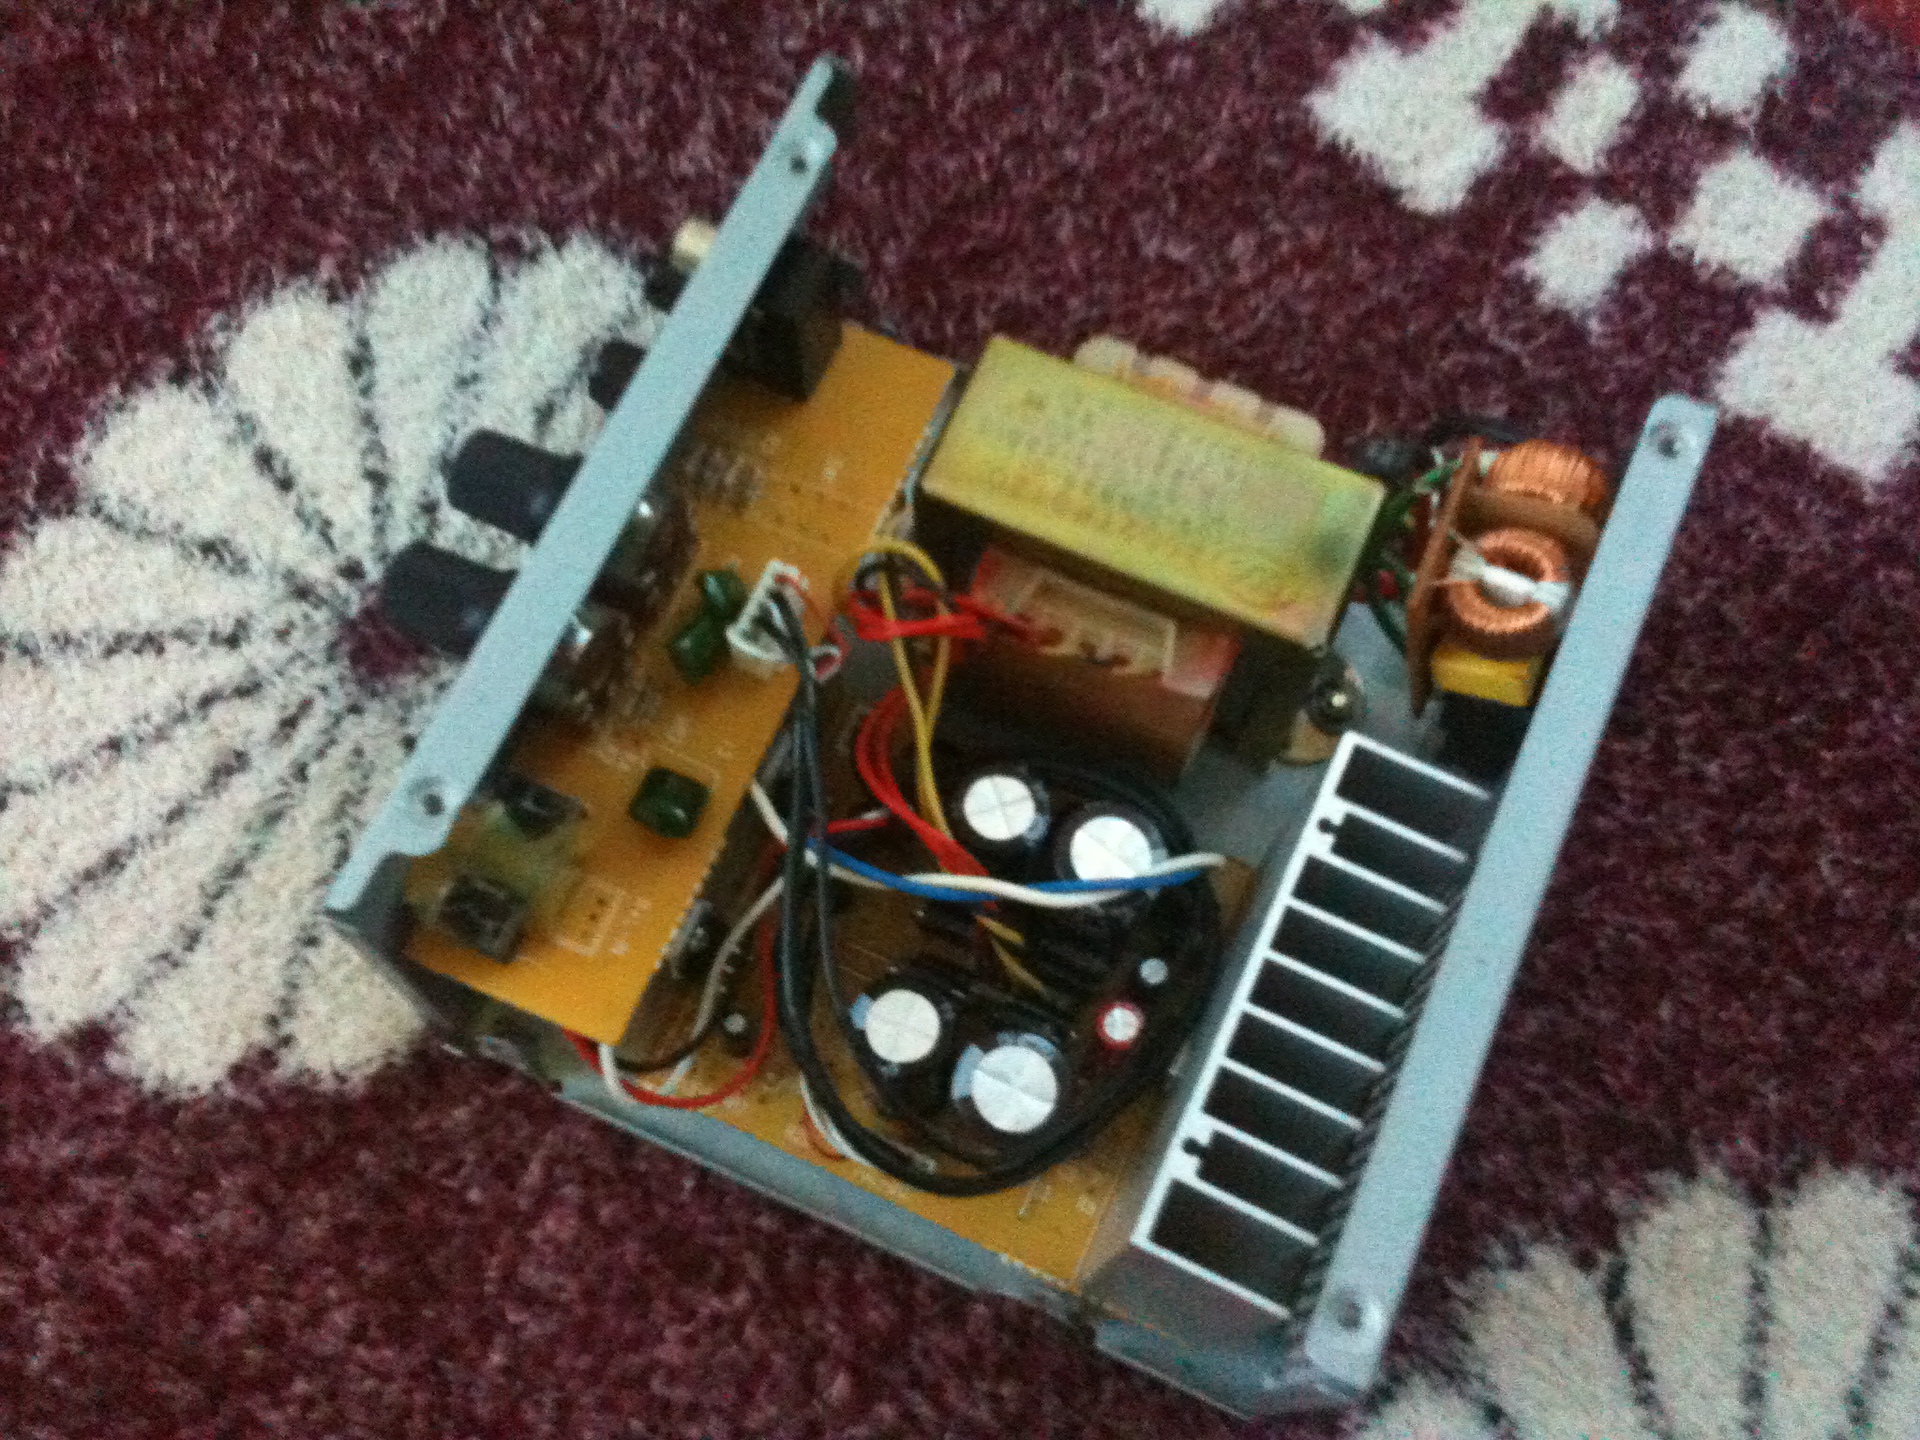
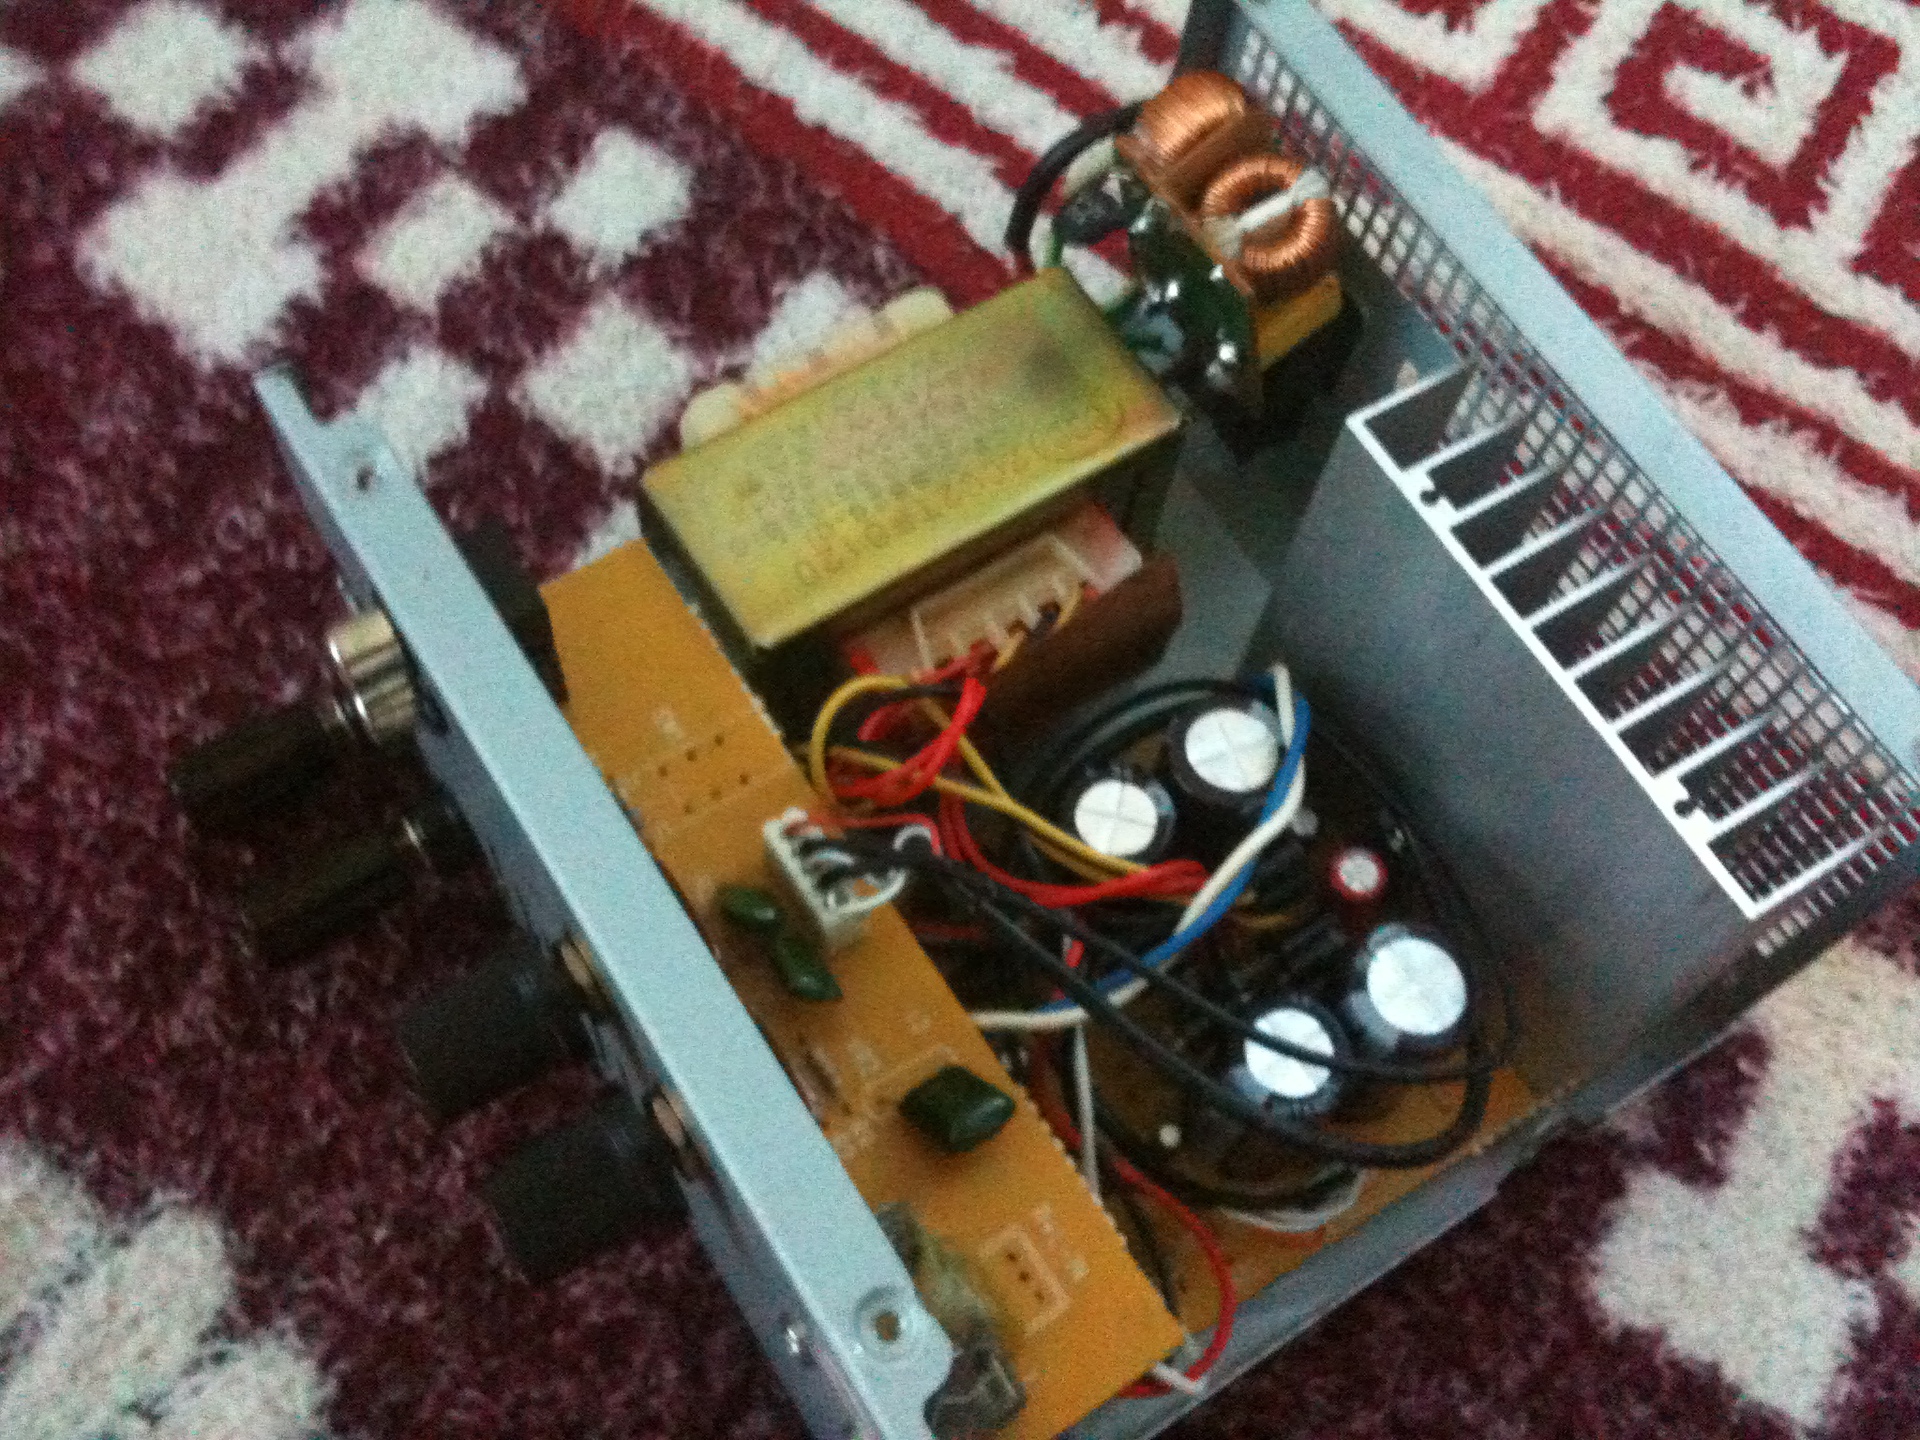


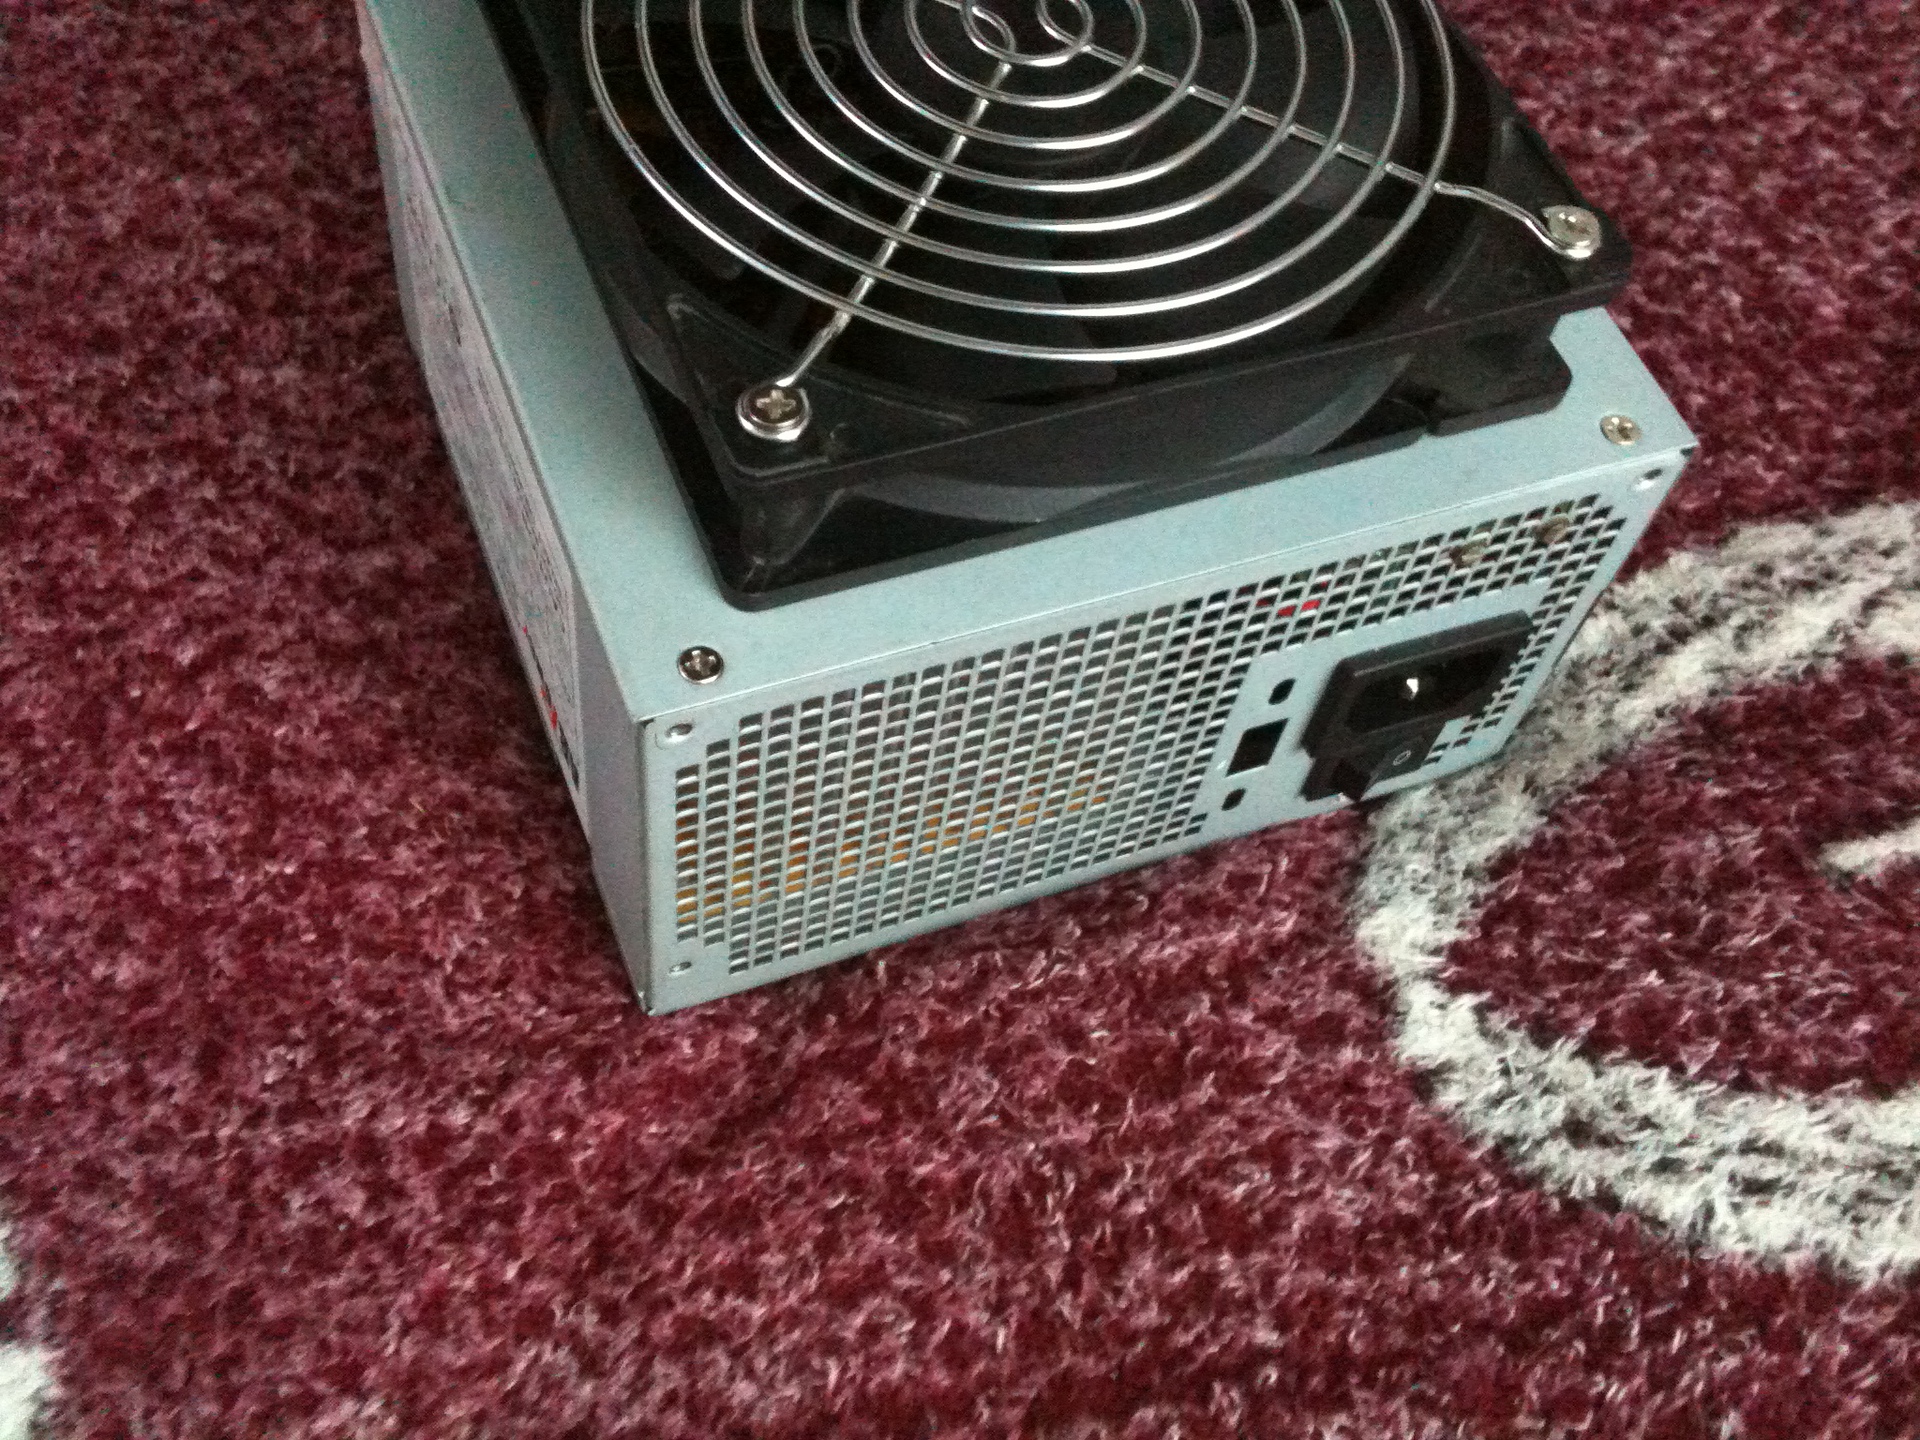
I am glad that all the components of the amplifier fit in the case of a computer power supply and even more - EMI filter on the power connector.
The amplifier board was fixed on four racks, the transformer was installed on two gaskets from felt so that the vibration was not transmitted and screwed it with two bolts to the case, did not modify the interface board mounting, fastened it to the same two nuts of variable regulators and a screw.
I don’t like just one moment, the radiator that cools the TDA2050 microcircuit is covered by a board with connectors, it will interfere with air circulation, but no matter how I twist and rearrange everything in places, it didn’t work otherwise.
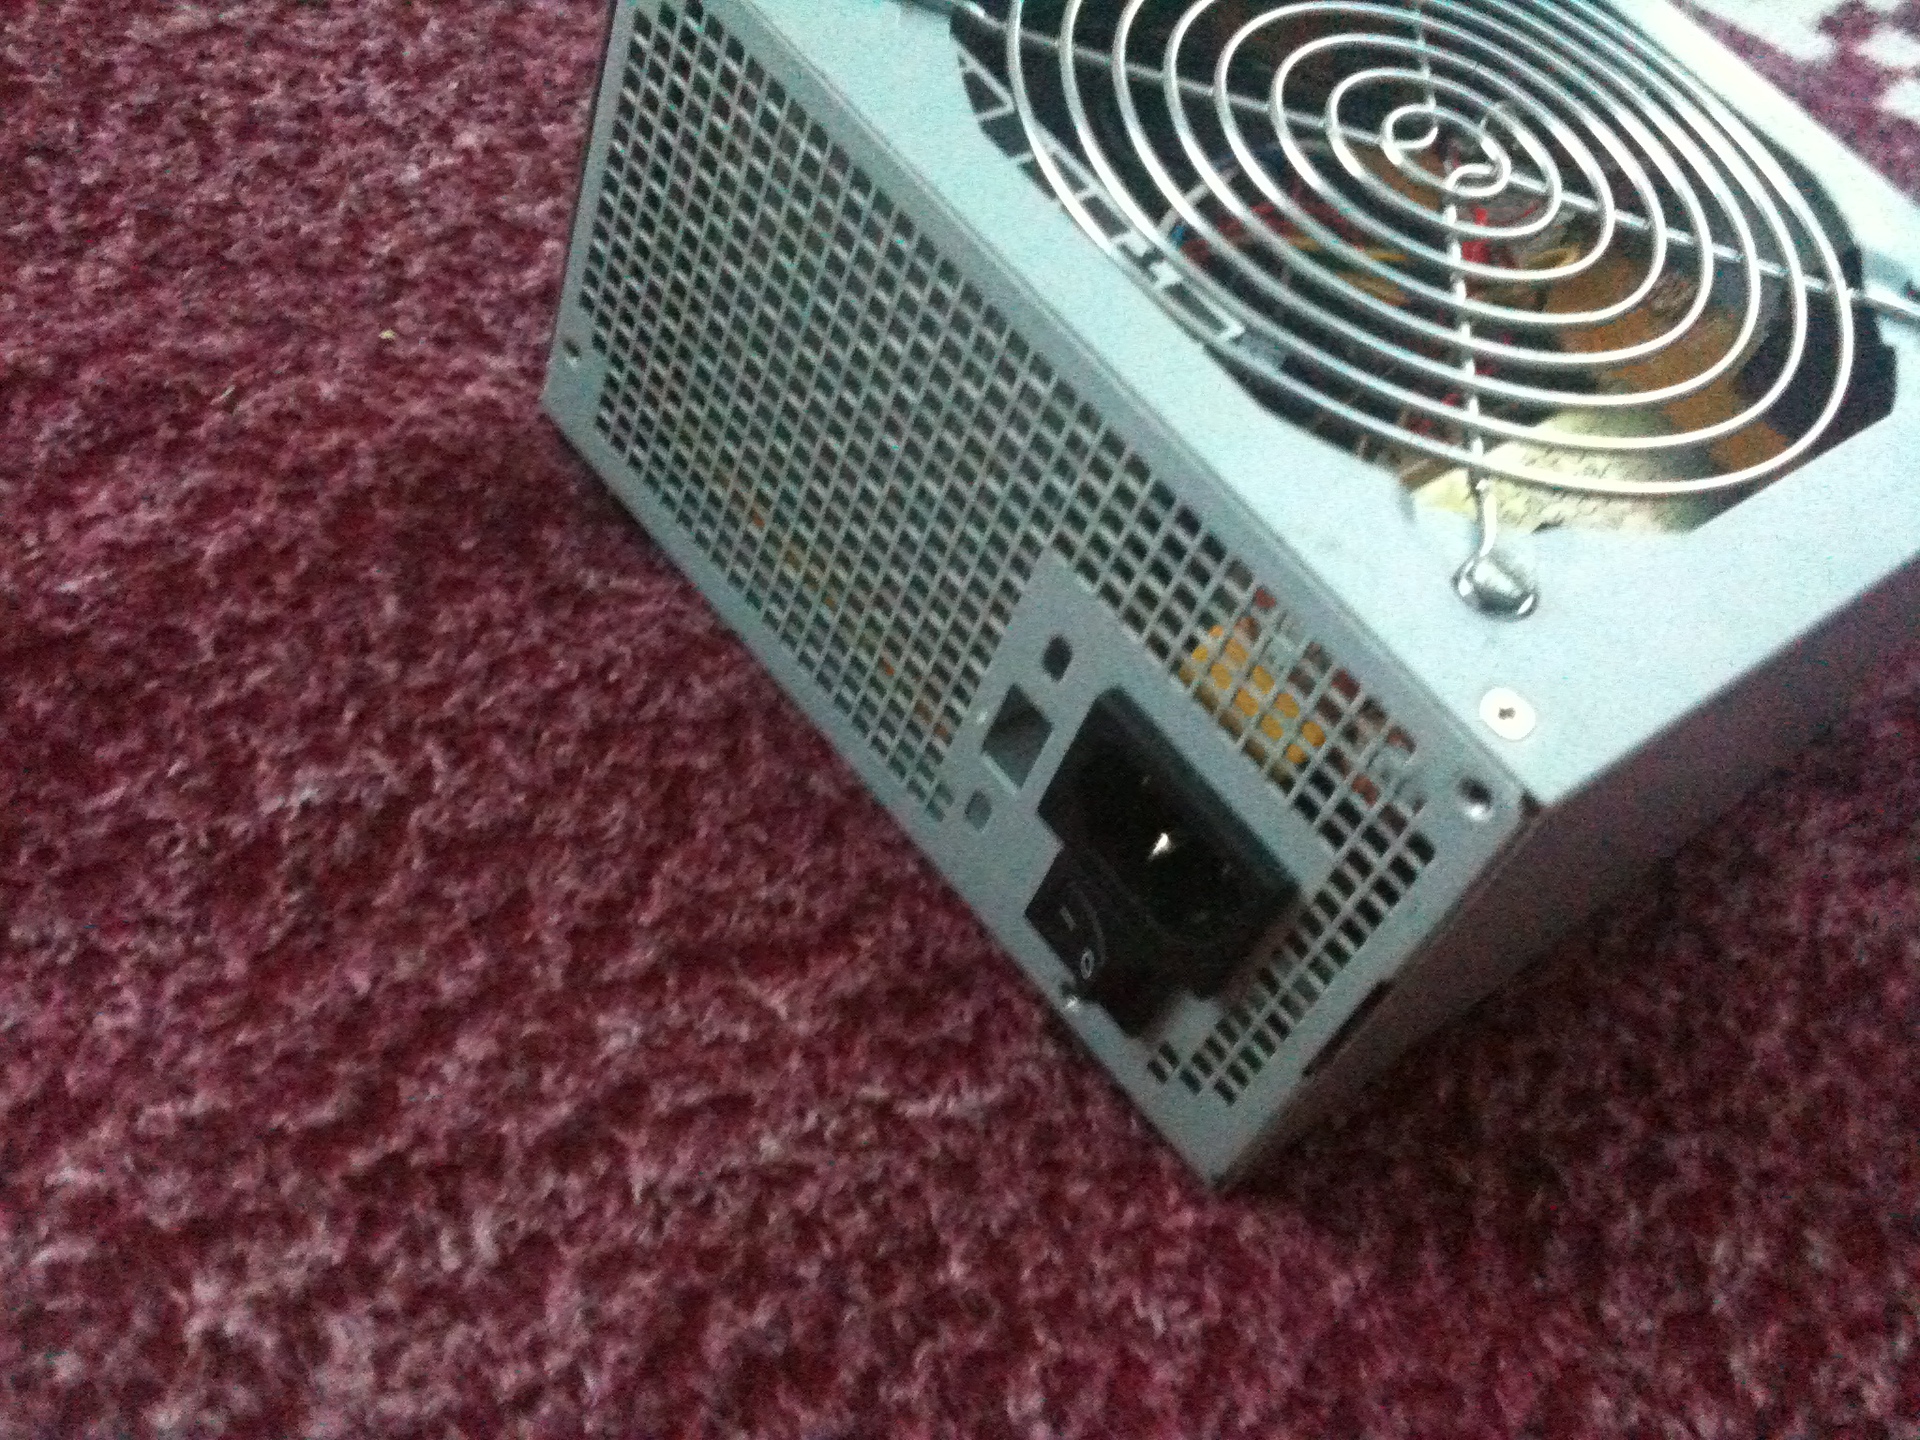
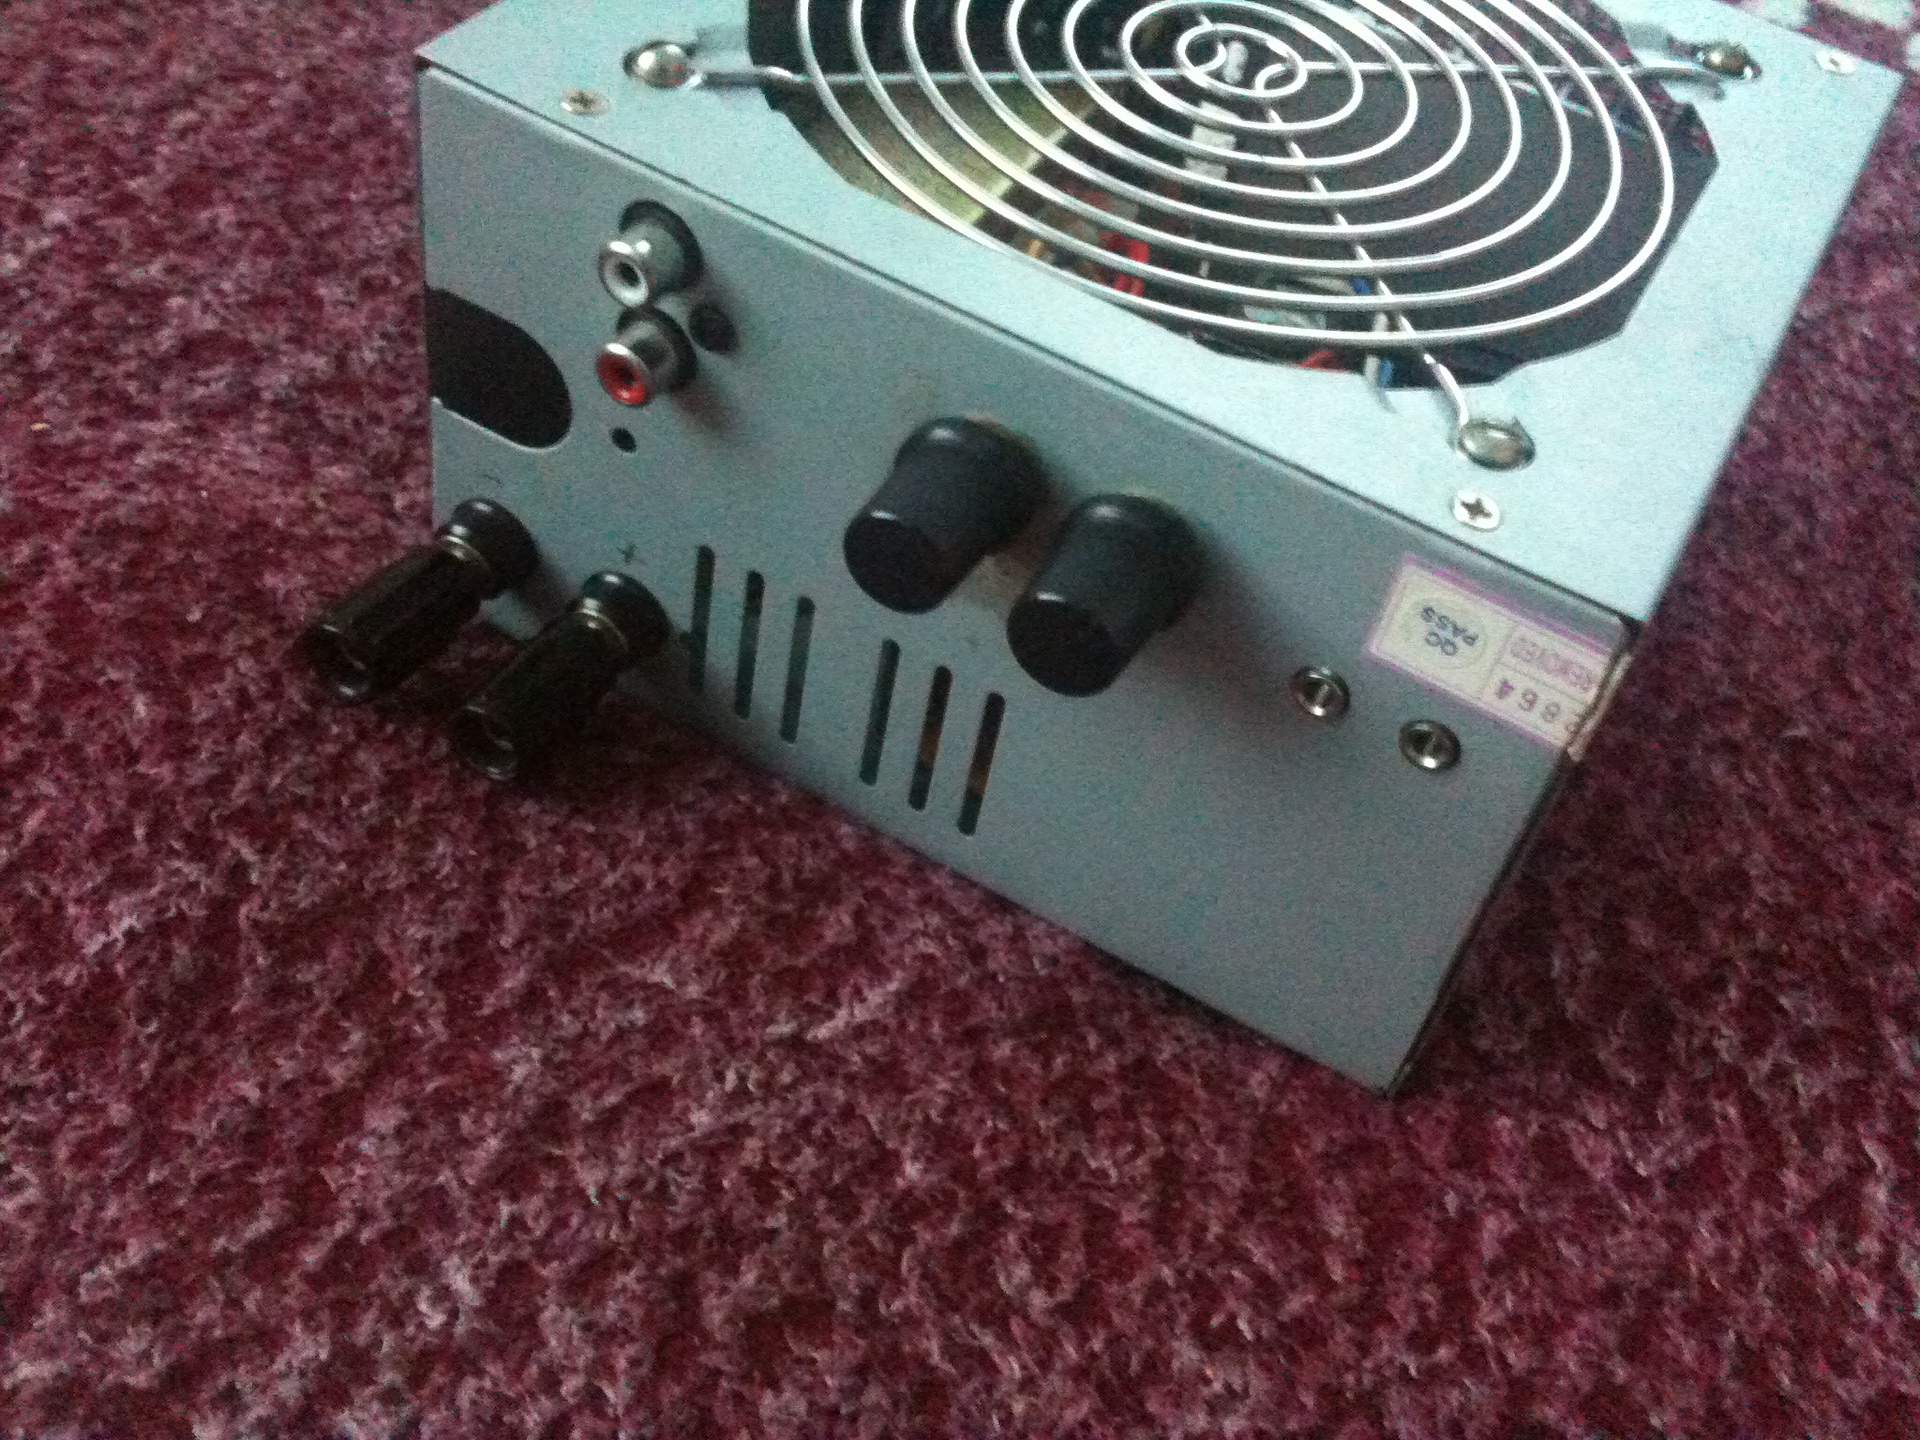
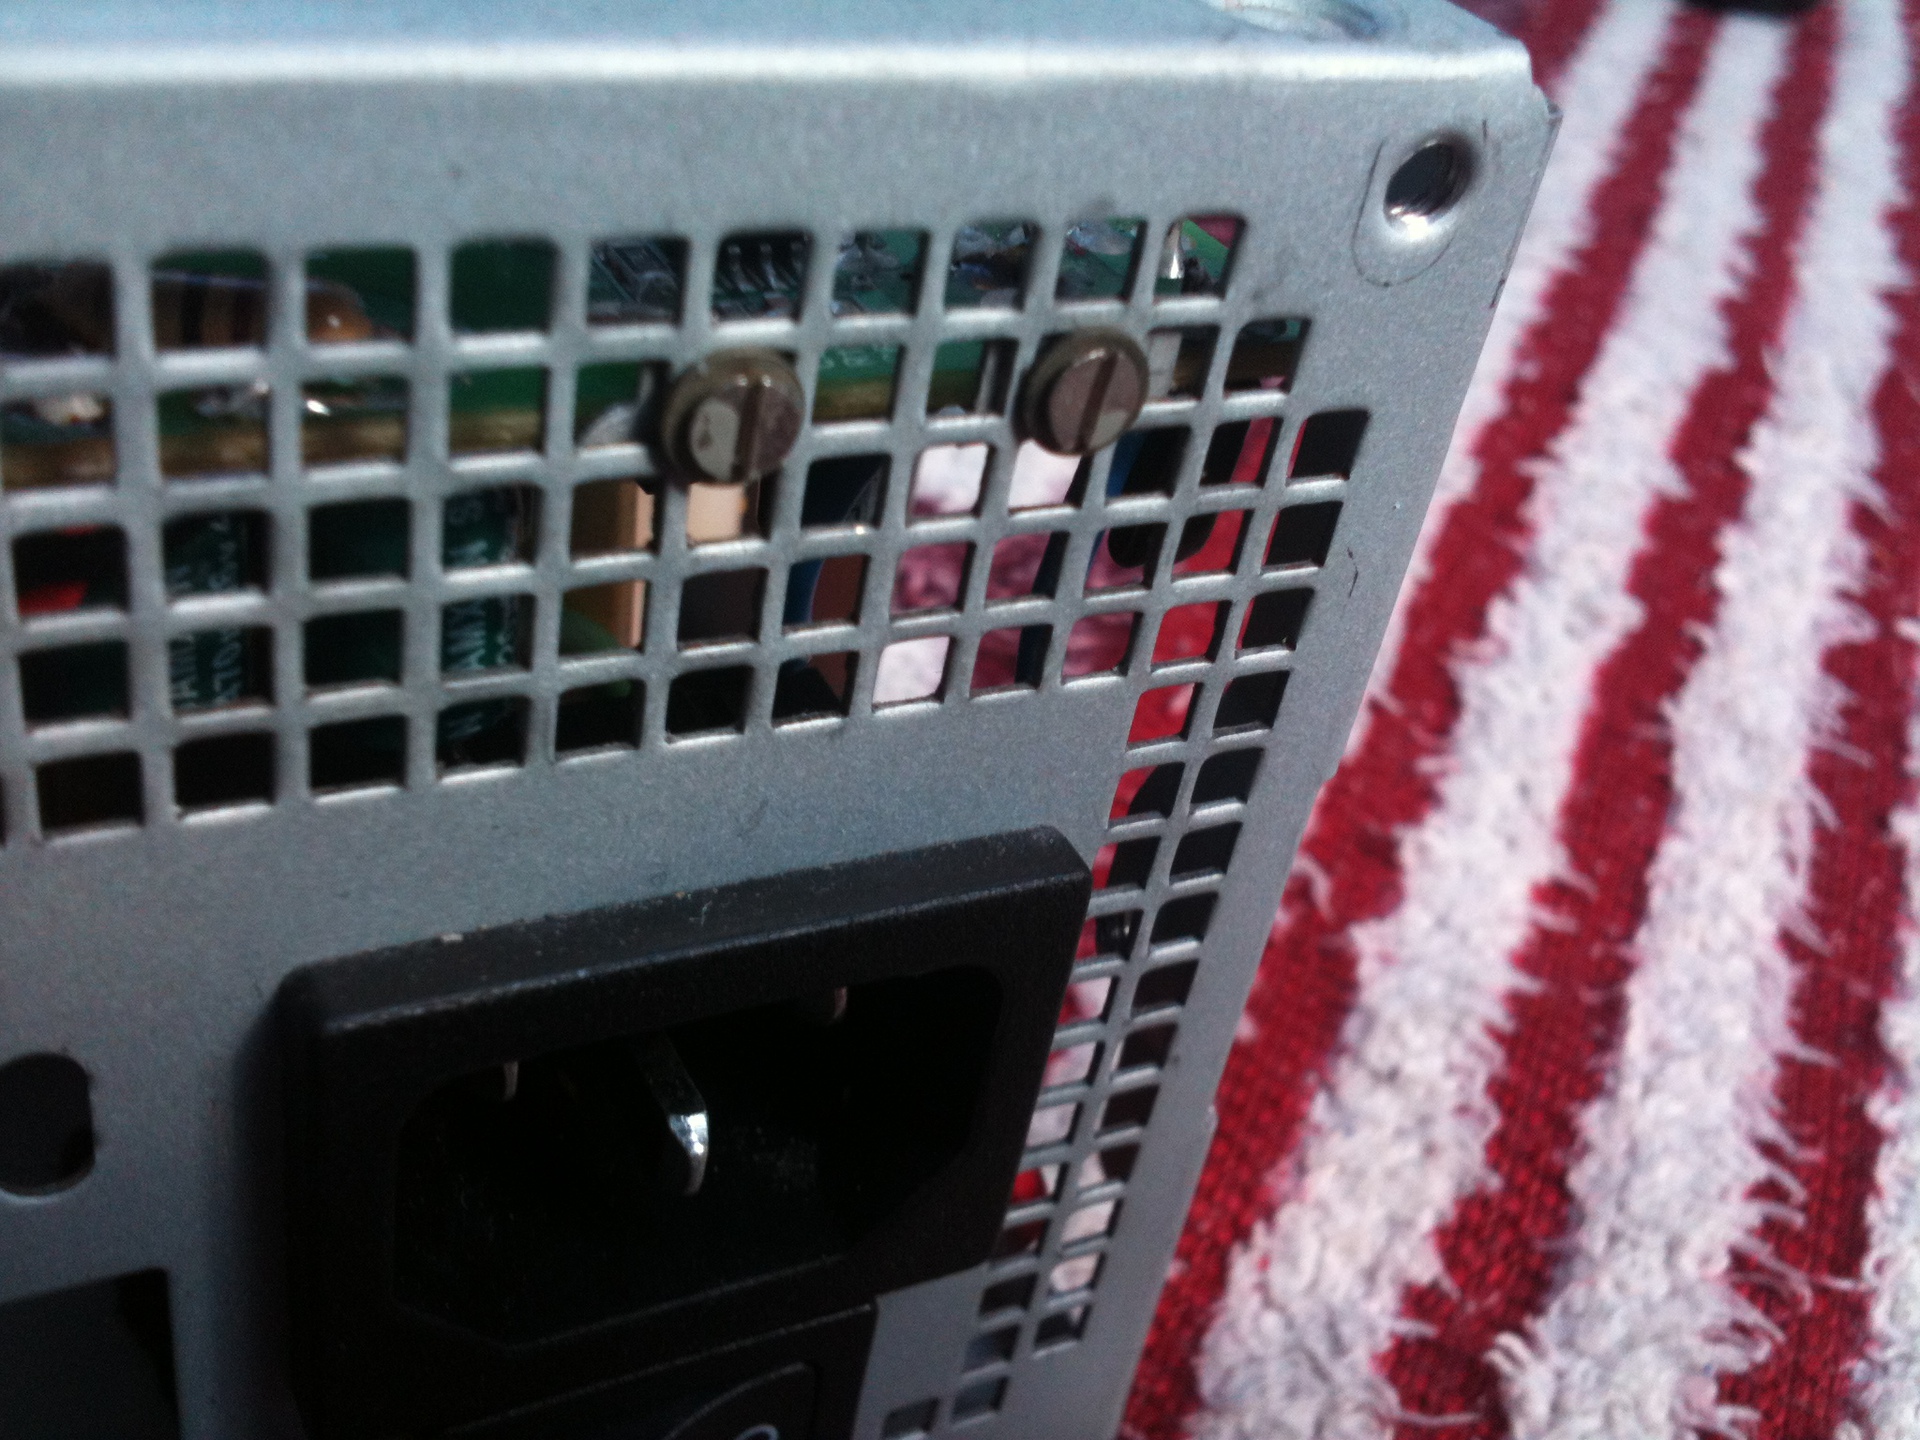
Back panel connectors:
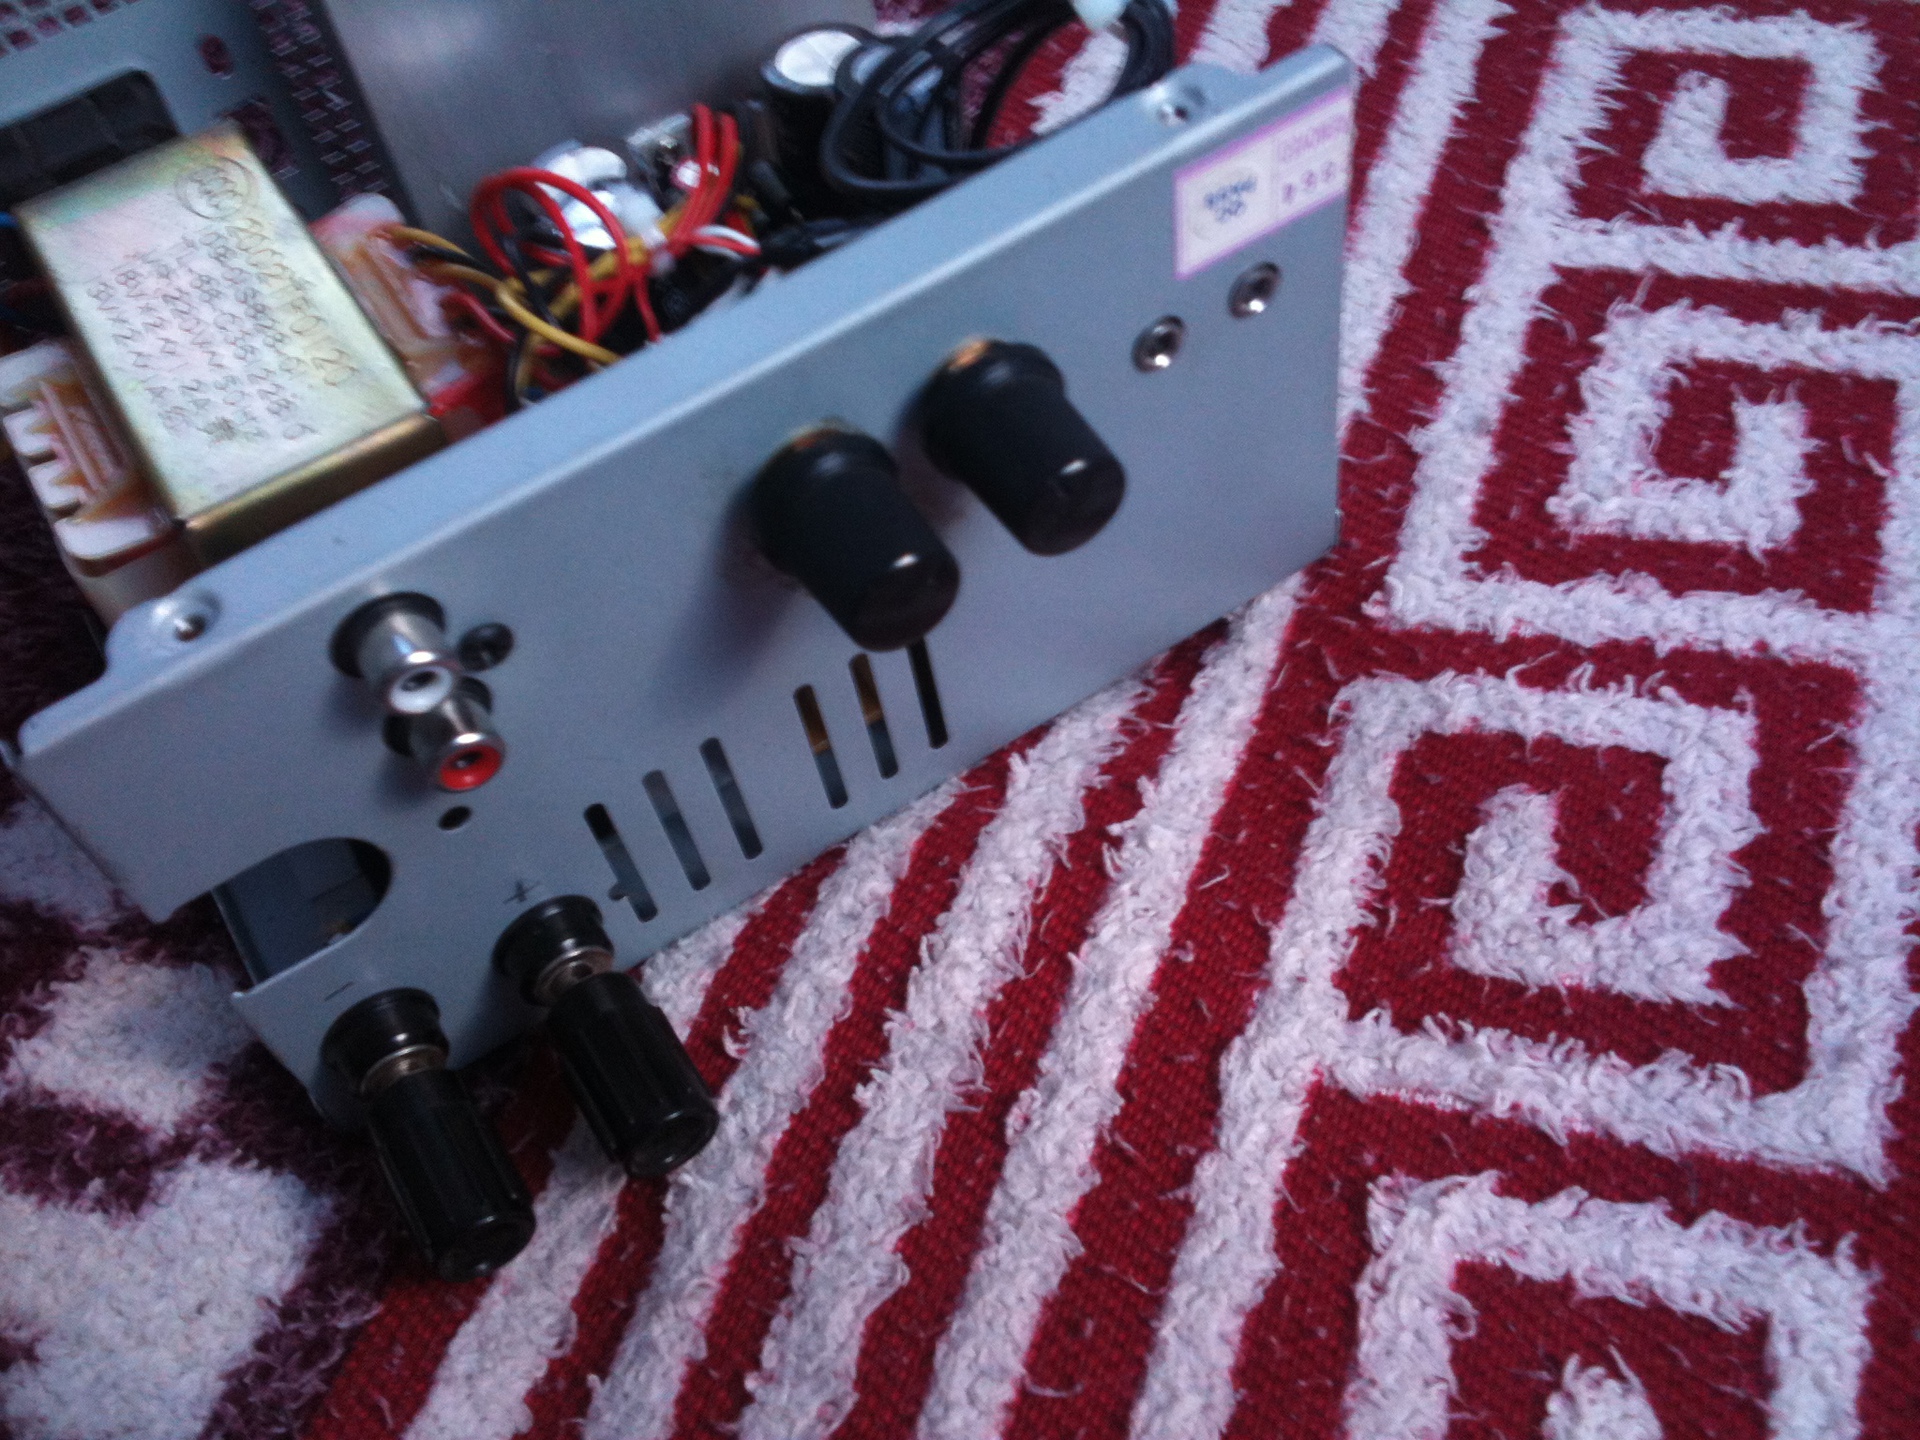
At the bottom left there are two terminals on the woofer of the subwoofer, above these are two RCA jacks of the incoming signal, the knob on the left is responsible for the speaker volume, the right one for the subwoofer volume, two jacks on the mini-jack for the left / right channels, respectively.
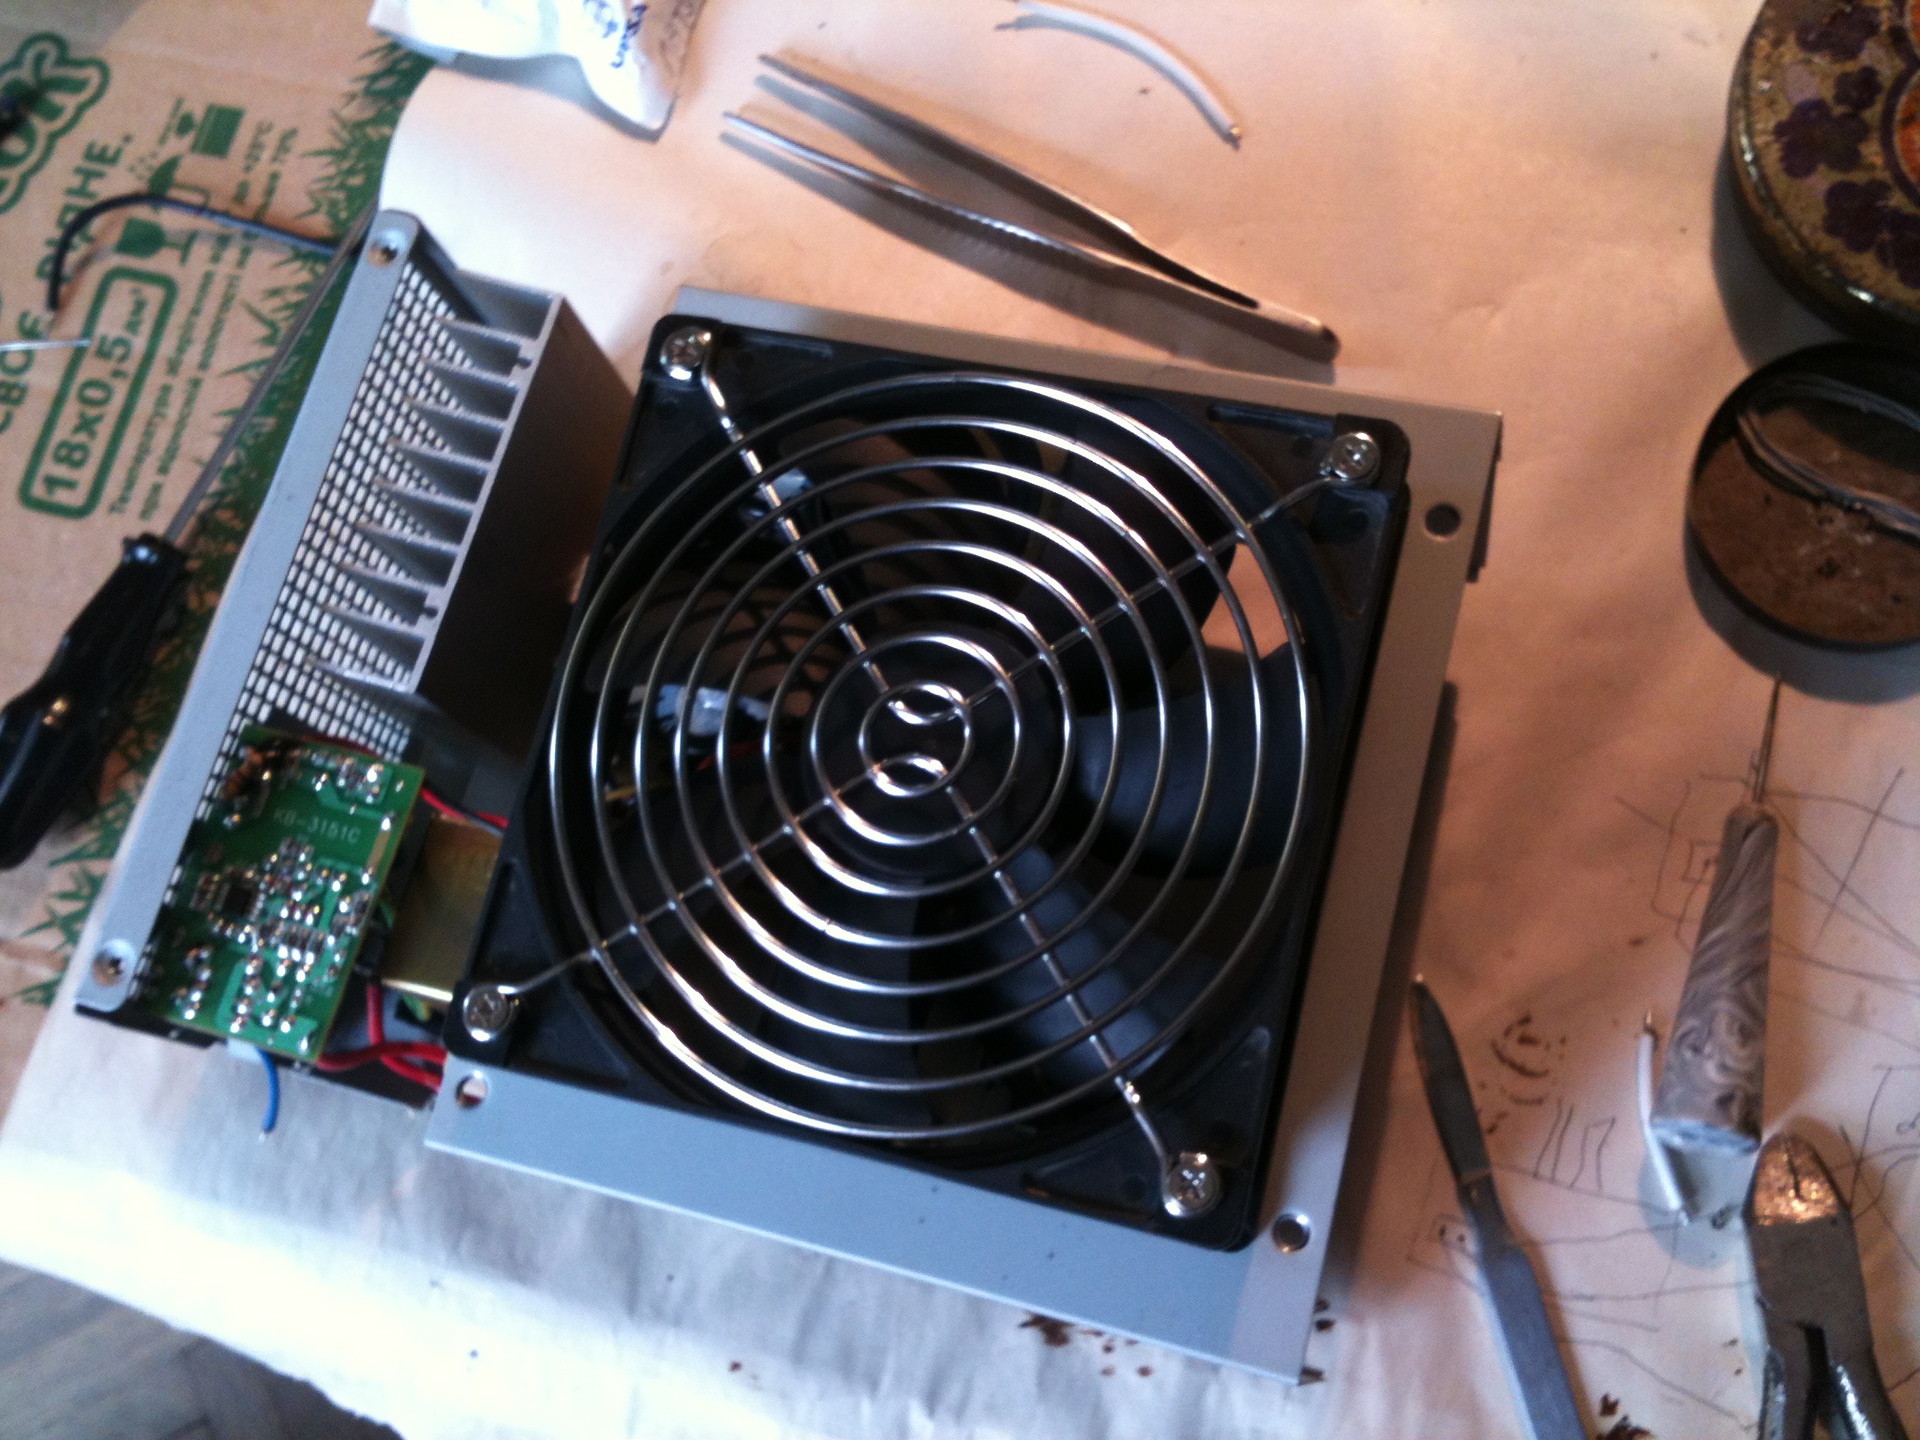
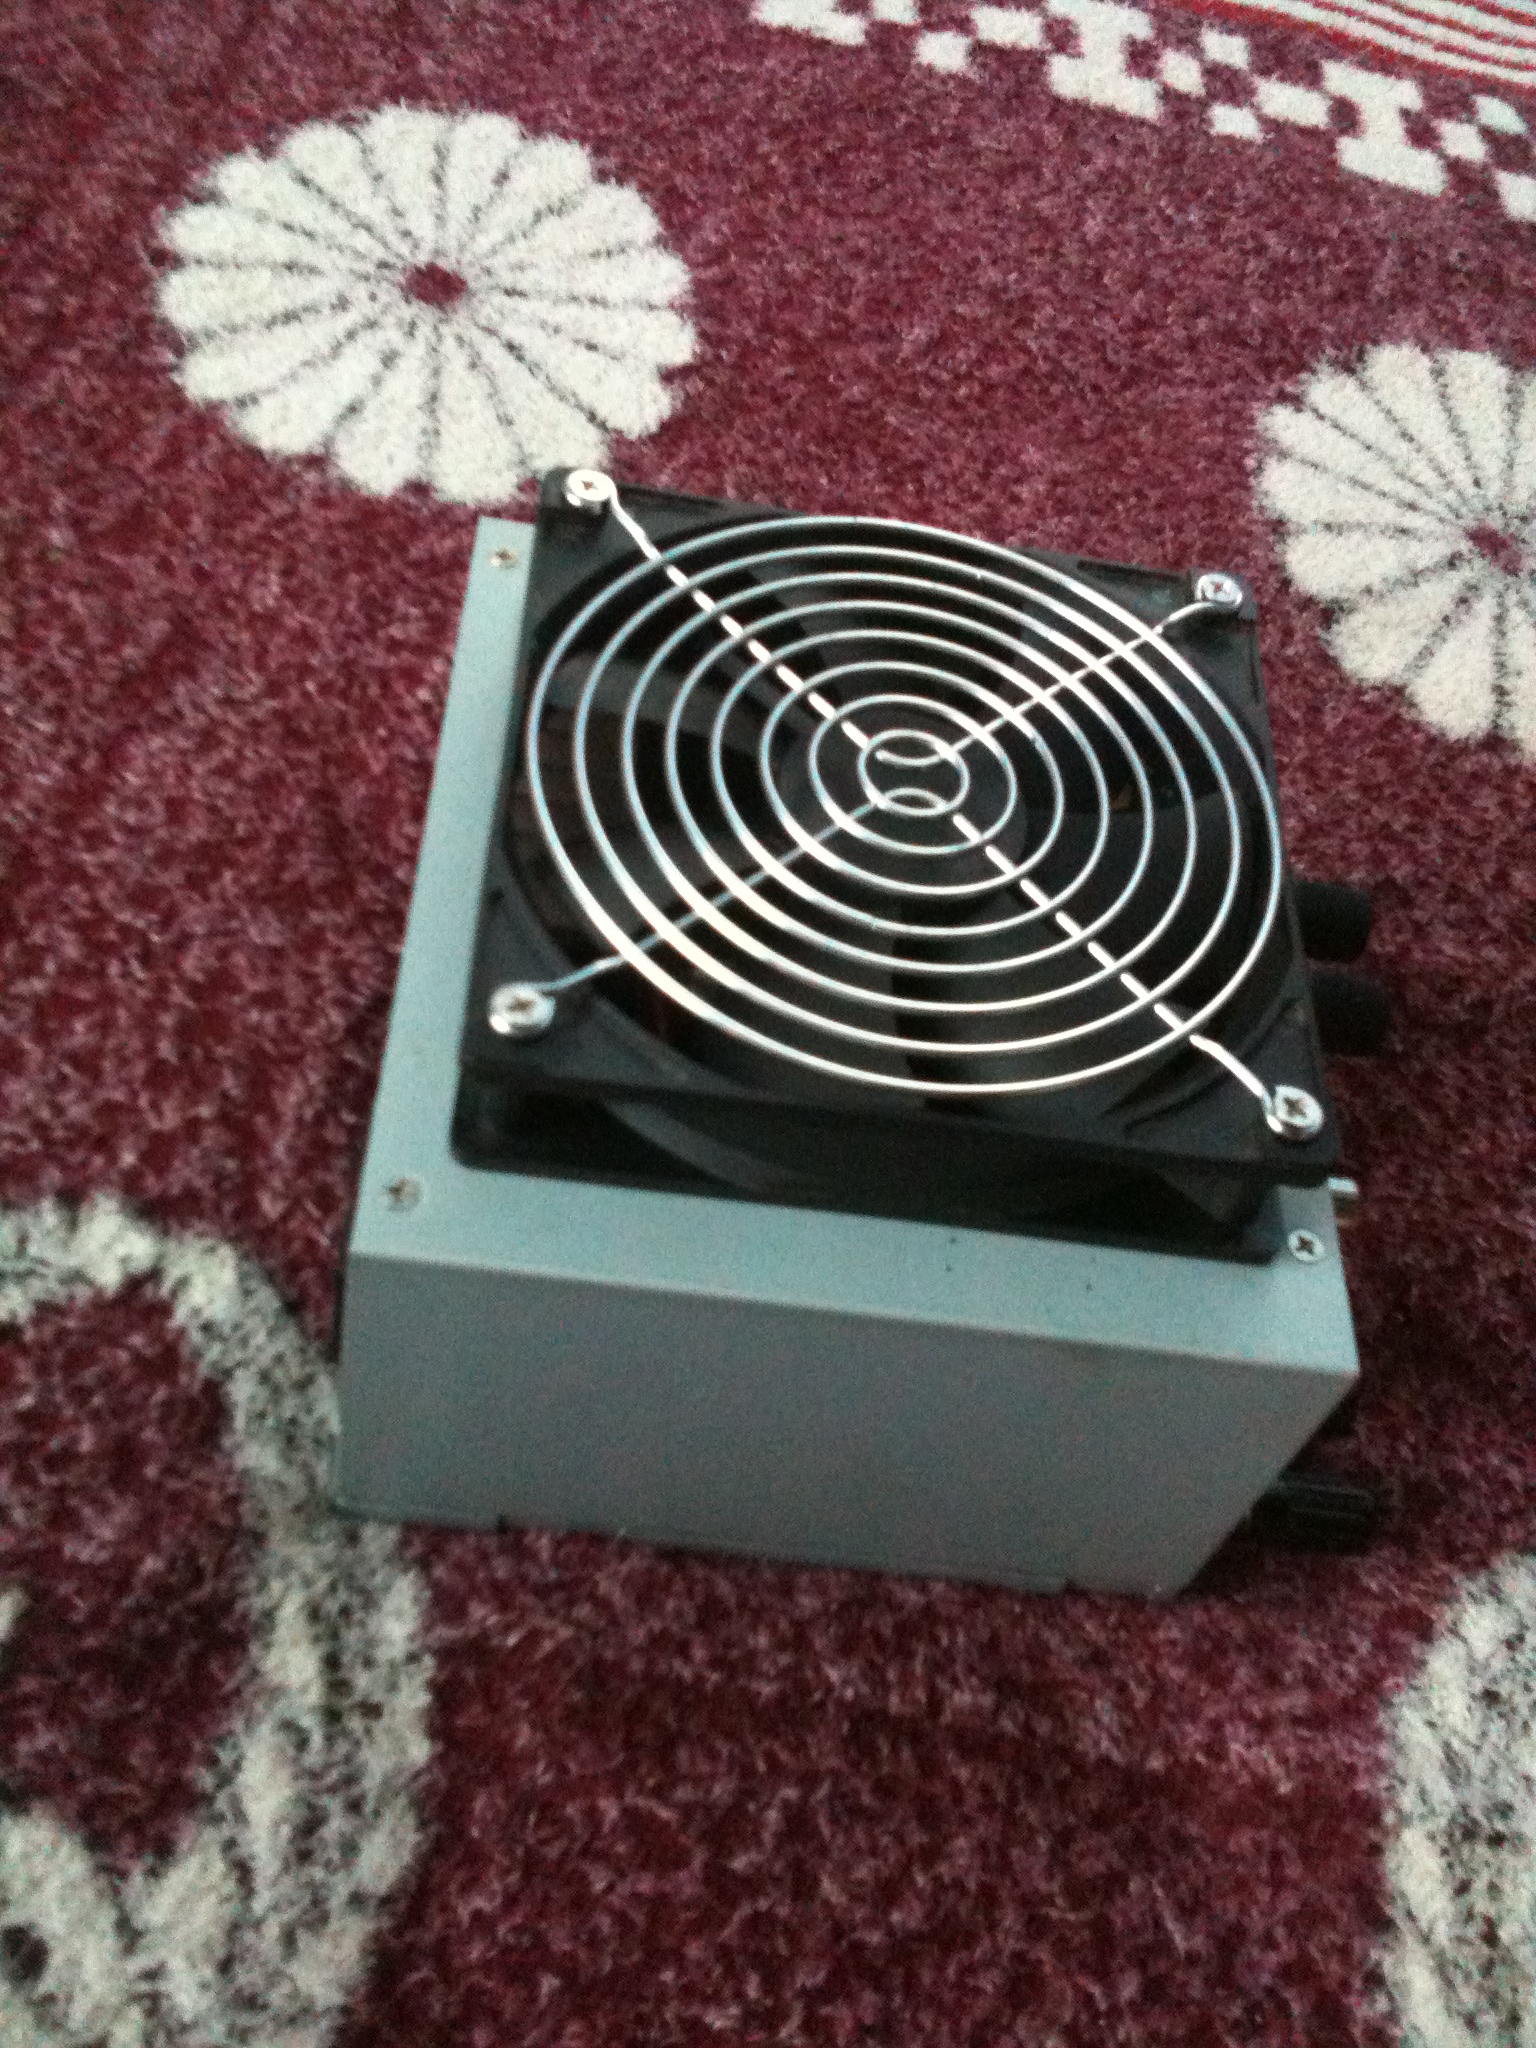
Fully assembled:
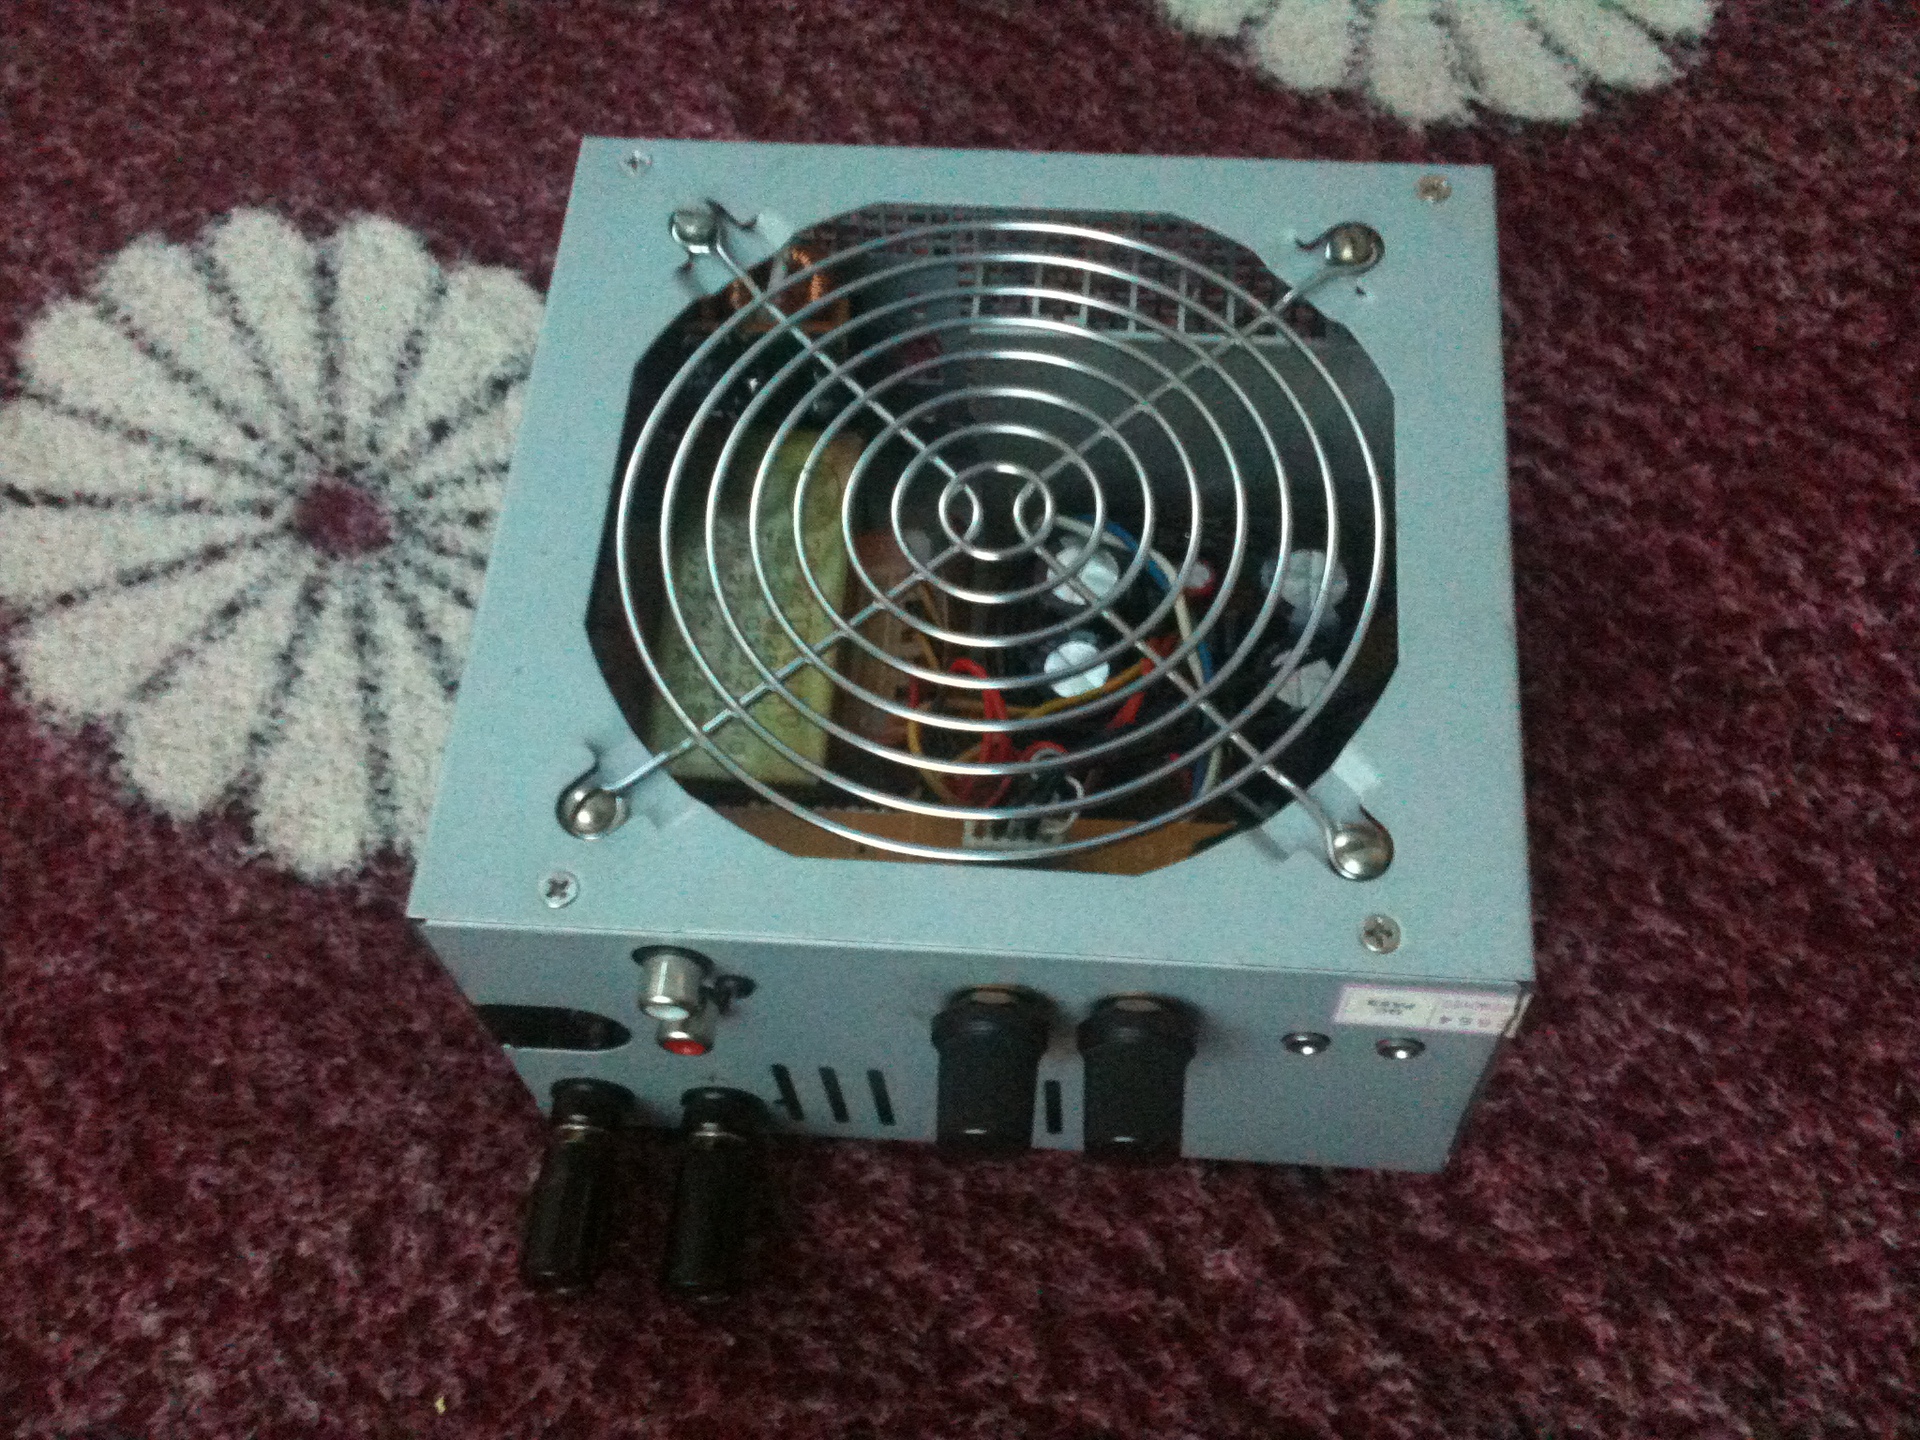
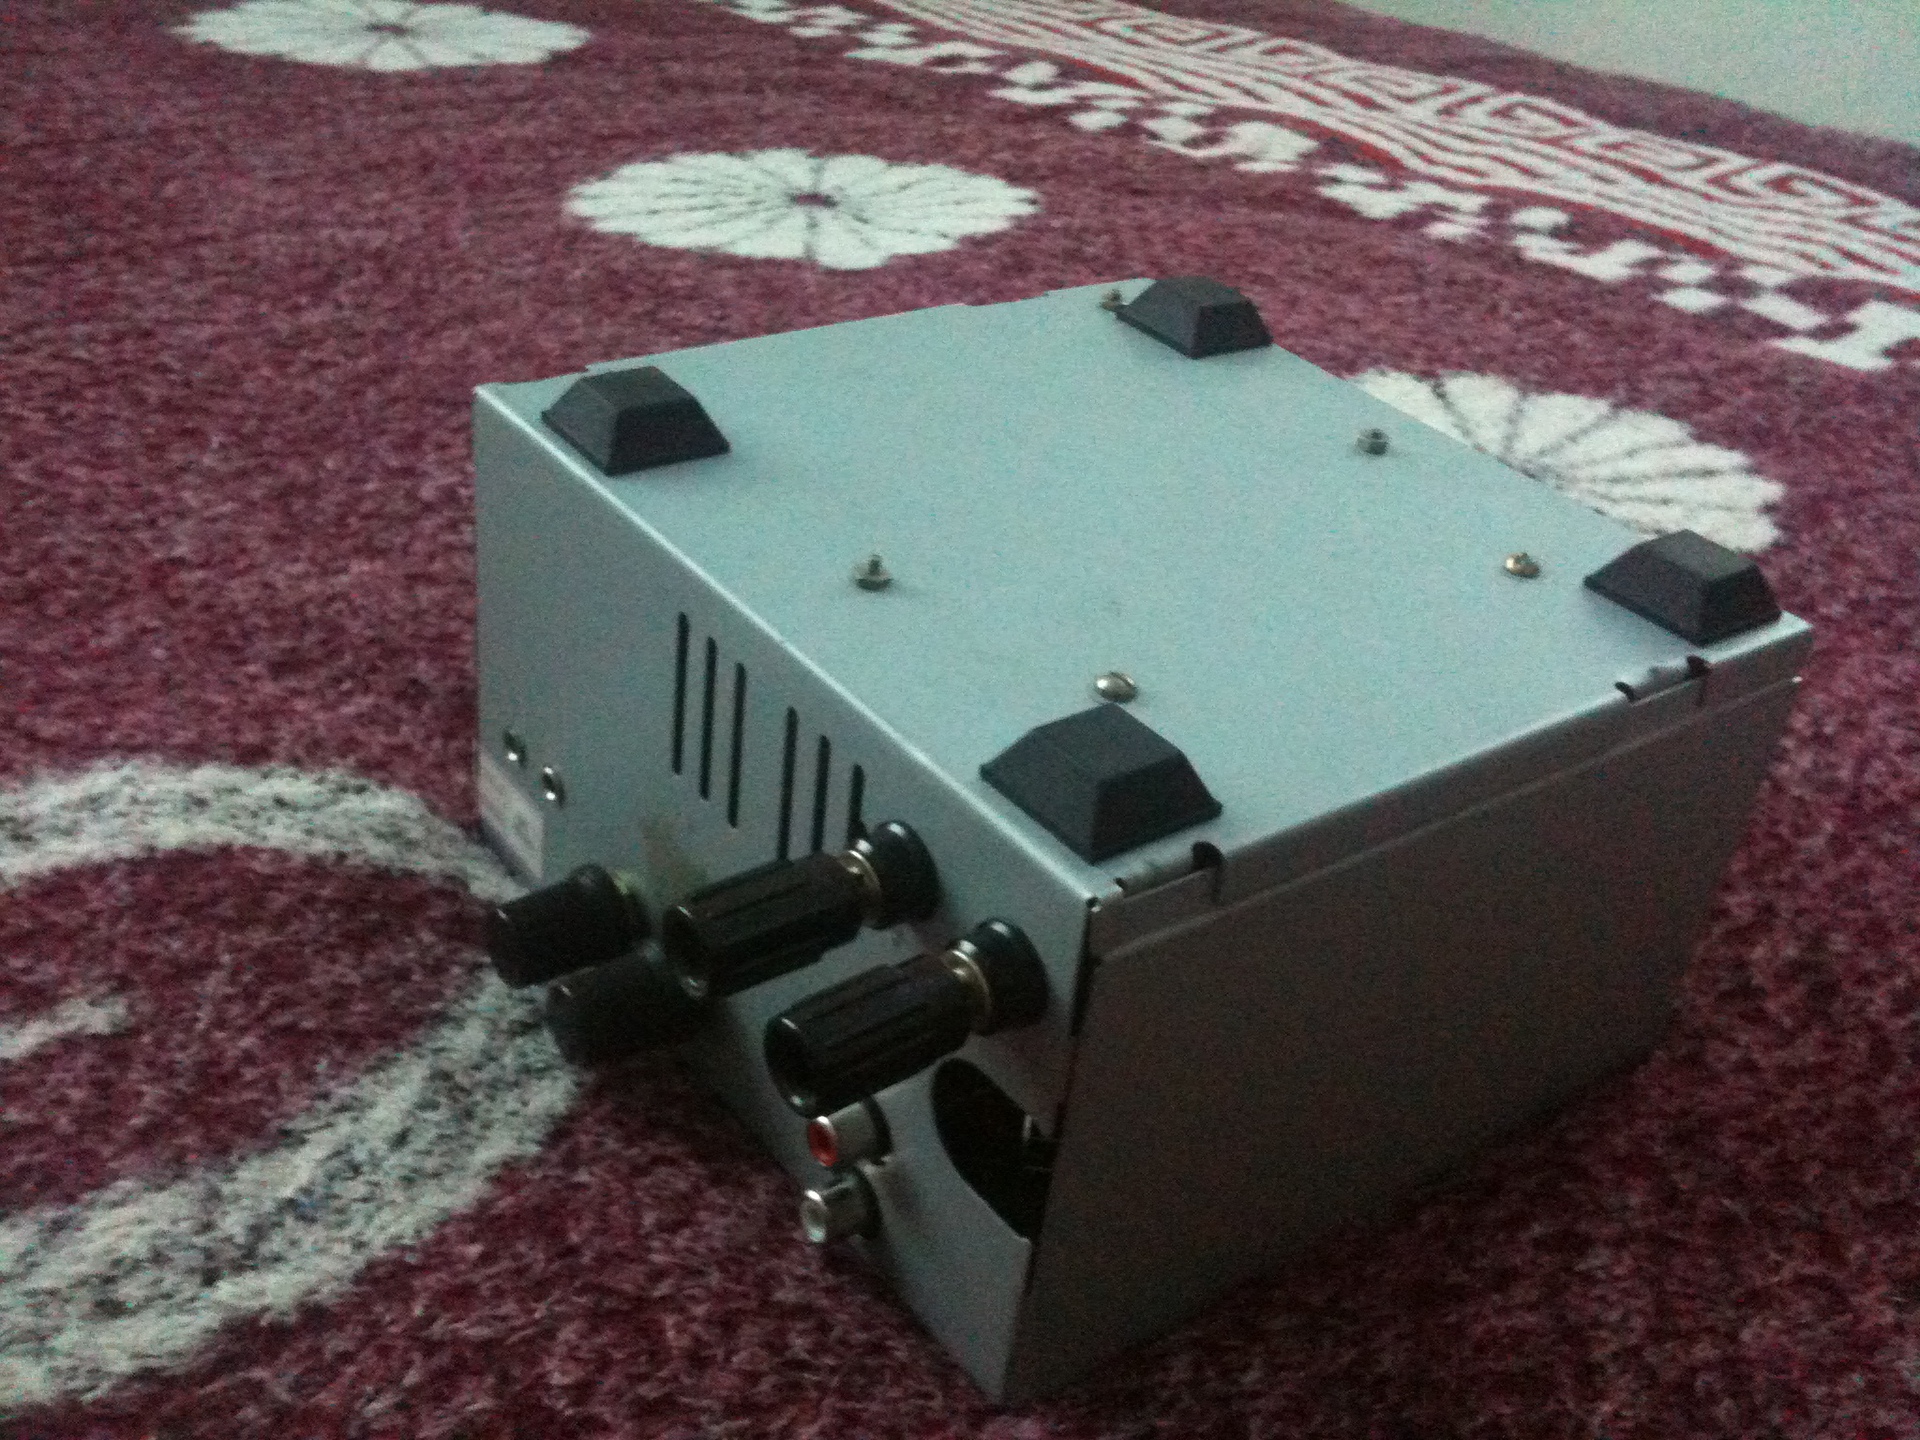
Self-adhesive "legs" from a set of the D-Link DES-3200F switch perfectly suited.
It's time to turn on.
Honestly, the sound is simply excellent and very different from what it was before the upgrade, words can not convey, but.
If you put your hand to the grid, then there was a significant heat from both the transformer and the radiators of the microcircuits. I can not imagine how it all so long lived in a wooden non-ventilated case? Then I decided to put a 120mm blower fan.
Instead of an EMI filter, which in fact does not give anything and does not take away, screwed a 9V pulsed power supply unit from the TP-Link WR340GD router for a separate fan power supply:

In the impulse power supply of the router, the transformer issued a high-frequency squeak, it was necessary to glue it with epoxy, when the epoxy hardened, the squeak decreased, but did not disappear completely, it was hardly audible, except that when you close your ear to the amplifier, that's okay, people get used to it.
And this is what an already fixed BP router looks like in an amplifier:

I did not want to power the fan from the amplifier board, judging by the characteristics / dimensions of the transformer, it is already weak and is not designed for a load of this type. I connected a turntable through a resistor (I don’t remember the nominal, 80 ohms somewhere, I don’t want to disassemble), instead of 9V, it turned out ~ 5.3V, which is quite enough for blowing components.
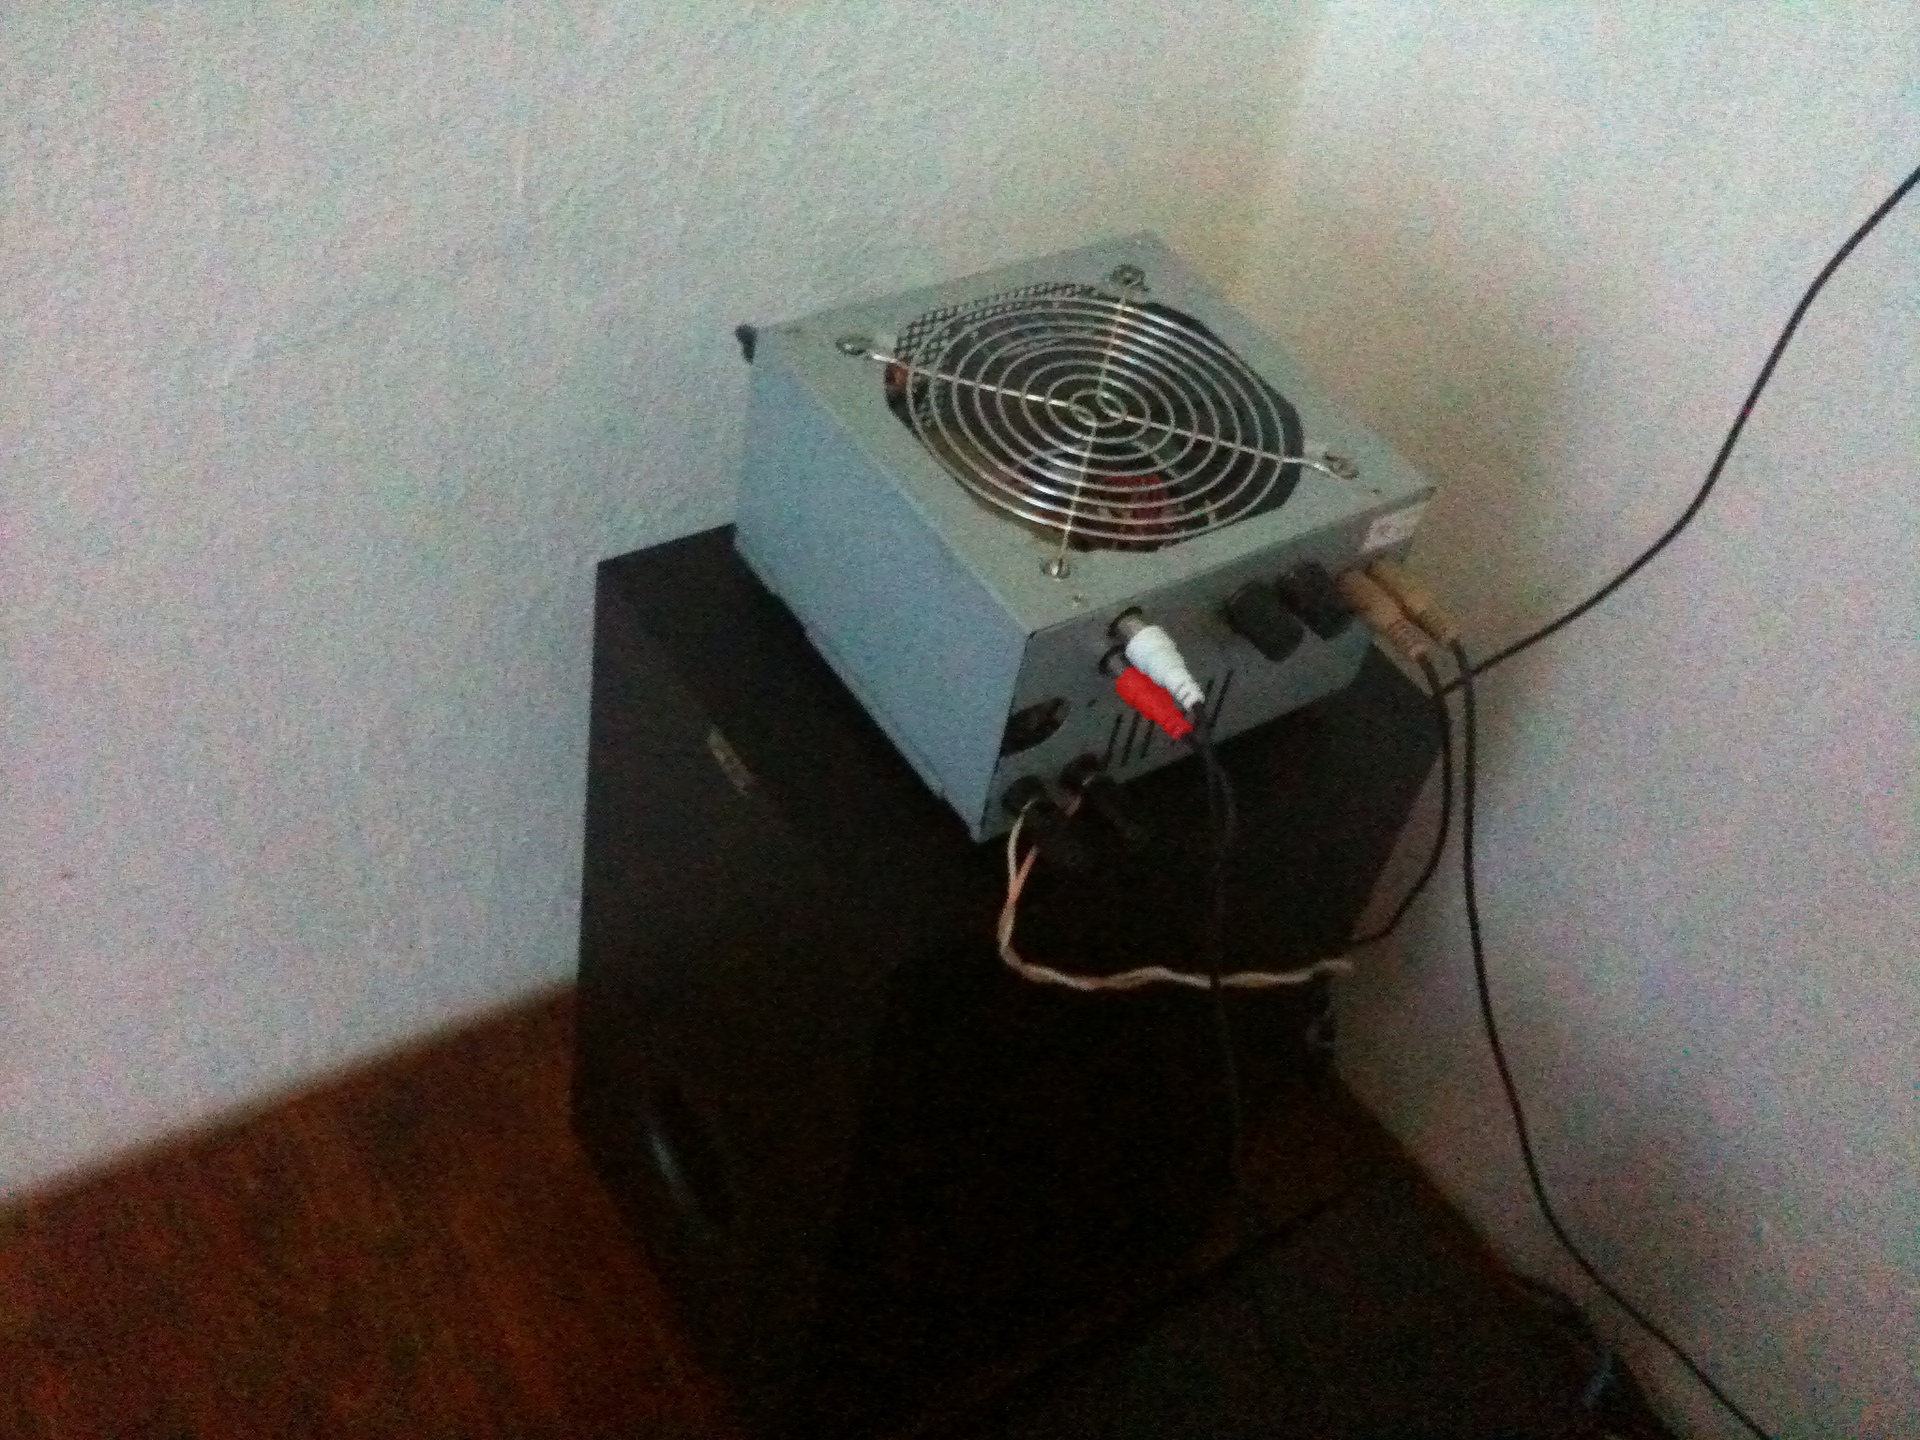
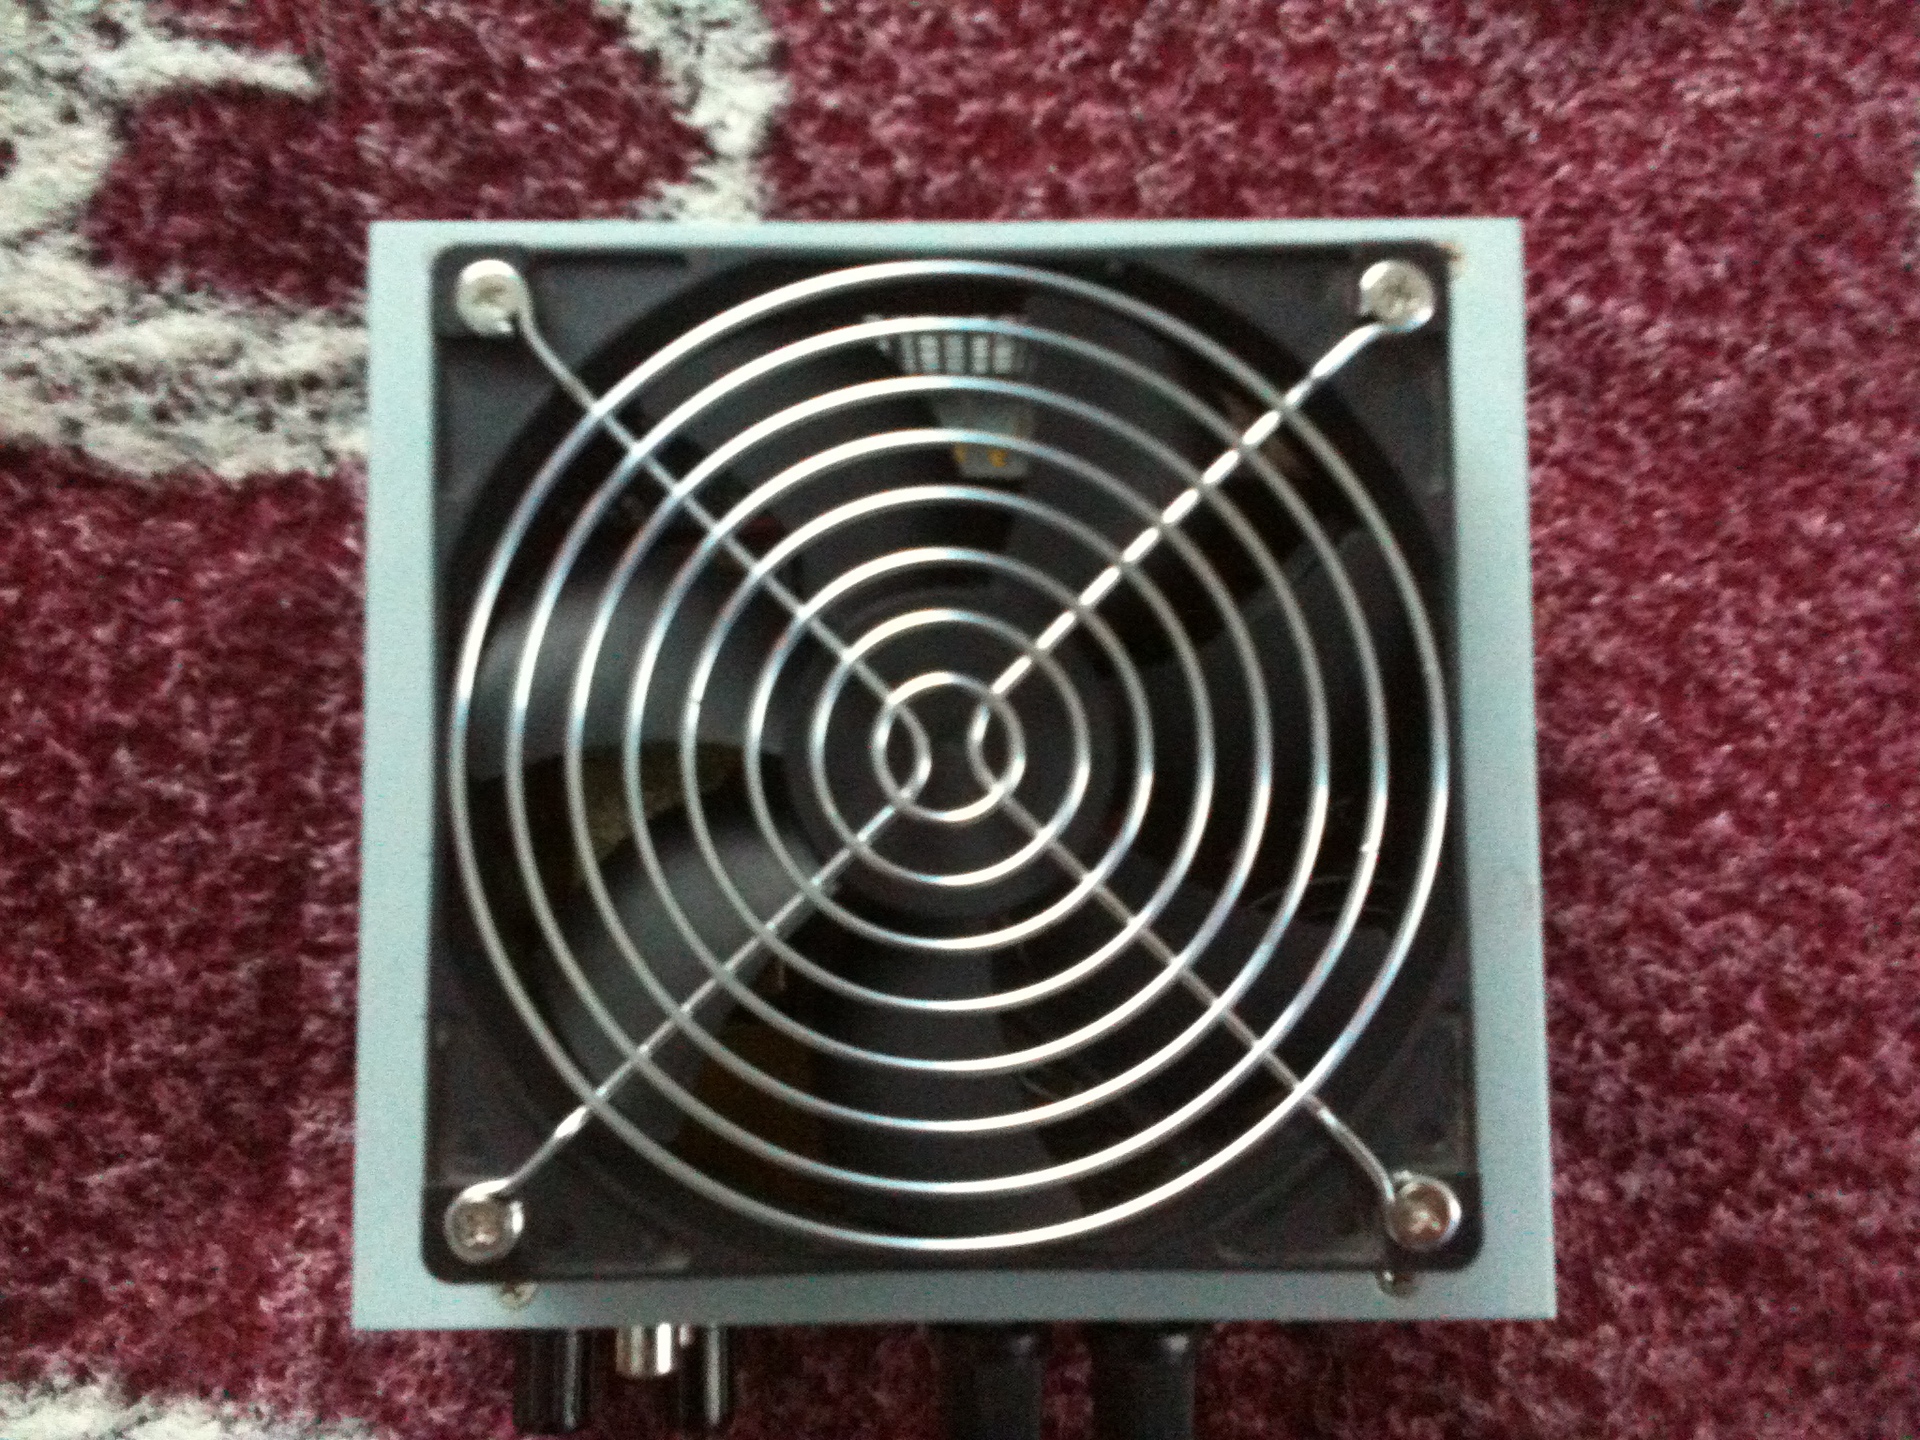
The final view of the device:

I also upgraded the speakers themselves, they were like in the first photo, in small plastic cases, the sound was just disgusting, especially when you slow down the bass.
Unfortunately I didn’t do the photo of the converted columns, in principle there’s nothing to look at, now they weigh on the wall, I’ll take it off for cleaning, take a photo and add this note.
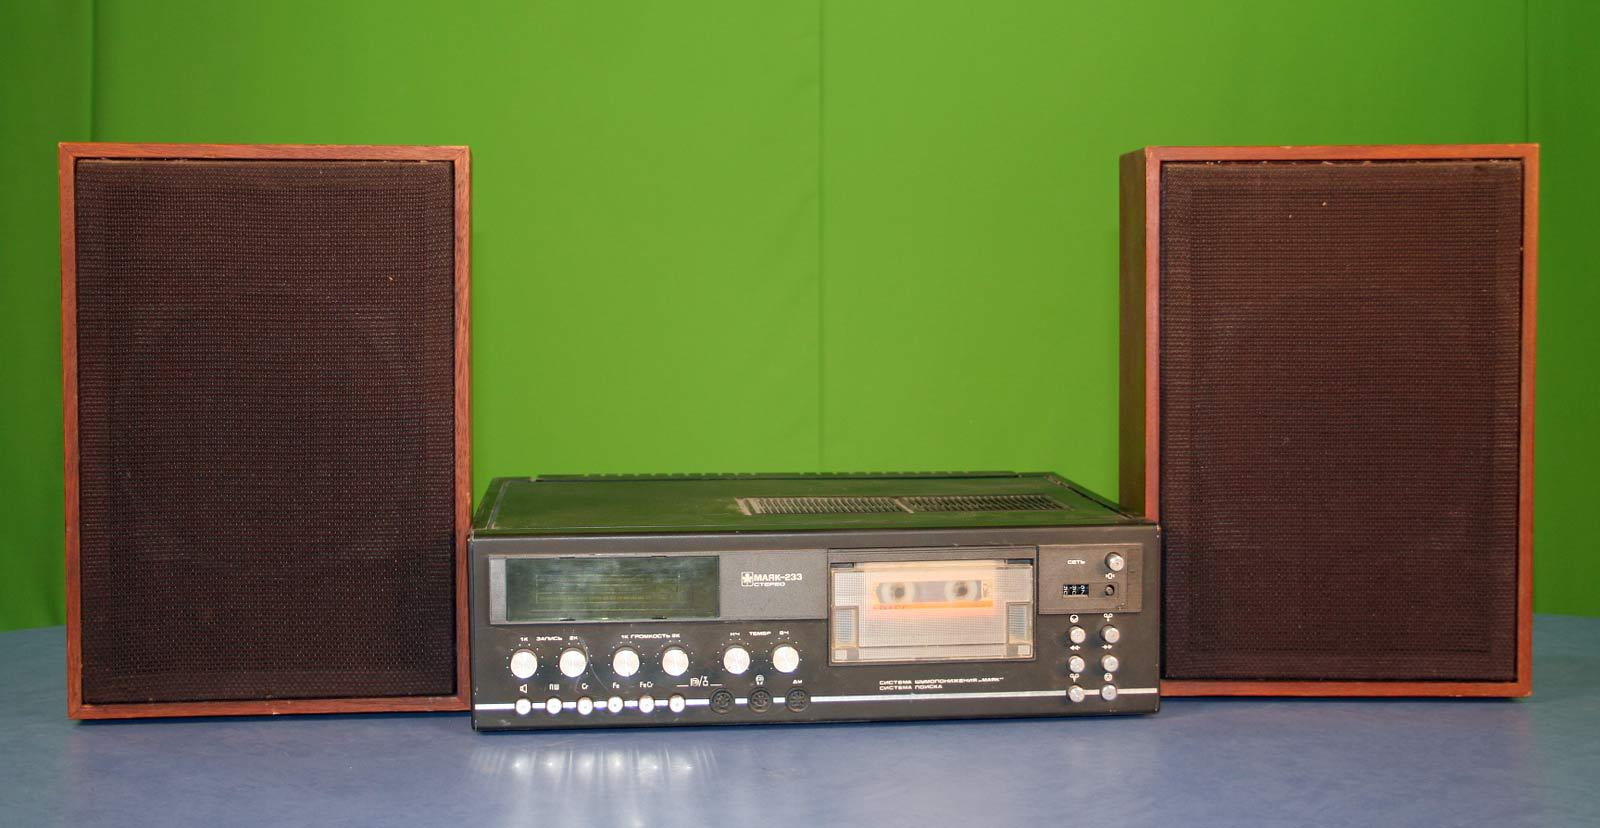
In general, I had two new speakers from the Soviet Beacon tape recorder:
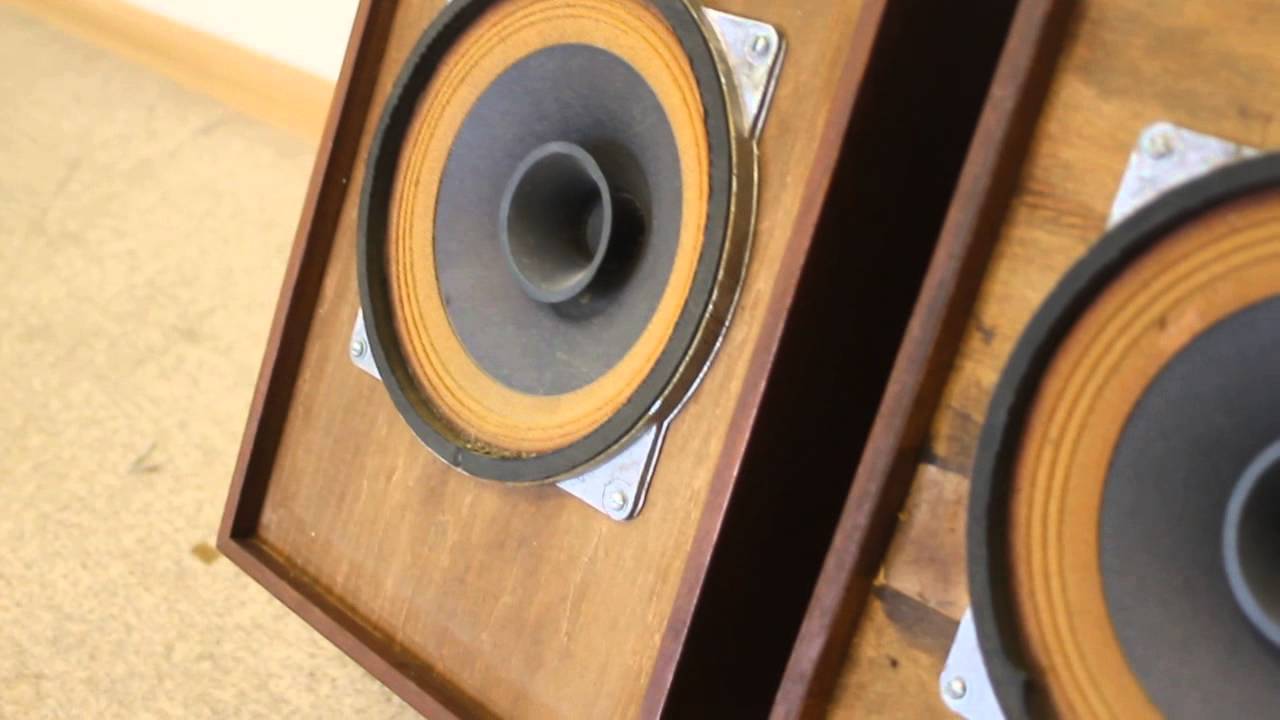
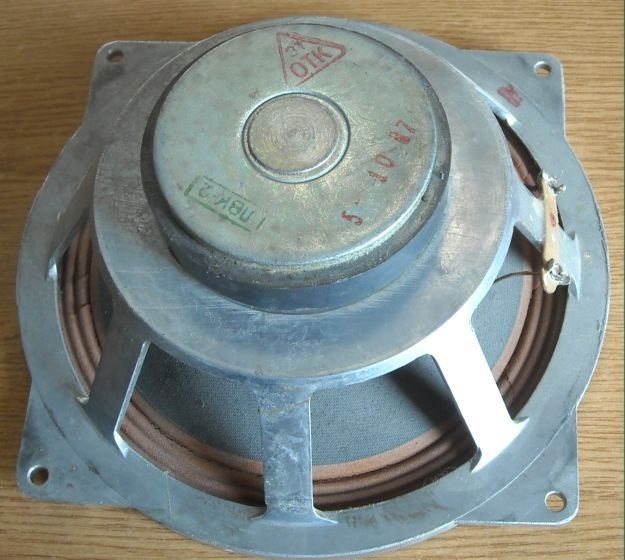
With 15-GDSh, 15W, 4 Ohm speakers:

In the case of the speaker, above the large speaker, I cut a hole under the standard, standard small speaker of this speaker (I couldn’t lie around) and screwed it in there with four screws. The speakers in the column connected to each other in series, it turned out 8 ohms, judging by the data rate, this is the ideal resistance for the TDA2050, a minimum of side harmonics. True wanted to turn on in parallel, it would be louder, but then the resistance would be 2.6 ohms, which is not gud.
Judging by the date of the photographs, I did it on 09/21/2012, but only now my hands came to write about this note.
Everything about everything took me about eight hours.
Modernization and the time spent on it were justified both by the quality of the sound and by the aesthetic pleasure of the work done.
I bought this speaker system back in 2005. together with my first computer, from that time I changed a lot of system units, monitors, UPS'ov on my desk, but this amplifier remained with me all this time and makes me happy until now.
Thanks for taking the time to read.
I want to share with you my experience in upgrading the F & D speaker system (it is also distributed under the SVEN brand) of the SPS-828 model. Immediately I want to apologize for the quality of the photo, I photographed when and similar crafts are made - in the evening, with a quick telephone.
I don’t have any photos of the “virgin” type of speaker system that I made myself, as I didn’t think about it during disassembly, so I borrowed them from various resources using Google Images so that you had an idea of how the speaker looked before the intervention.
')
Let's start with the original look.
This is how the AU looks like:
The subwoofer is made of fiberboard with a thickness of about 1 cm, the speakers are completely made of plastic with a thickness of about 2 mm. All components of the speaker system are painted black.
Interface panel and control, which is located behind the subwoofer:
As you can see, access to the controls is very inconvenient, the regulators and the power switch should have been brought to the front panel, or at least from the side, which I basically only wanted to do in the beginning, but then changed my mind.
Interfaces panel disassembled:
The board itself clings to the aluminum plate by means of two nuts of variable regulators, one screw, which is screwed into the plastic housing of the RCA jacks of the connectors and a pile of glue. The aluminum plate is in turn bolted to the subwoofer itself with the help of 10 screws.
The heart of this speaker system is on the bottom of the subwoofer, after unscrewing 14 screws, we can observe the following picture:
The transformer is attached with two bolts and nuts that pass through the bottom, the board is bolted with four screws to two small bars, which in turn are glued to the bottom.
A larger radiator cools the LM1875T microcircuit responsible for the subwoofer woofer; a smaller radiator has two TDA2030 microcircuits on which the left and right speaker channels are implemented.
Let's take a closer look at the transformer itself (my photos will go on):
The transformer has two secondary windings with a midpoint.
Characteristics of the winding that feeds the opamp LM1875T (subwoofer) 18V, 1.2A, the winding supplying the opamp TDA2030 (speakers) is satisfied with a lower voltage and current of 13V, 1A.
I want to note that in a wooden, closed case, without active cooling, especially in summer, the power transformer and radiators on which the operational amplifiers are installed were very hot, it was impossible to touch them with a finger and it is in idle mode, without any load, it’s generally strange how a thermistor in a transformer didn’t work for so many hot summer days, except that it’s not there, but oh well, we’ll leave it to the engineers ’conscience, although I’m not so sure about conscience, especially if we take into account the price of this product how much it cost, but I know that a little.
What I wanted most of all was to replace the poor-quality Chinese electrolytes of the incoming power supply circuits with better and more capacious ones, but as we know, the greater the capacitance and voltage, the larger the size of the capacitor itself. Instead of four standard 2x3300mkF 35V (sub) and 2x2200mkF 25V (speakers) of an unknown company Konmo, I wanted to put 2x4700mkF 35V of Samwha (sub) and 2x10000mkF 25V of Jamicon (speakers), but they simply didn’t fit into the subwoofer case, they didn’t play the last pieces.
Then the idea came to me, to move the entire middle of the wooden active subwoofer, to the ATX case from 400W of computer power supply, immediately replacing some of the details.
- For that matter, the first thing I did was replace two TDA2030 microcircuits with a TDA2050, the latter have better response characteristics.
-Then I took over the replacement of all the small electrolytes on the board, for seven years of work, day after day in such a temperature mode, they just dried out and partially lost their properties.
- I replaced the diodes in the bridges, instead of the identical, small 1A 1000V, I installed more 3A 1000V for the LM1875T (subwoofer), and 3A 80B Schottky for the TDA2050 (speakers).
The part in which I took measurements, drilled, twisted, sawed ... I’ll skip because there are still no photos of this whole process, and this is a tedious task, at least for me: D
Okay, enough stories about the replacement, see what all this happened.
Amplifier board:
Replaced all the above parts and of course thermal grease on the chip.
Amplifier assembled without top cover:
I am glad that all the components of the amplifier fit in the case of a computer power supply and even more - EMI filter on the power connector.
The amplifier board was fixed on four racks, the transformer was installed on two gaskets from felt so that the vibration was not transmitted and screwed it with two bolts to the case, did not modify the interface board mounting, fastened it to the same two nuts of variable regulators and a screw.
I don’t like just one moment, the radiator that cools the TDA2050 microcircuit is covered by a board with connectors, it will interfere with air circulation, but no matter how I twist and rearrange everything in places, it didn’t work otherwise.
Back panel connectors:
At the bottom left there are two terminals on the woofer of the subwoofer, above these are two RCA jacks of the incoming signal, the knob on the left is responsible for the speaker volume, the right one for the subwoofer volume, two jacks on the mini-jack for the left / right channels, respectively.
Fully assembled:
Self-adhesive "legs" from a set of the D-Link DES-3200F switch perfectly suited.
It's time to turn on.
Honestly, the sound is simply excellent and very different from what it was before the upgrade, words can not convey, but.
If you put your hand to the grid, then there was a significant heat from both the transformer and the radiators of the microcircuits. I can not imagine how it all so long lived in a wooden non-ventilated case? Then I decided to put a 120mm blower fan.
Instead of an EMI filter, which in fact does not give anything and does not take away, screwed a 9V pulsed power supply unit from the TP-Link WR340GD router for a separate fan power supply:
In the impulse power supply of the router, the transformer issued a high-frequency squeak, it was necessary to glue it with epoxy, when the epoxy hardened, the squeak decreased, but did not disappear completely, it was hardly audible, except that when you close your ear to the amplifier, that's okay, people get used to it.
And this is what an already fixed BP router looks like in an amplifier:
I did not want to power the fan from the amplifier board, judging by the characteristics / dimensions of the transformer, it is already weak and is not designed for a load of this type. I connected a turntable through a resistor (I don’t remember the nominal, 80 ohms somewhere, I don’t want to disassemble), instead of 9V, it turned out ~ 5.3V, which is quite enough for blowing components.
The final view of the device:
I also upgraded the speakers themselves, they were like in the first photo, in small plastic cases, the sound was just disgusting, especially when you slow down the bass.
Unfortunately I didn’t do the photo of the converted columns, in principle there’s nothing to look at, now they weigh on the wall, I’ll take it off for cleaning, take a photo and add this note.
In general, I had two new speakers from the Soviet Beacon tape recorder:
With 15-GDSh, 15W, 4 Ohm speakers:
In the case of the speaker, above the large speaker, I cut a hole under the standard, standard small speaker of this speaker (I couldn’t lie around) and screwed it in there with four screws. The speakers in the column connected to each other in series, it turned out 8 ohms, judging by the data rate, this is the ideal resistance for the TDA2050, a minimum of side harmonics. True wanted to turn on in parallel, it would be louder, but then the resistance would be 2.6 ohms, which is not gud.
Judging by the date of the photographs, I did it on 09/21/2012, but only now my hands came to write about this note.
Everything about everything took me about eight hours.
Modernization and the time spent on it were justified both by the quality of the sound and by the aesthetic pleasure of the work done.
I bought this speaker system back in 2005. together with my first computer, from that time I changed a lot of system units, monitors, UPS'ov on my desk, but this amplifier remained with me all this time and makes me happy until now.
Thanks for taking the time to read.
Source: https://habr.com/ru/post/226445/
All Articles