As we built the first prototype
 Hi Habr! This is our second post, it opens a series of technical publications. We decided to tell more about the CamIRa architecture, the components and technologies used, as well as how we came to this. It is time to share something with the community, especially since a lot has already accumulated, which we had to face during the implementation of our first prototype. In this article, we will describe how you have gone from a simple program with a single IR image, to a full-fledged cloud system with a personal account.
We ask interested under kat!
Prototyping
A lot of time may pass from the appearance of an idea to how it becomes something tangible, it can take months and sometimes years! In order to reduce these very years at least to a month or two, and there is prototyping.
Today, a lot of things are available for rapid prototyping, many of which are available to almost everyone. These are all kinds of single-board computers and amateur boards with programmable microcontrollers: Raspberry Pi, Arduino, Intel Galileo, and others. For the rapid manufacture of the body used 3D printing.
We owned these tools from the very beginning, so we needed to find only a suitable IR sensor and put everything together.
')
Buying a sensor
A suitable option for us was the sensor used in the device IR-Blue RHWorkshop Melexis MLX90620. This is a rather primitive sensor with a 16x4 matrix, but already connected to the board with Bluetooth, and all the source codes for it are available on GitHub . For prototyping the most. We decided to order a ready device, especially since it was much more difficult to order only the sensor from the manufacturer.
Many of Habr's readers know how difficult it is to find something rare in our stores, you have to order because of the “hillock”, besides, wait a week or even months (hello “Russian Post”). We were ready for this and much more from our native mail, but could not even think that something could happen in the delivery service at the London airport!
By the time the company on the kickstarter has long passed, and the remnants of IR-Blue sold on the site ( RHWorkshop ). We ordered one in assembly and one in the form of a set of components for self-assembly, it is a bit cheaper, and from it we would like to use the sensor itself, even it would not be necessary to drink it.
By the seller’s assurance, the transport he uses delivers to Moscow in 14 days. The seller sent us a tracker, we saw by it that the package had already arrived in London a couple of days after sending from the USA! “Excellent,” we thought: what a speed. After that we stopped following the tracker, relaxed and decided that everything was in order. 14 days have passed, there is no package, we track the tracker, it shows that the package is still in London! They wrote to the seller, as he designed the shipment, and only he can kick the transport company. After a short correspondence with him, it turned out that the customs officers in London did not agree with the announced price for this type of parcel. And the most important thing is that they do nothing, they would send it back and that’s it, and they just don’t let it go, they keep it! After discussing the situation with the seller, they decided to recall, repack and send in two parcels. While there was a refund process, we thought that the increased shipping charge would not be an option, we were asked to return money for a set of components, but to send only the assembly.
Two weeks later we received it. The device worked steadily, but did not differ in the quality of the case and its materials. However, like most products with kickstarter. But the software to it is insanely buggy and capricious on different phones and different versions of Bluetooth. After a long dance with a tambourine, we hardly managed to get a picture through our native software.

Assembly
Having played enough with the device, they added a list of components for the first CamIRa prototype:
-Raspberry Pi model B
-Arduino Uno
Servo drives FS90 2 pcs. fs90
- Bracket for servomotors 9g servo bracket
-RaspiCam raspicam
- 16x4 Melexis MLX90620 sensor as part of the IR-Blue device
The brain of the device is the Raspberry Pi. General management of the device, receiving commands from the server, receiving video from RaspiCam, interacting with the Arduino is a Java application running on Malinka. For control of servomotors, as well as reading data from an IR sensor, Arduino is engaged (in the first versions, data from the sensor were obtained directly via Bluetooth), which is controlled by Raspberry via UART / RS-232. For this purpose, they even had to develop their own RS-232-based Raspberry-Arduino text interaction protocol.
Assembly it looks like this:
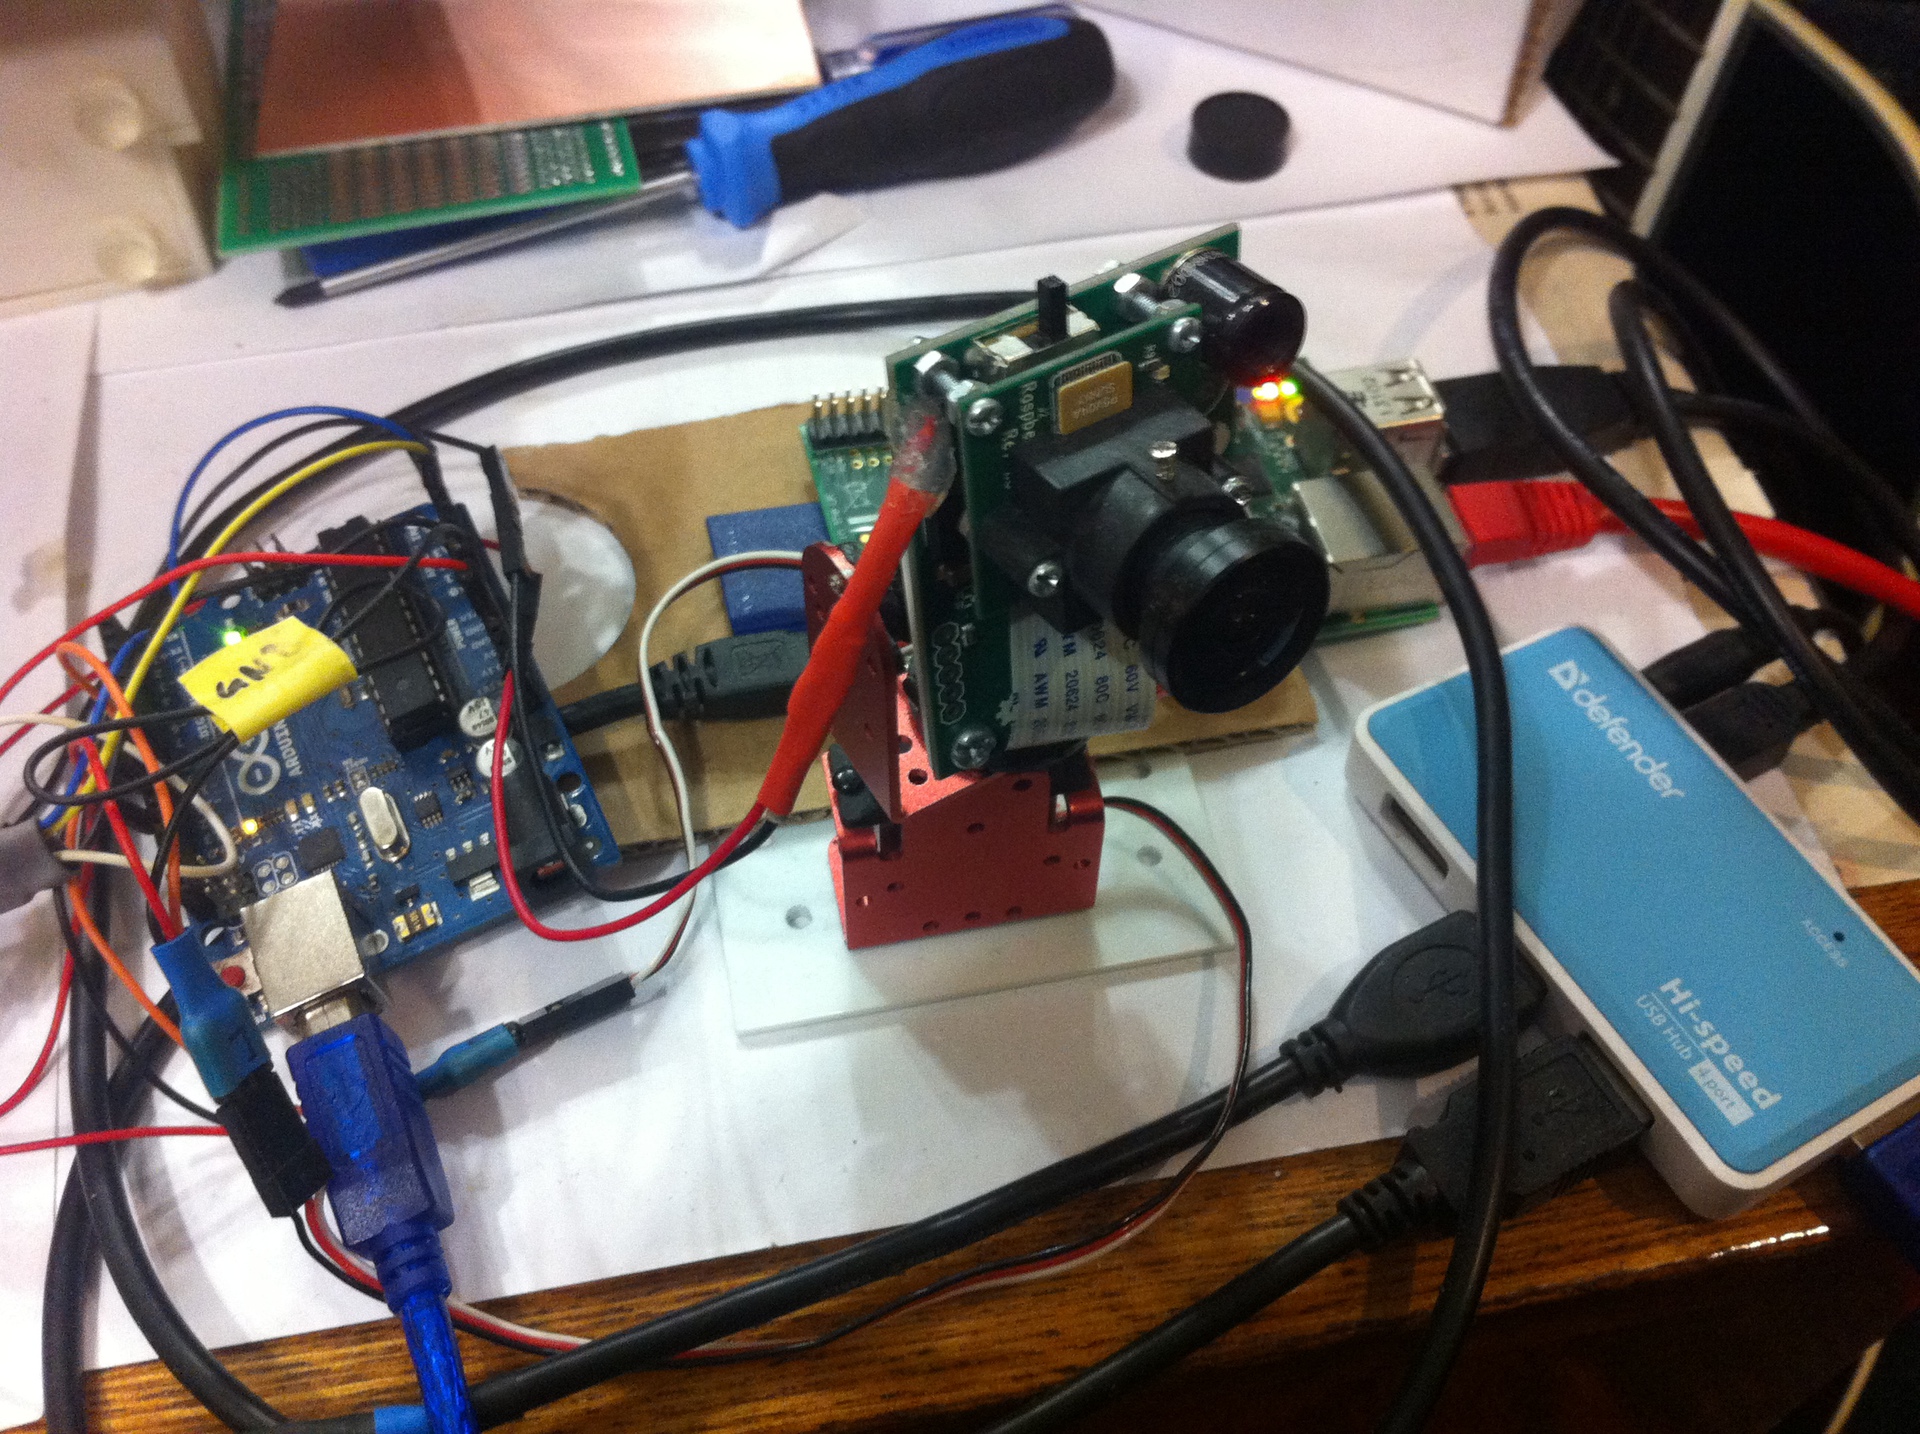
On top of the disassembled IR-Blue, the RaspiCam is attached with an adapter for a wide-angle lens printed on a 3D printer. All this is installed on a bracket with servomotors and connected to the Arduino and Raspberry Pi. By the way, we had to make our bike with a lens, since the camera had a 50 degree angle of view (FOV), which is even less than the IR sensor. Upgrade instructions are on the bourgeois site: wiki.raspberrytorte.com/index.php?title=Camera_Module_Lens_Modifcation . A small snag was that the lens holders should wait for a long time with e-bay, and in addition the distance between the mounting holes of the holders does not match the distance on the RaspiCam board. Therefore, a 3D model was quickly drawn and printed.

Anyone wishing to increase the viewing angles of RaspiCam, here's an adapter model: file . It is necessary to print it out on the printer, cut the M12x0.5 thread, gently unscrew the native lens from the camera with tweezers, put the adapter on top of the adapter and screw in these lenses or fingers2 . Our experiments have shown that the Daiwon BL2120 [DW2162] lens gives the greatest angle and best quality. It turned out to be FOV = 110 degrees, which is quite enough for an extensive coverage of a 4x5 m2 room, plus RaspiCam gives a Full HD picture.
Software component
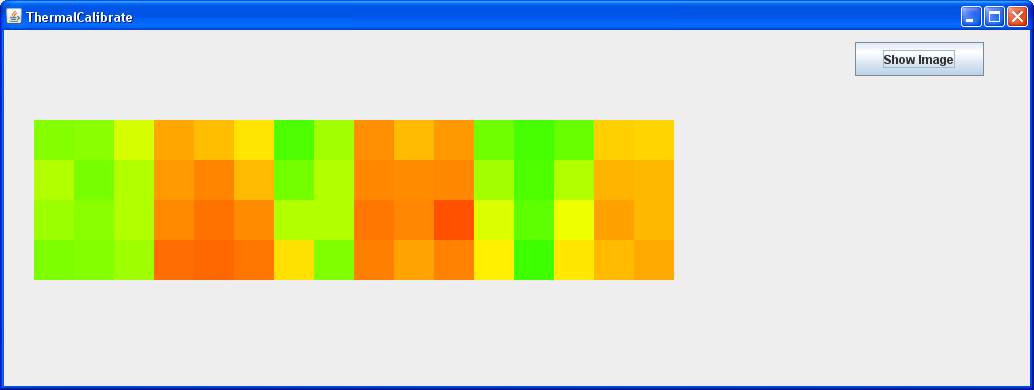
Having finished with iron began to write software for it. Initially, the study took source codes for the program IR-blue for iPhone with github. But, as it often happens, it is more difficult to understand someone else’s code than to write your own, so the IR-blue code was not used. Armed with a datasheet on the sensor, we began to develop (by the way, a little later, to process the IR images, it was tempting to take the code of the Habr Post project mentioned in our first post, but in order not to waste time, the sources were practically not even inspected). Our first program for this "monster" looked like this (these are three fingers):
Subsequently, it formed the basis of our service program, in which the calibration of IR sensors and servomotors is performed. After several weeks of work, the program window looked like this:
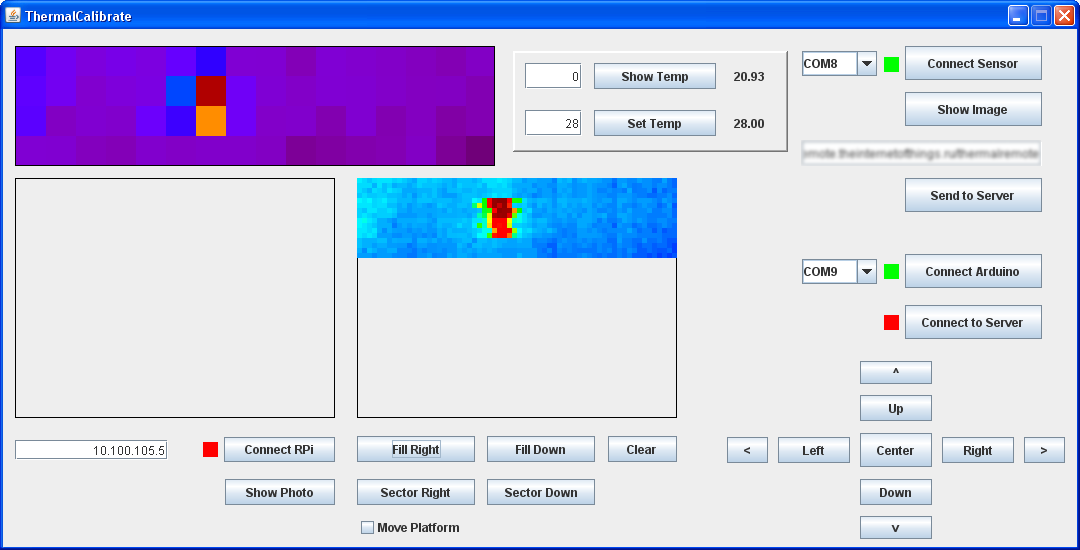
In the screenshot of the program, the image of a cup with boiling water: at the top left of the sensor in the center position, in the center - a composite image of several sensor movements (IR image).
Gradually debugging and testing functions directly from the PC, we began to transfer functionality to the server. Now Malina works with the server via HTTP / S (for streaming video) and WebSockets / wss (for transferring commands). The server part consists of several services - a video server and a WebSocket server (both are their own development in java, spinning on Tomcat) deployed to Azure (thanks to the BizSpark program), a web server with a personal account is also a Java application using the Play framework! , a set of Bootstrap + jQuery and self-written JavaScript, is deployed on GAE.
As a result, the overall interaction architecture looks like this:

Neither the screenshot below shows the result of the device operation with the Omron D6T-44L-06 ( Omron ) 4x4 sensor. In the browser in your account on top of the streaming video (online) a thermal image is superimposed.

In the next article, we will tell you more about the software part, in particular about the implementation of streaming video using RaspiCam, Raspberry Pi and various libraries for converting and processing streaming video. The next post will be useful to anyone who would like to make a full-fledged video surveillance system out of Raspberry. If someone is not familiar with us, we recommend reading our first post.
Source: https://habr.com/ru/post/226351/
All Articles