Quickly create callback scripts with Voximplant
 It is not surprising that in many business processes, one way or another there is such a task as to call one phone number and then connect it with another number. Most often, this service is called callback or callback, sometimes - call order. Many have met him on the websites of online stores, but in most cases this is not an automated callback, but a regular application that falls to the manager by email or appears in CRM, after which the manager dials the client’s number and talks to him. Some large companies implement automated callback and even integrate it with queues in the contact center. In this post, we will look at how to create a callback script using the VoxImplant platform in just a few minutes, as well as integrate this farm with some existing backend for storing / retrieving data on a call, store pop-root and welcome under cat.
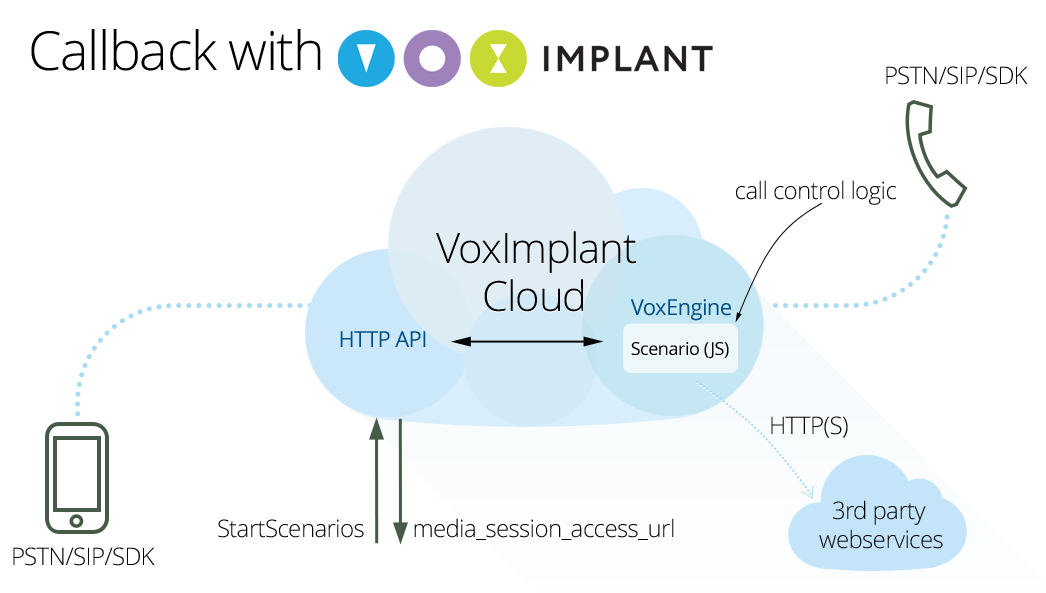
 To begin with, let's duplicate the scheme on a larger scale in order to make it easier to explain what, how and with what it interacts when implementing our callback service.

It looks a bit cumbersome, but in fact everything is very simple and convenient. The developer of VoxImplant (to get a developer account you need to register on the site , it is absolutely free) via the HTTP API makes a request to the VoxImplant cloud, after which the script server launches a script previously written in JS that describes the logic for making calls, connecting them, and also , business logic. Before you make an HTTP request to run a script, you obviously need to write it, and also hook it to an application through a rule (rule), then you need to specify the id of this rule in the HTTP request so that it is clear which script should be launched. So, in order:
- Create a VoxImplant application.
- Create a script.
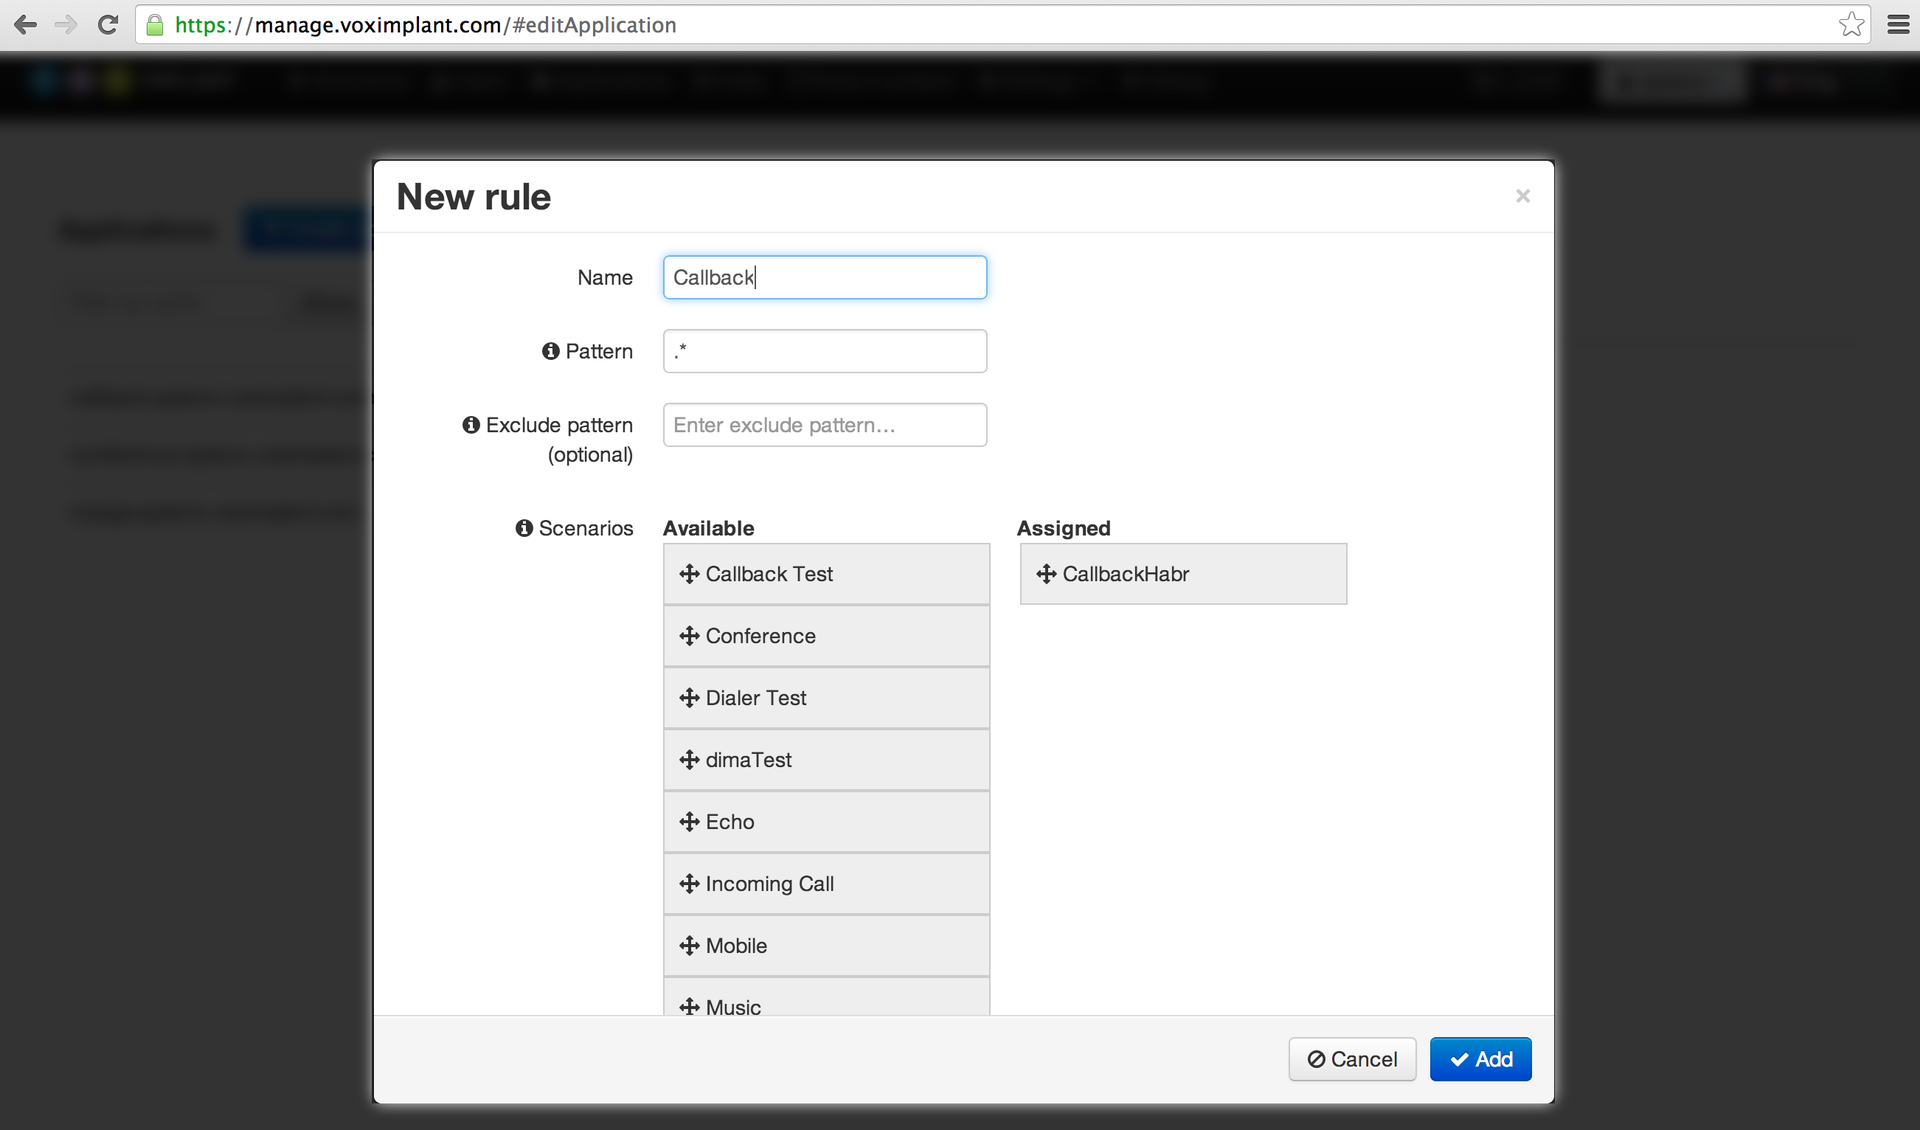
- We tie the script to the application using the rule.
- Make an HTTP request to run the script.
After completing the HTTP request to run the script, if everything is done correctly, media_session_access_url will come in response, which allows you to continue remote control of its operation after running the script. For example, if you need to finish the execution of a script at some specific point, you can write the following in the script:
VoxEngine.addEventListener(AppEvents.HttpRequest, handleHttpRequest); function handleHttpRequest(e) { VoxEngine.terminate(); } In this case, making a request for media_session_access_url, you stop the execution of the script. We return to the implementation of our callback to phone numbers. Create an application in the Applications section of the control panel, call it trite callback (the full name will be callback.account name.voximplant.com), and in the Scenarios section we create a new script of the following type:
var call1, call2, data; const callerId = "+1234567890"; // VoxEngine.addEventListener(AppEvents.Started, handleScenarioStart); function handleScenarioStart(e) { // customData, // script_custom_data HTTP- StartScenarios // 1:2 data = VoxEngine.customData(); data = data.split(":"); // - 1 call1 = VoxEngine.callPSTN(data[0], callerId); // call1.addEventListener(CallEvents.Connected, handleCall1Connected); call1.addEventListener(CallEvents.Failed, function(e) { VoxEngine.terminate(); }); call1.addEventListener(CallEvents.Disconnected, function(e) { VoxEngine.terminate(); }); } function handleCall1Connected(e) { // , call1.say(", , ", Language.RU_RUSSIAN_FEMALE); call1.addEventListener(CallEvents.PlaybackFinished, function(e1) { // 2 call2 = VoxEngine.callPSTN(data[1], callerId); // call2.addEventListener(CallEvents.Connected, handleCall2Connected); call2.addEventListener(CallEvents.Failed, function(e2) { call1.say(" , ", Language.RU_RUSSIAN_FEMALE); call1.addEventListener(CallEvents.PlaybackFinished, function(e3) { VoxEngine.terminate(); }); }); call2.addEventListener(CallEvents.Disconnected, function(e2) { VoxEngine.terminate(); }); }); } function handleCall2Connected(e) { // - VoxEngine.sendMediaBetween(call1, call2); // VoxEngine.easyProcess(call1, call2); } In short, this script calls the numbers that we pass through the special request parameter StartScenarios script_custom_data as line1: number2. First we dial to number 1 and play the message using TTS, then we dial to number 2 and connect two calls to each other. In this scenario, we do not work out some cases at all, for example, if you have not phoned to number 1, then we simply complete the execution of the script. If you conjure a little, you can notify the outside world that something has gone wrong, change
call1.addEventListener(CallEvents.Failed, function(e) { VoxEngine.terminate(); }); on
call1.addEventListener(CallEvents.Failed, handleCall1Failed); and describe handleCall1Failed:
function handleCall1Failed(e) { // var code = e.code, reason = e.reason; // HTTP- Net.httpRequest("http://somewebservice", function(e1) { // - e1.code, e1.text, e1.data, e1.headers // VoxEngine.terminate(); }); } This is the simplest example with a GET request. The HttpRequestOptions class is available for configuring and managing the HTTP request from the script.
In the same way, using the Date, you can measure the duration of individual calls or sessions within a script and send data to the outside world, if for some reason you can go into the call history to obtain this information does not match the logic of the service / application. As you probably already understood, we tried to make a very flexible system so that the developer could choose the mechanism for solving various tasks.
After the script is ready, we need to save it under some name, for example, CallbackHabr and go to the Applications section in order to hook the script to the rule and eventually get its ID.

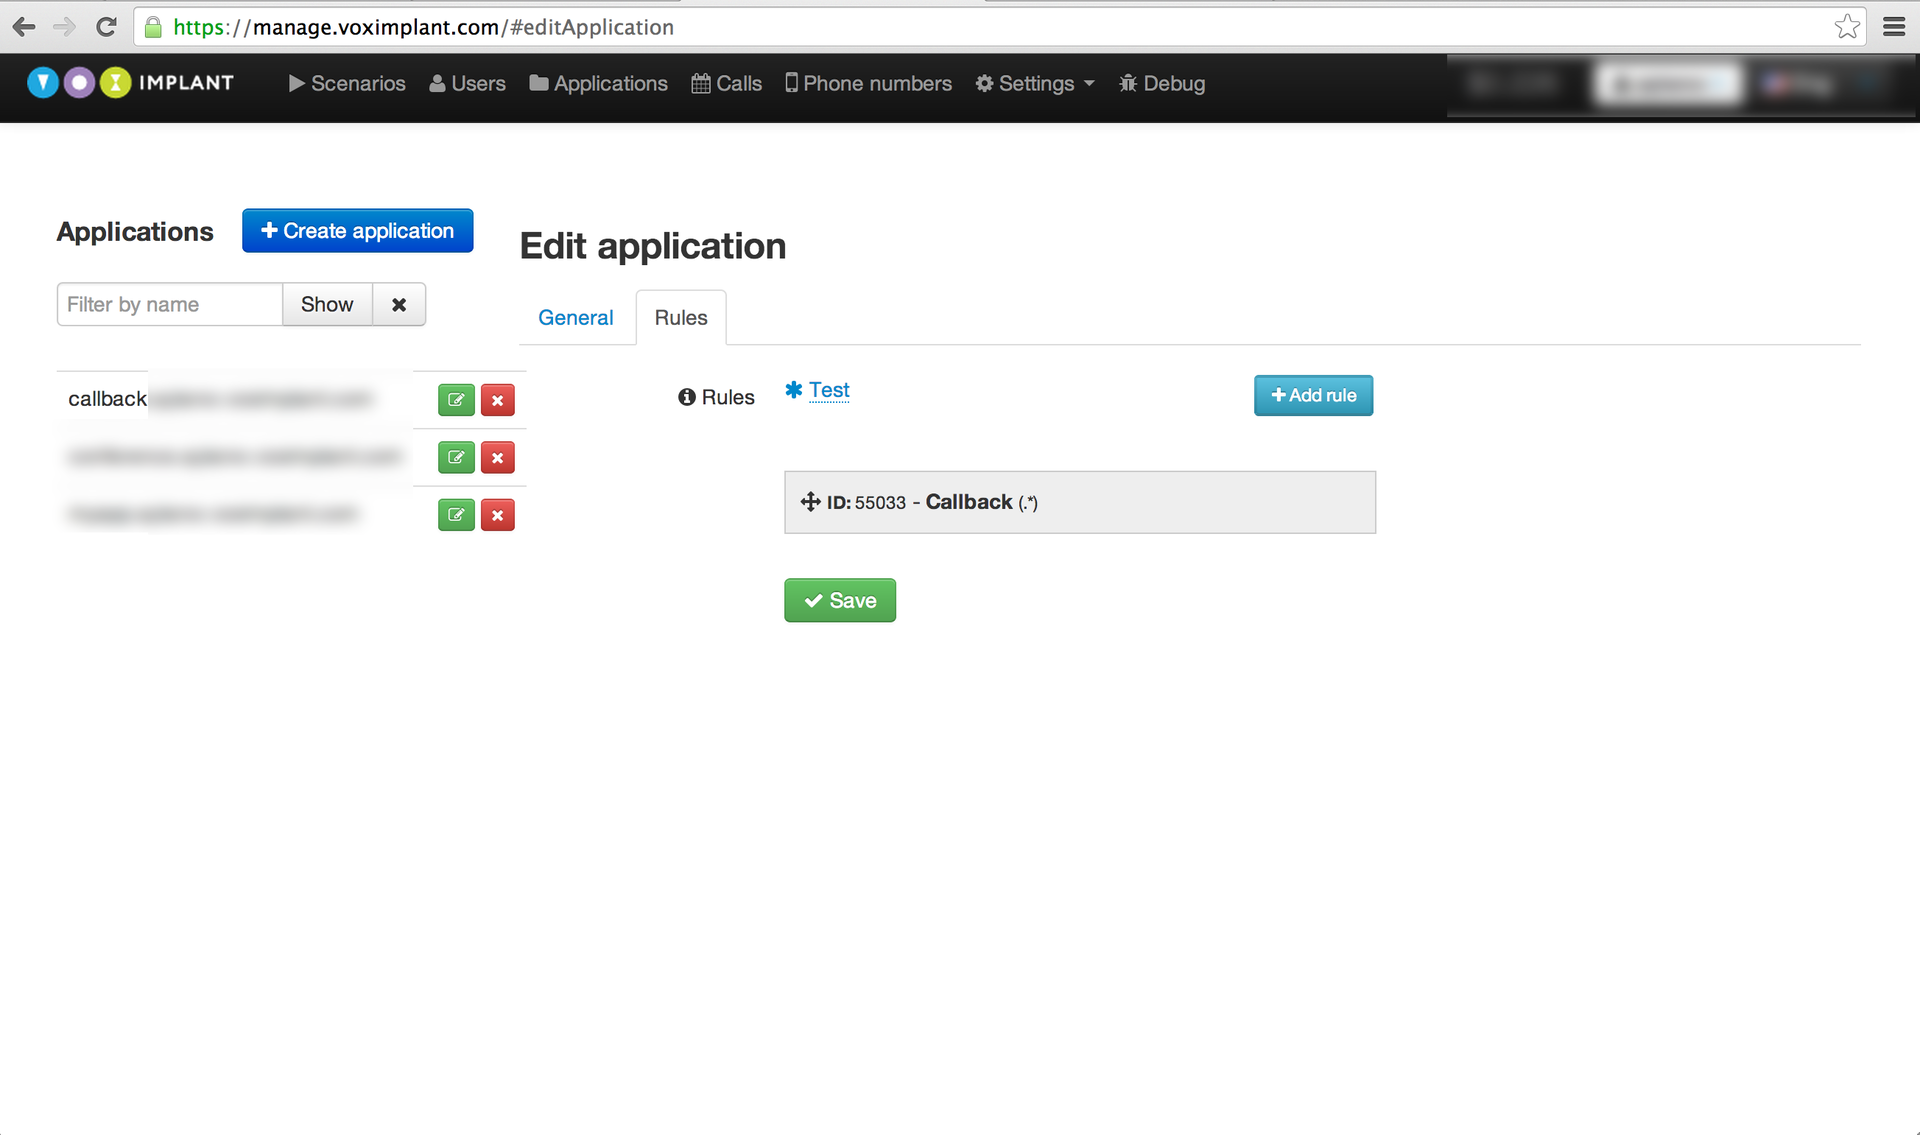
To get the ID of the rule, you need to tick a little (in the future we will try to eliminate this drawback of the control panel) - after creating the rule, you need to save the application (it is the application, not the order of the rules), that is, go to the General tab and click Save there. Then again open the application for editing and open the Rules tab, where the rule ID will be displayed (it can also be obtained via the HTTP API):

Well, in general, and that's it, now you can make an HTTP request StartScenarios, for which you will need some more parameters, you can find out your api_key in the Profile section. The request will end up looking something like this:
https://api.voximplant.com/platform_api/StartScenarios/?account_id=1&api_key=eec36d6c-a0eb-46b5-a006-1c2b65343bac&rule_id=55033&script_custom_data=number1%3Anumber2 As a result of success, something in the spirit will come back:
{ "result" : 1, "media_session_access_url" : "http:\/\/1.2.3.4:12092\/request?id=93e41c6e20811b9b.1380201554.0@1.2.3.4&token=36bc7ce95edc679e32d83bb6f3ad985f" } Through this media_session_access_url you can continue to communicate with the session, if necessary. Logs are always available for debugging the script, which are located in the Calls section (arrow in the upper right corner), as well as our overdriver, available here . For convenience, we downloaded the script from this post on GitHub so that you can experiment quickly.
Callback script on github
')
Source: https://habr.com/ru/post/226057/
All Articles