Switch to Sketch. Part 1
I learned about Sketch a year ago. I downloaded the demo then still the 2nd version. Frankly, she did not impress me at all. Something too simple seemed. I’m used to Adobe’s fancy software interfaces, and for some reason I don’t like the layout of Apple iWork-style panels (Pages, Numbers, Keynote). Besides, it turned out to be more comfortable for me to work with the dark interface, which is now in Photoshop CC. Plus, Sketch 2 was pretty crooked, contained a lot of annoying bugs, and in general did not give the impression of speed. In general, I played with the demo and safely forgot. However, it turned out that nothing ...
')
But over time, it became more and more often to receive complimentary reviews about the program (for example, here and here ). Especially a lot of them began to appear in the spring of 2014, when Bohemian Coding released the 3rd version of its product. The creators assured that, being the designers themselves, they focused on the manufacture of a product that was as sharpened as possible for the needs of designers. First of all - interface designers and websites. Well, that is, sort of for me.
I downloaded the demo again of the new version, poked, twisted. Something like something not. And again, I did not get the impression that this program suits me. Returned to the usual photoshop.
And it so happened that I had to do a very complex and extremely interesting project, where I needed to draw interface elements for iPad with Retina resolution. There were a lot of toolbars, panels, pop-up windows. All this was decided to do with the effect of matte translucency as in iOS7 (transcluent frosted glass). In Photoshop, this is not easy, especially if dynamic objects are required, while moving, preserving the blurring of the layers below. This method, however, is available. But it harbors a number of flaws. First, you need to constantly create new smart objects if the background structure changes. Secondly, on each panel you need to allocate a copy of the smart object with blur to make the necessary mask. In general, the layout swelled out very quickly because of this.
Once I discovered that it barely fits in RAM, it slows down all processes, and on the hard disk it takes about 700 megabytes! I tried to divide the layout into logical components and broke it into several smaller parts. Still, each PSD was at least 100-200 megabytes. In addition, at times it was necessary to simultaneously open two or three of these layouts in order to transfer some layers from one to another. At the same time, Photoshop terribly slowed down, which unnervingly wild, because I have far from the most nimble poppy. My old man is already five years old, with only dual-core Core2Duo and a simple video card with 256MB of video memory on board. At the time of purchase, he more or less coped with the assigned tasks, then because the photoshop was version CS5, but it was not so voracious as the current CC. Alas, Adobe from year to year builds up its products with all sorts of buns and functions, which in nine cases out of ten turn out to be useless and only worsen the performance of a package that has swollen to an ugly state.
In general, the trouble and headache.
And then I remembered Sketch. I found out that there is a Background Blur property for layers, which allows you to simply achieve the desired effect of frosted glass on translucent panels without applying any tricks.
I downloaded the current version 3.0.3 (which, by the way, according to the developers and numerous user reviews, finally lost most of the bugs and misunderstandings). And he began to try. For I firmly decided to switch from Photoshop to something more suitable, despite the fact that I was faithful to the Adobe product for 15 years.
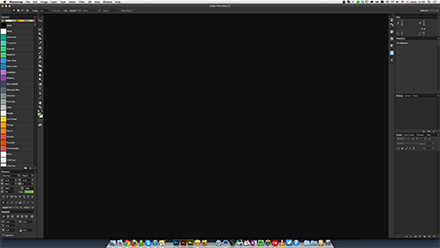
Here’s what my panel layout looks like in Photoshop CC (clickable):
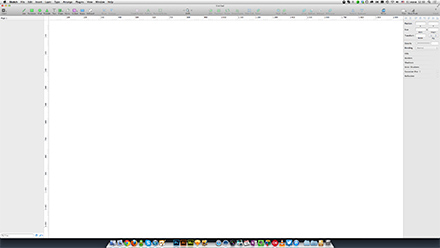
And this is how the window of the launched Sketch looks like with a little fine-tuning of the top toolbar for my needs:
Well, it is time to test the program in work.
To begin with, I decided to implant in the layout the foundation that I had in EPS format. This is a simple vector illustration of a cartoon character.
Photoshop allows you to open EPS as a smart object that can only be edited in Adobe Illustrator by double clicking on the layer name in Photoshop. I didn’t have this option at all, because there was a need for certain moments to hide some objects from the illustration, move them to another place, rotate and make them translucent. Therefore, in the illustrator, I had to select the necessary objects separately, transfer them via Copy / Paste to Photoshop as smart objects, until I received the necessary set of 20 layers of the components I needed. On the one hand, this turned out to be a very tedious task, but on the other hand, the layout of only one PSD format grew to an indecent 40 megabytes, although the original EPS weighed only 7 megabytes. This is such an “amazing” bundle for the products of one package - Photoshop and Illustrator. It is strange that so far Adobe has not made an adequate and mutual understanding of the PSD and AI formats by these programs.
A reasonable question may arise: why do I not fully work in illustrator? Well, somehow I did not work out with him. I don’t like something in him much, I just can’t get used to it. And besides, he is a monster no less bloated than Photoshop, and its performance is by no means encouraging. Plus, there is no way to make the effect of frosted glass with simple methods. In other words, I need Adobe Illustrator only as a kind of intermediate tool, and as a basic medium for design I personally do not fit.
And so I used Illustrator as a staging base. The fact is that although Sketch understands the format of EPS, it imports somehow crookedly, often distorting fills and strokes. But very good friends with the format Scalable Vector Graphics (SVG). Therefore, in the illustrator, the existing EPS is overwritten in the SVG and opened in Sketch. I must say, the loading of the layout flew in a matter of seconds, and all the objects retained their characteristics. I will say even more - all the groupings of vector forms turned out to be true, so choosing the right object and doing something with it was easier than ever. Actually, what you need. And the file in the .sketch format in the end turned out to be a little more than the original EPS - 7.5 MB. Against more than 40 megabytes .psd!
At the same time, I looked at the sizes that both programs occupy on disk and in memory, and also measured the speed with a stopwatch to start, open and write a document, exit a program.
Here are the results:

As you can see, Photoshop with a bang loses in all respects. In addition, it does not allow to fully edit all objects dragged from the illustrator, as Sketch can do.
Most of the keyboard shortcuts were the same for both programs, but some had to get used to Sketch. that, in general, is not a problem. And even after some time, returning to Photoshop, out of habit, I already tried several times to use the sketch shortcuts. All of them are described on this site: sketchshortcuts.com
In the same place, by the way, it is described how to add your own shortcuts. For example, in Sketch there was no keyboard shortcut for showing / hiding the guide guides, so I added the familiar Cmd-;
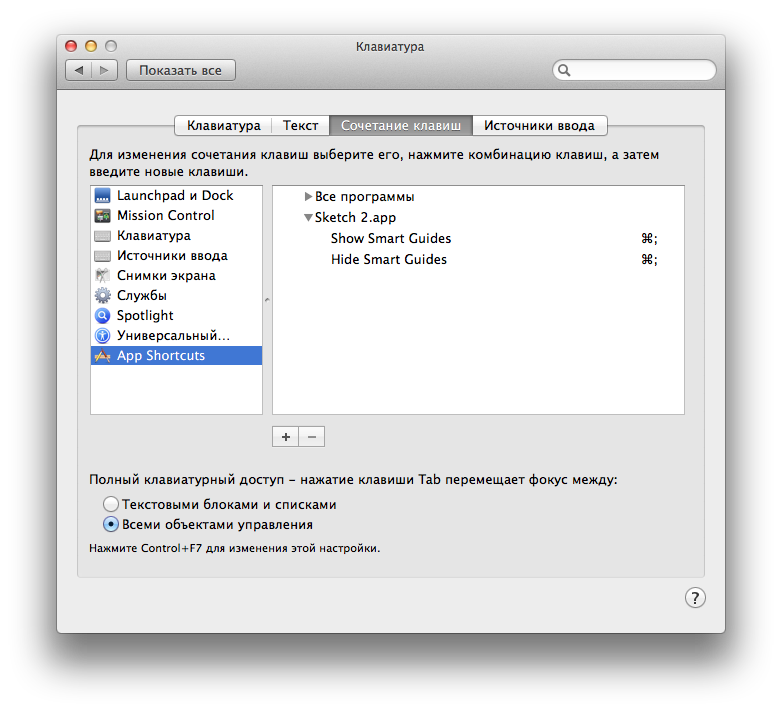
I believe that in the future, as I use the program, I will add a few more convenient combinations. However, those that are available are quite enough.
The next step was the need to create the very translucent window with the effect of frosted glass in the style of iOS7. As I wrote above, in Photoshop I had to use a trick with a copy of a smart object that was subjected to Gaussian blur (Gaussian Blur 20 pixels) with added noise (Add Noise with a value of 1%).
This is how the layouts in Photoshop looked. For example, I took a simple background photo and added a white rounded rectangle that simulated a pop-up window with frosted glass effect:
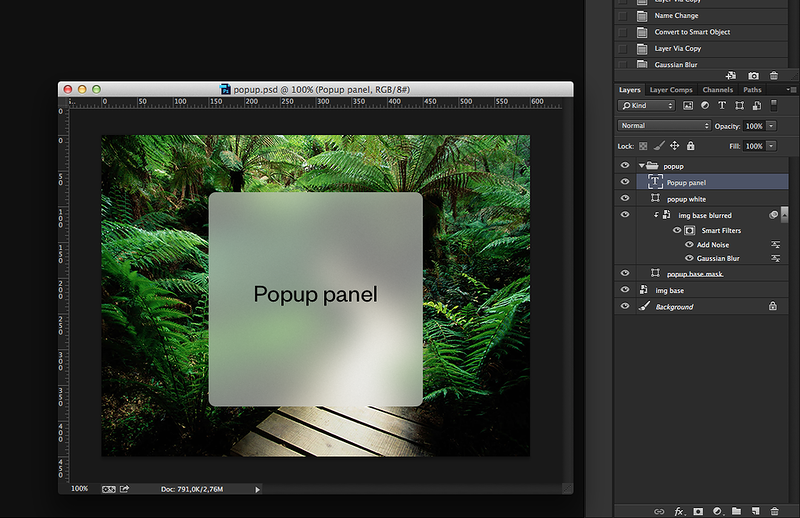
The size of this PSD is 5.5 MB
I did the same for Sketch using the Background Blur and Noise effects. This is what happened:
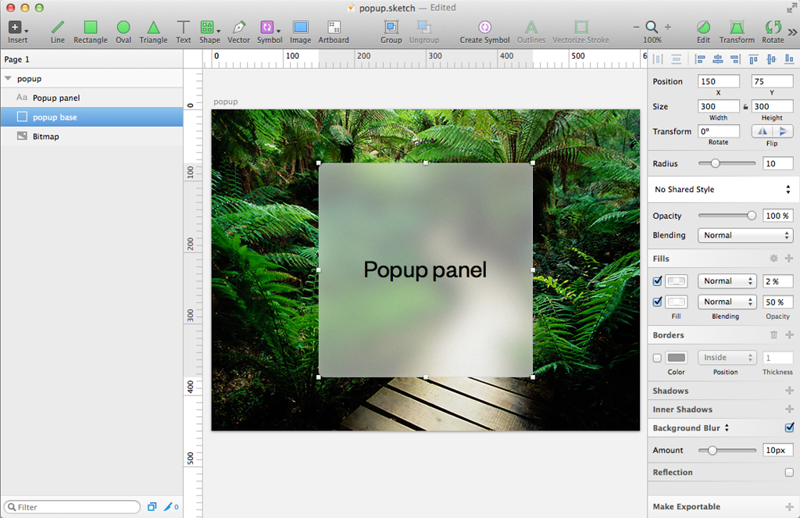
And the size of this .sketch file is 643 Kb. Almost ten times less! At the same time, there are only three layers (in fact, only one layer is needed for the basis of the popup, and not three, as in Photoshop).
Needless to say, there are no arguments in favor of Photoshop, with which I worked for 15 long years since version 3.0.
Next, I took a larger image, already under the iPad Retina, and began to create translucent windows, stuffing them with icons and text. And it turned out that my weak video card does not withstand such a load, and when I try to move all this stuff with an abundance of blur, very significant brakes begin.
But as it turned out, this is an easily solvable problem. Because Sketch has such an amazing thing as linked styles.
Simply select one of the objects, which has all the necessary effects of transparency, blur, fill and noise and add a linked style:
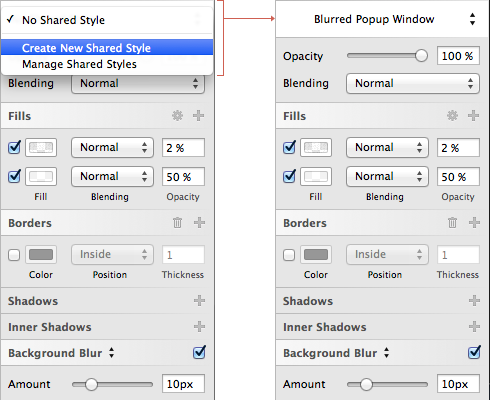
Then apply this style to all desired objects.
And if you need to somehow shuffle all these objects on the screen, you can temporarily remove the effects of blurring and noise by clicking on the appropriate checkboxes, and these effects will turn off for all objects with this style. Then the movement and transformation of all layers will be as fast as possible. Well, before exporting an image, you need to include effects just as easily with a couple of clicks:
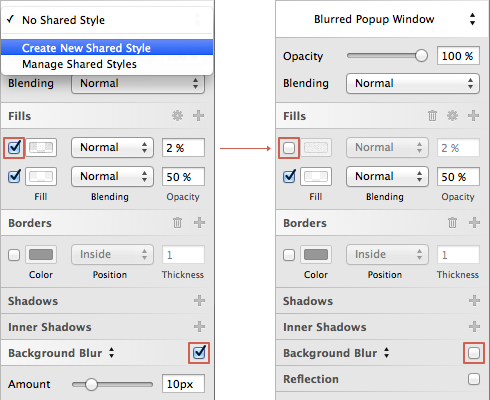
When I created 10 such popups in Photoshop, the file size increased to 19.1 mb, while the similar .sketch grew only to 672 kb !!!
In Sketch, there are no buttons for aligning objects relative to each other, although there are such items in the Arrange menu (Align and Distribute). At first, it discouraged me, because I was used to using such buttons on the toolbar in Photoshop. But as it turned out, they are completely unnecessary. After all, Sketch perfectly implemented smart guides, and when you move an object, you can easily recognize when it sticks to the edges of another object or is in the center:
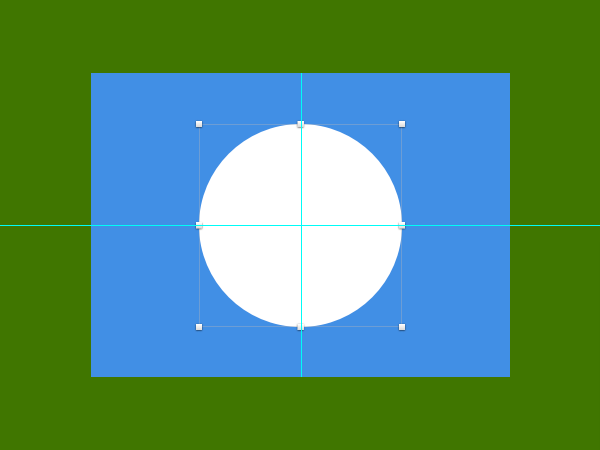
During the experiments, I discovered a number of interesting features of Sketch, which incredibly improve and speed up the workflow.
For example, in Photoshop, the “bouncy” of the text was always annoying if it was necessary to change the type of alignment of lines. As soon as the text box was centered, the alignment to the left was applied, as the entire text was shifted to the right. Probably, there is some kind of logic in this, but agree that every time you had to anticipate this behavior and again adjust the position of the layer:
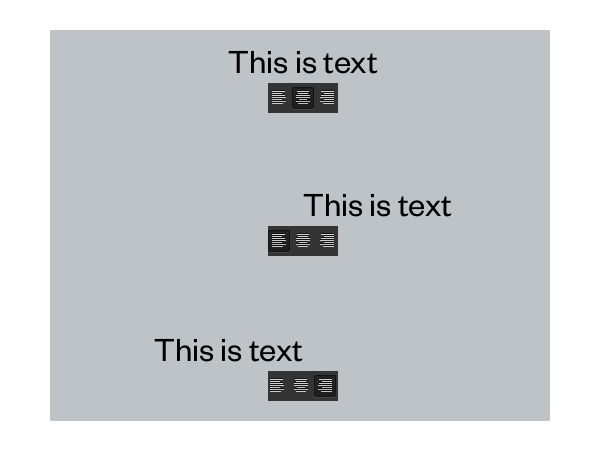
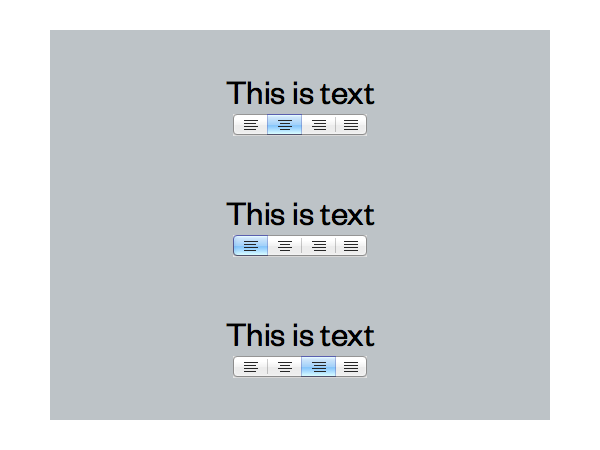
In Sketch, no jumps occur. The text block remains in place, whereas only the mutual alignment of lines inside this block changes. Trifle, but nice:
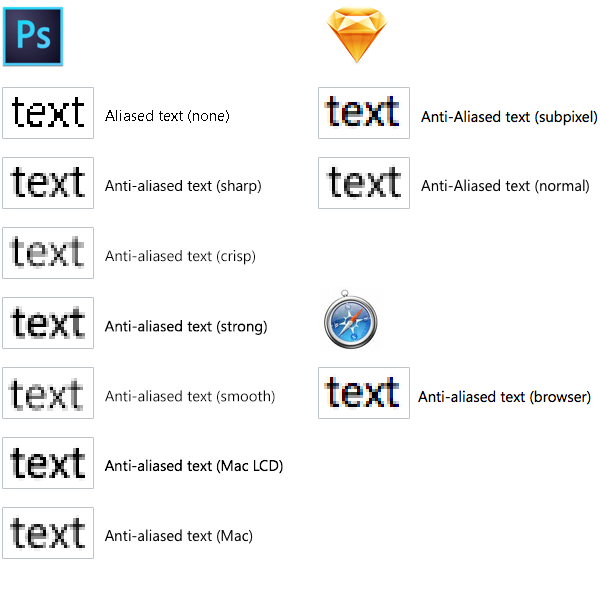
By the way, a little more about the text. Website and interface developers will be pleased to know that Sketch uses system anti-aliasing, and you can both enable and disable sub-pixel rendering, which allows you to get the most out of what is displayed on the website or in the program. And what about our photoshop? In the CC version, in addition to the existing five types of anti-aliasing (None, Sharp, Crisp, Smooth and Strong), two more were added (Mac and Mac LCD). But none of them repeat the anti-aliasing used, for example, in browsers. Which makes this whole bunch of anti-aliasing techniques almost useless (although None can be useful in extremely rare cases).
Here's how to compare the types of anti-aliasing in Photoshop, Sketch and Safari browser:
And if in Photoshop, after creating a text object, you need to select something else in the toolbar, for example, a tool for moving objects, and to return to text editing, select a text tool, then Sketch doesn’t need to switch between tools. Select the created text layer, double click and edit. After that, just click on any other object or an empty area of the canvas.
It is very convenient to highlight the object with a blue stroke when you hover the mouse. Moreover, the frame around the name of the object in the layers palette is also highlighted:

When working in Photoshop, I often encountered a strange and unpredictable extrapolation of dimensions. For example, you need to insert into the layout about a dozen images of different sizes, turn them into smart objects and adjust the height of all these objects to a given size. Let's say reduce them proportionally to 100 pixels in height.
And here torments often began. Since each object had to be reduced manually, constantly controlling the accuracy of extrapolation. In this case, it was necessary to refer to the top panel, where the default sizes were specified in percent, and to enter the exact value in pixels, it was necessary to add "px", and it was very annoying at times if you did not switch the layout in time and entered "scr", to which photoshop swore, because he does not understand such units. In addition, the chain symbol responsible for proportional zooming is unfortunately always disabled by default, and you had to remind yourself to turn it on every time. Of course, one can get used to such torments, but is it necessary?
In most cases, the camera shop coped with scaling correctly, but sometimes there were instances whose height was either 99 or 101 pixels. In reality, there was just a barely visible translucent strip on one side.
In Sketch, if you scale objects (this is especially important with regard to raster objects), then they take exclusively integer values, such as you specified in the inspector window. And no "fluffy" edges.
And at the same time, no additional characters like “px” need to be entered, since Sketch was originally designed to work with pixels. However, you can enter and interest, it normally recognizes and scales the object. In addition, you can use arithmetic operations like 300 * 2 or 256 + 128.
The variability of the Cmd-D keyboard combination has proven to be very useful. If the layer was not moved with copying, this shortcap simply duplicates the layer. But if you moved the layer while copying (while holding down the Alt key), calling Cmd-D will duplicate the object with the corresponding offset from the original. So you can quickly scatter copies at the same distance.
There is another, more curious way to distribute objects - creating a grid of objects. First you need to select the required objects:
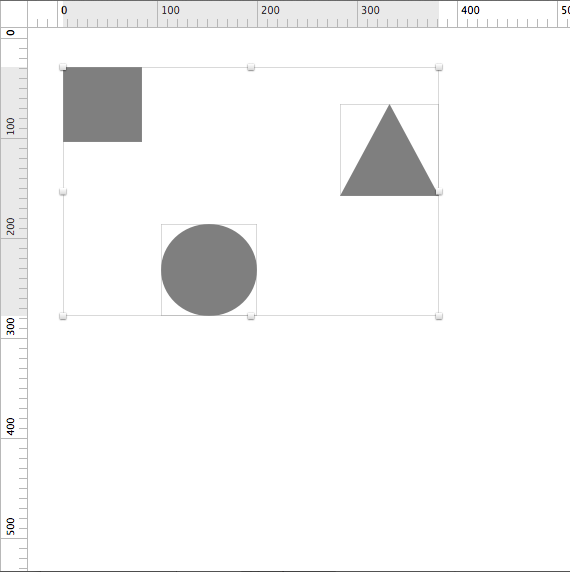
Then you need to select the menu command Arrange> Make Grid ...
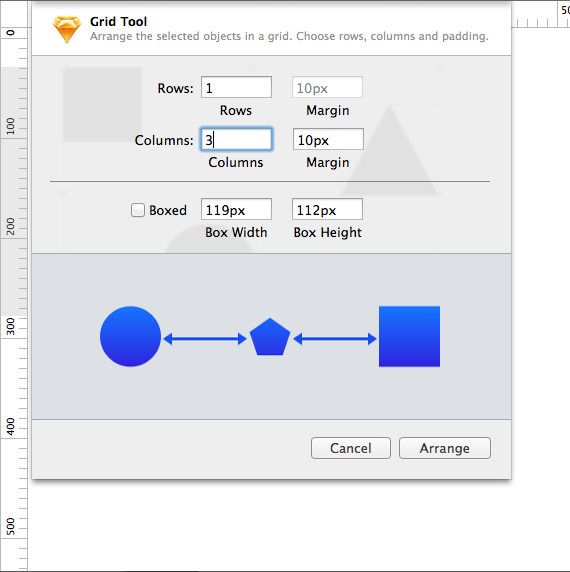
And the objects will be distributed with the specified indents:

And if you turn on the Boxed checkbox, then it is not the linear dimensions of the objects themselves that are taken into account, but the same size boxes, inside which the selected objects are placed:
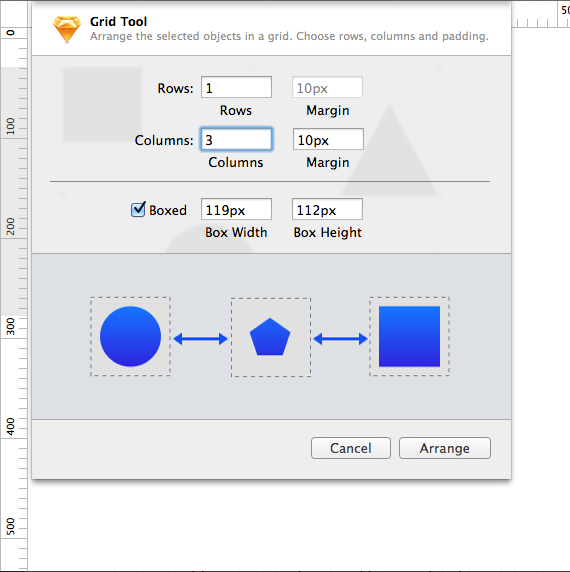
The size of the proposed box is automatically calculated by the program for the largest size of one of the objects, and the objects themselves will be centered inside the box horizontally and vertically. This is very convenient for the distribution of unequal objects:
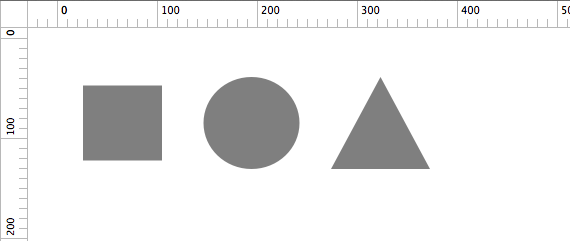
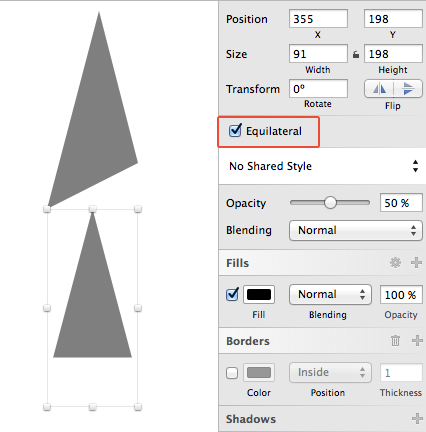
There is, by the way, a curious option for triangles. If you have edited the drawn triangle so that it becomes with different angles and sides, you can easily turn it into an isosceles by clicking on the Equilateral checkbox on the inspector:
Of course, even in the most recent version there are small annoying bugs. For example, manipulations with objects sometimes leave screen artifacts. But developers are actively working to eliminate this problem. In beta version 3.0.4, I did not observe such nuances. It is obvious that the program from version to version will become better and more stable. In addition, it is encouraging that the developers heed the wishes of designers. I also offered a couple of ideas, and I was answered the next day, including my wishes in the wishlist for future versions.
That's all for now. In the following sections, I will talk about my further discoveries in the wonderful program Sketch.
Source: https://habr.com/ru/post/226025/
All Articles