Seeedstudio Wifi Bee Engine Management
Introduction
Now on the market for wifi-diy-devices such a situation has arisen that most people buy XBee modules rather than Wifi Bee, and, accordingly, there are also more examples of some projects on the Internet for XBee. I would even say that there is almost no info on Wifi Bee at all and I had to get acquainted with it by the comments of the developers in the firmware files. I used this module version 1.1 in the management of a 6wd machine and, in general, a powerful engine turned out. Now I want to share with you what is available. I hope you will help somehow in your projects. Reference codes are fully working.
The initial composition is as follows:
- Arduino Due / Uno which receives command bytes from Serial from Bee and outputs PWM with different duty cycle
- motor drivers on L298
- Wireless Proto Shield as a nest for Bee and his flash driver
- Wifi Bee itself as uIP client
- Well, a netbook as a TCP / IP server
Sketch for Bee
So, as you know, on the manufacturer’s website there is a small description of the device, a WiShield library for Arduino and a couple of examples www.seeedstudio.com/wiki/index.php?title=Wifi_Bee . We download everything and we throw in libraries. As a result, we have the WiShield folder. (You can download the WiShield-user assembly using the link to GitHub, there are more sketches in it)
In examples, we have builds ready. If you want to do something, then take them as a basis. I took SimpleClient, as it just fits. Then you need to specify that SimpleClient will work - change apps-conf.h:
')
//#define APP_WEBSERVER //#define APP_WEBCLIENT //#define APP_SOCKAPP //#define APP_UDPAPP #define APP_WISERVER Then we change SimpleClient.pde to our needs - we change the IP, gateway, port, etc. Here is the code. The fact that you don’t need to touch the loop at all is a lot of header files and it’s hard to understand them. The getWeather.setReturnFunc (printData) function is important for us.
#include <WiServer.h> unsigned char local_ip[] = {192,168,1,210}; unsigned char gateway_ip[] = {192,168,1,1}; unsigned char subnet_mask[] = {255,255,255,0}; char ssid[] = {"openwrt"}; unsigned char security_type = 0; // 0 - open; 1 - WEP; 2 - WPA; 3 - WPA2 const prog_char security_passphrase[] PROGMEM = {"12345678"}; prog_uchar wep_keys[] PROGMEM = { 0x01, 0x02, 0x03, 0x04, 0x05, 0x06, 0x07, 0x08, 0x09, 0x0a, 0x0b, 0x0c, 0x0d, 0x00, 0x00, 0x00, 0x00, 0x00, 0x00, 0x00, 0x00, 0x00, 0x00, 0x00, 0x00, 0x00, 0x00, 0x00, 0x00, 0x00, 0x00, 0x00, 0x00, 0x00, 0x00, 0x00, 0x00, 0x00, 0x00, 0x00, 0x00, 0x00, 0x00, 0x00, 0x00, 0x00, 0x00, 0x00, 0x00, 0x00, 0x00, 0x00 }; #define WIRELESS_MODE_INFRA 1 #define WIRELESS_MODE_ADHOC 2 unsigned char wireless_mode = WIRELESS_MODE_INFRA; unsigned char ssid_len; unsigned char security_passphrase_len; void printData(char* data, int len){ Serial.println(*(data++)); } uint8 ip[] = {192,168,1,199}; void setup(){ WiServer.init(NULL); Serial.begin(57600); WiServer.enableVerboseMode(true); getWeather.setReturnFunc(printData); } long updateTime = 100; void loop(){ if (millis() >= updateTime) { getWeather.submit(); updateTime += 100; } WiServer.server_task(); delay(10); } Pay attention to:
uint8 ip[] = {192,168,1,199}; This is my netbook's ip at the moment. Change it either to your own or to 127.0.0.1
You need to know that here the printData (x, x) function just sends the received data to Serial. It does this as soon as the condition specified in WiShield / Wiserver.cpp is met:
if (uip_newdata()){ setRXPin(HIGH); if ((req->returnFunc) && (uip_datalen() > 0)){ req->returnFunc((char*)uip_appdata, uip_datalen()); } } In this variant of the sketch, the data to be sent must be in 1 character, otherwise it will work with errors. The point here is again in printData , or rather in markers, with which I can not work, but it does not matter.
There are errors in these libraries from the site, because of which the sketch does not start, this time. And two, this is what to issue in Serial it will not be long texts we need. Therefore, download the polished version of the link:
vk.com/doc84426434_305884673 - library
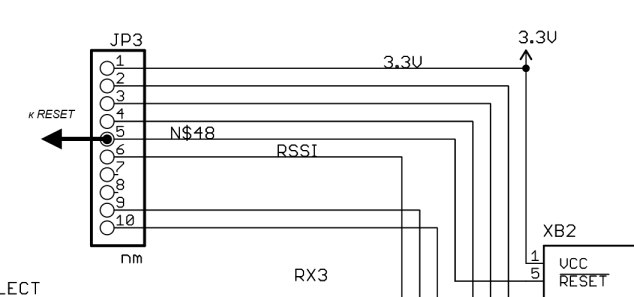
If downloaded, you can flash. If you are dealing with Bee first and want to flash through Proto Shield, and not a third-party Groove type, then be sure to connect 5 pin Shielda to RESET and do not forget to switch to USB.
Server code
Bee uses the uIP protocol, which means the server should also work on TCP / IP. I wrote my simple server on VB.NET and, of course, attached it below (you need the NET Framework 4.5). The main issues were with the management, a piece with the launch was taken from the Microsoft site.
vk.com/doc84426434_305893777 - project in VStudio 2010
Briefly about work: the listening request starts in Form1_Load and therefore, until Bee connects, nothing appears on the screen. If Bee is connected, the message “Press the buttons” will appear. You can press 4 buttons W, S, A, D (well, like in the game) and NumLock1 ... NumLock5 (gearbox). Since the server is simple, it cannot restart itself if the connection with Bee is broken; must take this into account.
Depending on the button pressed, the program sends a specific character to the Bee, and it sends it to Serial, and what does Arduino decide to do in response to this symbol. The sketch for Arduino is simple and does not need a comment and is attached below along with the Bee sketch.
vk.com/doc84426434_306833267 - sketches
Conclusion
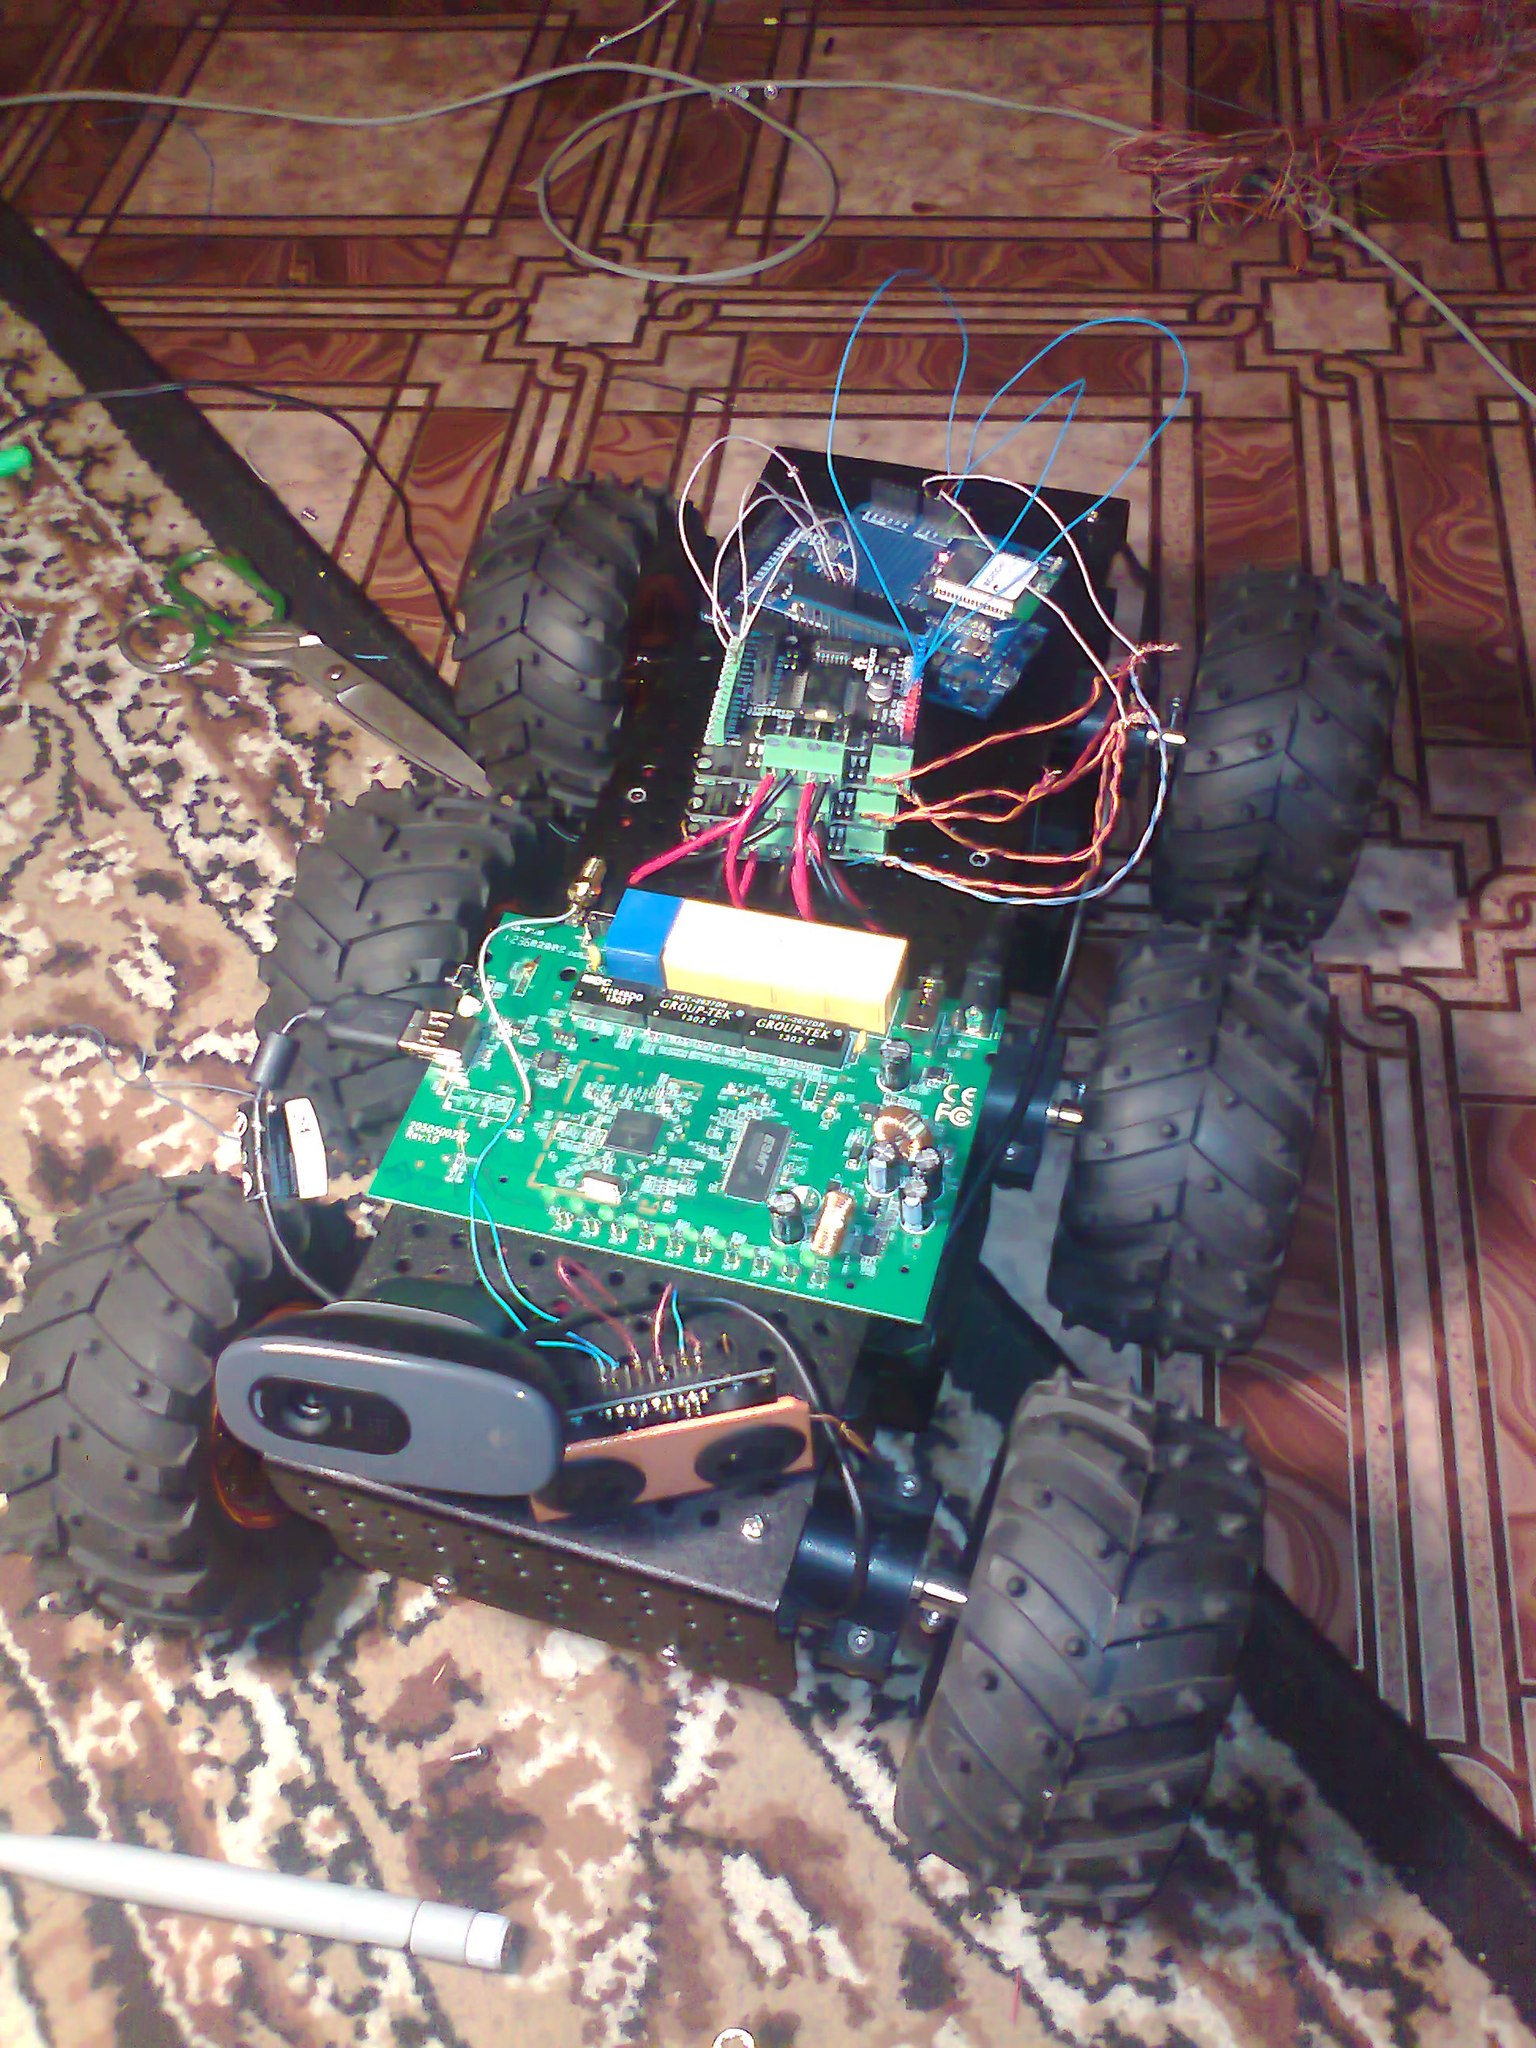
Thus, I tried to show how to make a pleasant such system on the Wifi Bee module. And here is the one-eyed Billy:
True, there is still a video hanging, but there is some material on the Internet.
Source: https://habr.com/ru/post/225671/
All Articles