Meet Swift!
On June 2, at the WWDC 2014 conference, Apple introduced a new object-oriented programming language - Swift. I think many have already managed to see what this language is ( Swift - innovations ), so I will not dwell on innovations. I propose to create a simple project in the Swift language, in order to understand the main differences from the usual Obj-C.

First you need to install Xcode 6 Beta. You can download it from here:
https://developer.apple.com/devcenter/ios/index.action
Download, install and open (installation problems should not arise, the beta version is put as a separate application and does not affect the main Xcode).
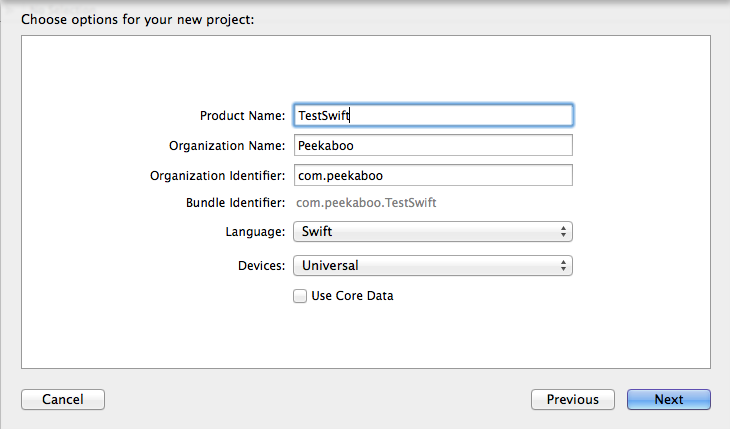
Create a new project (Single View Application) -> enter the name of the project and do not forget to choose the Swift language!
')
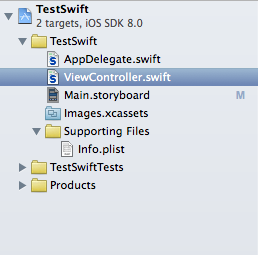
Pay attention to the structure, the number of files is now 2 times less, now there is no need for header files. The code written in the global scope is used as the entry point for the program, so the main function is no longer needed.
This is what AppDelegate looks like now:
Learning any language begins with Hello World. We will not break the tradition. Open AppDelegate.swift and add
Run the program and you will see the coveted Hello World in the console. That's how simple it is.
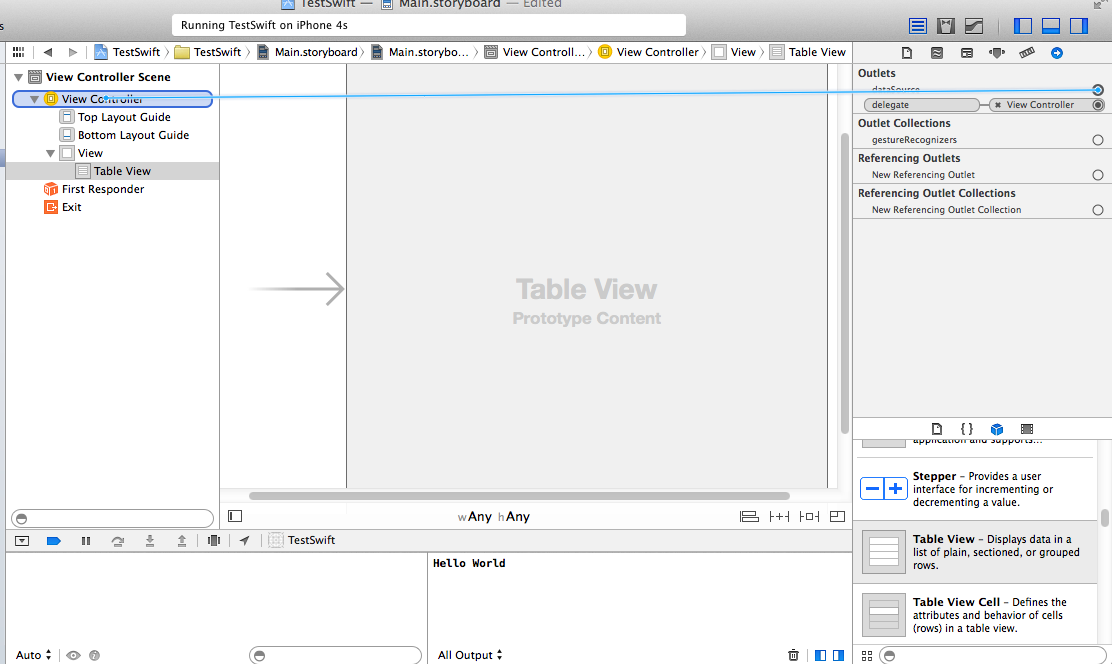
A little complicate the project. Add a favorite tableview.
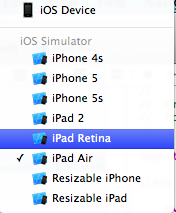
Open the Main.storyboard. By the way, please note that for the universal application, now by default, not two storyboards are created, as they were before, but only one. The number of simulators also increased:
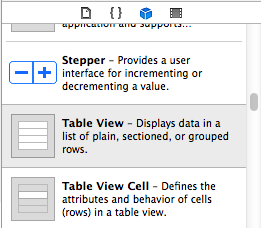
Find the cherished Table View in the Object Library and transfer it to the application screen. We stretch the table so that it is full screen (it is necessary that it coincides with the edges).
Then everything is done as before, we need to set the dataSource and delegate for the table. To do this, open the Connection Inspector, from the delegate pull to the ViewController object and likewise for the dataSource.
In ViewController.swift, you need to specify the protocols that we need: UITableViewDataSource and UITableViewDelegate
Now it can be done like this:
The compiler will immediately curse:
Type 'ViewController' does not conform to protocol 'UITableViewDataSource'
The compiler informs us that we have not defined the functions of the
These two functions should be added to our ViewController.swift
The first function should return the number of rows in the table (int):
And the second function returns a table cell:
In the first line create a cell. We will analyze the record in more detail:
let means that we are creating a constant, not a variable.
let cell: UITableViewCell report that the type of this constant will be UITableViewCell. In theory, it is not necessary to report what type a constant or variable will have. The program will work fine like this:
But as it seems to me, it is better to report, Apple gives a good example of why:
Let me remind you how we created a cell in Obj-C:
No more need to allocate, Swift does everything on its own. All methods that started with init have been removed, and now initialization takes place in the Swift style (i.e. MyClass ()). Moreover, initializers with with were also converted; what followed after with was the first argument in the initializer of Swift.
Here I especially liked this post:
In Obj-C, to make a simple string concatenation operation, you had to be done in the following way:
For me, this is a pleasant change.
Let's say now we wanted to change the text color to standard purple. This can be done in the same way as in Obj-C, we turn to the class method
As a result, we get

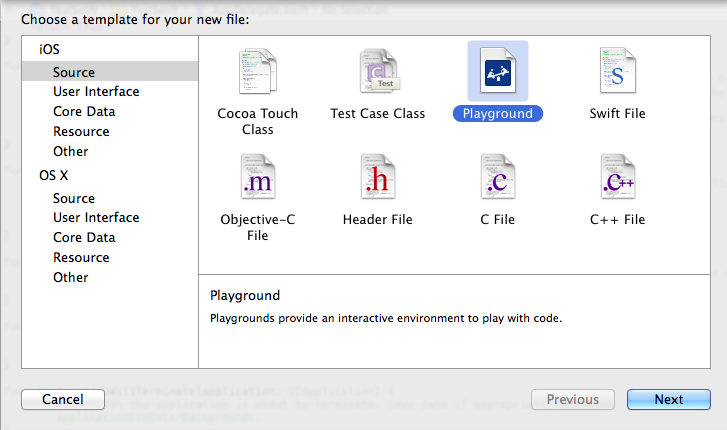
Playground is a platform where you can experiment, and if you like to transfer to the main project.
To create a playgroung, select File-> New-> File:
That's all, you can experiment. For example, I added a table cell to see how it will look.

You can read more here https: //developer.apple.com / ...
At first glance, I liked the language. It will be quite easy to switch from Obj-C to Swift, besides Swift gets on well with Obj-C. The amount of code has decreased by several times, while the readability has increased. No need to mess around with memory now, Swift does it all.
Read more about Swift: The Swift Programming Language
Training
First you need to install Xcode 6 Beta. You can download it from here:
https://developer.apple.com/devcenter/ios/index.action
Download, install and open (installation problems should not arise, the beta version is put as a separate application and does not affect the main Xcode).
Create a new project (Single View Application) -> enter the name of the project and do not forget to choose the Swift language!
')
Structure
Pay attention to the structure, the number of files is now 2 times less, now there is no need for header files. The code written in the global scope is used as the entry point for the program, so the main function is no longer needed.
This is what AppDelegate looks like now:
import UIKit @UIApplicationMain class AppDelegate: UIResponder, UIApplicationDelegate { var window: UIWindow? func application(application: UIApplication, didFinishLaunchingWithOptions launchOptions: NSDictionary?) -> Bool { // Override point for customization after application launch. return true } func applicationWillResignActive(application: UIApplication) { // Sent when the application is about to move from active to inactive state. This can occur for certain types of temporary interruptions (such as an incoming phone call or SMS message) or when the user quits the application and it begins the transition to the background state. // Use this method to pause ongoing tasks, disable timers, and throttle down OpenGL ES frame rates. Games should use this method to pause the game. } func applicationDidEnterBackground(application: UIApplication) { // Use this method to release shared resources, save user data, invalidate timers, and store enough application state information to restore your application to its current state in case it is terminated later. // If your application supports background execution, this method is called instead of applicationWillTerminate: when the user quits. } func applicationWillEnterForeground(application: UIApplication) { // Called as part of the transition from the background to the inactive state; here you can undo many of the changes made on entering the background. } func applicationDidBecomeActive(application: UIApplication) { // Restart any tasks that were paused (or not yet started) while the application was inactive. If the application was previously in the background, optionally refresh the user interface. } func applicationWillTerminate(application: UIApplication) { // Called when the application is about to terminate. Save data if appropriate. See also applicationDidEnterBackground:. } } Hello world
Learning any language begins with Hello World. We will not break the tradition. Open AppDelegate.swift and add
func application(application: UIApplication, didFinishLaunchingWithOptions launchOptions: NSDictionary?) -> Bool to the func application(application: UIApplication, didFinishLaunchingWithOptions launchOptions: NSDictionary?) -> Bool : println("Hello World") // Run the program and you will see the coveted Hello World in the console. That's how simple it is.
Complicate
A little complicate the project. Add a favorite tableview.
Open the Main.storyboard. By the way, please note that for the universal application, now by default, not two storyboards are created, as they were before, but only one. The number of simulators also increased:
Find the cherished Table View in the Object Library and transfer it to the application screen. We stretch the table so that it is full screen (it is necessary that it coincides with the edges).
Then everything is done as before, we need to set the dataSource and delegate for the table. To do this, open the Connection Inspector, from the delegate pull to the ViewController object and likewise for the dataSource.
In ViewController.swift, you need to specify the protocols that we need: UITableViewDataSource and UITableViewDelegate
Now it can be done like this:
class ViewController: UIViewController, UITableViewDataSource, UITableViewDelegate The compiler will immediately curse:
Type 'ViewController' does not conform to protocol 'UITableViewDataSource'
The compiler informs us that we have not defined the functions of the
'UITableViewDataSource' protocol. To see which functions need to be determined, hold down the command + click on the protocol. protocol UITableViewDataSource : NSObjectProtocol { func tableView(tableView: UITableView!, numberOfRowsInSection section: Int) -> Int func tableView(tableView: UITableView!, cellForRowAtIndexPath indexPath: NSIndexPath!) -> UITableViewCell! These two functions should be added to our ViewController.swift
The first function should return the number of rows in the table (int):
func tableView(tableView: UITableView!, numberOfRowsInSection section: Int) -> Int { return 20 } And the second function returns a table cell:
func tableView(tableView: UITableView!, cellForRowAtIndexPath indexPath: NSIndexPath!) -> UITableViewCell! { let cell: UITableViewCell = UITableViewCell(style: UITableViewCellStyle.Subtitle, reuseIdentifier: "MyTestSwiftCell") cell.text = "Habrapost \(indexPath.row)" cell.detailTextLabel.text = "Hi, \(indexPath.row)" return cell } In the first line create a cell. We will analyze the record in more detail:
let means that we are creating a constant, not a variable.
let cell: UITableViewCell report that the type of this constant will be UITableViewCell. In theory, it is not necessary to report what type a constant or variable will have. The program will work fine like this:
let cell = UITableViewCell(style: UITableViewCellStyle.Subtitle, reuseIdentifier: "MyTestSwiftCell") But as it seems to me, it is better to report, Apple gives a good example of why:
let implicitInteger = 70 let implicitDouble = 70.0 let explicitDouble: Double = 70 Let me remind you how we created a cell in Obj-C:
UITableCell *cell =[[UITableCell alloc] initWithStyle:UITableViewCellStyleSubtitle reuseIdentifier:@"MyTestSwiftCell"] No more need to allocate, Swift does everything on its own. All methods that started with init have been removed, and now initialization takes place in the Swift style (i.e. MyClass ()). Moreover, initializers with with were also converted; what followed after with was the first argument in the initializer of Swift.
Here I especially liked this post:
cell.text = "Habrapost \(indexPath.row)" In Obj-C, to make a simple string concatenation operation, you had to be done in the following way:
cell.text = [NSString stringWithFormat:@"Habrapost %@", indexPath.row]; For me, this is a pleasant change.
Let's say now we wanted to change the text color to standard purple. This can be done in the same way as in Obj-C, we turn to the class method
cell.detailTextLabel.textColor = UIColor.purpleColor() As a result, we get
Little about the playground
Playground is a platform where you can experiment, and if you like to transfer to the main project.
To create a playgroung, select File-> New-> File:
That's all, you can experiment. For example, I added a table cell to see how it will look.
You can read more here https: //developer.apple.com / ...
Conclusion
At first glance, I liked the language. It will be quite easy to switch from Obj-C to Swift, besides Swift gets on well with Obj-C. The amount of code has decreased by several times, while the readability has increased. No need to mess around with memory now, Swift does it all.
Read more about Swift: The Swift Programming Language
Source: https://habr.com/ru/post/225297/
All Articles