How to deploy MS SQL Server 2012 failover cluster on Windows Server 2012R2 for beginners
This topic will be interesting to beginners. Seasoned gurus and everyone who is already familiar with this issue are unlikely to find something new and useful. All the rest you are welcome under the cat.
The task that we face is to ensure uninterrupted operation and high availability of the database in a client-server deployment option.
Configuration type is active / passive.
PS The issues of redundancy of nodes not related to MSSQL are not considered.
Basic hardware and software requirements:
Test bench:
* as an option, you can use the Storage role on Windows Server 2012R2, a software solution from StarWind or a real iSCSI network device
')
Technically, you can get by with 3 servers having combined all the necessary roles on the domain controller, but in the field it is not recommended to do this.
First, we enter into the domain the servers WS2012R2C1 and WS2012R2C2; on each of them we establish the role “Failover Clustering”.
After installing the role, launch the Failover Cluster Manager snap-in and go to the Cluster Creation Wizard, where we configure our failover cluster: create Quorum (shared resource) and MSDTC (iSCSI).
Important: all actions must be performed on behalf of the user with the right to place new machines in the domain. (Thanks to minamoto for the addition)
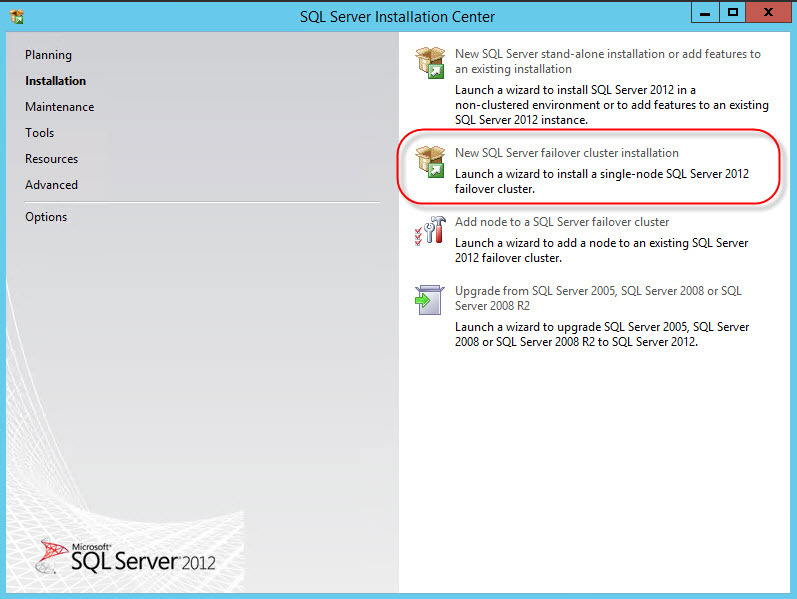
For installation, we need the MS SQL Server installation distribution. Run the installation wizard and select the option to install the new cluster instance:
Next, enter your license key data:

Carefully read and accept the license agreement:

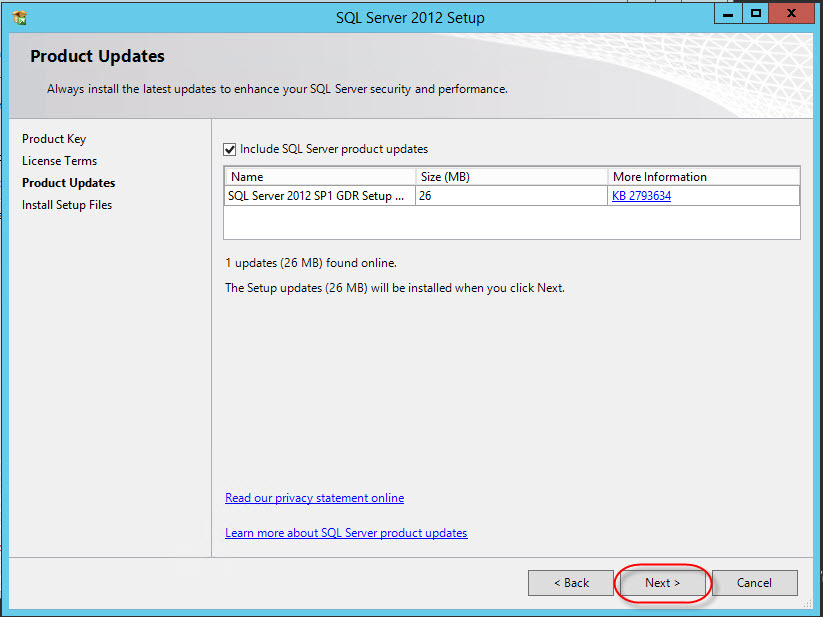
We get the available updates:
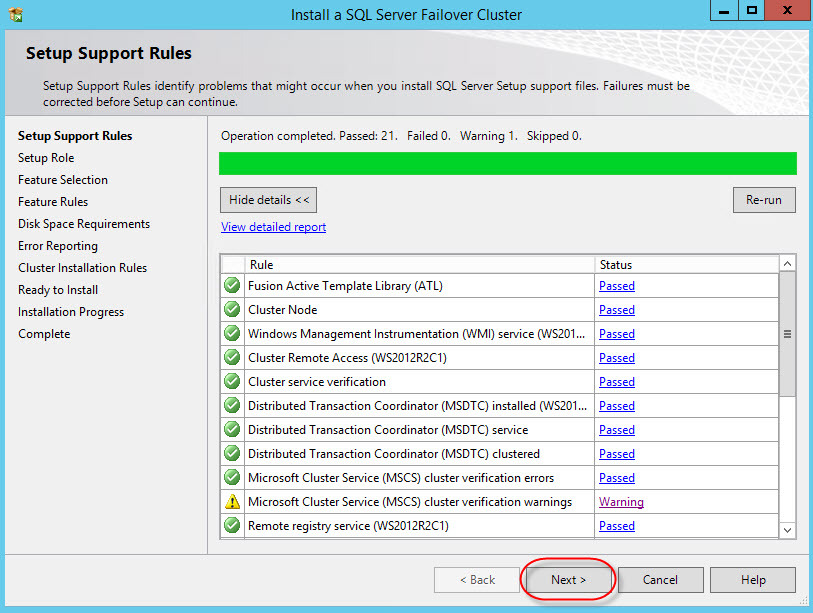
Pass the configuration check (we skip the warning MSCS):
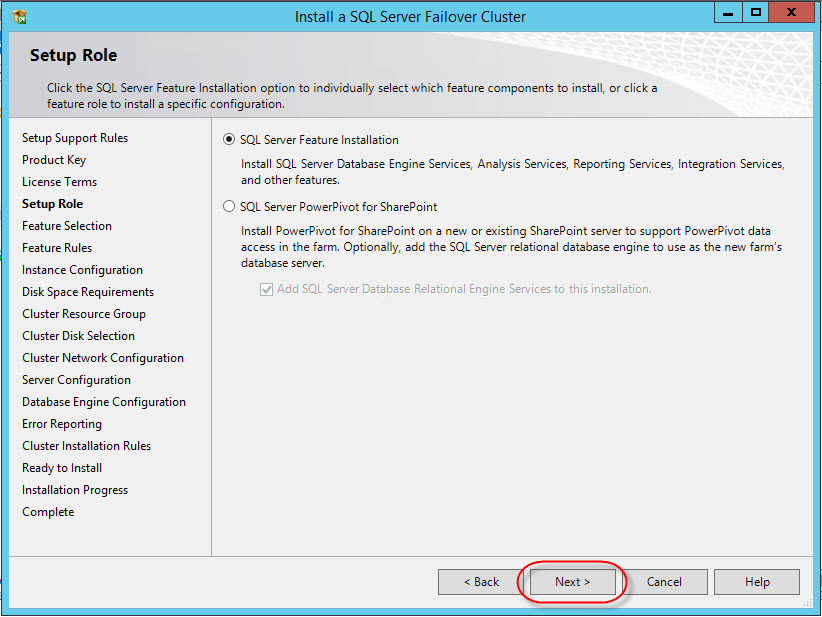
Select the target installation option:
Select the components that we need (for the task, the main ones are sufficient):

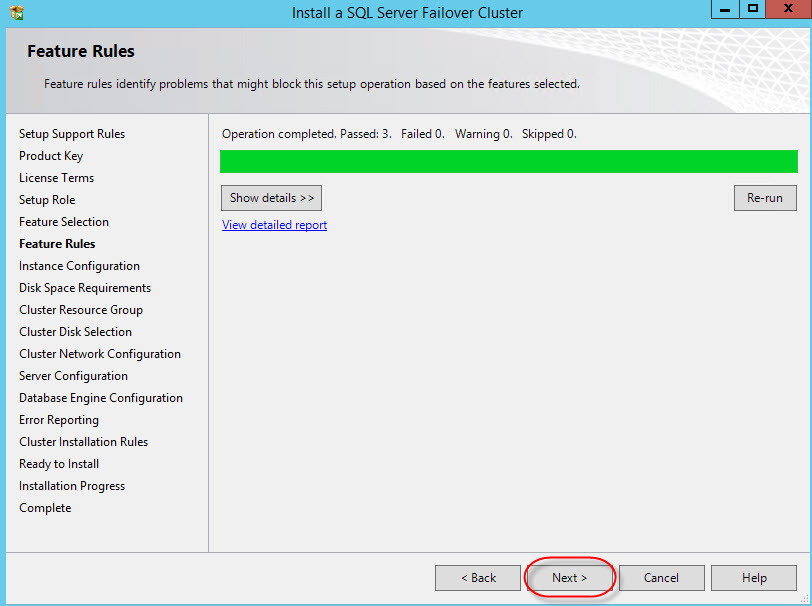
Another check for installation configuration:
Next - an important step, the choice of the network name for the cluster MSSQL (instance ID - leave):

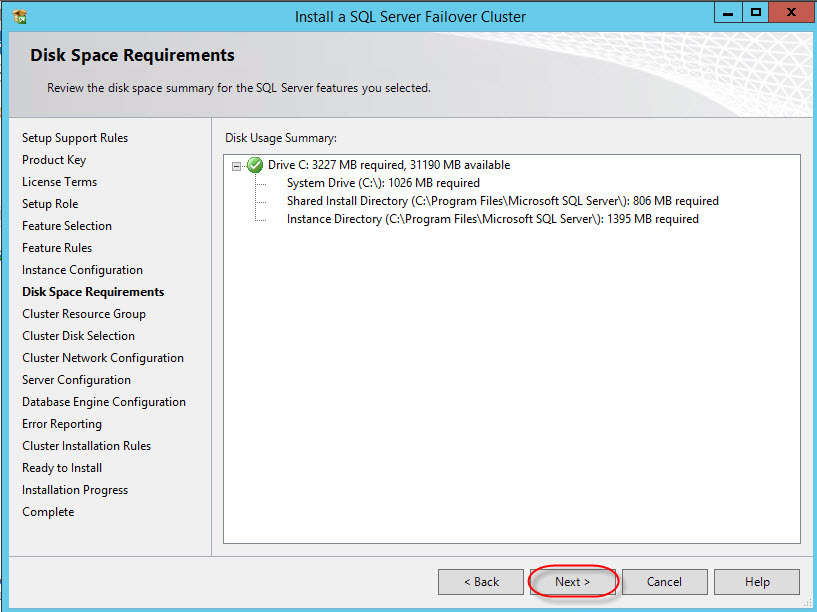
Check available space:
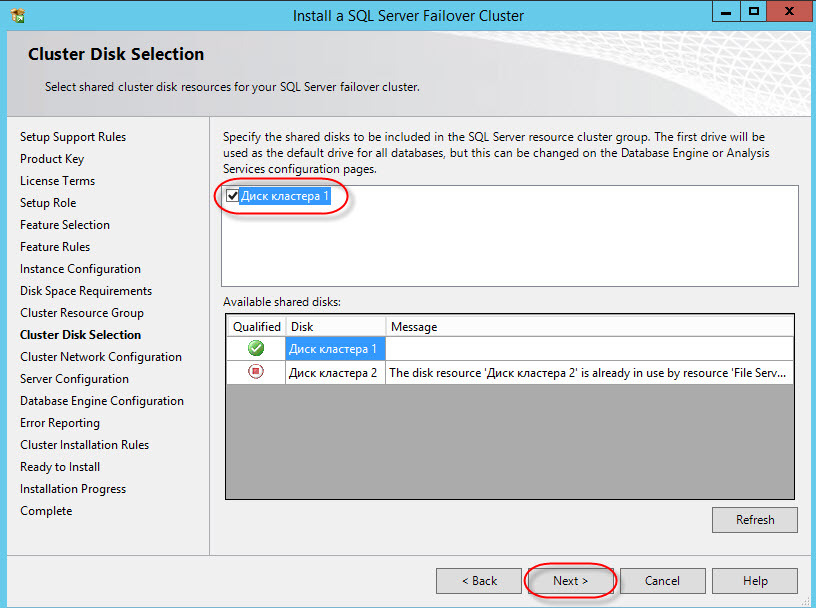
After that - the list of available storages, data (configured at the preparation stage):

Select the drive for the cluster database location:
The configuration of the cluster network interface is recommended to specify the address manually:

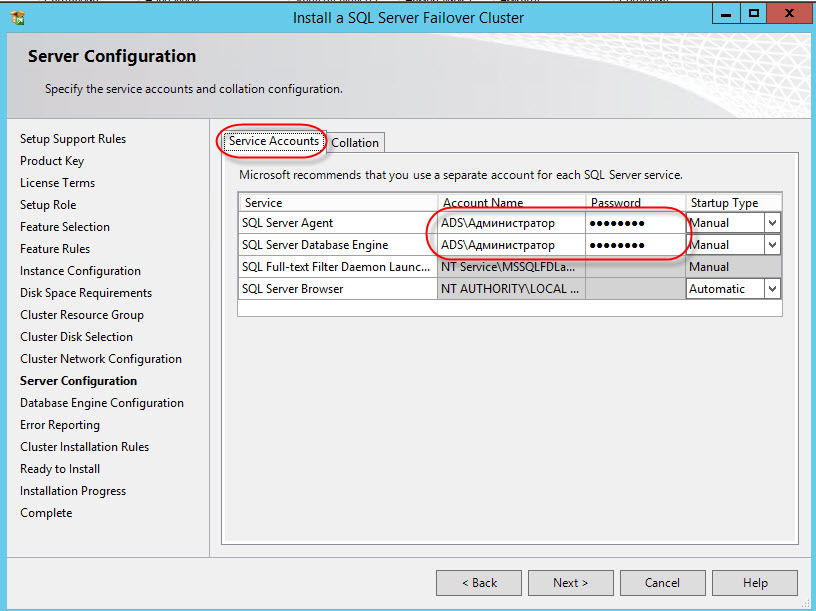
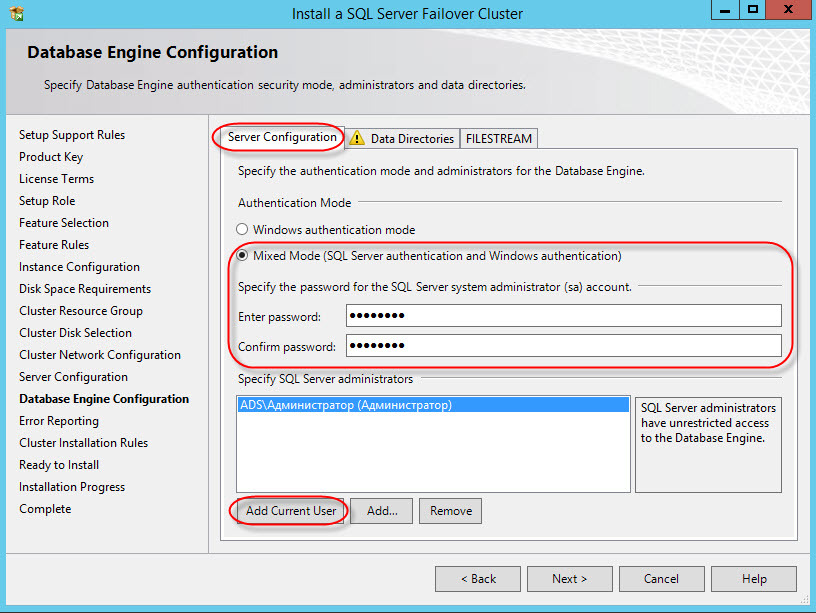
Specify the administrator's data (you can create a separate user for MSSQL):
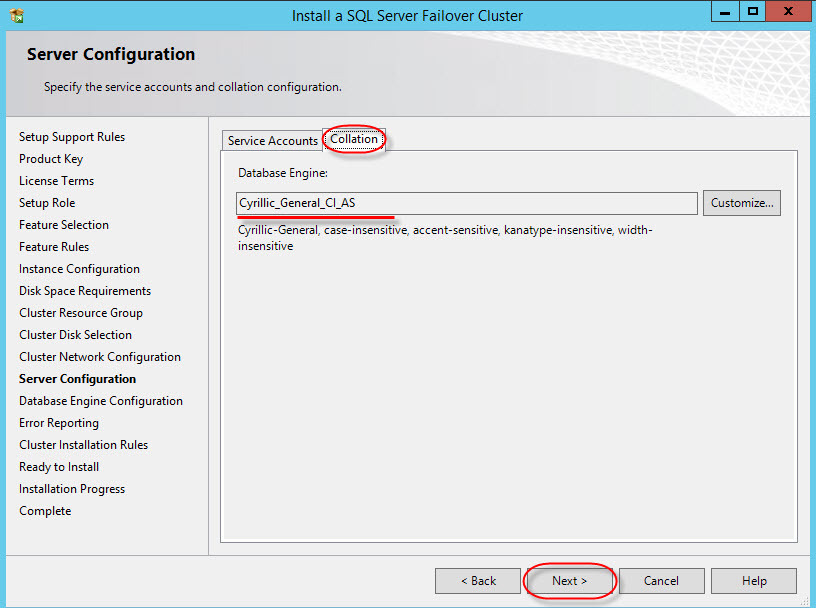
Another important step is the choice of sorting order (Collation). After installation, changing is extremely problematic:
Authentication parameters on the server (in our case, the mixed option is chosen, although it is safer to use only domain authentication):
The choice of directories for storing shared cluster files (in versions of MS SQL Server 2012 and older, TempDB can be stored on each node and not placed in shared storage):

Just a couple of checks:


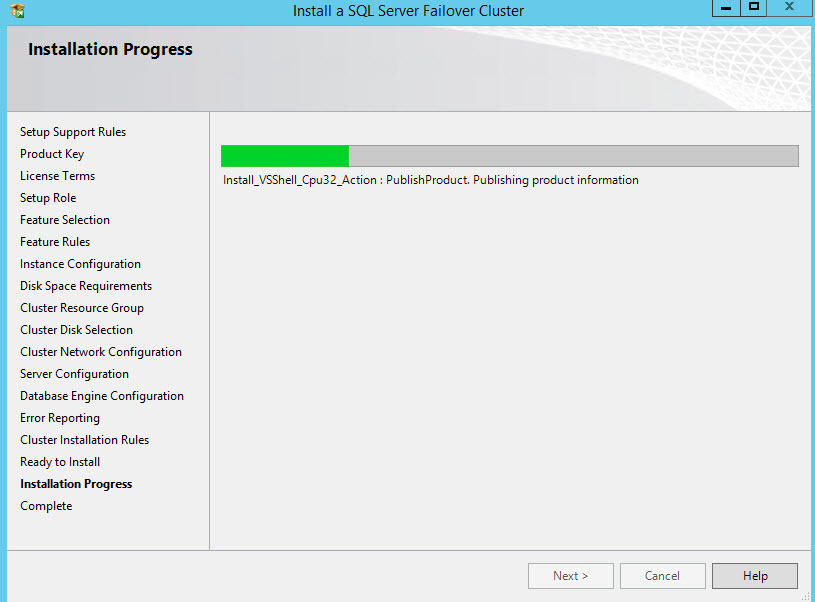
Finally proceed to the installation (the process may take a long time):
Setup and installation of the base node is completed, as reported by the "green" report

Next you need to add the second node to the cluster, since without it, there is no need to talk about fault tolerance.
Setup and installation is much easier. On the second server (VM), run the MS SQL Server installation wizard:
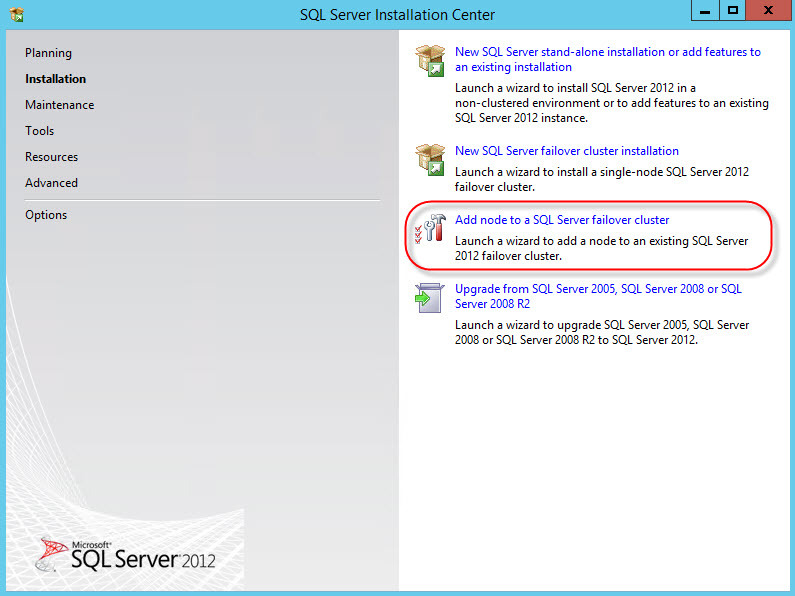
Choose: in which cluster to add the node:

View and accept network settings of the cluster instance:

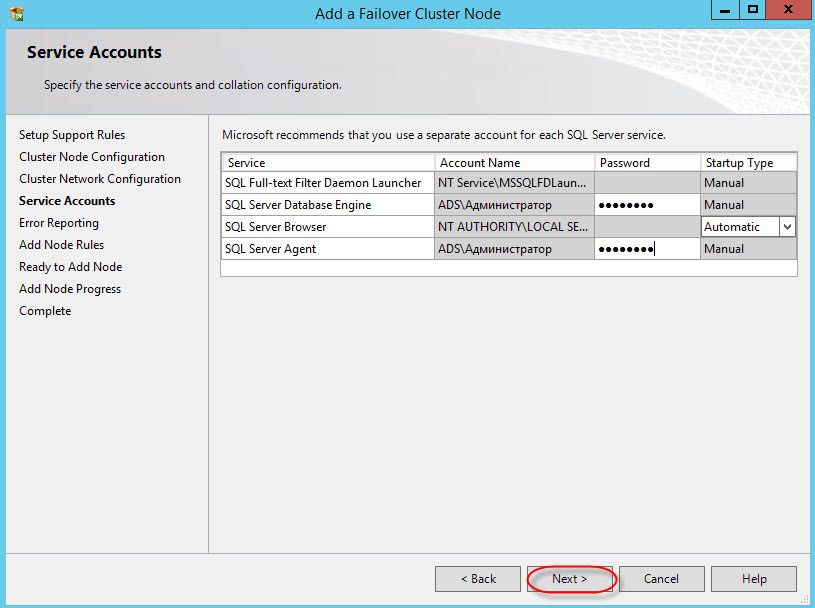
Specify the user and password (the same as in the first stage):
Again the tests and installation process:
Upon completion, we should get the following picture:
Congratulations, the installation is complete.
Make sure everything works as it should. To do this, go to the Failover Cluster Manager snap-in:
At the moment we are using the second node (WS2012R2C2) in case of failure, it will switch to the first node (WS2012R2C1).
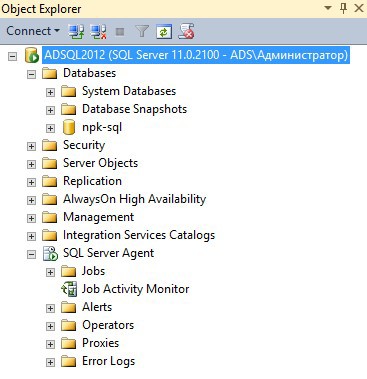
Let's try to connect directly to the MSSQL server cluster, for this we need any computer in the domain network with the MSSQL Management Studio installed. When starting, we specify the name of our cluster and user (or leave the domain authorization).
After connecting, we see the bases that are spinning in the cluster (in the screenshot there is a separately added base, after the installation, only the system ones are present).
This copy of the failover cluster is fully ready for use with any databases, for example, 1C (for us the task was to deploy such a configuration to work exactly 1C-ki). Working with him is no different from the usual, but the main feature is the reliability of such a solution.
For test purposes, I recommend to play with the disconnection of the nodes and see how the base is migrated between them; check the important parameters for you, for example, how long the switching will take.
If one of the nodes fails, we break the connection with the base and switch to the second one (recovery time: up to a minute).
In the field, to ensure the reliability of the entire infrastructure, it is necessary to handle the points of failure: DSS, AD and DNS.
PS Good luck in building fault-tolerant solutions.
The task that we face is to ensure uninterrupted operation and high availability of the database in a client-server deployment option.
Configuration type is active / passive.
PS The issues of redundancy of nodes not related to MSSQL are not considered.
Stage 1 - Preparation
Basic hardware and software requirements:
- Availability of at least 2 nodes (physical / virtual), storage system
- MS Windows Server, MS SQL ServerSD
- Storage system
- Available iSCSI disk for databases
- Available iSCSI disk for MSDTC
- Quorum disk
Test bench:
- Windows Server 2012R2 with AD DS, DNS, DHCP roles (WS2012R2AD)
- ISCSI Storage *
- 2xWindows Server 2012R2 (for WS2012R2C1 and WS2012R2C2 cluster)
- Windows Server 2012R2 with elevated 1C server service (WS2012R2AC)
* as an option, you can use the Storage role on Windows Server 2012R2, a software solution from StarWind or a real iSCSI network device
')
Technically, you can get by with 3 servers having combined all the necessary roles on the domain controller, but in the field it is not recommended to do this.
First, we enter into the domain the servers WS2012R2C1 and WS2012R2C2; on each of them we establish the role “Failover Clustering”.
After installing the role, launch the Failover Cluster Manager snap-in and go to the Cluster Creation Wizard, where we configure our failover cluster: create Quorum (shared resource) and MSDTC (iSCSI).
Stage 2 - Installing MS SQL Server
Important: all actions must be performed on behalf of the user with the right to place new machines in the domain. (Thanks to minamoto for the addition)
For installation, we need the MS SQL Server installation distribution. Run the installation wizard and select the option to install the new cluster instance:
Next, enter your license key data:
Carefully read and accept the license agreement:
We get the available updates:
Pass the configuration check (we skip the warning MSCS):
Select the target installation option:
Select the components that we need (for the task, the main ones are sufficient):
Another check for installation configuration:
Next - an important step, the choice of the network name for the cluster MSSQL (instance ID - leave):
Check available space:
After that - the list of available storages, data (configured at the preparation stage):
Select the drive for the cluster database location:
The configuration of the cluster network interface is recommended to specify the address manually:
Specify the administrator's data (you can create a separate user for MSSQL):
Another important step is the choice of sorting order (Collation). After installation, changing is extremely problematic:
Authentication parameters on the server (in our case, the mixed option is chosen, although it is safer to use only domain authentication):
The choice of directories for storing shared cluster files (in versions of MS SQL Server 2012 and older, TempDB can be stored on each node and not placed in shared storage):
Just a couple of checks:
Finally proceed to the installation (the process may take a long time):
Setup and installation of the base node is completed, as reported by the "green" report
Stage 3 - adding a second node to the MSSQL cluster
Next you need to add the second node to the cluster, since without it, there is no need to talk about fault tolerance.
Setup and installation is much easier. On the second server (VM), run the MS SQL Server installation wizard:
- We pass the starting test
- Enter the license key:
- We read and accept the license agreement:
- We get updates:
- We pass tests to meet the requirements for the installation of the node (MSCS warning - skip):
Choose: in which cluster to add the node:
View and accept network settings of the cluster instance:
Specify the user and password (the same as in the first stage):
Again the tests and installation process:
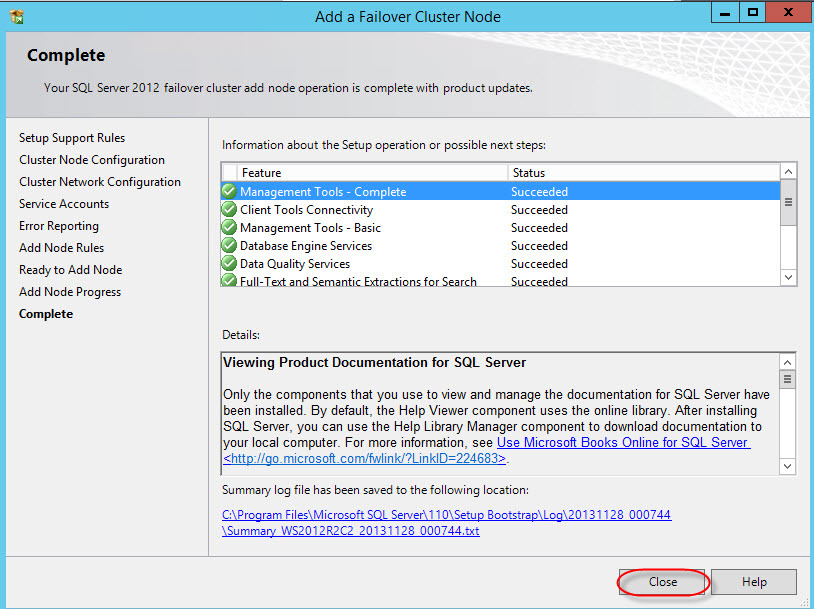
Upon completion, we should get the following picture:
Congratulations, the installation is complete.
Stage 4 - Health Check
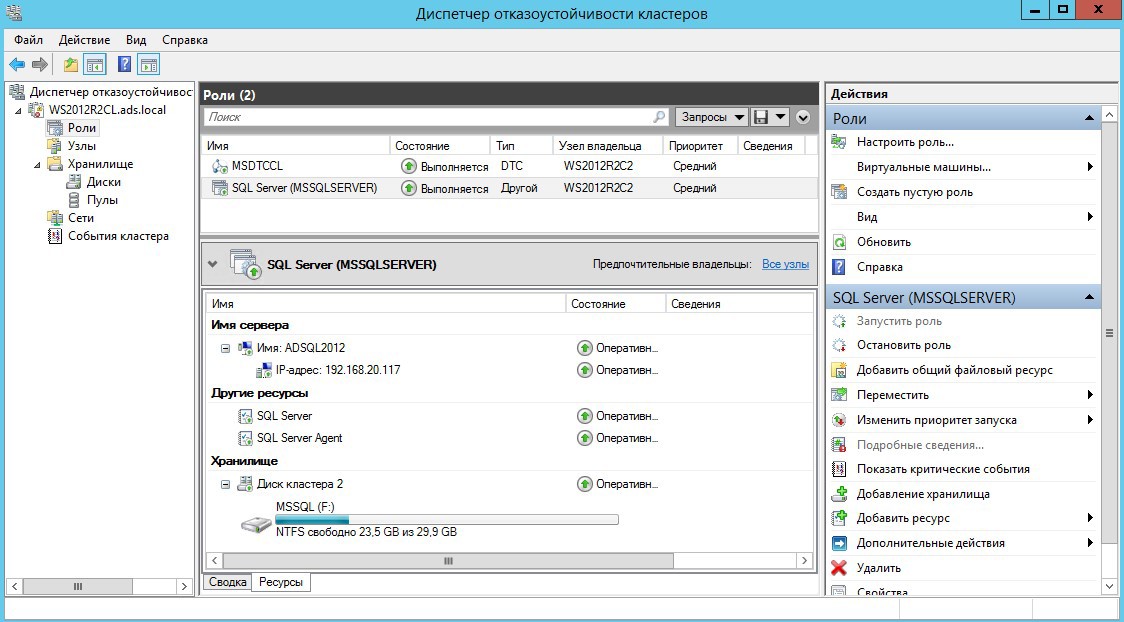
Make sure everything works as it should. To do this, go to the Failover Cluster Manager snap-in:
At the moment we are using the second node (WS2012R2C2) in case of failure, it will switch to the first node (WS2012R2C1).
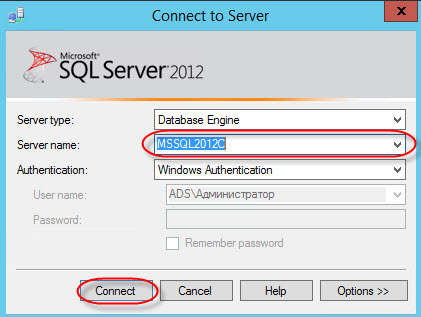
Let's try to connect directly to the MSSQL server cluster, for this we need any computer in the domain network with the MSSQL Management Studio installed. When starting, we specify the name of our cluster and user (or leave the domain authorization).
After connecting, we see the bases that are spinning in the cluster (in the screenshot there is a separately added base, after the installation, only the system ones are present).
This copy of the failover cluster is fully ready for use with any databases, for example, 1C (for us the task was to deploy such a configuration to work exactly 1C-ki). Working with him is no different from the usual, but the main feature is the reliability of such a solution.
For test purposes, I recommend to play with the disconnection of the nodes and see how the base is migrated between them; check the important parameters for you, for example, how long the switching will take.
If one of the nodes fails, we break the connection with the base and switch to the second one (recovery time: up to a minute).
In the field, to ensure the reliability of the entire infrastructure, it is necessary to handle the points of failure: DSS, AD and DNS.
PS Good luck in building fault-tolerant solutions.
Source: https://habr.com/ru/post/225099/
All Articles