Installing Alfresco Community 4.2.f on the Jelasctic.com cloud service
Jelastic.com is one of the network resources that offers hosting of Java applications and in particular offers deployment of content management systems. He attracted me to the fact that he offers hosting Alfresco.
The site even offers instructions for deploying Alfresco ECM (enterprise content management system), on the Jelastic cloud cloud service. Next, I was poured a bit of advertising that Jelastic is able to run any Java applications without changing the code, which can be critical for most applications. A little not a cautious statement, then try to make sure of it. This article is nothing more than an adapted translation, tested by steps by the author.
At the end of the document there is a link to the video material on Alfresco's deployment in the cloud (English).
Creating the environment
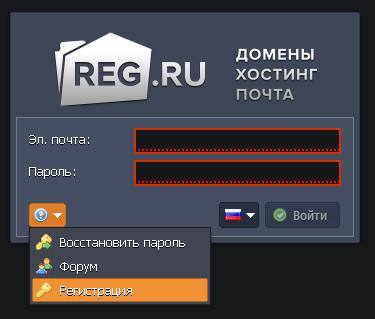
1. Go to jelastic.com register and login. The company offers a two-week trial through one of the regional providers. Nothing forbids choosing Brazil or the Netherlands, but it will be a little slower. Although our Russian provider Infobox is on the list, it refused to give two weeks, citing financial difficulties. Probably bankrupt ...: -000. God is his judge. There is a favorite REG.RU in the reserve, on it we will create our system.
2. Select the Create Environment button in the top Jelastic menu.
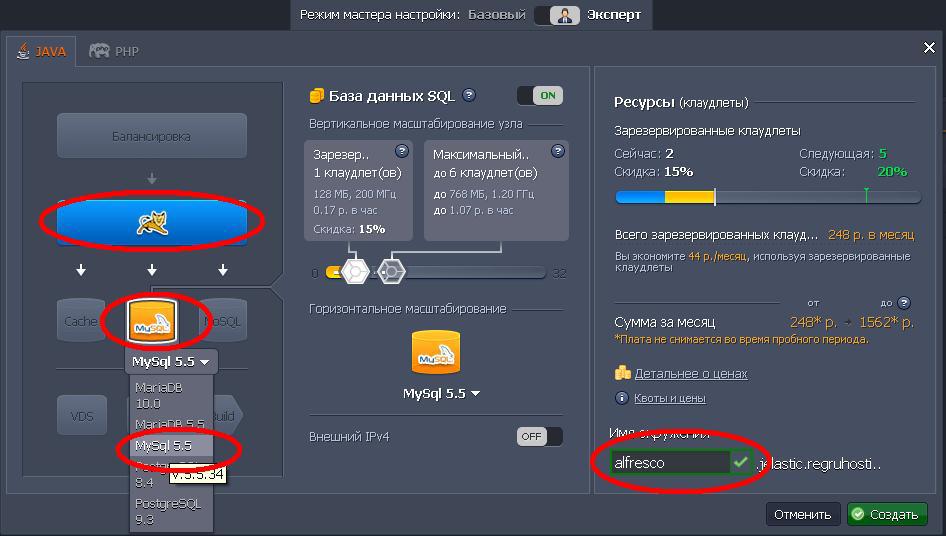
3.In the opened wizard, the setup of the environment topology on the JAVA tab, select Tomcat 7 as the application north and MySQL as the database, enter the name of the created environment, for example Alfresco, and click Create.
In a few minutes, an environment from Tomcat and MySQL DB will be created and appear in the list.

Application Download
1. Go to the Alfresco web-site and download the community edition version by going to:
https://wiki.alfresco.com/wiki/Community_file_list_4.2.f
and download the ZIP archive.
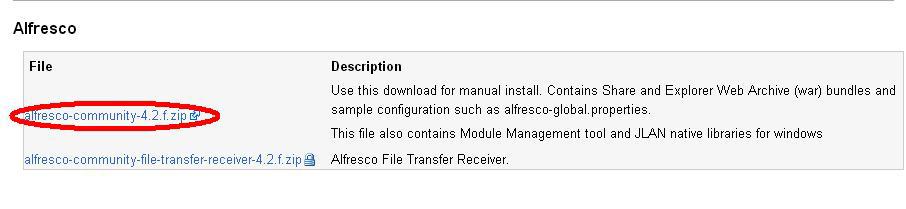
2. Unpack it and select from the Alfresco.WAR & Share.WAR archive.
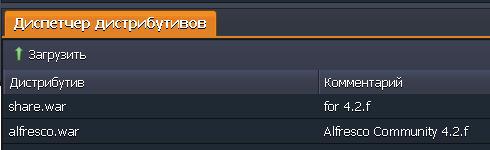
3. Download the selected files to jelastic.com using the Distribution Manager.


When the download is complete, the specified files will appear in the list available for deployment.
6. Deploy the alfresco.war distribution to the created environment.
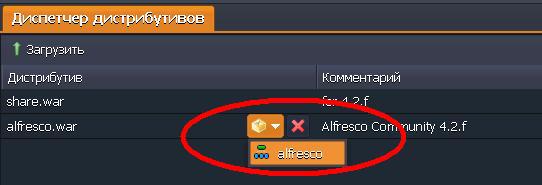
Give the name, which will be the name of the directory in which the distribution will unfold.
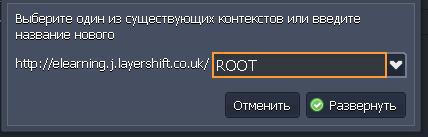
Name the directory ROOT and click on expand. An application named ROOT appears in the Tomcat list.
MySQL configuration
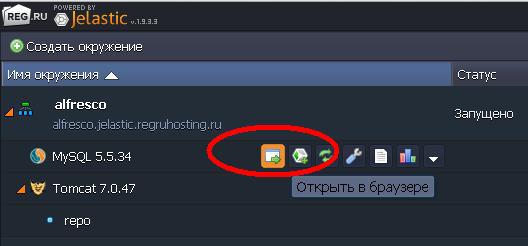
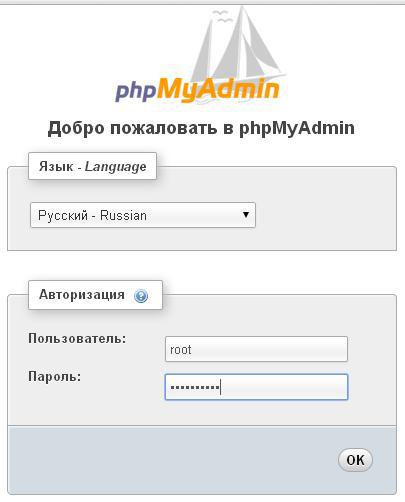
1. Open the MySQL DB admin panel in the browser.
2. Immediately after creating the environment, Jelastic sent you to the email address you provided during registration, your login and password to access the MySQL admin panel.
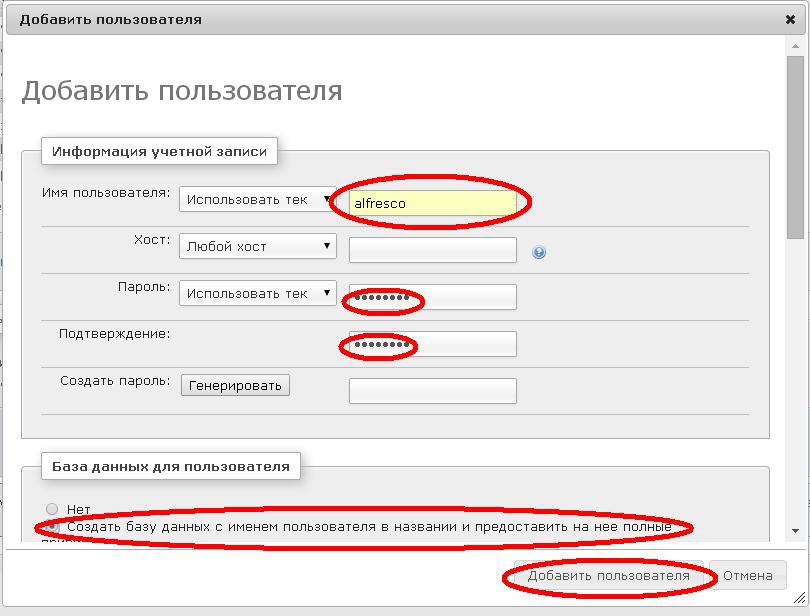
From the menu choose Users and Add Users:

Add a user with the name alfresco, he will also have a password alfresco. Do not forget to tick off that you need to create a database with the same name and click the Add user button.
')
Alfresco configuration
1. Click the Configuration button in the Tomcat panel.

2. Let's go to webapps / ROOT / WEB-INF / classes / alfresco-global.properties.sample.
3. Rename this file to alfresco-global.properties, as a result, it will be perceived as a configuration file.

4. Uncomment the database settings.
5. Specify the new driver in the database and the URL to the database server.
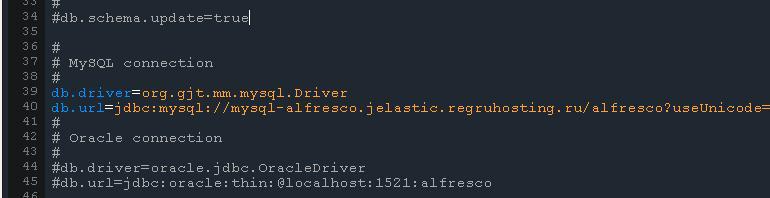
Click Save.
Download additional JAR libraries
1. Now load the mysql-connector (mysql-connector-java-5.1.30-bin) library into the Tomcat-lib directory (you need to search it in google and download).
To do this, select the lib folder and the Download button will highlight on the right.
2. Restart Tomcat.
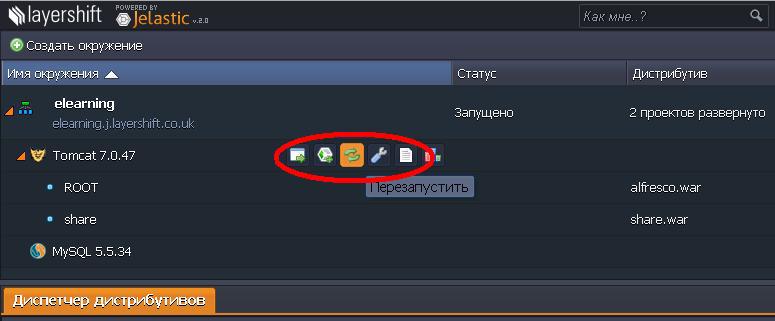
3. Open the Alfresco application, to do this, click the button in the line Tomcat - Open in a web browser.
And wow, in the new window we see the invitation window in Alfresco.
This can still be viewed on youtube, though in English:
http://www.youtube.com/watch?v=KUGErAtiaFI
The site even offers instructions for deploying Alfresco ECM (enterprise content management system), on the Jelastic cloud cloud service. Next, I was poured a bit of advertising that Jelastic is able to run any Java applications without changing the code, which can be critical for most applications. A little not a cautious statement, then try to make sure of it. This article is nothing more than an adapted translation, tested by steps by the author.
At the end of the document there is a link to the video material on Alfresco's deployment in the cloud (English).
Creating the environment
1. Go to jelastic.com register and login. The company offers a two-week trial through one of the regional providers. Nothing forbids choosing Brazil or the Netherlands, but it will be a little slower. Although our Russian provider Infobox is on the list, it refused to give two weeks, citing financial difficulties. Probably bankrupt ...: -000. God is his judge. There is a favorite REG.RU in the reserve, on it we will create our system.
2. Select the Create Environment button in the top Jelastic menu.
3.In the opened wizard, the setup of the environment topology on the JAVA tab, select Tomcat 7 as the application north and MySQL as the database, enter the name of the created environment, for example Alfresco, and click Create.
In a few minutes, an environment from Tomcat and MySQL DB will be created and appear in the list.
Application Download
1. Go to the Alfresco web-site and download the community edition version by going to:
https://wiki.alfresco.com/wiki/Community_file_list_4.2.f
and download the ZIP archive.
2. Unpack it and select from the Alfresco.WAR & Share.WAR archive.
3. Download the selected files to jelastic.com using the Distribution Manager.
When the download is complete, the specified files will appear in the list available for deployment.
6. Deploy the alfresco.war distribution to the created environment.
Give the name, which will be the name of the directory in which the distribution will unfold.
Name the directory ROOT and click on expand. An application named ROOT appears in the Tomcat list.
MySQL configuration
1. Open the MySQL DB admin panel in the browser.
2. Immediately after creating the environment, Jelastic sent you to the email address you provided during registration, your login and password to access the MySQL admin panel.
From the menu choose Users and Add Users:
Add a user with the name alfresco, he will also have a password alfresco. Do not forget to tick off that you need to create a database with the same name and click the Add user button.
')
Alfresco configuration
1. Click the Configuration button in the Tomcat panel.
2. Let's go to webapps / ROOT / WEB-INF / classes / alfresco-global.properties.sample.
3. Rename this file to alfresco-global.properties, as a result, it will be perceived as a configuration file.
4. Uncomment the database settings.
5. Specify the new driver in the database and the URL to the database server.
Click Save.
Download additional JAR libraries
1. Now load the mysql-connector (mysql-connector-java-5.1.30-bin) library into the Tomcat-lib directory (you need to search it in google and download).
To do this, select the lib folder and the Download button will highlight on the right.
2. Restart Tomcat.
3. Open the Alfresco application, to do this, click the button in the line Tomcat - Open in a web browser.
And wow, in the new window we see the invitation window in Alfresco.
This can still be viewed on youtube, though in English:
http://www.youtube.com/watch?v=KUGErAtiaFI
Source: https://habr.com/ru/post/224001/
All Articles