Secure encrypted data storage and features of working with it
At some point we were faced with the need to organize encrypted storage for remote file allocation. After a brief search, I found an easy, cloudy solution, which in the end was completely satisfactory. Next, I will briefly describe this solution and some features of working with him, perhaps someone will come in handy. In my opinion, the option is reliable and at the same time quite comfortable.
 I decided to use the ownCloud cloud storage system as a basis. Which was installed in OS Debian Linux v7.1 and deployed as a virtual machine under the Proxmox Virtual Environment v3.1 hypervisor.
I installed the cloud storage system on the Linux encrypted disk, access to the data is possible only via the HTTPS protocol, in addition to the standard password, you must also enter a one-time password (OTP). Regularly backed up. The possibility of emergency shutdown and delete all data ownCloud.
The Proxmox Virtual Environment hypervisor is a specialized OS distribution of Debian Linux v7.1, remote access to the system is possible via the SSH protocol on the standard TCP port 22. However, the main working tool for managing virtual machines is a Web interface.
')
Once a day, a hot copy (snapshot) of the ownCloud virtual machine is generated and exported to NFS servers using the standard features of Proxmox VE.

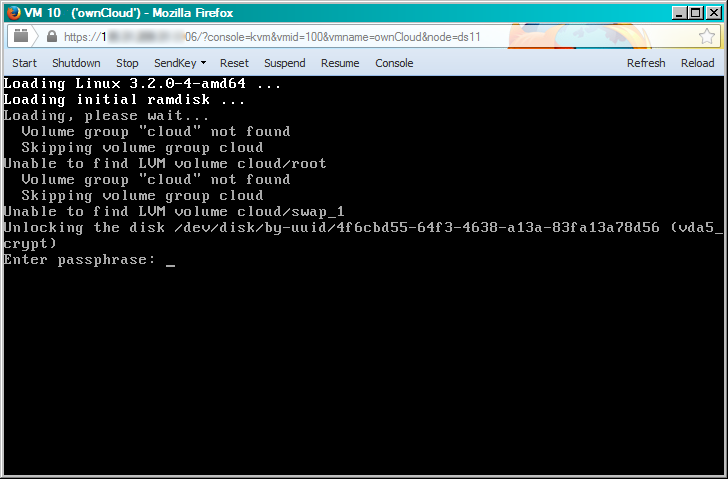
In the screenshot, the virtual machine in the web interface has the identifier 100 (ownCloud). Access to its console is possible through the context menu item “Console”.
For example, this is how a password is entered for an encrypted disk at boot time:
About installing ownCloud on Habré, there is a fairly good article from the BlackIce13 user http://habrahabr.ru/post/208566/ there are already listed the main features and some advantages of this platform.
From myself I can only add that, in my opinion, there is a somewhat simpler way to install ownCloud for the Linux Debian distribution and many others than the one suggested by the author. Available repositories are available: http://software.opensuse.org/download/package?project=isv:ownCloud:community&package=owncloud
In this case, all the necessary dependencies are set automatically, and you will only be required to adjust the settings to fit your specifics.
ownCloud deployed on the basis of the OS Debian Linux v7.1 inside a virtual container. Remote access to the storage is possible via SSH protocol on the standard TCP port 22.
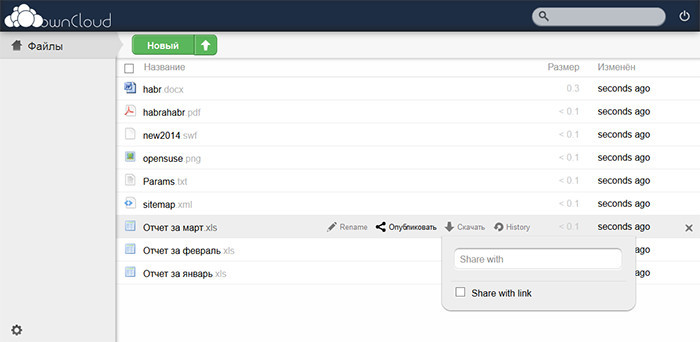
The main work with ownCloud is carried out through a Web-interface, it is also possible to connect via WebDAV protocol and use synchronization clients (Sync).
By the way, since access to ownCloud is done via HTTPS, access and error logs are kept by the Apache server in the files "/var/log/apache2/access.log" and "/var/log/apache2/error.log", respectively. OwnCloud also has its own log "/var/www/owncloud/data/owncloud.log".
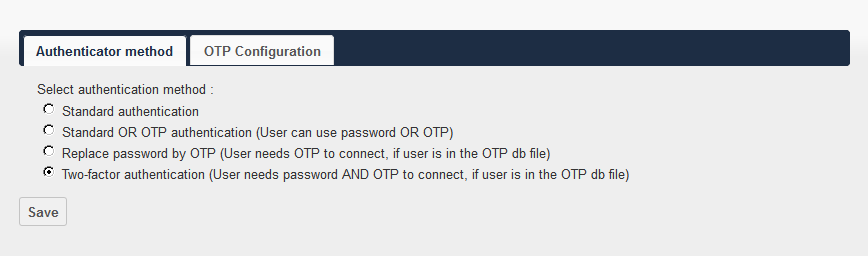
To enhance security, access to ownCloud via a Web interface is possible using two-factor authentication: a traditional password and a one-time OTP password. The OTP functionality is implemented using the external One Time Password Backend add-on. There is no native OTP support for ownCloud.
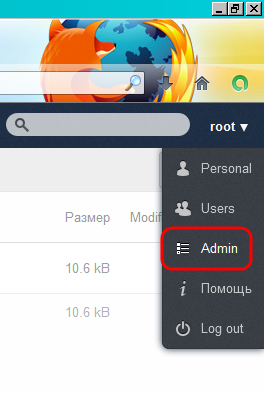
The configuration of the main OTP parameters is carried out in the “Admin” section under the administrative account.
In the screenshots, the two-factor authentication and one-time password settings are selected to ensure compatibility with the FEITIAN OTP c200 hardware generators.
Algorithm: Time-based One Time Password (TOTP)
Number of digits in the password: 6
Password lifetime: 60 seconds

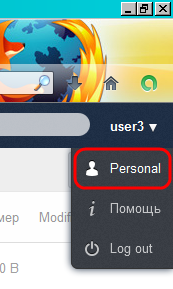
In order for two-factor authentication to take effect, you must assign it to a Token Seed user. Up to this point, he can enter his ownCloud using only a regular password. What you actually need to do immediately after creating the user, go to the "Personal" section and enter Token Seed in the field of the same name.

It is not recommended to generate Token Seed using the built-in capabilities of the ownCloud OTP module, since its operation has problems. Input format: Base32 (% 32) UPPERCASE. You can convert Token Seed into different formats using the utility www.darkfader.net/toolbox/convert
Specifically for this project was used Token Seed embedded in hardware Token FEITIAN OTP c200. In general, you can use any password generator, and then bring it to the desired format using the converter provided in the text.
An example of such an Android application is Android Token: https://play.google.com/store/apps/details?id=uk.co.bitethebullet.android.token&hl=en
Initialized Token Seed looks like this:

To disable OTP, just remove Token Seed from the settings. If this is impossible, for example, due to the fact that the OTP generator is lost, so there is no access to the user's personal account, then the OTP can only be disabled by directly modifying the data in the MySQL DBMS. To do this, you need to start the MySQL client from the command line:
Then execute the query similar to the following, changing the value of the “user” field to the necessary one:
Due to architectural constraints, OTP only works when accessing ownCloud via a web interface, but not via WebDAV. This disadvantage is compensated by the fact that the list of IP addresses that can use WebDAV is strictly limited. The “Allow from” directives in the Apache server configuration file "/etc/apache2/conf.d/owncloud.conf" are responsible for this. Please note that the directives are indicated there twice.
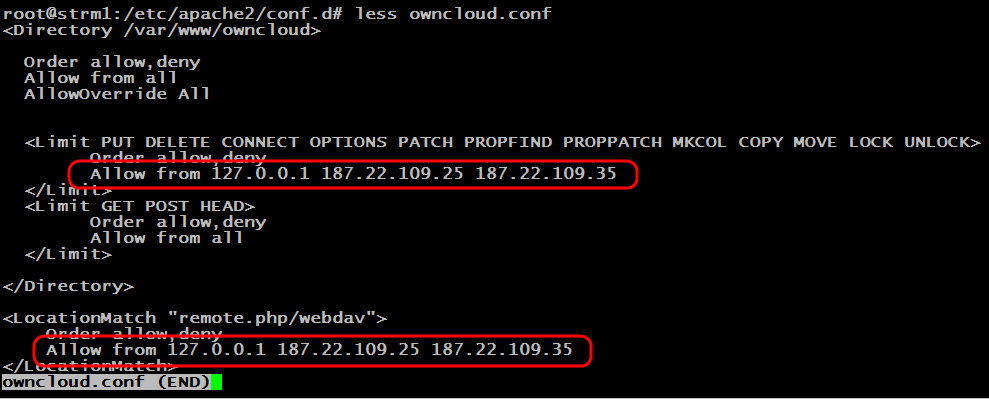
IP addresses are listed separated by spaces. You must make sure that the list always contains the IP loopback 127.0.0.1, as well as the public IP server itself ownCloud. Otherwise, WebDAV may fail. After changing the Apache settings, you must restart it:
In recent versions of ownCloud, a log of failed authorization attempts is maintained: "/var/log/owncloud/auth.log". The content of "/var/log/owncloud/auth.log" is controlled by the Fail2ban service. If they receive 5 or more unsuccessful authorization attempts from the same IP address for a short time, then they are blocked by the IPTables packet filter for 10 minutes. If, after automatic unlocking, attempts continue, the IP is blocked again forever. Follows the work Fail2ban possible in the log "/var/log/fail2ban.log".
The list of IP addresses that should not be blocked under any circumstances is set by the “ignoreip” parameter in the configuration file "/etc/fail2ban/jail.conf". IPs are separated by spaces.

After changing the settings of Fail2ban, you must restart it:
If you need to manually unblock any IP, you need to execute a command on the server from the CLI that is similar to the following, by correcting the address in it:
PS
Live version of ownCloud can be viewed on the official website http://demo.owncloud.org
Architecture
I decided to use the ownCloud cloud storage system as a basis. Which was installed in OS Debian Linux v7.1 and deployed as a virtual machine under the Proxmox Virtual Environment v3.1 hypervisor.I installed the cloud storage system on the Linux encrypted disk, access to the data is possible only via the HTTPS protocol, in addition to the standard password, you must also enter a one-time password (OTP). Regularly backed up. The possibility of emergency shutdown and delete all data ownCloud.
Proxmox Virtual Environment Hypervisor
The Proxmox Virtual Environment hypervisor is a specialized OS distribution of Debian Linux v7.1, remote access to the system is possible via the SSH protocol on the standard TCP port 22. However, the main working tool for managing virtual machines is a Web interface.
')
Once a day, a hot copy (snapshot) of the ownCloud virtual machine is generated and exported to NFS servers using the standard features of Proxmox VE.
In the screenshot, the virtual machine in the web interface has the identifier 100 (ownCloud). Access to its console is possible through the context menu item “Console”.
For example, this is how a password is entered for an encrypted disk at boot time:
OwnCloud cloud storage
About installing ownCloud on Habré, there is a fairly good article from the BlackIce13 user http://habrahabr.ru/post/208566/ there are already listed the main features and some advantages of this platform.
From myself I can only add that, in my opinion, there is a somewhat simpler way to install ownCloud for the Linux Debian distribution and many others than the one suggested by the author. Available repositories are available: http://software.opensuse.org/download/package?project=isv:ownCloud:community&package=owncloud
In this case, all the necessary dependencies are set automatically, and you will only be required to adjust the settings to fit your specifics.
ownCloud deployed on the basis of the OS Debian Linux v7.1 inside a virtual container. Remote access to the storage is possible via SSH protocol on the standard TCP port 22.
The main work with ownCloud is carried out through a Web-interface, it is also possible to connect via WebDAV protocol and use synchronization clients (Sync).
By the way, since access to ownCloud is done via HTTPS, access and error logs are kept by the Apache server in the files "/var/log/apache2/access.log" and "/var/log/apache2/error.log", respectively. OwnCloud also has its own log "/var/www/owncloud/data/owncloud.log".
One Time OTP Passwords
To enhance security, access to ownCloud via a Web interface is possible using two-factor authentication: a traditional password and a one-time OTP password. The OTP functionality is implemented using the external One Time Password Backend add-on. There is no native OTP support for ownCloud.
The configuration of the main OTP parameters is carried out in the “Admin” section under the administrative account.
In the screenshots, the two-factor authentication and one-time password settings are selected to ensure compatibility with the FEITIAN OTP c200 hardware generators.
Algorithm: Time-based One Time Password (TOTP)
Number of digits in the password: 6
Password lifetime: 60 seconds
In order for two-factor authentication to take effect, you must assign it to a Token Seed user. Up to this point, he can enter his ownCloud using only a regular password. What you actually need to do immediately after creating the user, go to the "Personal" section and enter Token Seed in the field of the same name.
It is not recommended to generate Token Seed using the built-in capabilities of the ownCloud OTP module, since its operation has problems. Input format: Base32 (% 32) UPPERCASE. You can convert Token Seed into different formats using the utility www.darkfader.net/toolbox/convert
Specifically for this project was used Token Seed embedded in hardware Token FEITIAN OTP c200. In general, you can use any password generator, and then bring it to the desired format using the converter provided in the text.
An example of such an Android application is Android Token: https://play.google.com/store/apps/details?id=uk.co.bitethebullet.android.token&hl=en
Initialized Token Seed looks like this:
To disable OTP, just remove Token Seed from the settings. If this is impossible, for example, due to the fact that the OTP generator is lost, so there is no access to the user's personal account, then the OTP can only be disabled by directly modifying the data in the MySQL DBMS. To do this, you need to start the MySQL client from the command line:
# mysql -uowncloud –p
Enter password:
Then execute the query similar to the following, changing the value of the “user” field to the necessary one:
mysql> delete from owncloud.oc_user_otp where `user` = 'test';Due to architectural constraints, OTP only works when accessing ownCloud via a web interface, but not via WebDAV. This disadvantage is compensated by the fact that the list of IP addresses that can use WebDAV is strictly limited. The “Allow from” directives in the Apache server configuration file "/etc/apache2/conf.d/owncloud.conf" are responsible for this. Please note that the directives are indicated there twice.
IP addresses are listed separated by spaces. You must make sure that the list always contains the IP loopback 127.0.0.1, as well as the public IP server itself ownCloud. Otherwise, WebDAV may fail. After changing the Apache settings, you must restart it:
service apache2 restartBrute force protection
In recent versions of ownCloud, a log of failed authorization attempts is maintained: "/var/log/owncloud/auth.log". The content of "/var/log/owncloud/auth.log" is controlled by the Fail2ban service. If they receive 5 or more unsuccessful authorization attempts from the same IP address for a short time, then they are blocked by the IPTables packet filter for 10 minutes. If, after automatic unlocking, attempts continue, the IP is blocked again forever. Follows the work Fail2ban possible in the log "/var/log/fail2ban.log".
The list of IP addresses that should not be blocked under any circumstances is set by the “ignoreip” parameter in the configuration file "/etc/fail2ban/jail.conf". IPs are separated by spaces.
After changing the settings of Fail2ban, you must restart it:
service fail2ban restartIf you need to manually unblock any IP, you need to execute a command on the server from the CLI that is similar to the following, by correcting the address in it:
iptables -D fail2ban-Owncloud -s 187.22.109.14/32 -j DROPPS
Live version of ownCloud can be viewed on the official website http://demo.owncloud.org
Source: https://habr.com/ru/post/222799/
All Articles