Squeeze all the juice or use Raspberry pi to the fullest
Hello!
Down with the sad words that this is my first post and all that. Perhaps I'd rather talk about how to squeeze all the juices from a little baby called Raspberry PI (hereinafter referred to as RPI), at the price of $ 35. I am 146.6% sure that there have already been posts of this kind, and this post does not claim to be a solid five . Rather, it's just an introductory word about: "How I occupied myself with business for a couple of dull evenings." Actually we will end up with a Raspberry PI that can be used:
For those who are interested in asking for a cat (Warning! Traffic).
So, what is needed for all this:
We also need some programs, PUTTY, WinSCP, XMing. So, it is necessary for us that everything that we conceived to work without shutting down / restarting RPI, hence assemblies like OpenELEC, RaspBMC, XBian can be excluded. We need XBMC to be “inside” our OS, like a player, so we will do something like that. We will use Raspbian. You can download from the office. the site
Then everything is simple. Unzip the downloaded, connect the SD card to the computer, then we need the program Win32DiskImager . Install, run. Specify the path to the .img file with the OS on board, then in the "Device" field, select our SD card from the list of carriers and click "Write". Then in the dialog box that appears, select “Yes” and prepare for the first launch of the RPI.
')
For RPI to work, we need a TV with HDMI output, but in extreme cases, we can get by with the usual one. To do this, we need instead of the HDMI cable a SCART-RCA cable and ordinary USB speakers with their own power! I think it is clear what and where to stick. If everything went smoothly, we will see a window with the settings of our OS.
After the reboot, enter the username pi and the password you made (raspberry by default). I recommend immediately changing the root password:
First of all, download WinSCP . Install, customize.
In the host name field, enter the ip address of the RPI, I have 192.168.1.100 (you can find out using the Advanced IP Scaner, or via a router, I think it is not necessary to explain in detail how to do this). In the user name and password field we specify the data for authorization. It is best to use root, then Save. Then everything is simple, specify the name, click the checkbox and OK. That's it, now we are ready to proceed to the next step.
Actually trace. step is to install X-Ming . We need it more for monitoring, well, and this will make life easier for us in the future, since we will install Conky for monitoring and MySqlWorkbench for database administration (but this is rather just a whim) on the RPI. Those who do not need it, can safely go to the next step.
Download, install. Installation options:
Jackdaw Non US keyboard Support
jackdaw XLaunnch wizard
jackdaw Run Unility
Normal PuTTY Link SSH client
In the properties of the XMing shortcut, we write the
After that, we cut in and we can safely connect to RPI via SSH, the main thing is to remind your SSH client to use X-11 Forwarding.
In PuTTY, go to Connections -> SSH -> X11 -> Turn on X11 Forwarding
X display location - localhost: 10.0
Remote X11 authentification protocol - XDM-Authorization-1
Then the session settings themselves (Sessions)
HostName (or IP address) - 192.168.1.100 (your ip RPI) port 22
Connection type - SSH -> Click Save and connect. We start the terminal and ...
All preparations are finished and I think we come to the main point. Lyrical digression. Before I decided to do as we do, I set myself both OpenELEC and RaspBMC. It didn’t work for me, because I had to restart RPI in order to run either Raspbian or XBMC (In the case of OpenELEC), and with RaspBMC I couldn’t even do something close. Although there may be craftsmen who say that I am a fool and all that. Go ahead. The description of this process is not mine, there were craftsmen who invented the wheel for us, I just put it into practice. In order:
Add a user from which you plan to run XBMC in the following groups ( audio video input dialout plugdev plug-in tty ) with the command:
Then, change the settings of the input group with the command:
The file should be:
Run XBMC with the command:
Wait for the download and profit!
If you need to make Autostart XBMC, then you need to edit / etc / default / xbmc and change ENABLED to 1:
Plugins that stand by me:
- repository.superrepo.org.frodo.al - A huge number of any additions to XBMC
- repository.seppius - Russian repository, with additions of "our" sites like LostFilm and Seasonvar and not only. Can be found for every taste
- repository.oneevil - Service addon ACEStream for XBMC and Addon Torrenter in this repository
- repository.nuismons - TSengine api
- plugin.watch.is.latest - Plugin for watch.is website (Invited website !!)
- plugin.video.torrenter.1.1.5.5 - Plugin for streaming playback of torrent movies, let's say.
You also need to install libTorrent in order to stream movies from LostFilm:
All these plugins can be easily found on the Internet, I will not go into the details of setting up and installing.
In order for scrappers to work, you need to use IMDB instead of TMDB in TheMovieDB settings. I did not understand why, but after the change, I got scrapers on searching for some Russian films, but I still cannot find some.
We need it to monitor the temperature, CPU load, and so on. In order:
Then create the .conkyrc file with the command:
and paste there:
Run with the command:
All settings can be found on the Internet and customize "to your taste."
Please do not hit hard for this item. This is not an “ how it should be ” instruction, this is an “ how it works for me ” instruction, constructive criticism of the case is welcome if there are any additions or comments, take it into account, and adapt myself to work.
Before installing, I recommend in the settings of the router (for example, my ADSL modem 192.168.1.1 - forward ports Virtual Rout (Port Forwarding), forward port 80 to port 80 192.168.1.100 (.100 this is my Raspberry PI))
So let's go. Git:
Apache:
Now php5 with buns:
Reboot Apache:
We are checking. We go in the browser on IP_malinks (in my example 192.168.1.100). If the inscription “It works!” Appears, then I congratulate you; if not, please tryto turn it on and off first. For those who did not forward ports, you can check directly with RPI. To do this, it clings via SSH and launch the browser:
Then enterto turn it on and off first.
Next, check the performance of php5, create a file test.php:
We will make changes to it:
CTRL + X -> Y -> Enter, go to
To access phphmyadmin, you need to /etc/apache2/apache2.conf
write the following (only necessary before Squeeze, starting from version 6.0; this will be included in the installation script of the
Restart Apache:
We check, we go in the browser
I think with the installation of the web server is finished. About setting up DNS in bind9 and VIrtual Hosts in Apache will be in another article. I will also say that for myself I put the same RhodeCode on the RPI and wanted to put some kind of Issue tracker. The choice fell on YouTrack from JetBrain, but JavaMashina heavily loads Raspberry, so I did not bother. Since I use phpstorm, here’s a small digression on how to make phpstorm friends with our database on RPI :
Cut PHPStorm into DataBase (button on the left) -> new -> DataBase Source
Database URL - the address and port of the remote machine, as well as the name of the database
User - database username
Password - DB user password
SSH tunnel must be free on the machine with which you want to connect phpstorm to mysql on the remote machine.
We stick a flash drive into RPI, enter the command:
Result:
We look, remember, TR16GB, type "ntfs", install support for ntfs:
Create a directory where we will mount our flash drive:
Open the file:
We add there:
Where UUID is the unique id of our flash drive, which we saw at the very beginning with the
We proceed to the installation, Update just in case all that we have done here:
Install the Samba server:
Now open /etc/samba/smb.conf and enter there:
Where workgroup is, this is a working group, most likely you have a WORKGROUP. Access to the server will be carried out without authorization. If it was necessary to request a password when connecting, then instead of
I zamapil network drive for convenience. You can throw movies on RPI right from your computer and watch it on a huge TV, which let's say you have somewhere in the living room.
First put rTorrent
Then create a folder on our flash drive, download our movies here:
As well as the folder where we will store information about downloads:
Then go to the user's home folder, under which rtorrent will work, I have this
Here we create the file ".rtorrent.rc", these are the settings of our rtorrent:
Description of the settings can be found here . Set up autoload and install screen for rtorrent to work in the background:
Edit the script to work correctly:
in the
Configure Apache, enable modules:
Edit the
It's time to put a web-muzzle for our rtorrent. I chose ruTorrent, because It is simple and in Russian. First we install Subversion:
Now, download ruTorrent:
Set permissions on the folder:
It remains to check the work of our web-muzzle, go to the browser
Well, almost everything. Now we have a ready-to-work RPI, for web developers who can put their favorite series on the night from Friday to Saturday and the next morning, lying on the couch, watch the whole thing on a huge telly. Thanks for attention.
PS I want to apologize for the lack of some links to third-party resources, the material of which I was guided by. I did it for a long time, and published it just now.
Down with the sad words that this is my first post and all that. Perhaps I'd rather talk about how to squeeze all the juices from a little baby called Raspberry PI (hereinafter referred to as RPI), at the price of $ 35. I am 146.6% sure that there have already been posts of this kind, and this post does not claim to be a solid five . Rather, it's just an introductory word about: "How I occupied myself with business for a couple of dull evenings." Actually we will end up with a Raspberry PI that can be used:
- as a home web server (if you are some PHP developer and you are no stranger to fun);
- as a multimedia console with the popular XBMC Media Center (
or super-duper-cool-to-TV for a modest $ 1,800); - and as a night torrent rocking chair, with a web-interface (for the lazy);
For those who are interested in asking for a cat (Warning! Traffic).
Training
So, what is needed for all this:
- Raspberry PI model B
- SD card at 8GB, speed should be high. (6 and 10 class will do)
- USB Flash card, in order not to clog an already small SD memory card with movies you want to watch
- HDMI or SCART-RCA cable
- Power supply, any mini-USB charger with 5 V output and up to 2A current, with MicroUSB output or MicroUSB adapter for connecting to a computer
- Some free time
- Straight arms (in any case, I definitely needed them)
Photo of my model

We also need some programs, PUTTY, WinSCP, XMing. So, it is necessary for us that everything that we conceived to work without shutting down / restarting RPI, hence assemblies like OpenELEC, RaspBMC, XBian can be excluded. We need XBMC to be “inside” our OS, like a player, so we will do something like that. We will use Raspbian. You can download from the office. the site
Then everything is simple. Unzip the downloaded, connect the SD card to the computer, then we need the program Win32DiskImager . Install, run. Specify the path to the .img file with the OS on board, then in the "Device" field, select our SD card from the list of carriers and click "Write". Then in the dialog box that appears, select “Yes” and prepare for the first launch of the RPI.
')
For RPI to work, we need a TV with HDMI output, but in extreme cases, we can get by with the usual one. To do this, we need instead of the HDMI cable a SCART-RCA cable and ordinary USB speakers with their own power! I think it is clear what and where to stick. If everything went smoothly, we will see a window with the settings of our OS.
Menu items with a detailed description and photo
- Expand filesystem - Expand the main section of the entire SD card.
- Change User Password - Set a password for the user “pi” (the default password is “raspberry”). Password must be entered twice!
- Enable Boot to Desktop - Download / do not load the GUI at startup. Disable because we do not need it, but you can enable it using the
- Internationalization Options - Choosing a location and language, there are 3 points:
- Add to Rastrack - Register the device in the common database. Skip it.
- Overclock - Overclocking the processor. The default frequency is 700 MHz, you can increase it to 1000 MHz. Raspberry Pi can now officially overclock to 1 GHz and not lose the warranty ( click! ). We put 1000 MHz, it will give us performance when working with XBMC.
- Advanced Options - Advanced Settings. There is a trace. items:
Now press TAB, choose FINISH.
- Expand filesystem - Expand the main section of the entire SD card.
- Change User Password - Set a password for the user “pi” (the default password is “raspberry”). Password must be entered twice!
- Enable Boot to Desktop - Download / do not load the GUI at startup. Disable because we do not need it, but you can enable it using the
startx command. After selecting, there are 2 more points: the first line is to load, the second line is not to load (there is also the third line, but in this article we are not interested).- Internationalization Options - Choosing a location and language, there are 3 points:
- Change Locale - Language selection, select “ru_RU.UTF-8 UTF-8”.
- Change Timezone - Select time zone, choose your own.
- Change Keyboard Layout - Keyboard settings. We leave everything as it is.
- Add to Rastrack - Register the device in the common database. Skip it.
- Overclock - Overclocking the processor. The default frequency is 700 MHz, you can increase it to 1000 MHz. Raspberry Pi can now officially overclock to 1 GHz and not lose the warranty ( click! ). We put 1000 MHz, it will give us performance when working with XBMC.
- Advanced Options - Advanced Settings. There is a trace. items:
- Overscan - If you have a wide black line around the edge of the image, you must turn off this mode.
- Hostname - Network Name RPI. Leave by default.
- Memoy Split - Allocation of video memory for the graphics processor. We put 128.
- SSH - SSH access. Turn on, because further we will configure everything on SSH. I got some bugs.
Initial ssh key generation still running. Please wait and try again.
It is treated by simple actions after a reboot:sudo rm /var/log/regen_ssh_keys.logsudo rm /etc/ssh/ssh_host*sudo ssh-keygen -A - Update - OS update. This requires access to the Internet.
- About raspi-config - Skip, not interesting.
Now press TAB, choose FINISH.
After the reboot, enter the username pi and the password you made (raspberry by default). I recommend immediately changing the root password:
sudo passwd root Setting up SSH access to the RPI file system (from Windows)
First of all, download WinSCP . Install, customize.
In the host name field, enter the ip address of the RPI, I have 192.168.1.100 (you can find out using the Advanced IP Scaner, or via a router, I think it is not necessary to explain in detail how to do this). In the user name and password field we specify the data for authorization. It is best to use root, then Save. Then everything is simple, specify the name, click the checkbox and OK. That's it, now we are ready to proceed to the next step.
Xming: X-Server for Windows
Actually trace. step is to install X-Ming . We need it more for monitoring, well, and this will make life easier for us in the future, since we will install Conky for monitoring and MySqlWorkbench for database administration (but this is rather just a whim) on the RPI. Those who do not need it, can safely go to the next step.
Download, install. Installation options:
Jackdaw Non US keyboard Support
jackdaw XLaunnch wizard
jackdaw Run Unility
Normal PuTTY Link SSH client
In the properties of the XMing shortcut, we write the
__\Xming.exe :10 -clipboard -multiwindowAfter that, we cut in and we can safely connect to RPI via SSH, the main thing is to remind your SSH client to use X-11 Forwarding.
In PuTTY, go to Connections -> SSH -> X11 -> Turn on X11 Forwarding
X display location - localhost: 10.0
Remote X11 authentification protocol - XDM-Authorization-1
Then the session settings themselves (Sessions)
HostName (or IP address) - 192.168.1.100 (your ip RPI) port 22
Connection type - SSH -> Click Save and connect. We start the terminal and ...
pi@raspberrypi ~ $ lxterminal& [1] 2997 pi@raspberrypi ~ $ Voila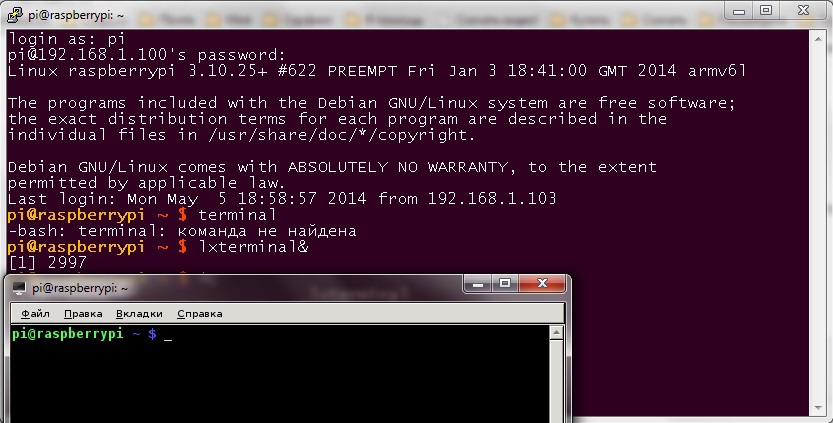
Installing XBMC on Raspberry Pi under Raspbian
All preparations are finished and I think we come to the main point. Lyrical digression. Before I decided to do as we do, I set myself both OpenELEC and RaspBMC. It didn’t work for me, because I had to restart RPI in order to run either Raspbian or XBMC (In the case of OpenELEC), and with RaspBMC I couldn’t even do something close. Although there may be craftsmen who say that I am a fool and all that. Go ahead. The description of this process is not mine, there were craftsmen who invented the wheel for us, I just put it into practice. In order:
cd /etc/apt/sources.list.d/ deb http://archive.mene.za.net/raspbian wheezy contrib CTRL + X -> Y -> Enter sudo apt-key adv --keyserver keyserver.ubuntu.com --recv-key 5243CDED sudo apt-get update sudo apt-get install xbmc Add a user from which you plan to run XBMC in the following groups ( audio video input dialout plugdev plug-in tty ) with the command:
sudo usermod -a -G _ Then, change the settings of the input group with the command:
sudo nano /etc/udev/rules.d/99-input.rules The file should be:
SUBSYSTEM=="input", GROUP="input", MODE="0660" KERNEL=="tty[0-9]*", GROUP="tty", MODE="0660" Run XBMC with the command:
xbmc-standalone Wait for the download and profit!
Cry!
This is already configured XBMC with already installed plugins, I will list below.
This is already configured XBMC with already installed plugins, I will list below.
If you need to make Autostart XBMC, then you need to edit / etc / default / xbmc and change ENABLED to 1:
ENABLED=1 Plugins that stand by me:
- repository.superrepo.org.frodo.al - A huge number of any additions to XBMC
- repository.seppius - Russian repository, with additions of "our" sites like LostFilm and Seasonvar and not only. Can be found for every taste
- repository.oneevil - Service addon ACEStream for XBMC and Addon Torrenter in this repository
- repository.nuismons - TSengine api
- plugin.watch.is.latest - Plugin for watch.is website (Invited website !!)
- plugin.video.torrenter.1.1.5.5 - Plugin for streaming playback of torrent movies, let's say.
You also need to install libTorrent in order to stream movies from LostFilm:
sudo apt-get install python-libtorrent All these plugins can be easily found on the Internet, I will not go into the details of setting up and installing.
In order for scrappers to work, you need to use IMDB instead of TMDB in TheMovieDB settings. I did not understand why, but after the change, I got scrapers on searching for some Russian films, but I still cannot find some.
Cry!


Conky installation
We need it to monitor the temperature, CPU load, and so on. In order:
sudo apt-get install conky Then create the .conkyrc file with the command:
sudo nano .conkyrc and paste there:
alignment top_left background no border_width 1 cpu_avg_samples 2 default_color white default_outline_color white default_shade_color white double_buffer yes draw_borders no draw_graph_borders yes draw_outline no draw_shades no use_xft yes xftfont DejaVu Sans Mono:size=12 gap_x 5 gap_y 60 minimum_size 5 5 net_avg_samples 2 no_buffers yes out_to_console no out_to_stderr no extra_newline no own_window yes own_window_class Conky own_window_type desktop stippled_borders 0 update_interval 1.0 uppercase no use_spacer none show_graph_scale no show_graph_range no TEXT ${color grey}Uptime:$color $uptime ${color grey}Frequency (in MHz):$color $freq ${color grey}Frequency (in GHz):$color $freq_g ${color grey}RAM Usage:$color $mem/$memmax - $memperc% ${membar 4} ${color grey}Swap Usage:$color $swap/$swapmax - $swapperc% ${swapbar 4} ${color grey}CPU Usage:$color $cpu% ${cpubar 4} ${color red}Temp: $color ${alignr 4}${color red}${acpitemp}°$color ${color grey}Processes:$color $processes ${color grey}Running:$color $running_processes $hr ${color grey}File systems: / $color${fs_used /}/${fs_size /} ${fs_bar 6 /} ${color grey}Networking: Up:$color ${upspeed eth0} ${color grey} - Down:$color ${downspeed eth0} $hr ${color grey}Name PID CPU% MEM% ${color lightgrey} ${top name 1} ${top pid 1} ${top cpu 1} ${top mem 1} ${color lightgrey} ${top name 2} ${top pid 2} ${top cpu 2} ${top mem 2} ${color lightgrey} ${top name 3} ${top pid 3} ${top cpu 3} ${top mem 3} ${color lightgrey} ${top name 4} ${top pid 4} ${top cpu 4} ${top mem 4} Run with the command:
conky All settings can be found on the Internet and customize "to your taste."
Cry!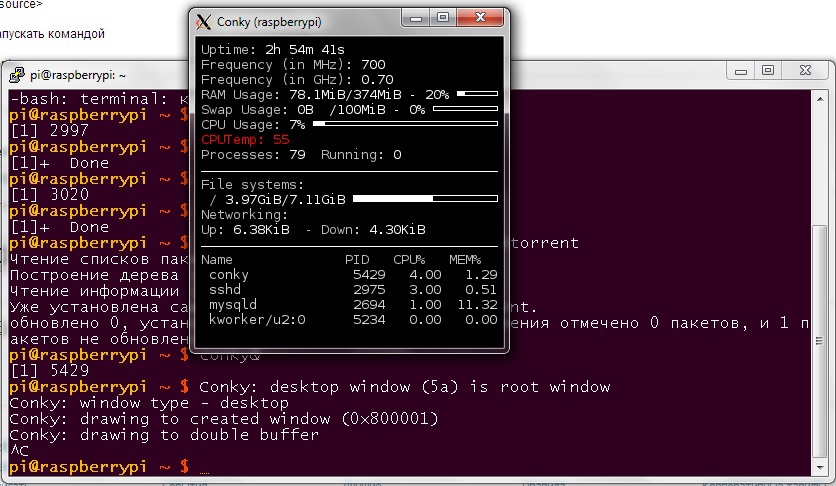
Installing and configuring Apache2.2, php5, mysql, phpmyadmin, mysql-workbench WebServer
Please do not hit hard for this item. This is not an “ how it should be ” instruction, this is an “ how it works for me ” instruction, constructive criticism of the case is welcome if there are any additions or comments, take it into account, and adapt myself to work.
Before installing, I recommend in the settings of the router (for example, my ADSL modem 192.168.1.1 - forward ports Virtual Rout (Port Forwarding), forward port 80 to port 80 192.168.1.100 (.100 this is my Raspberry PI))
So let's go. Git:
sudo apt-get install git Apache:
sudo apt-get install apache2 apache2-doc libapache2-mod-scgi Now php5 with buns:
sudo apt-get install php5 libapache2-mod-php5 libapache2-mod-auth-mysql php5 php5-common php5-curl php5-mysql php-image-graph imagemagick Reboot Apache:
sudo service apache2 restart We are checking. We go in the browser on IP_malinks (in my example 192.168.1.100). If the inscription “It works!” Appears, then I congratulate you; if not, please try
midori& Then enter
localhost/ or localhost/apache2-default . If the inscription “It works!” Appears, then I congratulate you; if not, please try /var/www/ - daddy with your sites and scripts./etc/php5/ /etc/apache2/ - there are php5 and apache configs here.Next, check the performance of php5, create a file test.php:
sudo nano /var/www/phpinfo.php We will make changes to it:
<?php phpinfo(); ?> CTRL + X -> Y -> Enter, go to
IP__/test.php (if via RPI, then localhost/test.php ). If there is information about PHP5 then all is well. Next we install PHPMyAdmin: sudo apt-get install phpmyadmin To access phphmyadmin, you need to /etc/apache2/apache2.conf
sudo nano /etc/apache2/apache2.conf write the following (only necessary before Squeeze, starting from version 6.0; this will be included in the installation script of the
/etc/apache2/conf.d/phpmyadmin.conf package -> ../../phpmyadmin/apache.conf automatically): Include /etc/phpmyadmin/apache.conf Restart Apache:
sudo /etc/init.d/apache2 restart We check, we go in the browser
192.168.1.100/phpmyadmin (c RPI localhost/phpmyadmin ).I think with the installation of the web server is finished. About setting up DNS in bind9 and VIrtual Hosts in Apache will be in another article. I will also say that for myself I put the same RhodeCode on the RPI and wanted to put some kind of Issue tracker. The choice fell on YouTrack from JetBrain, but JavaMashina heavily loads Raspberry, so I did not bother. Since I use phpstorm, here’s a small digression on how to make phpstorm friends with our database on RPI :
Cut PHPStorm into DataBase (button on the left) -> new -> DataBase Source
Cry!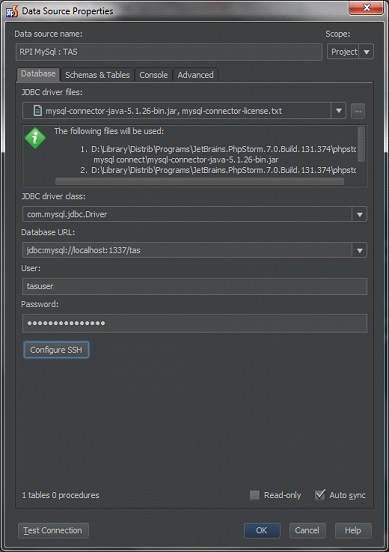
Database URL - the address and port of the remote machine, as well as the name of the database
User - database username
Password - DB user password
Cry!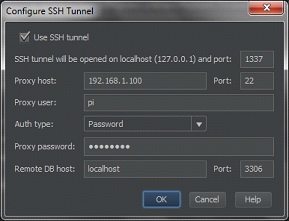
SSH tunnel must be free on the machine with which you want to connect phpstorm to mysql on the remote machine.
Mount our USB flash drive
We stick a flash drive into RPI, enter the command:
sudo blkid Result:
/dev/mmcblk0p1: SEC_TYPE="msdos" LABEL="boot" UUID="993B-8922" TYPE="vfat" /dev/mmcblk0p2: UUID="fc254b57-8fff-4f96-9609-ea202d871acf" TYPE="ext4" /dev/sda: LABEL="TR16GB" UUID="D29807B898079A5D" TYPE="ntfs" We look, remember, TR16GB, type "ntfs", install support for ntfs:
sudo apt-get install ntfs-3g Create a directory where we will mount our flash drive:
sudo mkdir /mount/flash Open the file:
sudo nano /etc/fstab We add there:
"UUID="D29807B898079A5D" /mount/flash ntfs-3g rw,force,exec,users 0 0" Where UUID is the unique id of our flash drive, which we saw at the very beginning with the
sudo blkid command. Reboot RPI: sudo reboot Install samba
We proceed to the installation, Update just in case all that we have done here:
sudo apt-get update && sudo apt-get upgrade Install the Samba server:
sudo apt-get install samba samba-common-bin Now open /etc/samba/smb.conf and enter there:
[global] workgroup = WORKGROUP security = share guest ok = yes browseable = yes [flash] path = /mount/flash writeable = yes readonly = no browseable = yes guest ok = yes Where workgroup is, this is a working group, most likely you have a WORKGROUP. Access to the server will be carried out without authorization. If it was necessary to request a password when connecting, then instead of
security = share and guest ok = yes write security = user . It is also necessary to create a new user, enter the command sudo smbpasswd -a [] , where [name] is the user name. Save the config, reboot: sudo /etc/init.d/samba restart I zamapil network drive for convenience. You can throw movies on RPI right from your computer and watch it on a huge TV, which let's say you have somewhere in the living room.
Cry!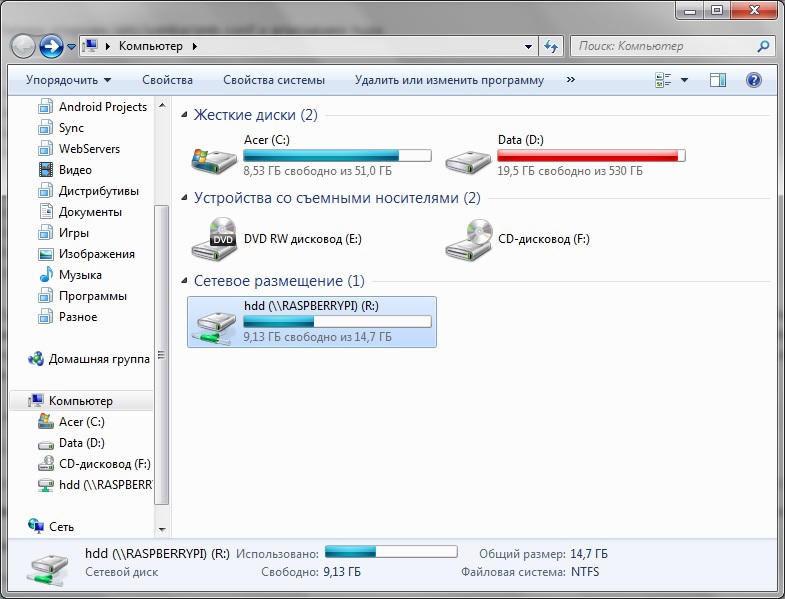
Install rTorrent, Screen, RuTorrent
First put rTorrent
sudo aptitude install rtorrent Then create a folder on our flash drive, download our movies here:
mkdir /mount/flash/Torrent/ As well as the folder where we will store information about downloads:
mkdir /mount/flash/Torrent/.rt/ Then go to the user's home folder, under which rtorrent will work, I have this
/home/pi : cd /home/pi Here we create the file ".rtorrent.rc", these are the settings of our rtorrent:
min_peers = 1 max_peers = 30 download_rate = 0 upload_rate = 0 directory = /mount/flash/Torrent/ session = /mount/flash/Torrent/.rt/ port_range = 40890-40890 port_random = no check_hash = yes session_save = yes encryption = allow_incoming,enable_retry,prefer_plaintext use_udp_trackers = yes dht = auto dht_port = 6881 encoding_list = UTF-8 scgi_port = 127.0.0.1:5000 Description of the settings can be found here . Set up autoload and install screen for rtorrent to work in the background:
sudo aptitude install screen sudo wget http://libtorrent.rakshasa.no/attachment/wiki/RTorrentCommonTasks/rtorrentInit.sh?format=raw -O /etc/init.d/rtorrent Edit the script to work correctly:
sudo nano /etc/init.d/rtorrent in the
user="user" we write user="pi" . We save. Now we will add this whole thing to autoload and run: sudo chmod 755 /etc/init.d/rtorrent && sudo update-rc.d rtorrent defaults && sudo /etc/init.d/rtorrent start Configure Apache, enable modules:
sudo a2enmod scgi Edit the
/etc/apache2/apache2.conf file — add the line “ SCGIMount /RPC2 127.0.0.1:5000 ” at the very end of the file. Restart Apache: sudo service apache2 restart It's time to put a web-muzzle for our rtorrent. I chose ruTorrent, because It is simple and in Russian. First we install Subversion:
sudo apt-get install subversion Now, download ruTorrent:
cd /var/www/ sudo svn checkout http://rutorrent.googlecode.com/svn/trunk/rutorrent Set permissions on the folder:
sudo chown -R www-data:www-data ./rutorrent/ It remains to check the work of our web-muzzle, go to the browser
ip__RPI/rutorrent (if with RPI then localhost/rutorrent ):Voila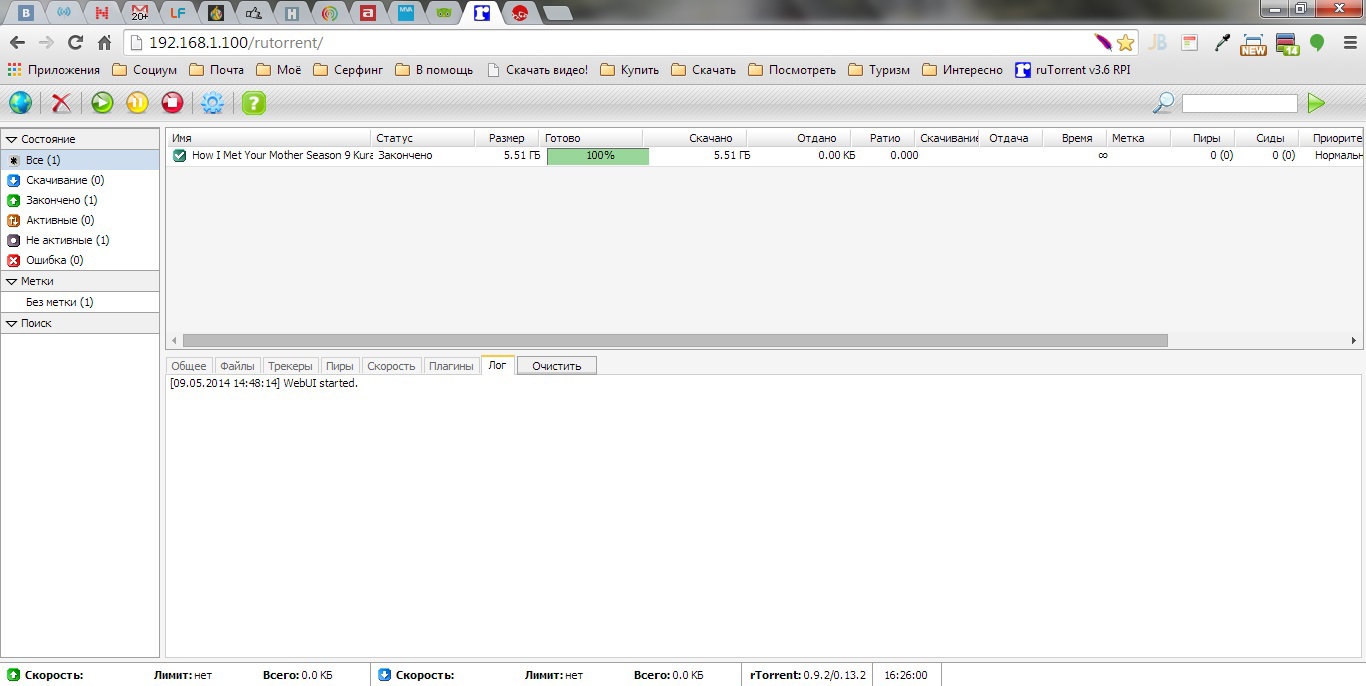
Well, almost everything. Now we have a ready-to-work RPI, for web developers who can put their favorite series on the night from Friday to Saturday and the next morning, lying on the couch, watch the whole thing on a huge telly. Thanks for attention.
PS I want to apologize for the lack of some links to third-party resources, the material of which I was guided by. I did it for a long time, and published it just now.
Source: https://habr.com/ru/post/222447/
All Articles