Plywood monitor from an old laptop
Probably many habrizhiteli are faced with the fact that computer hardware is accumulated at home. Something is kept in reserve, something for future experiments, something on the details. So for 4 years I had a disassembled laptop from HP, which died in an unequal struggle with temperature and careless repairmen.
But sooner or later, cleaning comes to the mezzanine, where the useless iron is stored. Most of the obsolete, broken, and simply useless iron is sent to another box, which is proud of "ON DISPOSAL". However, the saved matrix of the laptop made me remember a long-standing idea - to turn it into a fully working monitor.
Then, 4 years ago, I didn’t know what to do with it, and familiar electronics engineers kept saying that it was cheaper to buy a new monitor, and not to bother with finding the right board. In the end, this turned out to be the case, but, damn it, the pleasure of the design and assembly process will not replace the order of the new monitor. However, more about this below.
')
A short jog on Google did not give me any special results. It is now, and articles on the Habré about it are found, and useful forums appeared on the forums, and then on most forums such questions were shrugged. Yes, I even managed to find a scheme for soldering the required board with my own hands, but this was not for me. And only in one forgotten article I found the answer and went to Ebay.
Short search, the choice of the seller and the price and a lot of doubts. These Chinese controllers seem to be universal, but it was scary to order a joke for 50 bucks from the other side of the planet, and therefore I wrote a letter to the seller, to whom I attached the images of the matrix and its serial number. And the cherished package hit the road. Quickly crossed the border and disappeared ... The parcel went for more than two months - not a record, but at that time she survived the termination of reception at customs, a fire in the warehouse of the Russian Post, visited Samara, returned to Moscow and finally came to me.
Naturally, the new thing should definitely try. However, I apologize to the readers for the quality of some of the photographs that you will see below.
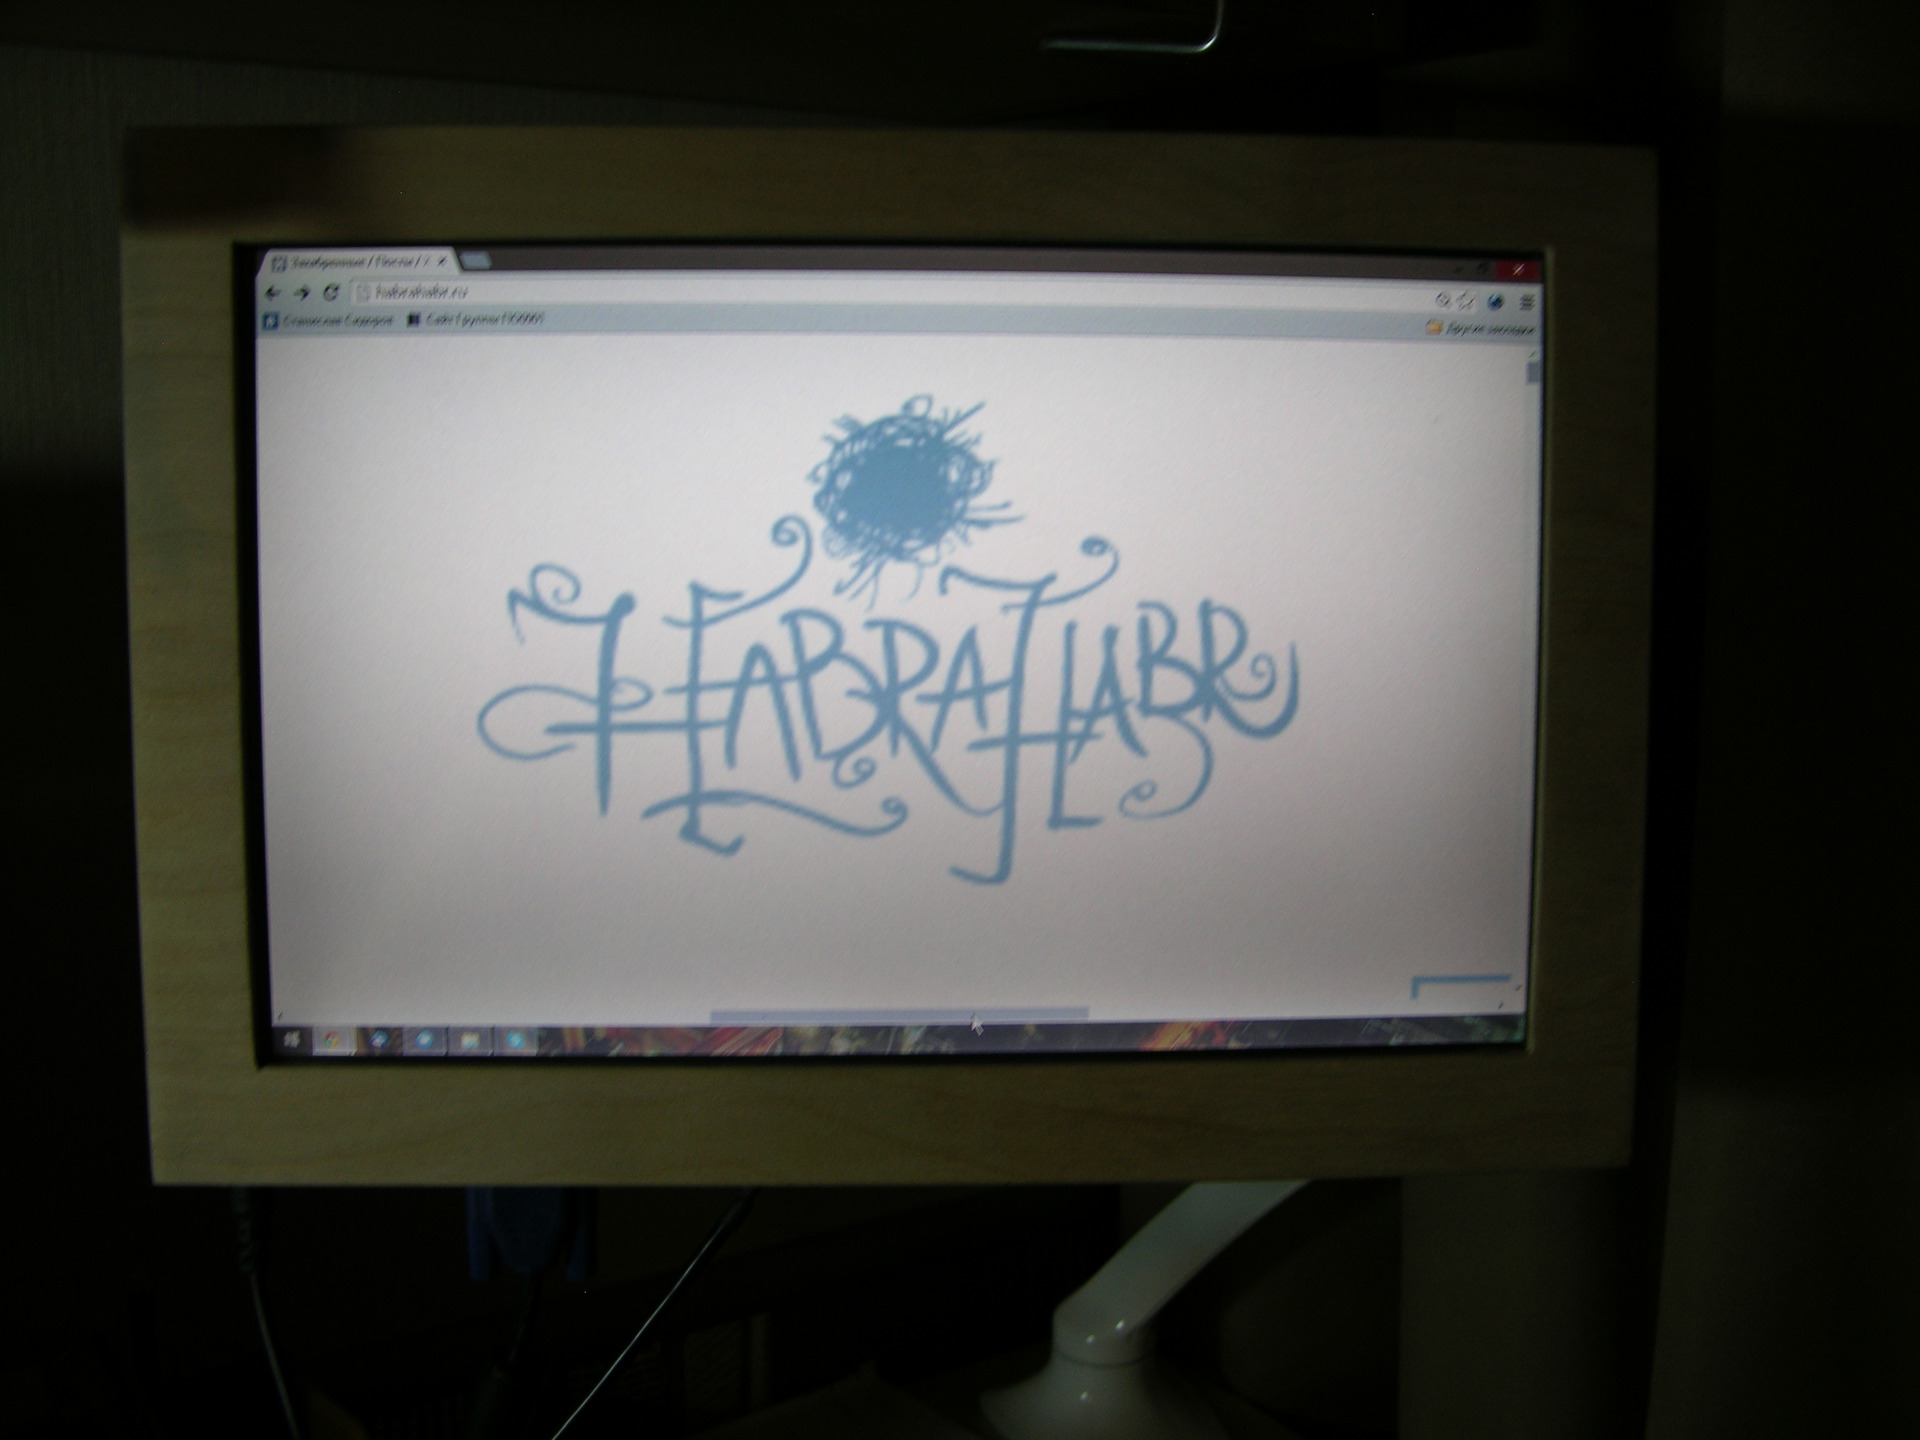
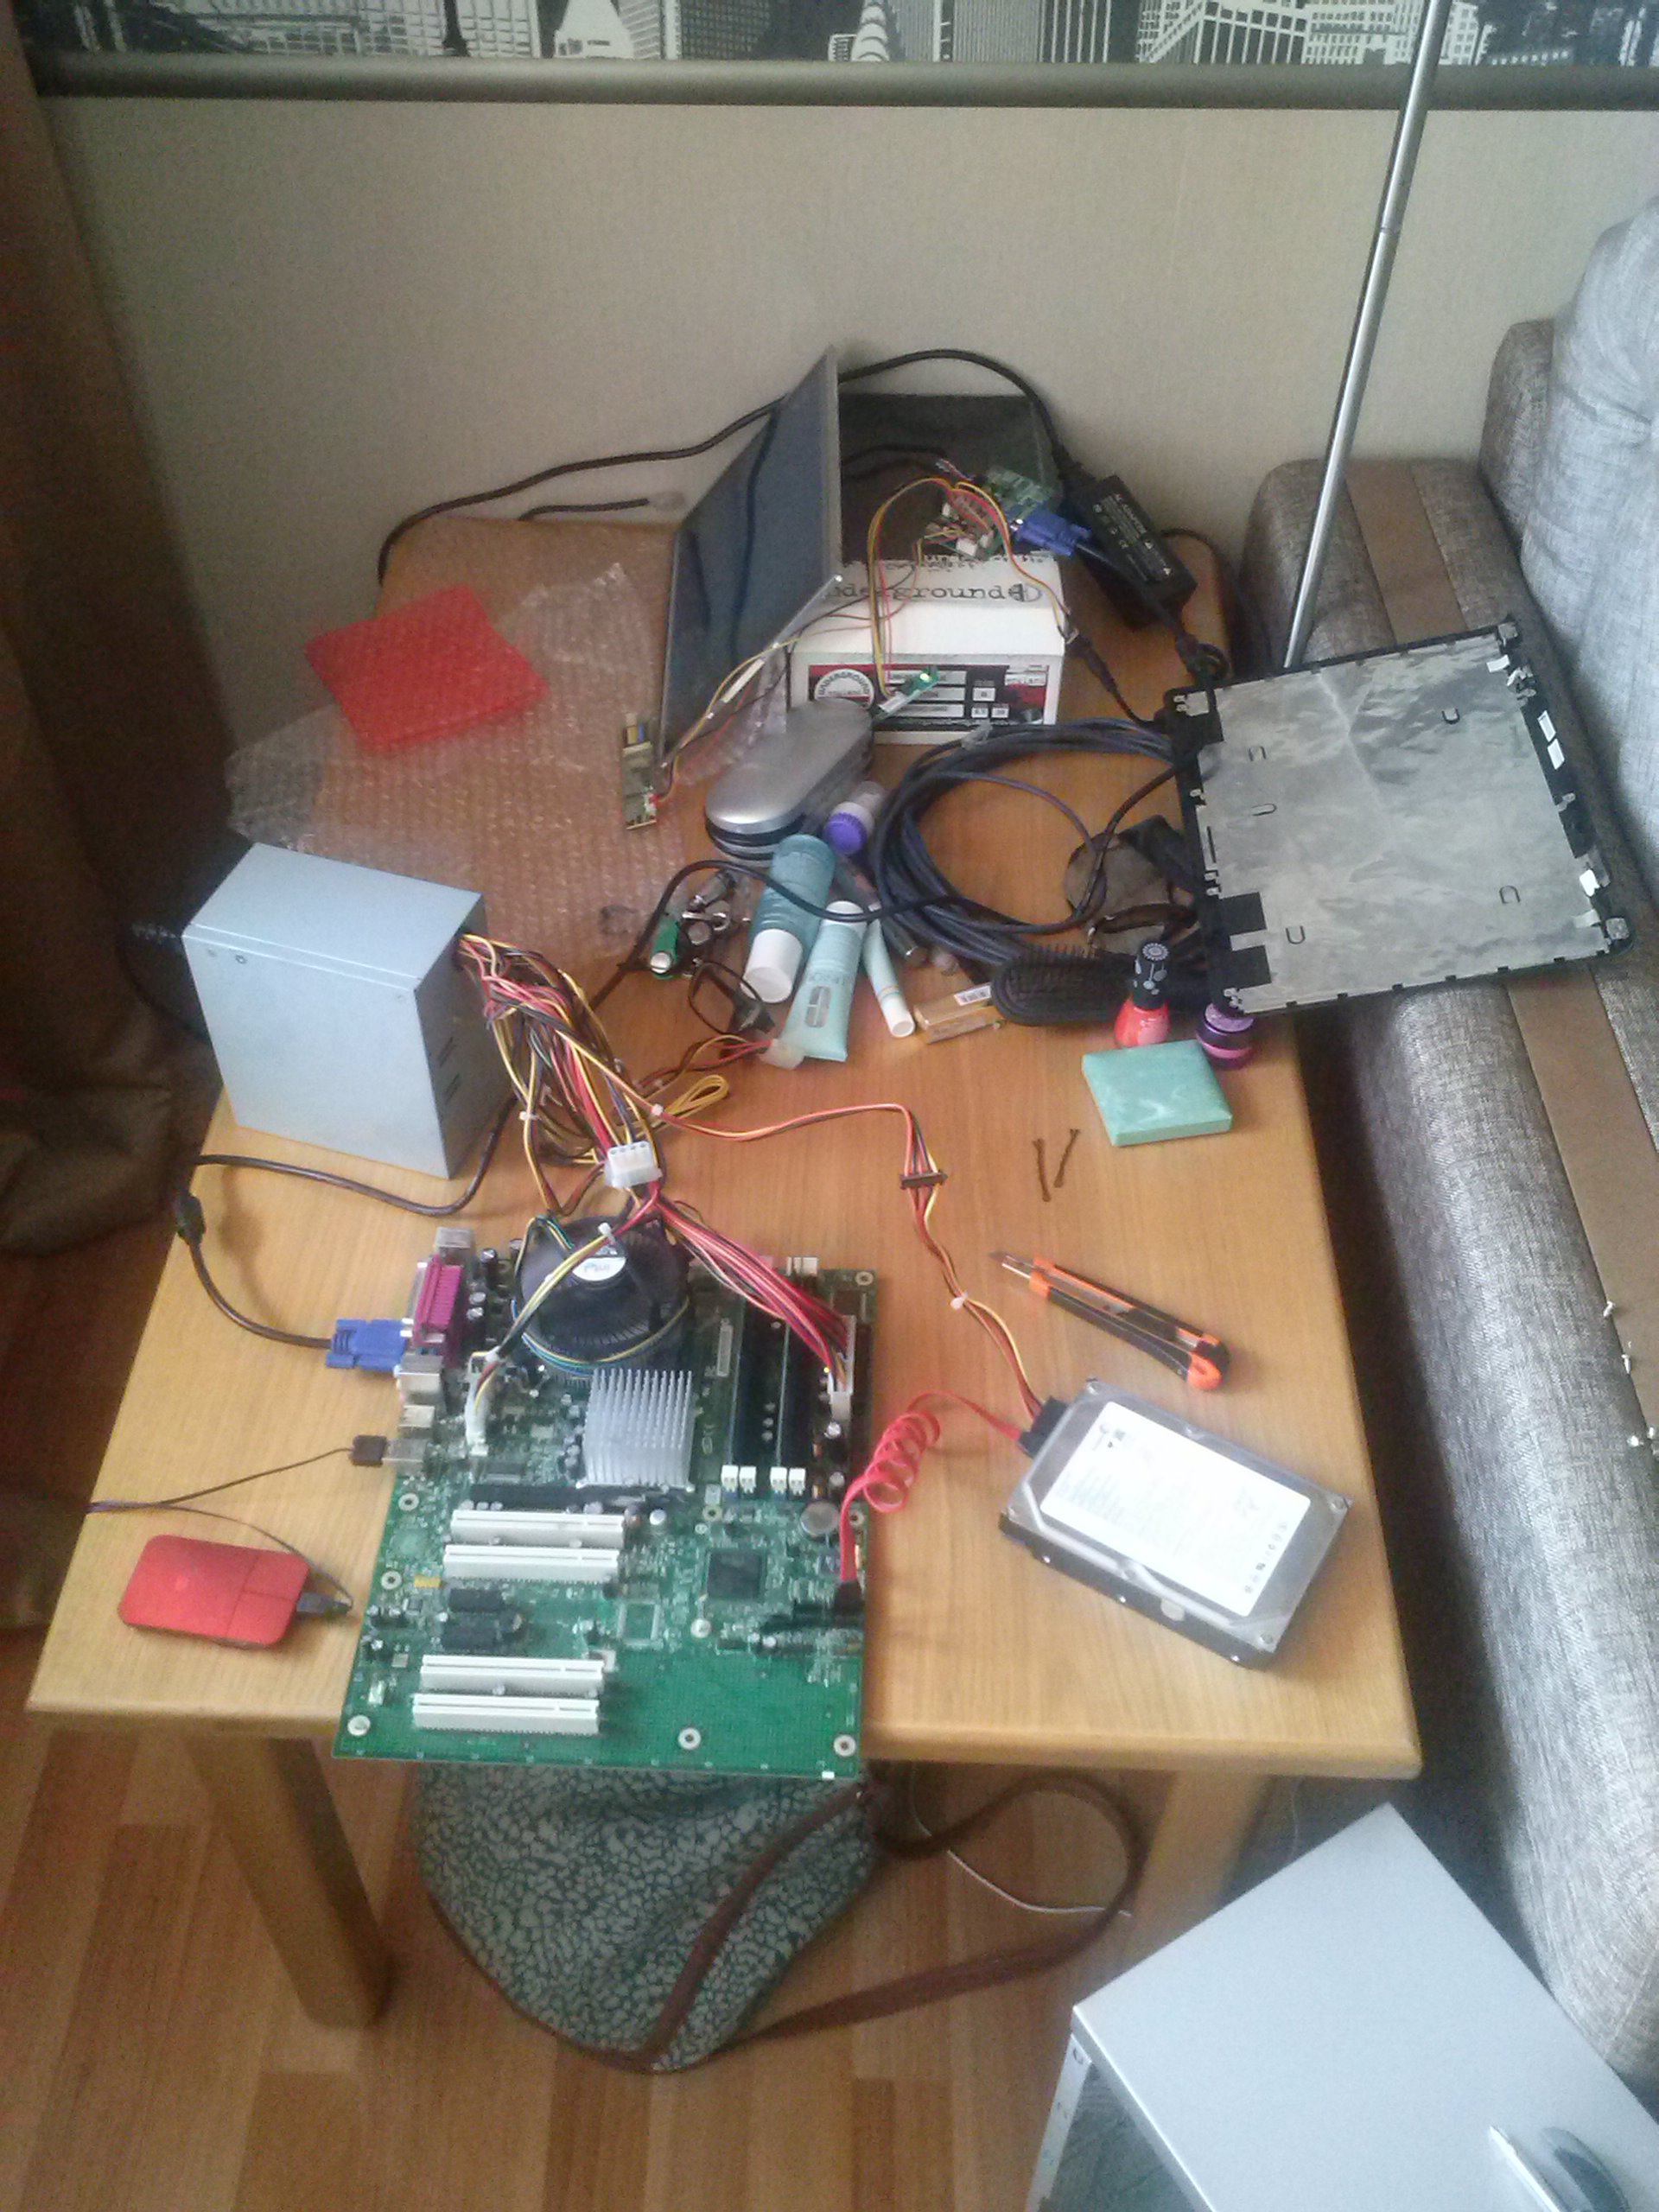
Connected to one of the inhabitants of the mezzanine design:
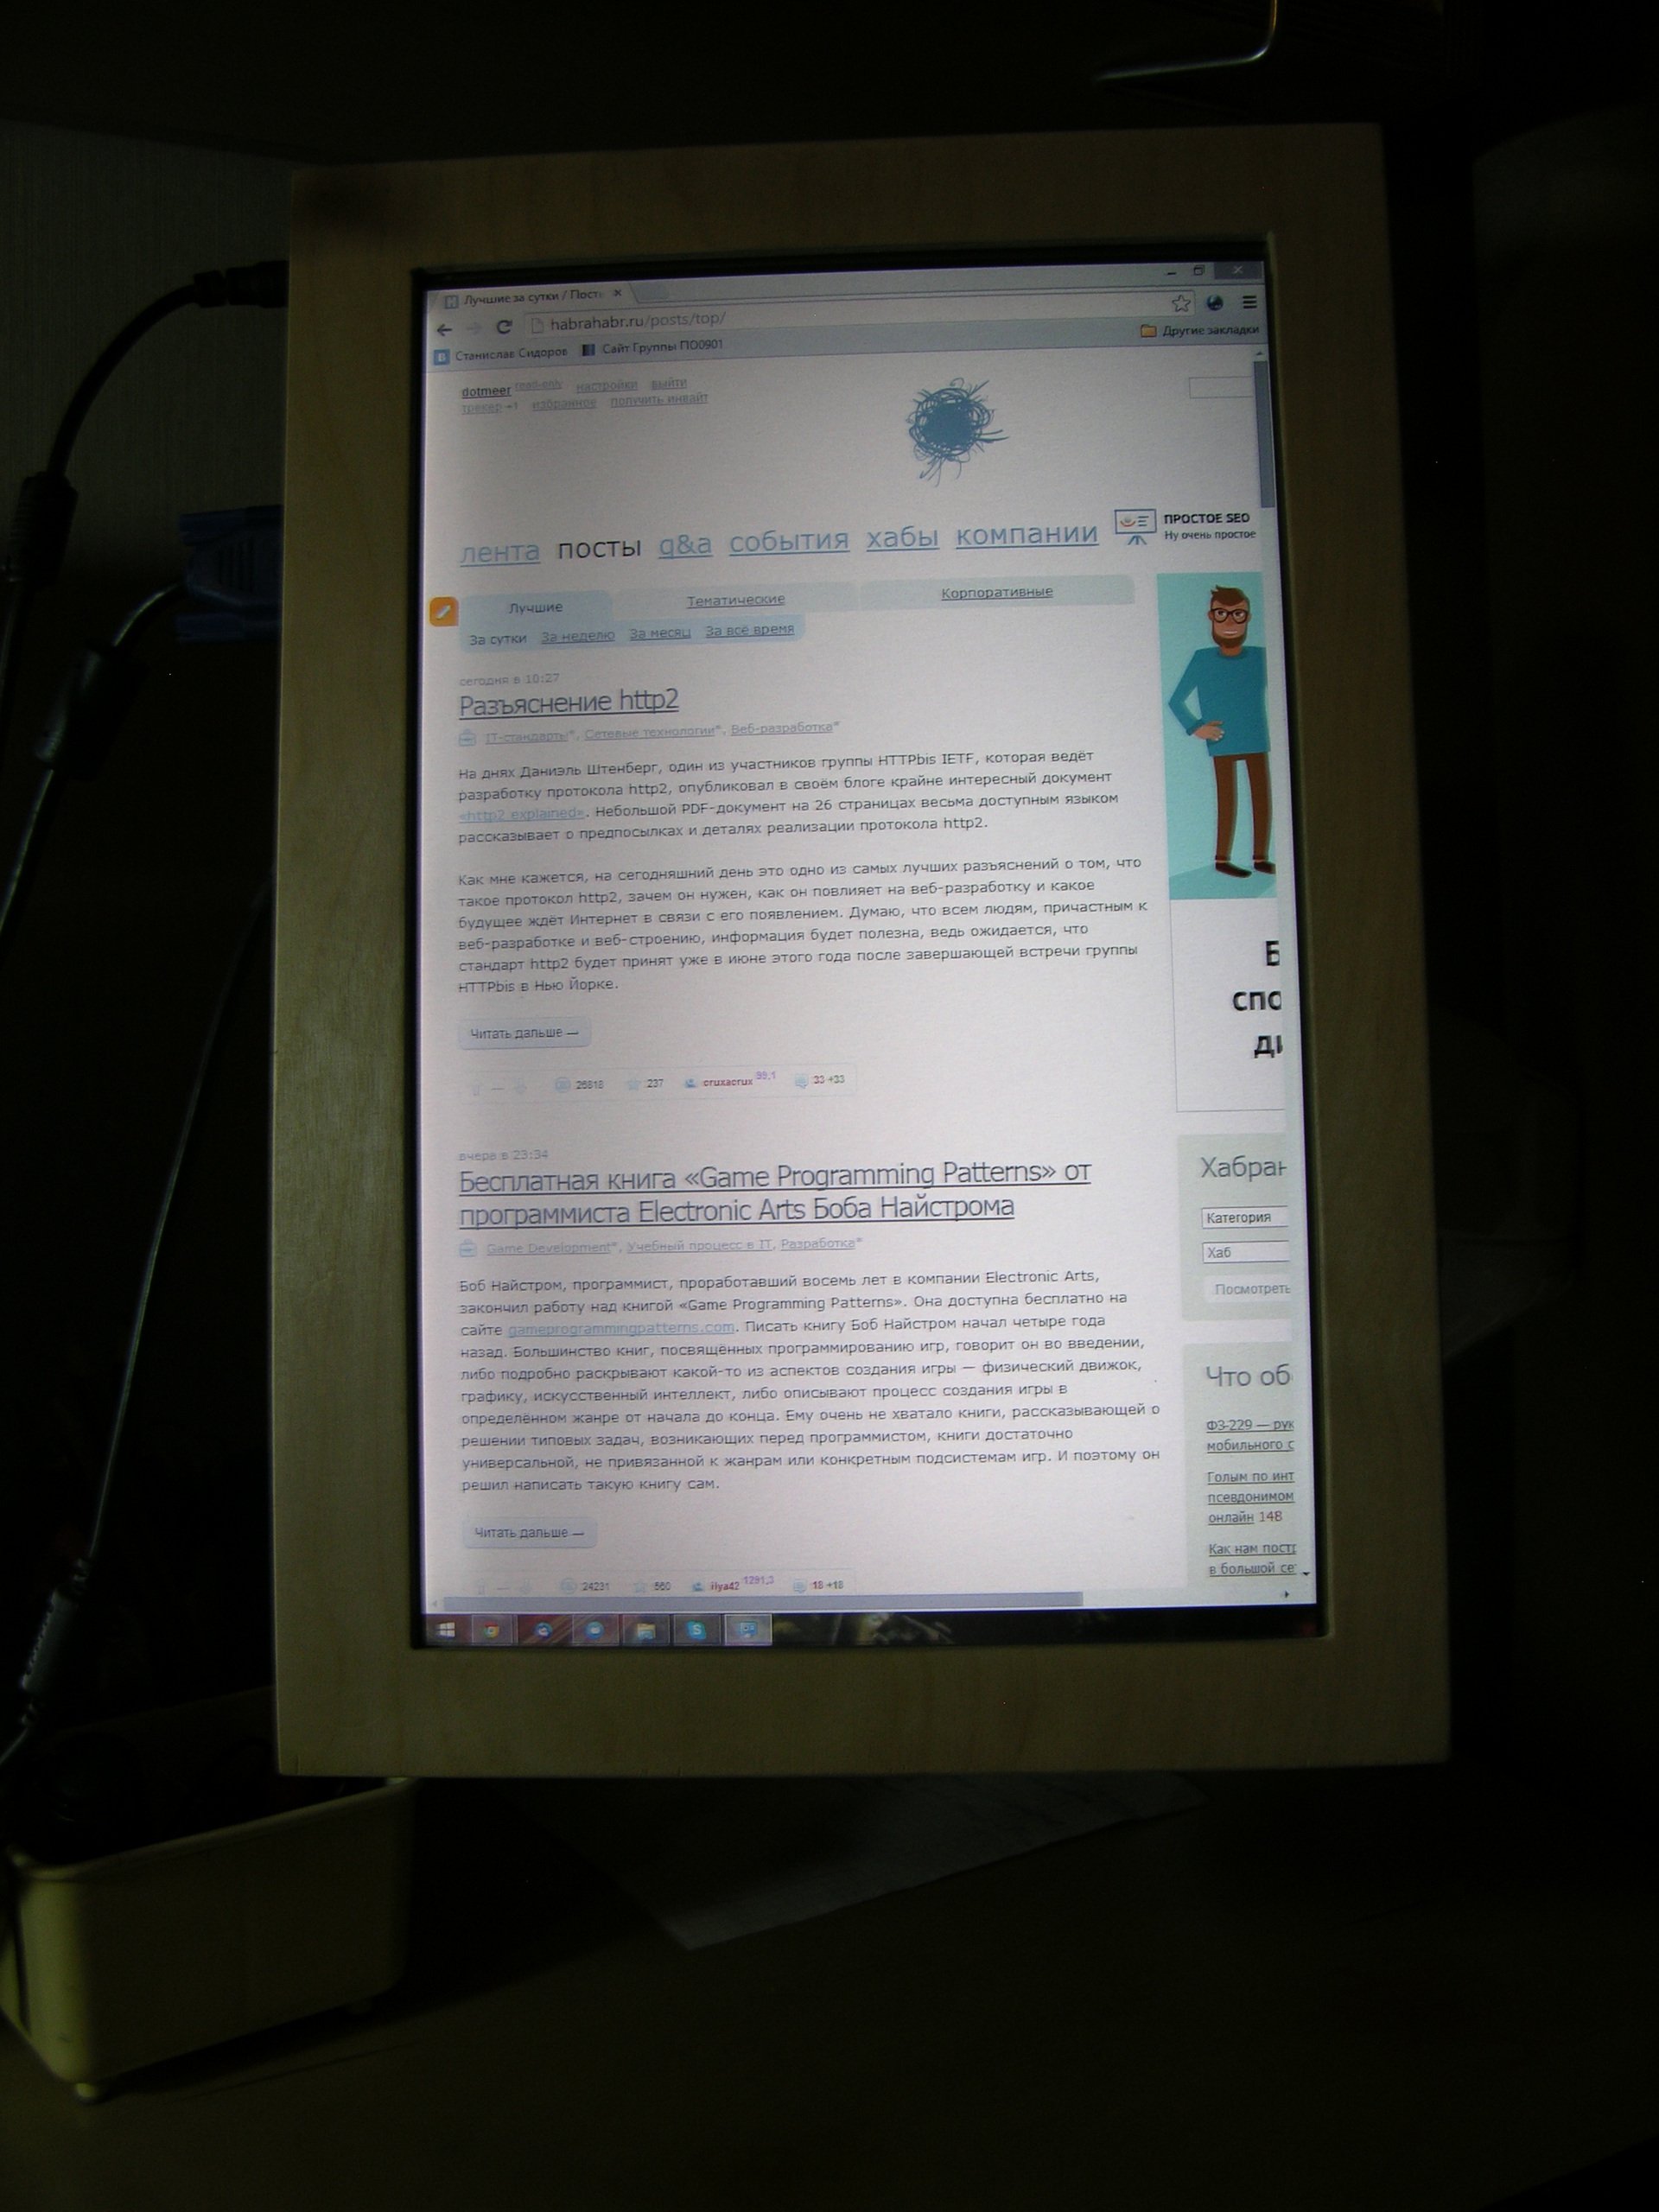
Received image:

So, it's time to invent a case. At that time, and it was a little less than a year ago, there was an old 19 "4: 3 monitor on my desk (I didn’t plan to replace it with a monitor from the matrix, yet the viewing angles leave much to be desired), so I was inspired by them This meant a frame that framed the monitor, a thick case, a stand (although even then there were thoughts about the bracket.) The frame was also needed to hide some metal parts of the matrix itself.
Now about the choice of the material itself. While I was waiting for the controller, I was looking through DIY posts on the desktop. There were plastic and even painted cardboard products, but there were after all works of art made of wood and brass, made and painted with love and skill. Although I did not initially plan to save on material, plywood was chosen for one simple reason - a wardrobe, a table, a shelf, platbands and even a window sill were made from it in my room.
2 semesters of engineering and computer graphics were enough for me to depict a drawing in 2 projections with dimensions without any problems. The drawing depicted only the front frame, where the matrix itself was placed. Then there was a drawing of the bottom, with cutouts for ports and buttons. The side walls were cut out of blanks and glued together only later, and the back cover was just a rectangle of the right size.
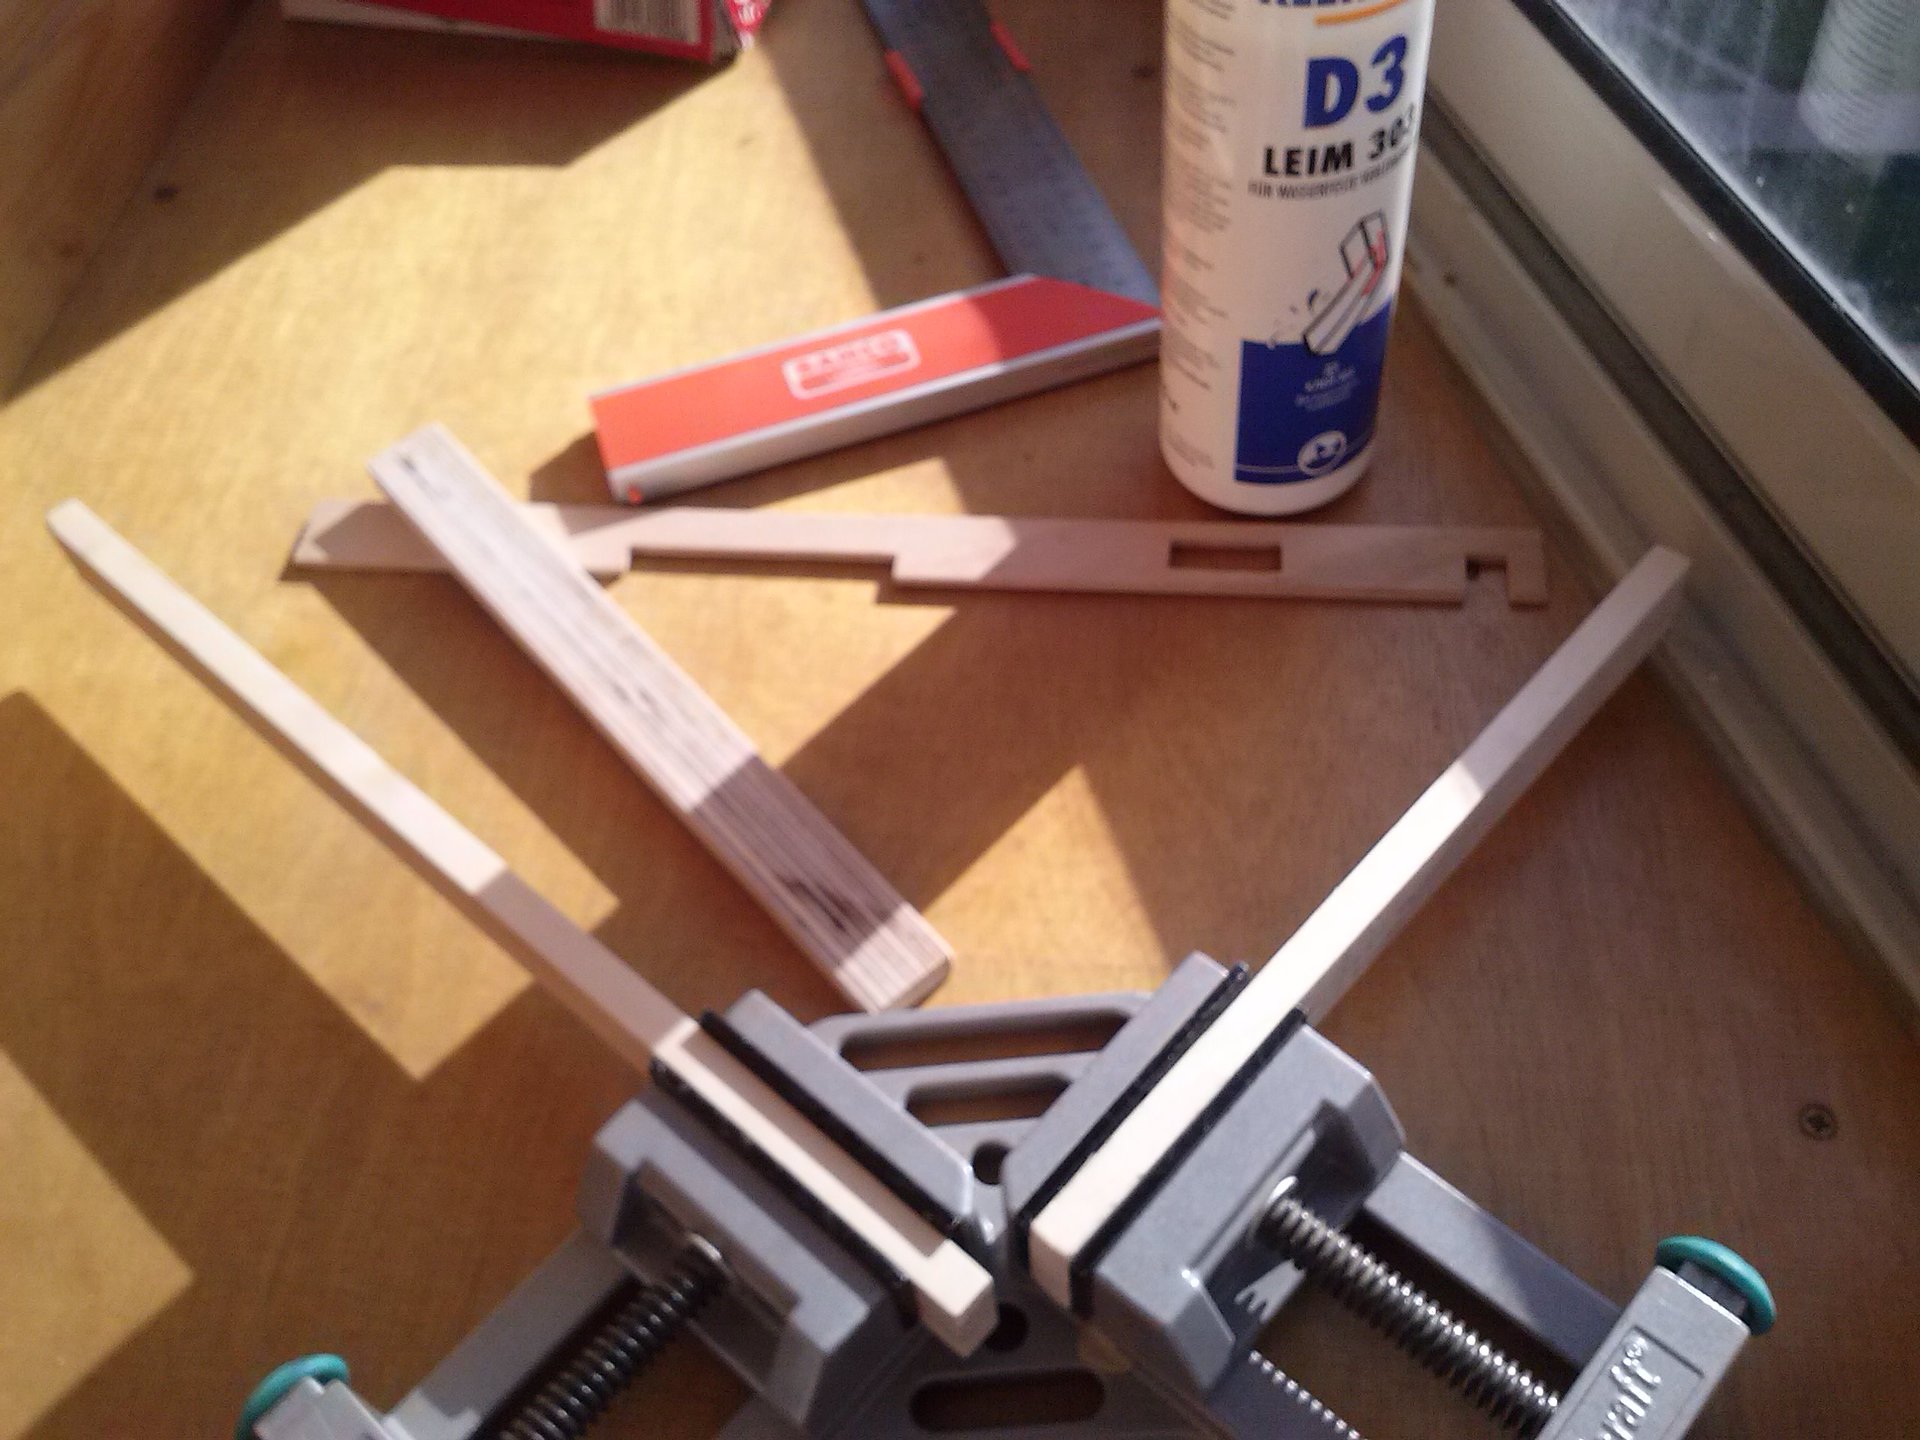
How the side walls stuck together (here you can see the lower part):
Honestly, this whole project has been done for about a year. Sometimes we had to wait for the parcels, sometimes there was simply no time or desire, which made the unfinished blanks and the box with “iron” and wires gather dust on the table, sometimes it took time to make next plywood blanks or to grind them. All the plywood blanks and polishing of the finished product were helped by my father, who is closer to working with wood than me (furniture in my room: an individual project, factory production, manual assembly).
While reading Habr, I stumbled upon a post about a workbench of a hauler, and there, in the comments, I learned for the first time what touch screen overlay is. “Who doesn't want to poke a finger into the monitor for a reason?” I thought. And again went to Ebay. What I saw did not please me, and I did not want to wait. I was ready to abandon this venture, I did not want to take a chance and order through fragile glass through delivery by Russian Post. But then I stumbled upon the online store touchbaza (not advertising), where I found the touchpad of the size I needed. Here and delivery by the forwarding company, and the panel at 13 "in the box from under the monitor between the foam gaskets.
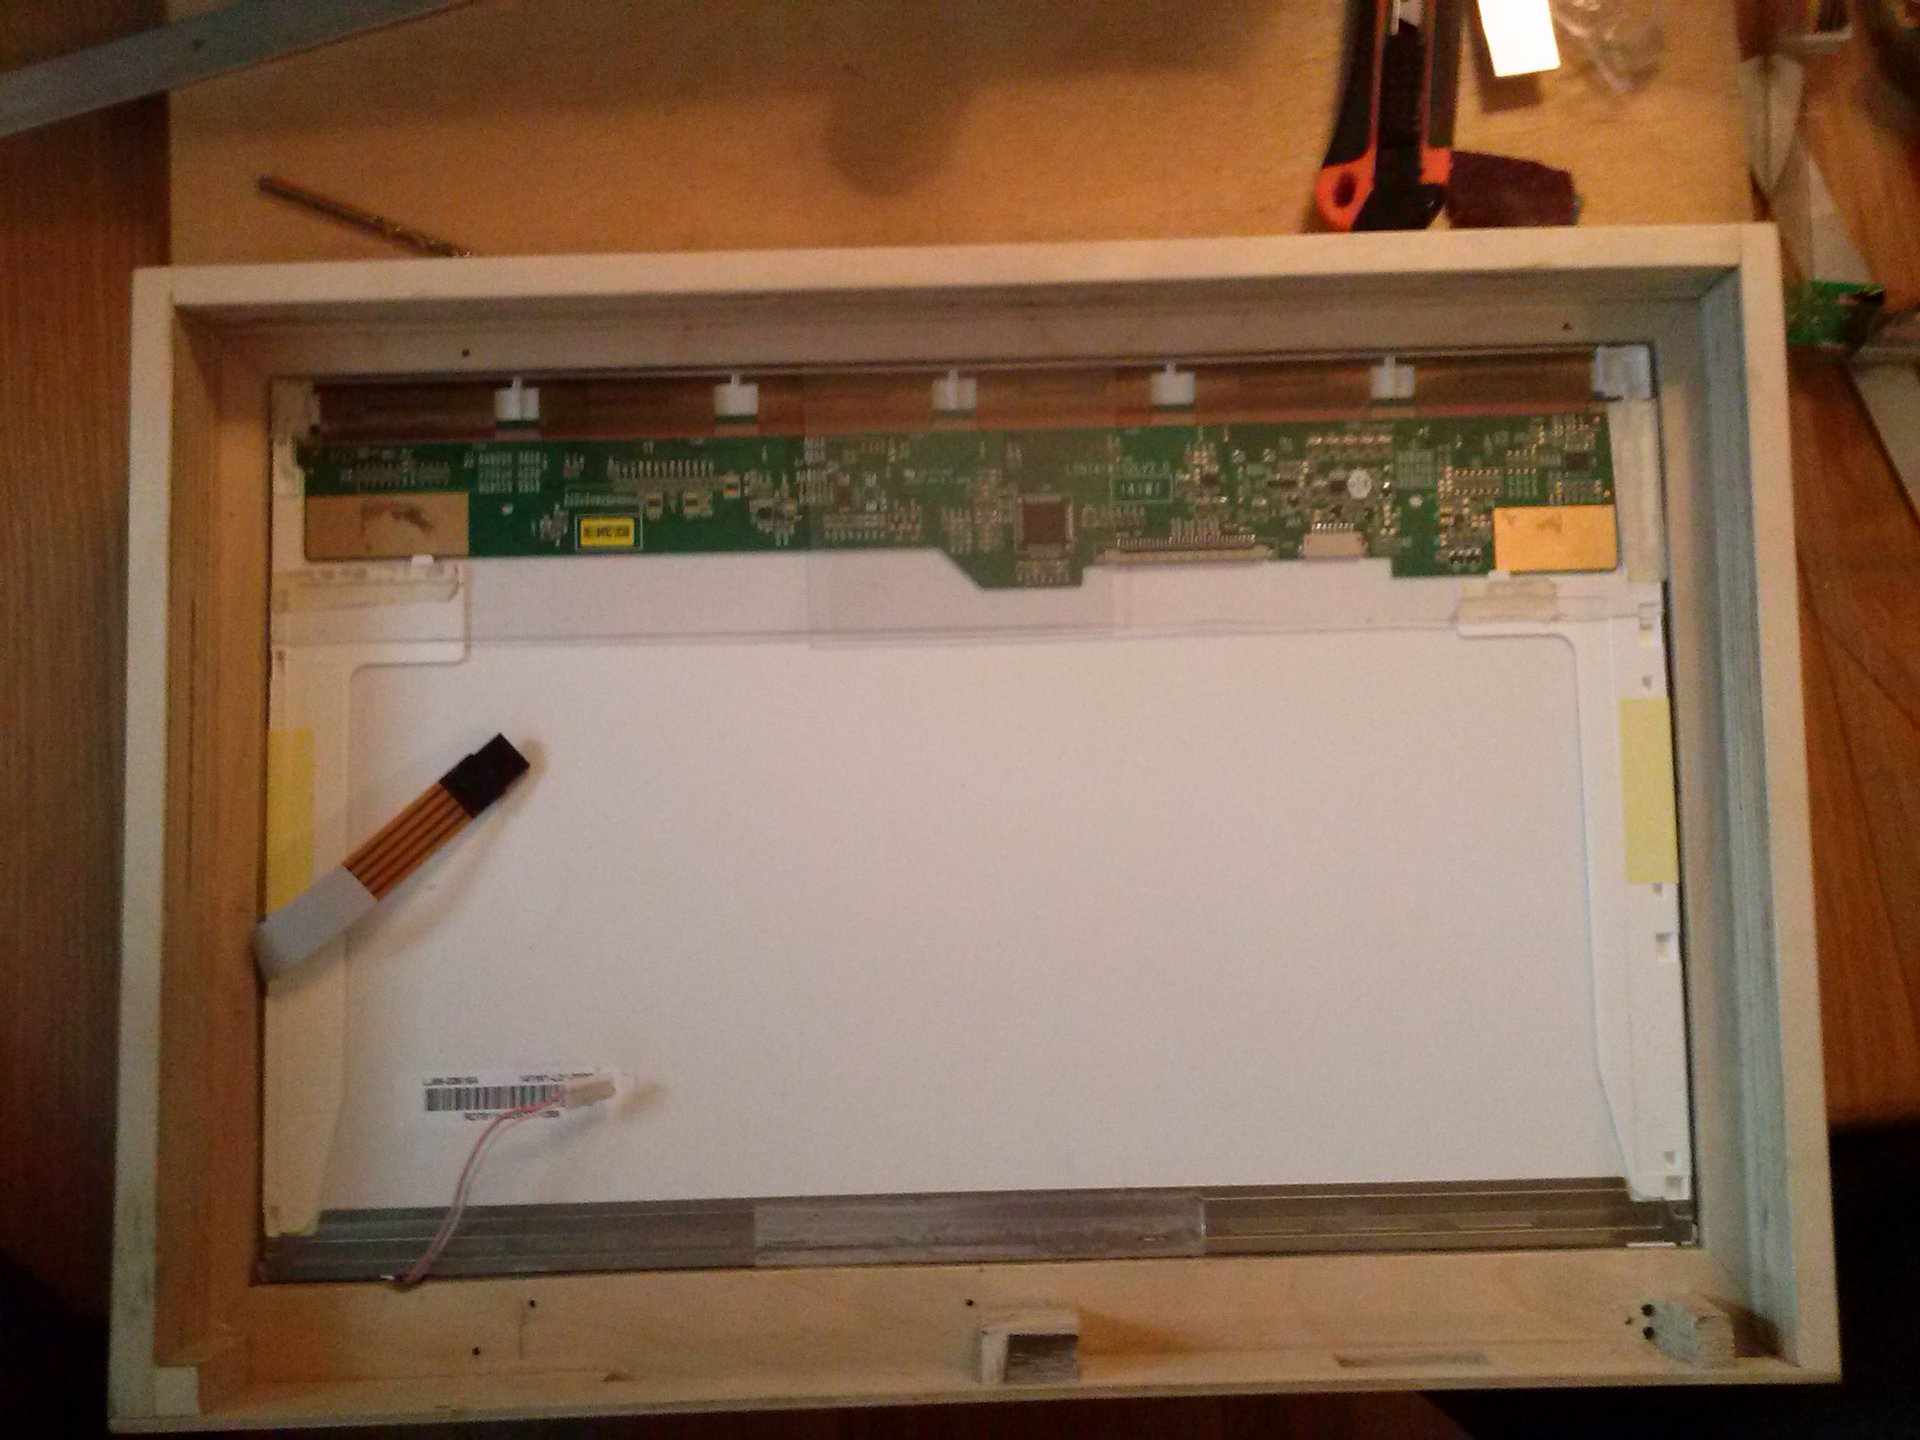
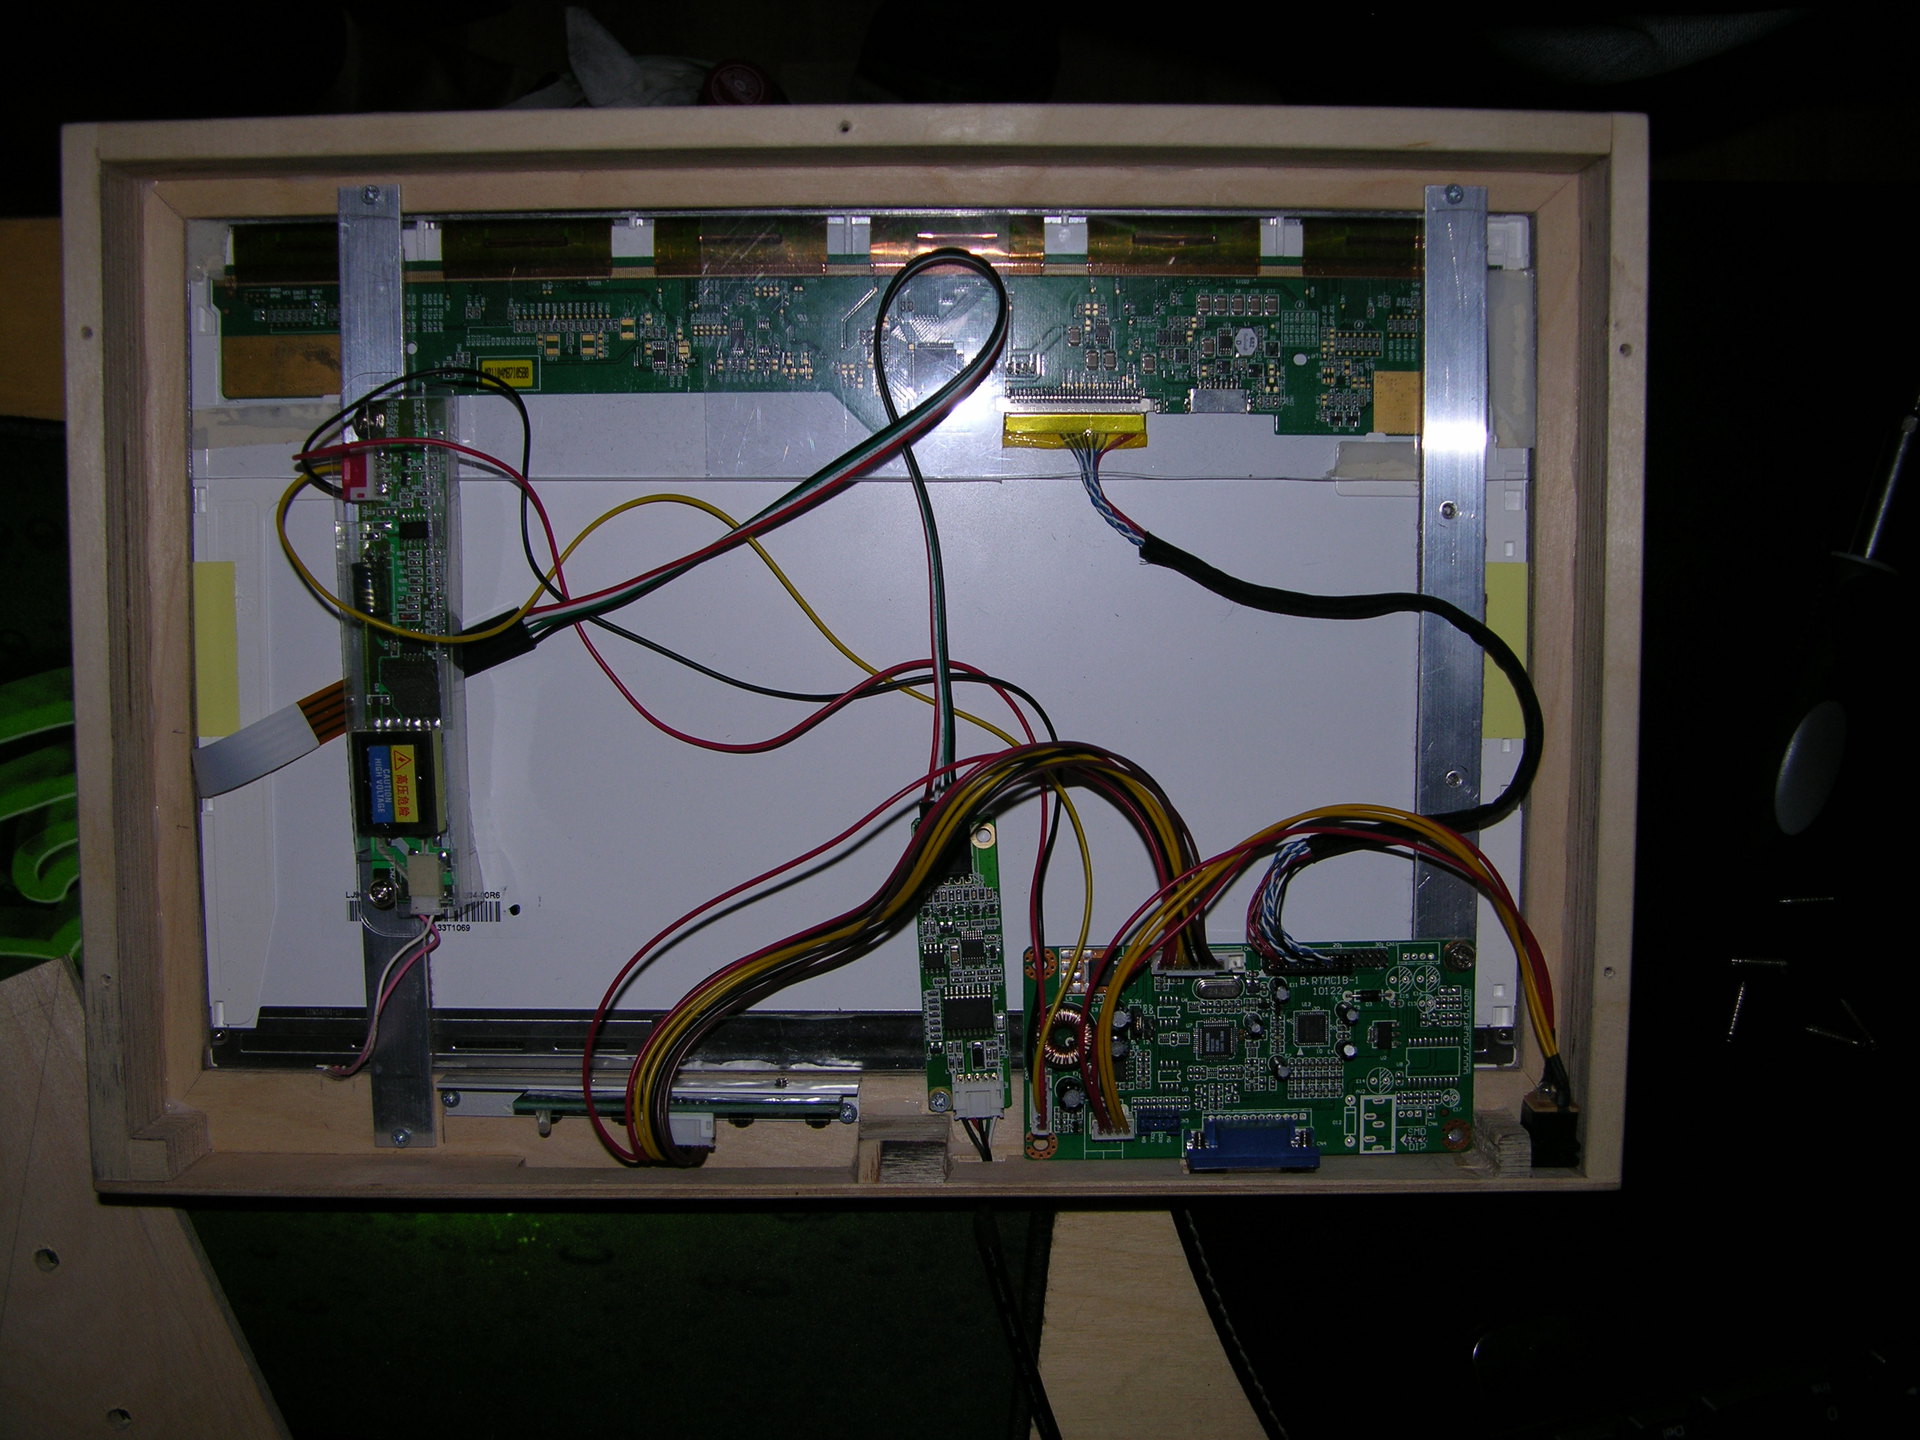
By the way, this is how the matrix looks from behind, inside the monitor, and the tail on the side of the touch panel:
Further it was simple, we first arrange the boards, fixing them on aluminum strips screwed from the inside:

On the side of the matrix, strips are glued to the strips, such as those that are glued to the bottom of the furniture, preventing damage to the flooring.
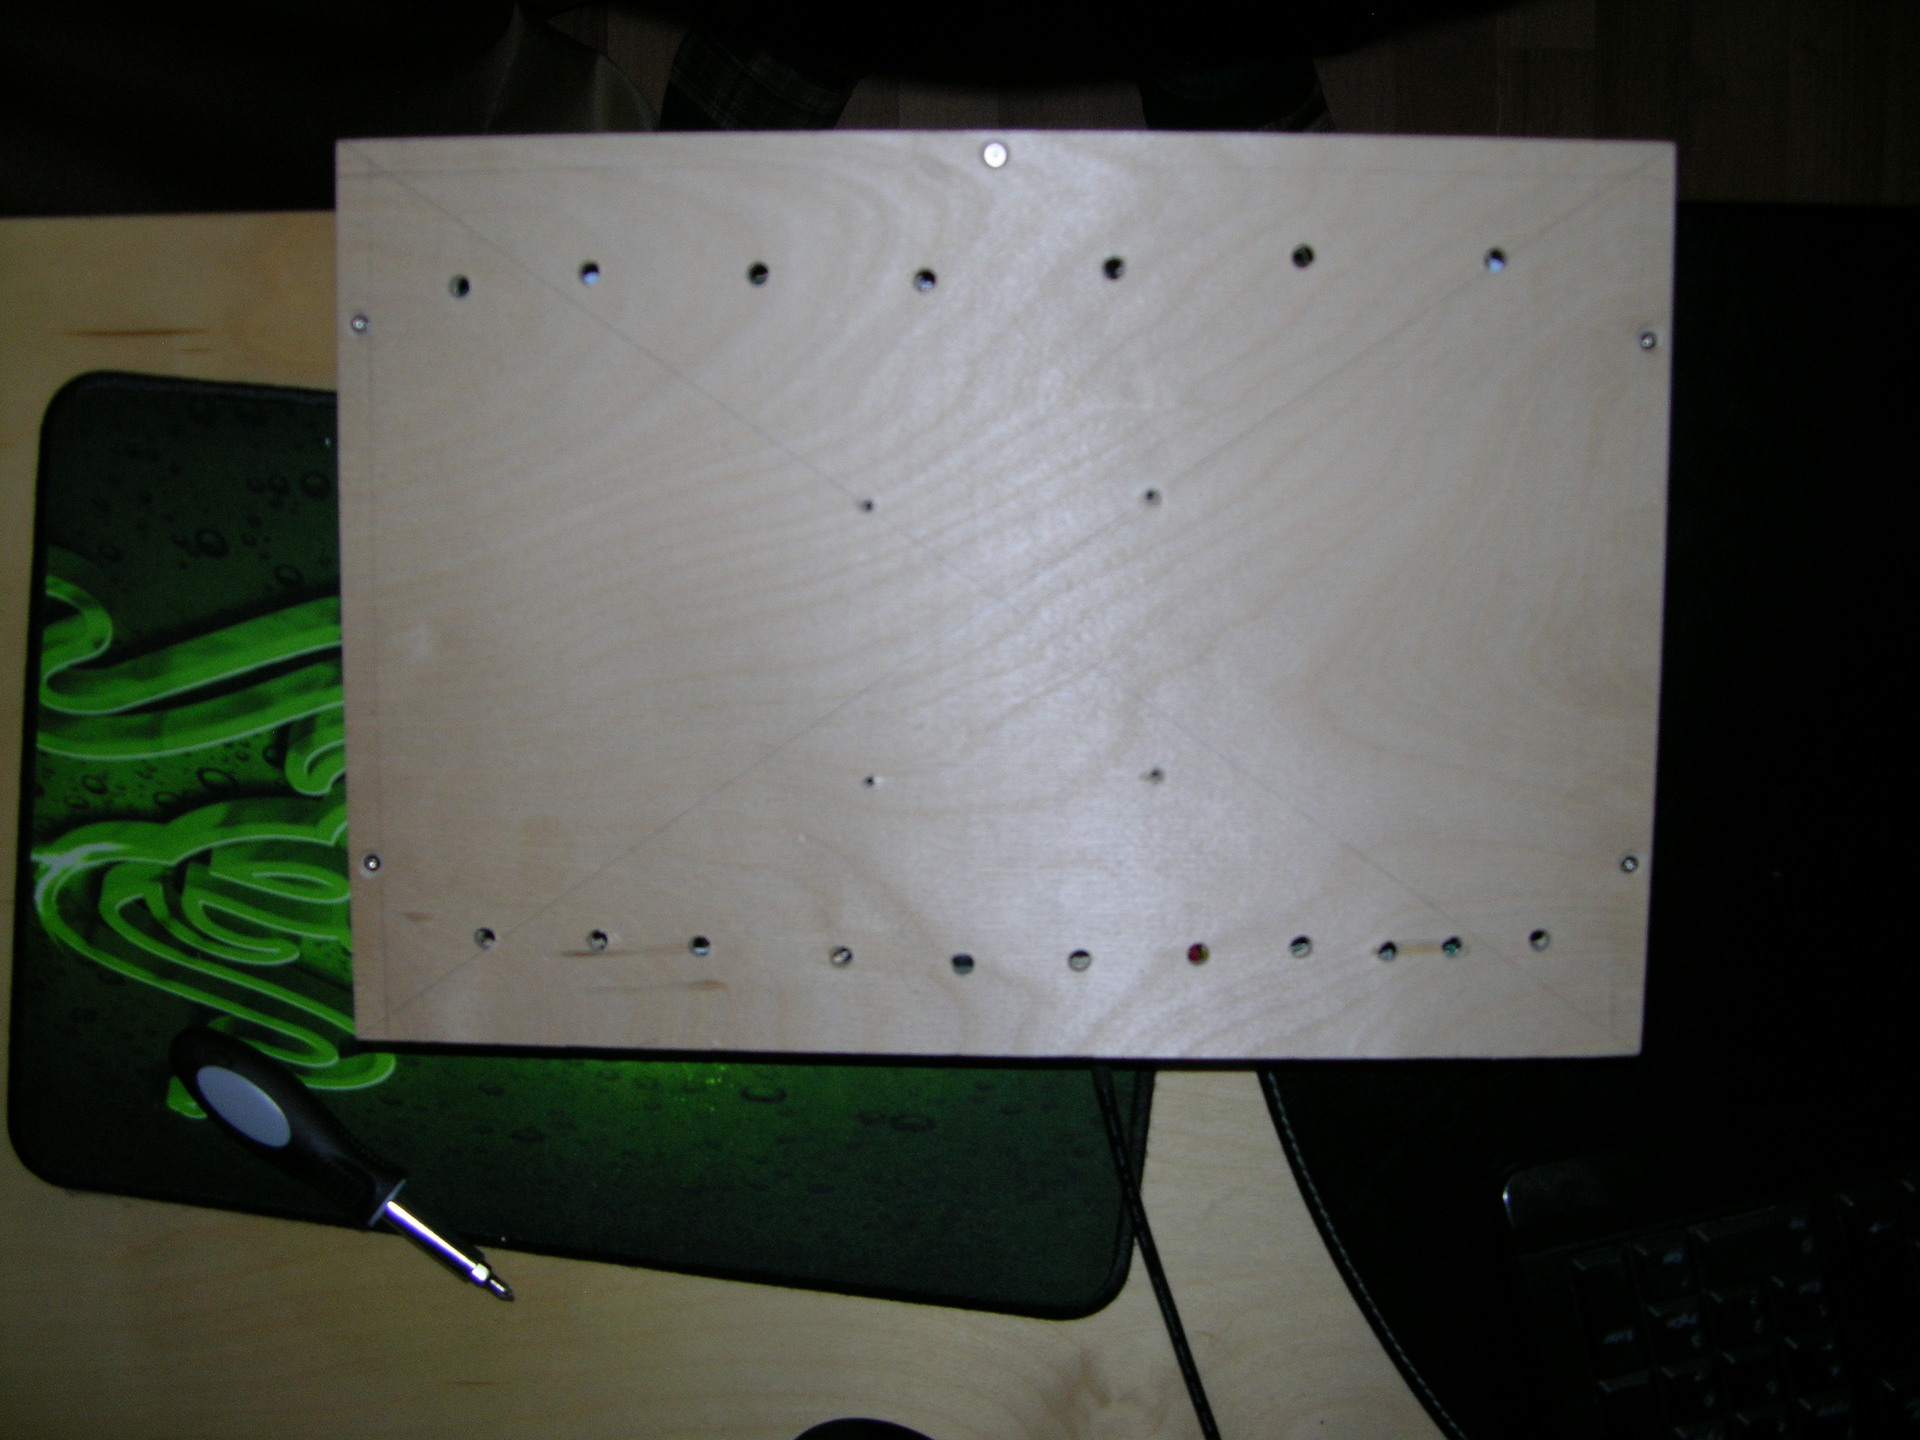
Next was the back cover with drilled holes for ventilation:
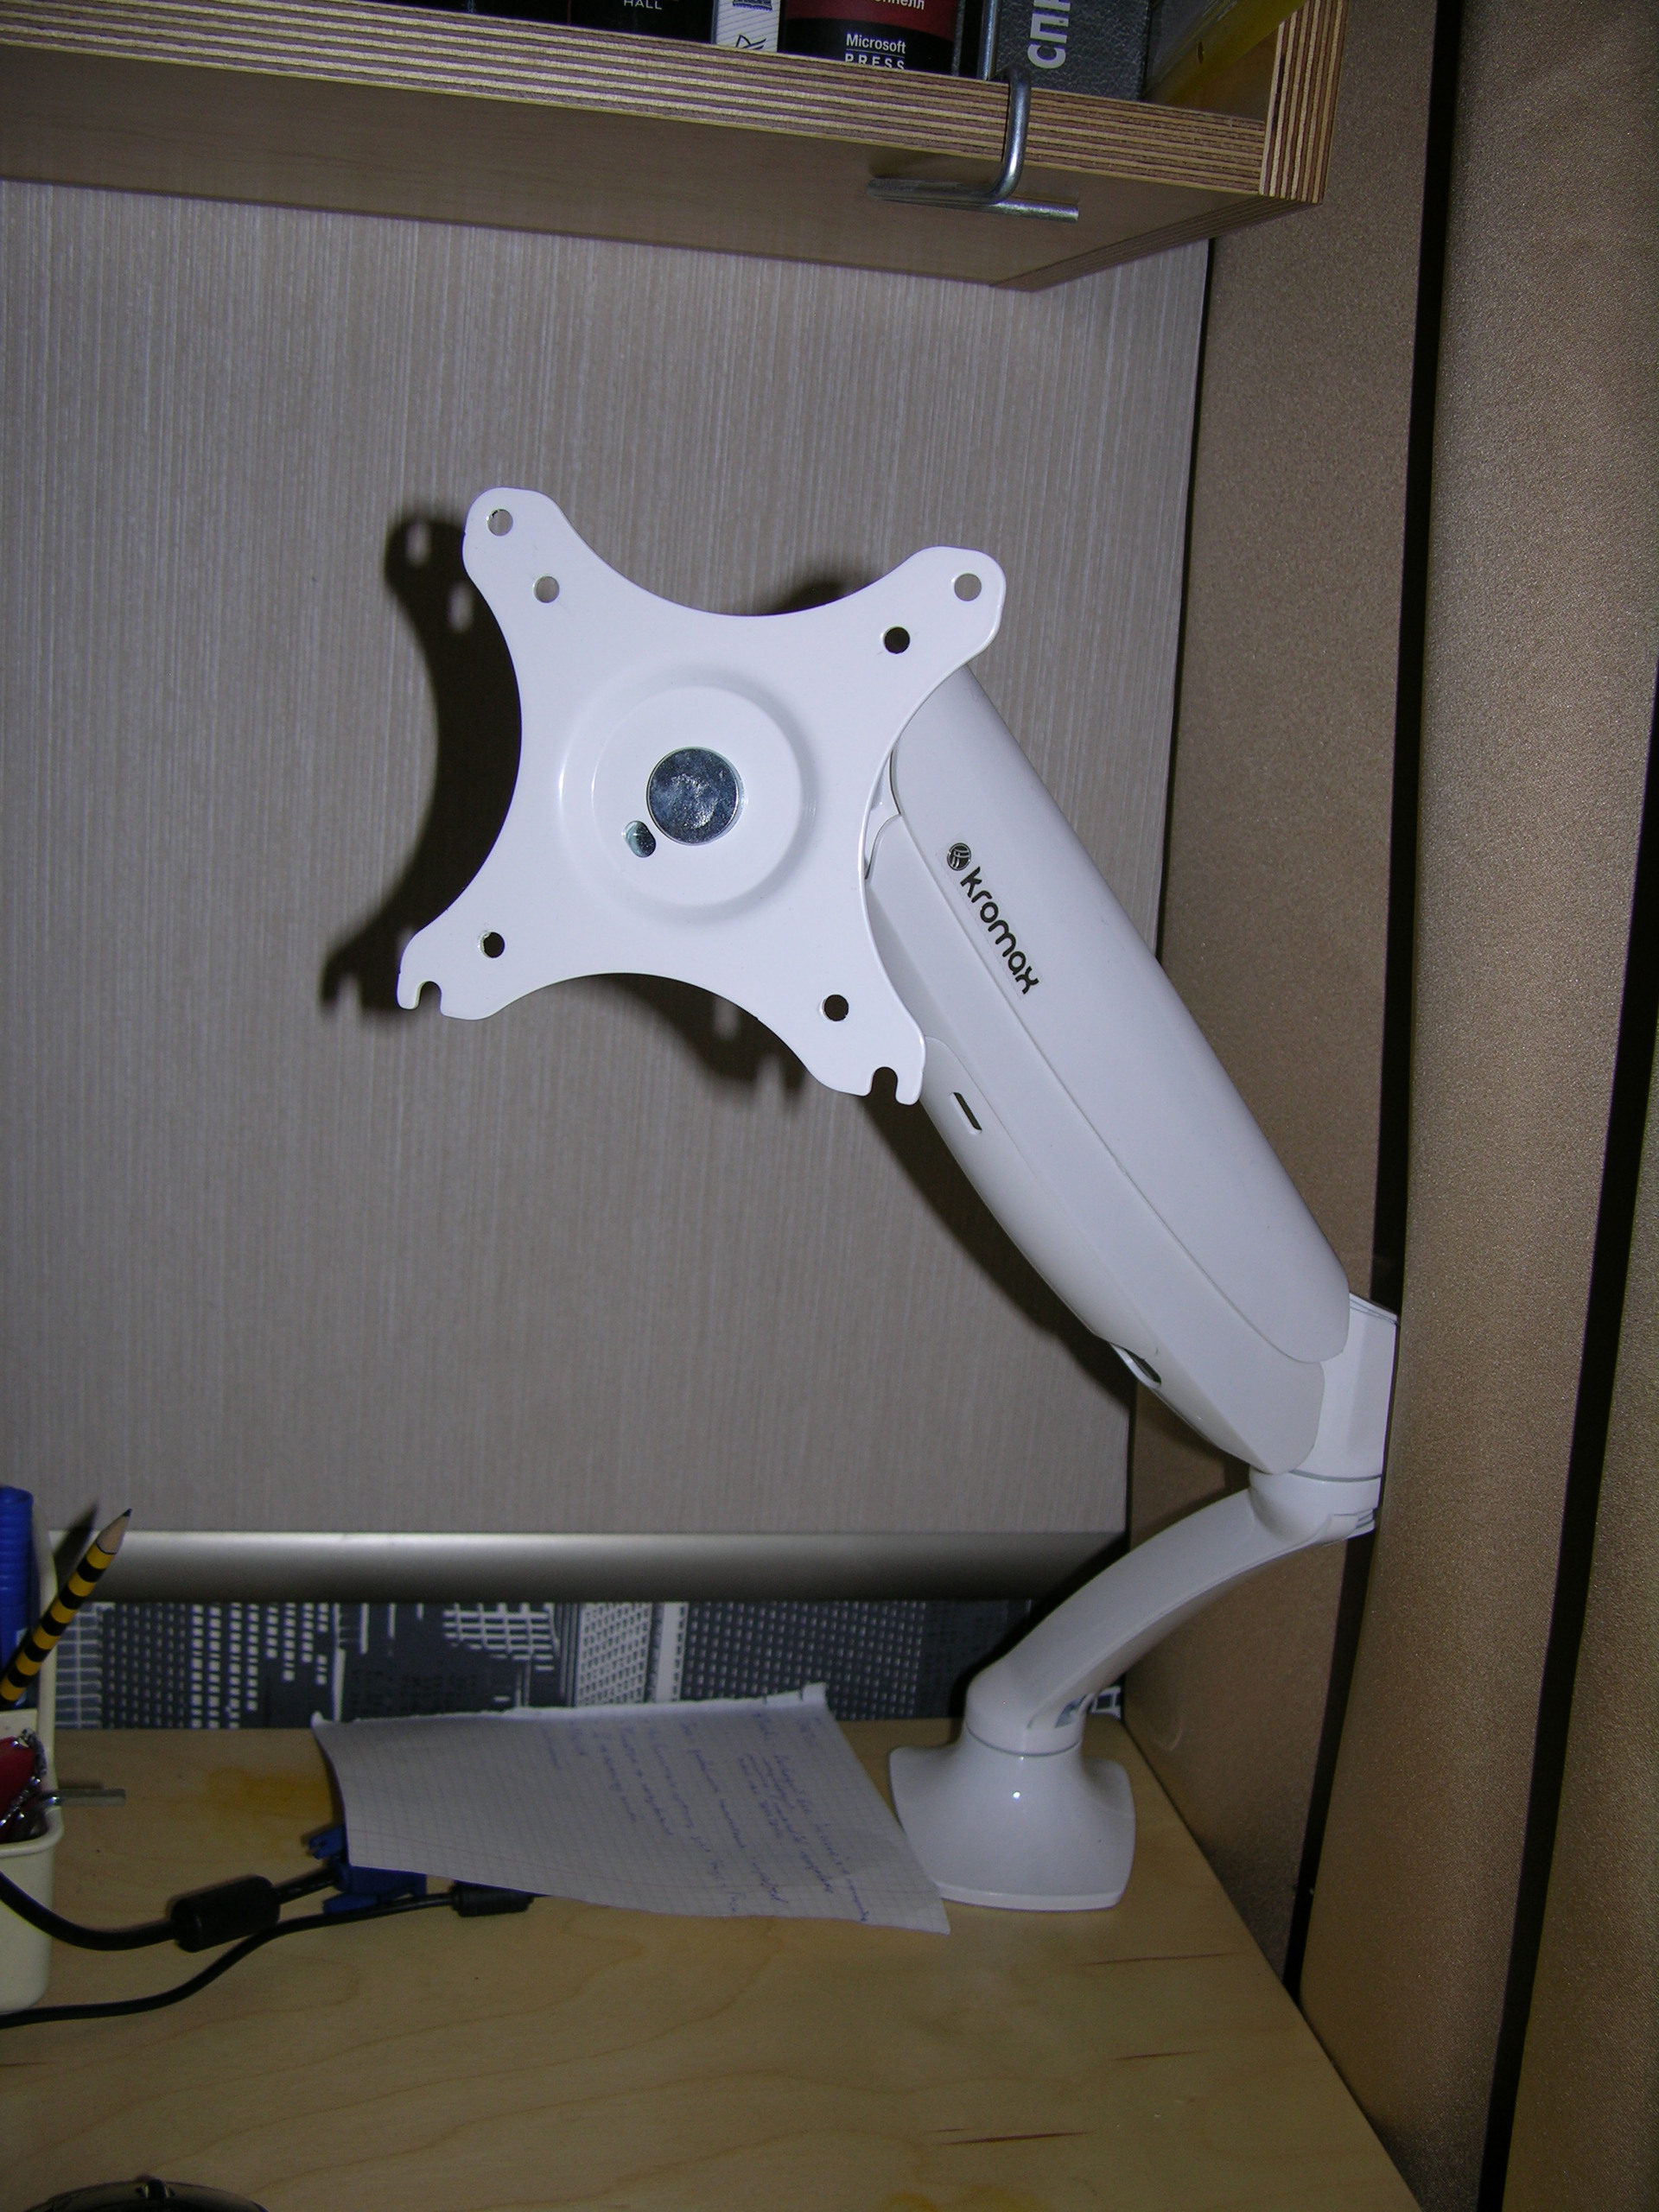
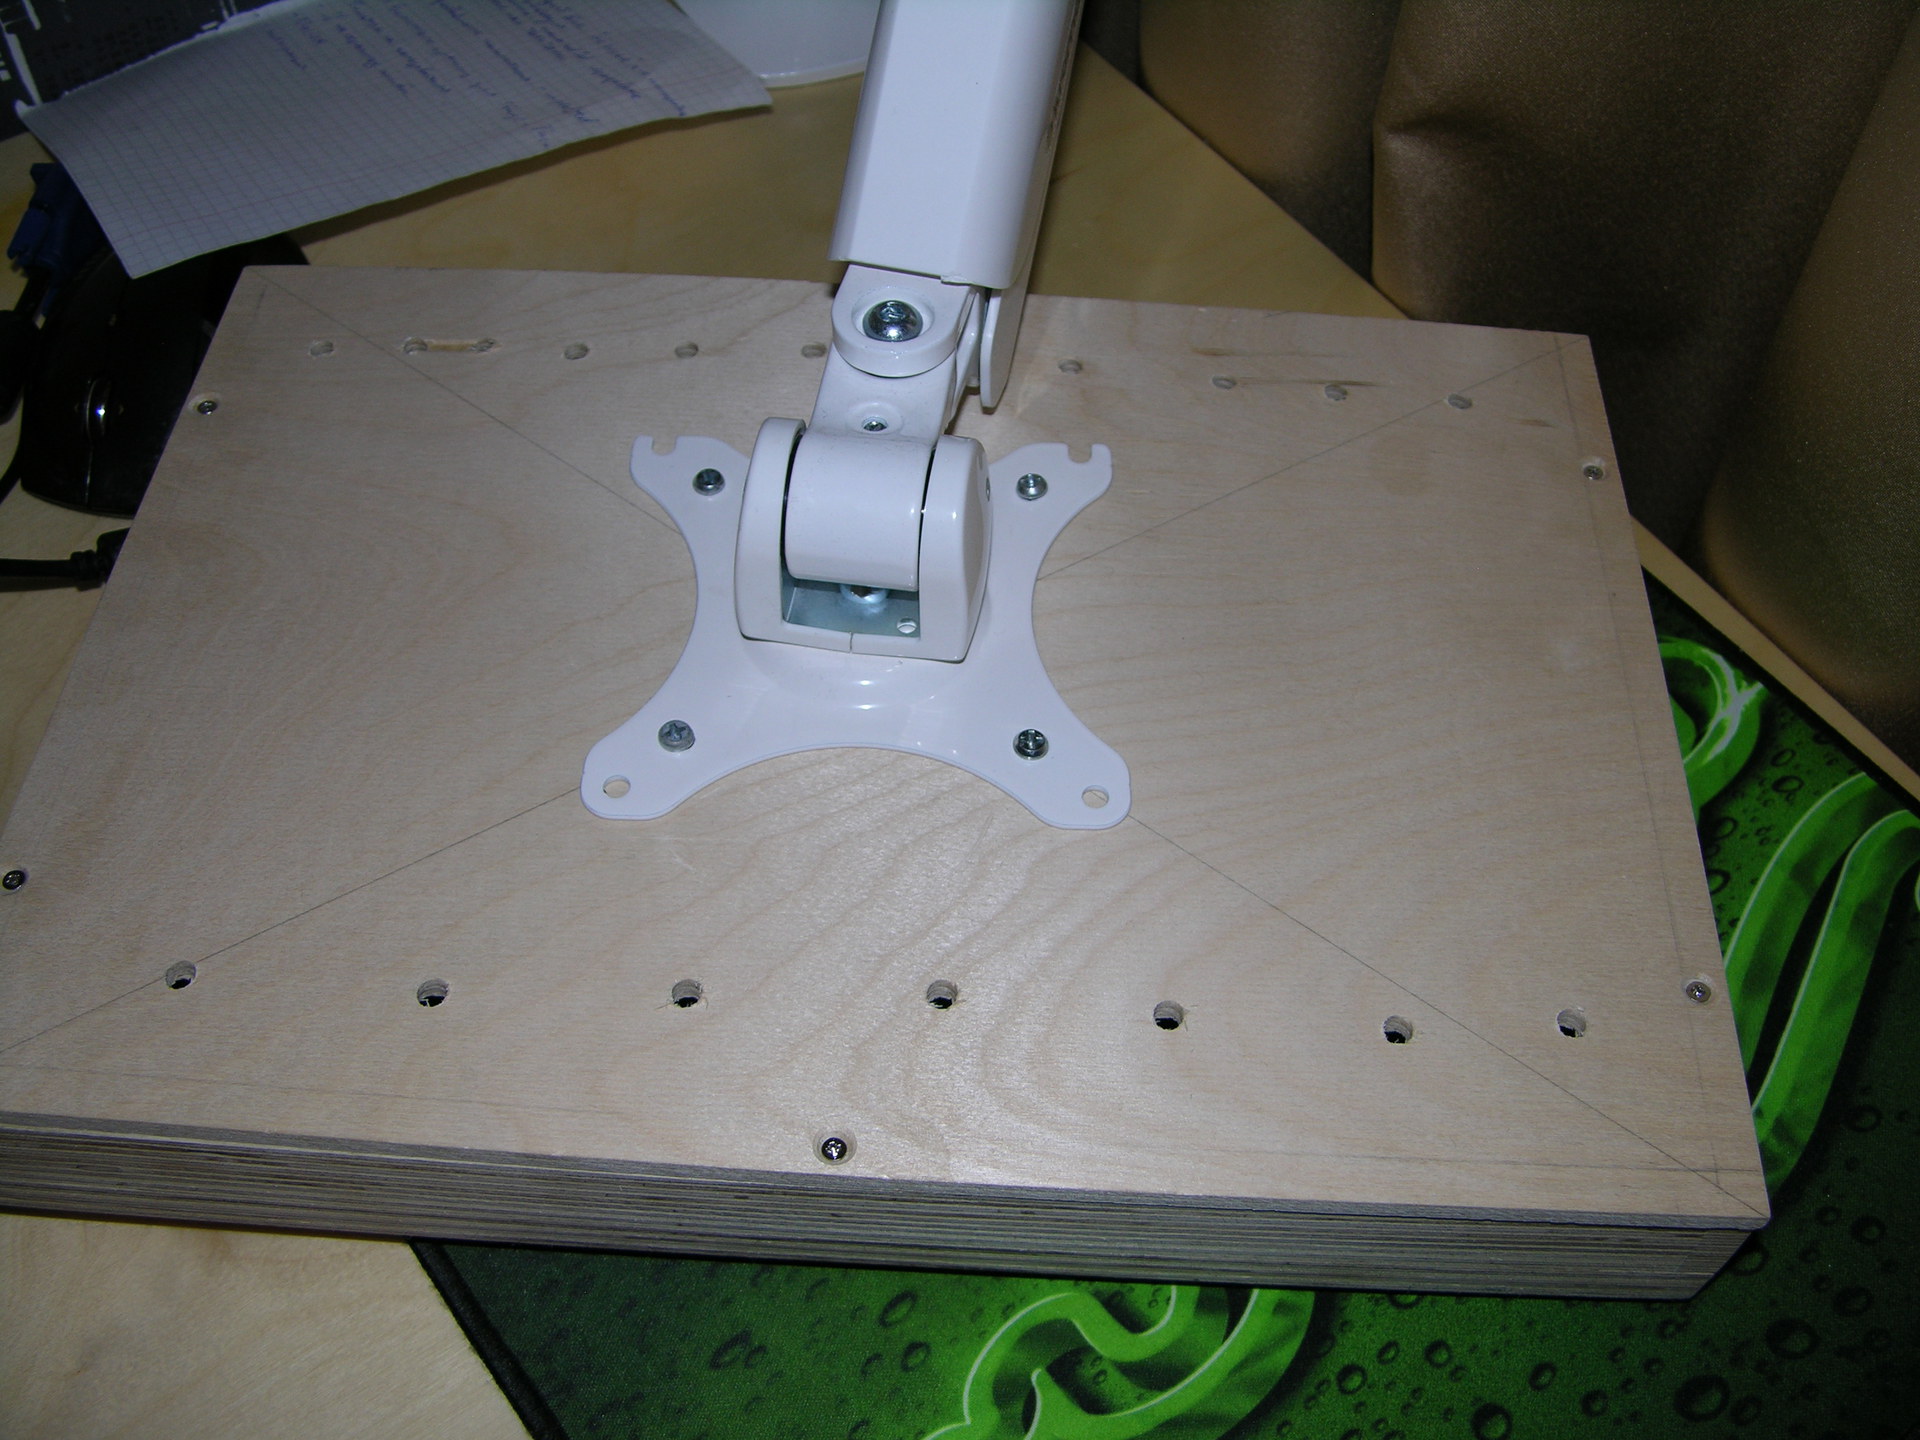
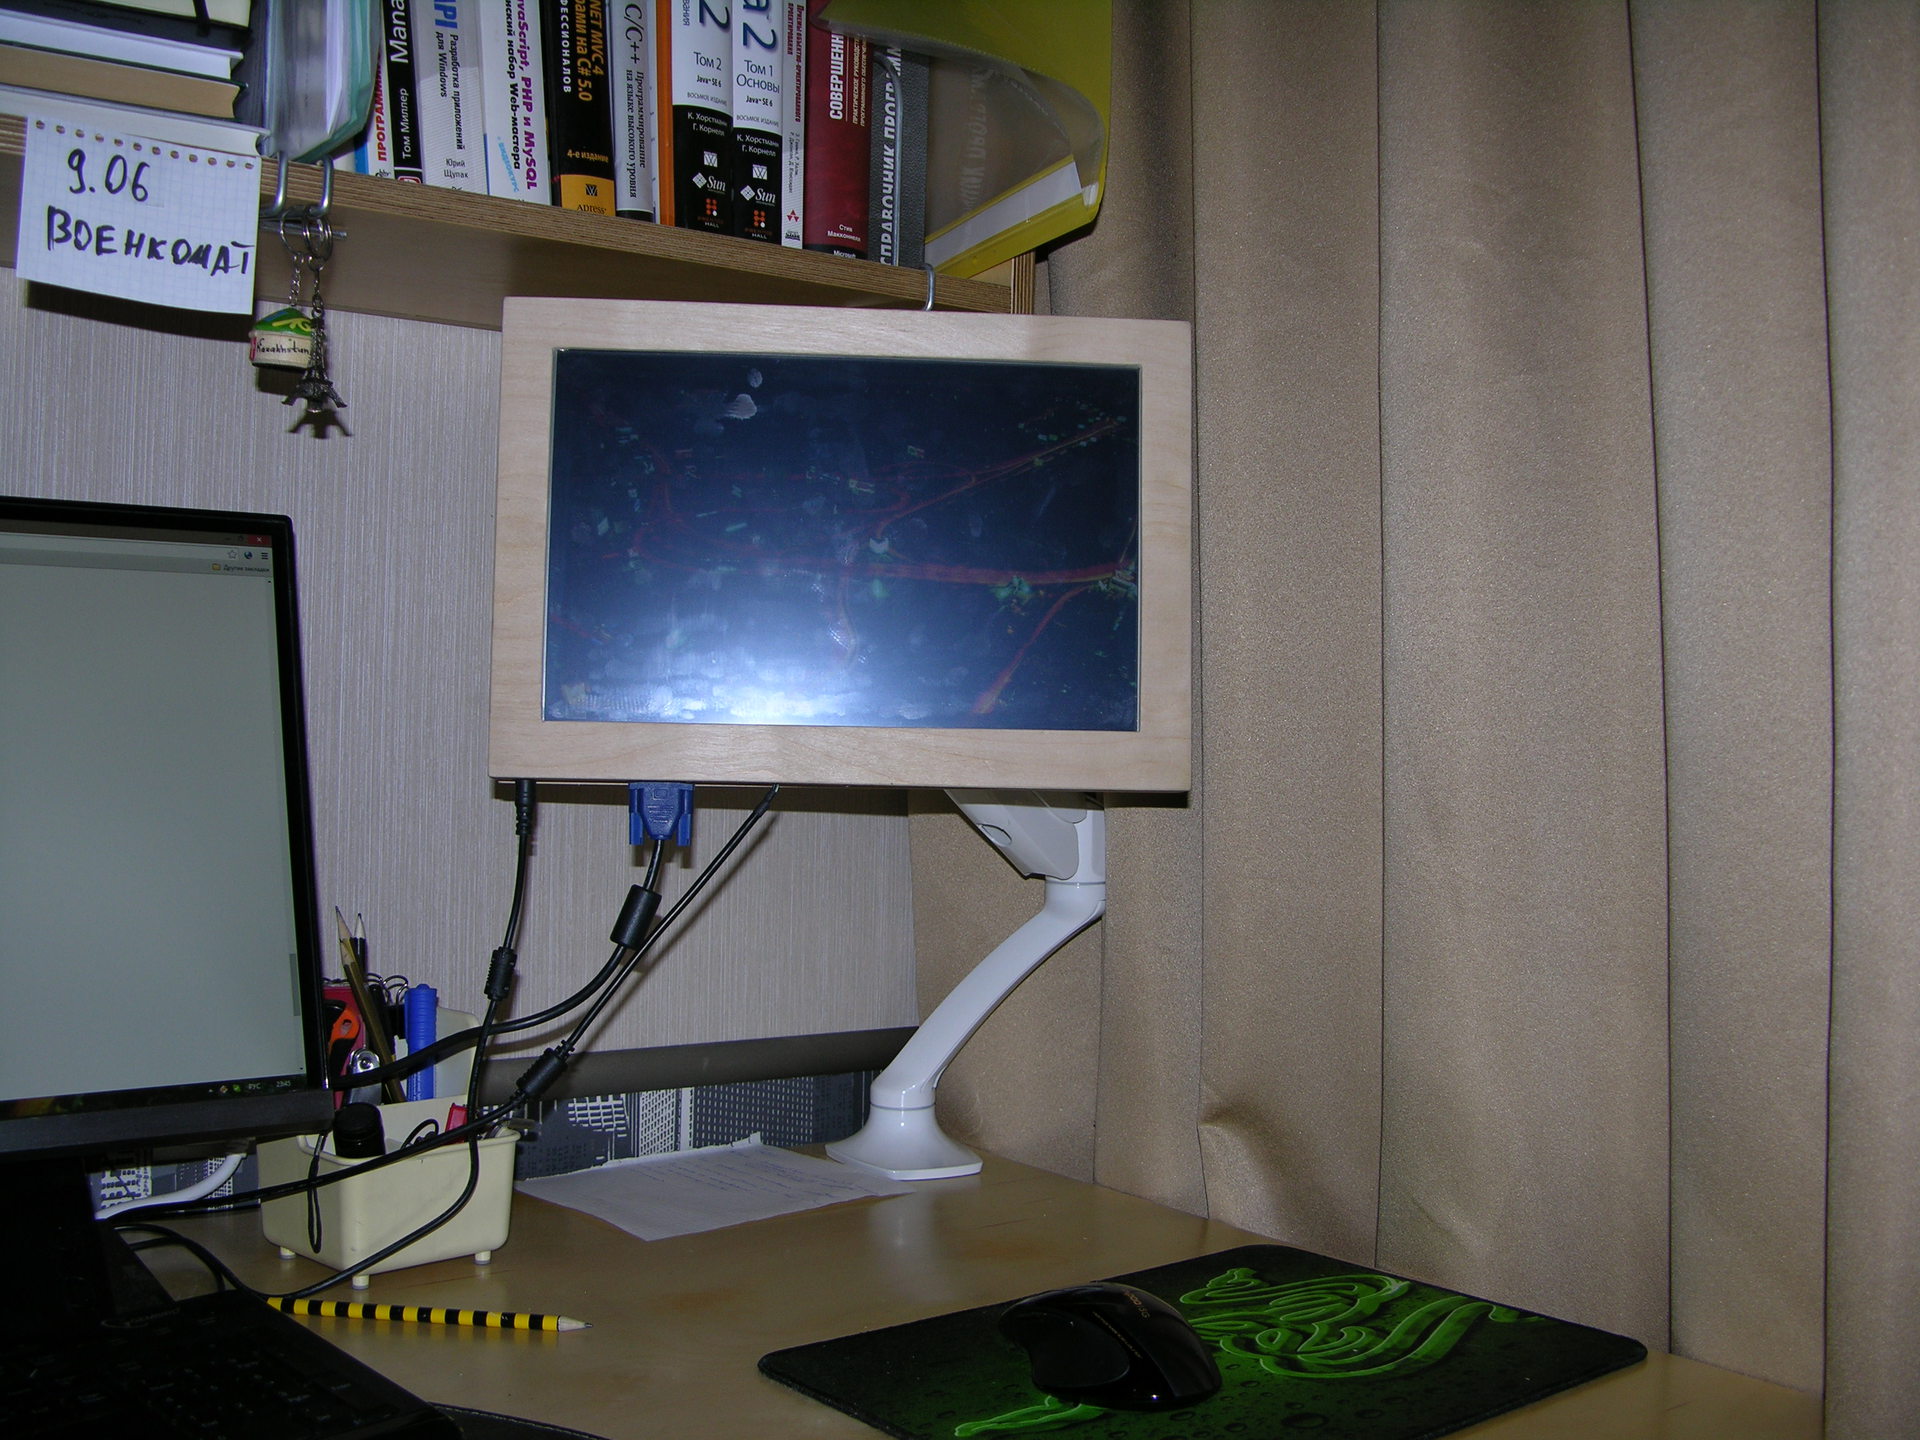
Then came the choice of the bracket. The stand was originally planned, but I wanted the monitor to be mobile. However, the wall brackets surprised by the poverty of mobility, which, incidentally, is quite logical. The price for more or less mobile seemed prohibitive. Desktop, for the most part, have a fastening clamp, which was unacceptable because of the design of the table. Finally, I chose the bracket Kromax office-7, which met all my requirements and had the ability to mount through the table top, for which it had to drill an additional hole.
So, the monitor on the bracket, turns, moves, falls and rises, bends. We connect 3 wires: power, VGA and USB cable from the touch panel. By the way, you need an application that allows you to select a monitor where it is connected and adjust the positioning accuracy, although the application itself is clearly not too fresh and has obvious signs of translation, there were no problems installing and using it on Windows 8.1. (The application is downloaded from the store page and also has versions for MacOs and Linux.)
On this one could finish the story, but it is worth mentioning one more thing. In addition to my main monitor, a projector is connected to a computer (it is very convenient to watch movies lounging on a sofa). However, when I tried to use both monitors and a projector at the same time, I was faced with the fact that on my video card, despite the presence of 3 outputs, you can use only 2 output devices simultaneously. A kind of greetings from Nvidea with a slight smell of capitalism. It was necessary at the same time to carry out an unplanned upgrade of the computer.
Recent photos of the monitor:
A small conclusion. It turned out that using a second, albeit small, monitor is quite convenient: the design of some applications is adapted for “finger poking”; in portrait mode, it is very convenient to open text files, and watching a movie, doing something else on the small monitor is much more convenient than turning towards a huge screen. Of course, there were some shortcomings: I still have not varnished the monitor, and the experience of use suggests that it was possible to come up with a slightly more successful body shape, besides, I still have to use a pencil to press the buttons - no I did not invent an additional mechanism for this.
And sometimes I thoughtfully look at another full, but already 3-4 years old as a dead laptop, with a matrix of 16:10 format (I thought that 4: 3, thanks to DodgeViper . In China, controllers have not yet run out, and touch panels of the right size I saw on the site. Make yourself a candy bar ...
But sooner or later, cleaning comes to the mezzanine, where the useless iron is stored. Most of the obsolete, broken, and simply useless iron is sent to another box, which is proud of "ON DISPOSAL". However, the saved matrix of the laptop made me remember a long-standing idea - to turn it into a fully working monitor.
Then, 4 years ago, I didn’t know what to do with it, and familiar electronics engineers kept saying that it was cheaper to buy a new monitor, and not to bother with finding the right board. In the end, this turned out to be the case, but, damn it, the pleasure of the design and assembly process will not replace the order of the new monitor. However, more about this below.
')
A short jog on Google did not give me any special results. It is now, and articles on the Habré about it are found, and useful forums appeared on the forums, and then on most forums such questions were shrugged. Yes, I even managed to find a scheme for soldering the required board with my own hands, but this was not for me. And only in one forgotten article I found the answer and went to Ebay.
Short search, the choice of the seller and the price and a lot of doubts. These Chinese controllers seem to be universal, but it was scary to order a joke for 50 bucks from the other side of the planet, and therefore I wrote a letter to the seller, to whom I attached the images of the matrix and its serial number. And the cherished package hit the road. Quickly crossed the border and disappeared ... The parcel went for more than two months - not a record, but at that time she survived the termination of reception at customs, a fire in the warehouse of the Russian Post, visited Samara, returned to Moscow and finally came to me.
Naturally, the new thing should definitely try. However, I apologize to the readers for the quality of some of the photographs that you will see below.
Connected to one of the inhabitants of the mezzanine design:
Received image:
So, it's time to invent a case. At that time, and it was a little less than a year ago, there was an old 19 "4: 3 monitor on my desk (I didn’t plan to replace it with a monitor from the matrix, yet the viewing angles leave much to be desired), so I was inspired by them This meant a frame that framed the monitor, a thick case, a stand (although even then there were thoughts about the bracket.) The frame was also needed to hide some metal parts of the matrix itself.
Now about the choice of the material itself. While I was waiting for the controller, I was looking through DIY posts on the desktop. There were plastic and even painted cardboard products, but there were after all works of art made of wood and brass, made and painted with love and skill. Although I did not initially plan to save on material, plywood was chosen for one simple reason - a wardrobe, a table, a shelf, platbands and even a window sill were made from it in my room.
2 semesters of engineering and computer graphics were enough for me to depict a drawing in 2 projections with dimensions without any problems. The drawing depicted only the front frame, where the matrix itself was placed. Then there was a drawing of the bottom, with cutouts for ports and buttons. The side walls were cut out of blanks and glued together only later, and the back cover was just a rectangle of the right size.
How the side walls stuck together (here you can see the lower part):
Honestly, this whole project has been done for about a year. Sometimes we had to wait for the parcels, sometimes there was simply no time or desire, which made the unfinished blanks and the box with “iron” and wires gather dust on the table, sometimes it took time to make next plywood blanks or to grind them. All the plywood blanks and polishing of the finished product were helped by my father, who is closer to working with wood than me (furniture in my room: an individual project, factory production, manual assembly).
While reading Habr, I stumbled upon a post about a workbench of a hauler, and there, in the comments, I learned for the first time what touch screen overlay is. “Who doesn't want to poke a finger into the monitor for a reason?” I thought. And again went to Ebay. What I saw did not please me, and I did not want to wait. I was ready to abandon this venture, I did not want to take a chance and order through fragile glass through delivery by Russian Post. But then I stumbled upon the online store touchbaza (not advertising), where I found the touchpad of the size I needed. Here and delivery by the forwarding company, and the panel at 13 "in the box from under the monitor between the foam gaskets.
By the way, this is how the matrix looks from behind, inside the monitor, and the tail on the side of the touch panel:
Further it was simple, we first arrange the boards, fixing them on aluminum strips screwed from the inside:
On the side of the matrix, strips are glued to the strips, such as those that are glued to the bottom of the furniture, preventing damage to the flooring.
Next was the back cover with drilled holes for ventilation:
Then came the choice of the bracket. The stand was originally planned, but I wanted the monitor to be mobile. However, the wall brackets surprised by the poverty of mobility, which, incidentally, is quite logical. The price for more or less mobile seemed prohibitive. Desktop, for the most part, have a fastening clamp, which was unacceptable because of the design of the table. Finally, I chose the bracket Kromax office-7, which met all my requirements and had the ability to mount through the table top, for which it had to drill an additional hole.
So, the monitor on the bracket, turns, moves, falls and rises, bends. We connect 3 wires: power, VGA and USB cable from the touch panel. By the way, you need an application that allows you to select a monitor where it is connected and adjust the positioning accuracy, although the application itself is clearly not too fresh and has obvious signs of translation, there were no problems installing and using it on Windows 8.1. (The application is downloaded from the store page and also has versions for MacOs and Linux.)
On this one could finish the story, but it is worth mentioning one more thing. In addition to my main monitor, a projector is connected to a computer (it is very convenient to watch movies lounging on a sofa). However, when I tried to use both monitors and a projector at the same time, I was faced with the fact that on my video card, despite the presence of 3 outputs, you can use only 2 output devices simultaneously. A kind of greetings from Nvidea with a slight smell of capitalism. It was necessary at the same time to carry out an unplanned upgrade of the computer.
Recent photos of the monitor:
A small conclusion. It turned out that using a second, albeit small, monitor is quite convenient: the design of some applications is adapted for “finger poking”; in portrait mode, it is very convenient to open text files, and watching a movie, doing something else on the small monitor is much more convenient than turning towards a huge screen. Of course, there were some shortcomings: I still have not varnished the monitor, and the experience of use suggests that it was possible to come up with a slightly more successful body shape, besides, I still have to use a pencil to press the buttons - no I did not invent an additional mechanism for this.
And sometimes I thoughtfully look at another full, but already 3-4 years old as a dead laptop, with a matrix of 16:10 format (I thought that 4: 3, thanks to DodgeViper . In China, controllers have not yet run out, and touch panels of the right size I saw on the site. Make yourself a candy bar ...
Source: https://habr.com/ru/post/221847/
All Articles