One approach to debugging solutions for SharePoint
Of course, you are familiar with the possible options for debugging solutions that are developed for SharePoint and fit into it. If not, then in more detail about this you can read here or here and I will only briefly give a sequence of possible actions.
In the article itself, I will describe one of the approaches that will help simplify the process of debugging the business logic of your decision.
The standard debugging process and the process itself are as follows:
')
After each modification of the code, in order to debug it in such a way, it is necessary that this solution be immersed in SharePoint . This is accompanied by many additional operations, such as withdrawing an existing solution, adding a new one, re-activating features, clearing the cache, and so on. Each such deployment is not important from the studio, it is done either manually, each separate launch of this kind of debugging takes a lot of time. It’s not scary once, but if after each change you try to debug the code, the debugging process will take much more time than the development process itself. This approach, of course, has one very big plus - the programmer quickly gets used to writing workable code with a minimum number of debugging processes :) But in fact, such debugging starts to strain pretty quickly.
The standard debugging process for SharePoint will also come in handy, of course. Without it, as without hands, when it will be necessary to debug the development with more / less vital data or it will be necessary to rely on events occurring in SharePoint . But now is not about that.
The proposed option is very simple, in fact, this is the creation of a console application in which objects of our business logic will be created, methods called, results recorded, and so on. It would seem that everything becomes clear immediately, but it is better to create such a project step by step and see what problems can be and how to solve them:
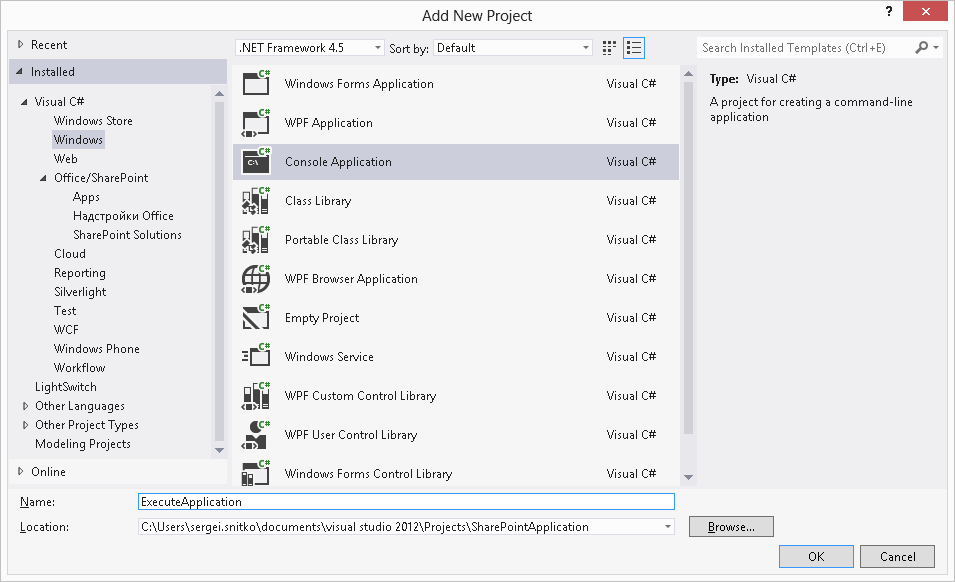
1. Create a new project using the SharePoint 2013 template - Empty Project and name it SharePointApplication :

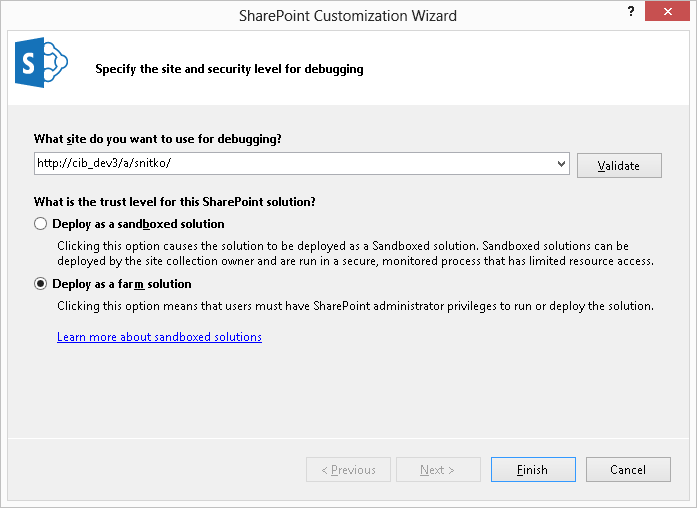
2. Specify the type of solution (Farm solution. But you know what is the difference between Farm and Sandbox Solution? Now let's not go into details, in another article) and specify the address of our site-collection in SharePoint:
3. Next, we create a simple DEMO class for example with the SPWeb class extension method, which will be responsible for updating the filtered lists of this node in the part of the property responsible for opening list forms in a modal window or not:
4. Create a web part with a filter input field and a button to call this method:
5. Deploy the solution on our website.

6. Place the required web part on the page and test its performance.
7. Now we understand that if something went wrong and it was necessary to look for the cause of the problem, you need to connect the w3wp process and monitor what is happening, make changes to the code, deploy again, check and so on. The main part of the checks (at least business logic) can be checked in the console application.
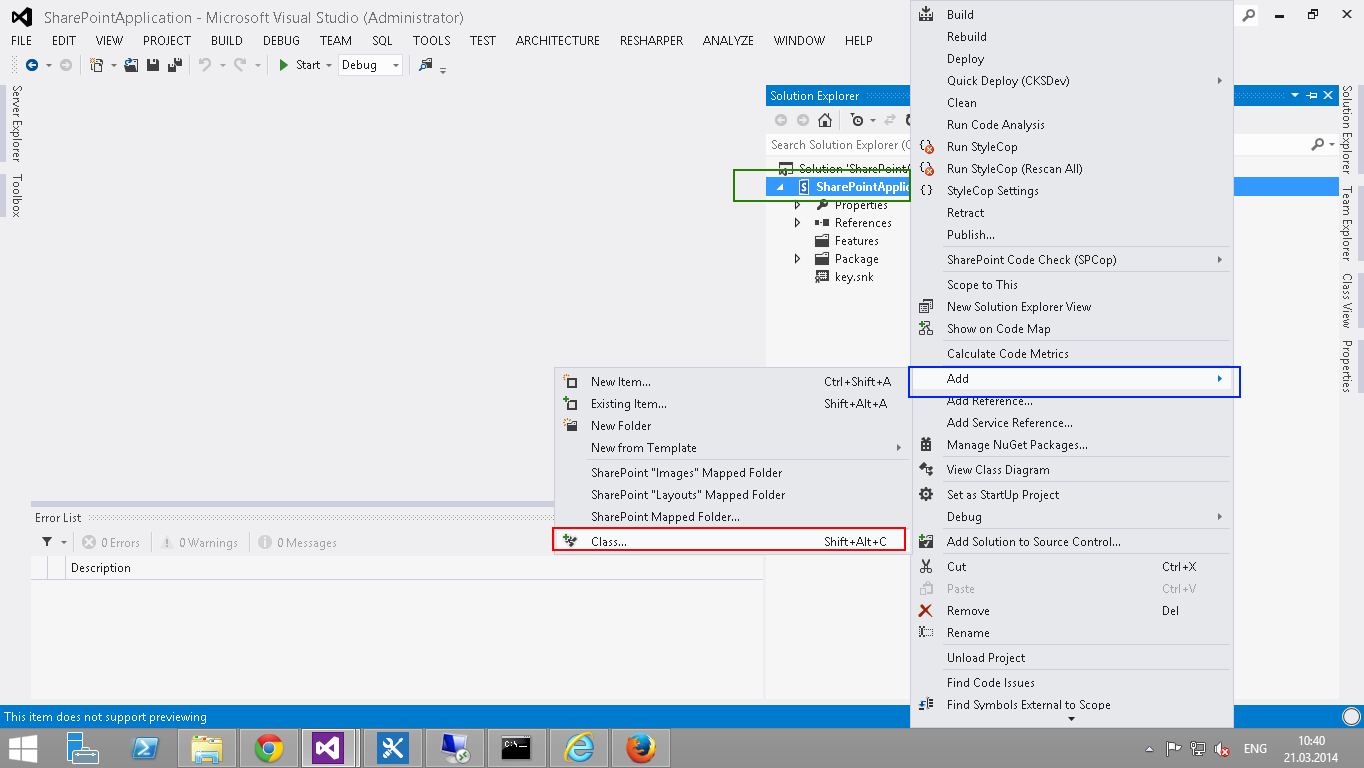
8. Add a new console application to our solution and name it ExecuteApplication.

9. Change the application launch mode to x64 platform.
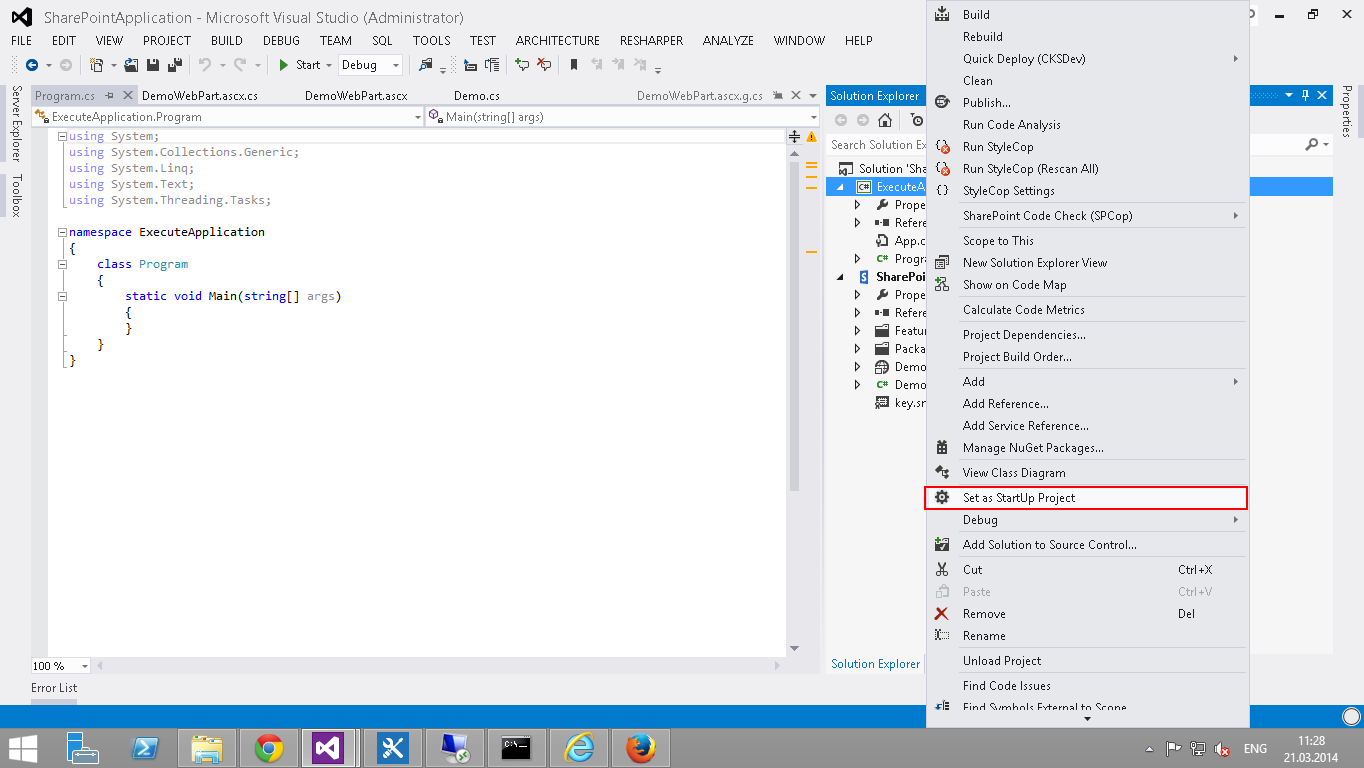
10. Install the console application with the project to run:
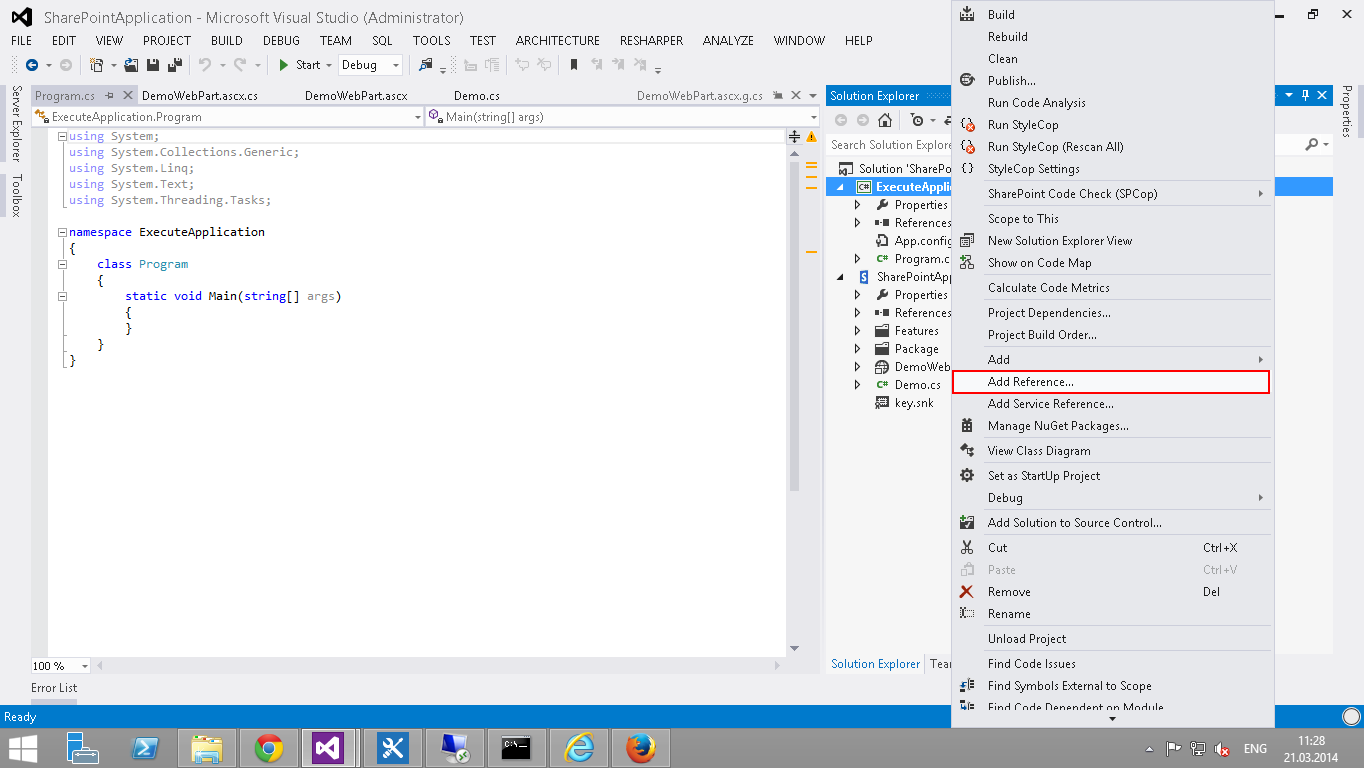
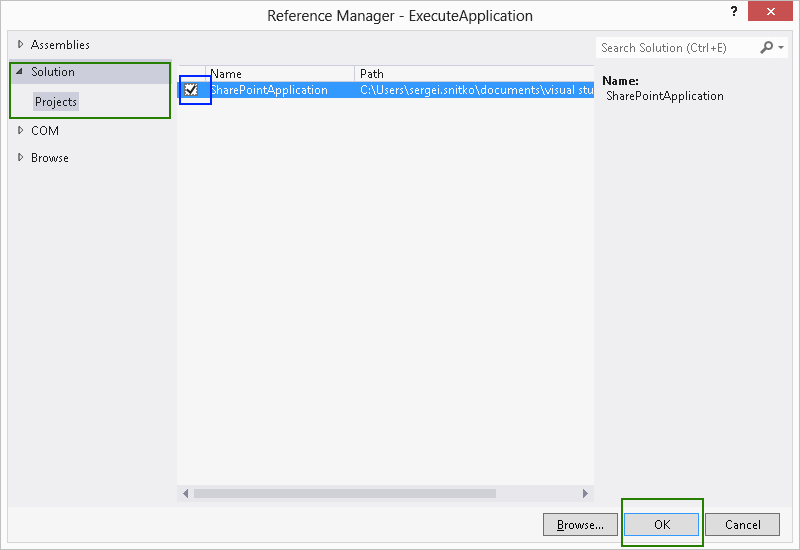
11. We connect to the project a library from a neighboring project, in which our objects and methods are located:
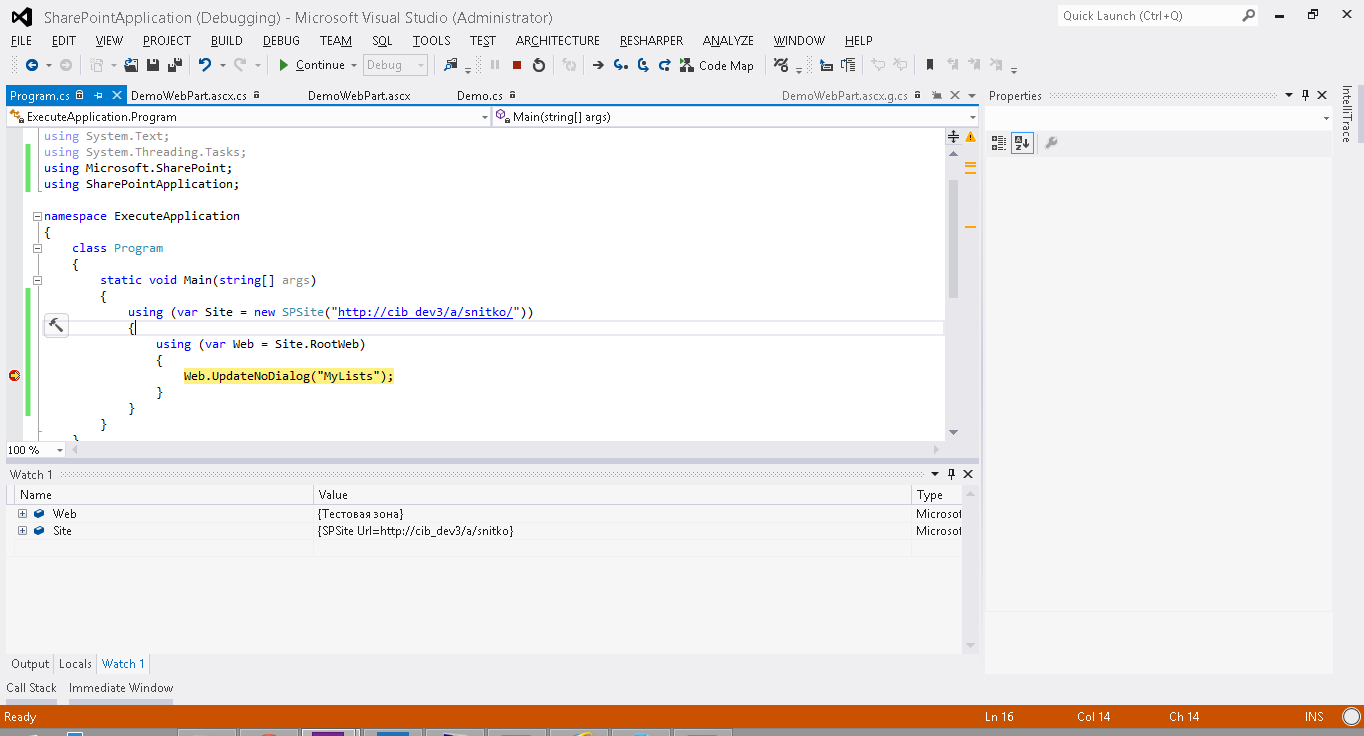
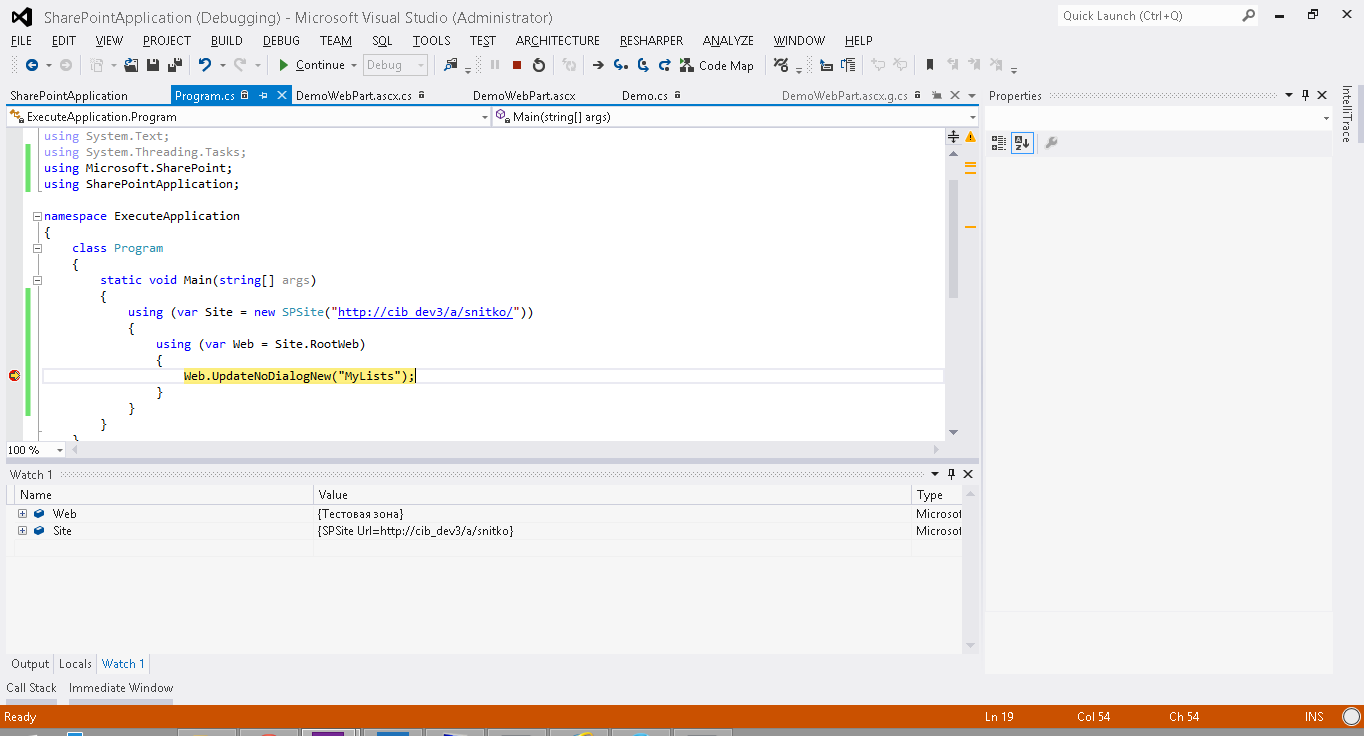
12. In the main method of the console application, we create a connection to our SharePoint site, in the context of which it will work and call the necessary function that we want to test. Sample code is as follows:
13. We start the project and monitor what is happening in real time:
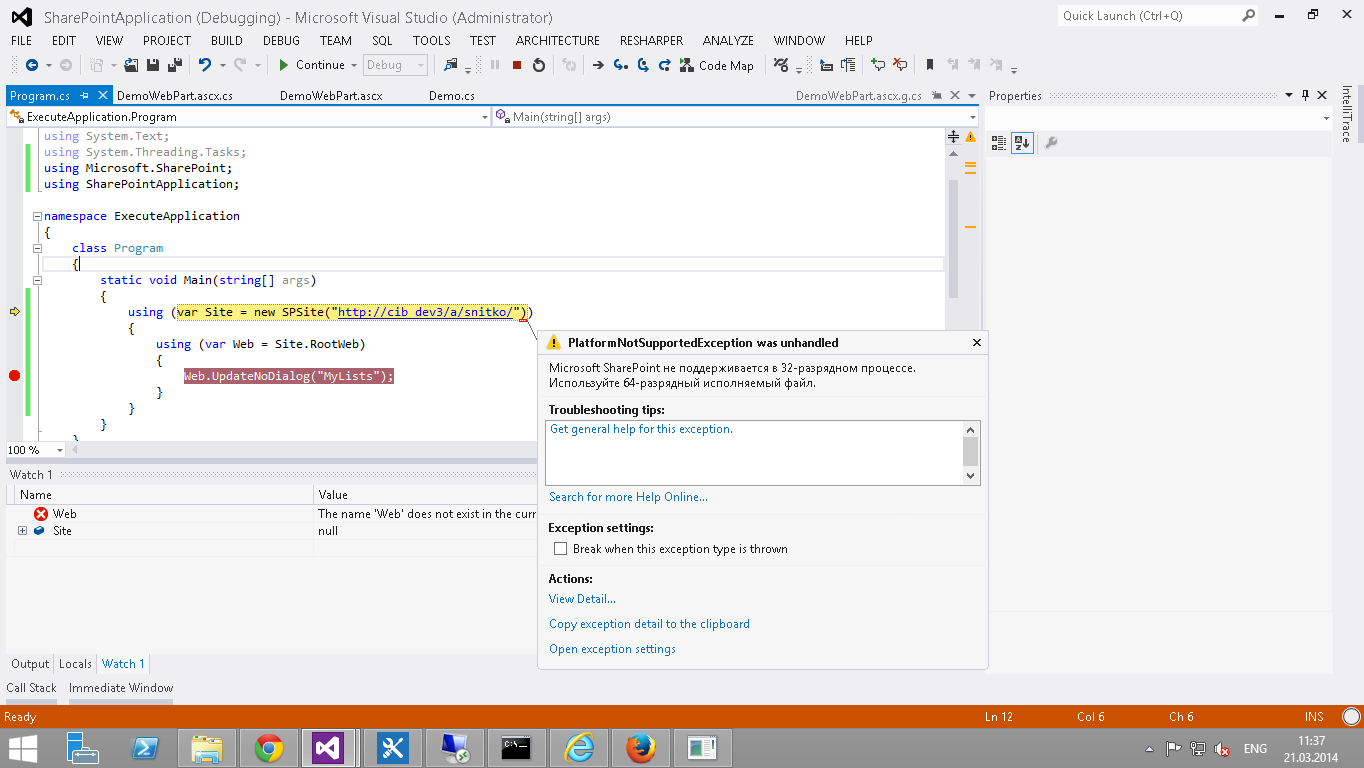
14. If we see the following error ( Microsoft SharePoint is not supported in a 32-bit process. Use a 64-bit executable file.), Then we most likely did not complete item number 9. Sometimes the error may look different (for example, the site is unavailable) , but the essence of the error is the same:
15. If after the changes in the class and the next launch of the project we see the following error ( Method not found: "Void SharePointApplication.Demo.UpdateNoDialogNew (Microsoft.SharePoint.SPWeb, System.String)".),:
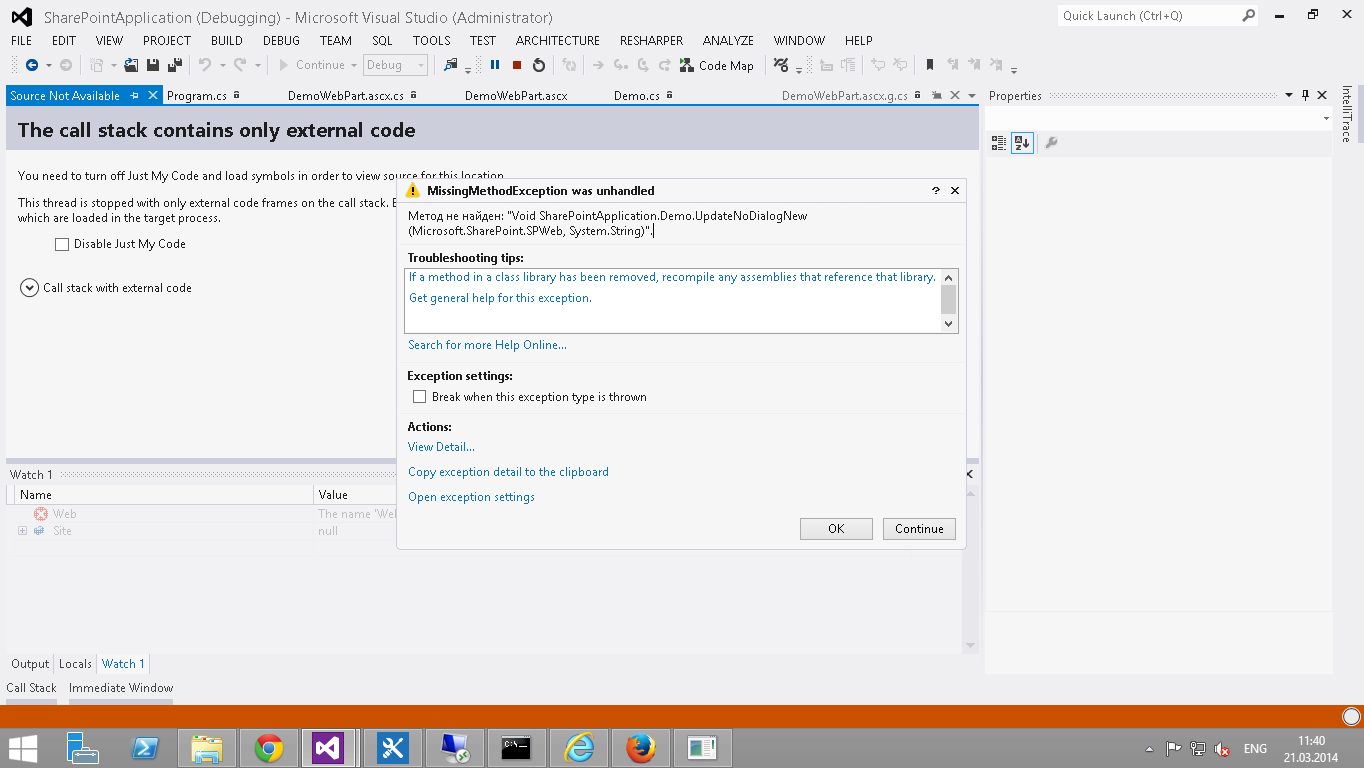
This is most likely due to the fact that the assembly from the neighboring solution exists both locally (in the project) and in the GAC, but in the GAC the assembly is older, but at the start it is more priority. Thus, it turns out that when writing code, the studio does not issue errors, because it uses the assembly locally, and when starting the solution it reports that the assembly (which is in the GAC) does not have the methods that you call. To do this, before launching the console application, put the modified library of the neighboring project in the GAC.
Congratulations ! The process of debugging the main business logic is now working on ur.
Today we have reviewed one of the approaches for more convenient and quick debugging for solutions on SharePoint , as well as several typical problems that a developer may encounter when using this approach.
In the article itself, I will describe one of the approaches that will help simplify the process of debugging the business logic of your decision.
The standard debugging process and the process itself are as follows:
- Enable debugging in web.config
- CallStack = "true"
- customErrors mode = "Off"
- compilation debug = "true"
- Debugging process
- Attaching to the processes w3wp.exe / SPUCWorkerProcess.exe / OWSTimer.exe;
- Set the required breakpoints;
- Perform the required operation and step-by-step debugging of the code.
')
After each modification of the code, in order to debug it in such a way, it is necessary that this solution be immersed in SharePoint . This is accompanied by many additional operations, such as withdrawing an existing solution, adding a new one, re-activating features, clearing the cache, and so on. Each such deployment is not important from the studio, it is done either manually, each separate launch of this kind of debugging takes a lot of time. It’s not scary once, but if after each change you try to debug the code, the debugging process will take much more time than the development process itself. This approach, of course, has one very big plus - the programmer quickly gets used to writing workable code with a minimum number of debugging processes :) But in fact, such debugging starts to strain pretty quickly.
The standard debugging process for SharePoint will also come in handy, of course. Without it, as without hands, when it will be necessary to debug the development with more / less vital data or it will be necessary to rely on events occurring in SharePoint . But now is not about that.
The proposed option is very simple, in fact, this is the creation of a console application in which objects of our business logic will be created, methods called, results recorded, and so on. It would seem that everything becomes clear immediately, but it is better to create such a project step by step and see what problems can be and how to solve them:
1. Create a new project using the SharePoint 2013 template - Empty Project and name it SharePointApplication :
2. Specify the type of solution (Farm solution. But you know what is the difference between Farm and Sandbox Solution? Now let's not go into details, in another article) and specify the address of our site-collection in SharePoint:
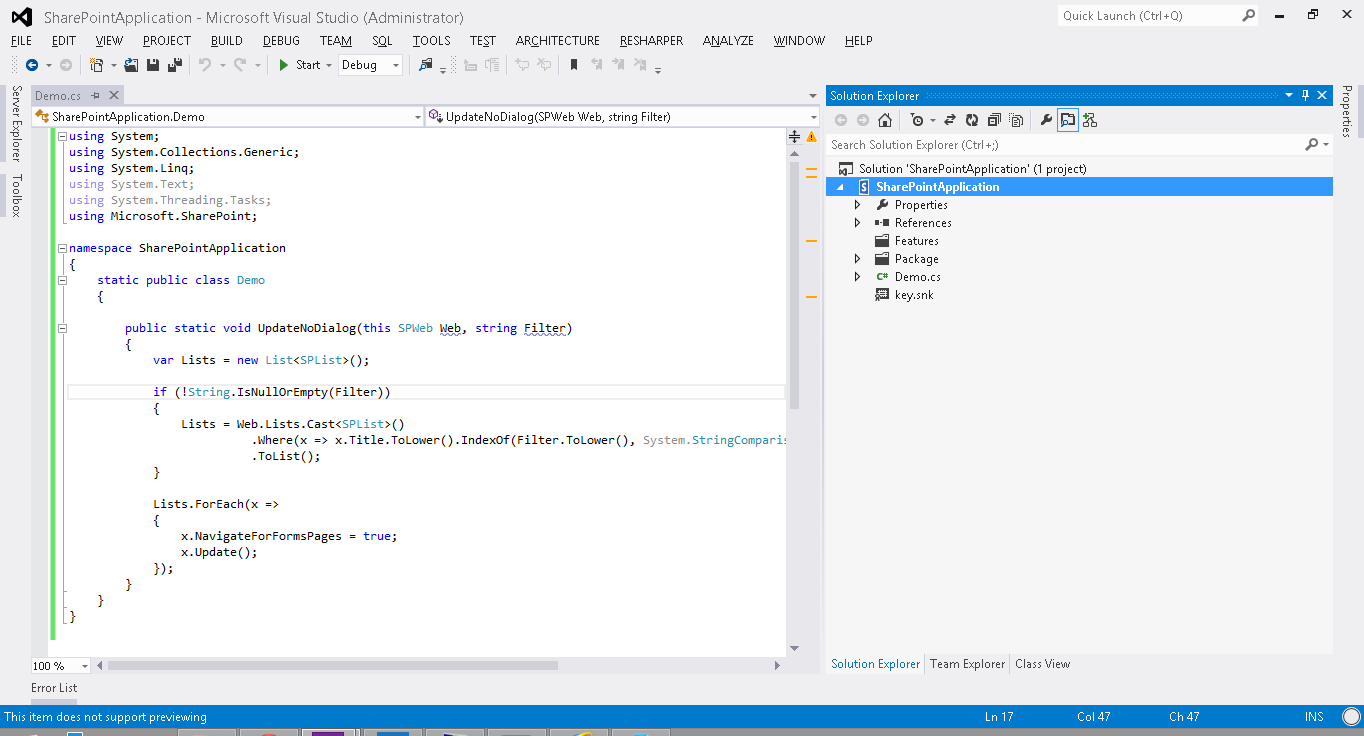
3. Next, we create a simple DEMO class for example with the SPWeb class extension method, which will be responsible for updating the filtered lists of this node in the part of the property responsible for opening list forms in a modal window or not:
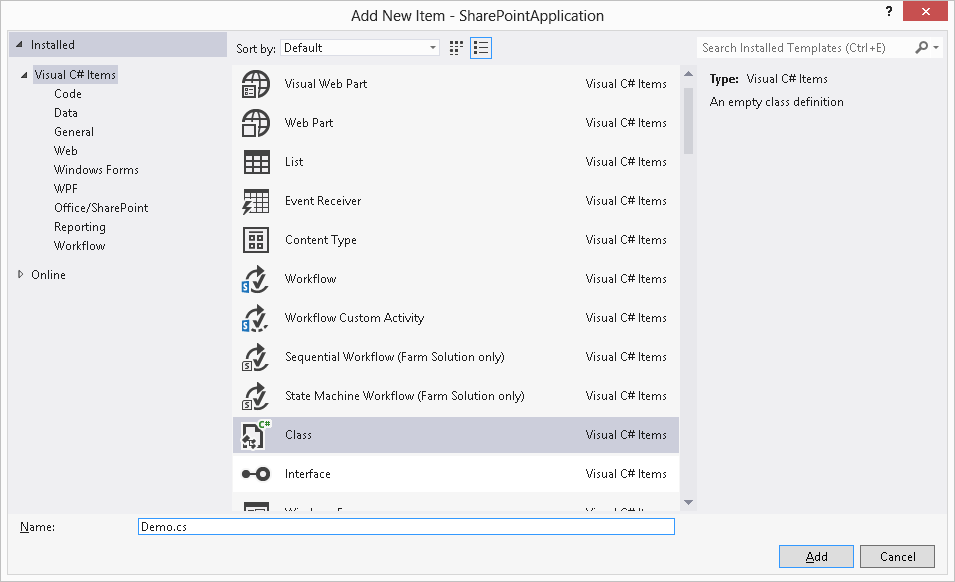
- Add a new class to the project and name it Demo.cs:
- Inside the class, insert the following code:
using System; using System.Collections.Generic; using System.Linq; using System.Text; using System.Threading.Tasks; using Microsoft.SharePoint; namespace SharePointApplication { static public class Demo { public static void UpdateNoDialog(this SPWeb Web, string Filter) { var Lists = new List<splist>(); if (!String.IsNullOrEmpty(Filter)) { Lists = Web.Lists.Cast<splist>() .Where(x => x.Title.ToLower().IndexOf(Filter.ToLower(), System.StringComparison.Ordinal) != -1) .ToList(); } Lists.ForEach(x => { x.NavigateForFormsPages = true; x.Update(); }); } } } - The result is the following picture:
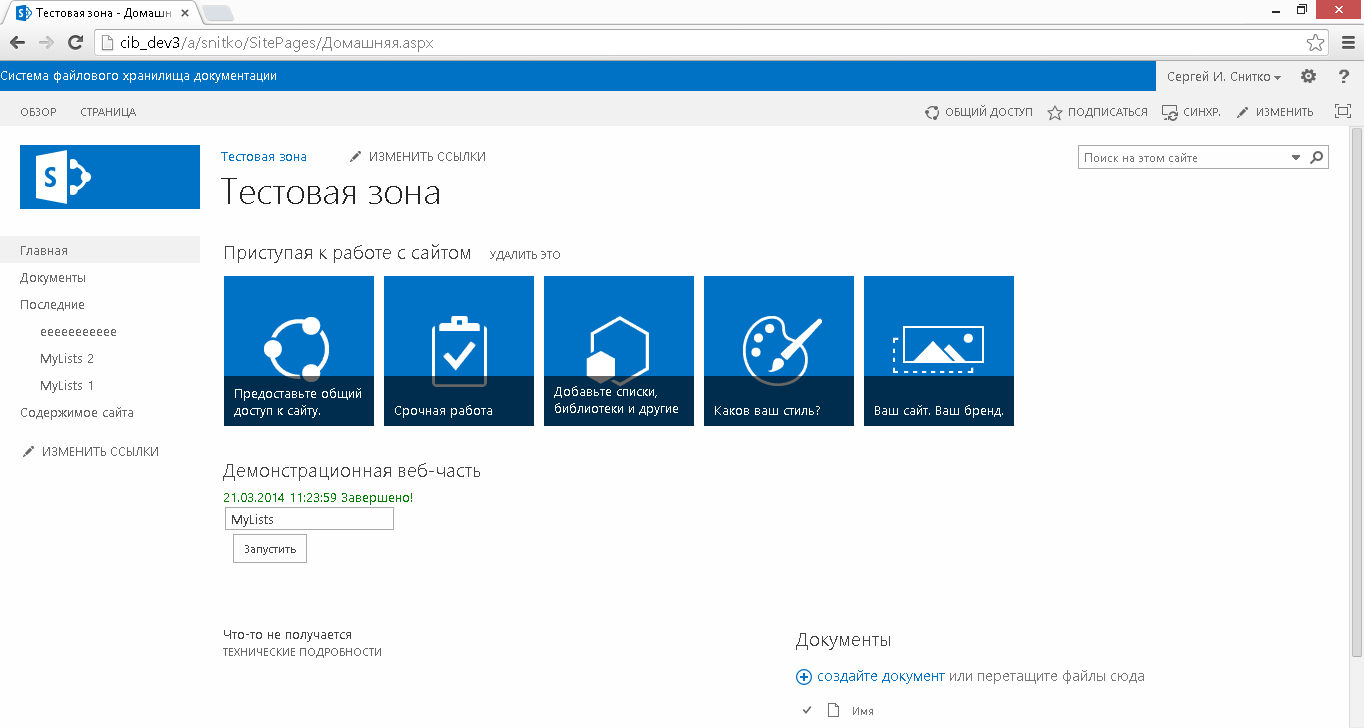
4. Create a web part with a filter input field and a button to call this method:
- Add a new web part to the project and name it DemoWebPart

- In the Elements.xml file associated with this web part, you must specify the group name ( DemoGroup ) in which the created web part will be displayed:
<?xml version="1.0" encoding="utf-8"?> <Elements xmlns="http://schemas.microsoft.com/sharepoint/" > <Module Name="DemoWebPart" List="113" Url="_catalogs/wp"> <File Path="DemoWebPartDemoWebPart.webpart" Url="SharePointApplication_DemoWebPart.webpart" Type="GhostableInLibrary" > <Property Name="Group" Value="DemoGroup" /> </File> </Module> </Elements> - In the file DemoWebPart.webpart, you must specify the displayed title and description of the web part:
<?xml version="1.0" encoding="utf-8"?> <webParts> <webPart xmlns="http://schemas.microsoft.com/WebPart/v3"> <metaData> <type name="SharePointApplication.DemoWebPart.DemoWebPart, $SharePoint.Project.AssemblyFullName$" /> <importErrorMessage>$Resources:core,ImportErrorMessage;</importErrorMessage> </metaData> <data> <properties> <property name="Title" type="string"> -</property> <property name="Description" type="string">- </property> </properties> </data> </webPart> </webParts> - In the file DemoWebPart.ascx you need to write the following code:
<%@ Assembly Name="$SharePoint.Project.AssemblyFullName$" %> <%@ Assembly Name="Microsoft.Web.CommandUI, Version=15.0.0.0, Culture=neutral, PublicKeyToken=71e9bce111e9429c" %> <%@ Register Tagprefix="SharePoint" Namespace="Microsoft.SharePoint.WebControls" Assembly="Microsoft.SharePoint, Version=15.0.0.0, Culture=neutral, PublicKeyToken=71e9bce111e9429c" %> <%@ Register Tagprefix="Utilities" Namespace="Microsoft.SharePoint.Utilities" Assembly="Microsoft.SharePoint, Version=15.0.0.0, Culture=neutral, PublicKeyToken=71e9bce111e9429c" %> <%@ Register Tagprefix="asp" Namespace="System.Web.UI" Assembly="System.Web.Extensions, Version=4.0.0.0, Culture=neutral, PublicKeyToken=31bf3856ad364e35" %> <%@ Import Namespace="Microsoft.SharePoint" %> <%@ Register Tagprefix="WebPartPages" Namespace="Microsoft.SharePoint.WebPartPages" Assembly="Microsoft.SharePoint, Version=15.0.0.0, Culture=neutral, PublicKeyToken=71e9bce111e9429c" %> <%@ Control Language="C#" AutoEventWireup="true" CodeBehind="DemoWebPart.ascx.cs" Inherits="SharePointApplication.DemoWebPart.DemoWebPart" %> <asp:Label ID="ResultLabel" runat="server" Text="Label" Visible="False" ForeColor="Green"></asp:Label><br/> <asp:TextBox ID="FilterBox" runat="server"></asp:TextBox><br/> <asp:Button ID="ExecuteButton" runat="server" Text="" OnClick="ExecuteButton_OnClick"/> - In the file DemoWebPart.ascx.cs you need to add a function:
protected void ExecuteButton_OnClick(object sender, EventArgs e) { try { SPContext.Current.Web.UpdateNoDialog(FilterBox.Text); ResultLabel.Text = DateTime.Now.ToString()+" !"; ResultLabel.Visible = true; ResultLabel.ForeColor = System.Drawing.Color.Green; } catch (Exception Error) { // . ResultLabel.Text = DateTime.Now.ToString() + " ! " + Error.Message; ResultLabel.Visible = true; ResultLabel.ForeColor = System.Drawing.Color.Red; } }
5. Deploy the solution on our website.
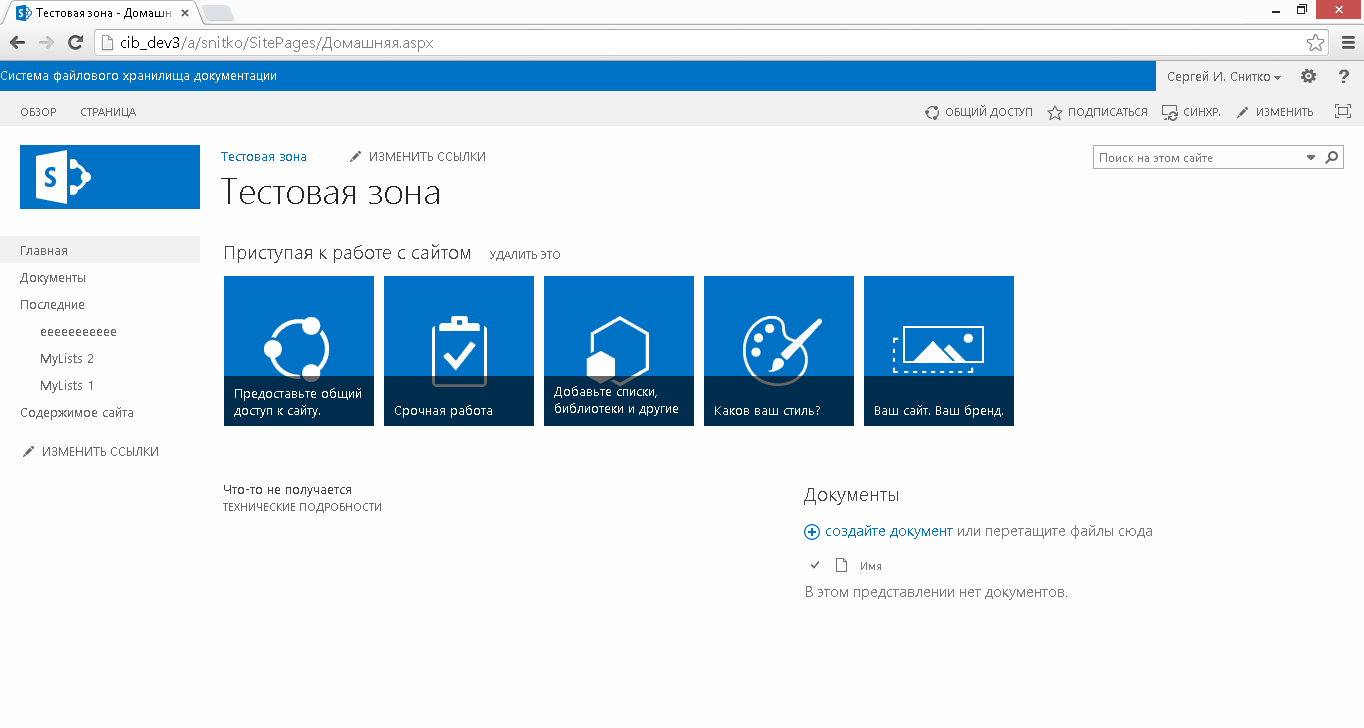
6. Place the required web part on the page and test its performance.
- Go to the page where we plan to host the web part.
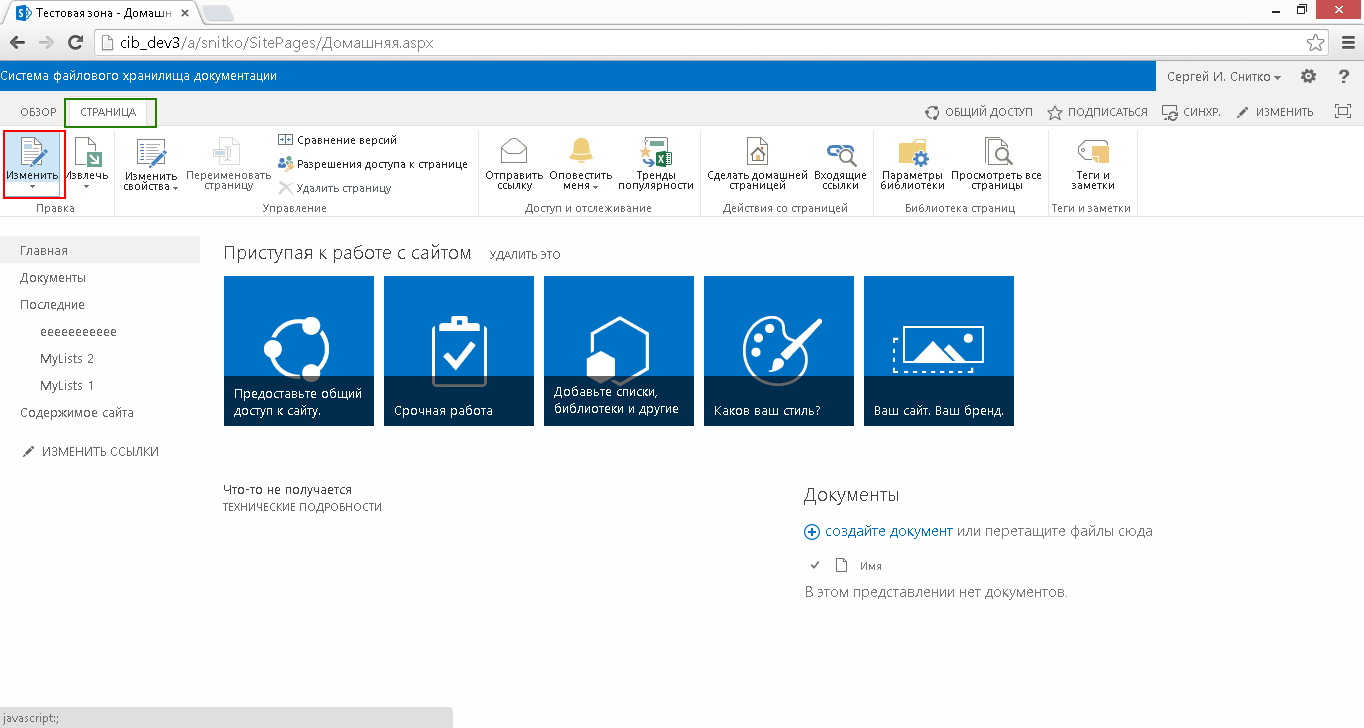
- In Ribbon, click Page - Edit:
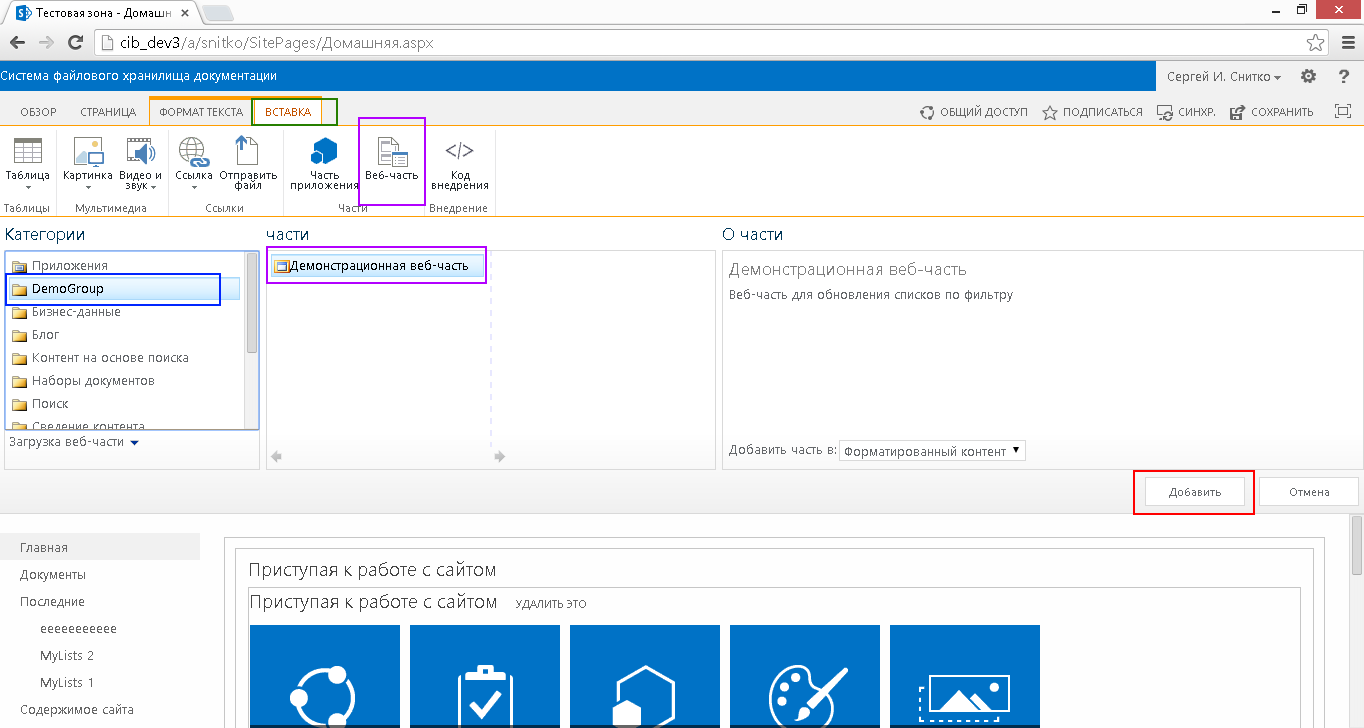
- In the modified view, select Insert - Web Part - DemoGroup - Demo Web Part and the Add button:
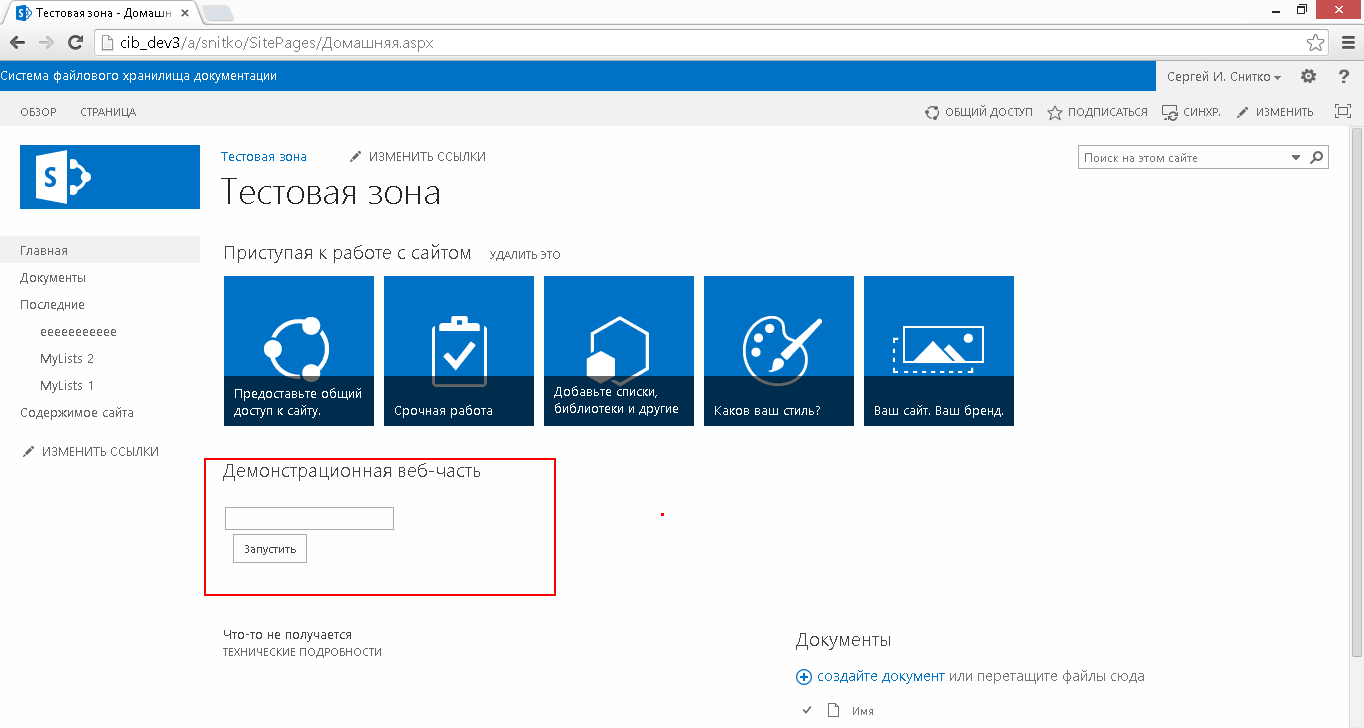
- Specify the filter value (MyLists, for example) and click the Run button:
7. Now we understand that if something went wrong and it was necessary to look for the cause of the problem, you need to connect the w3wp process and monitor what is happening, make changes to the code, deploy again, check and so on. The main part of the checks (at least business logic) can be checked in the console application.
8. Add a new console application to our solution and name it ExecuteApplication.
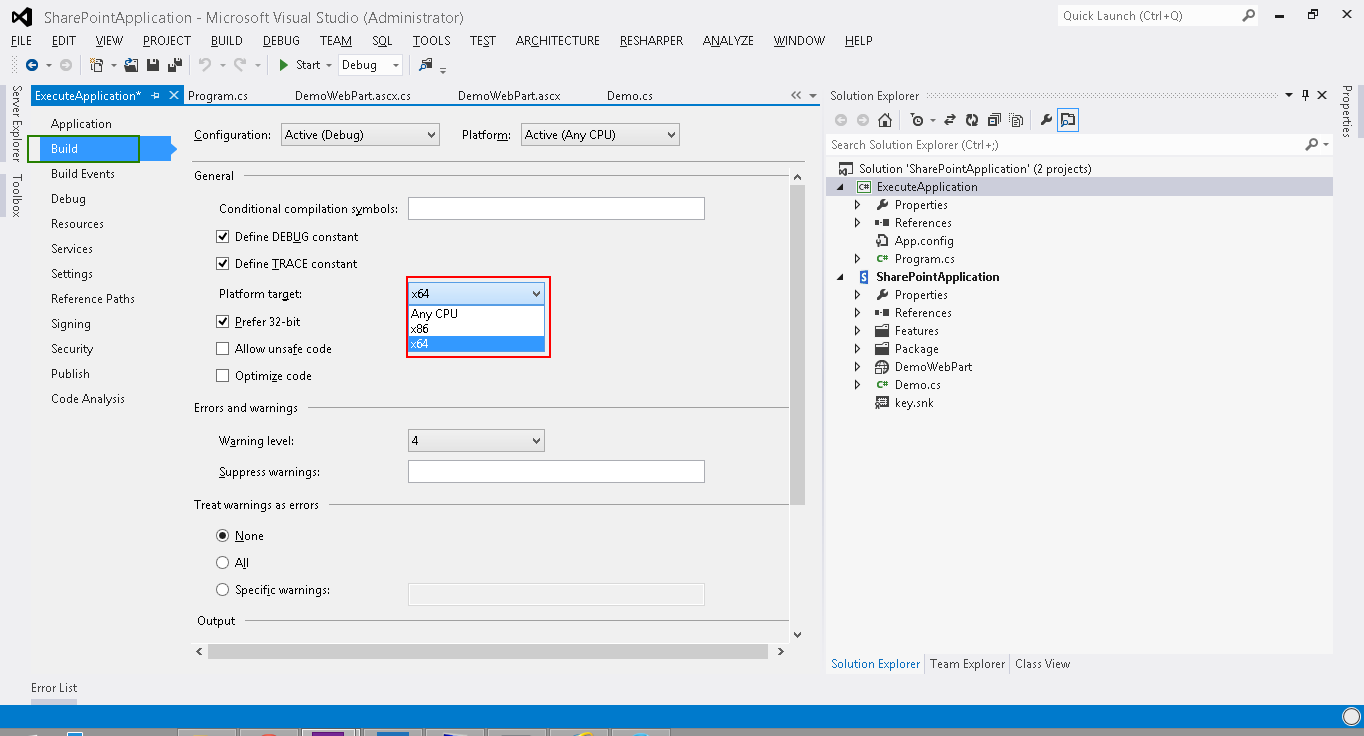
9. Change the application launch mode to x64 platform.
- Go to the project properties:

- Go to the Build tab and enter x64 in the Perform target field:
10. Install the console application with the project to run:
11. We connect to the project a library from a neighboring project, in which our objects and methods are located:
12. In the main method of the console application, we create a connection to our SharePoint site, in the context of which it will work and call the necessary function that we want to test. Sample code is as follows:
using System; using System.Collections.Generic; using System.Linq; using System.Text; using System.Threading.Tasks; using Microsoft.SharePoint; using SharePointApplication; namespace ExecuteApplication { class Program { static void Main(string[] args) { using (var Site = new SPSite("http://cib_dev3/a/snitko/")) { using (var Web = Site.RootWeb) { Web.UpdateNoDialog("MyLists"); } } } } } 13. We start the project and monitor what is happening in real time:
14. If we see the following error ( Microsoft SharePoint is not supported in a 32-bit process. Use a 64-bit executable file.), Then we most likely did not complete item number 9. Sometimes the error may look different (for example, the site is unavailable) , but the essence of the error is the same:
15. If after the changes in the class and the next launch of the project we see the following error ( Method not found: "Void SharePointApplication.Demo.UpdateNoDialogNew (Microsoft.SharePoint.SPWeb, System.String)".),:
This is most likely due to the fact that the assembly from the neighboring solution exists both locally (in the project) and in the GAC, but in the GAC the assembly is older, but at the start it is more priority. Thus, it turns out that when writing code, the studio does not issue errors, because it uses the assembly locally, and when starting the solution it reports that the assembly (which is in the GAC) does not have the methods that you call. To do this, before launching the console application, put the modified library of the neighboring project in the GAC.
- You need to find gacutil.exe (included in the Windows SDK. For example, you can take it here ), create a folder in the file system and place the contents of the archive in this folder. For example, C: \ gacutil.
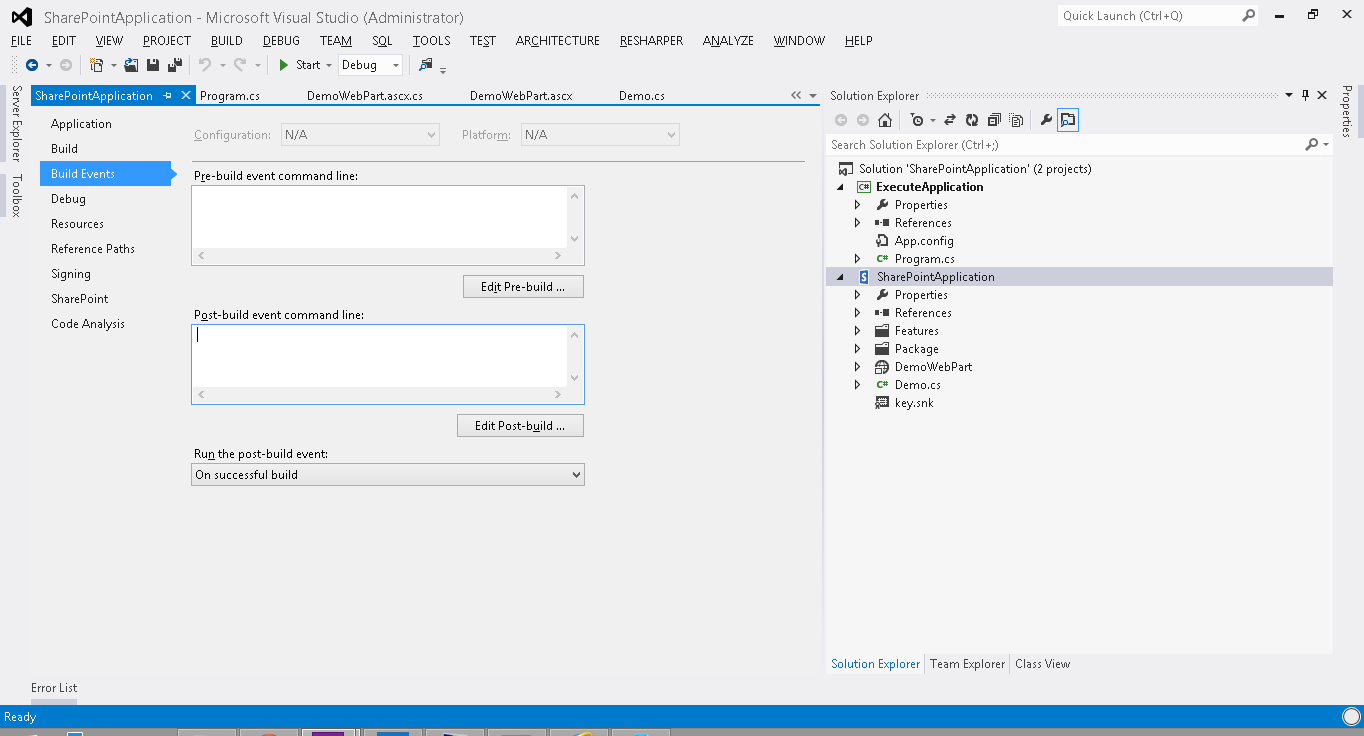
- Go to the SharePointApplication project (with the basic business logic), go to the project properties on the Build Events tab:
- In the Post Build Event field we write the following code:
"C:\gacutil\gacutil.exe" /i "$(TargetPath)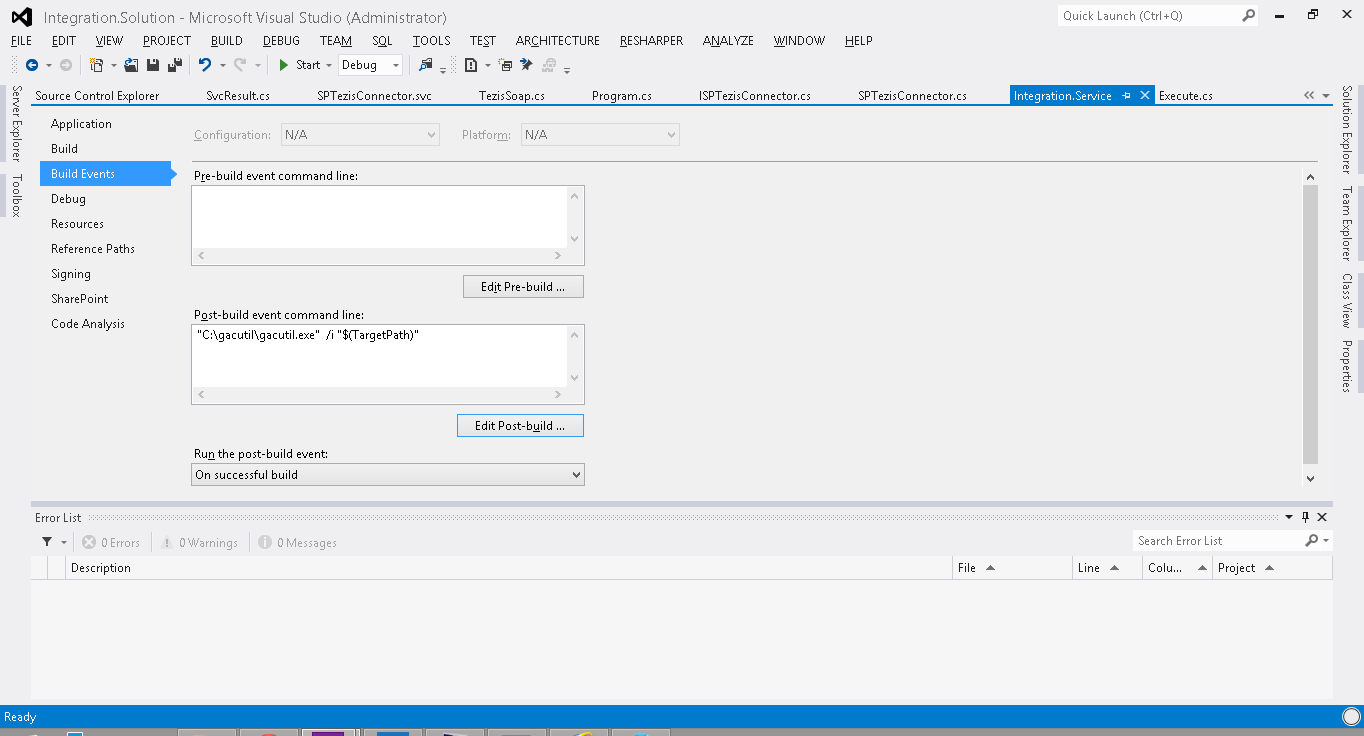
- It turned out that the event “After building the project”, which is called when the project starts, added the installation of the final library of the current project (it is located on the path $ (TargetPath) - this is a Visual Studio constant that forms the required path itself) in the GAC using the gacutil utility .
- As a result, there is no more error when launching the console application.
Congratulations ! The process of debugging the main business logic is now working on ur.
Today we have reviewed one of the approaches for more convenient and quick debugging for solutions on SharePoint , as well as several typical problems that a developer may encounter when using this approach.
Source: https://habr.com/ru/post/221525/
All Articles