Arduino UNO plays in 2048 with a field size of 8x8
Relatively recently, an exciting game of 2048 has appeared on the network. A lot of people have delayed since the first days of its appearance on the network. And all in order to collect the coveted number of 2048. Having played enough in this game, I came across a new version of the game in which the number of cells in rows and columns increased to eight.
And then it all started, after three hours of play, I never lost, and the excitement only increased in proportion to the points received. Having killed almost half a day, folding tsiferki, it became interesting to me. How long can you play this game? But I didn’t want to lose on purpose,(not for nothing, I played for the whole day) decided to write a sketch that would perform not complicated actions for me, moving rows and columns with numbers. I just want to clarify that I rejected the idea to write a program for execution on a PC, because this is a long-awaited topic. The algorithm in the video is different from what I used when writing a sketch.
So let's get down to what we need:
Algorithm of our actions:
A bit of theory.
Bootloader firmware - first you need to switch the Arduino to the Device Firmware Update mode or in the more commonly used version of the DFU. It serves for flashing the controller acting as serial to usb converter.
As you know, the main difference between Arduino UNO from previous models of Arduino boards is the presence of a second ATmega8U2 controller, to replace the USB <-> COM (FT232R) hardware converter. The advantage of this solution is the ability to replace the firmware in the interface controller in order to emulate an arbitrary device when the Arduino is connected to a PC (drive, hid device, etc.). How to do it? The interface controller has a DFU mode - ATmega8U2 controller firmware via USB connection. Almost like the Arduino central controller firmware. To do this, you can use the proprietary utility Flip. In order to transfer the controller to this programming mode, a small hardware upgrade of the Arduino is required. Apparently the developers have specially created it to use the DFU-mode of the interface controller. On the Internet, they write a lot about how to solder a 10k ohm resistor to a specially designated place on the back of the board.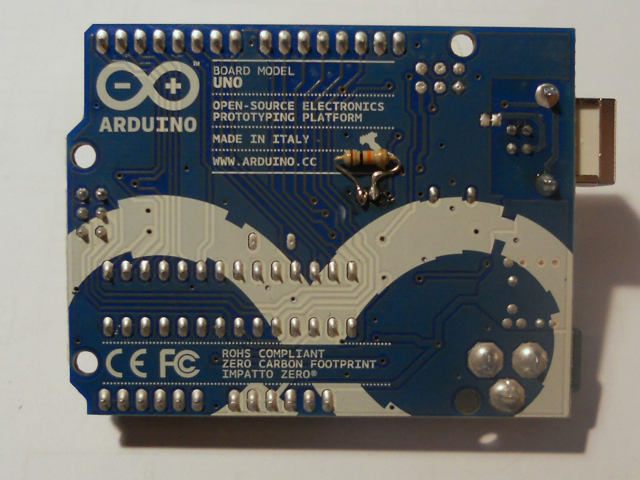 Formally, there is no difficulty, only not everyone will risk soldering. Yes, and honestly it is no good. There is a way much more convenient.
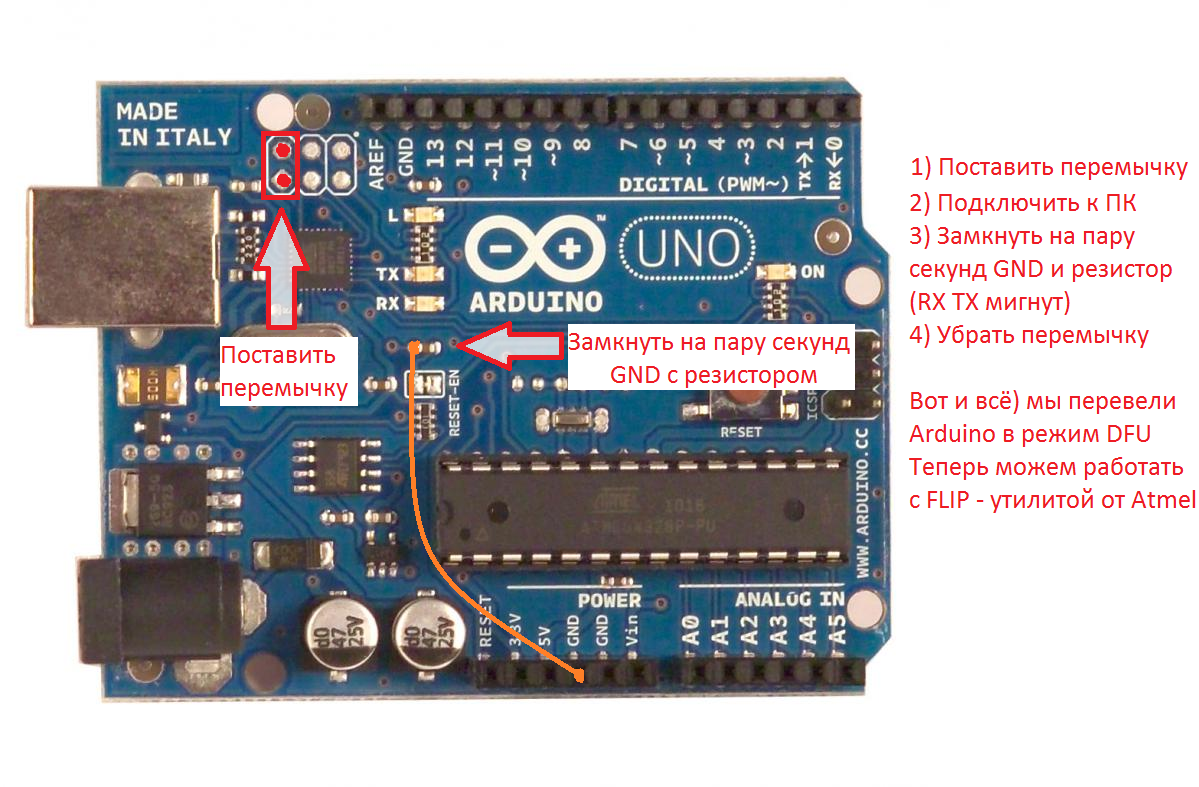 After these actions, the computer will detect the new device and try to install the driver on its own, but it will fail. It is time to install the Atmel proprietary Flip utility. Open the task manager and see the new device Arduino Uno DFU.
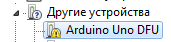 Select the driver from the folder of the recently installed FLIP utility. As a result, we will have a new device - AT90USB82. In the future, when you connect the Arduino, the device will define as a USB device. Now we need to fill the HEX file with USB keyboard instructions. In order for the computer to further recognize our Arduino as a usb keyboard. Run FLIP.
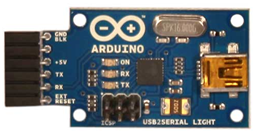
 This is how you can turn the Arduino UNO into a HID device. By the way, you can not only play games, but also play a friend by connecting a device to his computer, which will launch a notebook and write jokes there, or run commands, because the keyboard is the main control panel of the computer. Unfortunately you can not apply this method to the Arduino Nano. As mentioned earlier, the second Arduino UNO controller (ATmega8U2) is used as a USB to Serial converter for the Arduino UNO computer to define as a USB device. It can be concluded: to implement this method, without extraneous devices, is possible only if there is a microcontroller on the Arduino board programmed as a USB-to-serial converter. But what if you have an Arduino Nano or other board without a USB to Serial converter? In this case, you can buy a separate converter like this.
And then it all started, after three hours of play, I never lost, and the excitement only increased in proportion to the points received. Having killed almost half a day, folding tsiferki, it became interesting to me. How long can you play this game? But I didn’t want to lose on purpose,
So let's get down to what we need:
- Arduino uno
- Branded utility Atmel - Flip
- Wire and Jumper
Algorithm of our actions:
- We write a sketch with the necessary functionality and fill in ATmega328 MK
- We flash Arduino bootloader, ATmega8U2 usb controller
A bit of theory.
Bootloader firmware - first you need to switch the Arduino to the Device Firmware Update mode or in the more commonly used version of the DFU. It serves for flashing the controller acting as serial to usb converter.
As you know, the main difference between Arduino UNO from previous models of Arduino boards is the presence of a second ATmega8U2 controller, to replace the USB <-> COM (FT232R) hardware converter. The advantage of this solution is the ability to replace the firmware in the interface controller in order to emulate an arbitrary device when the Arduino is connected to a PC (drive, hid device, etc.). How to do it? The interface controller has a DFU mode - ATmega8U2 controller firmware via USB connection. Almost like the Arduino central controller firmware. To do this, you can use the proprietary utility Flip. In order to transfer the controller to this programming mode, a small hardware upgrade of the Arduino is required. Apparently the developers have specially created it to use the DFU-mode of the interface controller. On the Internet, they write a lot about how to solder a 10k ohm resistor to a specially designated place on the back of the board.
- Select in the menu Device> Select> AT90USB82
- Choose Setting> Communication> USB from the menu.
- Click Open
- Getting to the firmware, click Run
')
Source: https://habr.com/ru/post/220963/
All Articles