Implementing user support with JIRA or how we got rid of OTRS
0. What is it all about
The story began with the fact that the company in which I worked was an old and, subjectively, somewhat inconvenient application processing system (OTRS), with which technical support worked. The development used JIRA, and the lack of integration between JIRA and OTRS made it difficult to formalize the process of interaction between departments. In addition, there were several significant flaws in OTRS, for example, a letter taken into work by one support officer could not see another. These problems had to be solved somehow and in the process of thinking it all came down to two options:
- Update OTRS and configure its integration with JIRA
- Full transfer of technical support work to JIRA and disabling OTRS
They decided to do the second option: it allowed to unify the working tools, stop supporting the extra service (which administrators supported according to the principle “it works — don't worry”, which did not allow it to be optimized and developed), implement automatic statistics gathering on the technical support work and use various JIRA buns : Kanban boards, creating a template bug for developing with one button, flexible search, automatic sending of letters when correcting errors, and so on.
To simplify the work, the correspondence with users decided to reduce to the establishment of the task the first letter from the user and commenting on the task for all subsequent ones. Technical support comments were sent back to the user by email.
To implement the minimum working draft, which will be discussed in this article, we need:
- JIRA on your server. Cloud JIRA does not support the necessary plugins,
- JETI ( JEMH is also possible , but expensive and not in this manual) - a plugin that adds tools to work correctly with incoming and outgoing letters,
- Administrator rights and hands of medium curvature ;-)
- The user to whom we will create tasks and comments (let's call him support),
- A separate JIRA project for working with the technical support box (in the article it will be support@example.com), customized to your taste. It has one type of tasks (in my case - Ticket)
')
1. Finishing the fields and project roles
First, we need to make a few changes to the created project related to the specifics of the plugins used and the project features.
- Create a field of the type “Text Field (single line)” and bind it to the editing and viewing of tasks screens. In it, the plugin will store the user's mail. Let's call it "Customer Email".
- In the role of the Developers project we write down people who will provide user support. All possible changes in tasks are prohibited for everyone except this role using the Permission Scheme, as in our case “wrote a comment in the task” = “sent a letter to the user”.
2. Set up auto reply templates and comments in JETI
We will have two types of letters:
- Auto answer - confirmation for the user to create a task. It allows you to save support from unnecessary work, and users from unnecessary waste of nerves to write a second letter.
- Normal letter - the main way of communicating support with the user, will be sent when commenting on the task.
* In the templates, you can make a cool layout and stuff, but not in the framework of this article, so the examples will be ugly, but working. For everything else, there is a Field picker on the form (it allows you to pull field values from JIRA) and HTML tags ;-)
Perhaps we will begin. For this:
- Go to Administration> Add-ons> JIRA Email This Issue (Configuration)> Templates> Add
- In the form that opens, enter the name of the template (In my case, the "Comment template"), click "Add"
- Fill in the Subject template and Letter Body Template fields, for example: hereScreenshot

- Repeat steps 1-3 for the autovet template (In my case “Auto-reply template”), for example: hereScreenshot

Now the “Comment template” needs to be tied to a specific project and event using the Notification template. For the “Auto-reply template” this is not necessary - we will tie it to the creation of a task from a letter, and not to an event in JIRA. - Go to Administration> Add-ons> JIRA Email This Issue (Configuration)> Notifications> Add
- In the form that opens, enter the name of the notification template: “Comment notification template” and click “Add”
- Press “Add” in the upper right corner of the screen again.
- Fill out the form:
Event Type: “Issue Commented” - the letter is sent as a reaction to an event in JIRA. In this case, select the event that is sent to JIRA when commenting on any task.
Template: "Comment template" - Again, click "Add"
- In the form that opens, fill in the fields:
Recipients (To): "Customer Email" from clause 1.1
Add attachments to email: Newest - in the letter we will only send the latest attachments to the user. - Click "Save".
3. Configure JIRA for work with incoming mail
Now we will configure the creation of tasks and comments to them via mail. This can be done without using the JETI plugin, replacing “Email this Issue Mail Handler” in the 4th paragraph with “Create an issue”.
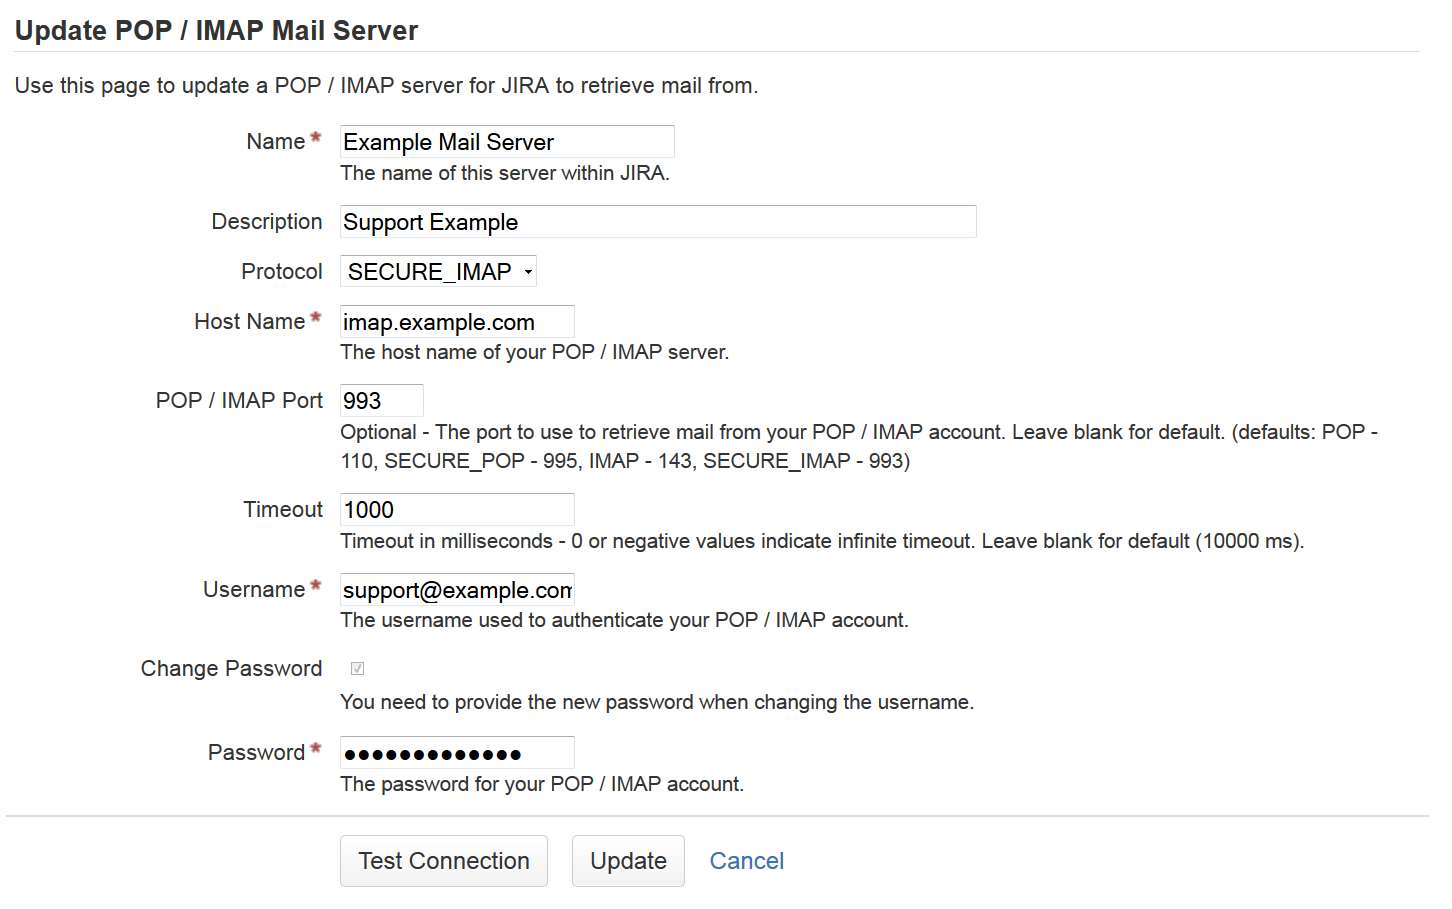
- Follow the path: Administration> System> Incoming Mail> Add POP> IMAP Mail Servers
- We connect to the support mail "support@example.com" - absolutely similar to any email client. Pay attention to the useful “Test connection” button.Fill example
- After successfully opening the box, click on the “Add Incoming Mail Handler” button below to add a handler to our mail.
- Fill in the window that opens:
"Server" - Mail, created just above;
"Handler" - "Email this Issue Mail Handler" - Having filled, we press "Next"
- On the next page, fill out the form as follows:
Project: Your project
Issue Type: Ticket
Default Reporter: support
Notify user: remove the check mark
There is also a "Test" button.Fill example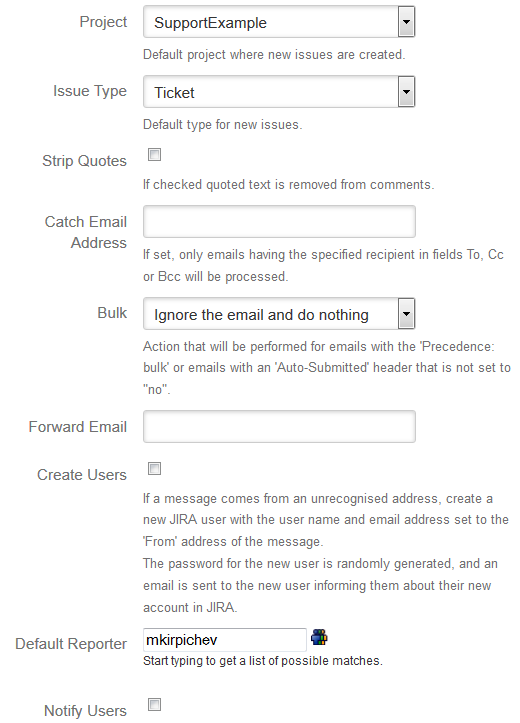
Now JIRA can create tasks via mail, but for the correct operation of the entire project, you need to tune Handler in the plugin itself. - Go to Administration> Add-ons> JIRA Email This Issue (Configuration)> Mail Handlers> Add
- Fill out the form:
Project: Your project
Issue Type: Ticket
Acknowledge new issues: “Auto-reply template” - specify the auto-reply template
* Acknowledge new comments - here you can file another auto reply template for subsequent emails from the user. Personally, I do not use, but you can.
Sender field: "Customer Email" - select the field where we will save the user's mail.Fill example
- Click "Save"
4. Set up outgoing mail in JETI
Since the templates we have already created, it remains for us to only specify the context for their use:
- Go to Administration> Add-ons> JIRA Email This Issue (Configuration)> Contexts> Add
- In the opened form we fill in:
Project: Your project
Issue Type: Ticket
Notification Template: "Comment notification template"
From Address: "support@example.com" - we enter the mail, which we will use to correspond with users.Fill example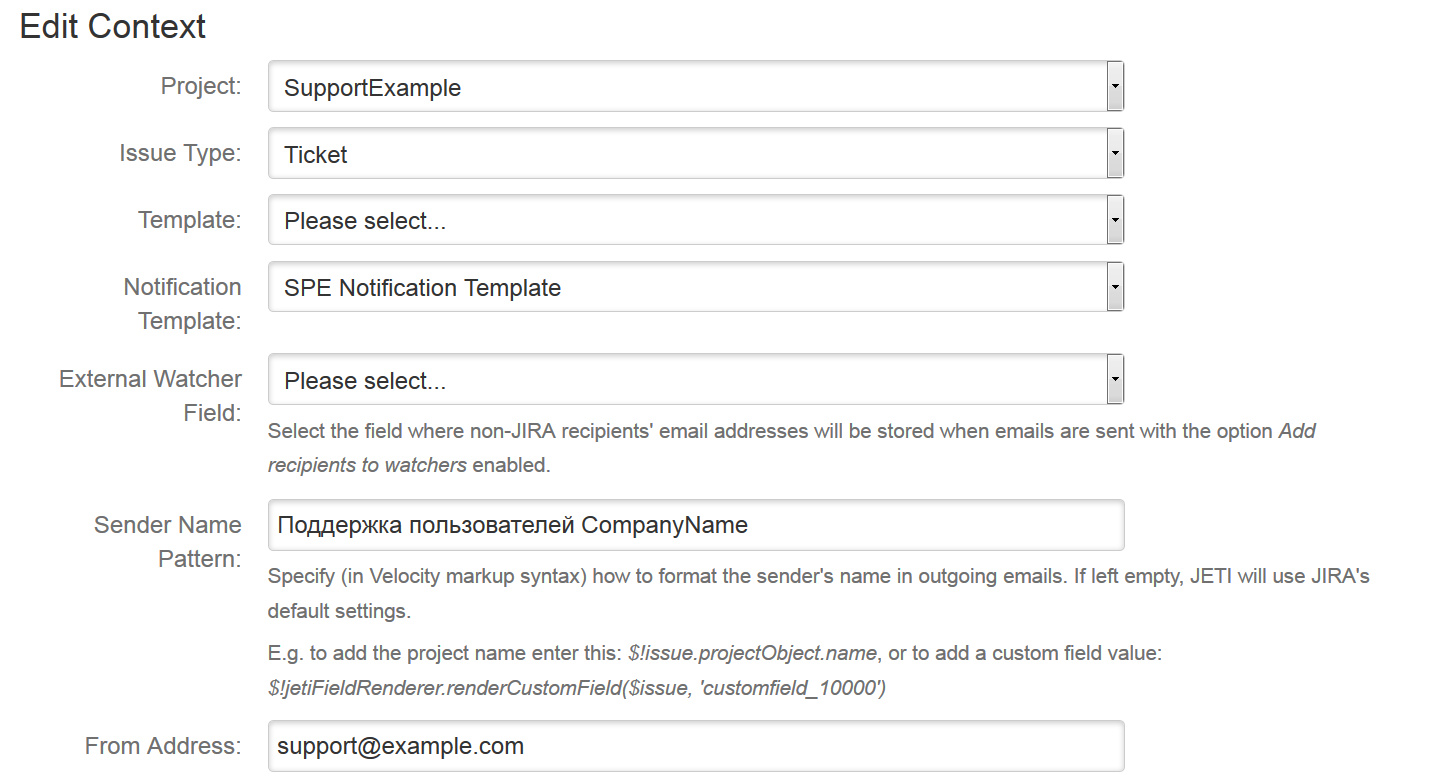
- Save again
5. Check
Now let's look at the results of our works:
- We send a letter to the support address - within five minutes a task should be entered and an auto answer should come. In the Customer Email field of the created task there should be the address of the sender of the letter if there is no such user in JIRA. An auto reply about the receipt of the letter should come to the mail.
- We are sending another letter with the same topic and from the same address - the task should be commented out.
- Commenting the task - the user should receive a letter with a comment.
View from the Jira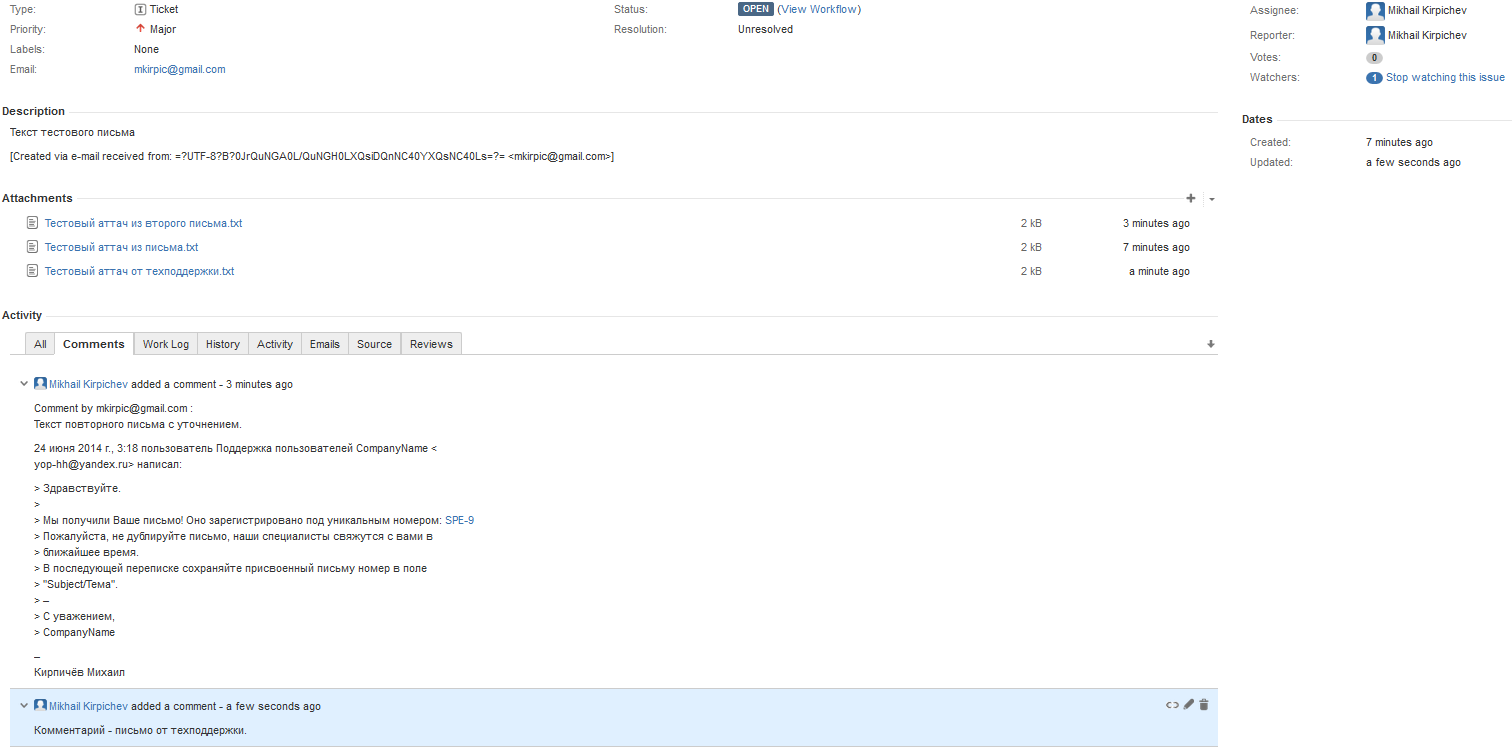
View from the user's mail
6. Summary
At this stage, we have created a minimally efficient project for processing user requests based on JIRA and JETI.
Pros:
- Collection of technical information about the site user with the help of request collectors (resolution, browser, page - in theory everything that js can pull out),
- Integration with other plugins: Kanban board for the project, automatic distribution of letters when released, sending reminders of unfinished tasks etc,
- Unified working tool for development and support,
- The implementation of analytics of any level of complexity on the work of technical user support
Minuses:
- The JETI author has not yet fulfilled the request to send custom events when processing letters. Therefore, it was not possible to set up a re-opening of tasks when receiving a second letter from the user after the first was processed by technical support. Now it is necessary to catch filters in notifications from JIRA, but they promise to fix it in the next release: link
- The inability to send specific attachments to the user: the last few are sent on a cunning algorithm.
- Dependence on the general settings of outgoing JIRA mail (letter prefix, text address) - I did not find how to fix it, and I will be happy with ideas, if there are.
The lack of protection against spam was decided by filters through the interface of the mail itself, but cool would be to do similar things through JIRA. - You can not just take and send a letter of support to some left box. Rare, but sometimes necessary case.
That's all, in the next article I will try to tell how to add such cool and necessary things to this project, such as:
- Mail Merge Templates - A project to support users without templates looks weird.
- Sending a task fix letter when you close a development task,
- The query collector and kanban board mentioned above.
Source: https://habr.com/ru/post/220823/
All Articles