We build motion simulator from sticks and blue electrical tape
Usually, the first comment on an article about some unknown technology looks like this: “Before you go deep, you would first tell what it is and why you need it.” So, this wonderful periphery is designed to imitate the effect of overload on a player when playing car simulators. In this case, this is ensured by the tilting of the chair along two axes, hence a motion simulator with two degrees of freedom is obtained.
Visual demonstration:
')
A piece of history
A few years ago I saw this video on the Internet. I wanted to build something similar. Judging that I did not master such a design, I decided to make just a swinging chair. Googled, it turned out America, I did not open, and such devices are. The device described in the topic is implemented according to the racingseat scheme, when the seat is fixed on the cardan gear or its functional analogue. This is the second attempt to implement. The first was the joyrider scheme, in which the chair rotates on two perpendicular axes, ideally intersecting in the center of mass of the platform. I also proceeded from the fact that there is no money. Therefore, between the good, the cheap, the bad and the expensive had to choose the good and the cheap.
Accessories
Engine. Studying the thematic resources for choice, I could not find a clear answer to what power the engine is needed. In the previous version I used a motor from a cordless screwdriver, the result was not very good. Typically, for such purposes use gear motors for car wipers. It is recommended to use nodes from cars with large front windows (large cars, buses, trucks), since the electric motors there are more powerful. And even so, simovody usually complain of low power. After evaluating the budget, I decided to score on recommendations, put up with low power and do it cheaply and angrily - I bought two gear motors from Lanos for $ 20 each. The engine is marked as 30W. I thought the plastic driven gear gear will not live long. Fortunately, I was wrong, after half a year of use there was not even a backlash. I can say that according to the sensations, the power of these engines is quite enough. If desired, you can raise the supply voltage and get a little more dynamics.
The cardan gear is used from the VAZ-2101 cardan shaft. ~ $ 20
The power supply unit 12V 350W was ordered in China, since the ATX'-based power supply unit with slightly lower power worked protection even when one engine was running. I think this protection, if desired, can be easily disabled, but did not bother. The Chinese also pulls both engines without straining. ~ $ 30
Ball joint hinges - hinges that transmit the force of gear motors to the seat. I do not know how this hinge is called in Russian. Perhaps a ball joint. The first thought was to use the steering tips from the car. Bought, tried - turned out to be too tight and bulky. Then I decided to skolhozit homemade - the gaps turned out to be too large. As a result, ordered in the same China for $ 3 apiece. It's funny that when I tried to find such hinges in offline, in an office specializing in the sale of bearings, they laughed a little at me and said that such a thing could not be found.
A pair of circuit breakers for short circuit protection.
Car seat with an unknown pedigree, and certainly no easy fate.
Hardware, iron, wires, all sorts of stuff like venilators, HZ how much.
Game controller aka Logitech G25, computer, monitor and the rest was already available.
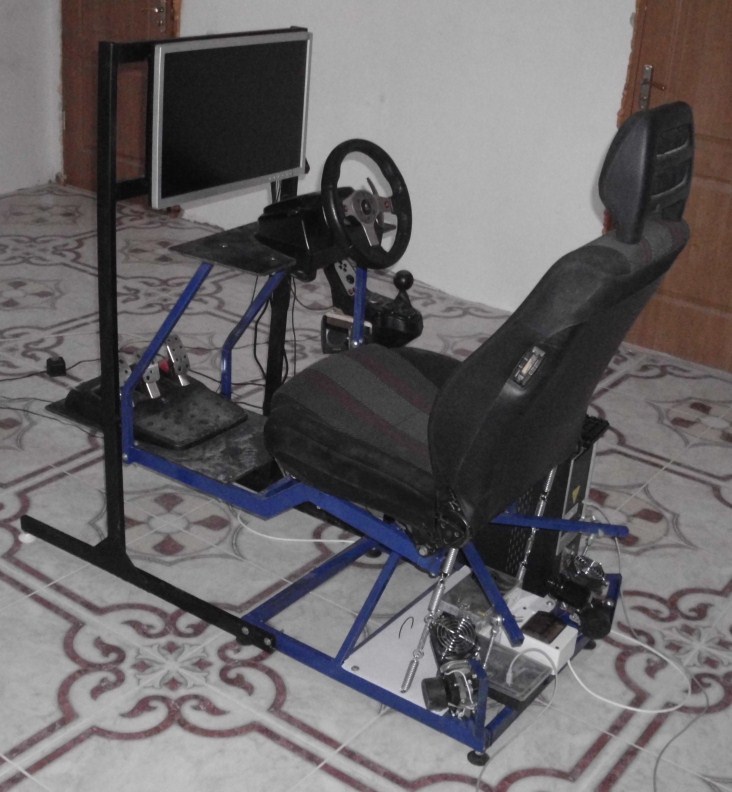
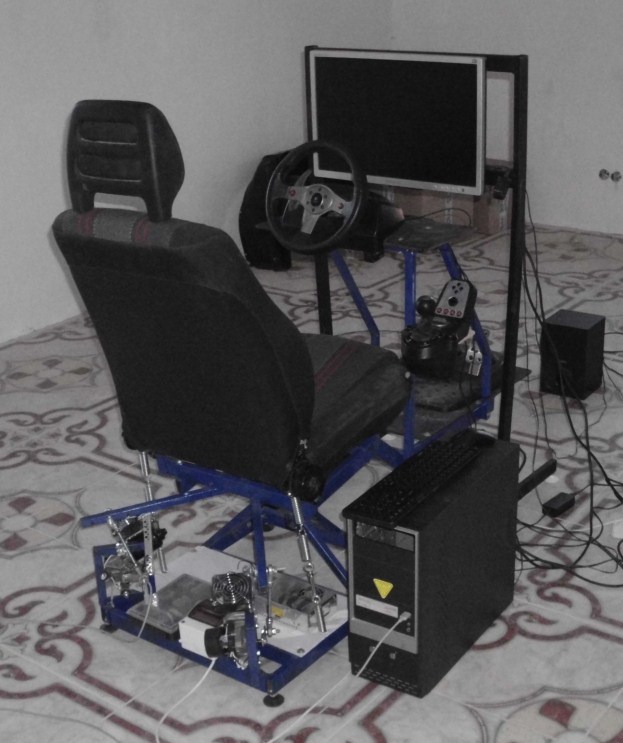
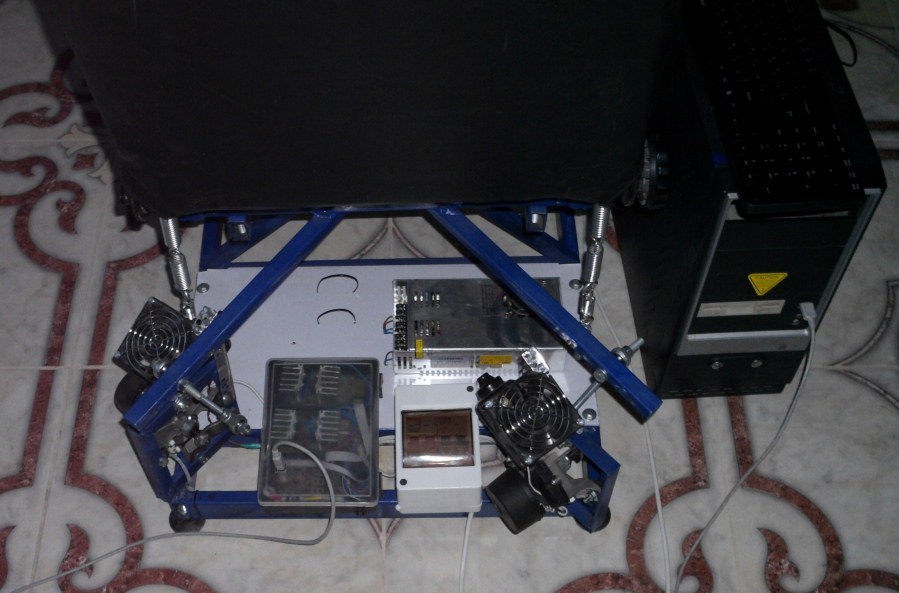
A few photos to understand the mechanical part. Fastening the universal joint and engines with the ball joint mentioned above. At the same time, you can laugh at my skills as a welder and painter:


Electronics.
If I were smarter, I bought or copied Chinese engine drivers and connected them to the Arduino, the benefit of the implementation is in the public domain. But no, I decided to go my own way. And so that it was not boring on the way, I decided to drag a newly invented bicycle with square wheels on my back during the hike. Yes, I killed my drivers and controller with firmware. And I made the drivers, probably more than a dozen versions, and the number of burned field workers can be measured by weight. So, the death number, not recommended for repetition of the scheme:
controller
motor driver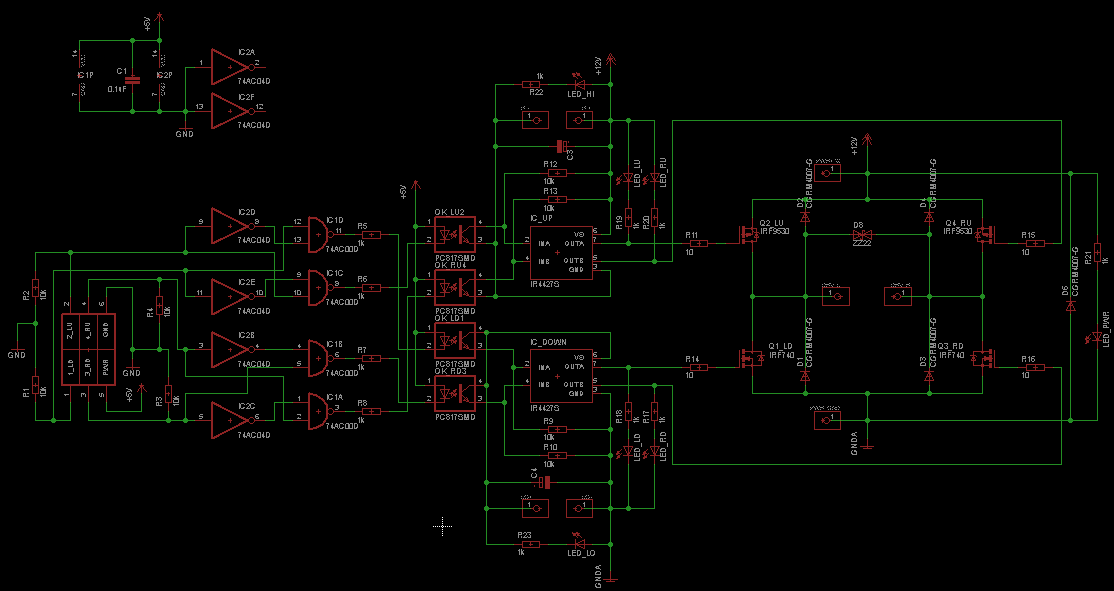
Some places in the diagrams have already been corrected on the PCB, so I do not recommend repeating it. We draw boards, we uncover the laser iron, sneakers for shooting. We get the following:
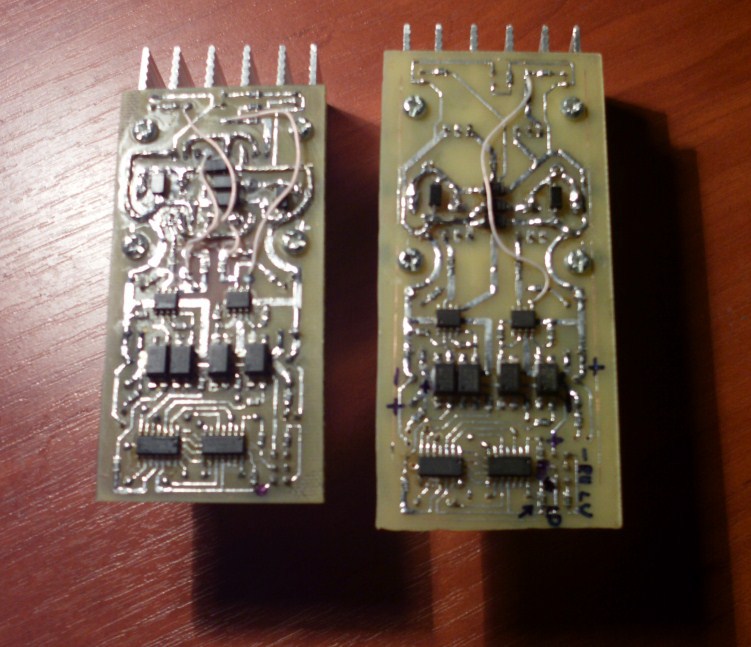
And we pack everything into an elegant case:

Of course, it was not without jambs, and in some places the board had to be fixed.
The information necessary for operation (setting the position of the engine) is transmitted via the USB-Serial TTL adapter on the cp2102 chip to the controller. The controller is implemented on atmega88 MK with minimal strapping. For convenience, a four-digit seven-segment indicator has been added. The controller on the feedback signal, the sensor of which acts as a variable resistor on the axis of the gearmotor, determines the actual position of the engine and, if necessary, makes adjustments to it. A proportional controller is implemented in the controller. I probably will not share the firmware, because I do not like backups. In the engine drivers implemented H-bridge. The controller has the ability to open any of the bridge transistors, which in this case is redundant. Because of this, it was necessary to fence the logical protection against short-circuit. It would be enough to transfer the direction and resolution signals from the controller to the driver.
Software for the computer.
For me, it was a revelation that many games implement telemetry output. I used to think that you can get data about the physical model of the game only with the help of black magic and the method of scientific spearhead in the memory of the process. It turns out not, often game developers bother over the output of the relevant data through a socket. Great place to invent another bike, otherwise I’ve almost recovered from the previous one. But here something went wrong and I decided to look at the finished options. And there are at least two of them free:
X-Sim is crammed with a lot of whistles, like the possibility of screwing plug-ins, intercepting the state of joysticks, but difficult to start. List of supported games .
SimTools is a relatively new program, much simpler than the first, but has less functionality. To start the most it. List of supported games .
Both programs allow the output of the necessary information through the serial port (in this case, virtual). Practically all more or less known automobiles are supported, but there are also aviation simulators.
I think it would be nice to have an Oculus Rift bundled with this device. Only probably will need the second version, since the first gyro will go crazy.
I want to apologize to those who looked through all the pictures, but did not see the blue duct tape, and to the readers, who read it here, for the post like KindarisovatSovu.jpg. Initially, it was not planned, so not all information about the manufacturing process has been preserved. But at least the article will tell about such devices to those who did not think about their existence. Some more videos with this piece of iron are in this playlist .
Source: https://habr.com/ru/post/219975/
All Articles