Migration of MSSQL database versions

Greetings
In this post, I want to share thoughts on the support and migration of changes in databases and MSSQL in particular, as well as my decision.
')
Problem
As a rule, in more or less serious projects, there are several independent environments (environment).
The developer uses his database to write and debug the system code, then the code changes and database schemas are transferred to the tester's environment, and then transferred to staging and production.
Again, in more or less serious projects, developers and testers are more than one, also with their surroundings.
Accordingly, the process of migration of changes should be organized not only the code, but also the database, and it is desirable that this process is convenient and reliable.
Details under the cut.
Solutions to the problem
Based on my experience of participating in projects, I can single out several ways to organize the process of migrating database changes:
1. In the code storage for each version of the product, a separate folder is created in which the scripts are numbered. And so for each version. In this case, there should be a separate deployment engineer (deploy engineer), which monitors all databases, maintains their relevance and compliance with the current version of the code. This process can be successfully applied in projects with regular and planned releases, but in the case of continuous releases it can already become a problem.
2. There is a dedicated person responsible for the database scheme to which developers send patches. These patches are added to the source control code storage and deployed with two different bat scripts, one of which creates the environment again, the second just applies patches. With this approach, the problem of matching the database version code is significantly reduced, but at the same time it is difficult to track which changes were made, by whom and when it is much more difficult. High probability of error.
3. Finally, the last option and the one closest to me is the use of special frameworks for migrating database versions, such as FluentMigrator , .Net Migrator, and others.
My decision
For one of the projects, I wrote an application that should greatly simplify the problem of migrating database versions.
The code is uploaded to CodePlex.com under an extremely liberal MIT license, so you can use this product at your convenience!
The system is a WinForm application consisting of two projects. FluentMigrator is used as a framework for migration. I will not go into details about what FluentMigrator is and what it is eaten with, those who want to read more about this framework can refer to this article FluentMigrator - a system of versioned migrations .
My project, with the simple name "C # Database Migrator" is here: https://csharpdatabasemigrator.codeplex.com/
What the system can do:
1. Work with several types of databases, that is, you can create migrations for databases with different structure. How this is done in the code below.
2. The system can create database backups, as well as restore them.
3. A directory with all the .sql files included in it can be used as a migration.
4. In the migration file you can check the name of the database. This can be useful in case some data should hit only the test base or vice versa.
How to start using
1. To pick up the source of the project https://csharpdatabasemigrator.codeplex.com/SourceControl/latest
2. Open a project in the studio
3. Go to the Default folder (default folder for migration files)
4. Create a migration file. The migration file is a class inherited from the base class Migration
using FluentMigrator; namespace Migrations.Default { [Migration(1, "Author: AuthorName; Description")] public class Migration_1: Migration { public override void Up() { // Migration Up code here } public override void Down() { // Migration Down code here } } } 5. Register the version number and its description in the class attributes, as well as the code for the migration itself. For example, creating a new table
Create.Table("Users") .WithIdColumn() .WithColumn("Name").AsString().NotNullable(); You can execute SQL commands:
Execute.Sql("DELETE TABLE Users"); Details of the syntax can be found here: https://github.com/schambers/fluentmigrator/wiki/Fluent-Interface
6. Compile the project and run the application:

7. Connect to the database server
8. Select the required database in the drop-down list.
9. Select the type of operation “Update To latest Version” and click the “Do Job” button.
10. Check the log in the right part of the form
How to work with several types of database
All migration files belonging to the same database schema must be in the same namespace (namespace). The default is “Migrations.Default” by the name of the folder in the project. To add another type of migration, you need to create another folder in the “Migrations” project, for example, “MySecondDatabase” and edit the configuration file “MigrationNamespaces.config”
<?xml version="1.0" encoding="utf-8" ?> <configuration> <MigrationNamespaces> <MigrationNamespace Name="Default" Path="Migrations.Default"/> <MigrationNamespace Name="My Second Database" Path="Migrations.MySecondDatabase"/> </MigrationNamespaces> </configuration> After that, the “My Second Database” type will be available in the main application window.
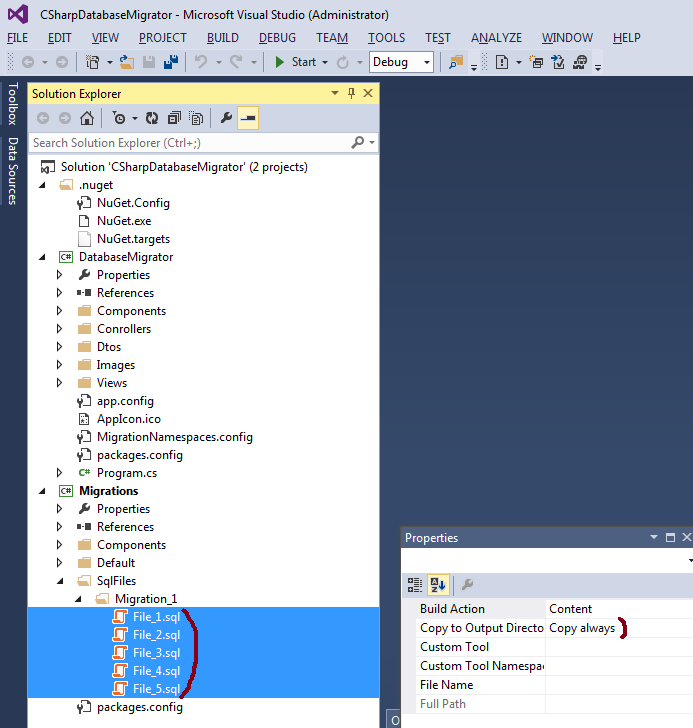
Execute sql files from folder
1. The system can use files from the specified folder as migration. All files will be sorted by name and executed when the migration is applied:

How it all works
To migrate from c # code, you need to connect the “FluentMigrator.Runner” assembly and execute one method:
public Action<string> OnNewUpdateLog; public void UpdateToLatestVersion(string databaseName, string migrationNamespace) { // , FluentMigrator-a var announcer = new TextWriterAnnouncer(OnNewUpdateLog); // var assembly = Assembly.GetExecutingAssembly(); // , var migrationContext = new RunnerContext(announcer) { Namespace = migrationNamespace }; var options = new MigrationOptions { PreviewOnly = false, Timeout = 60 }; // SqlServer2008 var factory = new FluentMigrator.Runner.Processors.SqlServer.SqlServer2008ProcessorFactory(); var processor = factory.Create(GetConnectionString(databaseName), announcer, options); // runner var runner = new MigrationRunner(assembly, migrationContext, processor); // runner.MigrateUp(true); OnNewUpdateLog("Done"); } There are two methods for creating and restoring database backups:
public void BackupDatabase(string databaseName, string destinationPath) { var sqlServer = new Server(_connection); databaseName = databaseName.Replace("[", "").Replace("]", ""); var sqlBackup = new Backup { Action = BackupActionType.Database, BackupSetDescription = "ArchiveDataBase:" + DateTime.Now.ToShortDateString(), BackupSetName = "Archive", Database = databaseName }; var deviceItem = new BackupDeviceItem(destinationPath, DeviceType.File); sqlBackup.Initialize = true; sqlBackup.Checksum = true; sqlBackup.ContinueAfterError = true; sqlBackup.Devices.Add(deviceItem); sqlBackup.Incremental = false; sqlBackup.ExpirationDate = DateTime.Now.AddDays(3); sqlBackup.LogTruncation = BackupTruncateLogType.Truncate; sqlBackup.PercentCompleteNotification = 10; sqlBackup.PercentComplete += (sender, e) => OnSqlBackupPercentComplete(e.Percent, e.Message); sqlBackup.Complete += (sender, e) => OnSqlBackupComplete(e.Error); sqlBackup.FormatMedia = false; sqlBackup.SqlBackup(sqlServer); } public void RestoreDatabase(string databaseName, string filePath) { var sqlServer = new Server(_connection); databaseName = databaseName.Replace("[", "").Replace("]", ""); var sqlRestore = new Restore(); sqlRestore.PercentCompleteNotification = 10; sqlRestore.PercentComplete += (sender, e) => OnSqlRestorePercentComplete(e.Percent, e.Message); sqlRestore.Complete += (sender, e) => OnSqlRestoreComplete(e.Error); var deviceItem = new BackupDeviceItem(filePath, DeviceType.File); sqlRestore.Devices.Add(deviceItem); sqlRestore.Database = databaseName; DataTable dtFileList = sqlRestore.ReadFileList(sqlServer); int lastIndexOf = dtFileList.Rows[1][1].ToString().LastIndexOf(@"\"); string physicalName = dtFileList.Rows[1][1].ToString().Substring(0, lastIndexOf + 1); string dbLogicalName = dtFileList.Rows[0][0].ToString(); if (!Directory.Exists(physicalName)) { physicalName = sqlServer.MasterDBPath + "\\"; } string dbPhysicalName = physicalName + databaseName + ".mdf"; string logLogicalName = dtFileList.Rows[1][0].ToString(); string logPhysicalName = physicalName + databaseName + "_log.ldf"; sqlRestore.RelocateFiles.Add(new RelocateFile(dbLogicalName, dbPhysicalName)); sqlRestore.RelocateFiles.Add(new RelocateFile(logLogicalName, logPhysicalName)); sqlServer.KillAllProcesses(sqlRestore.Database); Database db = sqlServer.Databases[databaseName]; if (db != null) { db.DatabaseOptions.UserAccess = DatabaseUserAccess.Single; db.Alter(TerminationClause.RollbackTransactionsImmediately); sqlServer.DetachDatabase(sqlRestore.Database, false); } sqlRestore.Action = RestoreActionType.Database; sqlRestore.ReplaceDatabase = true; sqlRestore.SqlRestore(sqlServer); db = sqlServer.Databases[databaseName]; db.SetOnline(); sqlServer.Refresh(); db.DatabaseOptions.UserAccess = DatabaseUserAccess.Multiple; } Details in the DatabaseManager.cs class
Thanks to all!
Source: https://habr.com/ru/post/219789/
All Articles