Build your Android for BeagleBoard
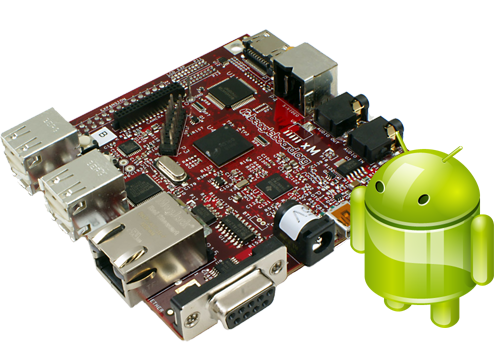
In this article, I want to talk about the build process of Android, for ARM controllers. I hope that for someone this article will be useful, not only to the developer but not to the experienced user. Basically, of course, I would like to show how the build process itself, the operating system for mobile devices. As a guinea pig, I chose BeagleBoard-xM .
This is one of the debug boards that are perfectly suited for such purposes. among other things, it has HDMI and S-VIDEO outputs in order to “touch” the result. As well as the 4th USB ports, which is quite enough to connect a keyboard, mouse, etc. In my experiments, I used BeadaFrame bought on eBay , but this condition is absolutely not important, as any “TV” will do.
And so, our motherboard will be loaded with microSD, and to build Android we will need a Linux machine, for example, with Ubuntu 13.04-AMD x64, it is possible to use a virtual machine, but I recommend to make sure that the MMC device is available, i.e. microSD card itself, and first we need to install the following packages:
sudo apt-get install aptitude sudo aptitude install ia32-libs sudo apt-get install git-core gnupg flex bison gperf build-essential zip curl libc6-dev libncurses5-dev:i386 x11proto-core-dev libx11-dev:i386 libreadline6-dev:i386 libgl1-mesa-glx:i386 libgl1-mesa-dev g++-multilib mingw32 openjdk-6-jdk tofrodos python-markdown libxml2-utils xsltproc zlib1g-dev:i386 curl For our Android, you need to collect three main things:
- the core of the operating system itself, in fact, is a binary file that will load the bootloader.
- bootloader, in our case, it will be u-boot , although you can use x-loader .
- file system
And for work we will create what be the working directory, for example: / home / ubuntu / Adroid /
mkdir /home/ubuntu/Android cd /home/ubuntu/Android and immediately add this directory in the path:
export PATH=/home/ubuntu/Android:$PATH If git was not installed on your virtual machine, you will have to do it:
sudo apt-get install git git config --global user.email "you@example.com" git config --global user.name "You Name" Repository Initialization
Now we need to get the source code of Android itself, from which, in the future, we will build the operating system kernel itself and the file system. To do this, inside the working directory / home / ubuntu / Adroid , run the following command:
curl http://commondatastorage.googleapis.com/git-repo-downloads/repo > androidrepo As a result, we received the androidrepo file, with which we will work with the repository. To do this, assign the rights of the executable file for androidrepo .
chmod a+x androidrepo Next, inside our working directory, create a directory for the source code:
mkdir /home/ubuntu/Android/source cd /home/ubuntu/Android/source and initiate the repository:
androidrepo init -u git://gitorious.org/rowboat/manifest.git -m rowboat-jb-am37x.xml After successful initiation, we synchronize with the repository.
androidrepo sync Synchronization is a rather long process, as it contains not only kernel kernels, but also the file system as well as the compiler with the help of which both the loader and the kernel itself will be built.
At the end of synchronization, we should see information about successful synchronization, something like this:
Syncing work tree: 100% (261/261), done.
Now, before building, we need to configure the path to the compiler, which we will build both the kernel and the loader. The compiler itself is located inside the repository itself in the prebuilts / gcc / linux-x86 / arm / arm-eabi-4.6 / bin directory , so we set the path to it in the PATH variable.
export PATH=/home/ubuntu/Android/source/prebuilts/gcc/linux-x86/arm/arm-eabi-4.6/bin:$PATH On this, the preparatory work can be considered complete.
')
Build loader
As I already wrote that as a bootloader, we will use u-boot. To build, we will need to make a u-boot clone repository in our working folder:
git clone git://git.denx.de/u-boot.git u-boot And we collect our bootloader, the first distclean command, with the very first build, you can skip.
To build u-boot, the arm-eabi-gcc compiler is used, the path to which is already set.
d u-boot-main make CROSS_COMPILE=arm-eabi- distclean make CROSS_COMPILE=arm-eabi- omap3_beagle_config make CROSS_COMPILE=arm-eabi- The bootloader build result is two MLO files, and u-boot.bin . Both of these files are in the root of the u-boot directory. Immediately transfer them wherever they are, just for convenience, for example, in the build directory.
Kernel build
Now we got to build the kernel itself. Physically, this is one uImage file, which in fact is nothing but a Linux kernel. However, before you start building, you must install Java SE 1.6. And it is version 1.6, which can be installed from the repository:
sudo add-apt-repository ppa:webupd8team/java sudo apt-get update sudo apt-get install oracle-java6-installer or, for example, as described in this article .
Next, to build the kernel, we need to go to the kernel directory, inside the Android repository. In our case: / home / ubuntu / Adroid / source / kernel , and following the example of the u-boot bootloader build, build:
make ARCH=arm CROSS_COMPILE=arm-eabi- distclean make ARCH=arm CROSS_COMPILE=arm-eabi- omap3_beagle_android_defconfig make ARCH=arm CROSS_COMPILE=arm-eabi- uImage It should be noted that omap3_beagle_android_defconfig is taken from the kernel / arch / arm / configs directory, which contains the kernel configurations. If desired, you can change, add, or choose the appropriate configuration for a particular "hardware".
The result of the build will be in the folder kernel / arch / arm / boot , i.e. in our case, / home / ubuntu / Adroid / source / kernel / arch / arm / boot , from where we take the uImage file, the kernel itself, and transfer it to the already convenient build directory.
File system build
This is the last stage of the assembly of our operating system, for this you need to go to the root of the repository, and collect it:
make TARGET_PRODUCT=beagleboard droid The file system has been going on for quite a long time, and it takes about 20Gb of disk space. After compiling the file system itself, you need to get an archive, which will include all the necessary files.
make TARGET_PRODUCT=beagleboard fs_tarball After the archive is assembled, we get the file footfs.tar.bz2 , which is located in the out directory: /home/ubuntu/Adroid/source/out/target/product/beagleboard/rootf.tar.bz2 , and actually contains the Android file system. Here are all the system files, applications, and utilities included in the operating system.
System configuration
The configuration process itself is quite simple, and for simplicity, we use Rowboat Tools from Texas Instruments. We need the boot.scr boot loader configuration file, which contains the settings of the boot loader variables.
Download and unpack Rowboat Tools directly:
cd /home/ubuntu/Android/ wget https://rowboat.googlecode.com/files/RowboatTools-JB.tar.gz tar -xvzf RowboatTools-JB.tar.gz For us, the mkbootscr file is now interesting, which is located in the RowboatTools-JB / am37x / mk-bootscr directory . If you look inside the file, you can find similar lines:
setenv bootargs 'console=ttyO2,115200n8 androidboot.console=ttyO2 mem=256M root=/dev/mmcblk0p2 rw rootfstype=ext4 rootwait init=/init ip=off omap_vout.vid1_static_vrfb_alloc=y vram=8M omapfb.vram=0:8M omapdss.def_disp=dvi omapfb.mode=dvi:1024x768-16' This is the setting of the loader variables, i.e. for example, we need to set the screen resolution to be different from “default”, which means we need to change the value of dvi: 1024x768-16 , and execute mkbootscr . As a result, we get the boot.scr file with our new settings. Immediately change boot.scr will not work, because it carries information about the checksum, which, of course, must match the size of the file itself.
Install and Download
The board itself, as in principle, and most devices on ARM controllers can boot from NAND memory, SD / MMC or USB / RS-232. In our case, we will boot from MMC. Firstly, this is safer than NAND memory firmware, and secondly, in my opinion, it is simply more convenient, especially for demonstration purposes.
And so, we need MMC, preferably from 2 to 8 Gb. We connect MMC to a Linux machine, and prepare the file system.
A bootable MMC disk must contain at least two partitions. The first FAT16 will call it boot, from which the u-boot and kernel of the operating system will actually boot, and the second Ext4, on which our file system will be located, we will call it rootfs.
To simplify the creation of the file system, I prepared a small bash script, just for ease of use. If the controller does not find the boot sector, our platform simply can not boot.
#!/bin/bash -e if ! [ $(id -u) = 0 ] ; then echo "This script should be run as sudo user or root" exit 1 fi mmcdisk=$1 conf_boot_startmb="1" conf_boot_endmb="96" sfdisk_fstype="0xE" label_boot="boot" label_rootfs="rootfs" # Umount existion partitions echo "Unmounting partitions" mountpoints=$(mount | grep -v none | grep "$mmcdisk" | wc -l) for ((i=1;i<=${mountpoints};i++)) do currentdisk=$(mount | grep -v none | grep "$mmcdisk" | tail -1 | awk '{print $1}') umount ${currentdisk} >/dev/null 2>&1 || true done dd if=/dev/zero of=${mmcdisk} bs=1M count=16 sync # Create partition table LC_ALL=C sfdisk --force --in-order --Linux --unit M "${mmcdisk}" <<-__EOF__ $conf_boot_startmb,$conf_boot_endmb,$sfdisk_fstype,* ,,,- __EOF__ sync partprobe ${mmcdisk} # Setup partitions echo "Setup partitions" LC_ALL=C fdisk -l "${mmcdisk}" LC_ALL=C mkfs.vfat -F 16 ${mmcdisk}p1 -n ${label_boot} sync LC_ALL=C mkfs.ext4 ${mmcdisk}p2 -L ${label_rootfs} sync For the script to work, as an argument, you need to pass the name of the MMC device, i.e. for example / dev / mmcblk0 . Be extremely careful and attentive with the device name, since the script itself does not check the MMC or HDD.
After creating the boot disk, we only need to correctly copy the collected files. To do this, copy the uImage kernel itself, the u-boot.bin and MLO boot loader, as well as the boot.scr configuration file, to the boot partition. On the second section: rootfs, you need to unpack the archive with our file system rootfs.tar.bz2 .
That's all, our freshly assembled Android is ready, unmount our microSD, insert it into the target device, and turn on the power. Sometimes, of course, you need to press the reset key, and the very first boot takes a little longer than usual. But still - this is a “cold start”.
Conclusion
Similarly, the Android build process for mobile phones and tablets looks like, unless the deployment process is different on the target device. And for debug boards like BeagleBoard and BeagleBone, etc. only device configurations differ.
Source: https://habr.com/ru/post/219457/
All Articles