Connecting the VFD Futaba GP1183A01B display to the Raspberry Pi
To connect a 16x2 character display to my Raspberry Pi, I chose the VFD Futaba GP1183A01B. What is he good at? Firstly, it is an endangered species, giving the “warm tube” fluorescent light of a pleasant green color (it is really green, this is something the camera is lying). Secondly, it uses a serial protocol for communication, which means it can be connected with just three wires, without using any additional devices, and communication with it will go through / dev / tty. Thirdly, it needs just 5 volts of power, which is already there (and even enough, though not always).
I connected it two years ago, but the article sat down to write now - the signal wire fell off the display and I decided to tell about this display at the same time. Still, it connects easily. And they are still for sale!
Connect to Raspberry
')
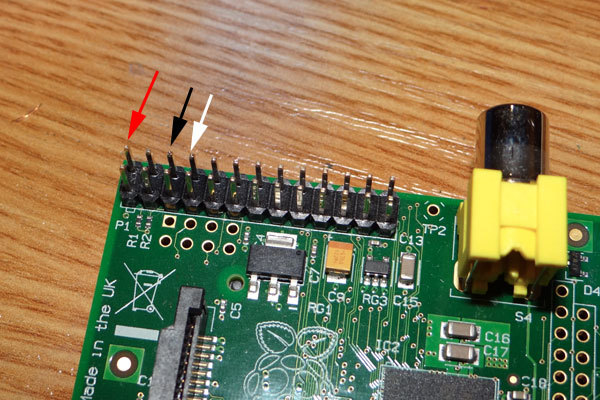
Connect through the GPIO pins located on the top left of the board. We are interested in the top row - the first pin (+ 5V), the third (GND) and the fourth (TX). According to standard numbering these are 2, 6 and 8 pins.
Power on pin + 5V enough butt. If video is used on the Raspberry Pi, not HDMI, then VFD will not turn on. You can bring + 5V separately, for example, from a USB hub from which the Malinka is powered - take the red and black (GND) wires (cut off the unnecessary USB cable), not forgetting to close the black GND from GPIO. I have done so now.
Connect to VFD
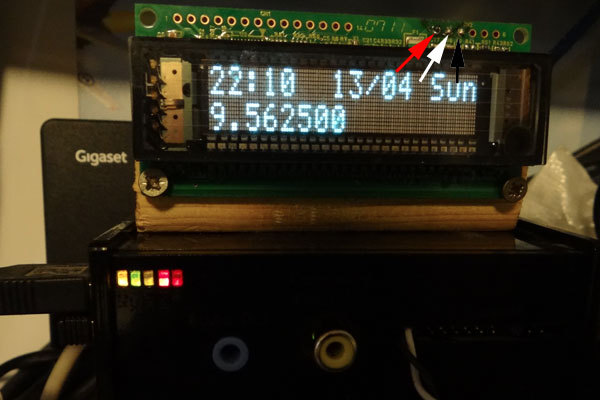
Above the display has a number of contact holes for soldering. We are interested in the left three in the right block of six holes. The first (+ 5V), the second (RX), the third (GND). Pripaevayem!
VFD Setup
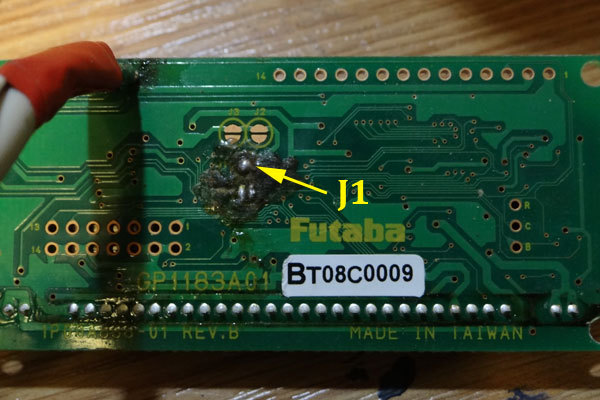
On the back of the display there are four jumpers that allow you to adjust the speed and mode of operation. We close the jumper J1 in order for the speed to be 9600 Baud. In principle, he pulls and 115200, but there are beginning to break through the interference.
Kernel configuration
The pin used by us is outputting messages from the kernel when booting (surprise!). To make them visible, you need to adjust the speed of the serial console - in the / boot / cmdline.txt file you need to define the parameter console = ttyAMA0.9600. The file may be:
dwc_otg.lpm_enable=0 console=ttyAMA0,9600 kgdboc=ttyAMA0,9600 console=tty1 root=/dev/mmcblk0p2 rootfstype=ext4 elevator=deadline rootwait Userland setup
So that after loading nothing is output to VFD without our participation in the / etc / inittab file, we need to comment out the last line:
#T0:23:respawn:/sbin/getty -L ttyAMA0 9600 vt100 Fan
You can use the echo command to display, for example:
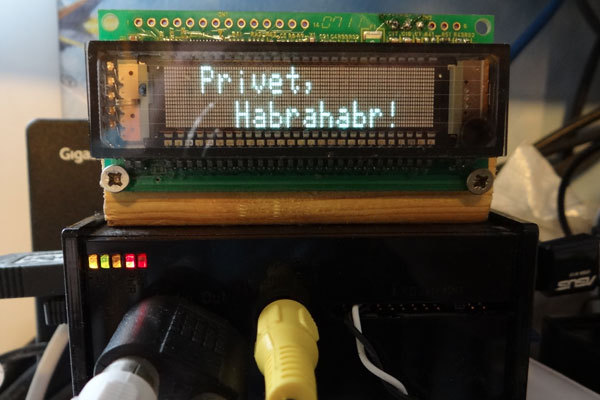
echo "Privet, Habrahabr!" > /dev/ttyAMA0 The screen capabilities are quite large, you can read the specification ( search in Google ), but I will give some commands that I use myself:
clear the screen and place the cursor in the upper left corner
echo -en "\x0C" > /dev/ttyAMA0 from minimum to maximum brightness
echo -en "\x1F\x58\x01" > /dev/ttyAMA0 echo -en "\x1F\x58\x02" > /dev/ttyAMA0 echo -en "\x1F\x58\x03" > /dev/ttyAMA0 ... echo -en "\x1F\x58\x08" > /dev/ttyAMA0 turn off the display
echo -en "\x1F\x28\x61\x40\x00" > /dev/ttyAMA0 turn on the display
echo -en "\x1F\x28\x61\x40\x01" > /dev/ttyAMA0 More Fan
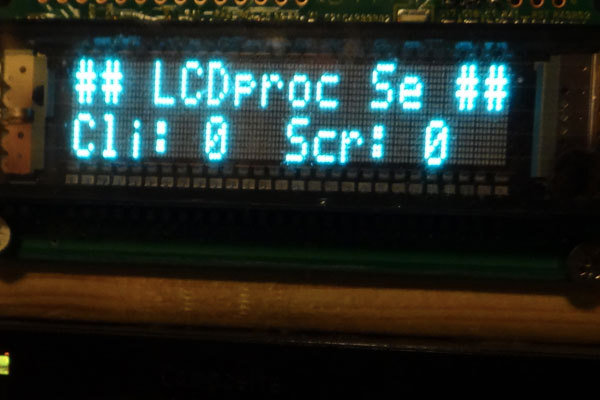
You can use LCDProc to display all kinds of information on this screen, for example, RaspBMC can display information about the current menu item, playback status through the LCDProc. Setting up for RaspBMC required writing a driver for the LCDProc, but it was not difficult at all (four lines were removed that draw a frame from the standard text driver) if there is an opportunity, I will write about it later.
[update] added video from RaspBMC
Unfortunately, the hands have not yet reached the Russian language, but it is there (CP866)!
Source: https://habr.com/ru/post/219251/
All Articles