Geksapod B.U.N.T
Watching a youtube video about hexapods (especially impressed by PhantomX), I decided to try my hand at robotics. Looking ahead - everything turned out and here's the result:
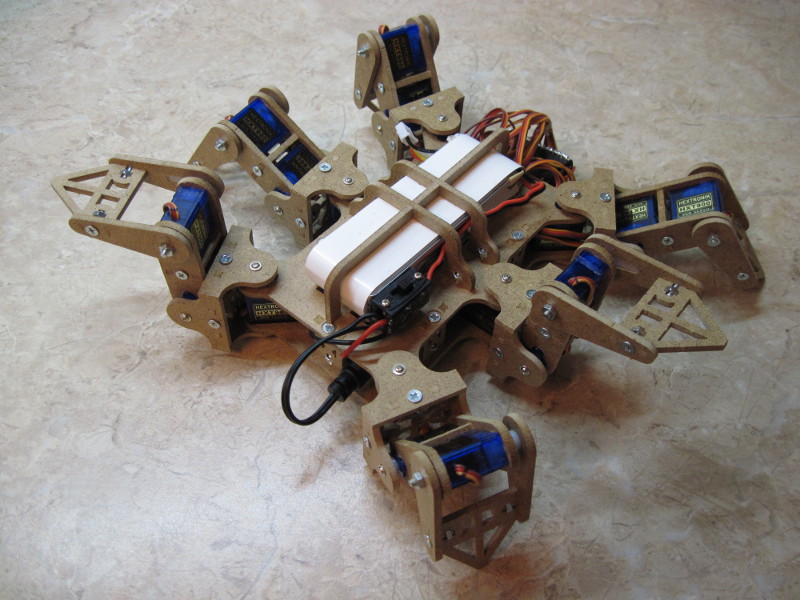
I ask all those who are interested under the cat, there they briefly described the history of creation and the difficulties that had to be encountered, as well as the video of the work of the hexapod. No graphs, charts and codes, only the lyrics.
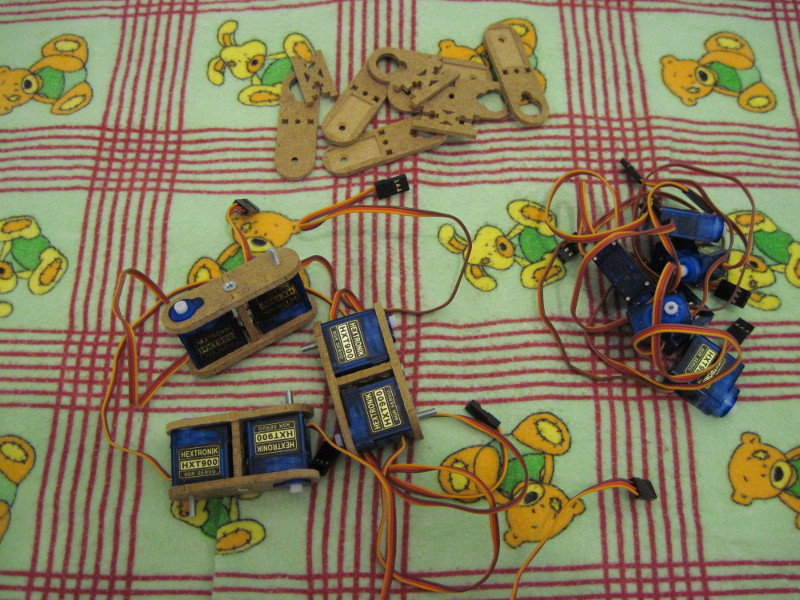
He was already familiar with arduino, but did not work with servos. I read for a long time, understood the servo assortment, and finally decided to take the miniature HXT900 , although it was said in this post that on weak servies the hexapods could hardly stand, but I decided to take a chance. I also ordered the Arduino Mega, the Turnigy 2200mAh 3S 20C Lipo Pack battery and the TURNIGY 8-15A UBEC stabilizer . Having received everything I needed, I took all the sizes with a caliper and began to draw the design first, and then the drawing of the hexapod itself. He took the PhantomX for the prototype, I liked how his servos are located. In the absence of aluminum and the inability to cut Plexiglas on the machine, it was decided to make all the details of the three-millimeter MDF, which I regretted, but more on that later. Actually because of the case material, it occurred to me to call the hexapod B.U.N.T. - Buratino No longer the One. To reduce the size, the “ears” of the serv were ruthlessly sawed, as seen in the photos below.
There are few photographs, somehow I became fascinated by the process and completely forgot to photograph. If you pay attention - in the last two photos the battery looks differently - in the latter it is already without a label. Just when I made out the order, somehow I didn’t think at all that I needed to buy a specific XT60 connector to connect to the load battery. As a result, I had to "bite off" the connector and solder. On mykrivorukost carelessness there was a short circuit and the voltage on the wires disappeared. Having measured the voltage at the terminals of the charging connector with a multimeter, I realized that the contact between the “banks” had disappeared. I disassembled the battery, found a gap - the aluminum “petal” (minus) was blown at one can, and almost at the root. I tried to solder - but aluminum does not take the existing soldering acid. I was upset, I wanted to order a new battery, but after a short googling, flux F64 was bought, with which, as it turned out, aluminum is no more difficult to solder than copper. I could hardly get soldered to the remnants of the “petal” and the battery was reanimated. Further, at the assembly stage, it was found that the idea of using the Mega Sensor Shield was unsuccessful - because of it, the carcass turned out to be too thick and ugly. I had to redo the drawings and reduce the thickness of the carcass to the height of the servo, which ultimately led to the fact that the wires from the serv into the carcass itself did not fit together - the part to which power was supplied was taken out. But even so beautiful (and stronger) than with a thick carcass. Collecting small parts from MDF is still a pleasure. Without a file, the connections simply do not fit into each other, although a gap is left - sharp edges interfere. The whole structure looks flimsy, there are small backlashes, but on the whole it turned out not badly and reliably enough, the main thing is not to get wet, otherwise it will lead. Hexapod is assembled, the first test and it turns out that he is perfectly on his feet and fully maintains his weight. It weighs 640 grams by the way. In the first experiments, due to its curvature due to an annoying error in the code, one of the servs had a gear ripped off - an excessively large angle was indicated and the leg rested on the carcass. I had to disassemble and change the servo, took the benefit with a margin. After some deliberation, a small sketch was written for a simple straight walk. It’s a shame to lay out a sketch, but I’m happy to show you the video of the first steps of the hexapod.
Total:
Further, I have plans to learn how to control the hexapod via bluetooth from the PS3 joystick, or at least from a smartphone, but that's another story.
And yes, I almost forgot, all the components, MDF and so on cost me about 5 thousand rubles. With a joystick, a shield (which turned out to be unnecessary) and other small things (which was also almost not used) it turns out about 6 thousand. But the quality of the finished product is far from the PhantomX, but I was ready for it.
I ask all those who are interested under the cat, there they briefly described the history of creation and the difficulties that had to be encountered, as well as the video of the work of the hexapod. No graphs, charts and codes, only the lyrics.
He was already familiar with arduino, but did not work with servos. I read for a long time, understood the servo assortment, and finally decided to take the miniature HXT900 , although it was said in this post that on weak servies the hexapods could hardly stand, but I decided to take a chance. I also ordered the Arduino Mega, the Turnigy 2200mAh 3S 20C Lipo Pack battery and the TURNIGY 8-15A UBEC stabilizer . Having received everything I needed, I took all the sizes with a caliper and began to draw the design first, and then the drawing of the hexapod itself. He took the PhantomX for the prototype, I liked how his servos are located. In the absence of aluminum and the inability to cut Plexiglas on the machine, it was decided to make all the details of the three-millimeter MDF, which I regretted, but more on that later. Actually because of the case material, it occurred to me to call the hexapod B.U.N.T. - Buratino No longer the One. To reduce the size, the “ears” of the serv were ruthlessly sawed, as seen in the photos below.
Photos of the assembly process
We connect two servy in a single unit.
')
We cut the details of the case

The body in the assembly, only this carcass seemed thick enough - I had to redo it, and this one in the trash.

The final touches - the carcass is collected, it remains to fasten the legs.

')
We cut the details of the case
The body in the assembly, only this carcass seemed thick enough - I had to redo it, and this one in the trash.
The final touches - the carcass is collected, it remains to fasten the legs.
There are few photographs, somehow I became fascinated by the process and completely forgot to photograph. If you pay attention - in the last two photos the battery looks differently - in the latter it is already without a label. Just when I made out the order, somehow I didn’t think at all that I needed to buy a specific XT60 connector to connect to the load battery. As a result, I had to "bite off" the connector and solder. On my
Video
Total:
- Collecting the hexapod is not so difficult.
- Microservas are not that weak
- Don't skimp on / forget battery connectors - soldering under power is a bad idea
- Serva always take with stock
- If possible, make it from aluminum, if not, then from plastic (Plexiglas), at least from MDF, although not, from MDF, don't do it at all
Further, I have plans to learn how to control the hexapod via bluetooth from the PS3 joystick, or at least from a smartphone, but that's another story.
And yes, I almost forgot, all the components, MDF and so on cost me about 5 thousand rubles. With a joystick, a shield (which turned out to be unnecessary) and other small things (which was also almost not used) it turns out about 6 thousand. But the quality of the finished product is far from the PhantomX, but I was ready for it.
Source: https://habr.com/ru/post/219051/
All Articles