Capture video in OpenGL applications using Intel INDE Media Pack
 From past articles, you already know what Intel INDE and its Intel INDE Media Pack component are, providing a variety of video capabilities. This time I want to elaborate on the possibility of capturing video in applications that use OpenGL, in more detail at the Intel INDE Media Pack.
I will start not with examples and a story about how it all works, but with answers to the questions that developers most often ask when it comes to capturing video in the Media Pack: “Why should I even do the ability to capture video in my application?” and "Why use Media Pack, if Android 4.4 has the ability to capture video via ADB?"
Why is it for the developer and users
1. This is a usage model that can form the basis of an application, such as, for example, Toy Story: Story Theater . The user performs actions with objects on the screen, the application captures the video, writes it to a file, then gives the opportunity to view it, save, share on social networks.
2. A new opportunity for the user - to record and save a good game moment, a way to pass the level, which he can also share on social networks. For the developer, this will be one of the ways to popularize the application.
')
Capture video via ADB
The main difference from this method is that there is no need to connect a mobile device to the host, the capture takes place directly on the device, without having to “ root ” the device, standard mechanisms are used. The output is MP4 video, ready for viewing or uploading to the network.
The second difference is the ability to capture not only video, but also audio from the built-in microphone, which makes it possible to capture sound from the application, plus the ability to comment on what is happening on the screen.
Capture video in OpenGL applications using media pack
The first thing you need to download and install INDE Media Pack, about how this is done, I described in detail in this article .
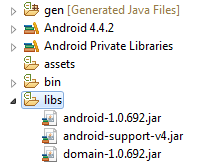
Inside there are two libraries that you need to include in your application - android- <version number> .jar and domain- <version number> .jar
All the work on capturing video is done by the GLCapture class. The principle of its operation is simple: it has its own surface ( Surface ), the contents of which it encodes into frames and writes in the video. The application first draws the current frame to the screen, then switches the context to the GLCapture surface and draws the scene again, when the context is restored, the current surface content is encoded and written to the resulting video.
Before you can start using GLCapture, you need to prepare it, namely:
- Set video options
- Audio (if you need to write sound)
- Specify where the video will be saved (file path)
- Configure surface
// GLCapture capturer; … // capturer = new GLCapture(new AndroidMediaObjectFactory()); Video settings
// // String videoMimeType = “video/avc”; // int videoFrameWidth = 640; // int videoFrameHeight = 480; // int videoBitRate = 5000; // int videoFrameRate = 30; // int videoIFrameInterval = 1; VideoFormatAndroid videoFormat = new VideoFormatAndroid(videoMimeType, videoFrameWidth, videoFrameHeight); videoFormat.setVideoBitRateInKBytes(videoBitRate); videoFormat.setVideoFrameRate(videoFrameRate); videoFormat.setVideoIFrameInterval(videoIFrameInterval); // apturer.setTargetVideoFormat(videoFormat); Audio settings
If you do not need to write sound, you can skip this step.
// // Audio String audioMimeType = “audio/mp4a-latm”; // int audioSampleRate = 44100; // int audioChannelCount = 1; AudioFormatAndroid audioFormat = new AudioFormatAndroid(audioMimeType , audioSampleRate, audioChannelCount); // apturer.setTargetAudioFormat(audioFormat); Path to the resulting video
String dstPath = “…”; capture.setTargetFile(dstPath); Surface initialization
Before first use it is necessary to initialize the surface, this is done by calling
capture.setSurfaceSize(videoFrameWidth, videoFrameHeight) One condition - the call must be made from a function with an active OpenGL context, i.e. somewhere in
onSurfaceChanged(GL10 gl, int width, int height) onDrawFrame(GL10 gl) After the parameters are set, the surface is configured, we can start saving frames in the video.
In the simplest case, you can draw a scene twice - first on the screen, then on the surface.
Method one: double rendering
// render(); // capturer.beginCaptureFrame(); // GLCapture render(); // capturer.endCaptureFrame(); In some cases, this approach may affect performance, for example, in the case of scenes with a large number of objects, textures, and post processing a frame. To avoid double rendering, you can use a frame buffer ( frame buffer ).
Method two: frame buffer
In this case, the algorithm looks like this:
- Create framebuffer and texture attached to it.
- Draw a scene on the texture
- We draw a full-screen texture on the screen
- Switch the context and draw the texture onto the GLCapture surface
In order to save time for developers to implement this method, we have included in the library all the necessary components for working with the frame buffer.
// - FrameBuffer frameBuffer; // FullFrameTexture texture; // - OpenGL , public void onSurfaceChanged(GL10 gl, int width, int height) { frameBuffer = new FrameBuffer(EglUtil.getInstance()); frameBuffer.setResolution(new Resolution(width, height)); texture = new FullFrameTexture(); } As you can see - a minimum of code for creating and initializing. If desired, our implementation can be replaced with our own, no restrictions.
// public void onDrawFrame(GL10 gl) { // frameBuffer.bind(); // renderScene(); // frameBuffer.unbind(); // texture.draw(frameBuffer.getTextureId()); // capture.beginCaptureFrame(); // texture.draw(frameBuffer.getTextureId()); // capture.endCaptureFrame(); } In order to simplify the example, I excluded a part of the code that calculates and sets the view port , which is a prerequisite for correctly displaying video capture in cases where the screen size and the resolution of the resulting video do not match.
You can find the full version of the example in the samples application, supplied as part of the Intel INDE Media Pack , GameRenderer class.

This example demonstrates the ability to capture both using double rendering, and using a frame buffer, and also allows you to evaluate the performance of each method, displaying the number of frames per second.
The annual Droidcon conference will take place on April 11-12 in Moscow at Digital October , at which Intel will present samples of mobile devices based on IA at its booth. In addition, we will present a report (on Friday the 11th) and a workshop (on Saturday the 12th) on the subject of Intel INDE . If you plan to attend this event - do not forget to visit us, it will be interesting!
Source: https://habr.com/ru/post/218761/
All Articles