Development of Chromecast Ready applications for the Android platform

1. What is Chromecast and how does it work?
Chromecast is a gadget that allows users to stream media content from mobile devices to a TV.
The device, priced at $ 35, was announced on July 24, 2013 and was named the gadget of the year according to Time's 2013 version. First of all, it is a technology for transferring media content from phones, tablets or laptops to a device with a large screen - for example, a TV.
Immediately after the announcement, the Chromacast SDK was in beta testing, which limited its practical application. But on February 3, 2014, Google released the final version of the SDK.
')
Now the number of applications supporting Chromecast is growing rapidly, so we decided to describe our experience in developing Chromecast ready applications for Android. This article covers the development theme of the Chromecast ready application: below you will find some notes, comments and recommendations for developers as well as examples and source codes of our application.
How it works?
The Chromecast device executes a special version of the Chrome browser that can display special Web applications (called “Receiver” applications). The immediate goal of these applications is to display media content to end users. But the Chromecast device does not have any direct control levers, so there should obviously be some external controls, and as mentioned earlier, this could be either a mobile app or a Web app (which is called the “Sender” app).
Thus, using Sender apps, we can control the Chromecast device. But how exactly does this happen?
This can be done through a shared WiFi network - i.e. Both Sender and Receiver applications must be connected to a single WiFi network. This channel is bidirectional, so the “Sender” application, for example, can issue commands for playing media content, while the “Receiver” application will notify “Sender” the application about the playback status and position.
2. Application development
In general, developing applications for Chromecast includes developing Sender and Receiver applications. As mentioned earlier, the Sender application can be a mobile or Web application, although this is not a limitation. Receiver app is a special Web application that can be launched on a Chromecast device.
In this article, we describe the development of a simple Chromecast application that allows messaging between sender and receiver parts. The application that we developed can be used as a template for further development.
But before we begin, we need to set up a Chromecast device and register our app.
2.1. Configure Chromecast Device
The procedure is described here .
2.2. Application registration
You need to register your application in order to get the application ID (which will be used in both “sender” and “receiver” applications).
The registration procedure is described here .
2.3. Development of “Sender” application
We will now discuss the development process of the “Sender” application. Although in order to be functional, “Sender” application requires a working “Receiver” application. So that we can check the results only after developing the “Receiver” application.
Also, the development of the “Sender” application for Android is described here .
In our case, the “Sender” application is an Android application that uses a set of technologies and libraries to communicate with the “Receiver” application.
2.3.1. Prerequisites:
- IDE for developing Android applications (for example, Eclipse)
- Android SDK
- Google Play Services SDK version 15 or higher
- appcompat and media router libraries from the Android Support Library
2.3.2. Making skeleton
Create an empty Android application and add the following libraries and dependencies:
- android-sdk \ extras \ android \ support \ v7 \ appcompat
- android-sdk \ extras \ android \ support \ v7 \ mediarouter
- android-sdk \ extras \ google \ google_play_services \ libproject \ google-play-services_lib
Specify the minimum Android version, permissions, and other required data:
<uses-sdk android:minSdkVersion="9" android:targetSdkVersion="19" /> <uses-permission android:name="android.permission.INTERNET" /> <uses-permission android:name="android.permission.ACCESS_NETWORK_STATE" /> <uses-permission android:name="android.permission.ACCESS_WIFI_STATE" /> <application android:label="@string/app_name" android:icon="@drawable/ic_launcher" android:theme="@style/Theme.AppCompat.Light.DarkActionBar"> <meta-data android:name="com.google.android.gms.version" android:value="@integer/google_play_services_version" /> </application> Now create an activating expanding ActionBarActivity.
2.3.3. Implementation
There are several key states in the application:
- Device detection
- Work with session
- Messaging between Sender and Receiver Applications
Let's describe each state in more detail:
1) Device Detection:
Detection can be triggered by clicking on the “Cast” button. There are several ways to show this button, but we will use the MediaRouter ActionBar provider.
Add the following to your menu:
<item android:id="@+id/media_route_menu_item" android:title="Route" app:actionProviderClass="android.support.v7.app.MediaRouteActionProvider" app:showAsAction="always"/> The following fields are involved in the process:
private final MediaRouter.Callback mediaRouterCallback = new MediaRouter.Callback() { @Override public void onRouteSelected(MediaRouter router, MediaRouter.RouteInfo route) { CastDevice device = CastDevice.getFromBundle(route.getExtras()); //setSelectedDevice(device); } @Override public void onRouteUnselected(MediaRouter router, MediaRouter.RouteInfo route) { //setSelectedDevice(null); } }; private MediaRouter mediaRouter; private MediaRouteSelector mediaRouteSelector; Initialize the mediaRouter and mediaRouteSelector in the onCreate method:
@Override protected void onCreate(Bundle savedInstanceState) { super.onCreate(savedInstanceState); mediaRouter = MediaRouter.getInstance(getApplicationContext()); mediaRouteSelector = new MediaRouteSelector.Builder().addControlCategory(CastMediaControlIntent.categoryForCast(APP_ID)).build(); } Configure the action provider:
@Override public boolean onCreateOptionsMenu(Menu menu) { super.onCreateOptionsMenu(menu); getMenuInflater().inflate(R.menu.main, menu); MenuItem mediaRouteMenuItem = menu.findItem(R.id.media_route_menu_item); MediaRouteActionProvider mediaRouteActionProvider = (MediaRouteActionProvider) MenuItemCompat.getActionProvider(mediaRouteMenuItem); mediaRouteActionProvider.setRouteSelector(mediaRouteSelector); return true; } and register the callback in the onStart and onStop methods:
@Override protected void onStart() { super.onStart(); mediaRouter.addCallback(mediaRouteSelector, mediaRouterCallback, MediaRouter.CALLBACK_FLAG_PERFORM_ACTIVE_SCAN); } @Override protected void onStop() { //setSelectedDevice(null); mediaRouter.removeCallback(mediaRouterCallback); super.onStop(); } APP_ID is a string with the application identifier obtained when registering the application in part 2.2
Now connect your Android device to a shared WiFi network device with Chromecast and start the application (note that the receiver application should already be available. It is very simple in our case, so we can take it from the source codes. We will return to this later).
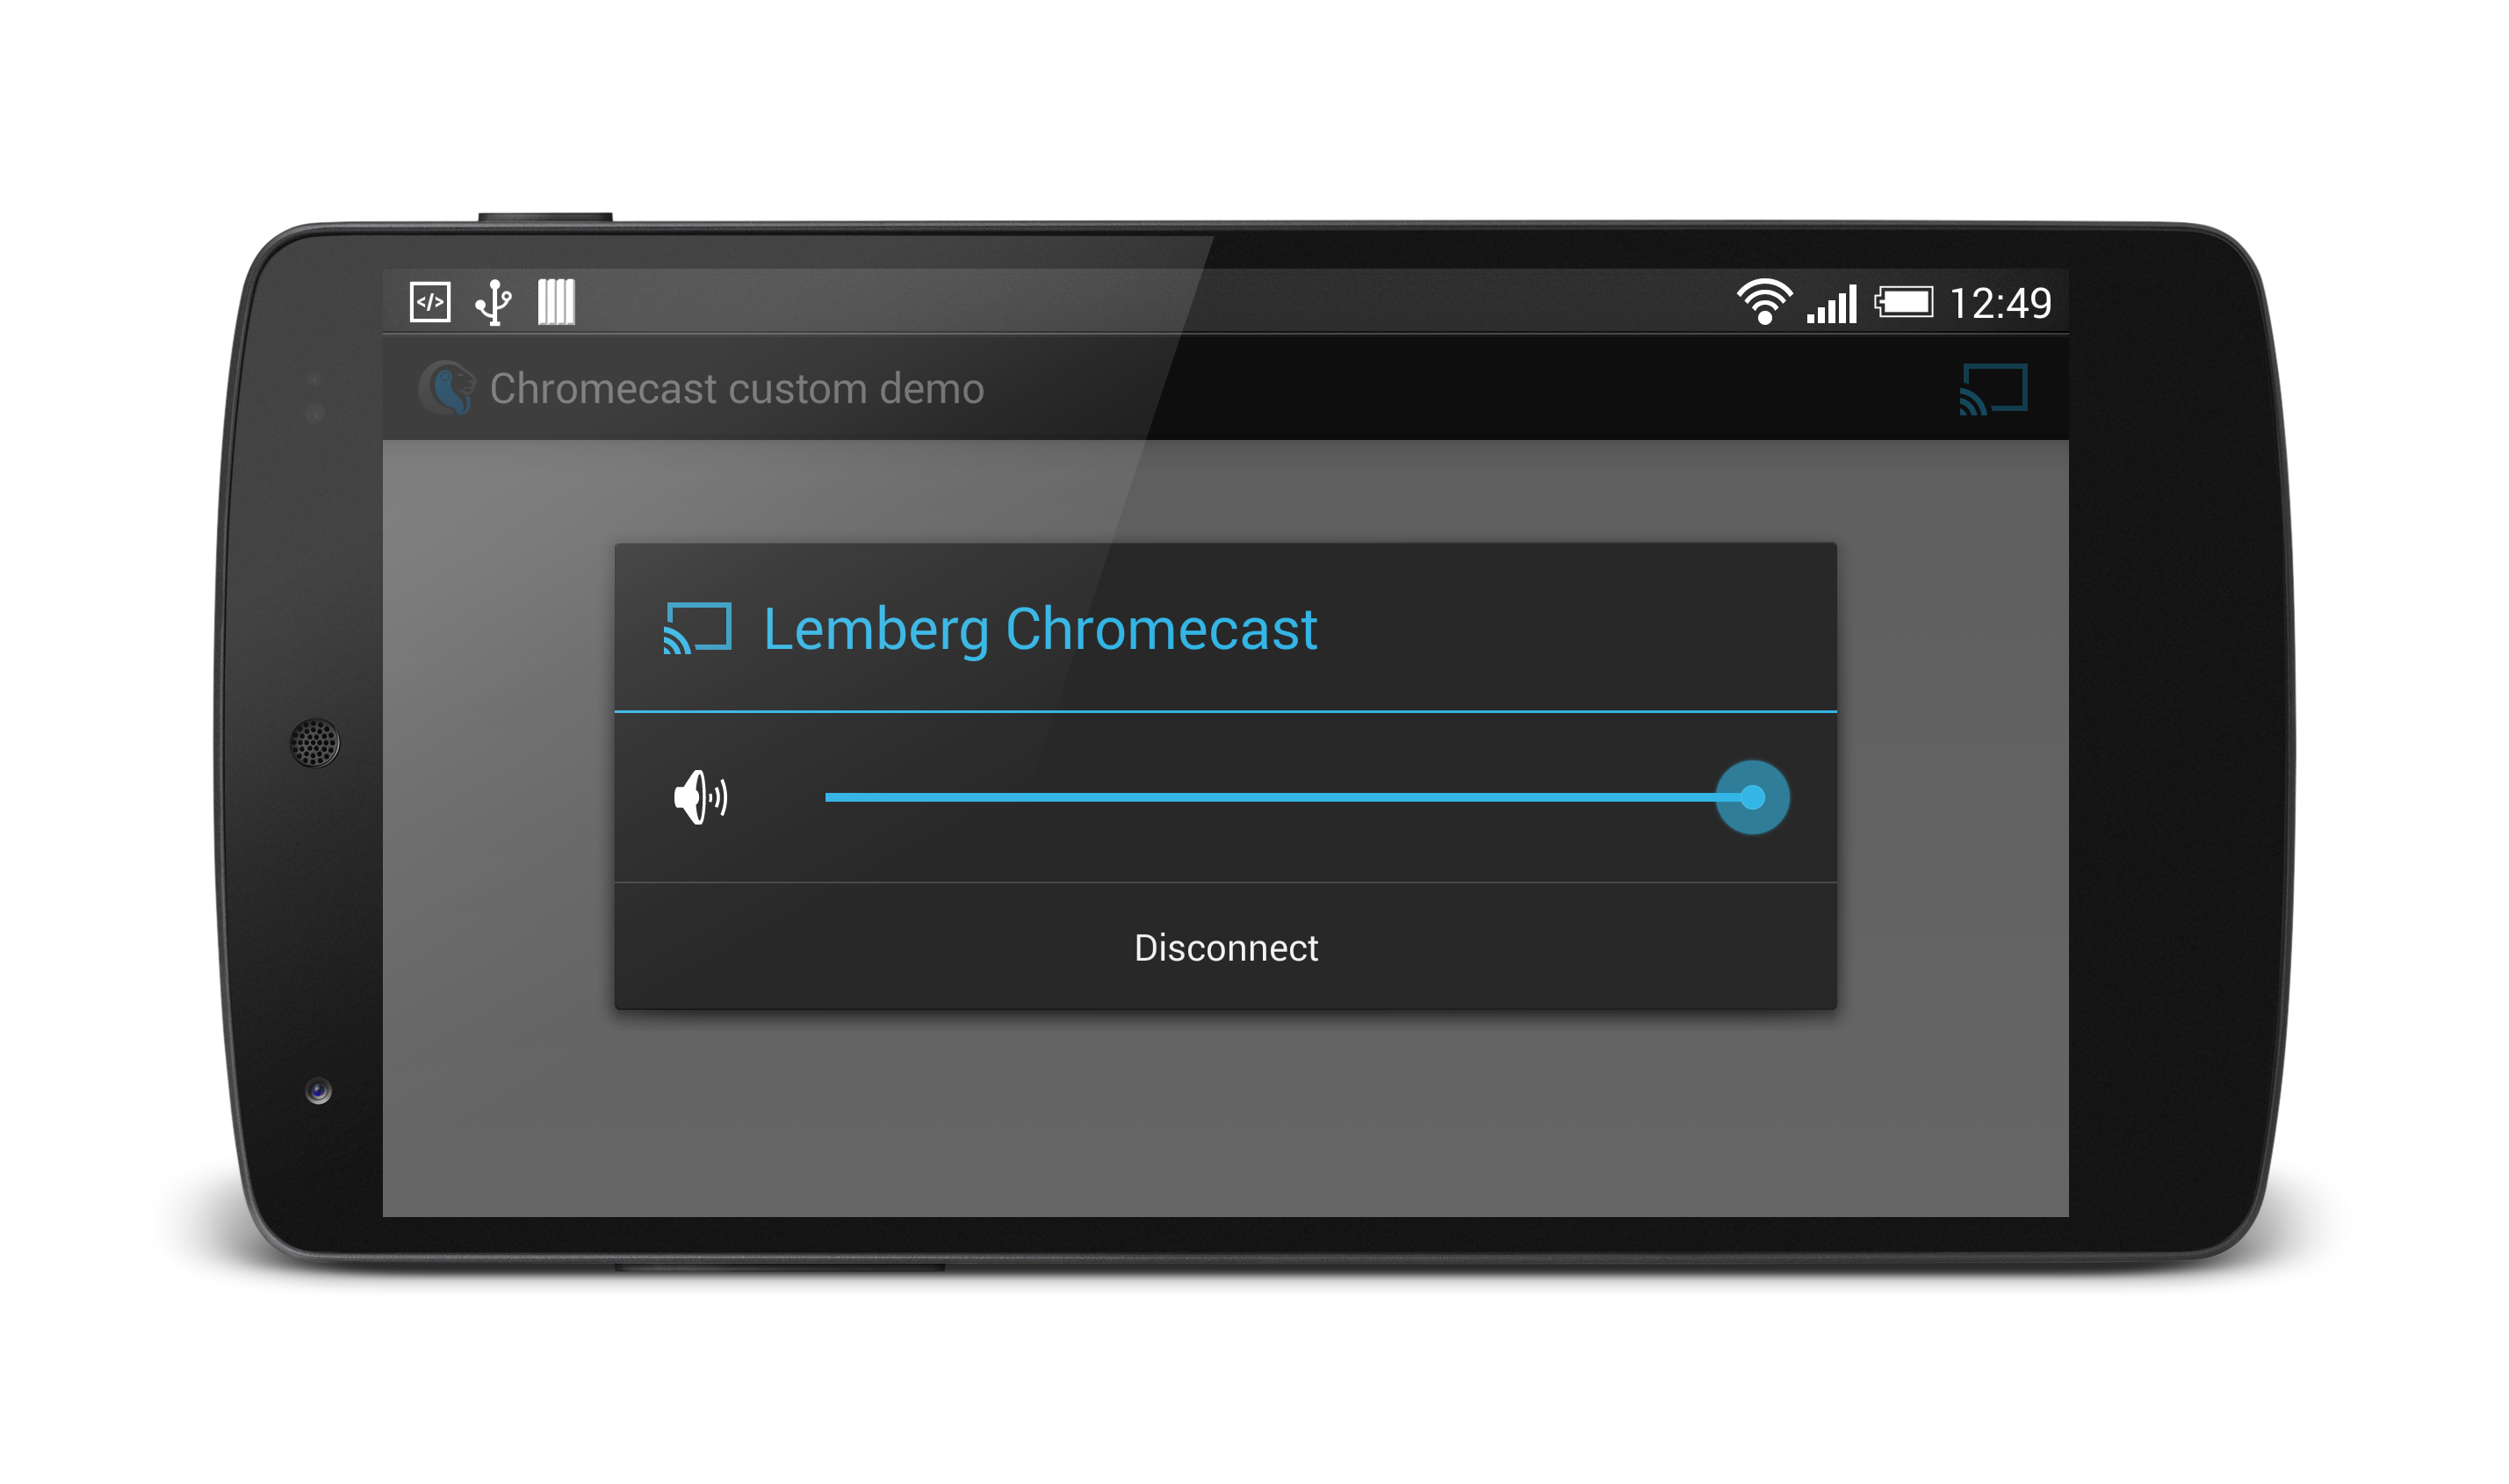
If all conditions are met, the broadcast icon will appear in the upper right corner. Clicking on it will open with a list of available devices, allowing you to connect to one of them. After connecting, the icon will turn blue, indicating that the connection has been established. Clicking on it again opens another dialog, which will allow you to change the volume on the Chromecast device or disconnect from it:
2) Session Management:
To control the session, we will add several fields and methods:
@Override protected void onStart() { super.onStart(); mediaRouter.addCallback(mediaRouteSelector, mediaRouterCallback, MediaRouter.CALLBACK_FLAG_PERFORM_ACTIVE_SCAN); } @Override protected void onStop() { //setSelectedDevice(null); mediaRouter.removeCallback(mediaRouterCallback); super.onStop(); } and a few listeners:
private CastDevice selectedDevice; private GoogleApiClient apiClient; private boolean applicationStarted; private void setSelectedDevice(CastDevice device) { Log.d(TAG, "setSelectedDevice: " + device); selectedDevice = device; if (selectedDevice != null) { try { stopApplication(); disconnectApiClient(); connectApiClient(); } catch (IllegalStateException e) { Log.w(TAG, "Exception while connecting API client", e); disconnectApiClient(); } } else { if (apiClient != null) { disconnectApiClient(); } mediaRouter.selectRoute(mediaRouter.getDefaultRoute()); } } private void connectApiClient() { Cast.CastOptions apiOptions = Cast.CastOptions.builder(selectedDevice, castClientListener).build(); apiClient = new GoogleApiClient.Builder(this) .addApi(Cast.API, apiOptions) .addConnectionCallbacks(connectionCallback) .addOnConnectionFailedListener(connectionFailedListener) .build(); apiClient.connect(); } private void disconnectApiClient() { if (apiClient != null) { apiClient.disconnect(); apiClient = null; } } private void stopApplication() { if (apiClient == null) return; if (applicationStarted) { Cast.CastApi.stopApplication(apiClient); applicationStarted = false; } } Now if you connect to the Chromecast, the “Receiver” app will be activated and you will see some debug information. Let's open the topic of messaging.
3) Messaging between Sender and Receiver applications.
Outgoing messages are sent using the connection method:
private void sendMessage(String message) { if (apiClient != null) { try { Cast.CastApi.sendMessage(apiClient, NAMESPACE, message) .setResultCallback(new ResultCallback<Status>() { @Override public void onResult(Status result) { if (!result.isSuccess()) { Log.e(TAG, "Sending message failed"); } } }); } catch (Exception e) { Log.e(TAG, "Exception while sending message", e); } } } In our case, NAMESPACE is the string "urn: x-cast: com.ls.cast.sample". It is used to separate our channel from others. The same should be used in the Receiver application.
To process incoming messages, we need to register Cast.MessageReceivedCallback as a message receiver. We do this in connectionResultCallback:
@Override public void onResult(Cast.ApplicationConnectionResult result) { Status status = result.getStatus(); if (status.isSuccess()) { applicationStarted = true; try { Cast.CastApi.setMessageReceivedCallbacks(apiClient, NAMESPACE, incomingMsgHandler); } catch (IOException e) { Log.e(TAG, "Exception while creating channel", e); } } } public final Cast.MessageReceivedCallback incomingMsgHandler = new Cast.MessageReceivedCallback() { @Override public void onMessageReceived(CastDevice castDevice, String namespace, String message) { } }; And the last thing you can do is exchange messages. In our demo application, we have created a simple layout that allows you to show incoming messages. You can read the full source code in the attached file .
2.4. Development of “Receiver” application
“Receiver” application is a special Web application that can work in a Chromecast device.
The ultimate goal of the application is to show the user useful information and allow him to interact with this information through the “Sender” application.
The first task of displaying information is common for Web applications and can be very different: it can be a media application like YouTube or something like a media player, or it can be some heavy UI application like Google Maps with additional layers, or be a simple HTML page displaying some statistics.
About the second task of interaction between Receiver and Sender by the application - the Chromecast SDK provides a JavaScript library for this. This allows you to exchange string messages in both directions. Let's open this topic.
First of all, keep in mind that the application must be registered as described in clause 2.2. When registering, you must provide a URL. This URL will be used to host your Receiver application. Receiver application development consists of the following stages:
1) application development locally;
2) placing it on the specified URL;
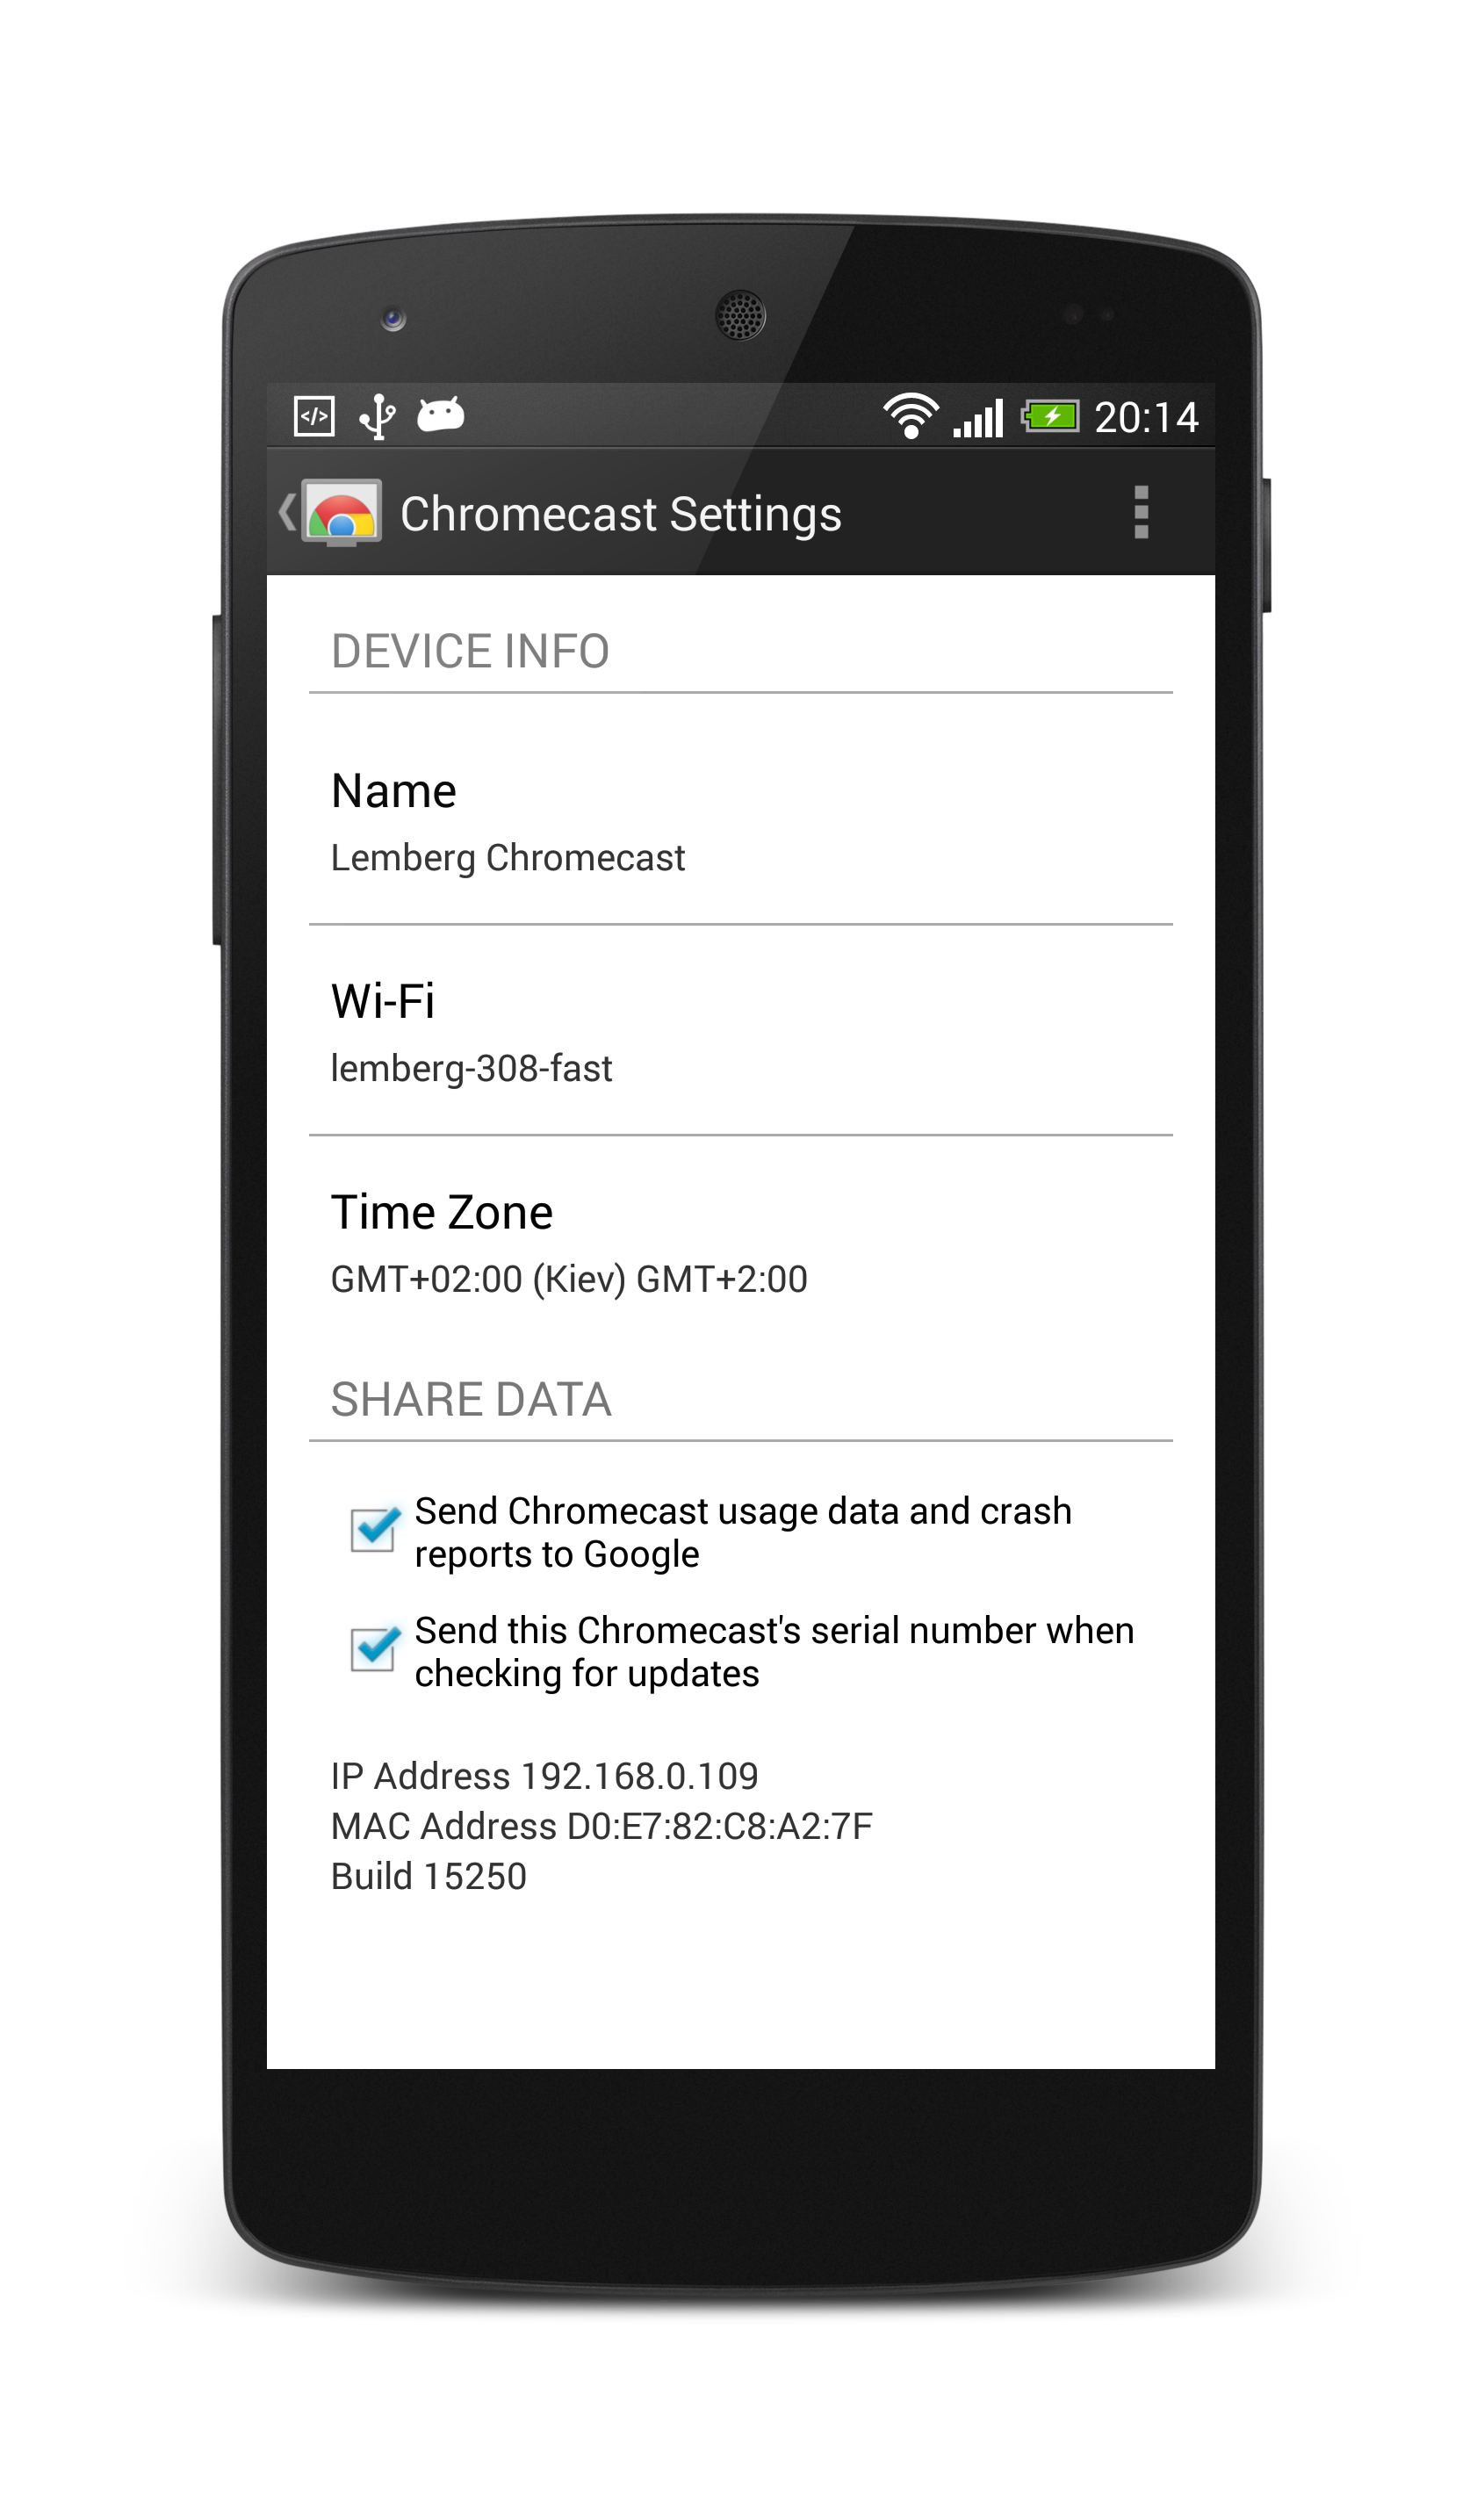
3) activation and debugging of the application through a special URL. To activate the application, simply launch the Sender application and connect to the device. To debug the “Receiver” application, open the following link on your PC: http: // CHROMECAST_IP: 9222 , where CHROMECAST_IP is the IP address of the Chromecast device. In order to get the IP address of the device, run the Chromecast configuration utility for PC or for mobile devices. Please note that the device used for the configuration must have a direct WiFi connection to the Chromecast device (so your PC must have a WiFi adapter if you select it for configuration):
Also note that the “Send this Chromecast's serial number when checking for updates” option should be enabled to enable debugging. After the browser opens the found address, you will see the following:
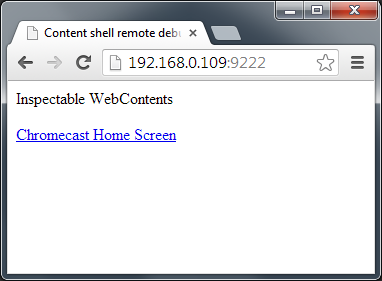
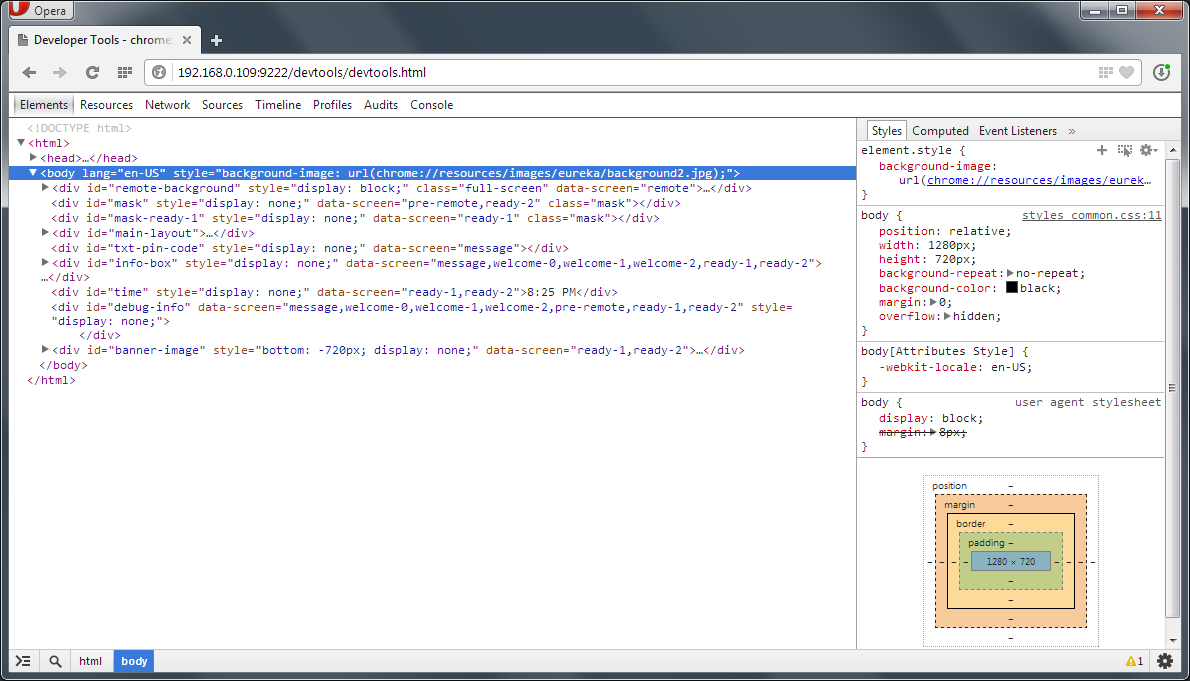
The highlighted link refers to the executing application. If you click on it, a new page with Chrome Developer tools will open. Do not stray them with local developer tools - in fact they are remote and belong to your Chromecast device:
Now we are finally ready to develop the application.
First of all, enable the Chromecast support script:
<script src="https://www.gstatic.com/cast/sdk/libs/receiver/2.0.0/cast_receiver.js"> After that, we need a cast.receiver.CastReceiverManager instance, connect onSenderConnected, onSenderDisconnected and onMessage listeners and start the exchange of messages. We can do this in the onLoad listener:
window.castReceiverManager = cast.receiver.CastReceiverManager.getInstance(); window.castReceiverManager.onSenderConnected = onChannelOpened; window.castReceiverManager.onSenderDisconnected = onChannelClosed; window.customMessageBus = window.castReceiverManager.getCastMessageBus(namespace); window.customMessageBus.onMessage = onMessage; window.castReceiverManager.start(); The following method can be used to process incoming messages:
function onMessage(event) { var message = event.data; var senderId = event.senderId; log("message from: " + senderId + " message: " + message); } The following method will be used to send outgoing messages:
function broadcast(message) { window.customMessageBus.broadcast(message); } Please note that several Sender applications can connect to one Receiver application at the same time. Therefore, we use the broadcast method to send a message to all connected sender applications.
In our demo application, we send timer messages for demonstration purposes.
And a few more comments. The default text color is black, so you need to redefine it via CSS in order to see something. Also note that the screen resolution in the Chromecast device is 1280x720 pixels.
Fuh. We have created a custom Sender and Receiver application capable of messaging both ways. This should be enough to understand and use the full power of the Chromecast device.
The full source code can be downloaded here .
PS In fact, I am also the author of the article, so I can answer technical questions.
Source: https://habr.com/ru/post/218425/
All Articles