Smart home control panel. iphone in the wall
I started automating my home about 2 years ago, mainly using Z-Wave wireless technology, but I also assembled several devices on my own at the ATtiny2313 microcontrol and Raspberry Pi microcontroller. When I decided what I would do smart home, I set three tasks that the smart home had to solve, the first - saving electricity, the second - ensuring comfort, the third - displaying information about the state of the house in real time.
At the moment, managed to implement the following:
- Automatic switching on and off of the light in the corridors
- Control your TV with iPhone with the Raspberry Pi and IR module
- Weather station with temperature and humidity sensors
- IRobot vacuum cleaner that will soon be connected to WiFi
But the third task of displaying information was not completely solved. In the kitchen and in the room I have weather stations showing temperature and humidity to see where the light is on, you need to open the application on the iPad, in order to find out the traffic jams, you need to open another application. I use all this information every day, and it would be logical to get it from one place, so I decided to make an information panel installed permanently in a convenient place.
Having thought up the panel, I knew what features it should have, it is:
- Display temperature outside the window
- Display the temperature in the house
- Display humidity in the house
- Traffic Information
- Turning off electrical appliances
- TURN ALL button
- Clock
As a panel, I first planned to use an Android tablet for 7 inches, and as an OpenRemote software, which was developed for this purpose . But later decided to make a panel of improvised means. Under the hand was an old iPhone 4, which as it turned out later, coped with the role of the control panel perfectly well, despite the small screen.
')
So, after selecting the panel, the main question arose: how to mount the iPhone into the wall, googling found several ready-made solutions, each of which cost around 600 ~ 800 euros. The price of the mount exceeded the price of the iPhone itself, I thought it was not reasonable and decided to make the iPhone under myself!
To install the iPhone on the wall, you had to understand:
- What to fix the iPhone so that it does not fall out of the wall
- Where to hide the power supply
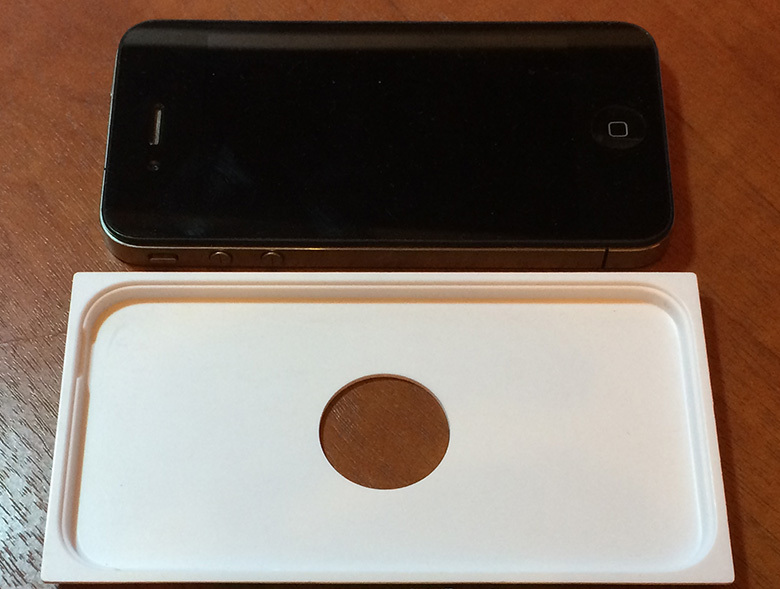
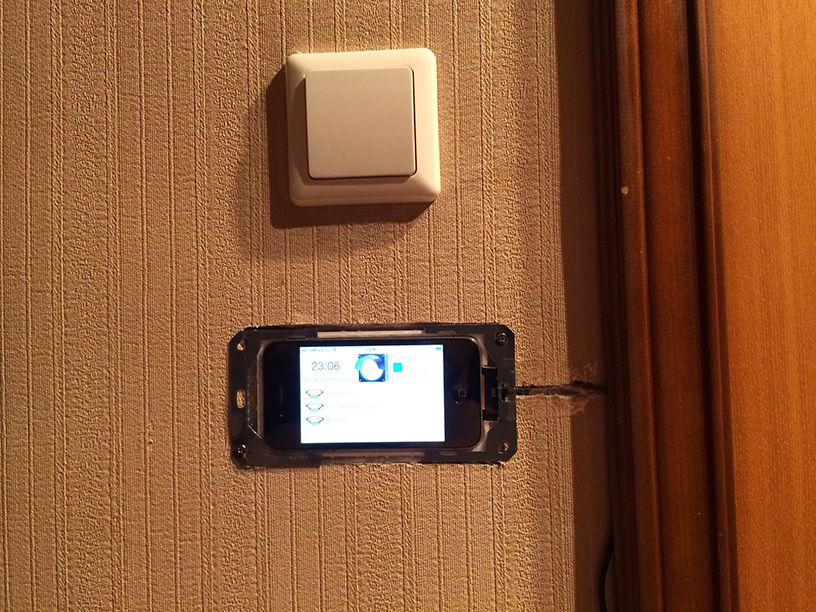
The solution to the first task was found in the box from the iPhone itself, the substrate separating the iPhone and accessories with minor modifications perfectly kept the iPhone in the wall.
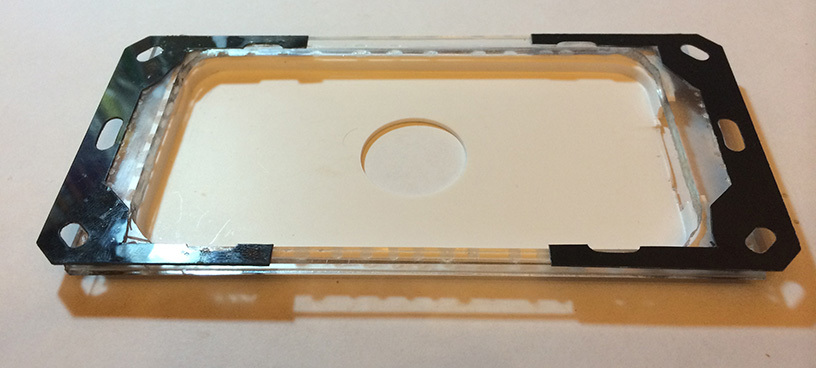
Plexiglas sawed frame increases the thickness of the substrate
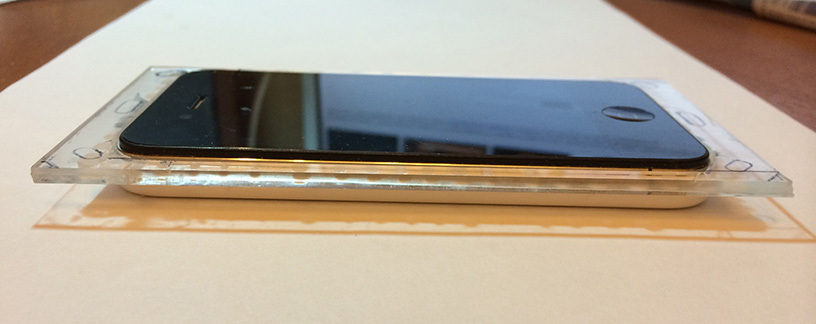
Found plastic anti-lufty gaskets for switches, made ears from them
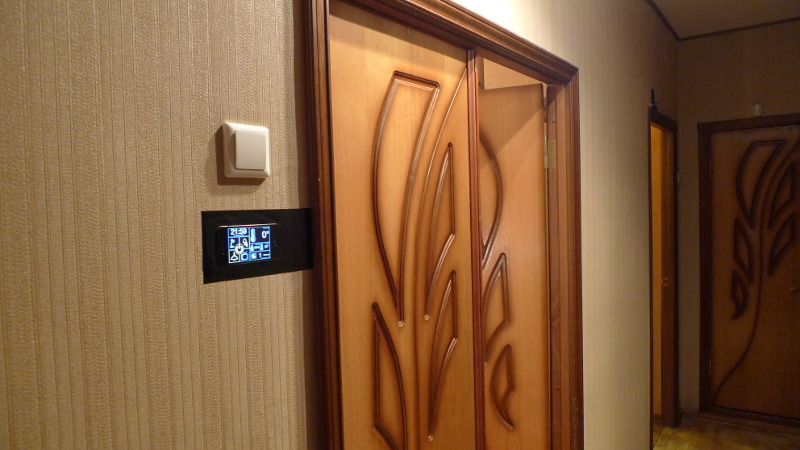
The power supply did not hide in the wall, but decided to move it into the room, the iPhone is conveniently located next to the door to the room. Having bought the power cord for 2 meters, I stretched the wire under the door casing, started the drilled hole in the door box into the room and inserted the power supply into the outlet specially prepared there.
Framed cut out of black glossy paper and stuck directly on the wallpaper, of course it would be cool to make such a frame of black glossy plexiglass, I even prepared an autocad file for cutting plexiglass on the machine, but the price in 1500r cooled me.
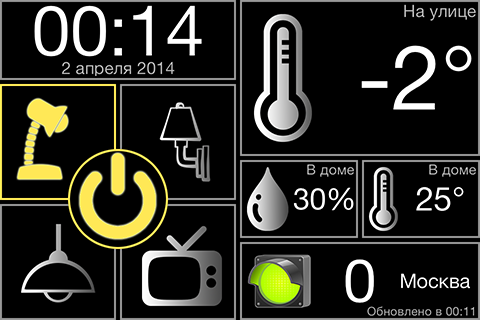
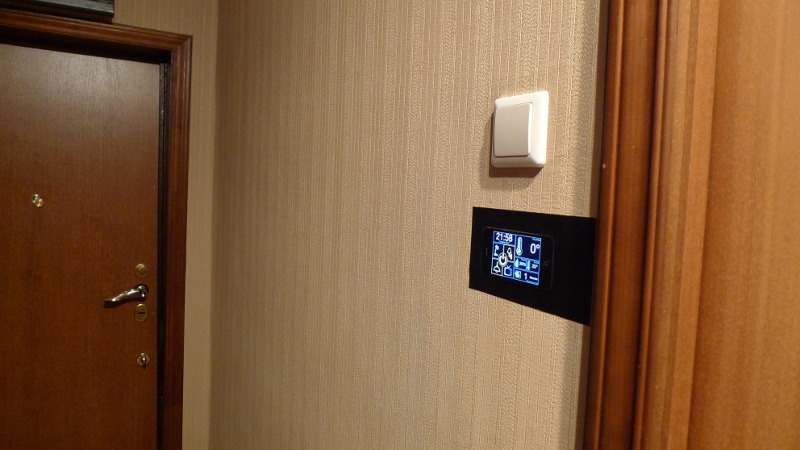
Here is the look of the finished panel:
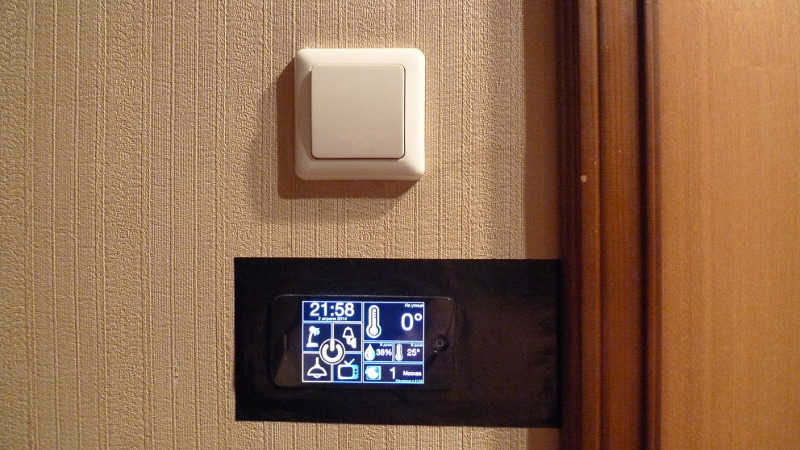
After installing the iPhone in the wall, it was the turn to write software, I am a little familiar with programming under iOS, so there were no difficulties in programming. Difficulties arose with the design, a few nights I pored in Photoshop over simple icons and the layout of the blocks. The result was what you see!
Still tiled design I like
In the second part I want to talk about the devices that I use and control from the panel.
Light control is fully built on Z-Wave wireless technology. The choice fell on it due to the large number of compatible devices, more than 200 companies worldwide produce Z-Wave devices, this means that I will not have any problems with the purchase of equipment in the future. Plus, it is cheap compared to knx, amx, crestron, on average, the device costs $ 100 and most importantly it is wireless, I do not need to pull any wires between the devices for their interaction.
Installed equipment
| A photo | Device |
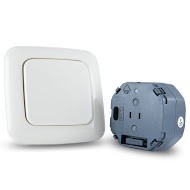 | Z-Wave.Me Dimmer 300W is a dimmer complete with a key, under the key are two buttons, pressed up - the light came on, pressed down - the light turned off, the key is always in the neutral position. I have 3 such devices installed, one in the room so that you can adjust the light from the phone, one in the hallway and the corridor so that the light turns on at 20% at night and 100% at daytime. These dimmers are installed in the phase gap, and according to the Soviet tradition, the wiring is so laid out that there is no zero in the switch box, only the phases, so I cannot use switches with a relay. |
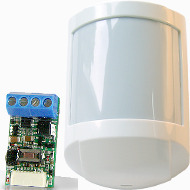 | Fibaro Universal Sensor is a binary sensor, if you close two wires on it, then a signal will be sent to the Z-Wave network that the sensor has been triggered. I have these wiring closes the motion sensor Astra-515. Thus, I made my Z-Wave motion sensor. I use 2 of these, one in the hallway, the other in the hallway, run by Z-Wave.Me Dimmer. |
 | Fibaro Dimmer is a micromodule dimmer without a key the size of a crown, I connected a night light to it, and I use a small doorbell as a control button. |
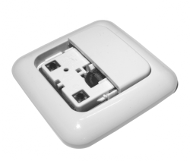 | Wall-mounted two-button switch on batteries Z-Wave.Me Dual Paddle Wall Controller is a remote control in the form of a conventional switch, controlled by Z-Wave.Me Dimmer (chandelier) and Fibaro Dimmer (night light) in the room. Glued around the bed. |
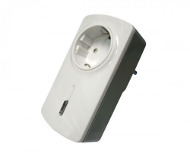 | The Everspring rosette module with power consumption is a radio-controlled socket, in the winter I turn on the garland and control it from the Z-Wave.Me Key Fob. Now the lamp is plugged in, I turn it on with a single-button battery-operated switch. |
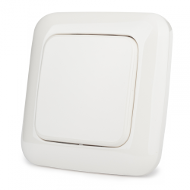 | Wall-mounted single-button switch on batteries Z-Wave.Me Single Paddle Wall Controller controls the sockets module Everspring. |
 | Keyring Z-Wave.Me Key Fob , each button turns on / off somewhere light. |
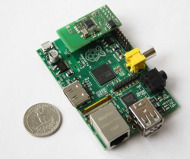 | The RaZberry expansion card for the Raspberry Pi is a motherboard installed in the Raspberry Pi and turns it into a smart home controller, with its help I configure communications and interaction scenarios. |
Z-Wave is a mesh network, i.e. each device can communicate with each device directly without the participation of a central controller. For example, a double switch on batteries, which I have glued to a double-sided tape to the wall near the bed, controls directly the dimmer in the chandelier and the dimmer in the nightlight.
But in the hallway and in the corridor, where I have installed motion sensors and dimmers, the control is carried out using a controller. When triggered, the motion sensor sends a signal to the controller, the controller runs a script that checks how much time it is, if from 7 to 0, the light turns on for the maximum, if the night from 0 to 7, the light turns on by 20%. And of course, the whole world can be controlled from the iPad and see the status of the sensors.
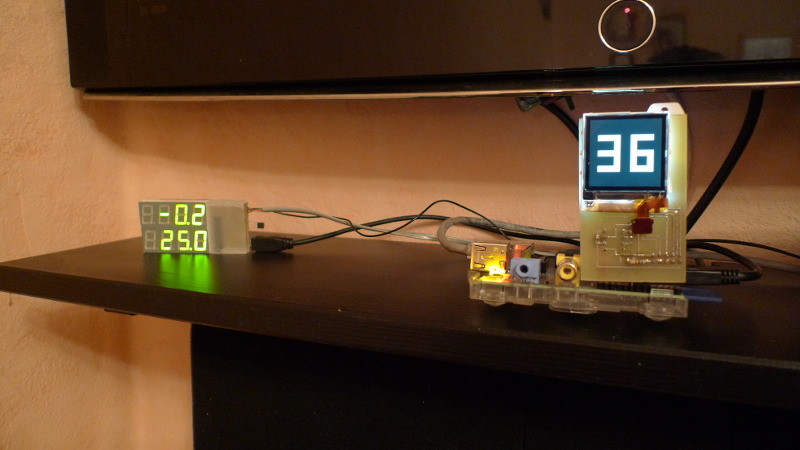
The weather station in the room consists of two parts
First part: 2 seven-segment indicators of 4 segments each operate on an attiny2313 microcontroller with 2 temperature sensors DS18B20, one sensor in the room, the other outside the window.
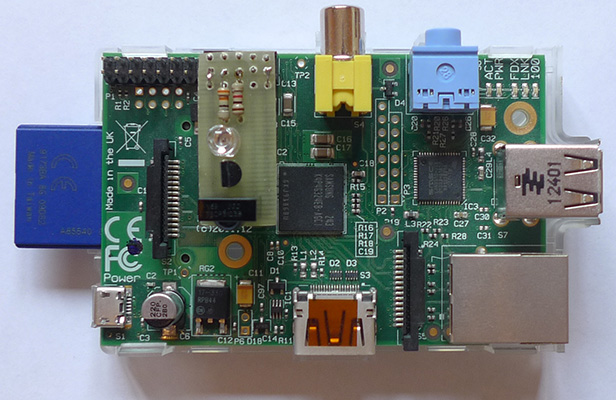
The second part: the LCD screen from the old Nokia 6020 is bolted to the Raspberry Pi, the SPI 9 bit displays information from the humidity sensor DHT-22. For Raspberry Pi, I wrote a couple of cgi-bin scripts, with which I pull out humidity and temperature information on the iPhone using HTTP requests.
If anyone is interested in the details of how to draw on the screen of Nokia 6020 with the PCF8833 16 bit color controller using raspberry, ask, because I had to solve this task myself and this is a topic for a separate article.
On the same Raspberry installed board to control the TV via IR . It works simply, the HTTP command is sent from the iPhone via WiFi to the Raspberry Pi using the lirc program, the desired IR command is executed. You can apply this fee to any IR technology.
The Roomba iRobot 770 vacuum cleaner lives in the next room, which is completely independent and operates on a schedule. I am planning to purchase a RooWiFi WiFi card for it and steer it from the phone or launch it when I'm not at home.

What I came to
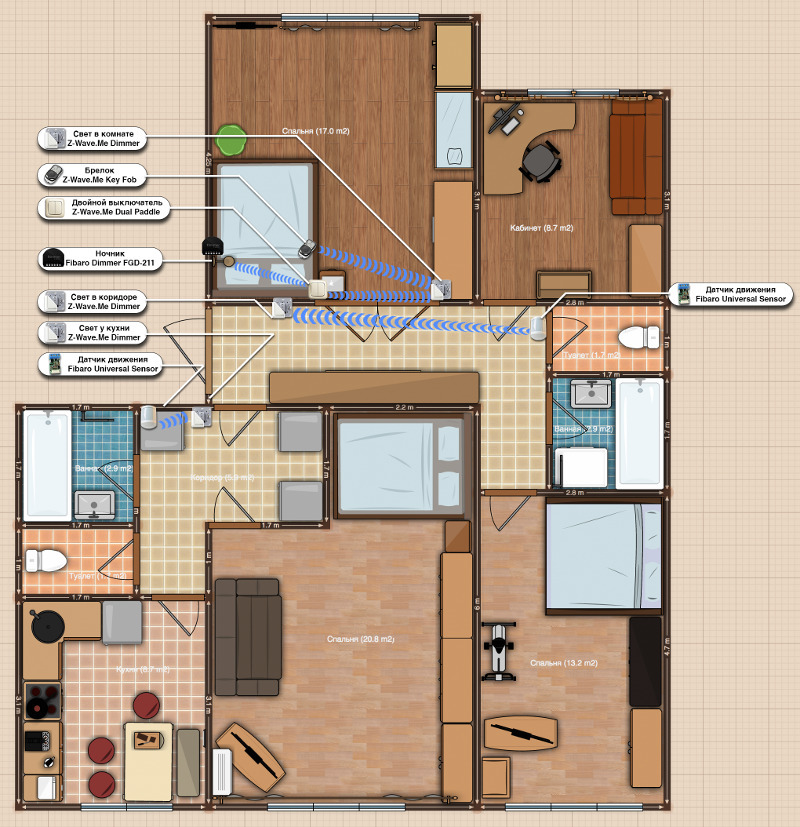
I will continue to improve my home for a long time. To demonstrate what is at the moment, I prepared a plan for my apartment in Planner5D, and with the help of Photoshop I placed the Z-Wave devices, indicating what they control.
I am fond of technology and always strive to improve my skills. I am interested in developing solutions that will be useful. Combining entertainment and practical benefits, I created a really comfortable smart home. Having decided to study the AVR microcontrollers and programming under the Raspberry Pi, I developed my weather station. Inspired by the technology of smart homes, I made an automatic switch on the light in the corridor according to a temporary algorithm. Robot vacuum cleaner was purchased for a known reason - the love of cleanliness and laziness to get out.
At the moment, installing the control panel in the hallway, I achieved the desired level of comfort: leaving the house, I turn off the forgotten light and the TV with one button, after a couple of hours the vacuum cleaner will start its work, if necessary, I can check if my sensors didn't work the absence, and when I came home, I would open the front door and the light would light up without forcing me to break my legs in the dark, making my way to the switch.
The house has become more comfortable, and the systems that work in it save me time, allowing me to spend it on the joy of life!
Source: https://habr.com/ru/post/217765/
All Articles