Wi-Fi Controller Access Points on Mikrotik
Introduction
The latest version of the operating system Mikrotik RouterOS, numbered 6.11, added an experimental feature that allows using a router on this platform as a Wi-Fi access point controller. Unfortunately, since this functionality has just appeared and is in beta status, information about it is limited to a rather boring article in the Mikrotik Wiki-Directory. I could not find the step-by-step instructions on how to set up, therefore, it was decided to try to adjust everything by the method of scientific typing. In this post, I consider a simple controller setup (without going into the wilds of settings, of which there are many) providing the following configuration (in fact, similar to the one that would be configured on a simple DHO-Link DIR-620 SOHO router with native firmware, and used at home):
- Two Wi-Fi routers Mikrotik RouterBoard
- Routerboard RB951G-2HnD - the main, is a Wi-Fi controller, access point, router, DHCP-and DNS-server. Next, I will call it a controller
- Routerboard RB951Ui-2HnD - optional, is only a Wi-Fi access point and a switch to 3 ports (POE in and out ports are not included in the switch and reserved for the future). Further I will call it an access point or a point.
- WPA / WPA2-PSK authentication with AES encryption
- Strictly defined channel, with a width of 20 MHz
- Single SSID, not hidden
- Clients are not isolated from each other and the wired network (really, why is it at home?)
Interested, I suggest to continue reading under a cat. Attention, traffic!
Disclaimer
So, we realized the fear and risk associated with the use of technologies that are at the testing stage, we understand that only you will be responsible for repeating the actions described in this article. It is also worth noting that this functionality is not yet compatible with:
- Nstreme AP support
- Nv2 AP support
That is, only 802.11 works.
Training
According to the information from the Wiki, the operation of this system does not require Wi-Fi on the router, in which case the device can perform the functions of a controller.
First of all, you need to update the system on our routers to version 6.11. You can download the firmware file from the official Mikrotik website, then drag it into the Winbox window, and then restart the router; or go to the System -> Packages section, click the Check For Updates button and click Check For Updates again in the window that appears, and then Download & Upgrade.
Further, in the download section of the official Mikrotik website, you need to download the Wireless CAPsMAN package file (it is located in the same place as the firmware for your platform), then install it in the same way as the RouterOS update, i.e. we drag on Winbox'a window and we reboot.
After the reboot, go to the Packages section to make sure that the package is correctly installed and activated.

')
Notice that the wireless-fp package has appeared, and the wireless package has become inactive. In addition, a new item appeared CAPsMAN in the main menu and the CAP button in the Wireless section.
Controller Configuration
The steps described in this section need only be performed on the controller.
Go to the CAPsMAN section in the main menu.
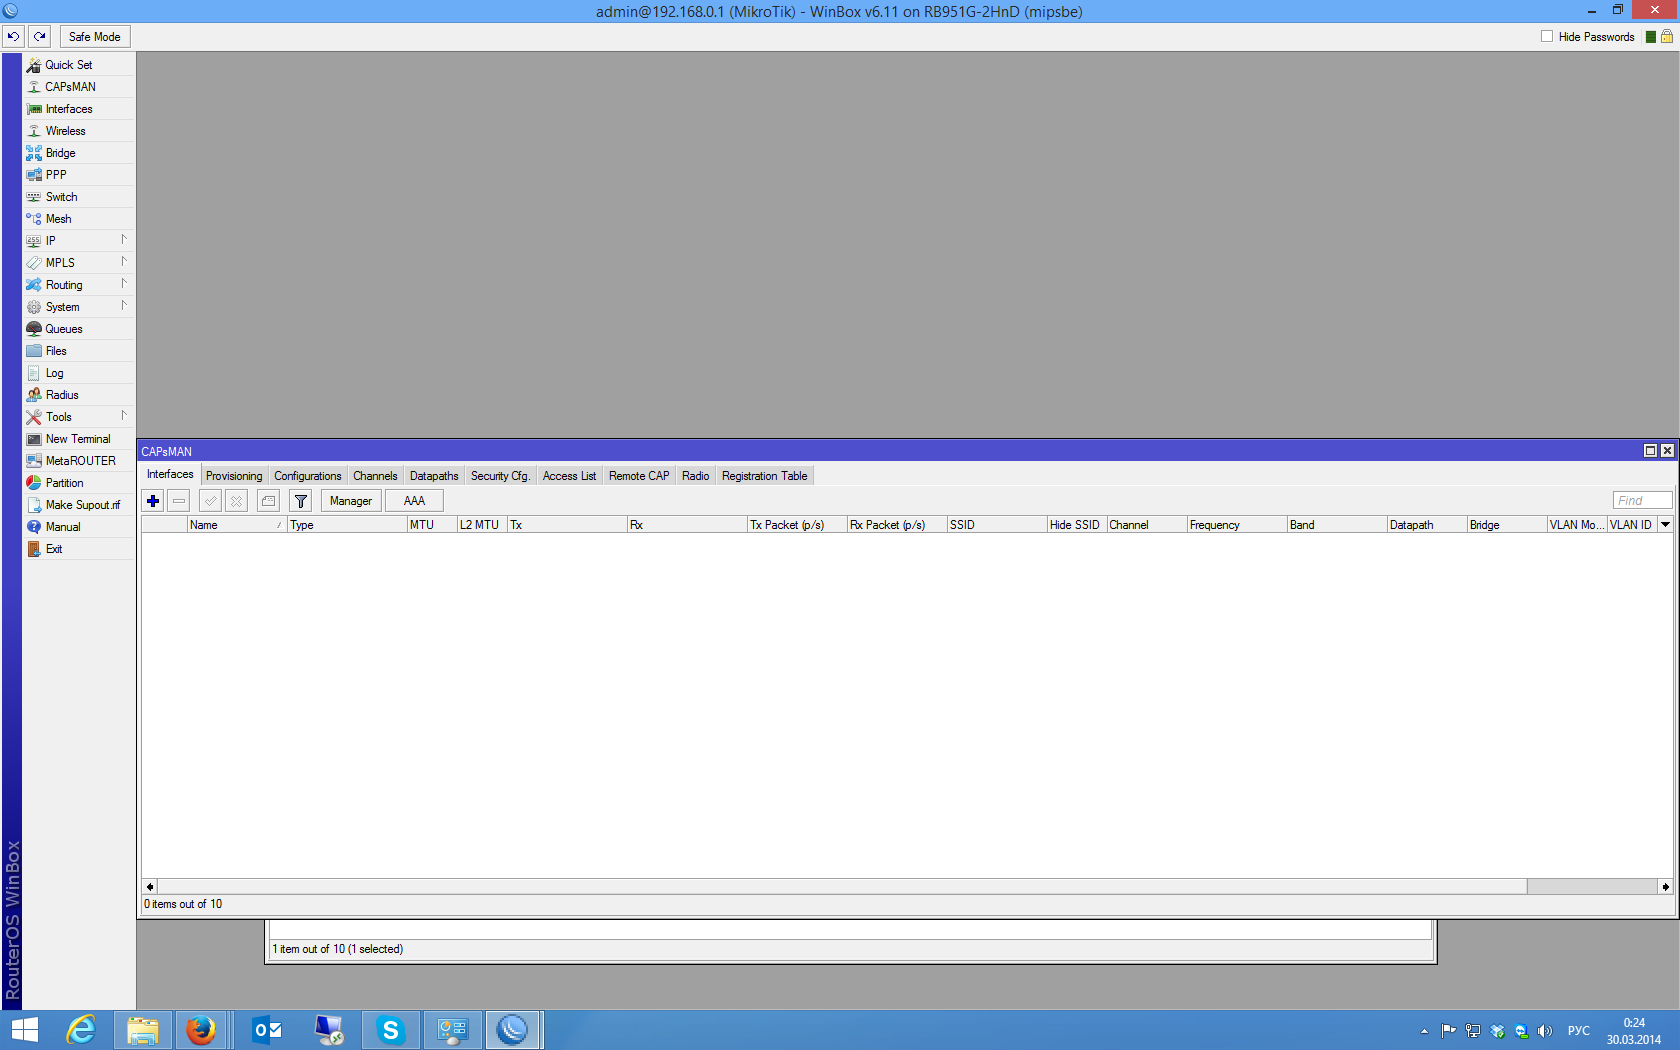
The first Interfaces tab will contain pseudo-interfaces that appear when connecting access points to the controller for each connection over one pseudo-interface. If you go into any pseudo-interface, you can see the settings that are applied to it.
In principle, you can manually create an interface for an access point, for example, if you need to select a specific point with some special settings.
To enable the controller mode, click the “Manager” button, set the Enabled checkbox and click OK.
Go to the Configurations tab. This is where configurations are created that will be deployed at our access points in the future.
Create a new configuration
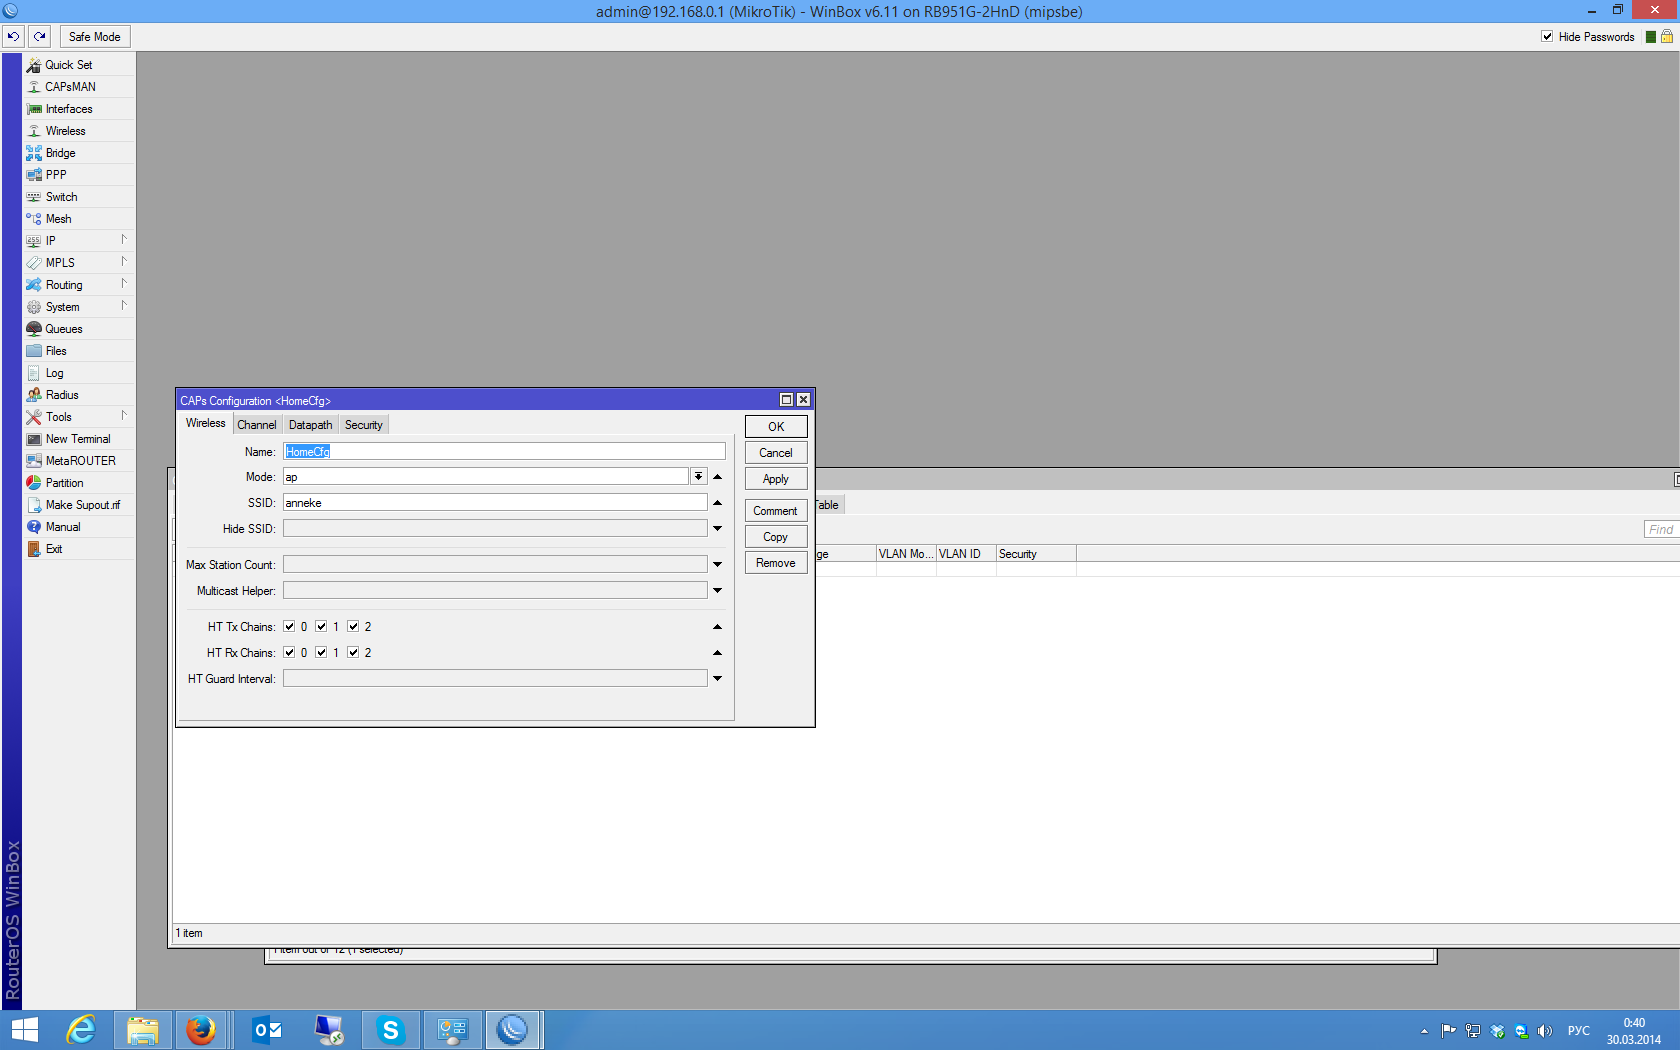
Set the configuration name, SSID, only one mode is available, but just in case, I decided not to leave this value empty, although everything works with an empty one too. We also indicate that all available antennas for reception and transmission should be used (there are two of them on my routers, but the third tick, although set, will not affect anything).
Next, we define the channel settings

Note that any settings can be made both directly in the configuration and you can create a “Channel” object on the corresponding CAPsMAN tab, and then select it from the list. This can be convenient when there are complex configurations with a combination of different parameters for several access points. We indicate the frequency (unfortunately, there is no drop-down list, so you have to specify the value manually), the channel width for some reason only takes 20 MHz (in the field description in the console it is written that it can be a decimal number from 0 to 4294967.295, therefore put 20 / 40 is impossible, and if you specify values greater than 20, an error appears that the access point does not support this frequency). If the channel width is not specified, then 20 MHz will be accepted by default. Next, select the broadcast format 2ghz-b / g / n. The next field, according to its meaning, should give the opportunity to expand the channel to 20/40, but for some reason, regardless of the chosen value, this does not happen. Just in case, I choose Ce (in previous versions above).
The next section allows you to specify network settings.

As in the case of the channel, you can arrange this section of the configuration through a separate object.
The tick local-forwarding allows you to transfer traffic control to access points. In this case, clients hit a certain subnet (by adding a wlan interface to a certain bridge), routing, etc. will be carried out in the usual way, i.e. through the wireless network interface. Removing this checkmark transfers control to the controller; accordingly, all other settings on this tab are valid only when the checkmark is unchecked.
Security Section
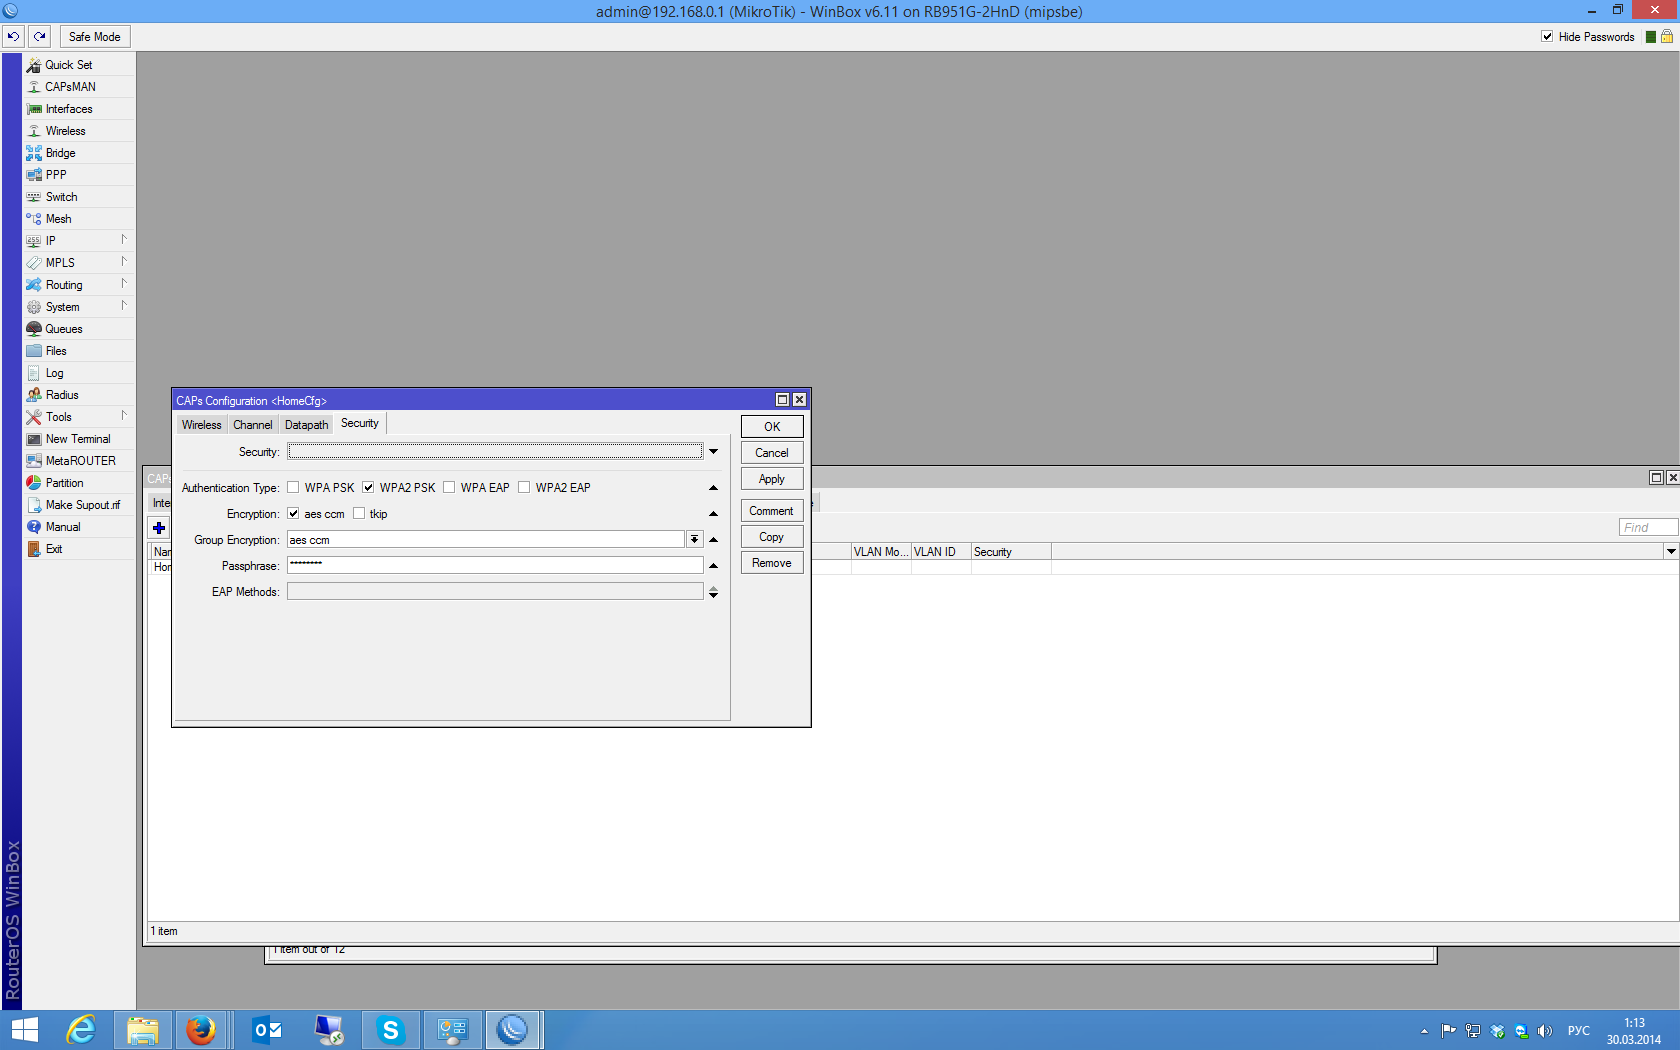
Contains, in principle, the usual settings that do not need commenting. The only thing I want to mention is the lack of WEP authentication. Here you can also make settings in a separate “Security” object, and then specify it in the corresponding field.
Deployment
After we finish editing the configuration, save it. We will need it in the next stage.

On the Provisioning tab, we create a new deployment. Specify the type of configuration.
Let's create a Provisioning object in this section.

The “Radio Mac” field allows you to define a specific access point to which this deployment will be applied, by default - to all. Action needs to be specified? Create dynamic enabled ?, other options are necessary for static interfaces. We indicate the newly created configuration as the main one.
Configure access points
Everything is much simpler here. Settings are performed on routers equipped with Wi-Fi modules. Go to the section Wireless.
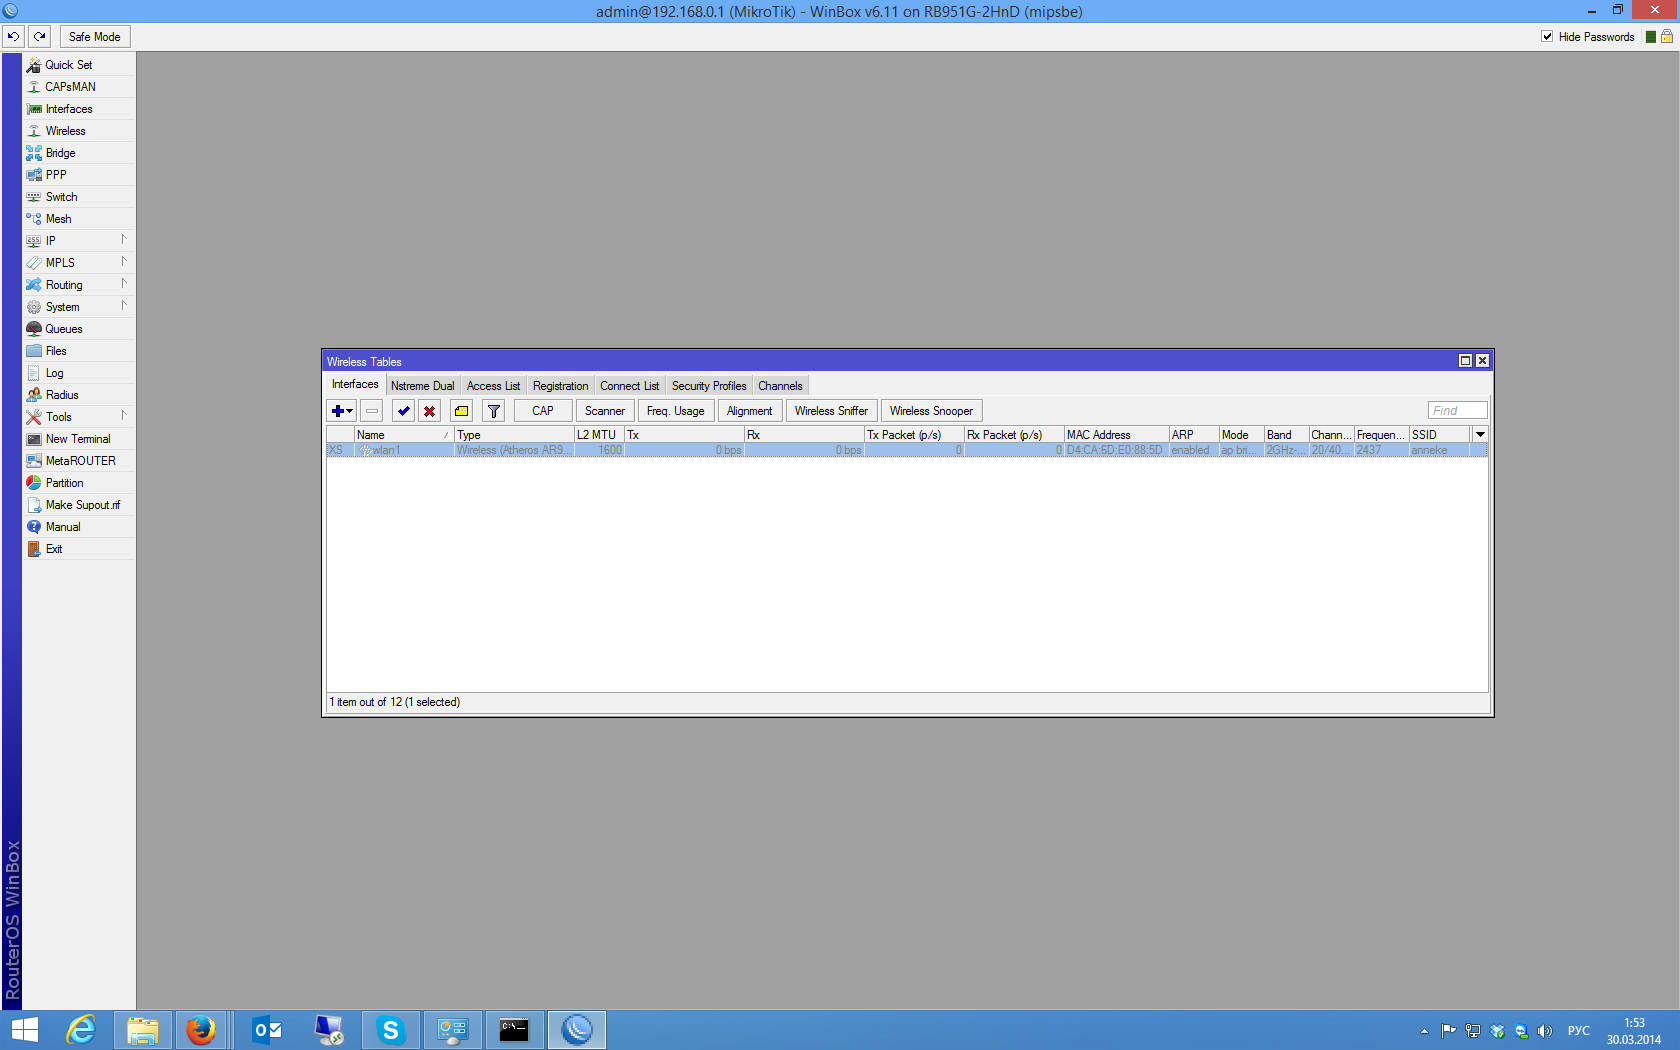
Press the CAP button.
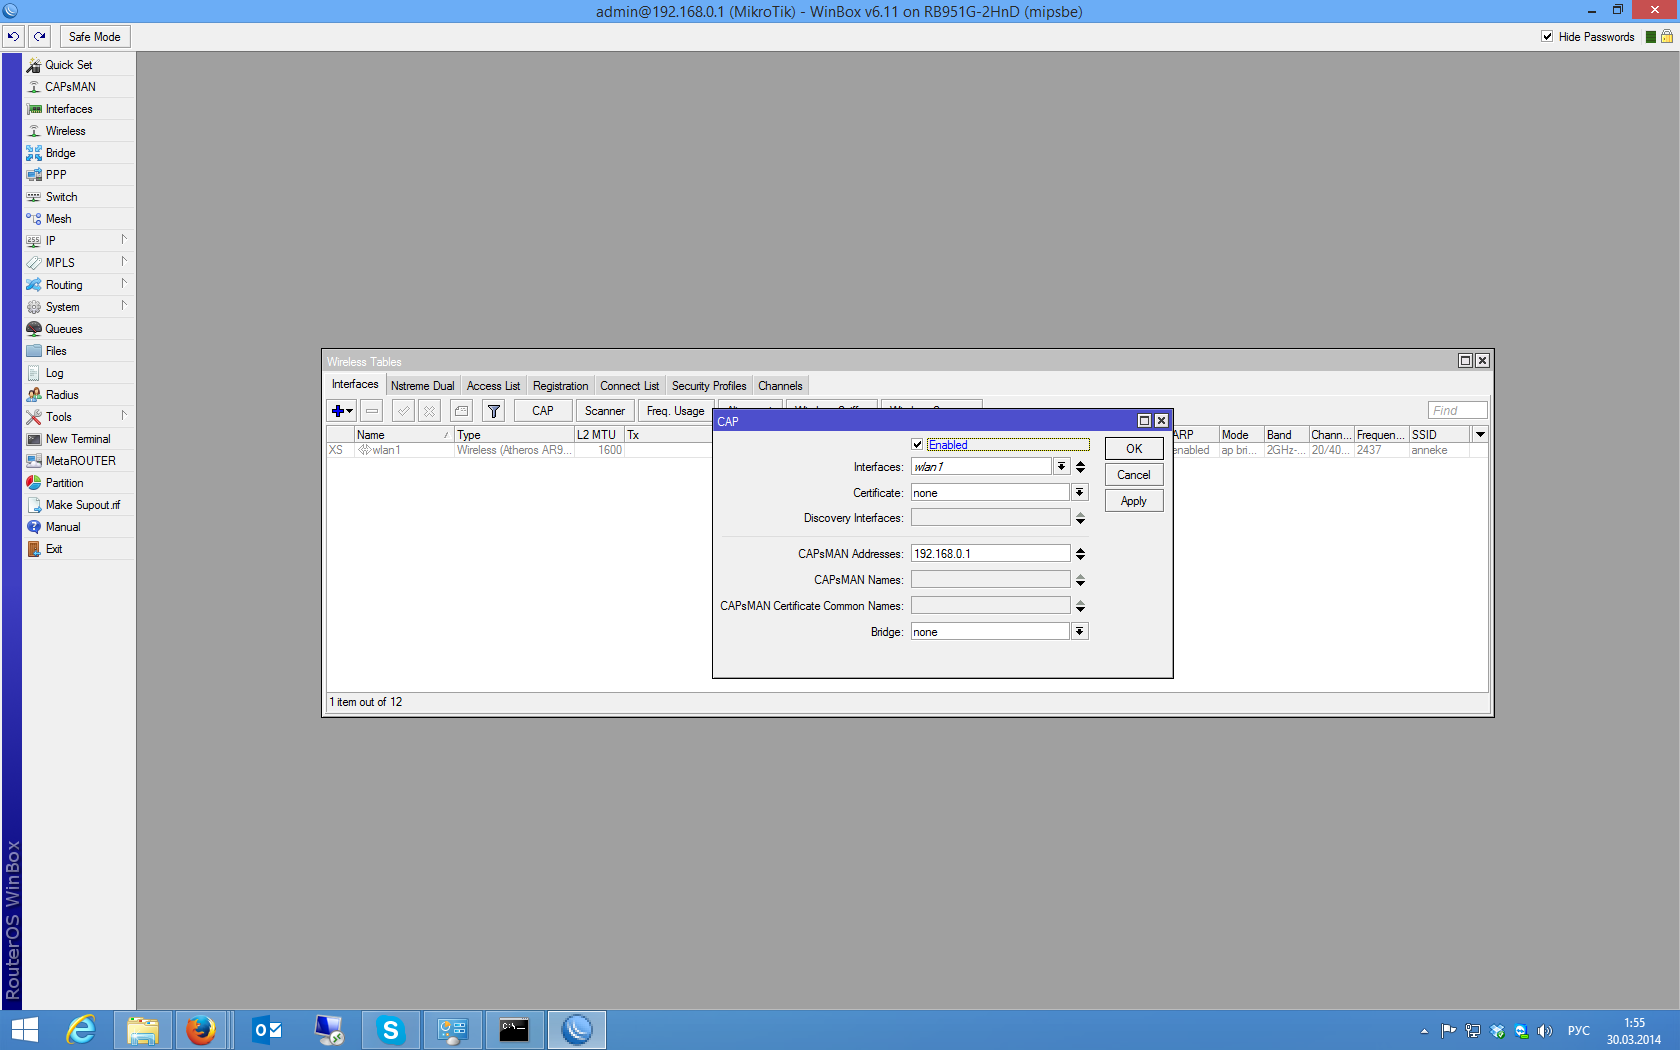
Check Enabled, specify the wireless interface, in case the access point and controller are one device, add your IP in the CAPsMAN addresses field.

If the access point and the controller are different devices, then you can leave out the CAPsMAN addresses, instead specify Discovery Interfaces.
The Bridge field can be filled in - specify the bridge in which the local network is located; in this case, when a connection to the controller is established, the interface will be automatically added to the bridge, or you may not specify it, then you will have to assign it in the Bridge menu item.
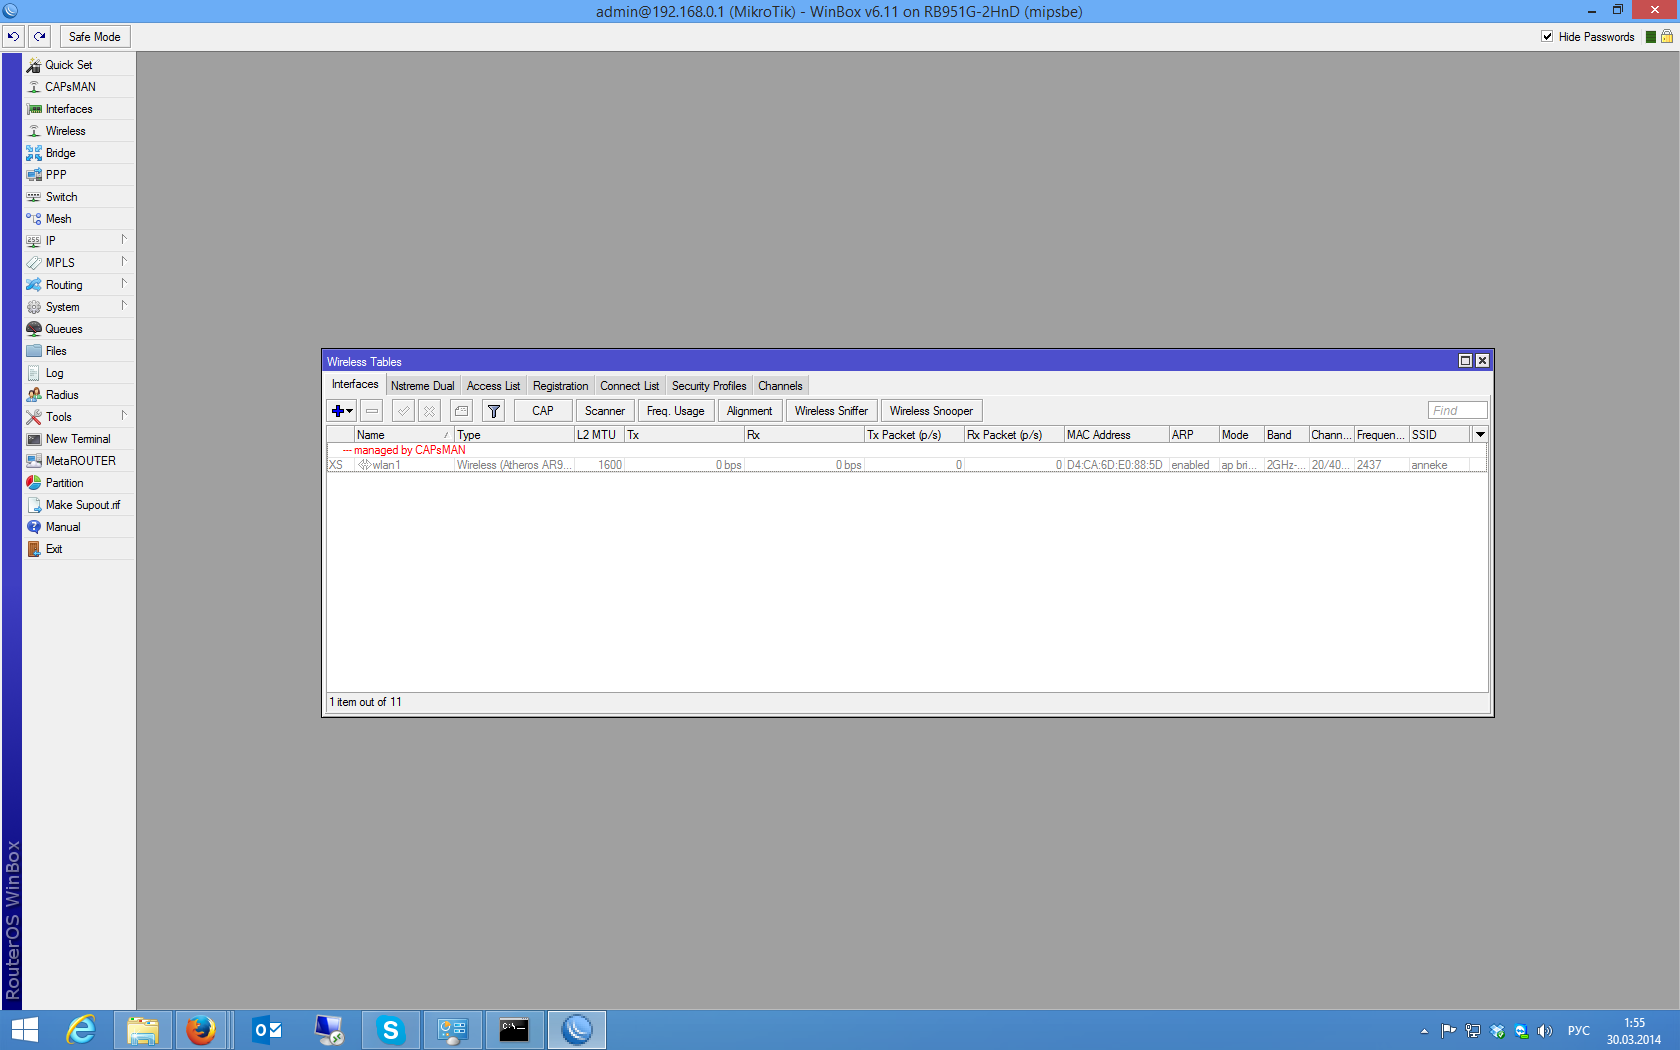
After clicking the OK button. The interface will have a red comment indicating that it is controlled by the controller.
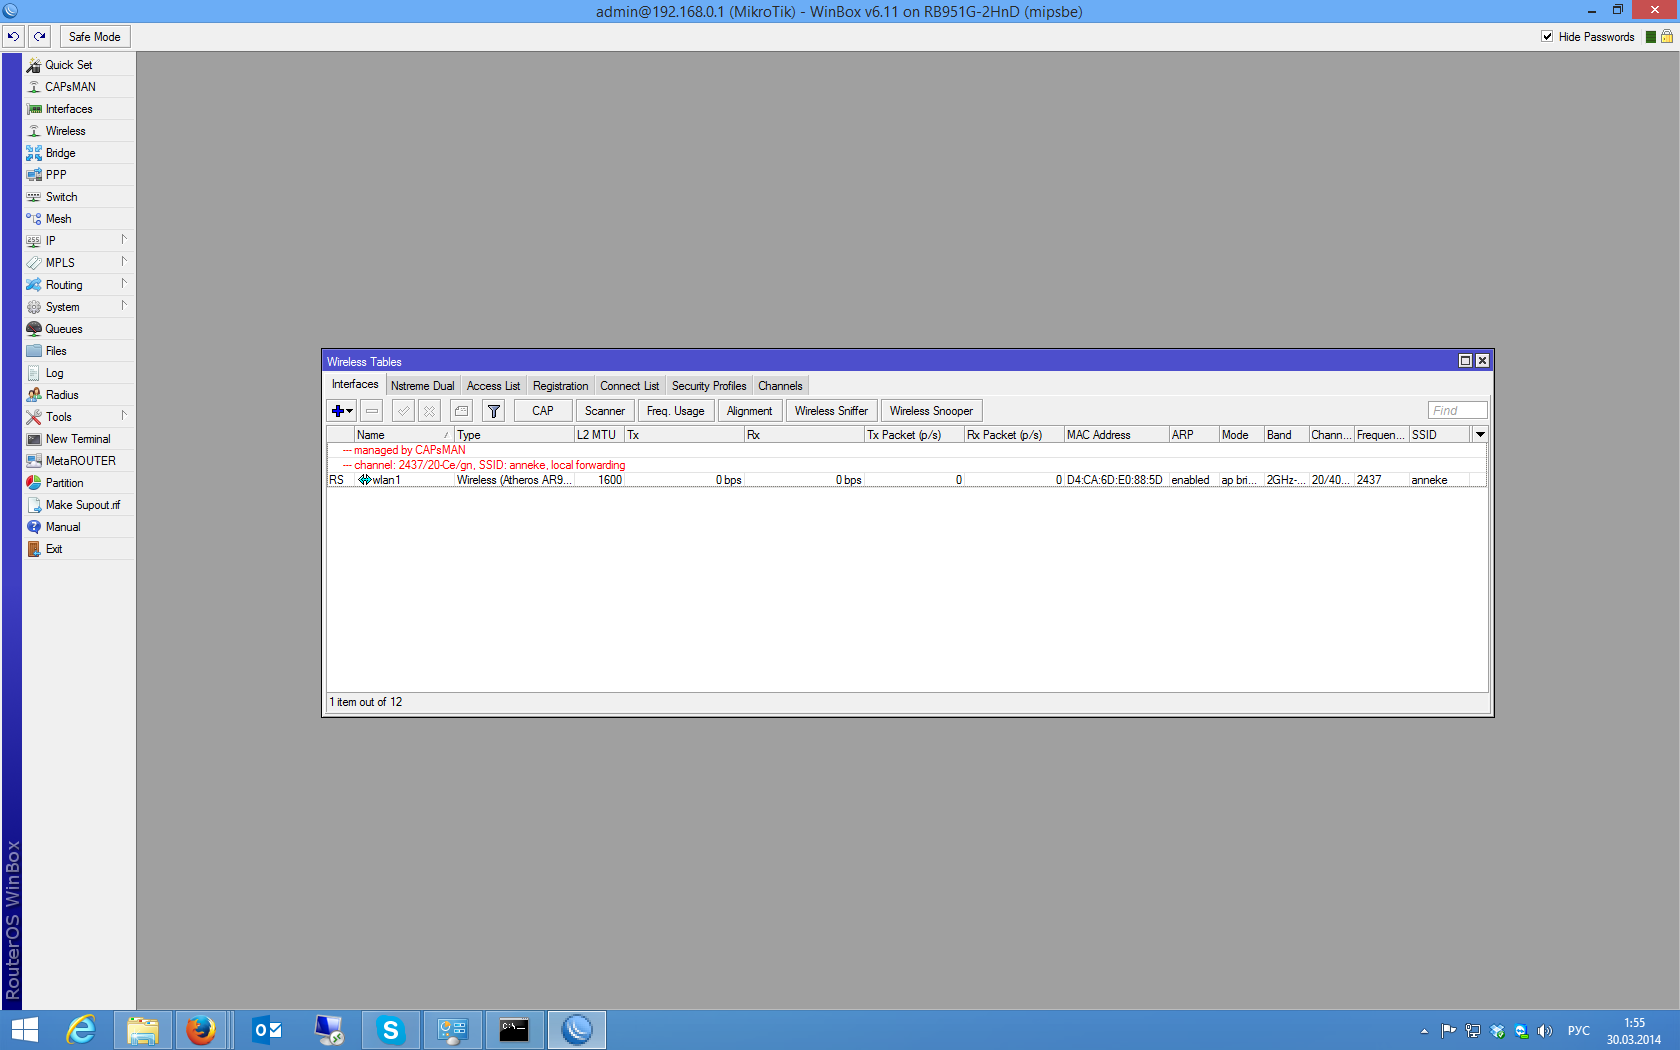
After the connection with the controller is established and the settings are received from it, a second line of comments will appear with an indication of the network parameters.

And in the Interfaces tab of the menu item CAPsMAN, pseudo-interfaces will appear corresponding to these connections.
After editing the controller settings, you can force the update to the access points in the Remote CAP and Radio sections (depending on what settings have been changed), by selecting the desired point and clicking on the Provision button.


Connected clients by interfaces can be seen in the Registration Table:

Conclusion
Since the CAPsMAN and CAP functionality has just appeared in the public domain and is still in beta testing status, I assume that the interface, settings, and features may well change in the near future. But fundamental changes are unlikely to occur, so I hope that the post will not lose relevance.
When writing this post, an article from the official Wiki Mikrotik was used.
UPD: re-read the wiki, found an error in the post regarding the datapath tab, made corrections to the article.
Source: https://habr.com/ru/post/217657/
All Articles