We ride the floppy and study the promising router. (In this article, not a single TP-Link MR3020 and TL-WR703N were injured, and HAME MPR A100 (A2) got off lightly)
Hello!
Today I want to talk about an interesting mobile router HAME MPR-A100 (similar to HAME MPR-A2). The device seemed interesting, especially for the "kitchen" robotics and I decided to tell about it. I will build the article as follows - first I will tell about the router itself, and then build on its basis the most simple and cheap bot on a wheeled chassis from the improvised material. It will be easier and cheaper than last time .
The main advantage - right from the box we will have a fairly large battery ( 5000mAh ) with all the strapping, and you can install OpenWrt there . If you connect the fantasy, you can get a lot of new solutions based on this router.
')
The review turns out to be very strange since nothing will be said here about the stock firmware and the standard application of this router. Review of stock functionality without problems can be found on the network. For example.
So, quite accidentally, one of the sellers in our Ukrainian online auction (if you need the seller’s coordinates, then write) saw an interesting device - a mobile router that can also charge consumers (Powerbank) as it has on board a battery of 5200mAh.
A little googling, it turned out that inside is quite a decent iron and moreover, OpenWrt is installed there .
Since the price and features were pleasantly surprised, I decided to order this miracle and experiment. The device is available at a price of about $ 40 (in different places the price is very different), while it has a battery inside and its harness. It is easy to find out how much an external battery of similar capacity costs, therefore the price is surprising. If you still remember the stock functionality, it becomes even more interesting.
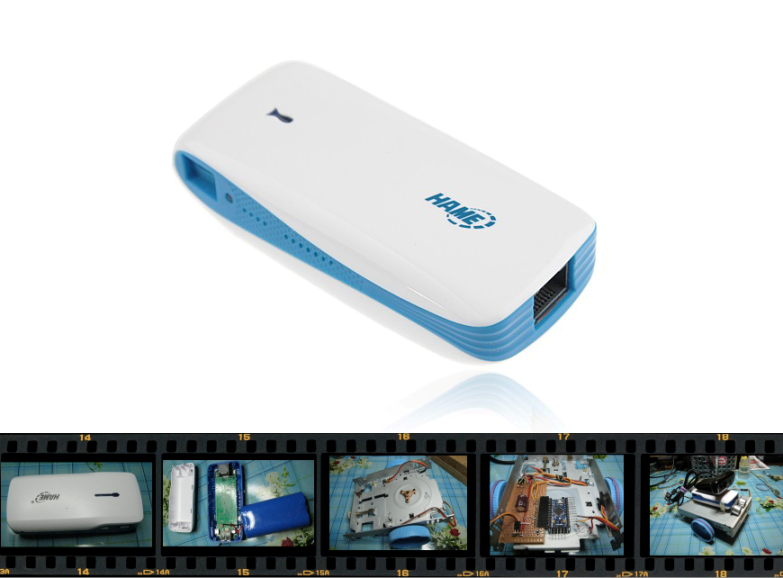
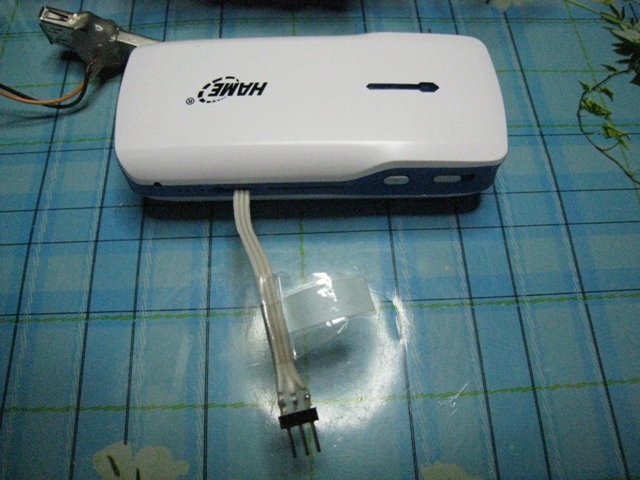
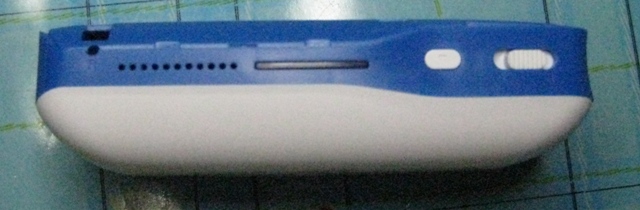
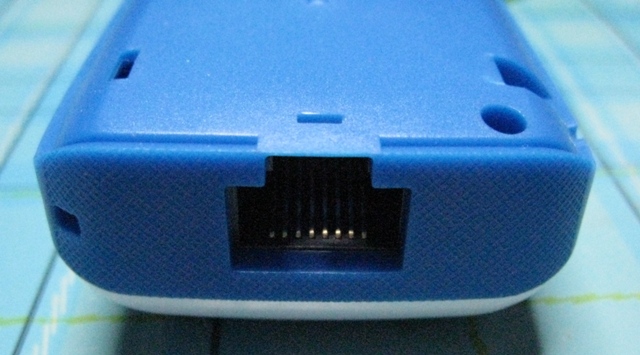
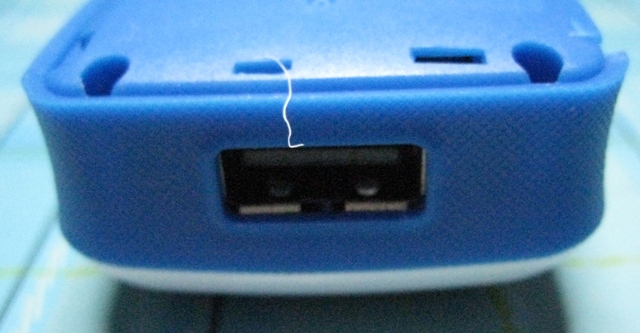
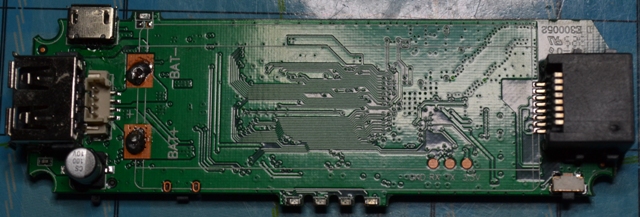
The appearance is quite friendly, the appointment of all ports is predictable and does not present any surprises. What is useful, on the side there is a button to check the battery status. We press and on four LEDs we understand how much "electricity" is left.
The insides are also predictable, the battery consists of two 18650 elements and it seems even with a protection board. The batteries are rootless, but 4000mAh is there for sure, maybe there is more, I didn’t wrap it up much with the measurement. (We will not go into the wilds of voltage conversion and reference methods for measuring capacitance. If desired, you can put the most eminent 18650 there.) In general, than a hundred times Describe the best show once:
In detail here to disassemble the circuitry does not see the point, who are interested can consider the name of the chips in the photo. I just note that without a battery, the router does not work, which means that it is powered by it and there is some kind of harness that charges and charges the battery on the go. Of course, it may be that such a "buffer" use of the battery leads to its deterioration, but the price of the batteries themselves is not very high and they are standard. You can install any 18650.
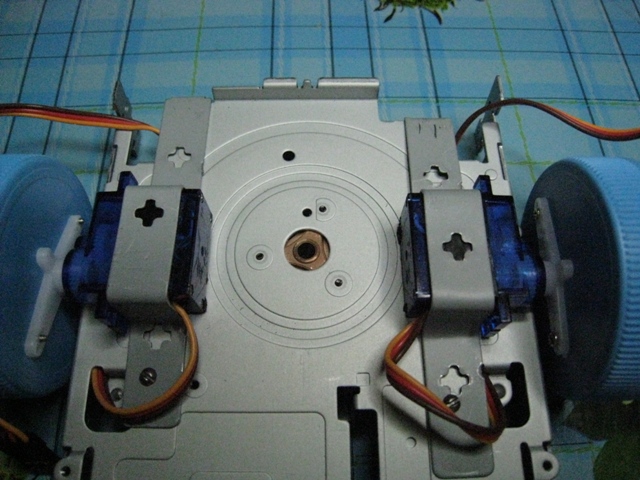
Next, we will assemble the simplest three-wheeled "cart" which, however, will have sufficient maneuverability, a turn in place (tank) and a minimum cost of components. You can use it not only with such a router, but generally as you like, even though completely autonomously.
We will ride with the help of just 4 basic things (and heaps of insignificant trifles):
1. Couples of the simplest and cheapest servos ($ 3 * 2)
2. Arduino Mini ($ 9)
3. Old floppy ($ 0)
4. Router ($ 25-45)
So, we start preparing the components:
Floppy or scientific floppy drive .
In general, any sufficiently flat panel will do. It will only need to fasten or glue two servos and a third free, supporting, self-made wheel. But it would not be interesting. And even if you disassemble the floppy, you can get several such platform panels from fairly soft metal that you can just drill. Well, as a bonus, a bunch of any other nice trash. If desired, standard stepper motors can be used, I left one for the future. You can take the entire external enclosure of the drive and hide everything inside, I did.

The size of these panels is quite suitable for a small bot, and we also have a lot of holes for hardware fasteners. At the same time the design remains quite strong thanks to the metal chassis. This is not a plastic case from the RU machines.
Arduino
I again took the Arduino mini because of the size, but any similar board will do. The main thing that you could steer from her servami. Well, enough memory. Since in this project I was faced with the fact that in Atmega8 it was already difficult to cram everything required.
We solder convenient connectors to the board for connecting to the router, as well as for connecting two serv. If you wish, you can do everything with mounted installation, but for the order I have put on a still cheap design scarf. So it is more convenient to "remix" something.
We solder the USB tail that will take power from the router and power the arduin with the servos. I did it with the help of the USB tail “papa-mama” with the expectation of powering everything you need and being able to connect another webcam.

If you want to connect more devices to the router, you can use a USB hub, as I did in the article about the PTZ webcam .
He also added a larger capacitor with a voltage of more than 5 volts. This is such a child protection from voltage sags at the start of the servos, although they are quite small. And perhaps it will help to smooth other pulsations in the "onboard network".
Servy
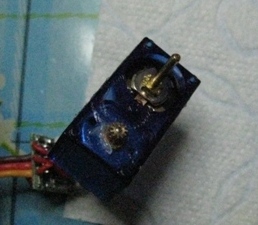
This is the most interesting. In theory, the servo can only deviate by 180 or 360 (almost) degrees. How to ride it? The answer is simple - to modify the file (with a knife and a soldering iron).
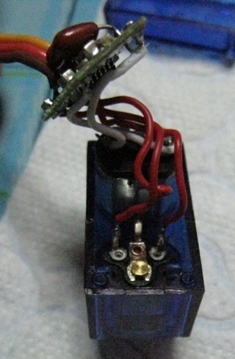
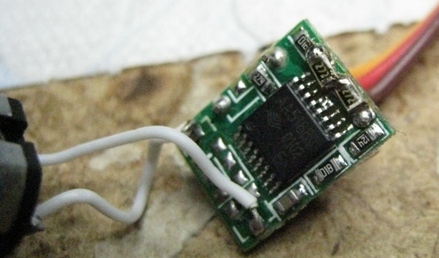
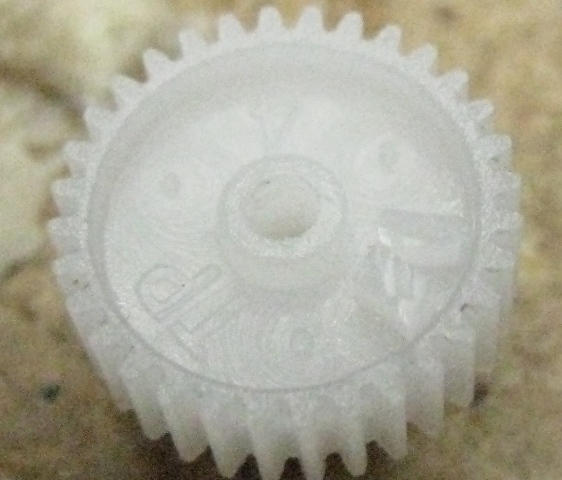
The servo is a regular gearbox, but with a stopper that does not allow to make a full turn. A variable resistor is mounted on the axis, the control board monitors the position of this resistor, compares it with the resistance for the desired angle, and turns the motor until it reaches the desired angle (desired resistance).
Guess what happens if you replace the variable resistor with permanent? The servo will constantly try to achieve a given angle of rotation, and if you remove the stopper, we get a gear motor with a control board! Goodbye LM293!
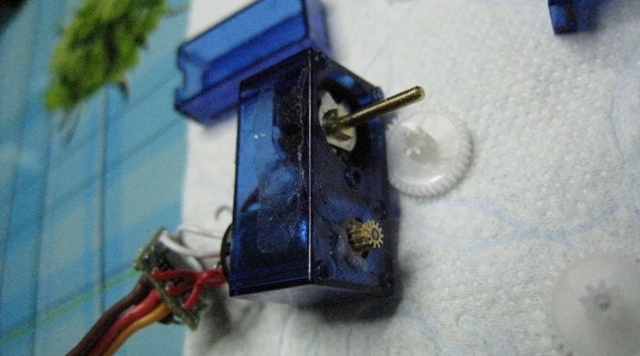
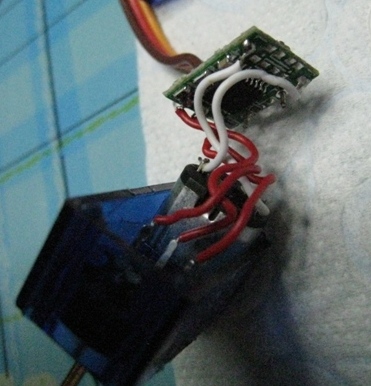
We disassemble the servo, we photograph the position of the gears on the memory. Measure the impedance of the variable resistor and replace it with two constants of half nominal. That is, if the total resistance is 5 KΩ, then we solder two 2.5 KΩ each. I even managed to use the smd resistors extracted from the old Nurse. You can just get a variable resistor, but I kept the design on it. Apart from the cut-off stopper, the servos can be returned to their original state.
Now, if the servo is set to the 90 degree position (programmatically from the skip), then our “gearbox” will stand, if set to the 100 degree position, it will start spinning in one direction, and if 80, then in the other. The greater the difference between 90 degrees and the fact that we set the faster our gearbox turns. As a result, we were able to adjust the speed. Here is such a "life hack".
However, in practice it turned out that there is a slight drift (the servos are sooo slow to roll or rumble) and using the selection method I set the “middle point” of one servo at 89 degrees, and at the second one at 85 (right in the sketch). In this position, only one server quietly rumbles, but does not spin.
Since it was assumed that the bot will perform all the same observational functions, I added the ability to de-energize the servos when the trolley is installed using a CMOS transistor. Thus it was possible to avoid the "groaning" of serva and extra energy costs.
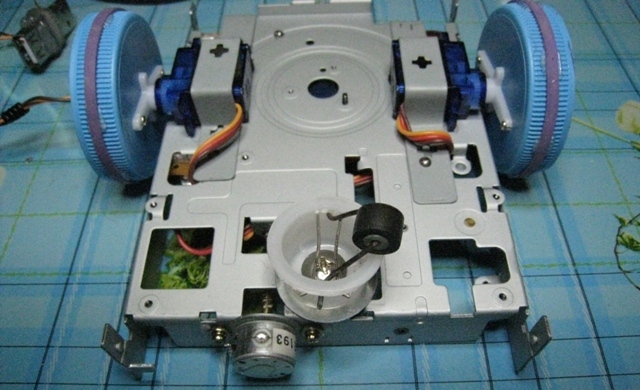
A few words about the wheels. The wheels themselves are already understood from what) Any size is available) For the clutch I pasted a pair of office gum for money. It is easiest to make the third support wheel out of a large bead attached to a paper clip with a curved letter “P” or from improvised materials (like mine). You can raid the furniture supermarket.
Router
In order for the router to do what we want from it, it must be properly prepared.
In terms of iron, you only need to solder wires to the internal UARTU (UART). Contact pads are located under the batteries and signed. And if you use the USB arduin, then you can not do this.
With software, the situation is more serious. On the router, you must install OpenWRT. Finished build already exists. How to flash can be read here .
They say that you can flash directly from the webmord, but something went wrong with me and in the end I uploaded the firmware via tftp. I mocked the router for a long time and sophisticated, but he survived, it's quite difficult to kill him. Flash firmware mpr-a1-32m-luci-usb-mjpg.bin
As the name of the firmware MJPG-streamer is already installed. This is a program for broadcasting video from the onboard webcam of the bot. For the complete set, all that is missing is the ser2net package. This is a program that acts as a bridge between the TCP port and the serial port of the router. This program, when we send control commands to our bot, forwards them through the serial port of the router to arduin. I found a package with this program, checked it and left it here .
It all works like this: mjpg-streamer “streaming” the video stream from the webcam, and we send commands to the 2000 port of the router and ser2net sends them to the arduin.
Many people have a question: how can I send commands to an arbitrary port of a host (router, PC or any other network node)? For this you can use just such a program . She can not only that. For some reason, such software is difficult to find, apparently the demand is not great.
And again, many will have a question - How to “shove” your files into the router or edit them there if you are not links-guru. To do this, there is an excellent utility WinSCP Works on the principle of TotalCommander.
This time I didn’t sculpt a webmord for a bot, as it annoys me with its slowness and buggy, in the future I think to write an application in C #, but for now you can do with VLC or browser + Hercules SETUP utility for management.
My personal settings of the router are quite insignificant and relate only to the installation speed of the internal "Uart" and that's it. Additionally, you will need to configure the router itself so that it is either a client of your wifi home network or itself acted as an access point. But this already relates to OpenWrt configuration issues. Everything is intuitively clear, if there are difficulties, then see the manuals for this firmware.
Tuning, useful, but not mandatory.
Since I want the bot to function without my “manual” intervention, I need a docking station for recharging. This is again very simple for cases - we take a piece of microUSB cable and solder it to the “usa-contacts” as last time . Add a diode to eliminate the possibility of replicating.
Experimentally, I found that the router in the on mode still “recharges”, which is most welcome to us. The docking station itself is made of two plates of tin, we connect the power supply unit to them. You can even complete. This time everything is easier as inside the router there is a battery charge-discharge harness and all we need is to apply a voltage of 5V to the input for charging the router.
Future plans.
Even during the operation of the previous bot, one inconvenience was noted - it was always necessary to manually start the bot in the parking lot and watch that charging started, otherwise you could get into a situation when the bot died from “starvation”.
Reflecting on ways of dealing with a similar problem, I came to the conclusion that the bot should get into charging itself. As I did not think of reliable and simple global positioning systems around the apartment, I decided to limit myself to a small one - to install an ultrasonic rangefinder and train the bot to park automatically using a characteristic docking station (a wall with a slot in the middle, this slot will be a beacon for centering the bot when approaching the station ).
I have already undertaken specific attempts to create this station, but unfortunately I did not correctly estimate the size of the slot and everything must be redone.
A range finder is a sensor that can “know” the distance to an obstacle. If we make a docking station in the form of converging surfaces, we can force the bot to go right in the center and stand on charging. The algorithm is simple - we manually approximately print the bot to the docking station center and give the command to start parking. The bot cyclically “gropes” the range-finder the slot and strides towards it. After each step, it is checked whether the tension on the "whiskers" appeared, if it appeared we parked!
If such an idea is interesting, I will publish an additional post with parking already established.
And as usual, a little video with "pokatushkami":
R.S. The article turned out to be a bit not finished, but I thought that I would better present it as it is at the moment, since in the light of recent events (both personal and global), it is likely that it will never be finished at all or in the foreseeable future for sure.
Today I want to talk about an interesting mobile router HAME MPR-A100 (similar to HAME MPR-A2). The device seemed interesting, especially for the "kitchen" robotics and I decided to tell about it. I will build the article as follows - first I will tell about the router itself, and then build on its basis the most simple and cheap bot on a wheeled chassis from the improvised material. It will be easier and cheaper than last time .
And the most important thing is found the answer to the question - “What to do with your old floppy that lies in the cabinet?”
The main advantage - right from the box we will have a fairly large battery ( 5000mAh ) with all the strapping, and you can install OpenWrt there . If you connect the fantasy, you can get a lot of new solutions based on this router.
')
1. Overview of the router itself.
The review turns out to be very strange since nothing will be said here about the stock firmware and the standard application of this router. Review of stock functionality without problems can be found on the network. For example.
So, quite accidentally, one of the sellers in our Ukrainian online auction (if you need the seller’s coordinates, then write) saw an interesting device - a mobile router that can also charge consumers (Powerbank) as it has on board a battery of 5200mAh.
A little googling, it turned out that inside is quite a decent iron and moreover, OpenWrt is installed there .
Since the price and features were pleasantly surprised, I decided to order this miracle and experiment. The device is available at a price of about $ 40 (in different places the price is very different), while it has a battery inside and its harness. It is easy to find out how much an external battery of similar capacity costs, therefore the price is surprising. If you still remember the stock functionality, it becomes even more interesting.
The appearance is quite friendly, the appointment of all ports is predictable and does not present any surprises. What is useful, on the side there is a button to check the battery status. We press and on four LEDs we understand how much "electricity" is left.
Diaper from the photo.

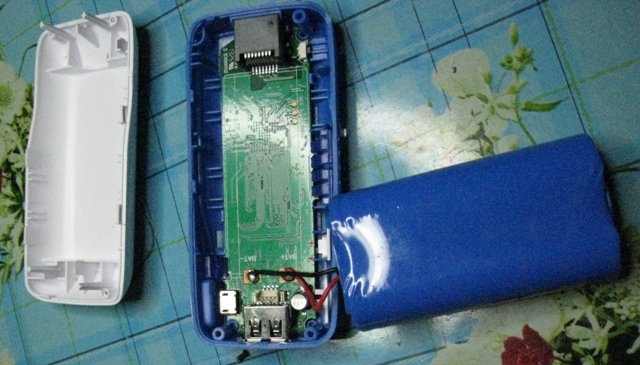
The insides are also predictable, the battery consists of two 18650 elements and it seems even with a protection board. The batteries are rootless, but 4000mAh is there for sure, maybe there is more, I didn’t wrap it up much with the measurement. (We will not go into the wilds of voltage conversion and reference methods for measuring capacitance. If desired, you can put the most eminent 18650 there.) In general, than a hundred times Describe the best show once:
Diaper from the photo.
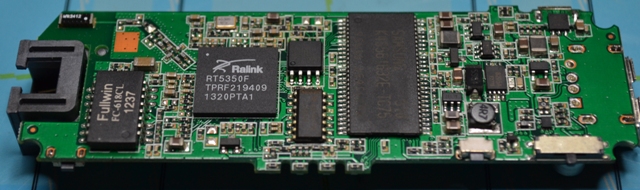
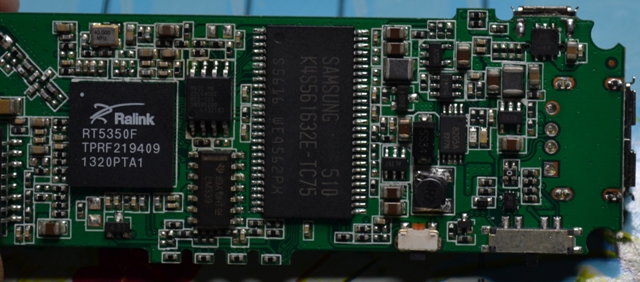
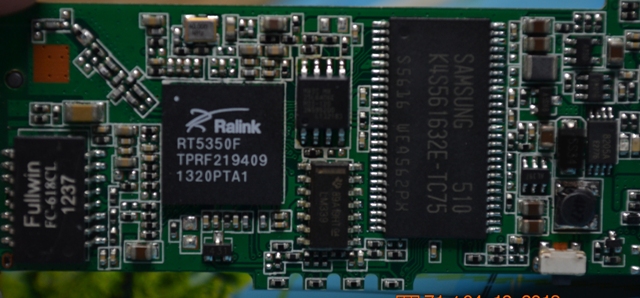
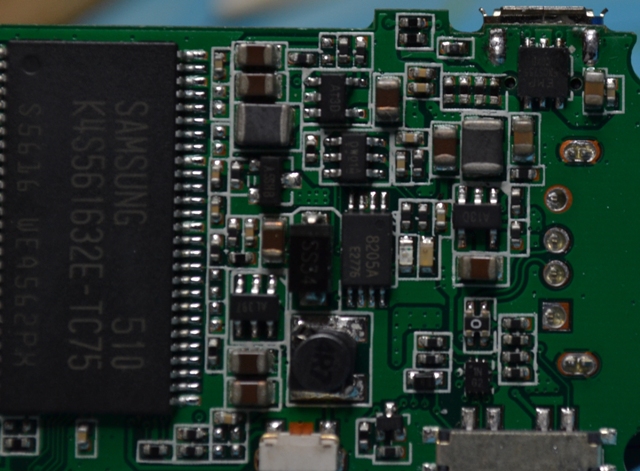
In detail here to disassemble the circuitry does not see the point, who are interested can consider the name of the chips in the photo. I just note that without a battery, the router does not work, which means that it is powered by it and there is some kind of harness that charges and charges the battery on the go. Of course, it may be that such a "buffer" use of the battery leads to its deterioration, but the price of the batteries themselves is not very high and they are standard. You can install any 18650.
2. We try to ride.
Next, we will assemble the simplest three-wheeled "cart" which, however, will have sufficient maneuverability, a turn in place (tank) and a minimum cost of components. You can use it not only with such a router, but generally as you like, even though completely autonomously.
It has long been my thought to assemble a simple chassis for various purposes using components available to everyone. I hope that happened.
We will ride with the help of just 4 basic things (and heaps of insignificant trifles):
1. Couples of the simplest and cheapest servos ($ 3 * 2)
2. Arduino Mini ($ 9)
3. Old floppy ($ 0)
4. Router ($ 25-45)
So, we start preparing the components:
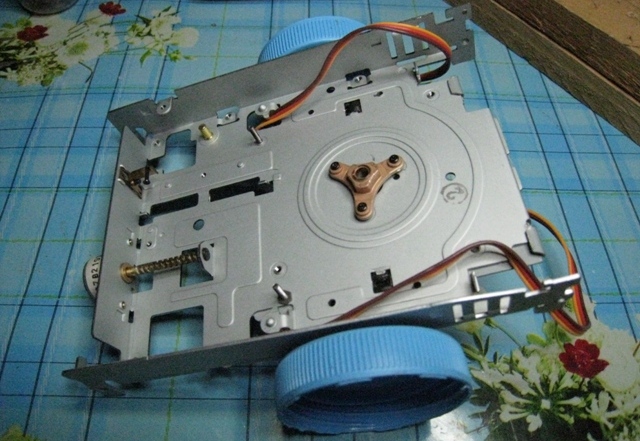
Floppy or scientific floppy drive .
In general, any sufficiently flat panel will do. It will only need to fasten or glue two servos and a third free, supporting, self-made wheel. But it would not be interesting. And even if you disassemble the floppy, you can get several such platform panels from fairly soft metal that you can just drill. Well, as a bonus, a bunch of any other nice trash. If desired, standard stepper motors can be used, I left one for the future. You can take the entire external enclosure of the drive and hide everything inside, I did.
The size of these panels is quite suitable for a small bot, and we also have a lot of holes for hardware fasteners. At the same time the design remains quite strong thanks to the metal chassis. This is not a plastic case from the RU machines.
Arduino
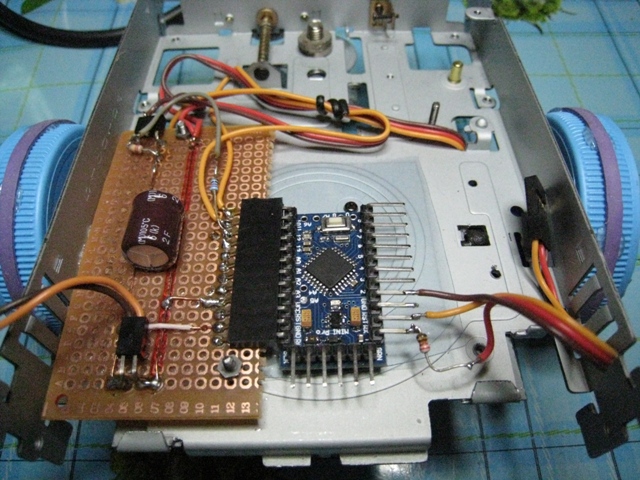
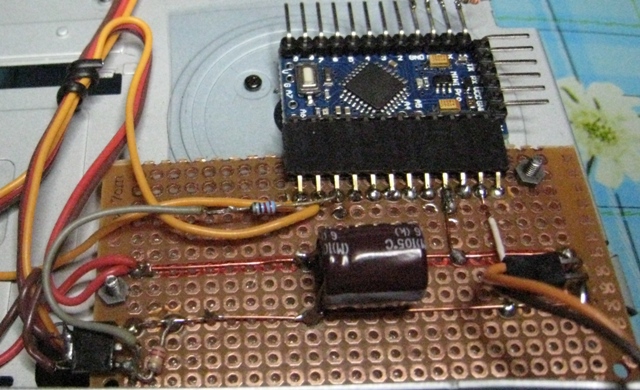
I again took the Arduino mini because of the size, but any similar board will do. The main thing that you could steer from her servami. Well, enough memory. Since in this project I was faced with the fact that in Atmega8 it was already difficult to cram everything required.
We solder convenient connectors to the board for connecting to the router, as well as for connecting two serv. If you wish, you can do everything with mounted installation, but for the order I have put on a still cheap design scarf. So it is more convenient to "remix" something.
We solder the USB tail that will take power from the router and power the arduin with the servos. I did it with the help of the USB tail “papa-mama” with the expectation of powering everything you need and being able to connect another webcam.
If you want to connect more devices to the router, you can use a USB hub, as I did in the article about the PTZ webcam .
He also added a larger capacitor with a voltage of more than 5 volts. This is such a child protection from voltage sags at the start of the servos, although they are quite small. And perhaps it will help to smooth other pulsations in the "onboard network".
Servy
This is the most interesting. In theory, the servo can only deviate by 180 or 360 (almost) degrees. How to ride it? The answer is simple - to modify the file (with a knife and a soldering iron).
The servo is a regular gearbox, but with a stopper that does not allow to make a full turn. A variable resistor is mounted on the axis, the control board monitors the position of this resistor, compares it with the resistance for the desired angle, and turns the motor until it reaches the desired angle (desired resistance).
Guess what happens if you replace the variable resistor with permanent? The servo will constantly try to achieve a given angle of rotation, and if you remove the stopper, we get a gear motor with a control board! Goodbye LM293!
Diaper from the photo.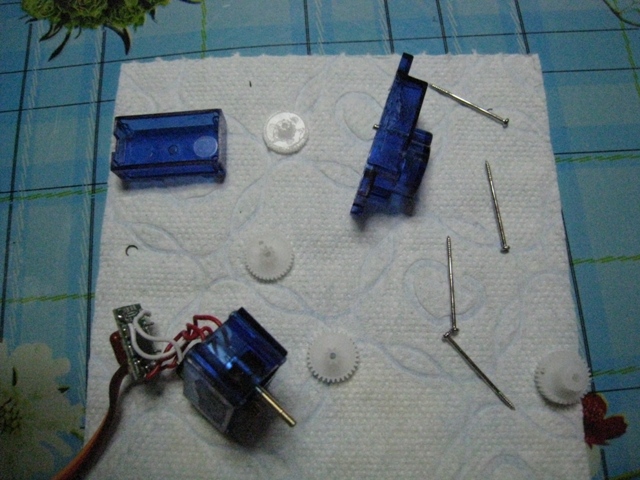
We disassemble the servo, we photograph the position of the gears on the memory. Measure the impedance of the variable resistor and replace it with two constants of half nominal. That is, if the total resistance is 5 KΩ, then we solder two 2.5 KΩ each. I even managed to use the smd resistors extracted from the old Nurse. You can just get a variable resistor, but I kept the design on it. Apart from the cut-off stopper, the servos can be returned to their original state.
Now, if the servo is set to the 90 degree position (programmatically from the skip), then our “gearbox” will stand, if set to the 100 degree position, it will start spinning in one direction, and if 80, then in the other. The greater the difference between 90 degrees and the fact that we set the faster our gearbox turns. As a result, we were able to adjust the speed. Here is such a "life hack".
However, in practice it turned out that there is a slight drift (the servos are sooo slow to roll or rumble) and using the selection method I set the “middle point” of one servo at 89 degrees, and at the second one at 85 (right in the sketch). In this position, only one server quietly rumbles, but does not spin.
Since it was assumed that the bot will perform all the same observational functions, I added the ability to de-energize the servos when the trolley is installed using a CMOS transistor. Thus it was possible to avoid the "groaning" of serva and extra energy costs.
Diaper from the photo.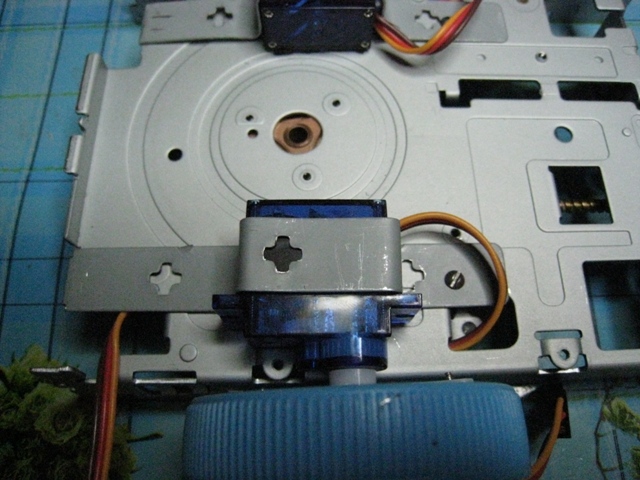


A few words about the wheels. The wheels themselves are already understood from what) Any size is available) For the clutch I pasted a pair of office gum for money. It is easiest to make the third support wheel out of a large bead attached to a paper clip with a curved letter “P” or from improvised materials (like mine). You can raid the furniture supermarket.
Router
In order for the router to do what we want from it, it must be properly prepared.
In terms of iron, you only need to solder wires to the internal UARTU (UART). Contact pads are located under the batteries and signed. And if you use the USB arduin, then you can not do this.
With software, the situation is more serious. On the router, you must install OpenWRT. Finished build already exists. How to flash can be read here .
They say that you can flash directly from the webmord, but something went wrong with me and in the end I uploaded the firmware via tftp. I mocked the router for a long time and sophisticated, but he survived, it's quite difficult to kill him. Flash firmware mpr-a1-32m-luci-usb-mjpg.bin
As the name of the firmware MJPG-streamer is already installed. This is a program for broadcasting video from the onboard webcam of the bot. For the complete set, all that is missing is the ser2net package. This is a program that acts as a bridge between the TCP port and the serial port of the router. This program, when we send control commands to our bot, forwards them through the serial port of the router to arduin. I found a package with this program, checked it and left it here .
It all works like this: mjpg-streamer “streaming” the video stream from the webcam, and we send commands to the 2000 port of the router and ser2net sends them to the arduin.
Many people have a question: how can I send commands to an arbitrary port of a host (router, PC or any other network node)? For this you can use just such a program . She can not only that. For some reason, such software is difficult to find, apparently the demand is not great.
And again, many will have a question - How to “shove” your files into the router or edit them there if you are not links-guru. To do this, there is an excellent utility WinSCP Works on the principle of TotalCommander.
This time I didn’t sculpt a webmord for a bot, as it annoys me with its slowness and buggy, in the future I think to write an application in C #, but for now you can do with VLC or browser + Hercules SETUP utility for management.
My personal settings of the router are quite insignificant and relate only to the installation speed of the internal "Uart" and that's it. Additionally, you will need to configure the router itself so that it is either a client of your wifi home network or itself acted as an access point. But this already relates to OpenWrt configuration issues. Everything is intuitively clear, if there are difficulties, then see the manuals for this firmware.
Tuning, useful, but not mandatory.
Since I want the bot to function without my “manual” intervention, I need a docking station for recharging. This is again very simple for cases - we take a piece of microUSB cable and solder it to the “usa-contacts” as last time . Add a diode to eliminate the possibility of replicating.
Experimentally, I found that the router in the on mode still “recharges”, which is most welcome to us. The docking station itself is made of two plates of tin, we connect the power supply unit to them. You can even complete. This time everything is easier as inside the router there is a battery charge-discharge harness and all we need is to apply a voltage of 5V to the input for charging the router.
Future plans.
Even during the operation of the previous bot, one inconvenience was noted - it was always necessary to manually start the bot in the parking lot and watch that charging started, otherwise you could get into a situation when the bot died from “starvation”.
Reflecting on ways of dealing with a similar problem, I came to the conclusion that the bot should get into charging itself. As I did not think of reliable and simple global positioning systems around the apartment, I decided to limit myself to a small one - to install an ultrasonic rangefinder and train the bot to park automatically using a characteristic docking station (a wall with a slot in the middle, this slot will be a beacon for centering the bot when approaching the station ).
A range finder is a sensor that can “know” the distance to an obstacle. If we make a docking station in the form of converging surfaces, we can force the bot to go right in the center and stand on charging. The algorithm is simple - we manually approximately print the bot to the docking station center and give the command to start parking. The bot cyclically “gropes” the range-finder the slot and strides towards it. After each step, it is checked whether the tension on the "whiskers" appeared, if it appeared we parked!
If such an idea is interesting, I will publish an additional post with parking already established.
And as usual, a little video with "pokatushkami":
R.S. The article turned out to be a bit not finished, but I thought that I would better present it as it is at the moment, since in the light of recent events (both personal and global), it is likely that it will never be finished at all or in the foreseeable future for sure.
Source: https://habr.com/ru/post/216601/
All Articles