Configuring Digium Phones via DPMA Module in Elastix

Good day, dear chabrozhiteli.
Through the efforts of our employees, Digium phones with Asterisk , AsteriskNow and Switchvox have already been tested. In my opinion, it would be incorrect not to supplement this list with testing the operation of phones with the popular Elastix distribution.
Interested please under the cat.
This review has been done for the Elastix 2.5 Beta system with Asterisk 11.7.0 and FreePBX 2.11.0.
')
STEP 1 - Obtaining a free DPMA license
Although the license is free, you need to register on the Digium website and order it at the link: www.digium.com/en/products/software/digium-phone-module-for-asterisk
STEP 2 - Adding the register utility to your distribution
In the server console, execute the following command:
sudo yum install register_digium_products -y Which will allow you to install the register_digium_products package along with libdaemon and Avahi, which are necessary for DPMA to work in the Elastix distribution.
If everything is done correctly, we will see the following output in the console:
Installed: register_digium_products.x86_64 2009020507:2.4.0-4 Dependency Installed: avahi.x86_64 0:0.6.16-10.el5_6 libdaemon.x86_64 0:0.10-5.el5 Complete! STEP 3 - Add a DPMA license via the Elastix web interface
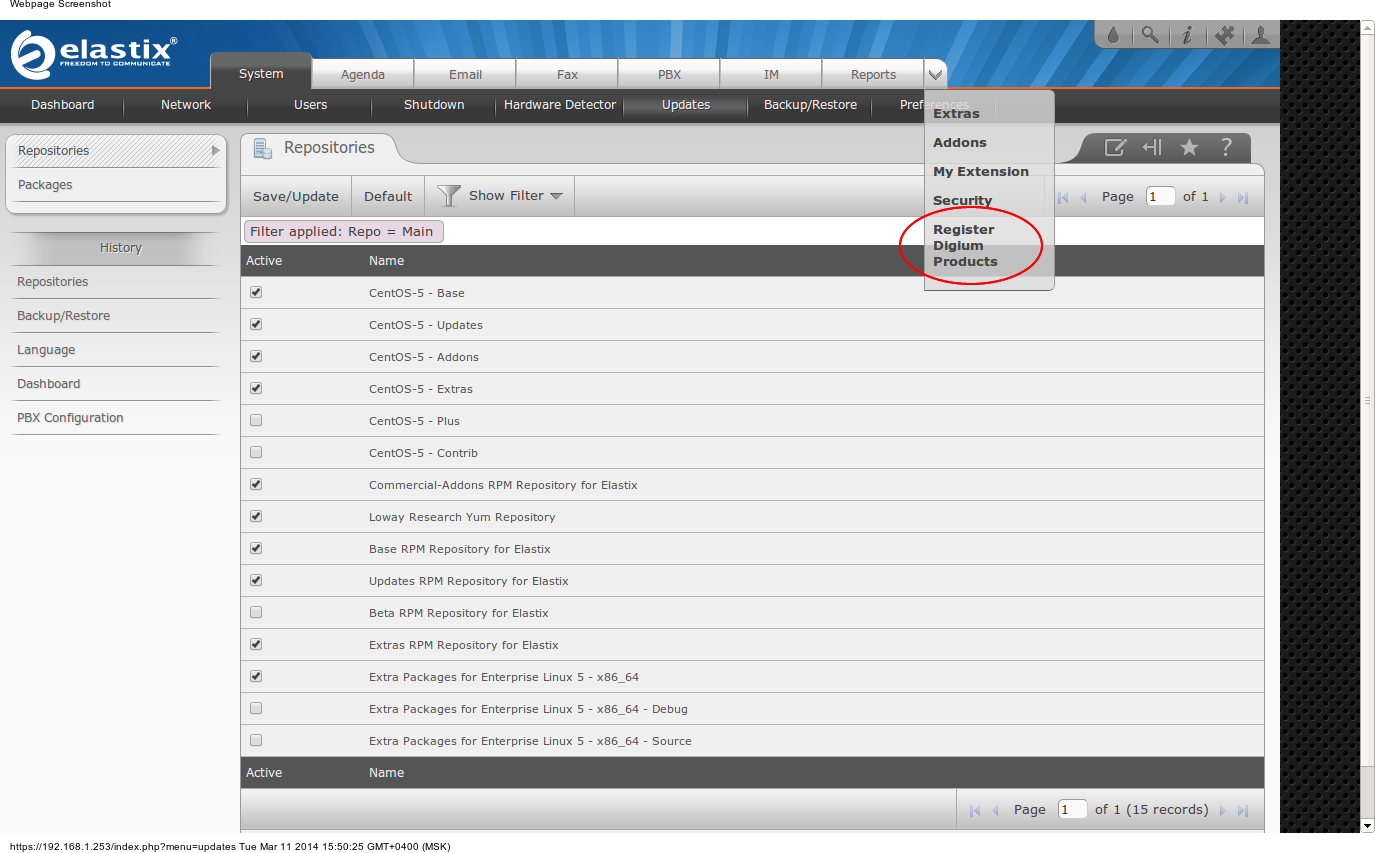
Go to the Elastix web interface (the default username / password is admin / palosanto), click on the drop-down menu arrow in the navigation panel and select “Register Digium Products”
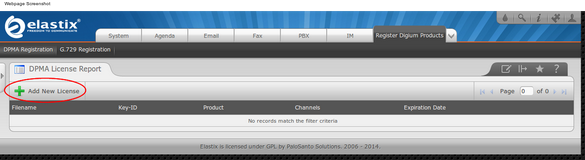
In the opened tab, click "Add New License"
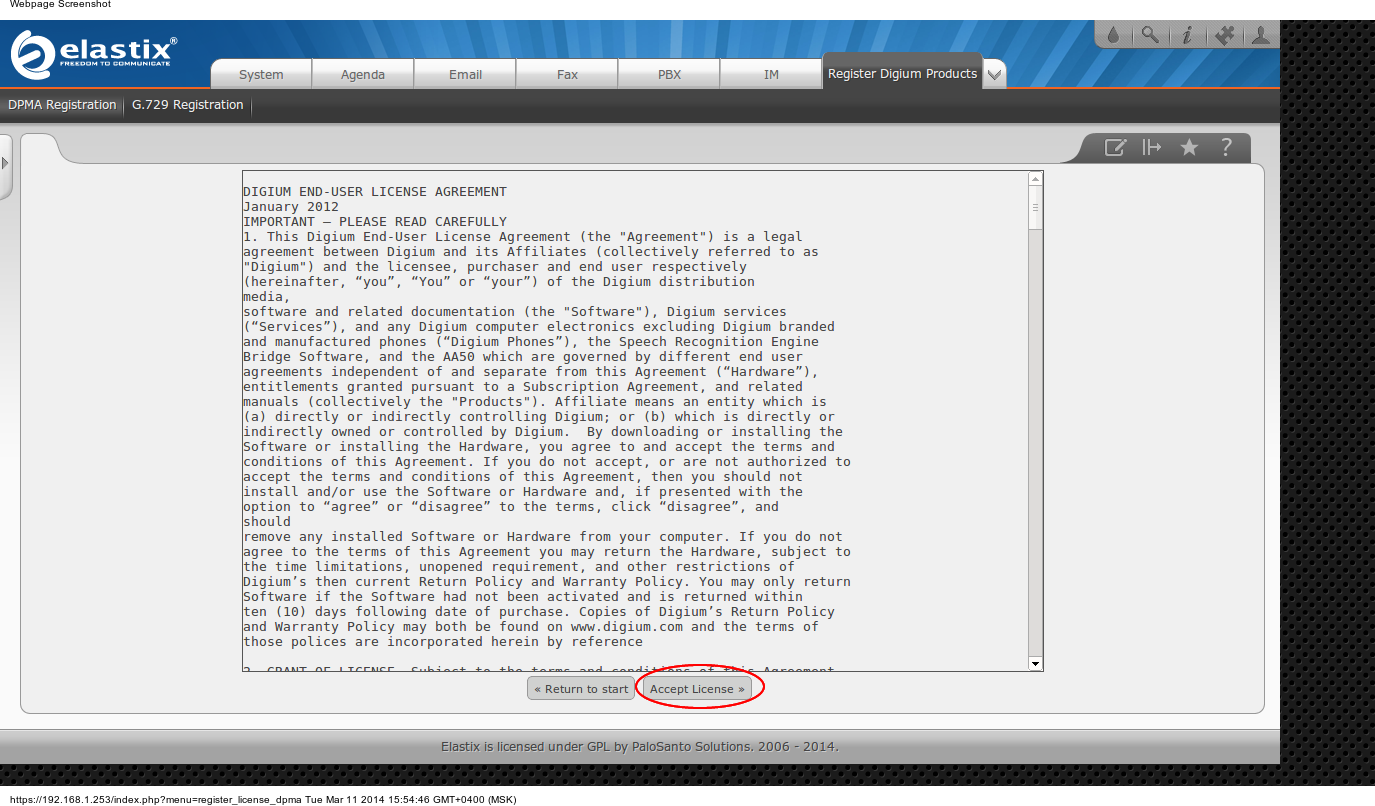
We agree with the terms of the proposed agreement:
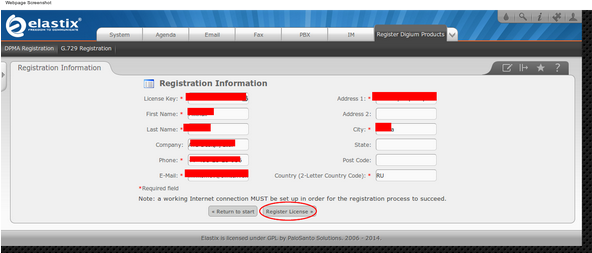
Enter the registration data and license code sent to us by Digium and click “Register License” (we enter the phone number without any spaces or hyphens, otherwise it swears):
If everything is filled in correctly, then after activation, the license that we just activated will be visible in the DPMA License Report tab:

STEP 4 - Activate the FreePBX web interface (not enabled by default)
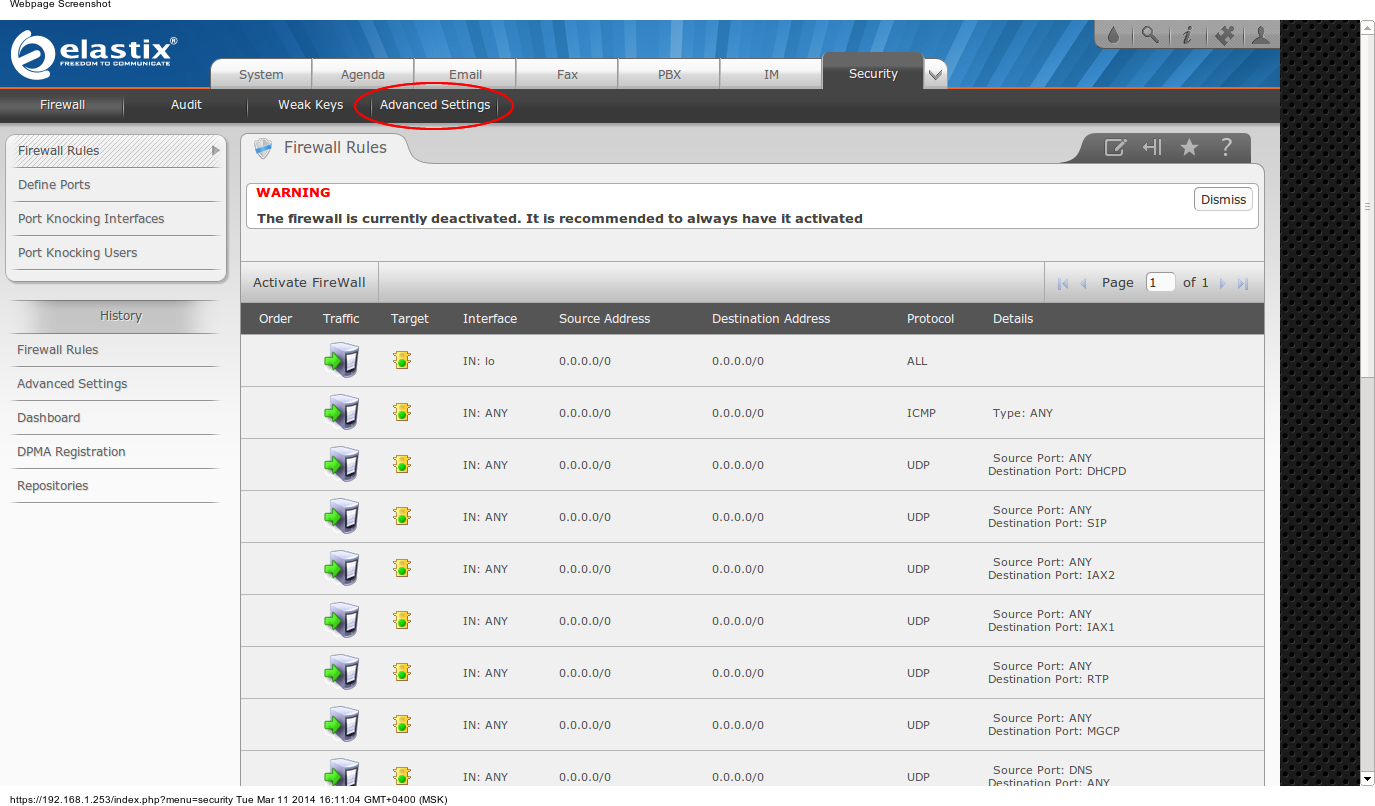
Again, click on the drop-down arrow in the navigation bar and select the item “Security”:

Then select “Advanced Settings”:
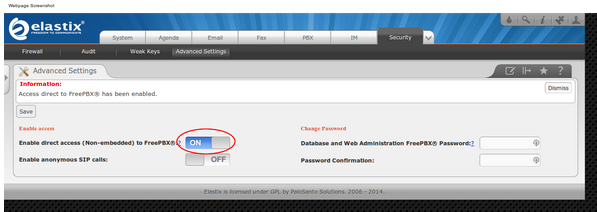
And we translate the selector to the “On” position for the item “Enable direct access (Non-embedded) to FreePBX”:
Now go to the FreePBX web interface by clicking on the “PBX” tab and selecting the “Unembedded FreePBX” option at the bottom of the list on the left:

STEP 5 - Upgrade the FreePBX web interface
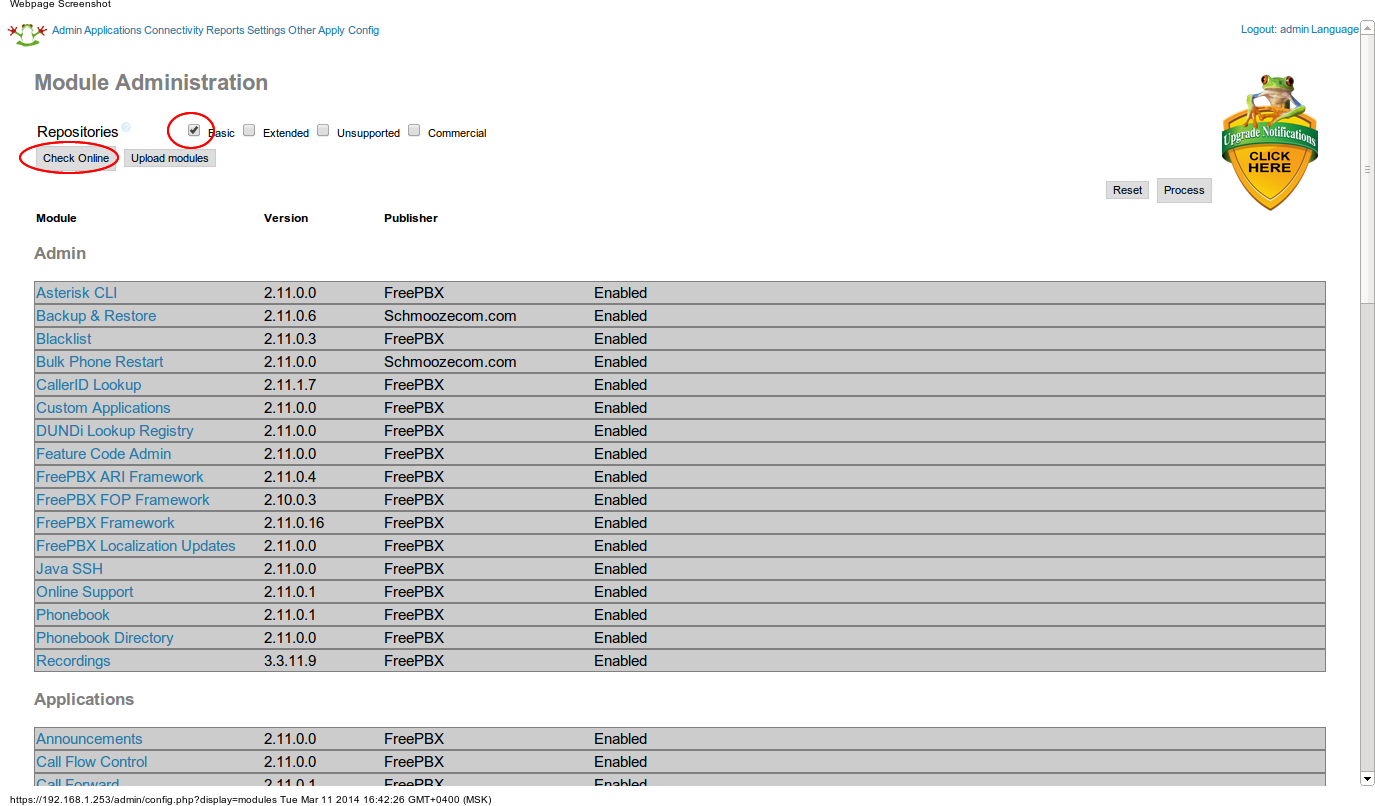
In this build of Elastix, the FreePBX web interface is practically unreadable (as seen in the screenshots), so we’ll update it. In the FreePBX web interface, go to the Admin -> Module Admin tab:

On the module management page, select the “basic” repository and click “check online”:
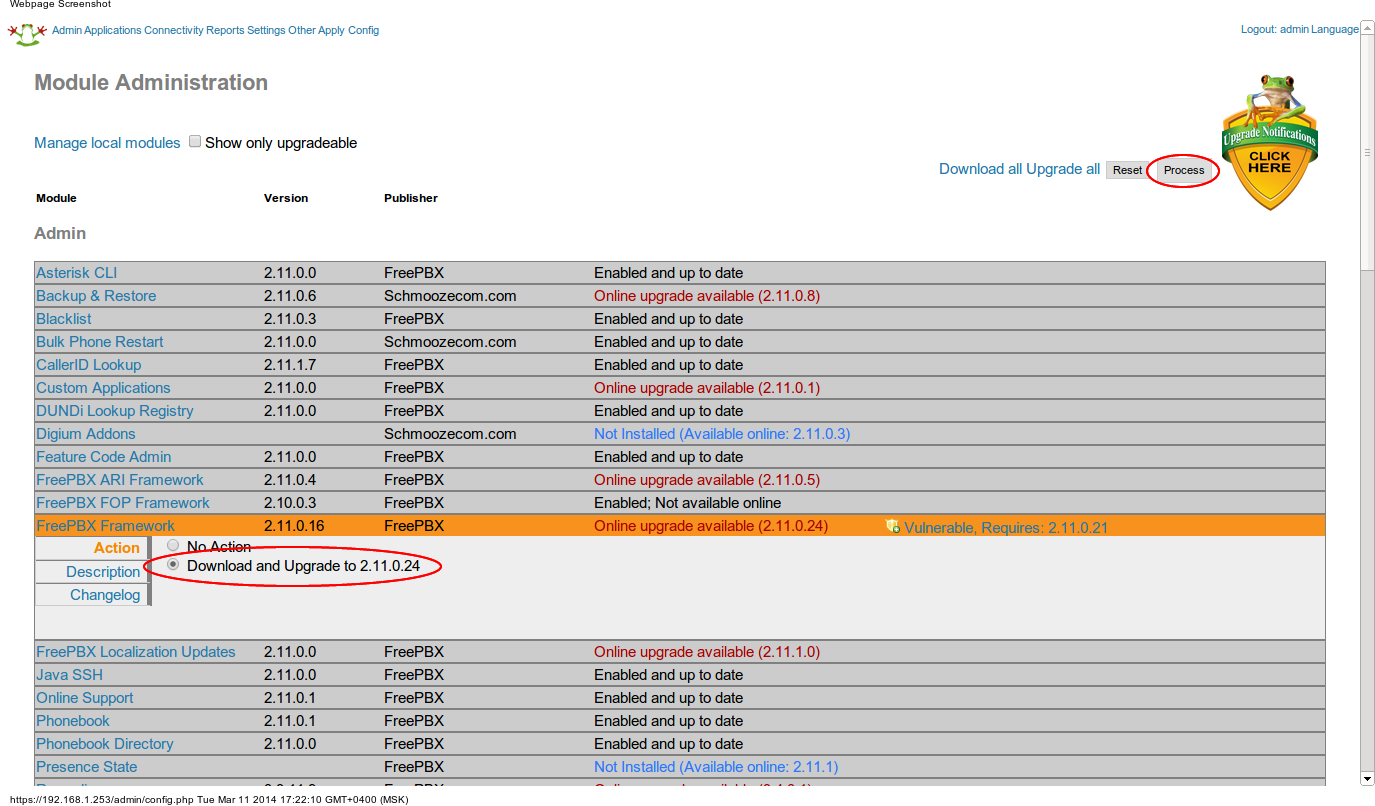
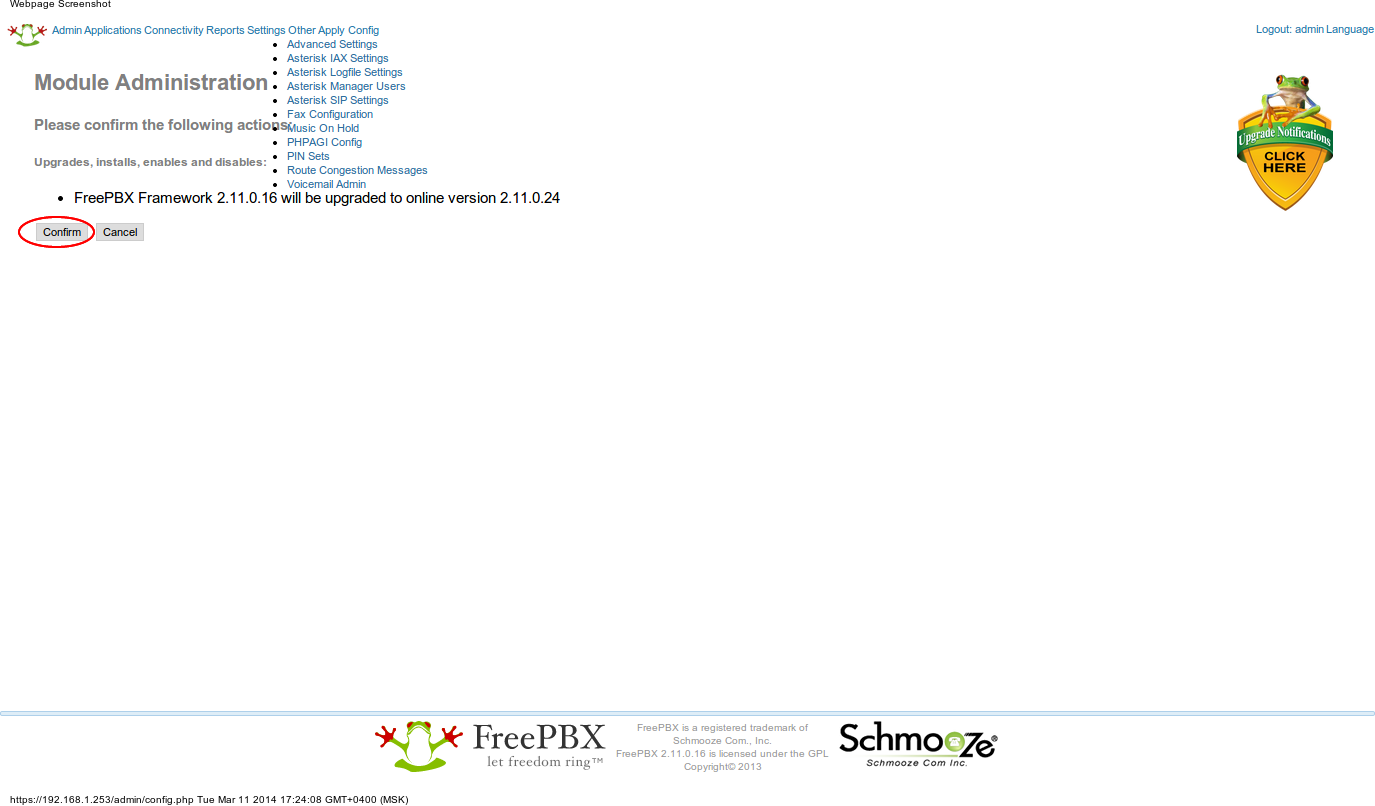
In the “Admin” section, click “FreePBX Framework”, select “Download and Upgrade” and click “Process”:
Redirect to the confirmation page, click “Confirm”:
After the update is completed, refresh the page and get to the FreePBX start page, go to the “FreePBX Administration” (login / password are the same as from Elastix)
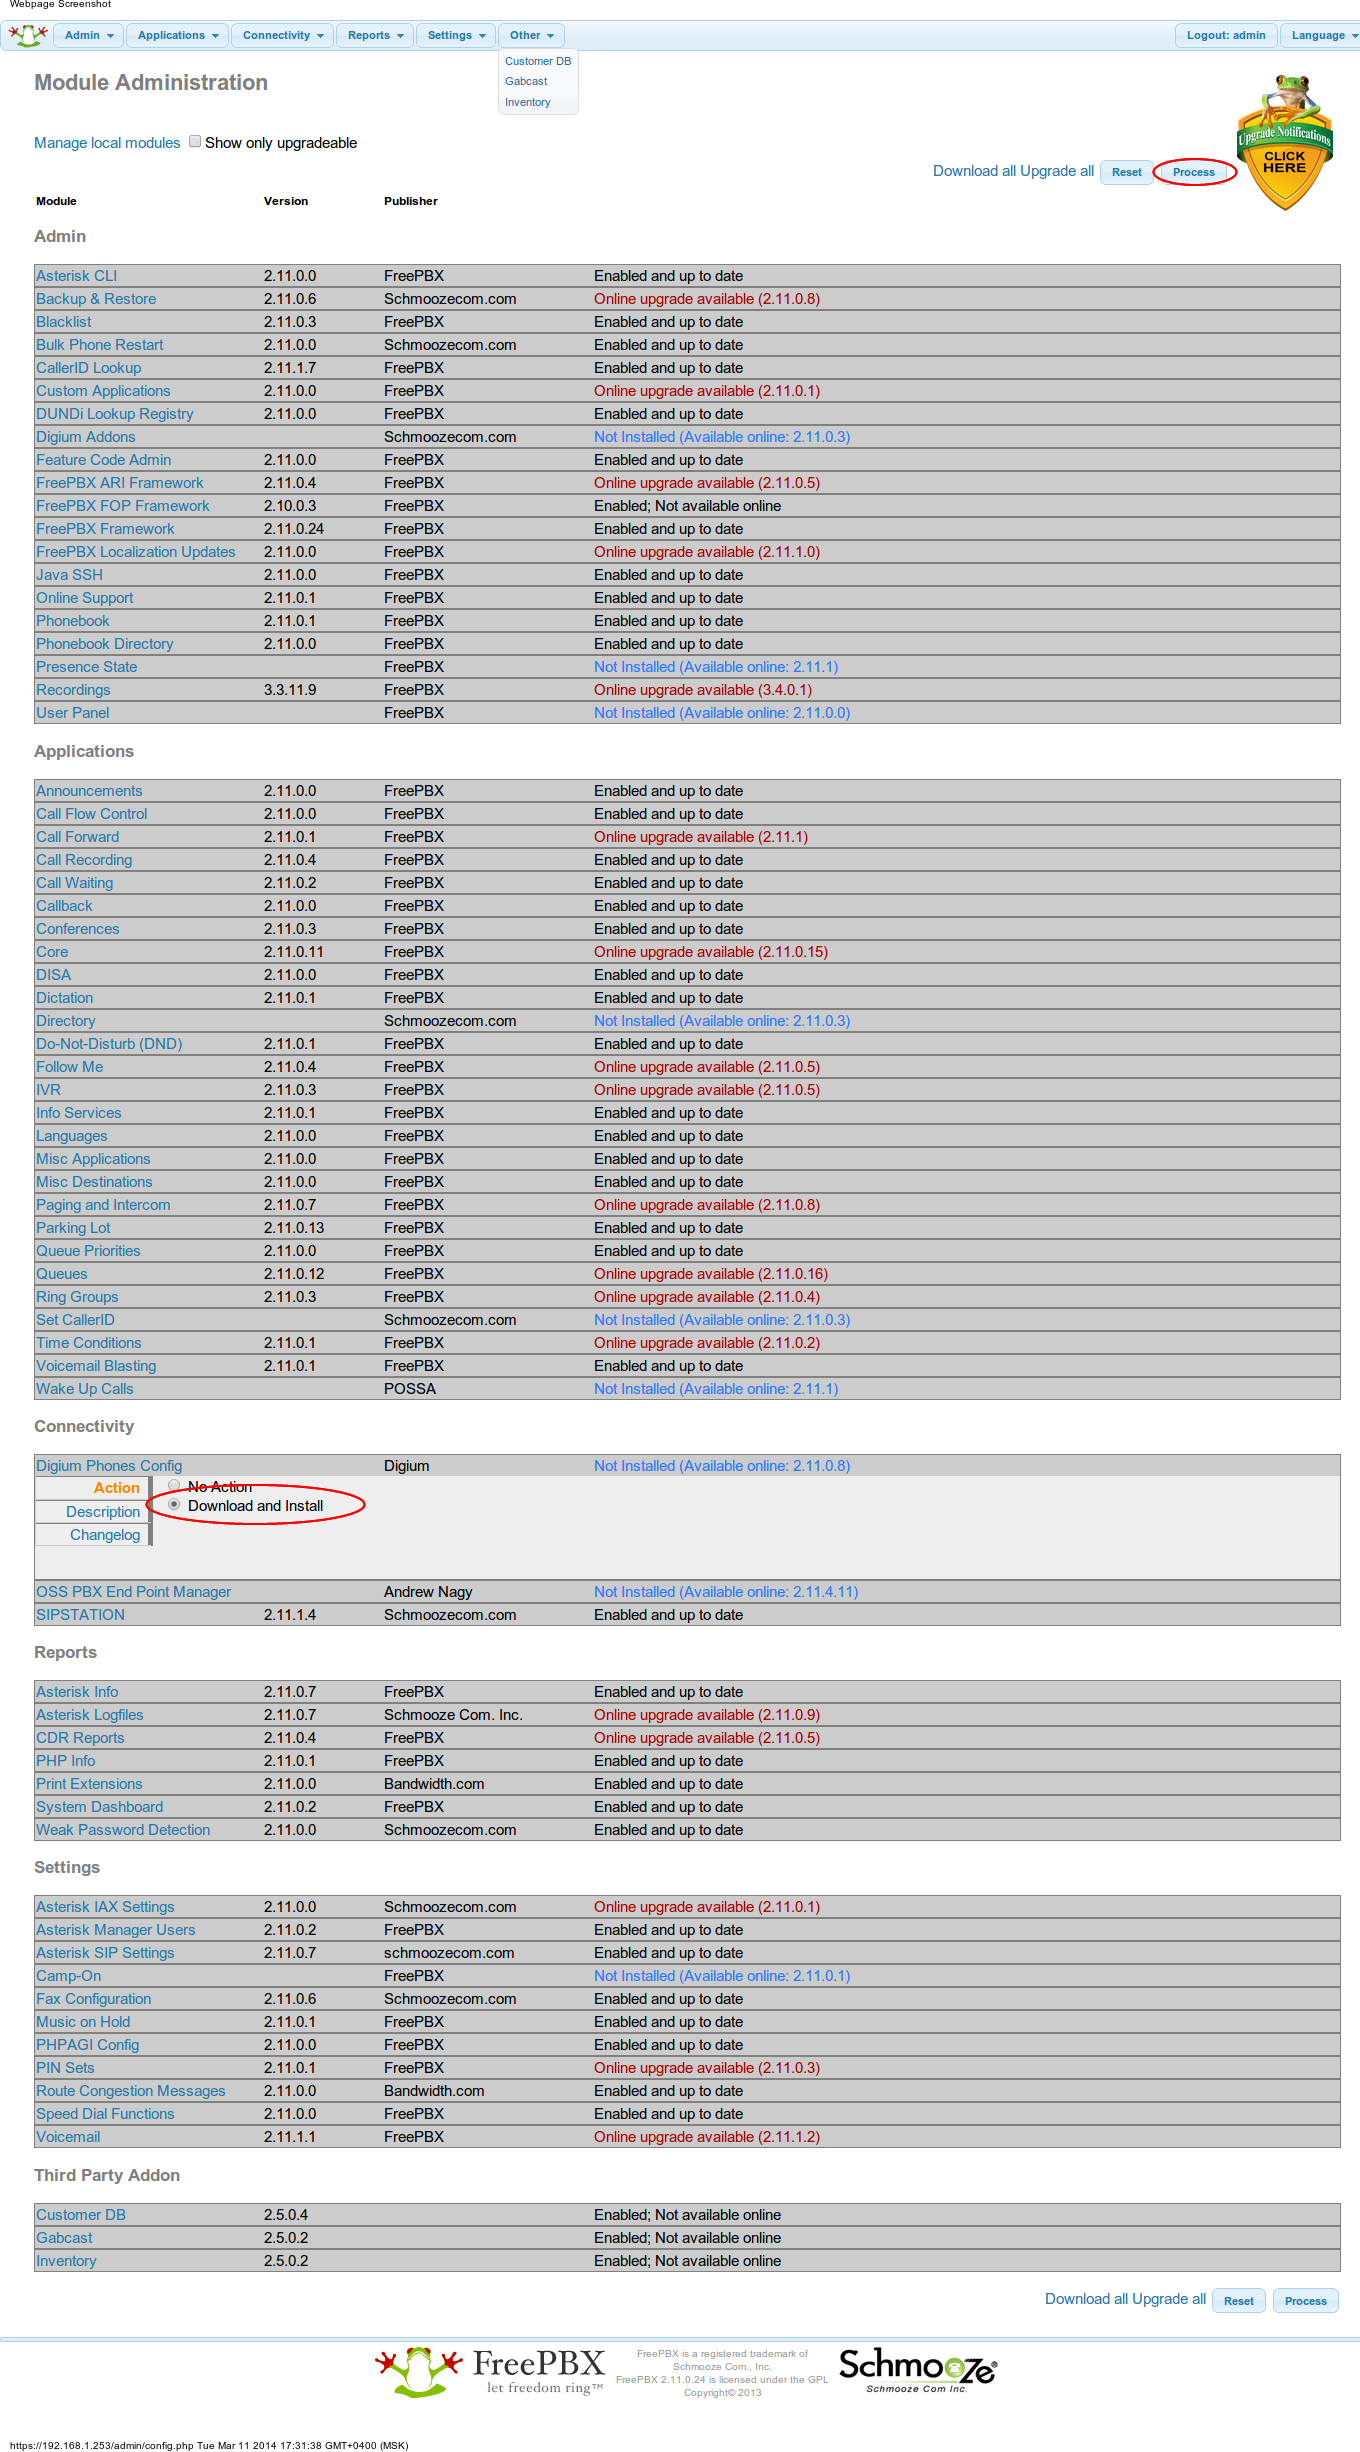
STEP 6 - Installing the Digium Phone Configuration Module
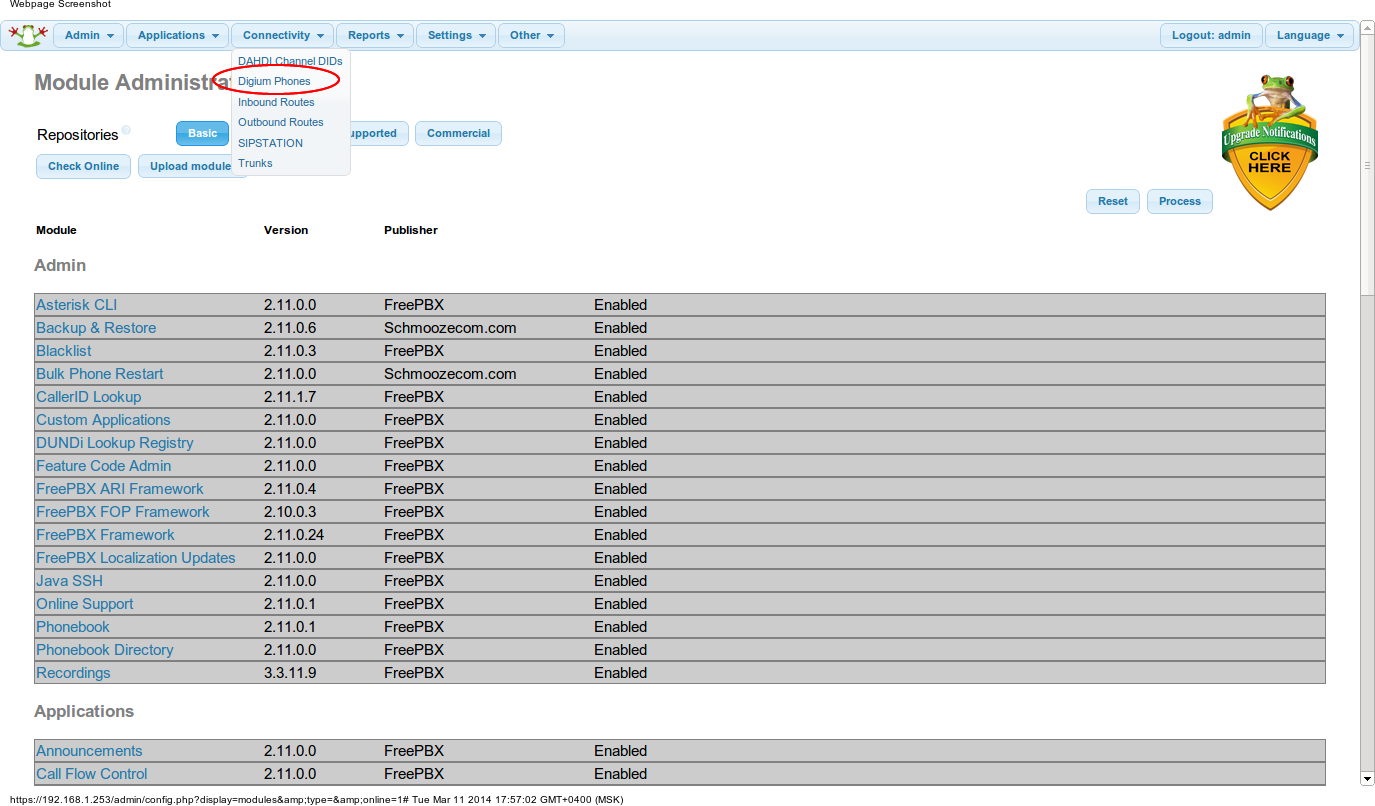
Again, go to Admin - Module Admin. On the module management page, select the “basic” repository and click “check online”, find the “Connectivity” section, click “Digium Phone Config”, then “Download and Install” and “Process”
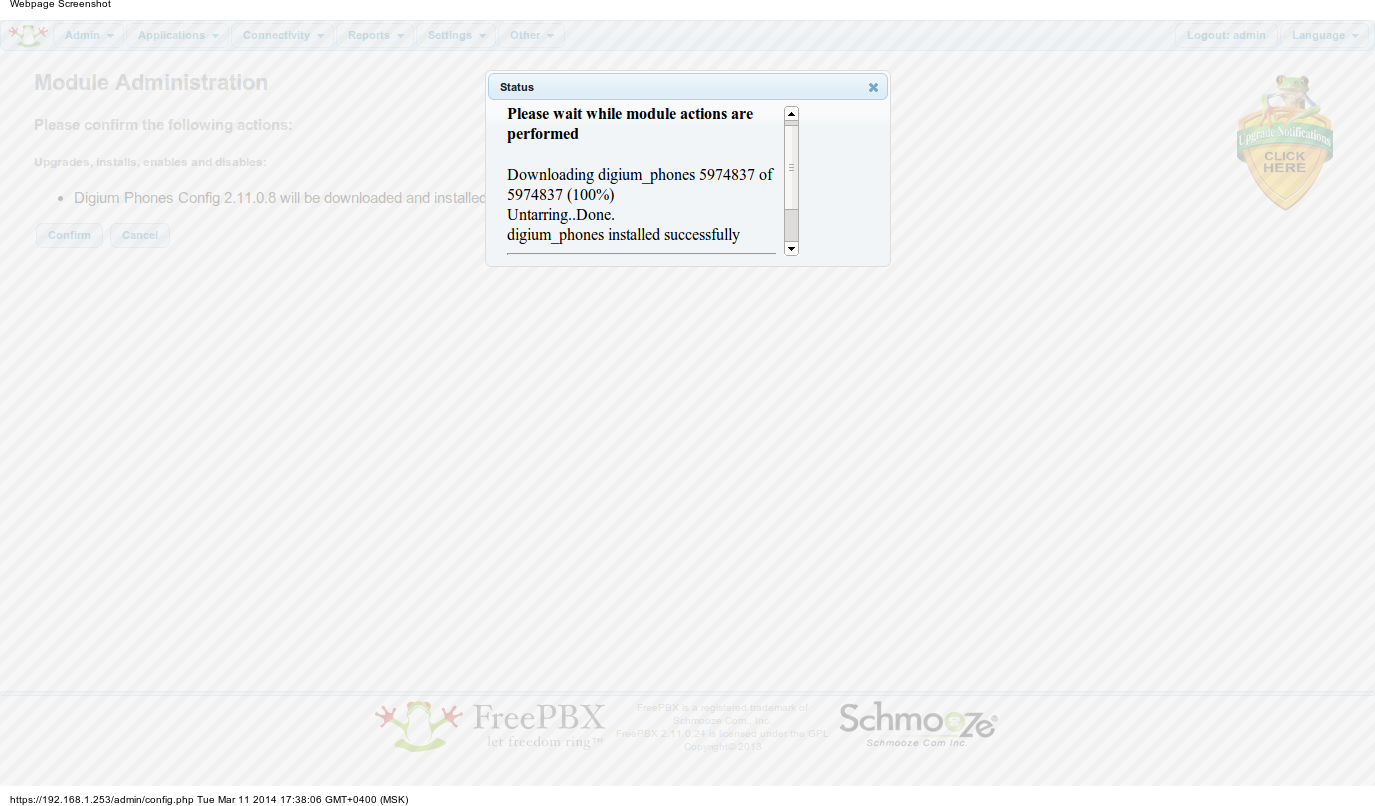
In the opened tab click “Confirm” and after downloading and installing, we receive a message about the successful completion of the operation (now in a quite readable form):
Important! You need to move the sample file res_digium_phones.conf so that it is not overwritten. To do this, go to the console of our server and execute the command:
sudo mv /etc/asterisk/res_digium_phone.conf /etc/asterisk/res_digium_phone.conf.sample Now we will always have an example of a config before our eyes, on the basis of which we will make our own configuration files.
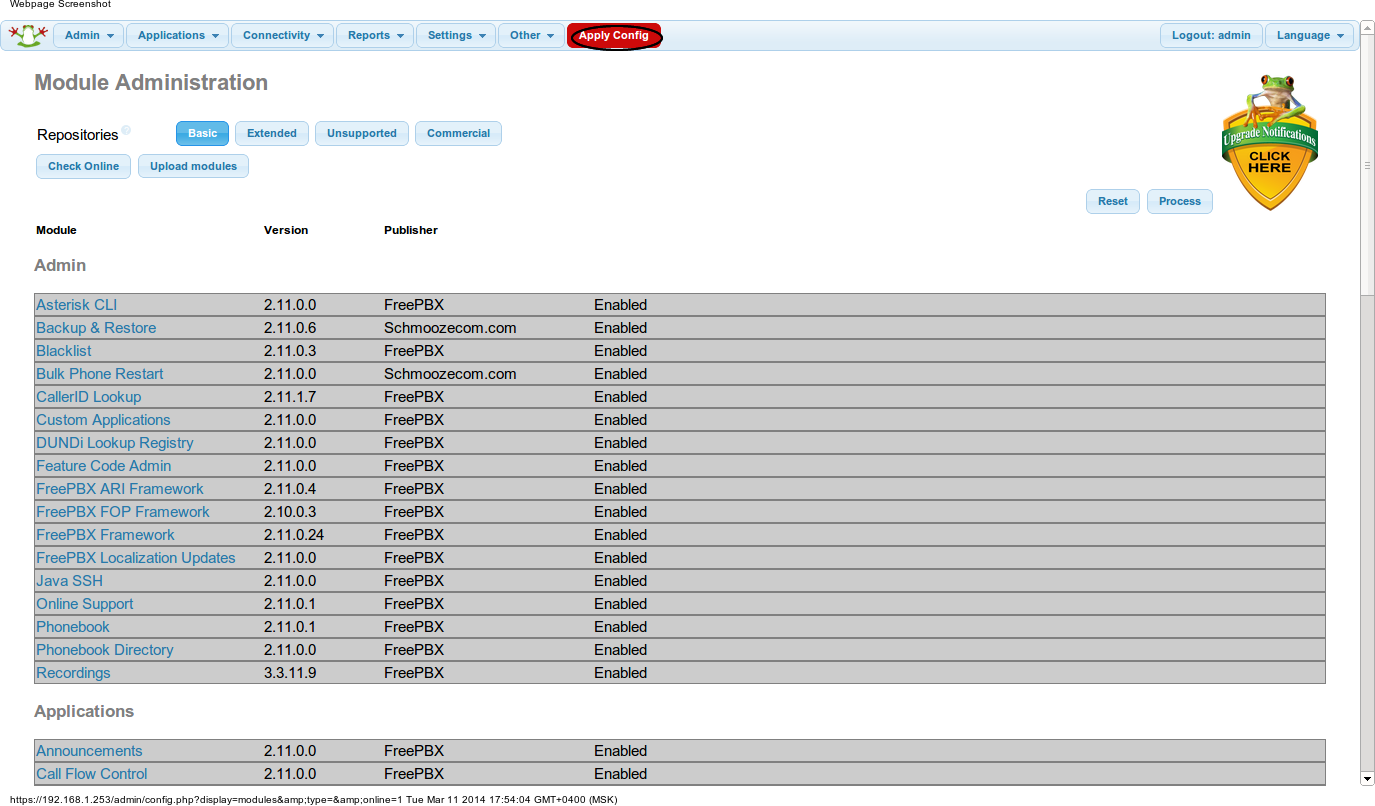
After moving, click on the Apply Config web interface:
Now we can manage the Digium phone settings from the FreePBX web interface. To do this, go to the Connectivity> Digium Phones tab:
Click “Add Phone”, in the opened tab FreePBX will offer us to link existing extensions to Digium phones. After configuration, you will see information about the phone, to which extension is now attached:
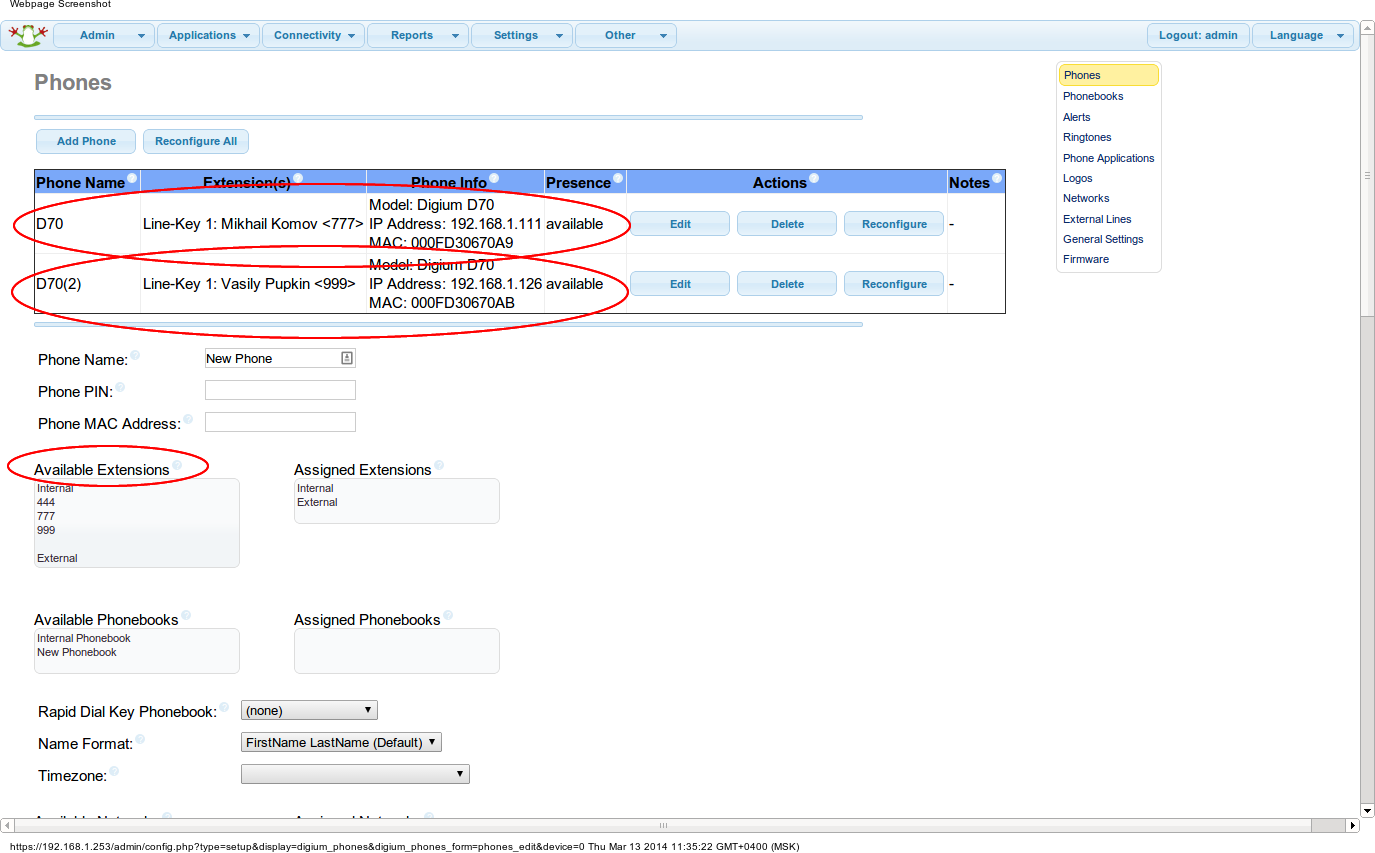
The DPMA-module, as in the case of the “bare” Asterisk, has several sections for configuration, which can be seen in the menu on the right.

Conclusion
In conclusion, I would like to say that configuring phones via a web interface using DPMA greatly simplifies the task of the PBX administrator, allows for the most tight integration of end devices and a telephone exchange, and also provides access to features that are not available without DPMA.
Source: https://habr.com/ru/post/215685/
All Articles