Disassembling and Taming Tube Guitar Sound
How it all began
About 5 years ago, I began my march through the world of lamp technology. During this time, dozens of different schemes were collected and about five dozen “original” tube amplifiers were heard. As a result, a clear understanding of “how it should sound” and what “flexibility” the apparatus should have.
In the process of exploring various guitar amplifiers, for a long time, I was not left alone by the sound of the “head” from Krank. But at that moment, unfortunately, it was impossible to evaluate it and try it. Sales began just in the States, and there were no live specimens in St. Petersburg. It was decided by all means to get such a "tidbit". Fortunately, there were suitable people who could buy and bring him to St. Petersburg. Long 14 days of waiting and my dear stood on the threshold of the apartment. Happiness knew no bounds. The more I played it, the more I was seized by the thought: “How this thing works.”
One fine moment, having gathered my courage, I firmly decided: “I must learn the“ secret ”of this miracle.”
Days went by, weeks flew. Piece by piece, a scheme loomed.
On this, it would seem, it was worth stopping, but the soul demanded continuation. And so the idea was born to make a portable, lightweight “krank” for playing off of rap. points.
And then it started ...
')
Housing
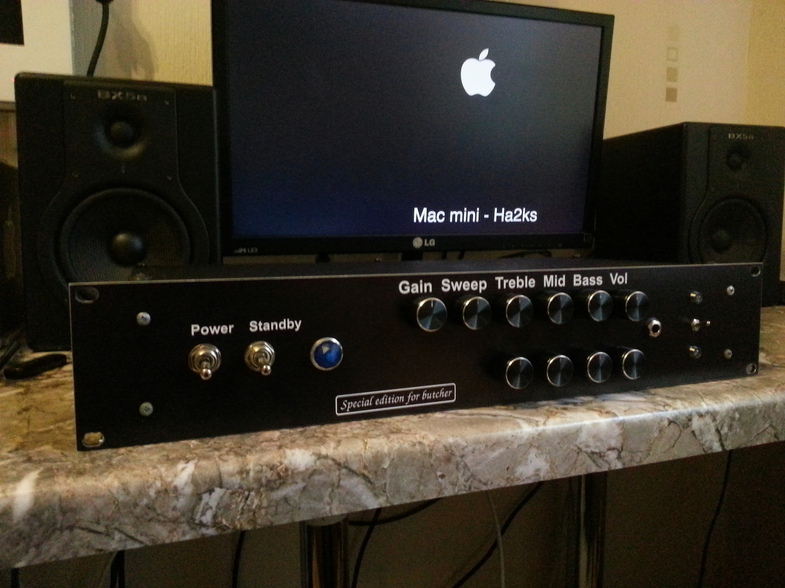
It was decided to take the case in a rackmount format (for easy storage and transportation). Advantages of the solution:
Convenience of installation in a rack / studio rack, durability, good cooling, convenience of location and wiring "vnutryanki".
A Hammond 2U 19 "Rack mount Case was used.
Transformer
I will make a reservation right away that many transformers have been tried, but Transeg turned out to be the most adequate in terms of price and dimensions (do not consider it an advertisement).

Chose a power transformer according to the following parameters:
3 lamps - 12ax7, switching and indication.
Total we have:
1. Winding for 6-15 volts to supply the lamp heat and switching.
2. High-voltage winding for powering the anodes of the lamps.
Open the datashit lamp 12ax7 EH and see:
Heater (heater) - 150ma (12,6v) or 300ma (6,3v)
Anode (Anode) - 10ma.
Indication and switching - 200ma.
Total minimum:
Winding 6,3v - not less than 1,2A
Winding 260-300v - 30ma
With a margin:
Winding 6,3v - not less than 1,8A
Winding 260-300v - 50ma
Tip:
In no case do not use the inverters "inverters" for power. Extremely negative impact on the sound and background.
Take a transformer with a margin, because the work on the limits turns around - overheating. Insulation breaks out faster, pulls trouble and time spent. Desired food supply ~ 20-25%. There have been cases when a very strong background in sound was manifested due to power.
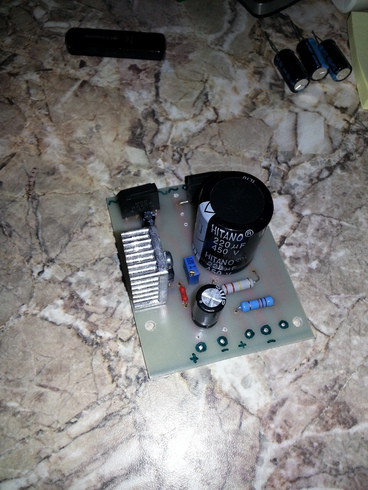
Power Supply
During long studies, I came to the conclusion that the power of the glow (for hi-gain) amplifiers must be stabilized, rectified. For my preamp, I used a power supply based on the Lm317T adjustable voltage regulator.

Components
All components bought in the online store (in Canada). Although by and large, no matter where they are bought and from whom, the main thing is to follow simple rules:
1. Noname electrolytic capacitors and "completely china" - do not take.
(I advise companies like Nichicon, Jamicon, Hitano, Vishay, Silver mica, Sprague.)
2. Do not save money on wires. For switching and timbre. block advise our MGTF, for power units (power), you can use MGSHV.
3. In hi-gain preamps and amplifiers do not put ceramic capacitors. Most often, they contribute to the sound of "ringing". I advise you to use Silver mica or our Soviet mica capacitors (SGM, CSR are very good).
4. The feedthroughs (capacitors in the anode circuit) and in the cathode circuits are best used with a film or polystyrene dielectric. (Wima, Rifa, Epcos are very good).
5. And of course, taking everything with a margin of voltage of 20-25%.
Lamps
Absolutely any 12ax7. Personally, I prefer 12ax7 EH for a dense, moderately readable overload. 12ax7 Tung Sol for a clean channel or in a mix with EH for greater detail in the high mid range and high frequencies on overload.
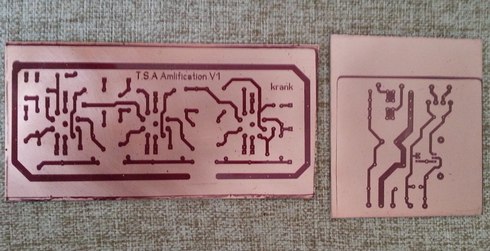
Printed circuit boards and their manufacturing technology
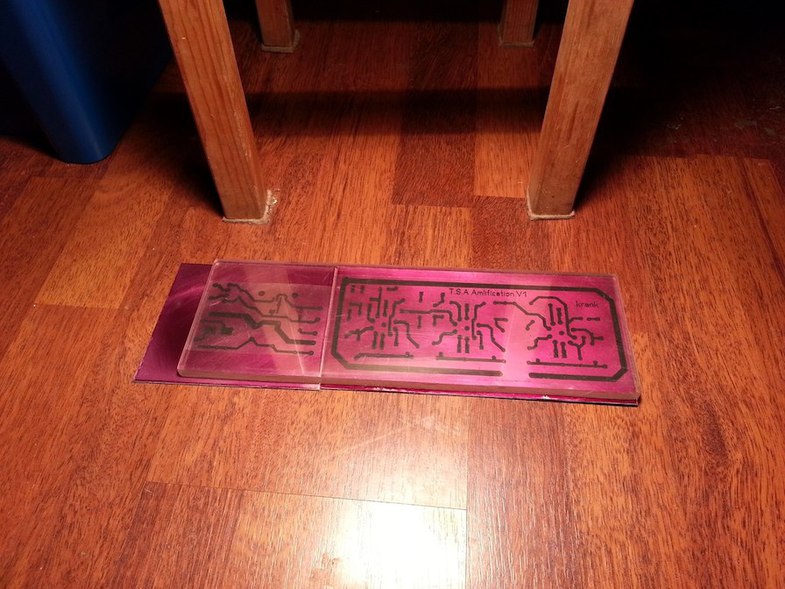
To be honest? It is advisable to make all tube technology on the turret board. But due to the fact that we are not making a hi-end, good old printed circuit boards based on foil PCB will also come off. For lamp circuits, I use a one-sided, one and a half millimeter textolite, with the thickest layer of copper foil.
As a rule, the blank (traforet) of a printed circuit board is printed on a transparent film.
I clean a fine sandpaper with a textolite plate with a foil, wash it with soap under running water, degrease, wipe it dry.
I spray it on the surface with a uniform layer of POSITIVE 20 and put it in a dark place to dry.
After 5-7 hours I put the stencil on and illuminate through the plexiglass glass 150 watt halogen spotlight 1.2-1.5 hours.
Next, I dilute 7 g of sodium hydroxide per liter of warm water, mix it up. I throw there our illuminated board and interfere with the water so that the dissolved photoresist will dissolve more actively. In the common people -I show a fee.
Next, take the tray, pour boiling water, throw ferric chloride and we etch the board.
At the end of the procedure, drill holes and conduct a session of sealing elements.
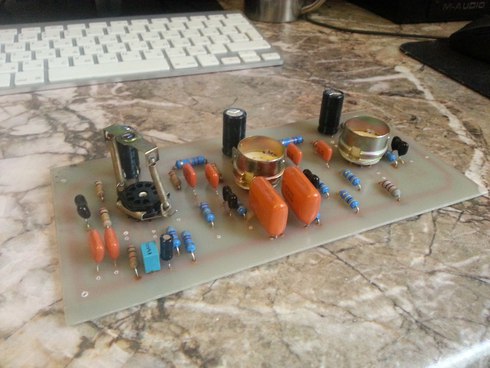
Build in the body and tips for setting up
Mark up space for the installation of "racks" for mounting the board. We drill holes and fasten the rack.
We begin the assembly. As a rule, I start the assembly with the timbre of the block, as I prefer to solder it partially with a canopy.
Wires, as a rule, try to fasten ties.

Simple assembly rules:
Do not tie signal and power wires into one bundle, otherwise problems with the background cannot be avoided.
Try to hold the chains of the glow of the “pigtails”.
Mesh lamps, always lead in shielded wires.
Input and output wires require shielding.
The input connector (signal contact) when the guitar is not stuck, it is advisable to ground.
Reduce the land in one place on the body. Ensure that no earth loops form.
The contacts of the heat through 100-ohm resistors (0.5w) to solder to the earth.
All of the above “recipes”, with properly diluted board and assembly without errors, give a quiet amplifier and sound pleasing your ears.
Thanks to all.
Ps
Hopefully, you haven’t been killed by a long article. There will be questions - write.
I almost forgot ... The secret was that the new is well forgotten old. Krankenstein turned out to be a 90% copy of the marshal, with almost no noticeable changes in the preamplifier and tip on the 6L6 WGC.
Links
Archive with schemes and signet made in sprint layout 5
Video (Distortion chanel) Played and recorded - friend.
Video (Clean chanel)
Audio Wrote in line. Map Focusrite saffire.
Source: https://habr.com/ru/post/213399/
All Articles